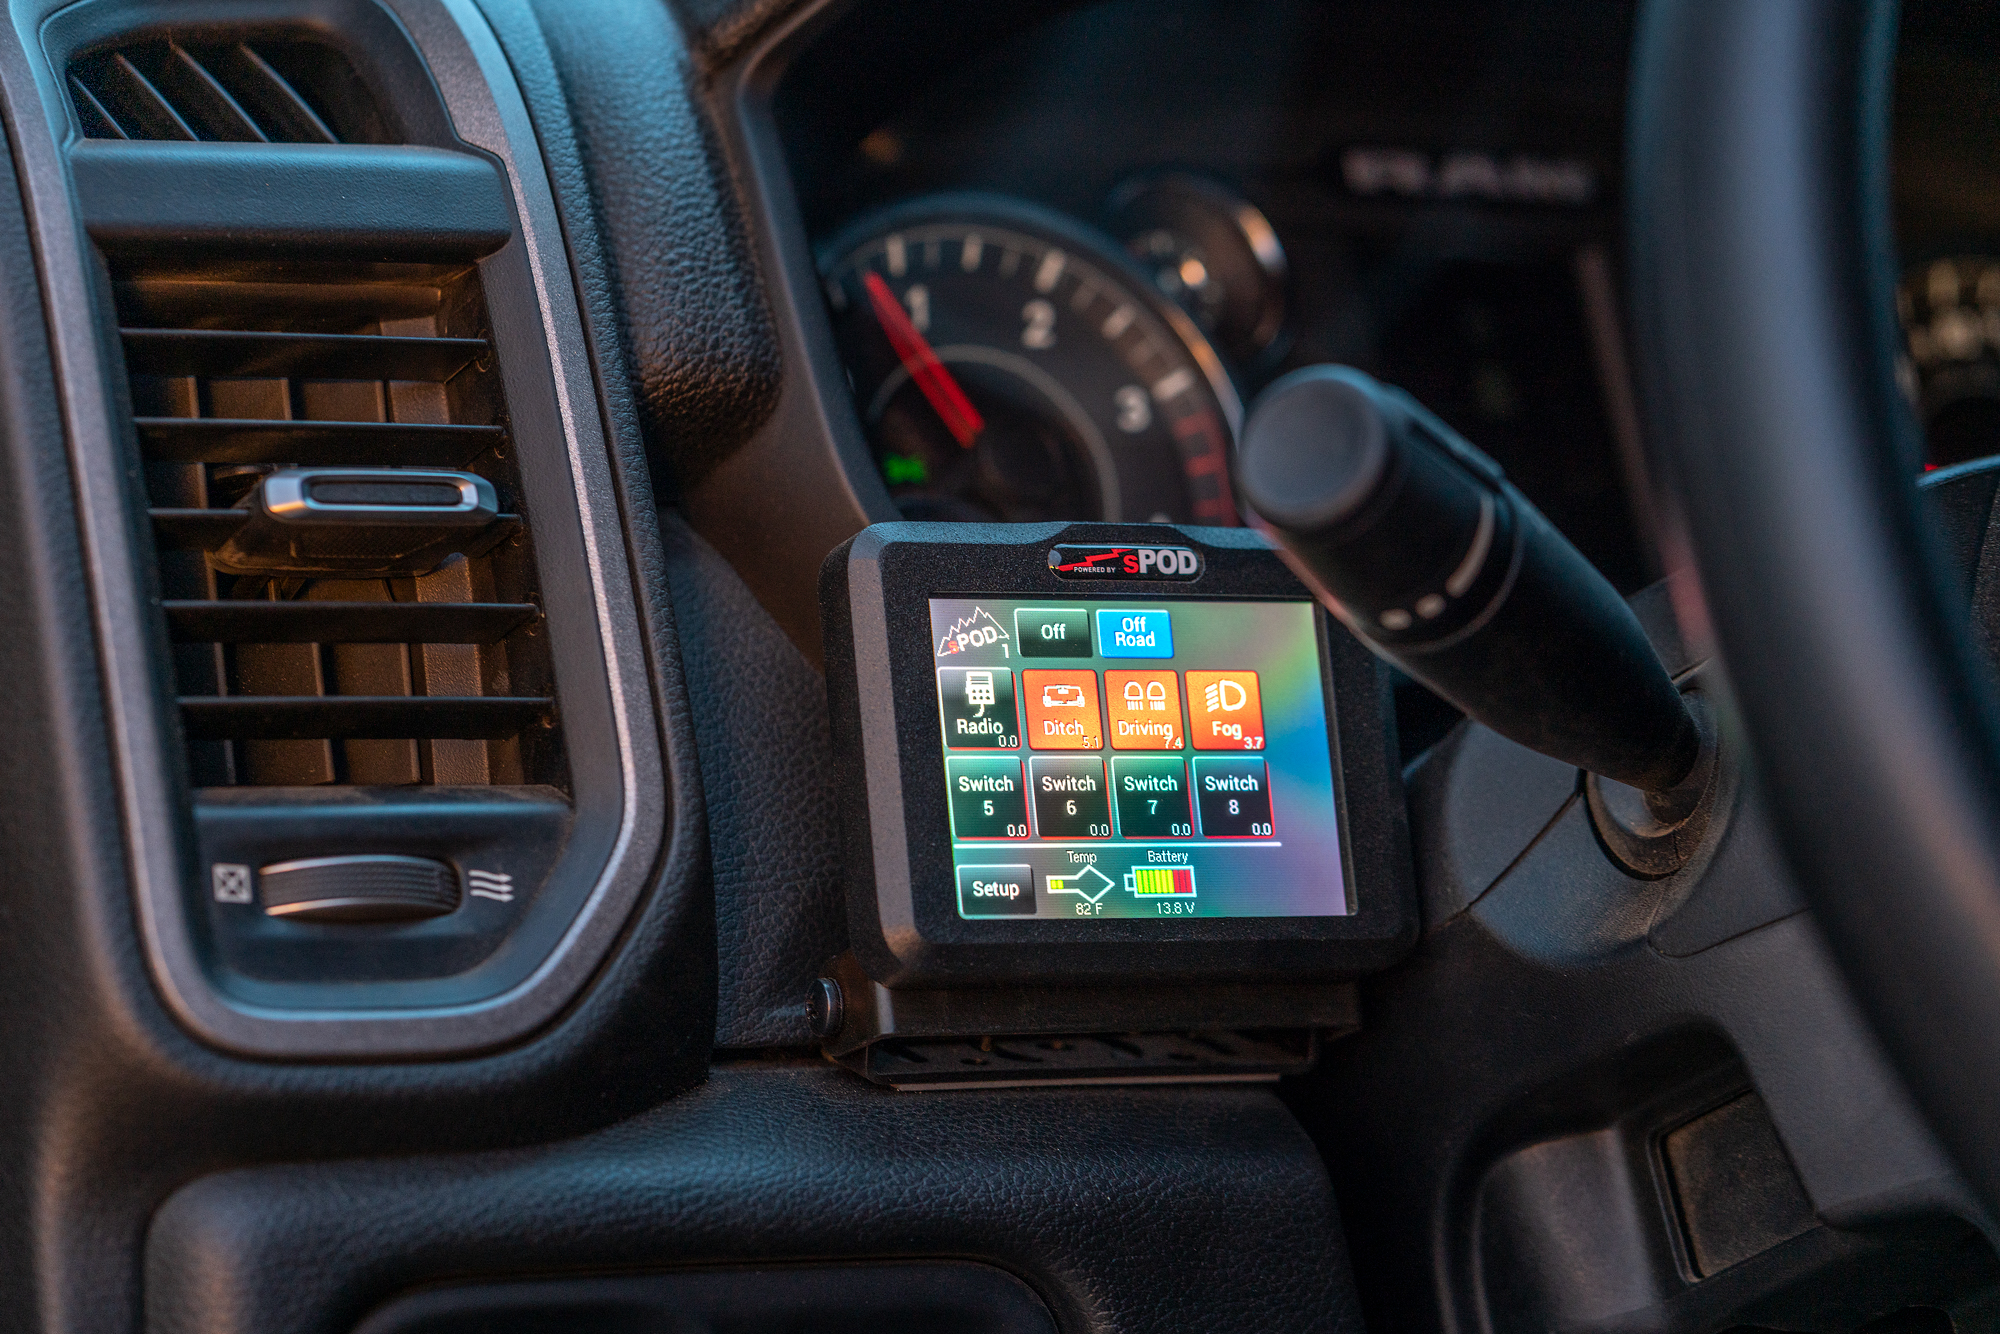
When I started researching how to install aftermarket lighting in my Ram 2500, I was very quickly overwhelmed with information. I was also discouraged to learn that making a small mistake could present a myriad of problems for the many computerized systems found in my vehicle. As someone with DIY ambitions who wants to understand and thereby be able to fix any of the aftermarket systems that I put in my vehicle (crucial for overland travel), I wasn’t about to let this challenge stop me.
I thought back to various Overland Expo events I attended in 2021, where I saw many rigs that utilized standalone digital lighting controllers to manage their installations, and wondered if this solution might work for me. After digging into the topic a bit more, it became apparent that these systems would simplify the process of installing 12-volt accessories.
Having previously done some simple 12-volt electrical work, I concluded that this route would allow me to perform my own lighting installation in a shorter amount of time while avoiding the possibility of screwing up the computerized electrical systems in my truck.
I reached out to SPod, and after securing a Bantam X universal with touchscreen lighting controller for my Ram 2500 overland build, I got to work with the installation.
What is a Bantam X and Why Would I Want One?
SPod designs, engineers, and manufactures all of its products in Valencia, California. The Bantam X is the evolution of their line of lighting controllers and was created to simplify the installation and control of 12- and 24-volt electrical accessories. It achieves this by tapping into the vehicle’s battery for power and providing an independent hub for connecting all of your lighting and accessories. The Bantam’s eight circuits are each rated for 30 amps at 12.5 volts. Each of these independent circuits is isolated from any systems in your rig, making installation and troubleshooting very simple.
You can control everything that is wired to the Bantam X with a variety of switch options. For this project, I selected the programmable touchscreen controller. This option requires a single cat-6 networking cable to be run into the cab of your vehicle (or wherever you decide to locate the controller).
Advantages of the Bantam X Universal:
- Keeps all accessory wiring within the engine compartment (except for the single controller cable)
- Provides a relatively intuitive interface that can be easily set up and customized
- Touch screen has Bluetooth and an accompanying smartphone app to facilitate setup
- Simplifies wiring of electrical accessories by providing a centralized electrical power distribution hub
- Has built-in self-healing circuit protection
- Touch screen controller adds additional functions like strobe, switch linking, flash, dimming functions, and more
- Provides real-time information about power use of each accessory
“At SPod, we use American-made and manufactured components, all designed, engineered, and constructed in Southern California using quality materials. Our design philosophy is simple: make the best possible product to withstand the most extreme conditions, with the most reliable and user-friendly systems.”
Installing the Bantam X in a 2021 Ram 2500
Because I am primarily using the Bantam X to control my off-highway lighting, the majority of which is installed in the front of my truck, I decided on an engine compartment installation.
For this standard location, SPod recommends attaching the Bantam to the cover of your OEM fuse box, but because it could make accessing the fuses inside more challenging, I decided to search for a manufactured bracket instead.
I had seen options for various Toyota and Jeep platforms, but came up empty-handed for a 2021 Ram 2500. I concluded that I would have to make my own. The reality of this outcome was that fabricating the bracket was a much more complicated and time-consuming process than installing the Bantam.
Fabricating a Bantam X Bracket for the 2021 Ram 2500 Cummins
The first step of the fabrication process was locating an appropriate place inside the engine bay that would allow for the hood of the truck to close properly, and which would not block access to the OEM fuse box. Because my truck already has a dual battery system (for the diesel engine), I ended up positioning the bracket over the driver’s side battery (maintaining access to the passenger-side battery for jump-starting and powering an air compressor).
Next, I made a cardboard template of the bracket, ensuring three secure mounting points as well as appropriate clearances for the Bantam’s power cables and accessory wire ingress points.
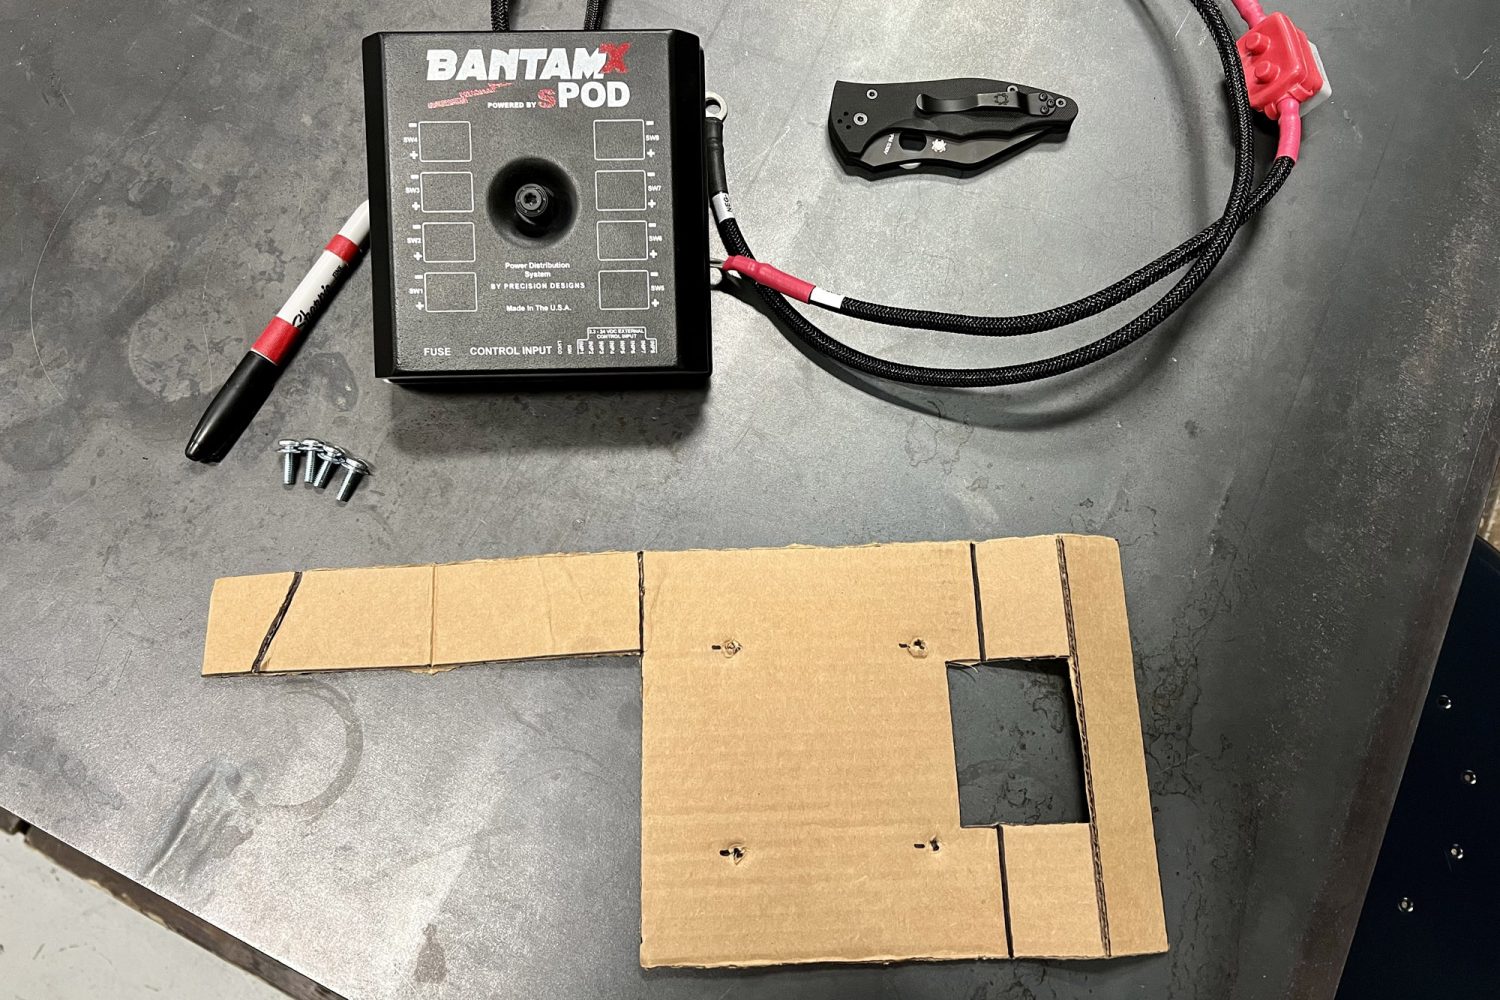 This template was the starting point for a custom mounting bracket for the Bantam X in our 2021 Ram 2500 Cummins.

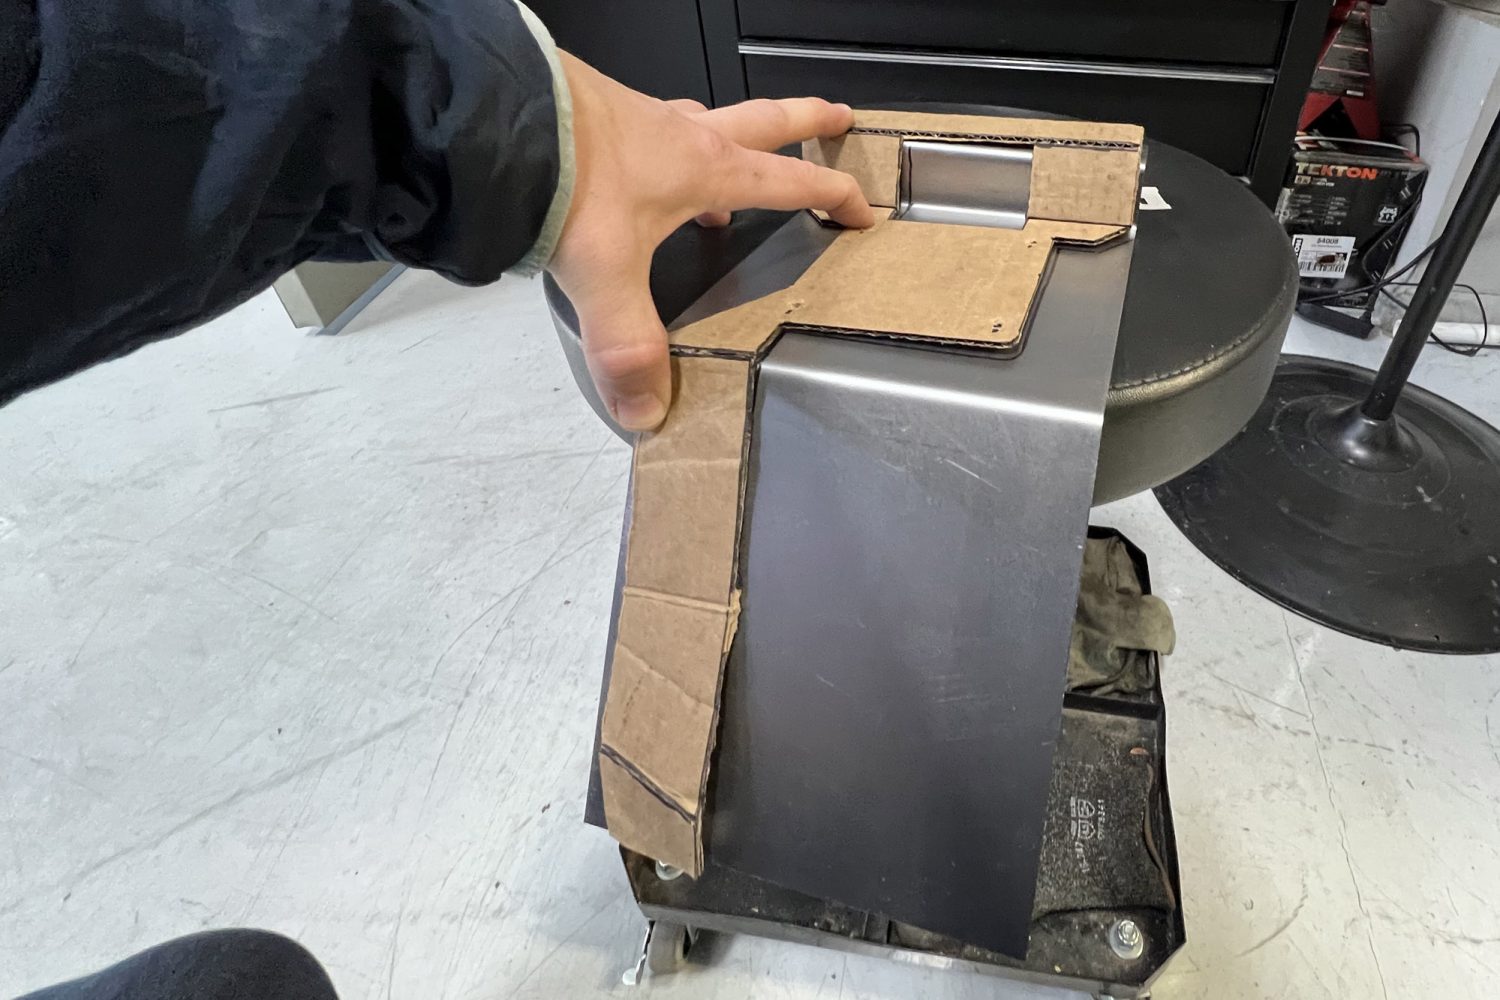
Left: The piece of sheet metal that I had cut and bent at the local metal shop. Right: Transfering the details from the template onto the bracket.
With the finished template in hand, I went to a local metal shop and had them cut a rectangular piece of sheet metal and apply a few bends using their machinery. The total cost of materials and labor for this step was under $13.
Next, I transferred the template details onto the piece of sheet metal with a permanent marker and went to work with an angle grinder.
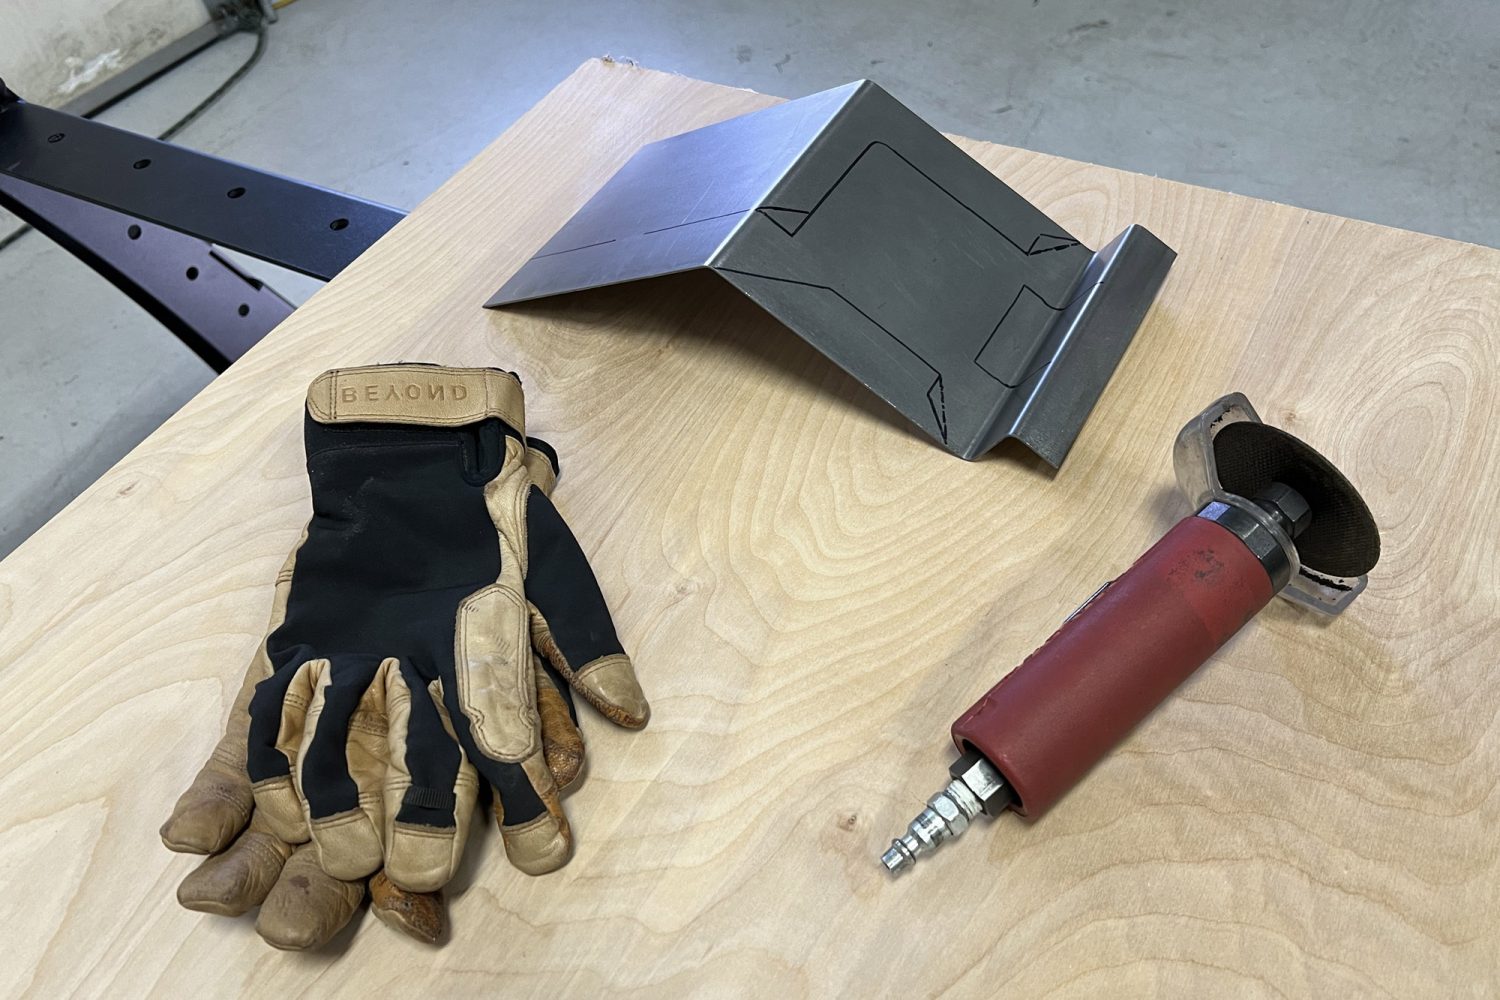
Preparing to cut the bracket. Ultimately, I used an angle grinder instead of the air-powered cutoff wheel pictured above.

After the bracket was finished, I utilized the included Bantam x template to mark the four holes that needed to be drilled to secure the lighting controller (to the bracket).
Using SPod’s supplied template, the final step was to drill four holes into the metal bracket so that I could attach the Bantam.
Installing the Bantam X Universal and Touch Screen Controller
After securing the bracket and controller in place, finishing the installation is very easy.
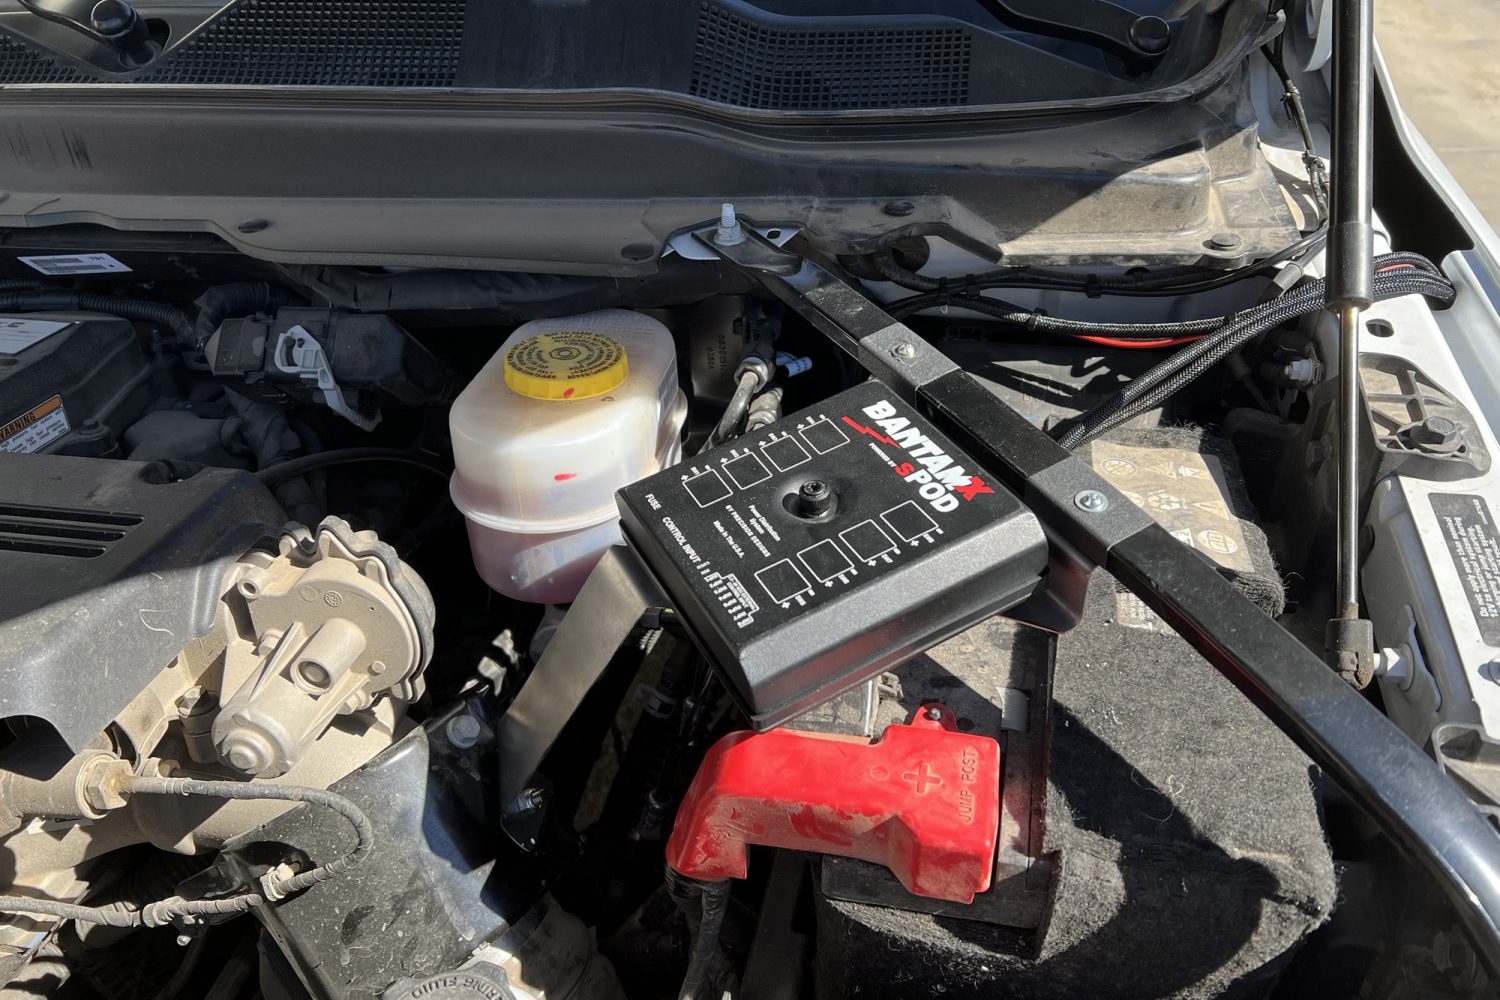
Final location: with the Bantam and bracket secured in the engine compartment, it’s time to move on to the wiring.
Step 1: Hook up the positive power cable from the Bantam to the vehicle battery and the negative to the truck’s chassis per SPod’s instructions (make sure that your vehicle’s battery is disconnected for this step).
Step 2: Route the cat-6 networking cable from the engine bay into the truck’s cab through the firewall.
Because my truck has an automatic transmission, I decided to utilize the pre-drilled hole where the clutch would have been routed into the engine bay. After removing a small plastic cover, I had a pass-through for my cable. I opted to reuse the plastic cover with a piece of PVC pipe attached to protect the wiring from wear caused by rubbing on the exposed metal edges of the firewall.
I routed the cat-6 cable through the firewall, up past the steering column, and to the controller, which I secured next to the steering wheel using the SPod-supplied bracket and some 3M VHB adhesive strips.
Step 3: Connect the touch screen controller to the Bantam.
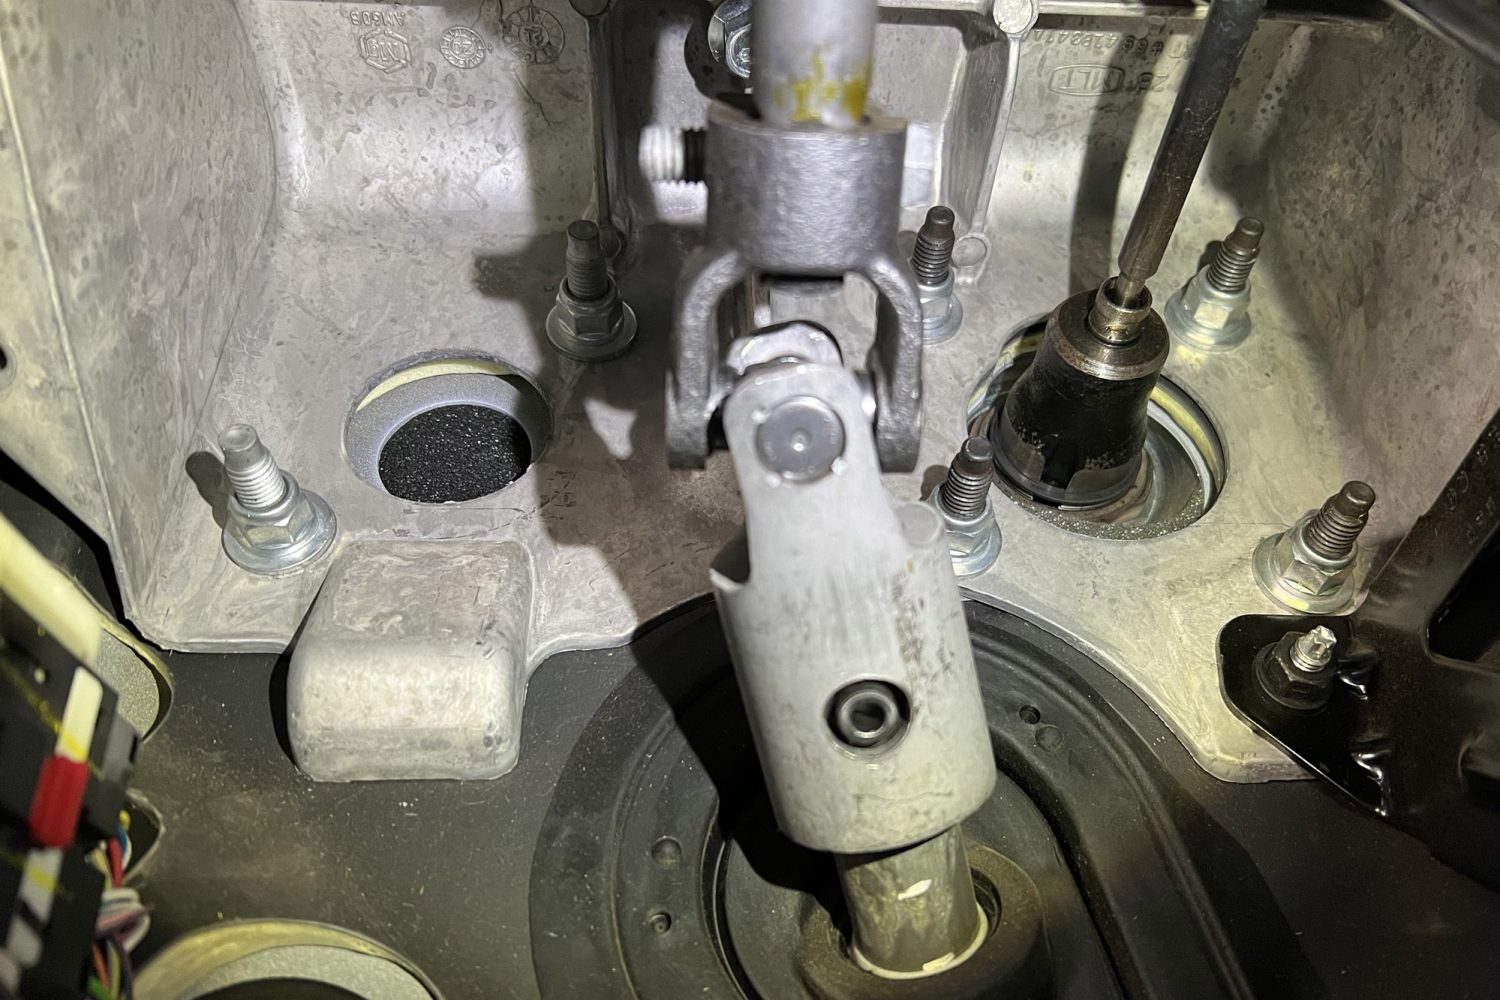
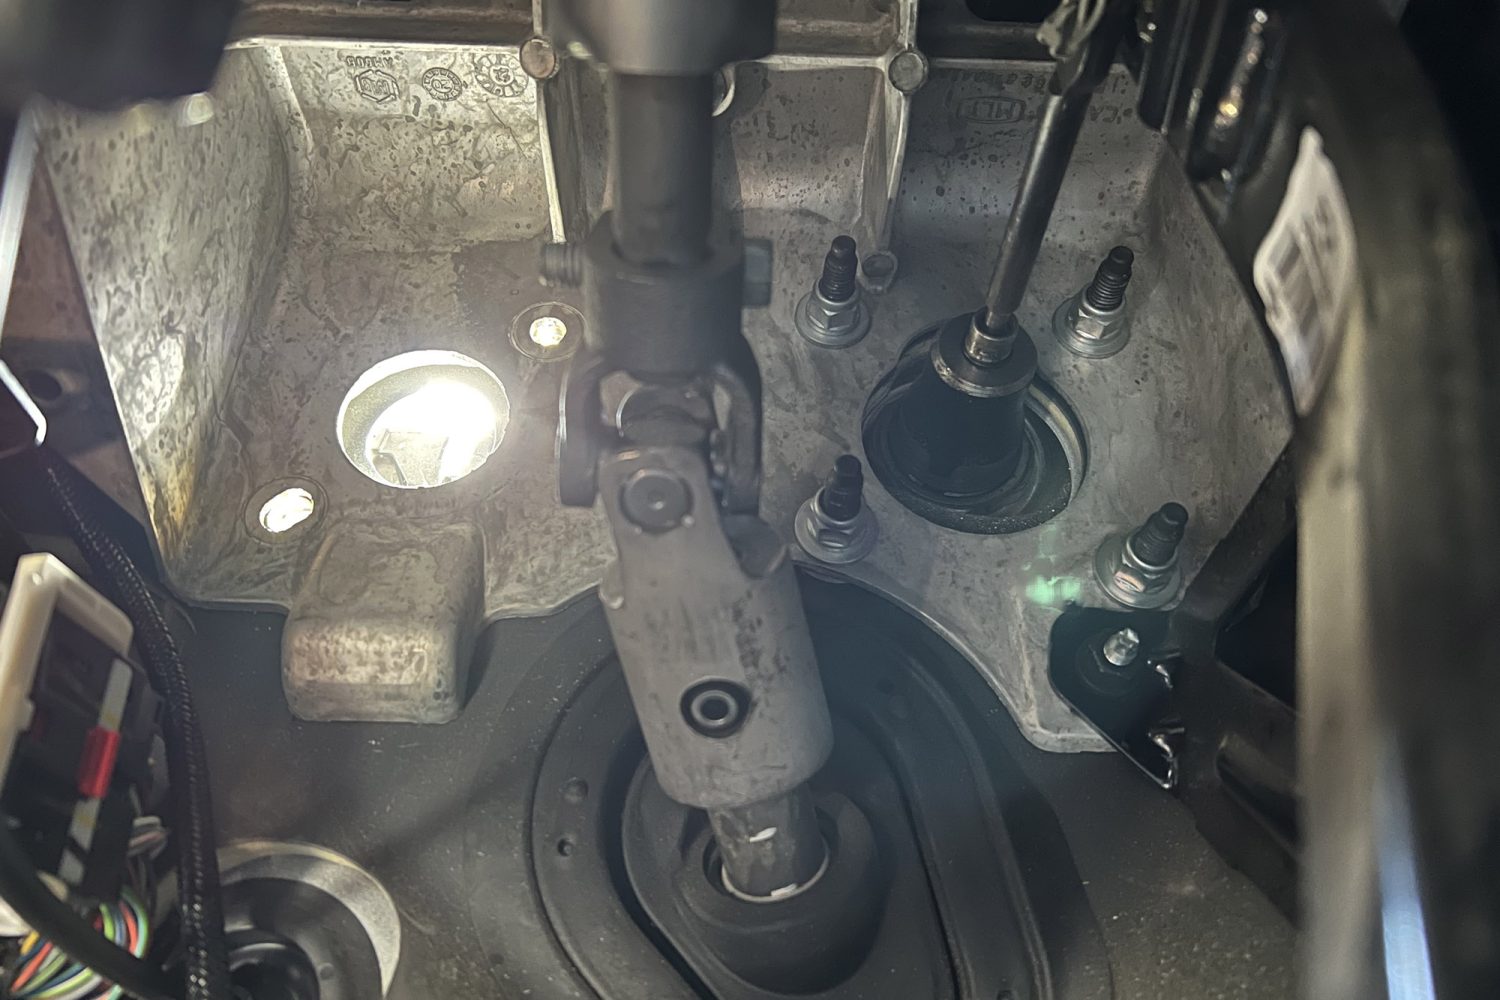
Left: Looking under the dash you can see where the clutch would be routed through the firewall. Right: With the plastic plate removed, I had the perfect-sized hole to route a few cables of various sizes.

After removing the plate, I drilled out the center and JB Welded (that’s a verb, right?) a piece of PVC pipe onto the plate to protect the wires from any sharp metal edges.
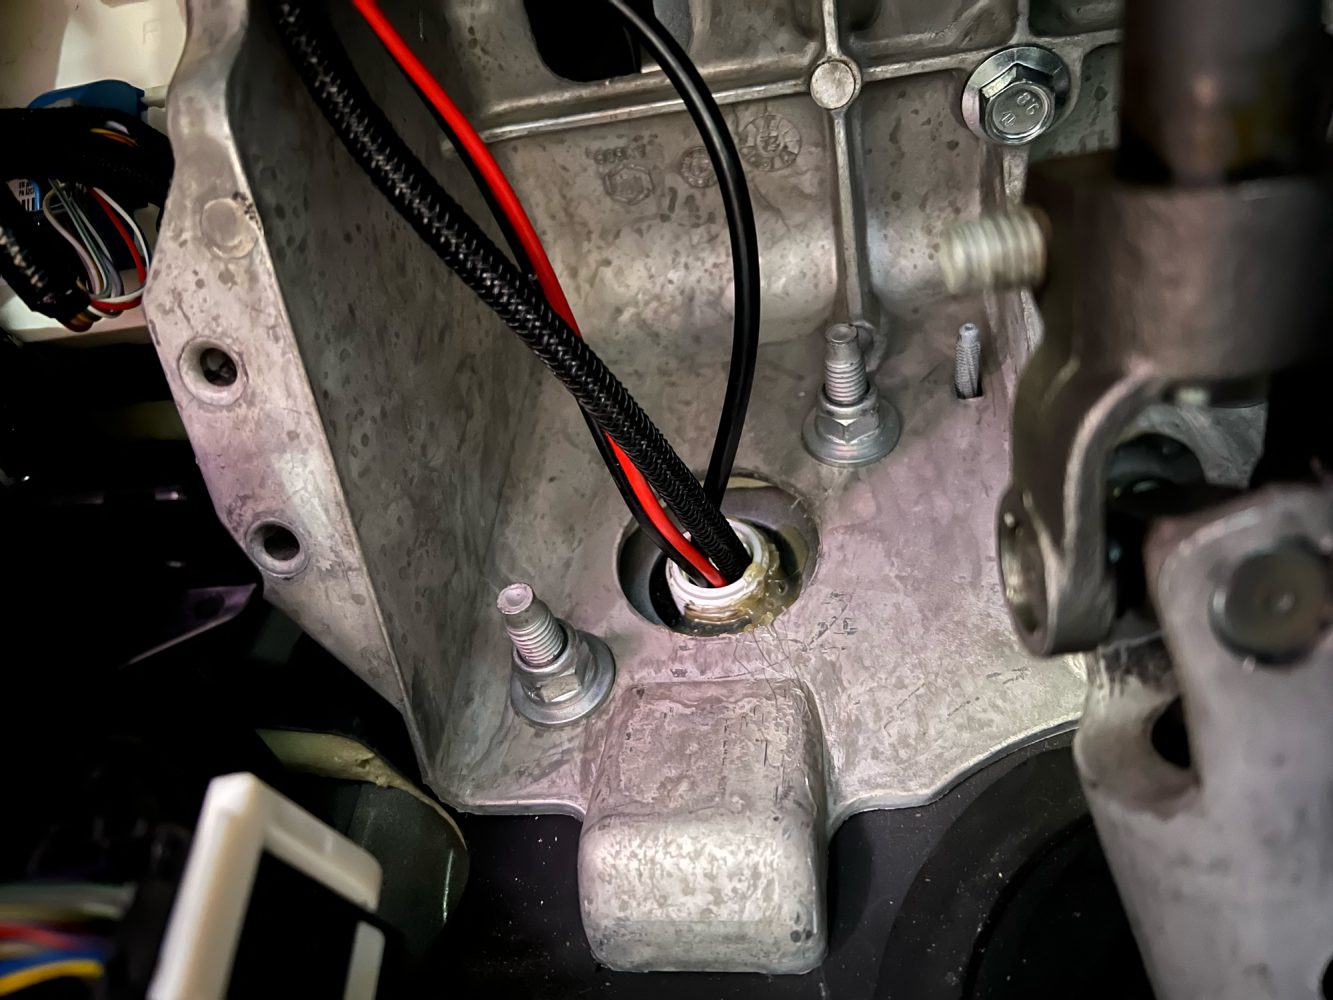
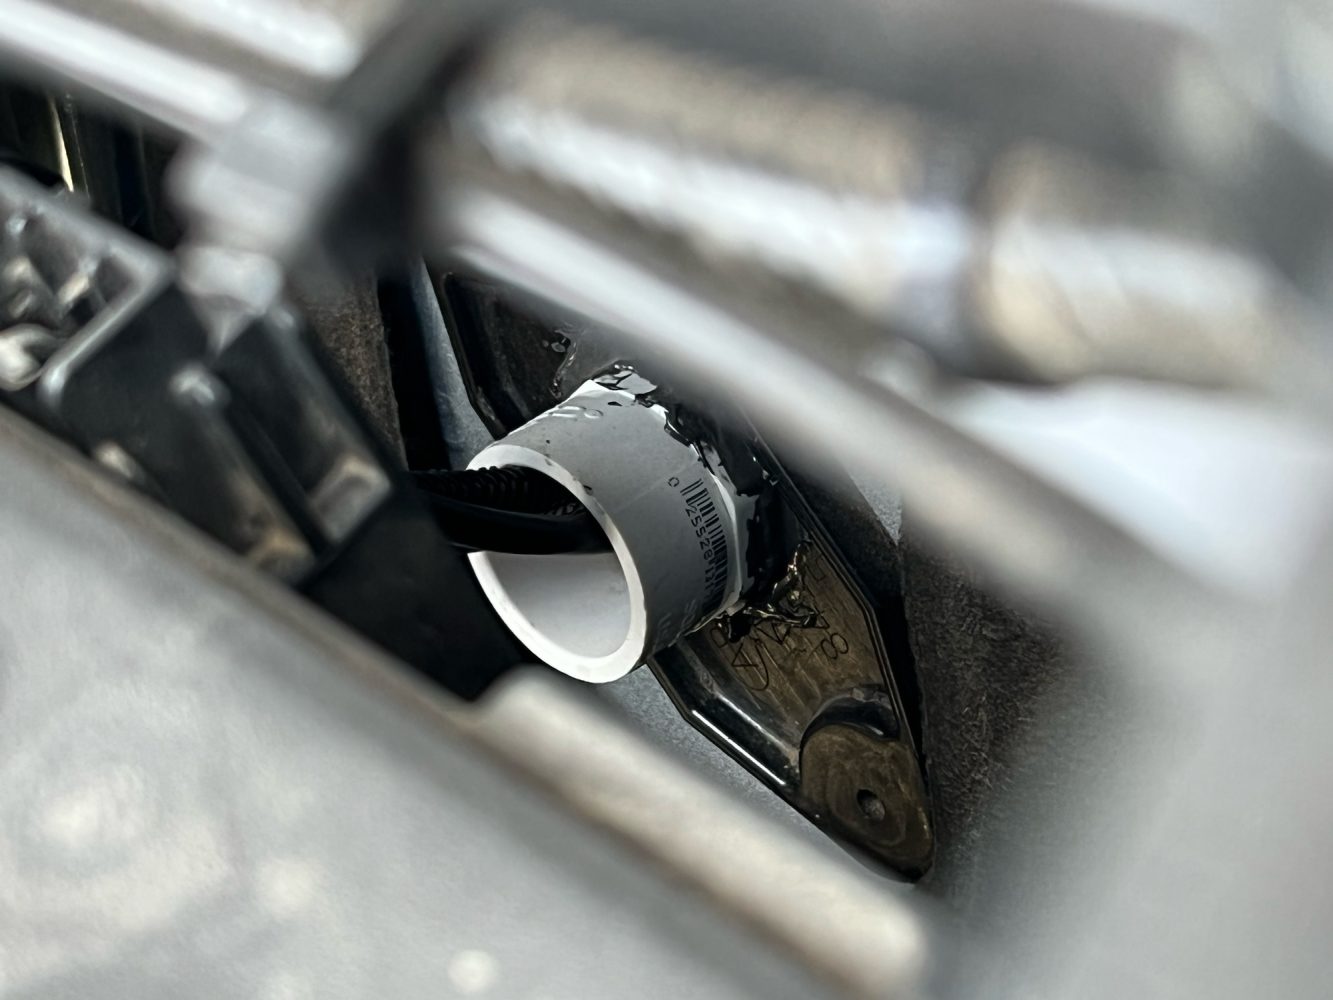
Left: The clutch penetration in the firewall with my modified PVC “wiring gland” in place. Right: The single Cat-6 data/power cable can be seen coming into the engine bay of the Ram 2500.
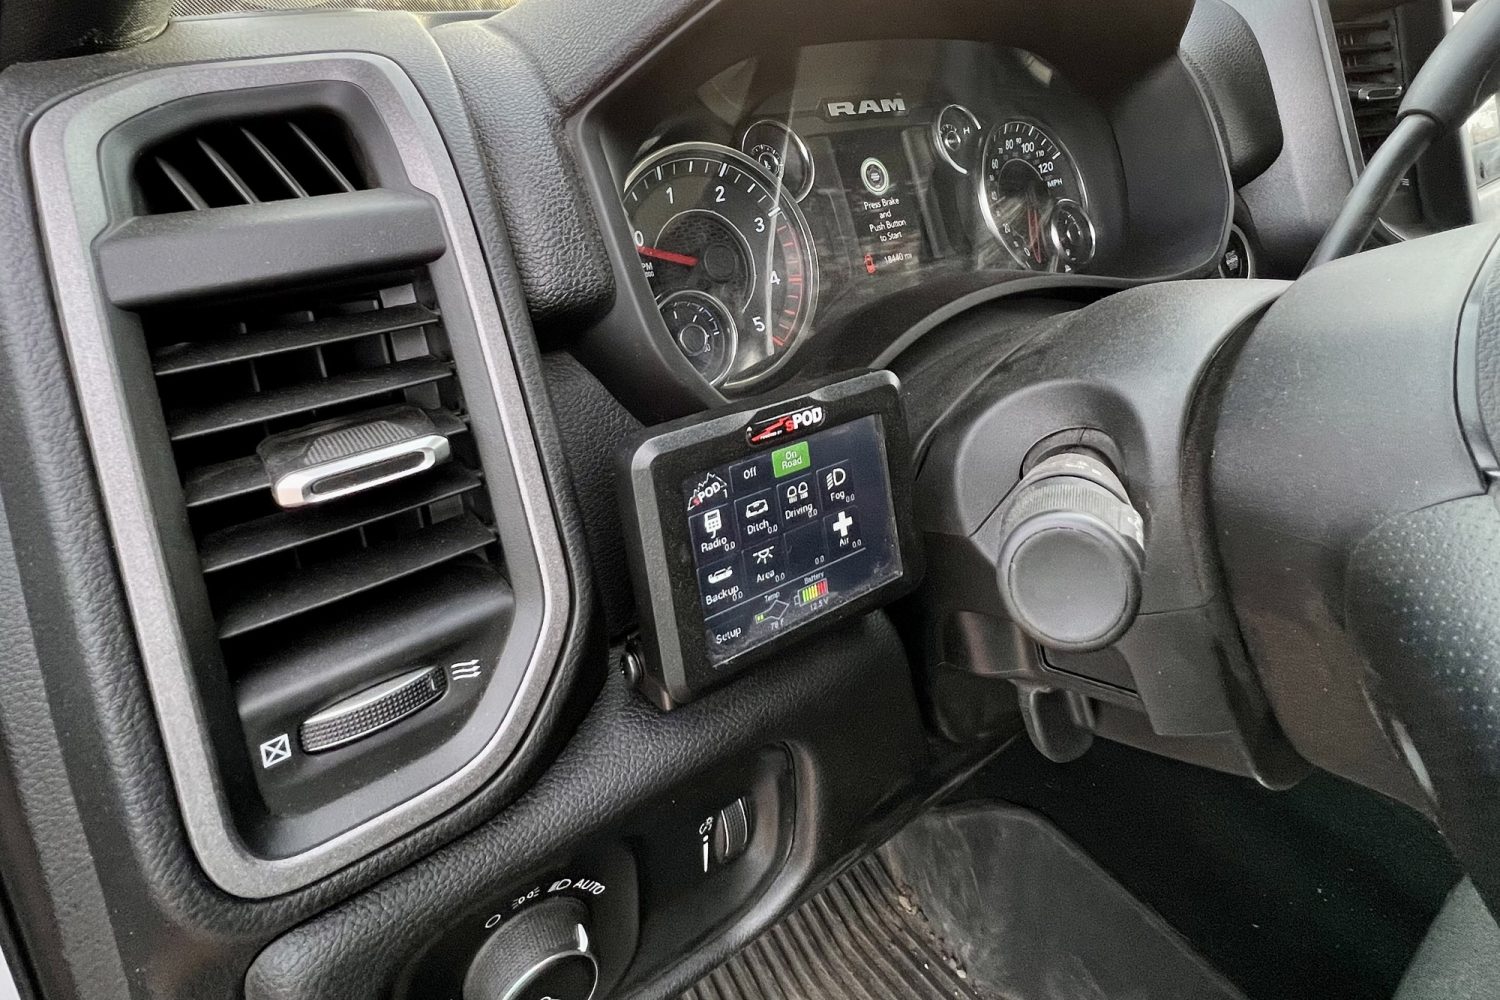
By adding some 3M VHB adhesive strips to the mounting bracket, and wedging it in between the panels of the dash, it remains secure in a convenient location. I will eventually move the controller to a ball mount on the truck’s a-pillar for even easier use while driving.

A screen-grab of the sPOD smartphone app – this mirrors what is displayed on the touch screen controller.
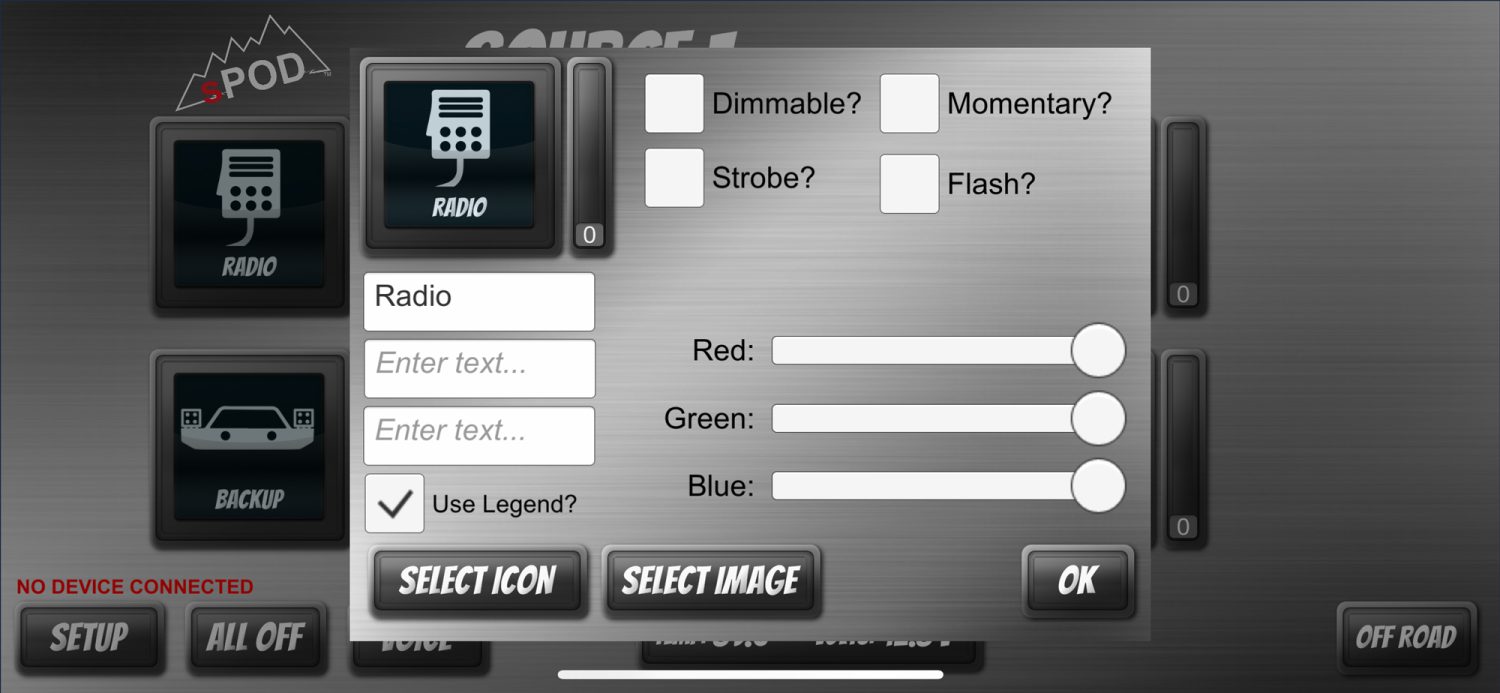
Editing details of individual devices. You can only assign icons to accessory buttons via the smartphone app.
Connecting Accessories to the Bantam X Universal Controller
The Bantam X is a great solution for those who want to perform their own installation of 12-volt accessories but want a simplified experience. If you can identify positive and negative wires, you have what it takes to connect accessories to this system.
Step 1: Begin installation by identifying the power consumption of each of your accessories that will be connected to the Bantam. It is important to select wiring that is rated for more than the maximum amperage of the accessory in question to avoid the possibility of electrical fires. There are a variety of resources online that can help you calculate this, and here is one example. Note: the maximum power output for each pair of terminals on the Bantam X is 30 amps. If you are using accessories that exceed 30 amps of electrical draw, you will need to utilize appropriately sized relays.
Step 2: Mount your accessories (lighting, radio, etc.) and run your wires. Wires should be located in convenient locations where they can be accessed if problems arise. Secure all wiring using zip ties to avoid wear caused by rubbing or vibration. Wires should be affixed to solid connection points, away from heat sources that could melt wire casings.
Step 3: Crimp SPod-supplied connectors onto the bare wire ends, apply shrink-tubing, and connect them to the Bantam X controller. Test each accessory for proper function using the touch screen controller.
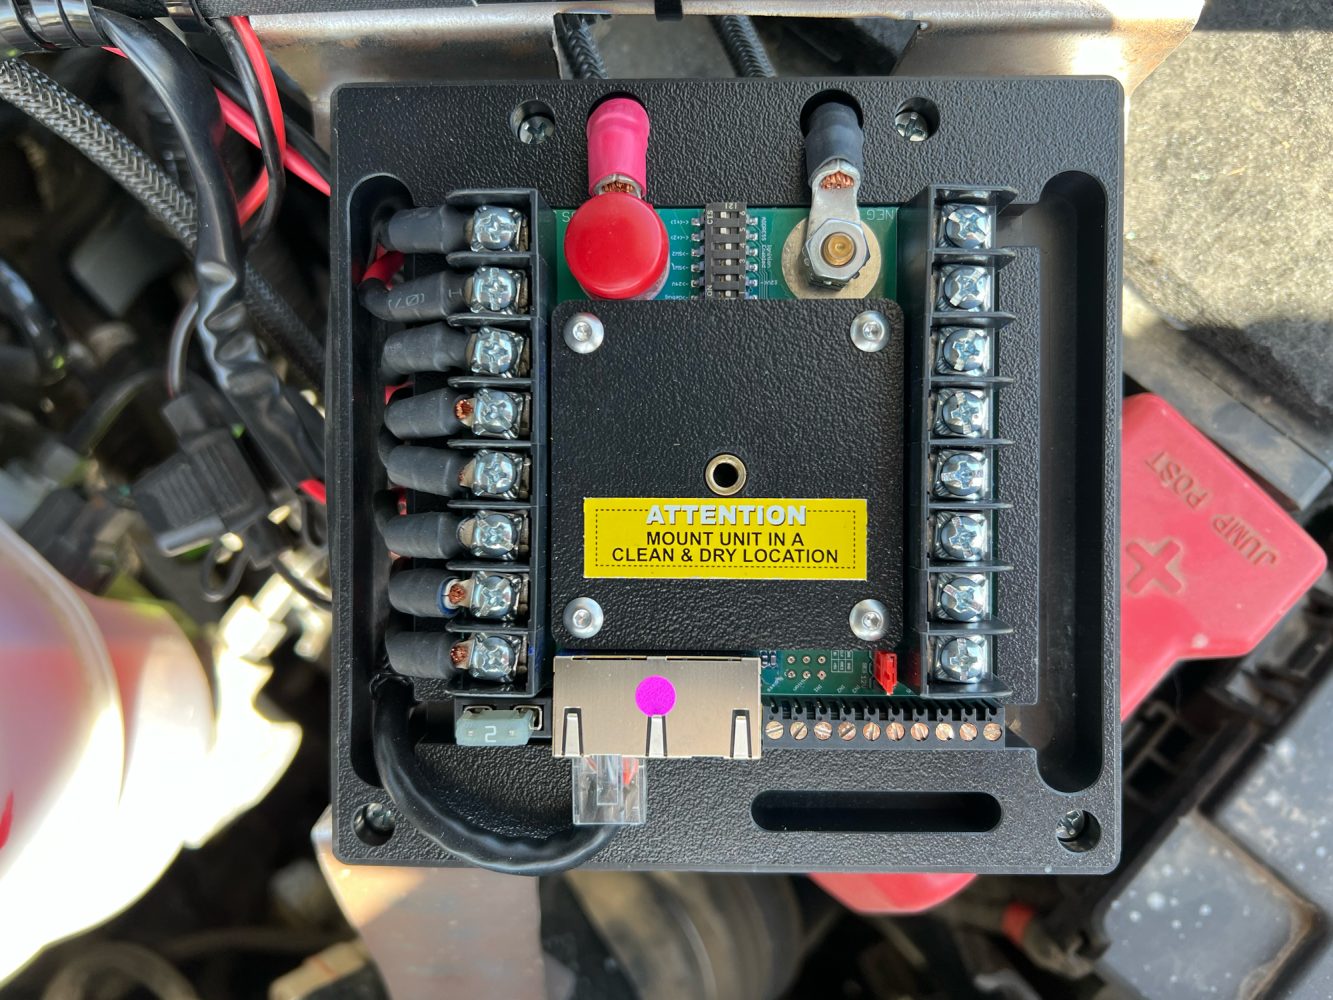
Under the cover of the Bantam X: power mains are the two wires at the top of the device which connect directly to your battery and vehicle chassis. There are two rows of wiring posts for connecting accessories. Note that I have four devices taking up the first eight terminals on the left-hand side of the Bantam.
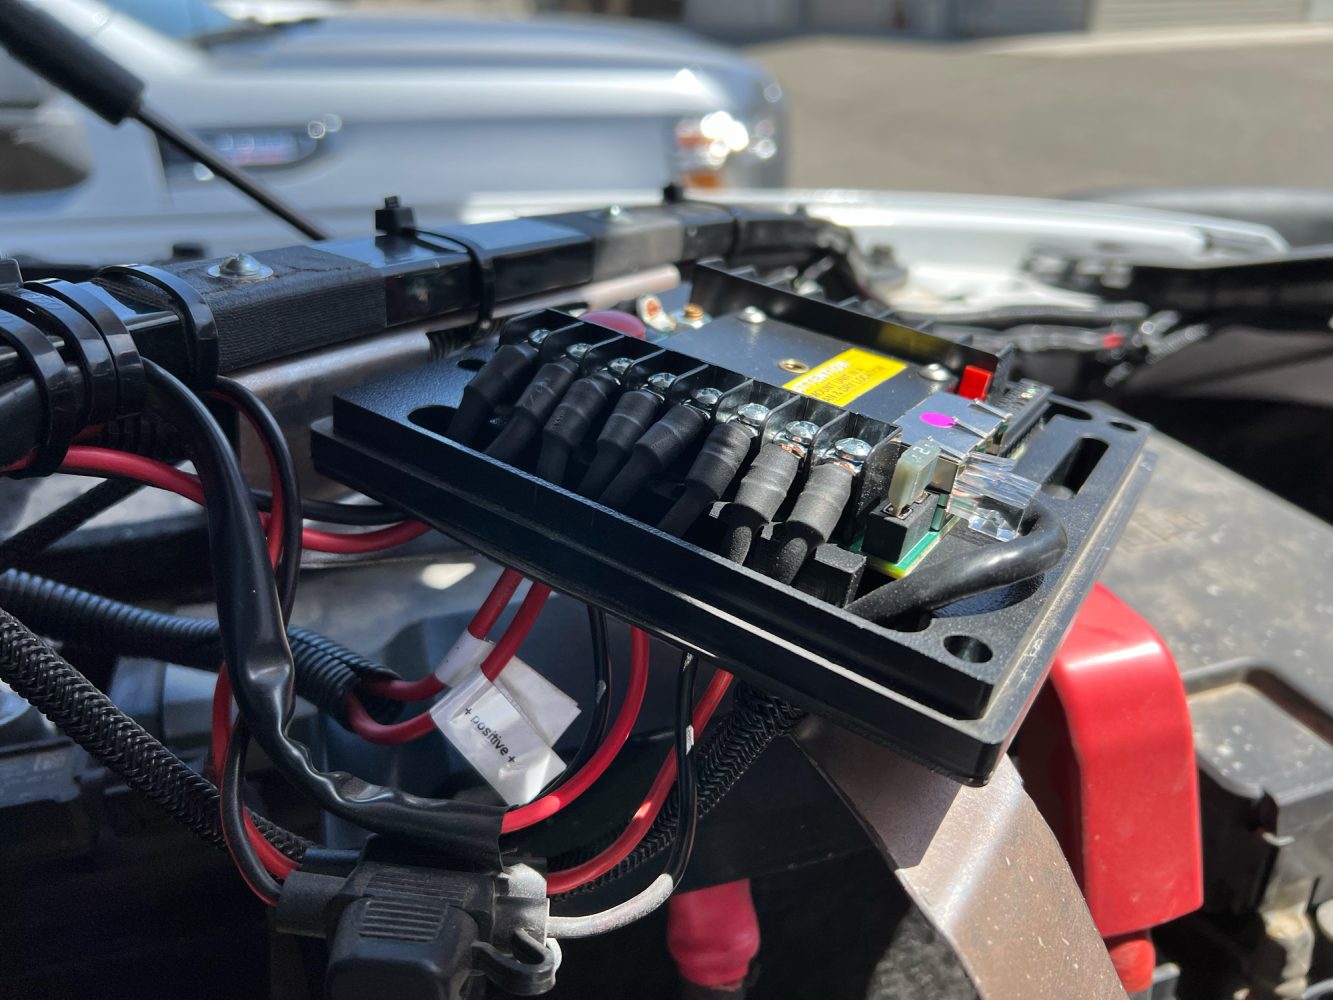
A closer look at the accessory wires where they enter the Bantam. Note the cat-6 data/power cable.
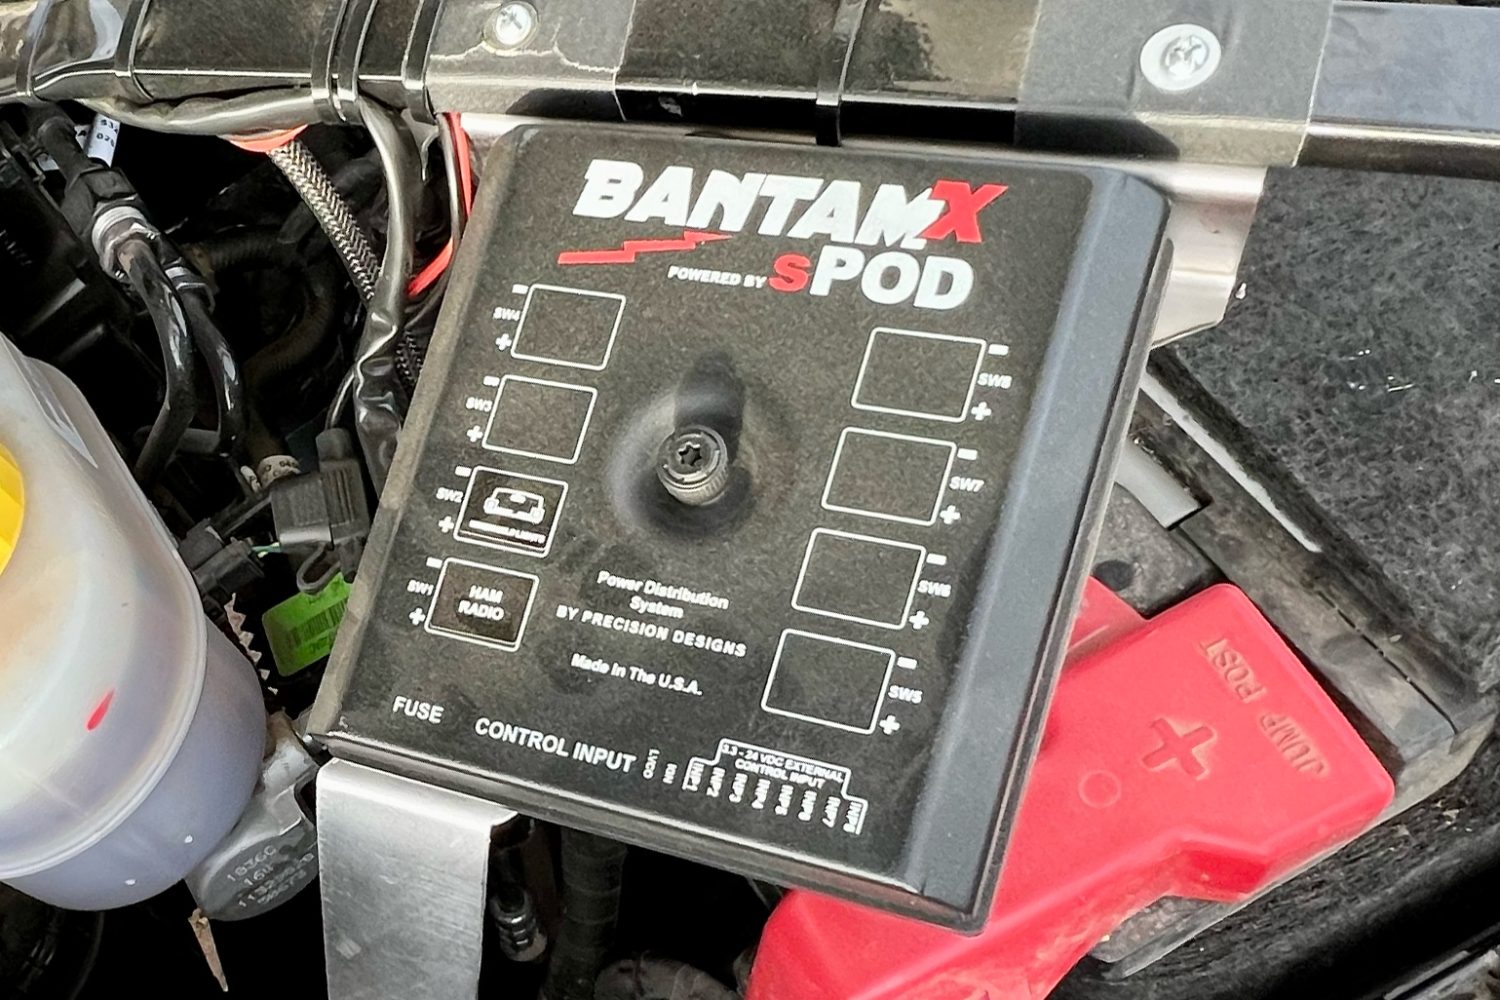
A closer look at the cover of the Bantam shows the labeling of the various terminals. sPOD provides stickers for labeling accessories for quick identification and/or troubleshooting.
Using the Bantam X and Final Thoughts
Using the Bantam X is very easy once the unit is set up. The touch screen is responsive, but not like a smartphone: it requires a little bit of pressure to register “button” presses. Some of the sliders adjacent to the edges of the screen can be difficult to operate precisely, but that hasn’t posed any significant problems.
Upon initial setup, I had some issues with the touch screen operating correctly, so I contacted the customer service team at SPod, who quickly set up a service ticket. After returning the touch screen to the factory, they had multiple technicians inspect the unit, perform a panel of tests to confirm proper operation, and reflashed the most current version of SPod’s firmware. They promptly returned the touch screen to me and it has been functioning properly, however, I have come to the conclusion that the touchscreen is very sensitive to static electricity.
For instance, if I have a static charge built up on myself when entering the vehicle, and I touch the screen without first discharging by touching the vehicle chassis, I will often ground out through the Bantam’s Touchscreen. This often results in the screen going blank and needing to be unplugged and replugged into its Cat-6 power/data cable. When I do this, it restarts and then works correctly. I’m not sure if this is a shared experience among other users, and I would be interested to know if there is something that I can do to prevent this issue in the future. If I find a solution, I will post an update here.
My final impression of the Bantam X Universal is that SPod has developed a very solid product. Installation was exceptionally easy and could have been accomplished even faster if I had mounted the controller to the lid of the fuse box instead of fabricating a custom mounting bracket. The Bantam has performed as advertised, and once I’ve had it in service for an extended period of time, I plan to publish a follow-up article which I will link to from here.
Want to see where this project started? Check out these two articles:
>> Intro Article for this Ram 2500 Cummins Overland Build <<
>> Expedition One Range Max Ultra HD Bumper Installation <<
Our No Compromise Clause: We carefully screen all contributors to ensure they are independent and impartial. We never have and never will accept advertorial, and we do not allow advertising to influence our product or destination reviews.


