Over the past ten years the off-road trailer industry has exploded in North-America. From the first home conversions of M416 trailers, nearly three dozen new companies have sprung up to produce their own version of an all-terrain tow-able. Each has a unique spin of course, low price, different suspension, cool shapes or colors, but by in large the concept has remained the same; a bare cargo box to be filled with gear and accessories. This setup is highly versatile and easy to recreate, but it lacks that degree of refinement and specialty which many people have come to expect in overland products.
Dave Munsterman set out to change that with the Turtleback. Betting that many people didn’t really want an empty cargo bay, but rather something purpose built for luxury back country travel, he integrated a massive slide-out kitchen, compartmentalized storage areas, and all the amenities you would expect in a modern RV. Between the best practice assembly methods, high quality components, and painstaking attention to detail, the Turtleback has become one of our favorite trailers and basecamps.
Building the Turtleback
Before we get down into the details, there are two broad factors that truly set this trailer apart from many of its competitors. First, it was designed from the ground up with civilian camping use in mind, which means that the layout and functionality were the first priority, not afterthoughts. You won’t find a table that sort of fits in a corner and is difficult to take out, or an oddly placed compressor or water system bolted into place where cargo can smash it. There are no cooking surfaces at knee height or mounting brackets which rattle and shake over every bump, just a well meshed system of components that integrate smoothly together.
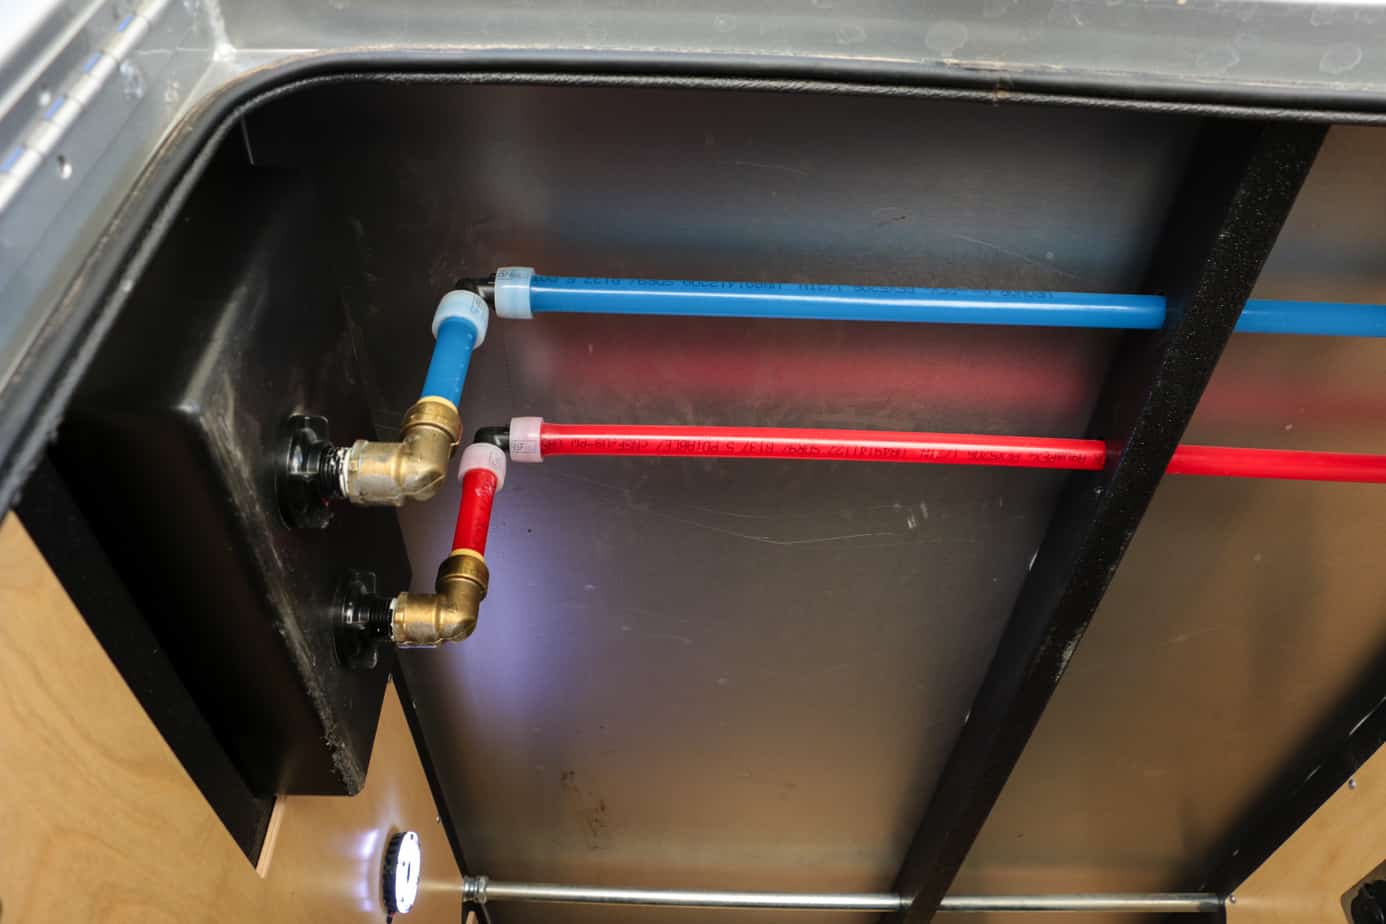
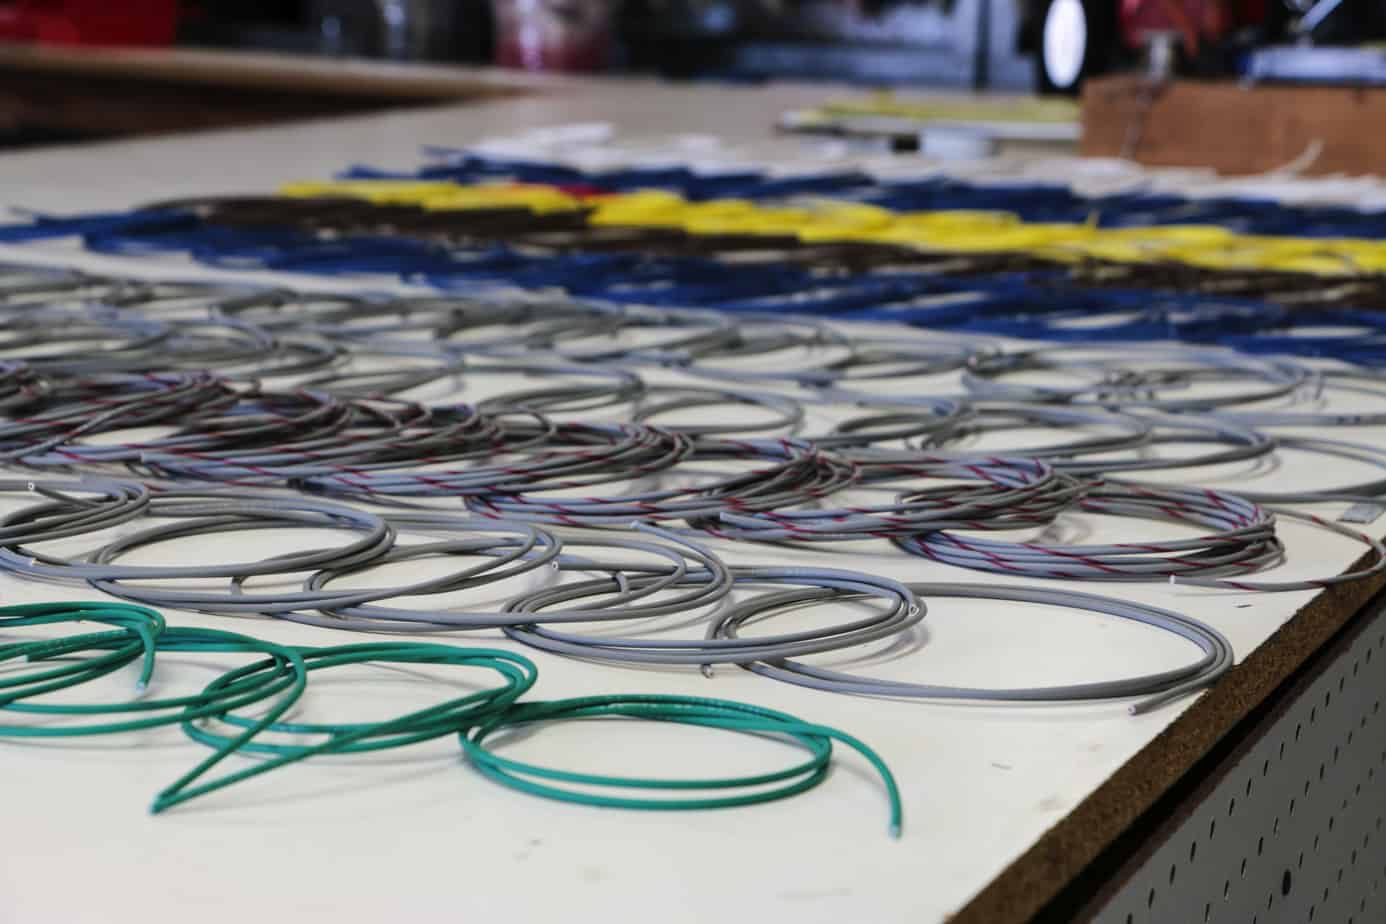
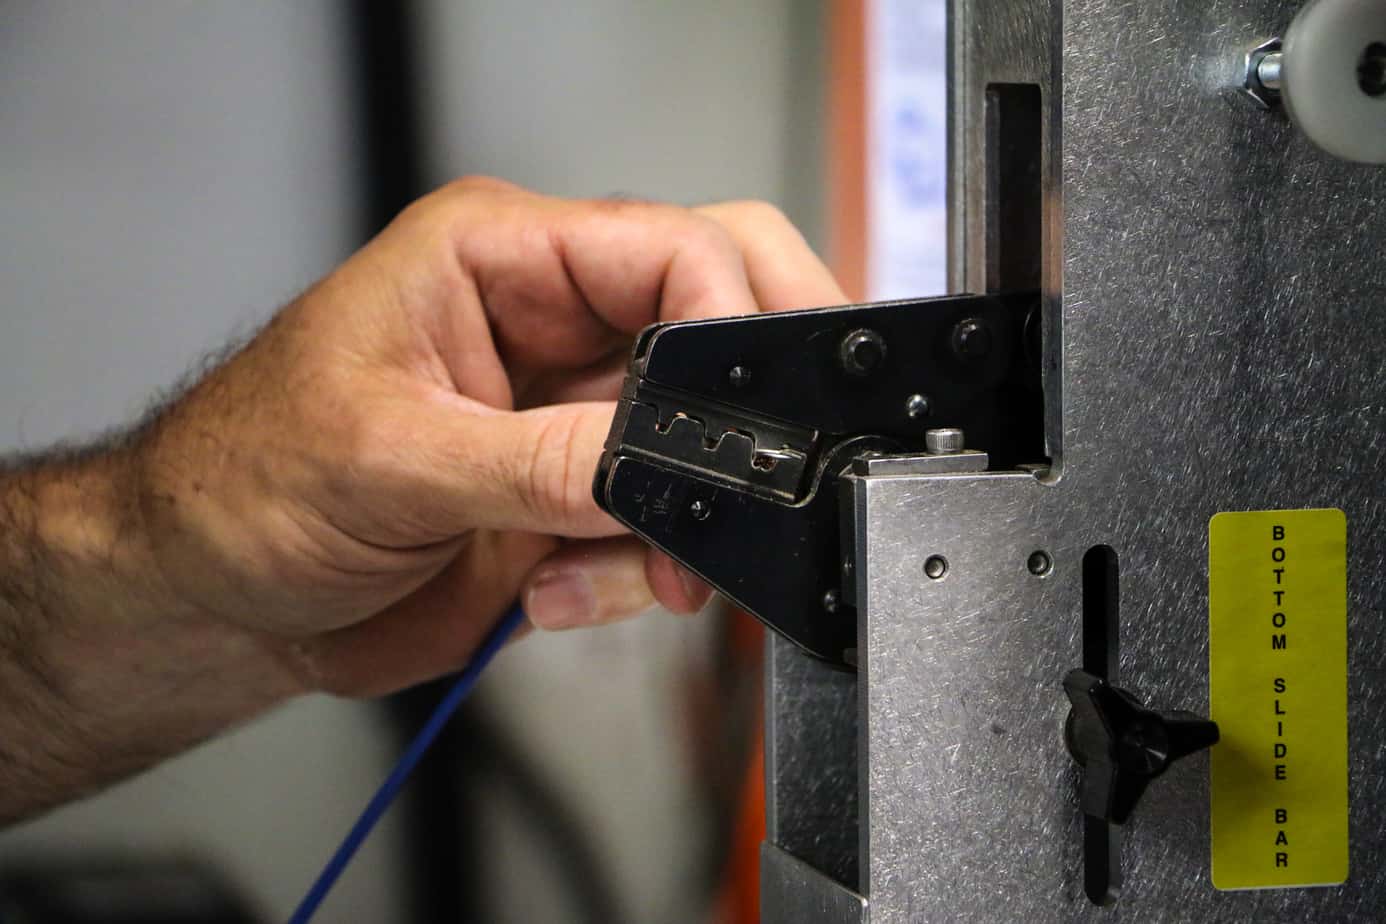
Second, Turtleback is hopelessly focused on best practices for everything they do, and the reason is simple; experience. From building and wrenching on dune buggies and jeeps, to years of working in the RV industry, Dave has applied the culmination of his knowledge and hard learned lessons into these trailers. He only uses US made gxl wires with double crimp connectors because faulty wires left his dune buggy stranded in the desert. Rusted parts on VW’s taught him to always use stainless hardware, so each and every nut and bolt is rust resistant. After seeing water damage from busted pipes and connectors in RV’s, he opted for durable and expandable PRO-PEX lines despite their additional cost. Each step of this trailer’s design tells a story of improvement, and together they paint a clear picture of Dave’s dedication to quality.


The Frame and Chassis
The key to making any great product is to start with a strong foundation, and an off-road trailer is no exception. That is why Turtleback’s process doesn’t begin on the shop floor, but in an office as a CAD (computer aided design) file. This type of program eliminates the guesswork when it comes to measurements, loads, and stress on components, allowing the product to be optimized before a single piece of steel is ever welded. Once the design is completed, it is dissected into components which are laser cut with accuracy between ten and thirty thousandths of an inch. This level of precision means that each piece of the trailer goes together easily on the first try, reducing production time and making the product more durable.
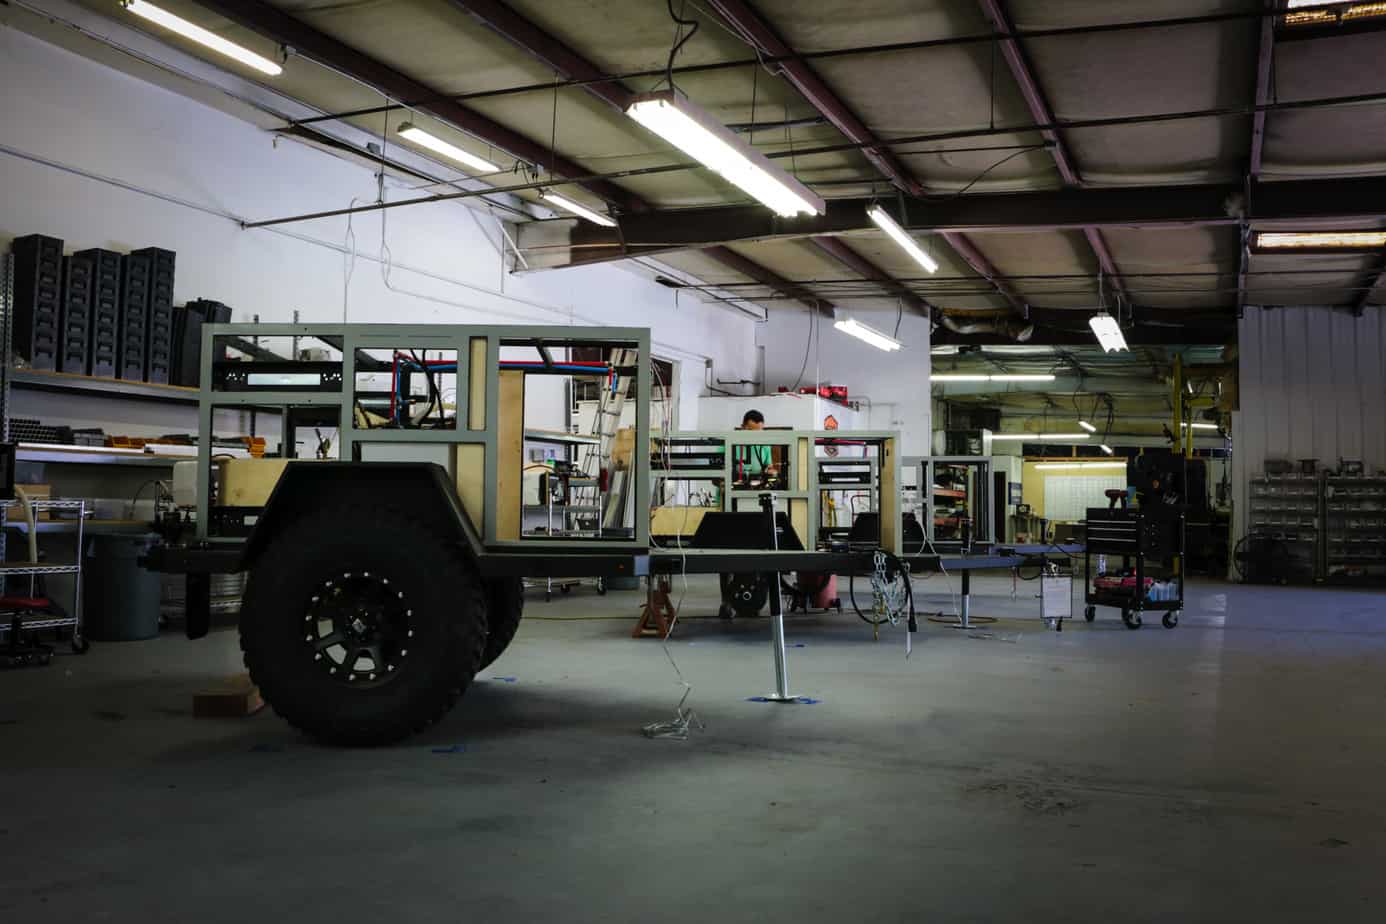
Once the skeleton has been assembled, it leaves the shop to be professionally sealed. Since a standard powder coat or bedliner wouldn’t reach into every nook and cranny, a three step military grade process was chosen. It begins with a layer of rust inhibitor on every surface and caulk in every seam. Next a two part epoxy coating is applied on the top and bottom of the trailer, followed by a thick coat of Polyuria liner. After curing, a spray of UV protectant seals it against damage from the sun. Amazingly that is the abbreviated version of this process, and even more can be learned here.
When the trailer finally makes it back to Turtleback’s facility, it begins the journey down their 5S production line. From attaching exterior panels to installing the electronics and water systems, every step is organized and clearly labeled. The process is clean and efficient, but more importantly it produces the same high quality product each time so the customer always gets what they paid for.
Living Systems and Accessories
Building a great trailer on paper is one thing, but producing one that still performs well after hundreds of miles of washboards, stream crossings, and rocky climbs is another. Thankfully our borrowed unit had already seen years of use in the field, so we got a rare chance to see how it has held up under the tests of journalists and the wear of time.
The Kitchen and Water System
Summary
Pros:
- Tons of work space
- Stylish Baltic Birch Cabinets
- Many separate drawers for organized storage
- 42 Gallon water tank
- Good water pressure to faucet
- Atwood water heater provides consistent hot water once warmed
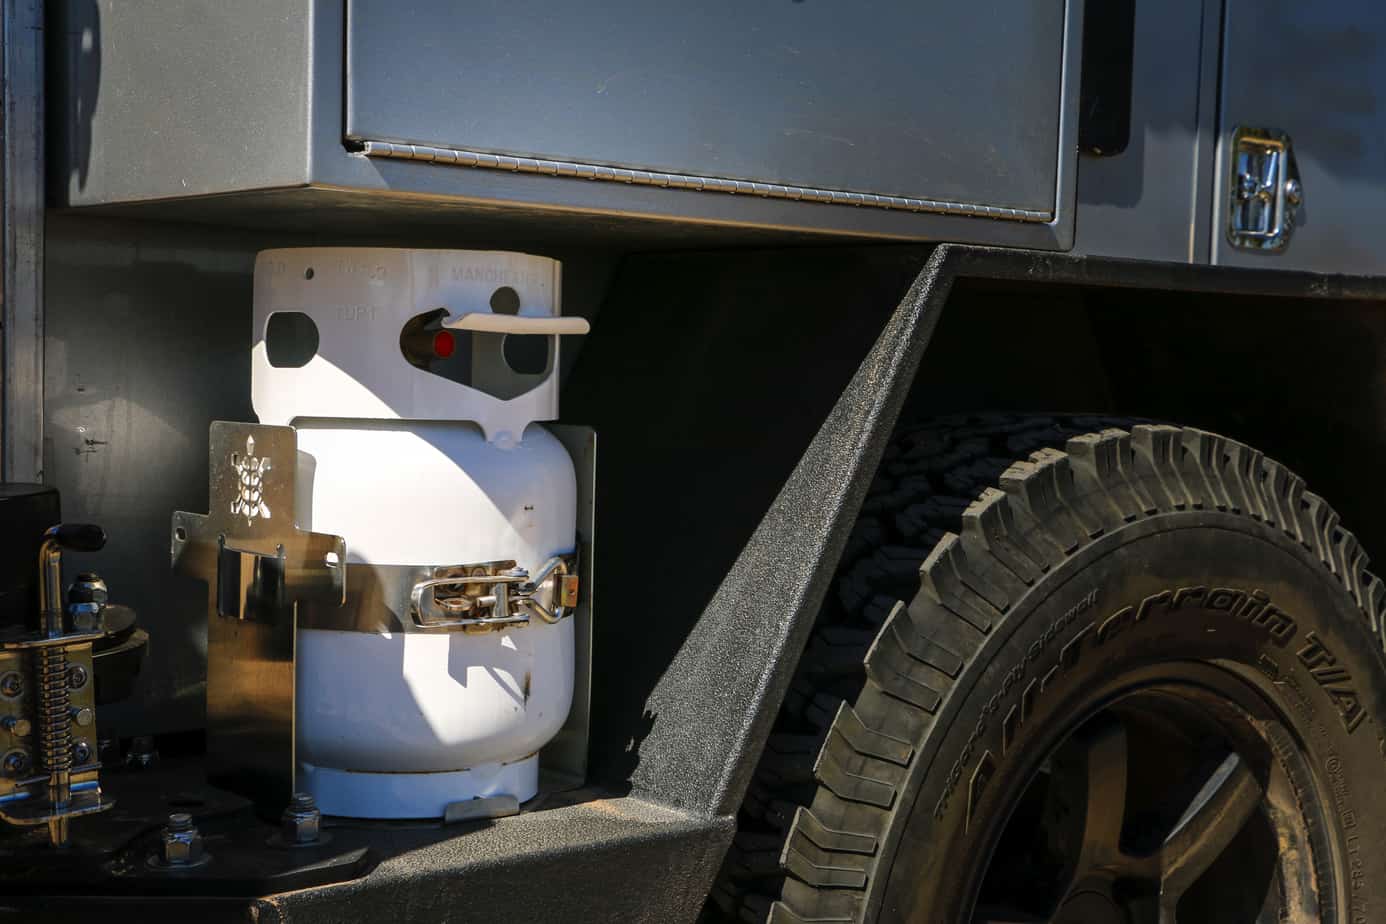
- Gas safety cut-off
Cons:
- Top drawer slide detent wore out
- Stove could use some more BTU’s
- No fridge
Details
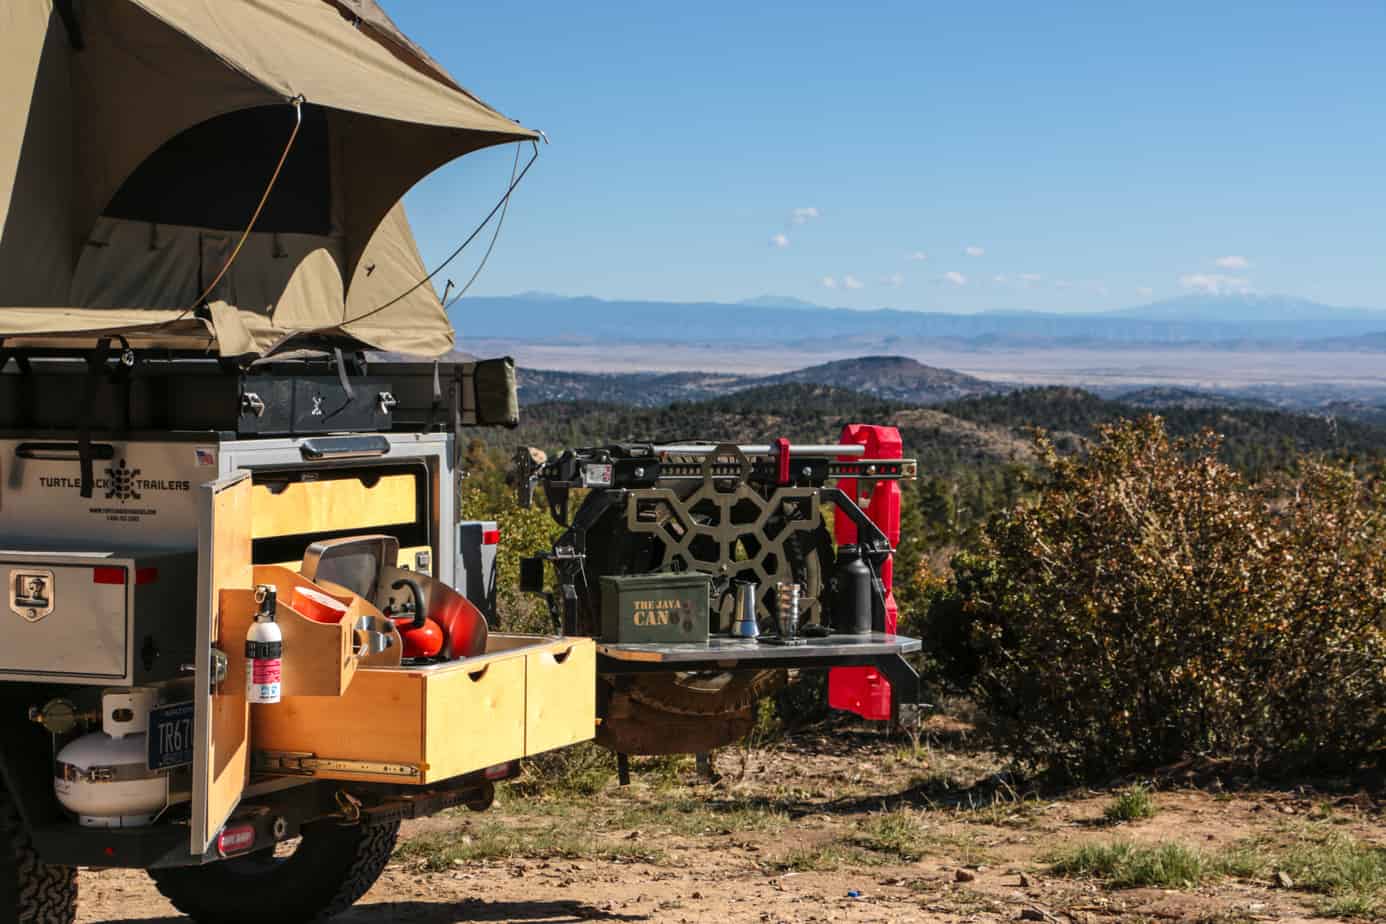
The first thing most people notice about the Turtleback is the kitchen, and for good reason. It is huge! Upon opening the back door you’ll immediately be greeted with two full width baltic birch drawers, each with sub drawers of their own. Additionally a stainless steel table can be deployed from the swing-out on the right to create the perfect space for chopping and mixing; while a thin cabinet on the door to your left holds bowls, cups, and other various sundries.

In the main galley, the top drawer holds spices, canned goods, coffee, cutlery, and thanks to the removable dividers, darn near anything else. It slides in and out easily and is the perfect height for most small containers. Our only gripe with this part was the lack of slide-locks, which allowed the drawer to creep out when the trailer was slanting down in the rear. It does have a detent to hold it back, but the countless hard miles endured by this test model had taken their toll and ours no longer functioned.

The lower slide out contains the backbone of this kitchen, the stove and sink. Of the two, the sink seemed to be everyone’s favorite feature, as it made cooking out of the trailer feel just like home. Sure it wastes more water, but with a 42 gallon tank you won’t be running out anytime soon. I found that we filled water bottles more often, cleaned dishes faster and more thoroughly, and even started making tea on occasion, but I have to say that it was the small daily task of washing my face that completely sold me on it. There’s nothing like turning on the faucet for a quick splash of water in the morning instead of having to pour it out of a container one handed.


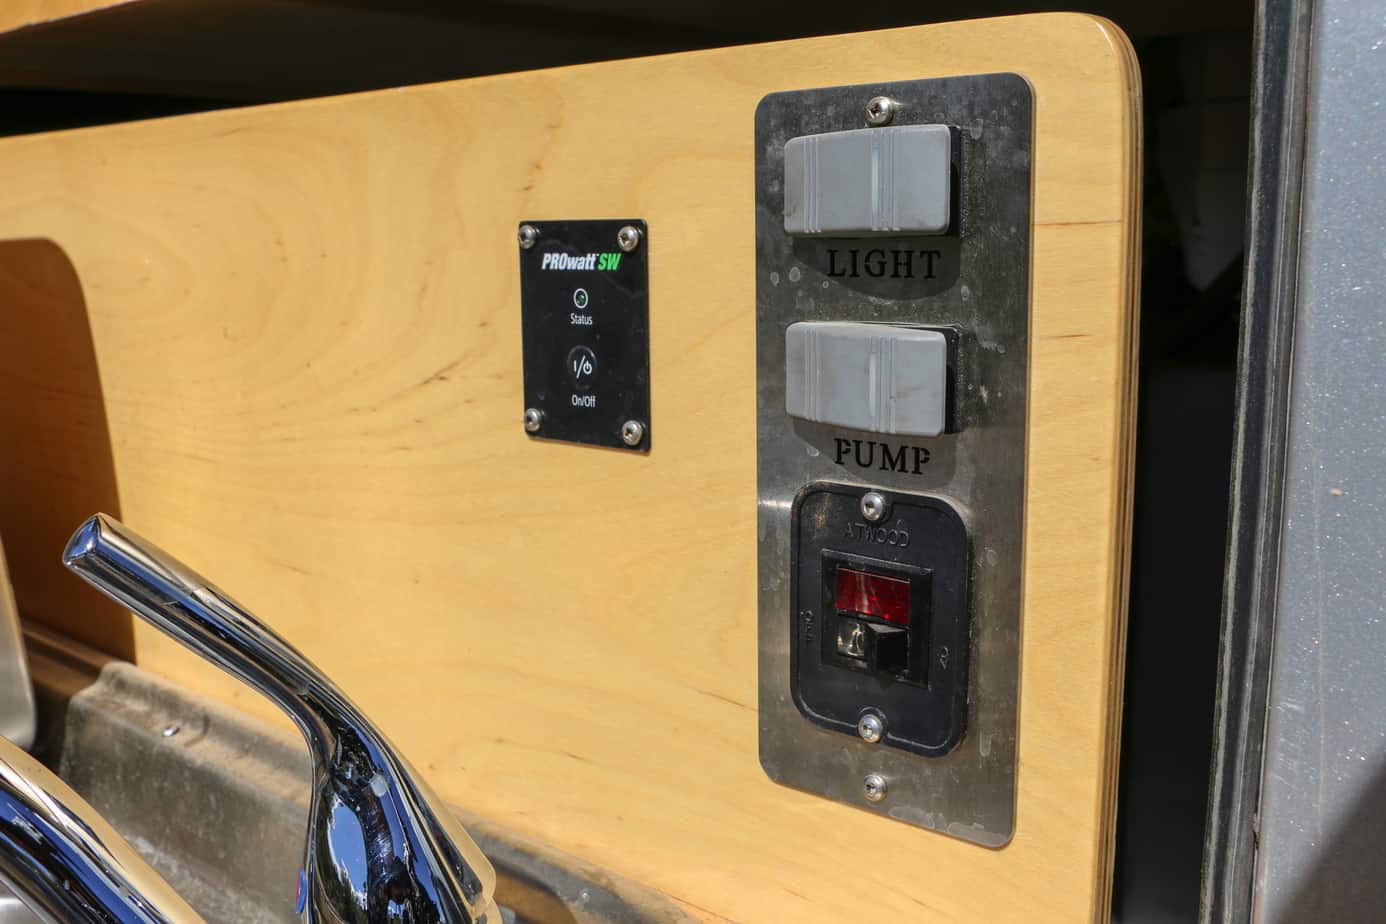
The water pump provided good pressure and didn’t spit or cough with air bubbles, and we’ve been told it won’t burn up when run dry. For cold morning and warm showers, Turtleback also tied in an Atwood heater for hot water on demand. Although it took about twenty minutes to get going, it was very effective once on. In fact with the small amount of propane needed to run it you can actually heat the trailer’s entire water supply overnight to prevent it from freezing.
The only minor issue we found was that the original pump used in this trailer was noisy, making early morning or late night use somewhat irritating to those sleeping in the tent. However, newer models have a quieter pump eliminating the issue.
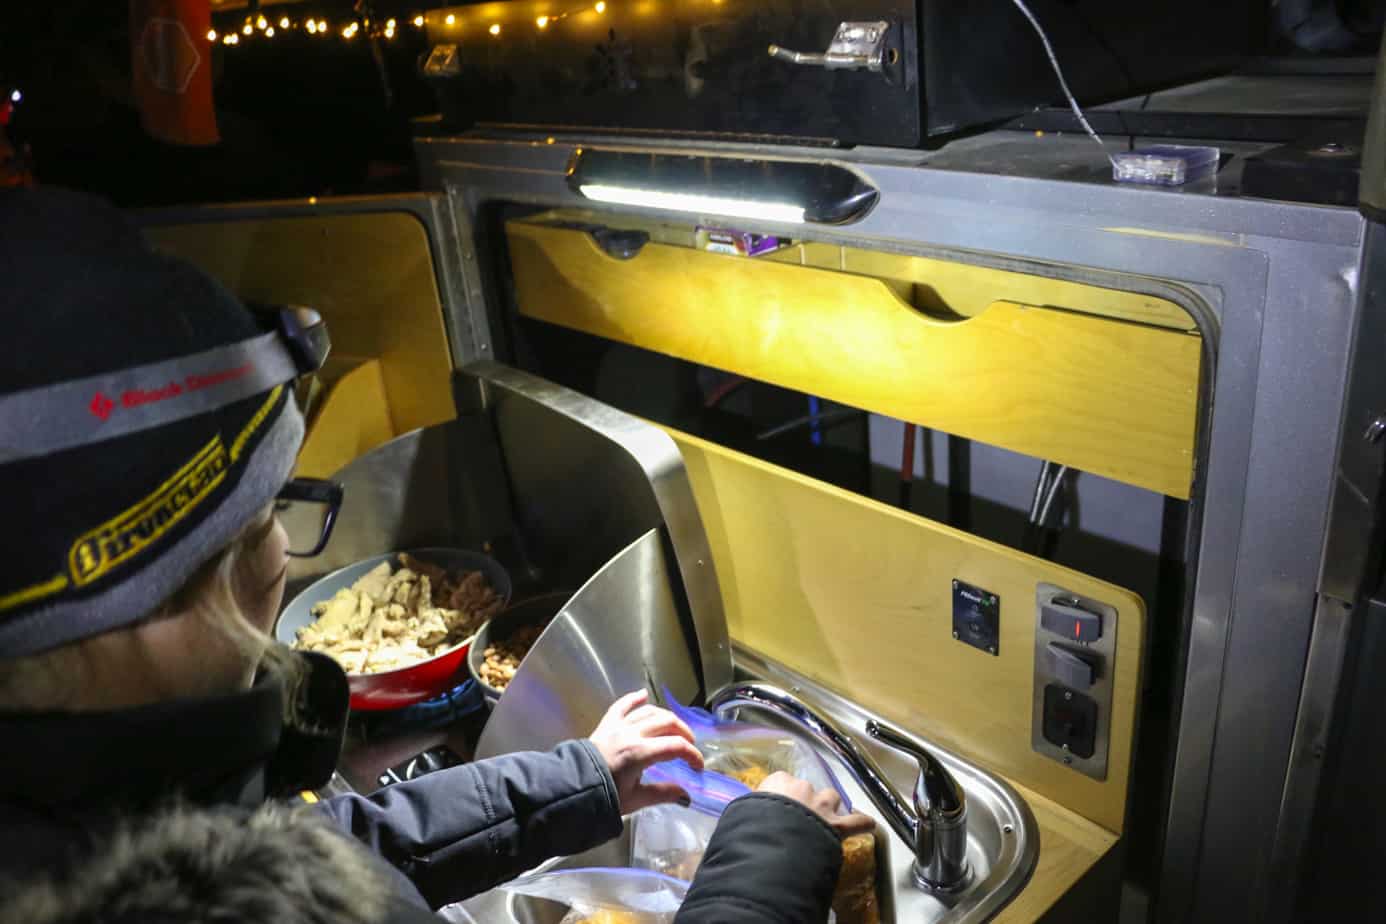
I’ll be honest and say that the stove didn’t overwhelm us like the rest of the kitchen. It’s a two burner Atwood unit, and in most cases it is adequate but average. Eggs and bacon cook easily enough in the morning, chicken will grill up okay though it takes longer, and overall there just never seems to be more than medium heat available. The most painfully obvious test of this was boiling water to make coffee in the morning, a time when twenty minutes feels like twenty hours. In general the stove can get any cooking job done, it will just take a bit longer to do it.
We have been told that a new upgraded kitchen and stove setup will be unveiled at Overland Expo West next week, and based on the rumored components we couldn’t be more excited!
One thing we loved about the stove setup was the auto-cutoff safety feature. With the upper drawer so close to the stove’s flame when deployed, Turtleback decided to wire in a switch that disabled the gas when the shelf above the stove slid out. Thankfully they included an override switch If you have to access the spice rack while cooking. Simply hold the button next to the stove and the gas will stay on while you slide it out and grab what you need.


Over all there was only one thing I felt the kitchen lacked and that was a fridge. While you can mount one in the storage area, it eats up a lot of cargo room. Dave’s thoughts are that the fridge should remain in your vehicle to stay with you on day trips, a good point. Often times we leave the trailer setup as a base-camp while exploring, and it stinks to leave your food and beer back at camp. For most people this works fine, but for those who can’t mount a fridge in their vehicle due to lease plans, or others that just want everything in a ready to roll hitch and go package, no fridge might be a hard sell.
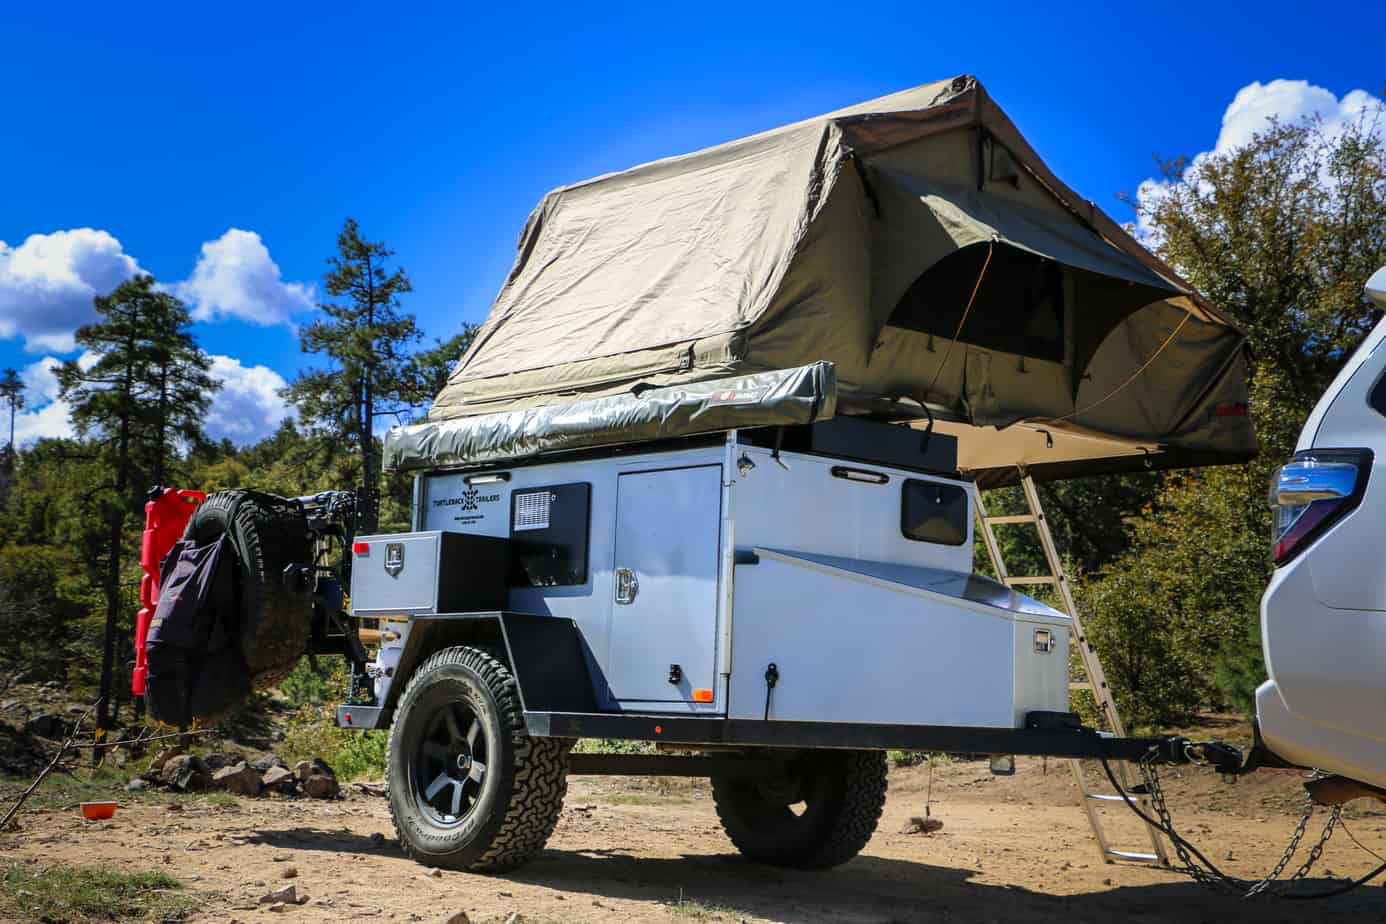
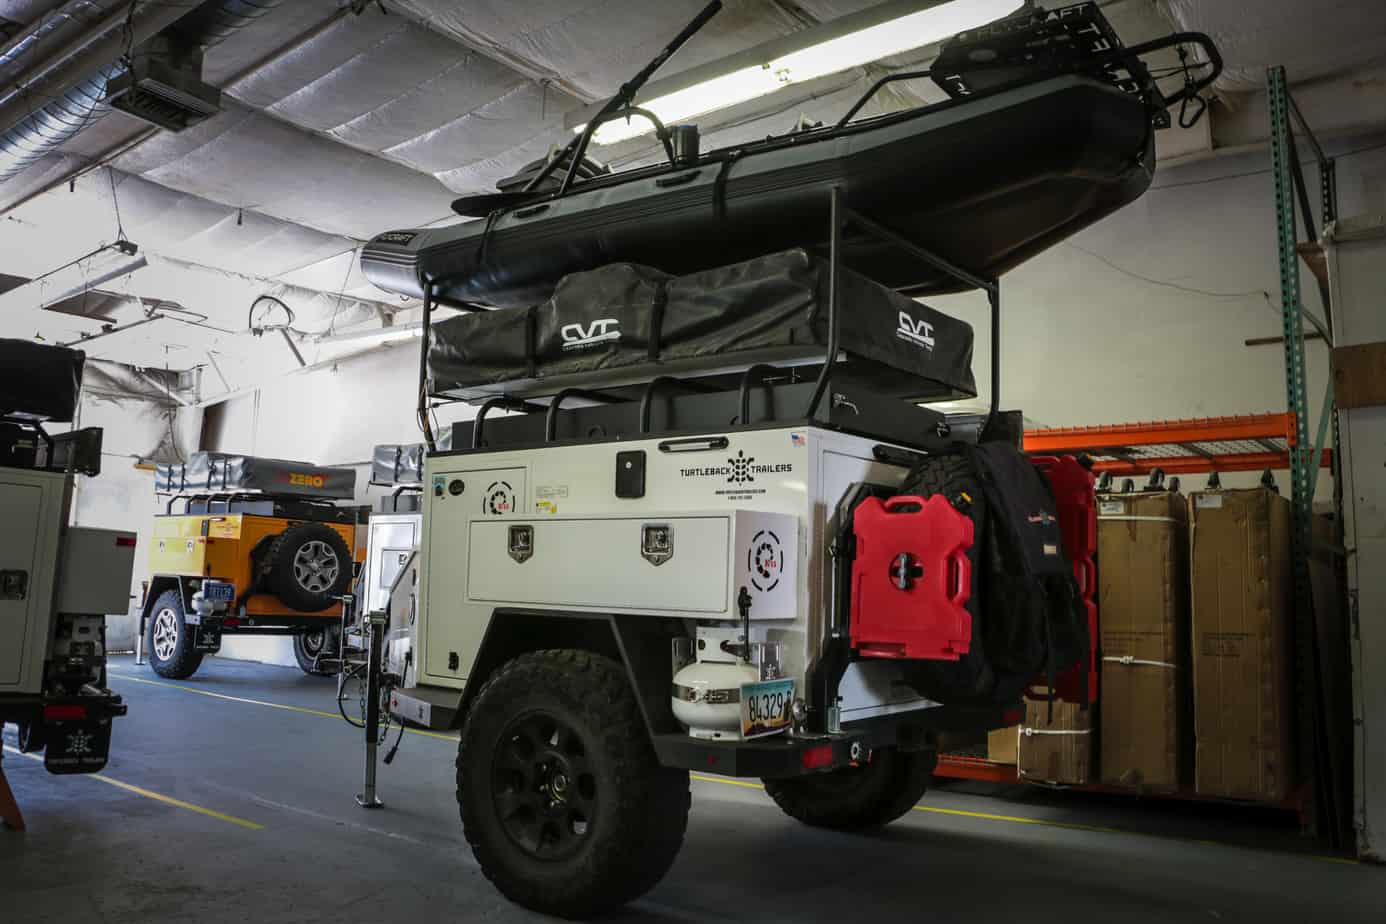
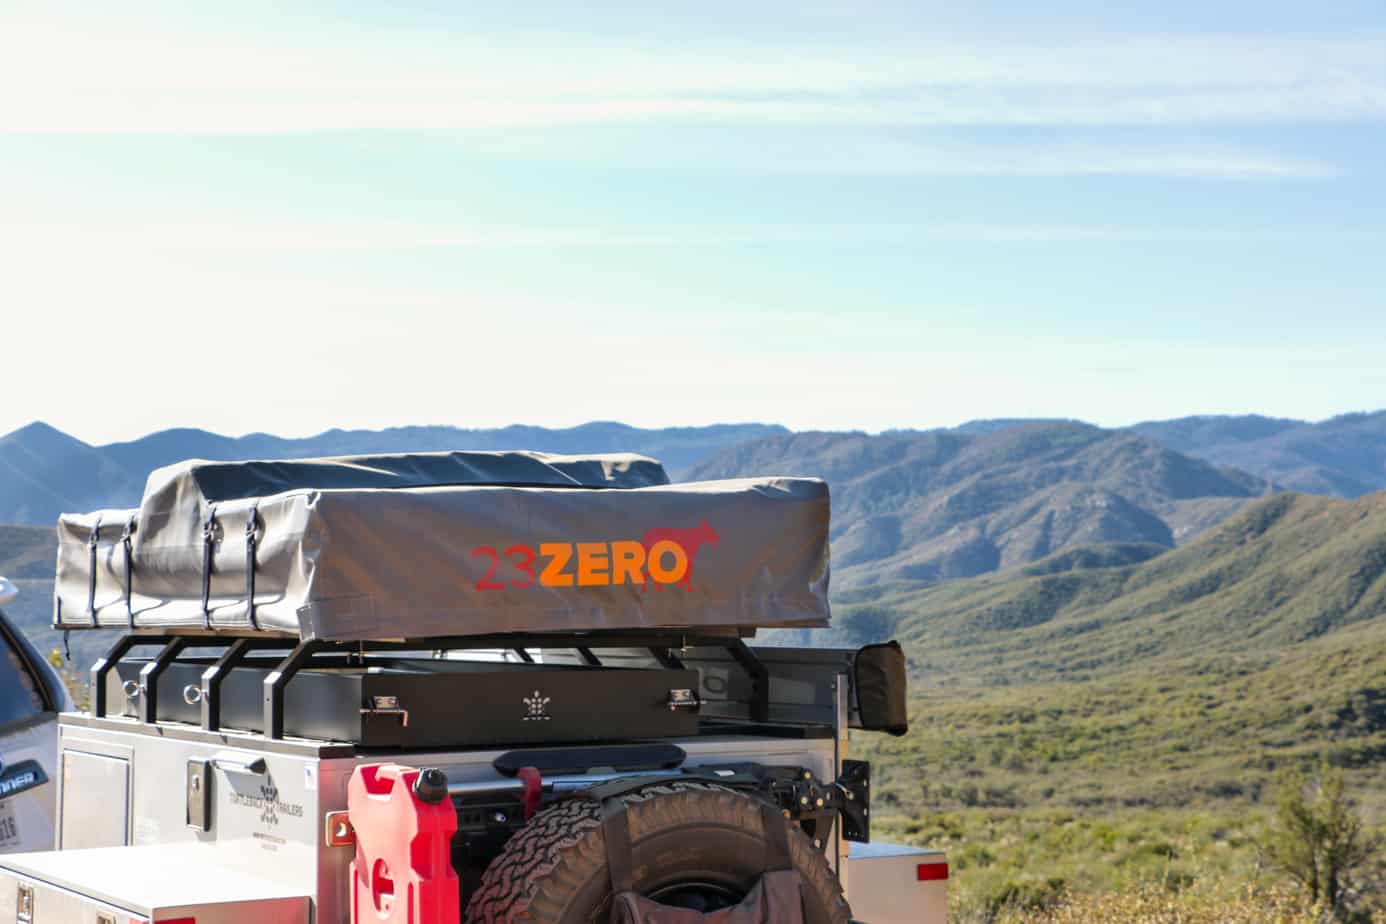
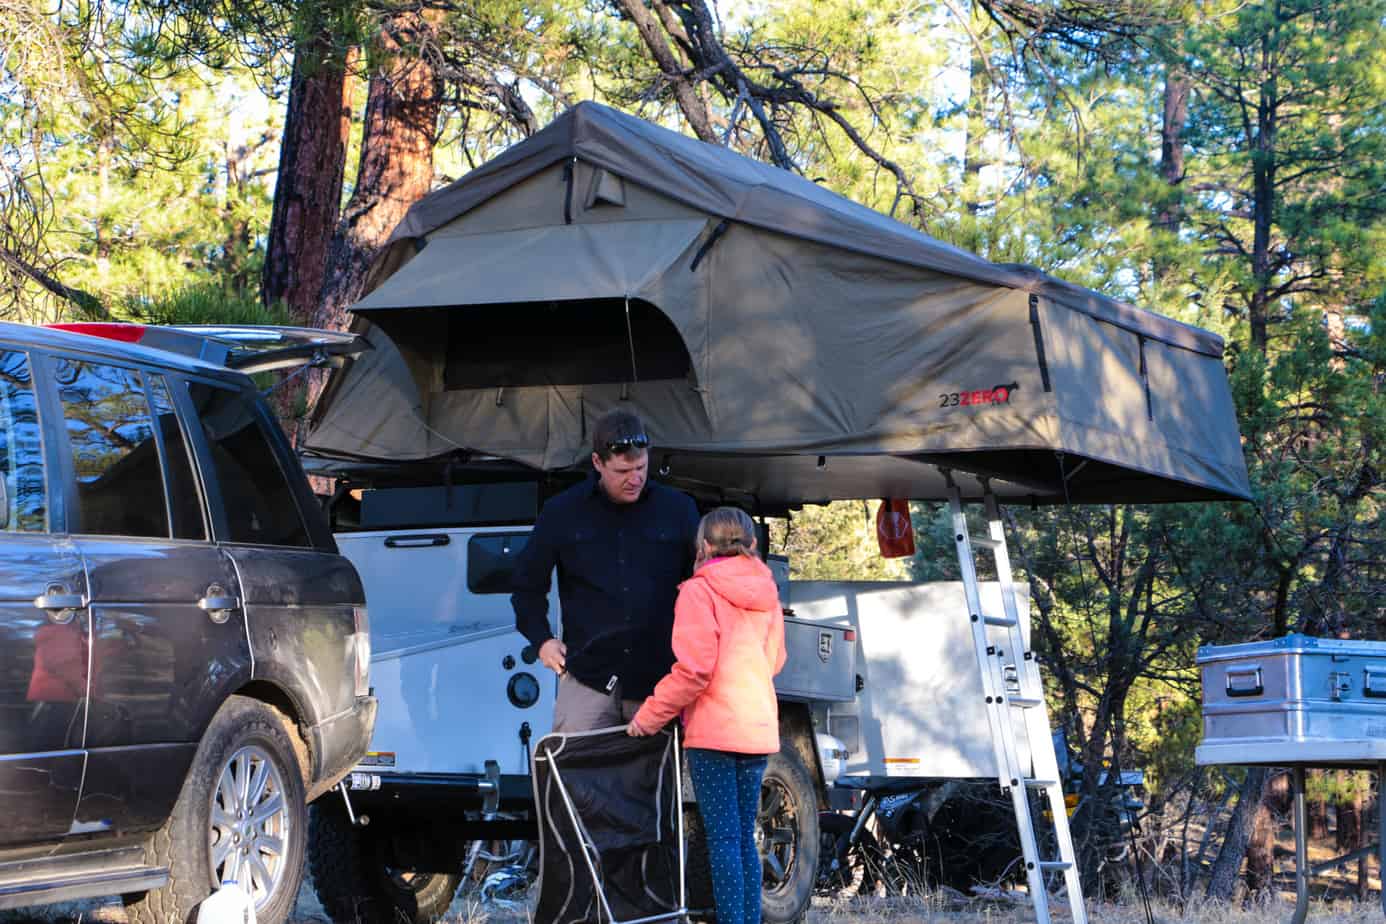
The Tent and Awning
Summary
Pros:
- Thick poly cotton rip stop canvas
- Tons of features you would find in a more expensive tent including stargazer roof, snow support rod, etc
- Thicker mattress than most roof tents – 3″
- Easy to stow with intuitive cover design and strong elastic fabric straps
- 270 awning provides plenty of protection from rain
Cons:
- Tent cover draped over storage box unless removed
- Fox wing zipper is small, mandating proper care
- Awning cover was a little short
Details
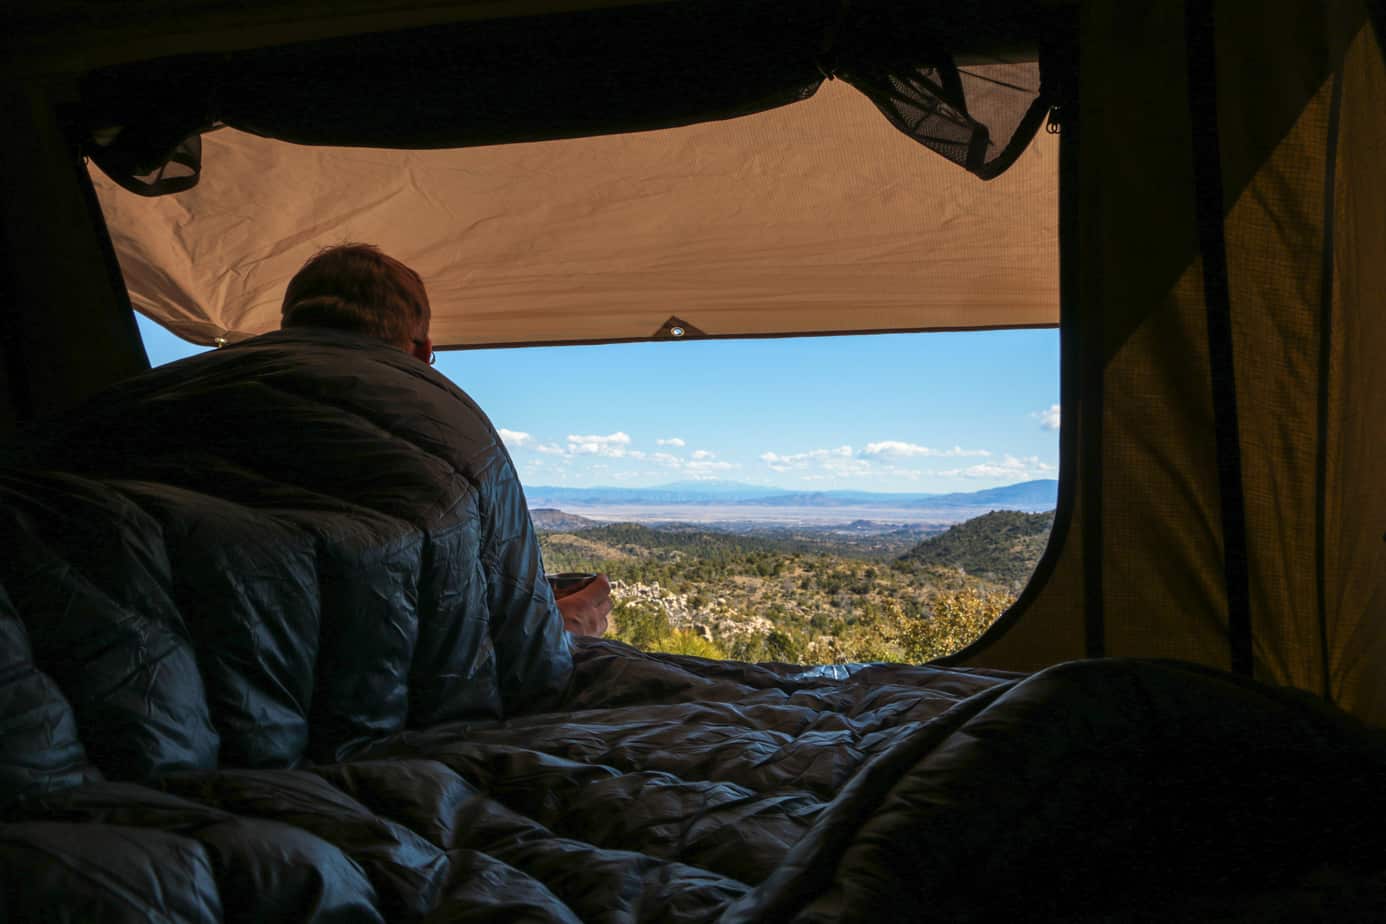
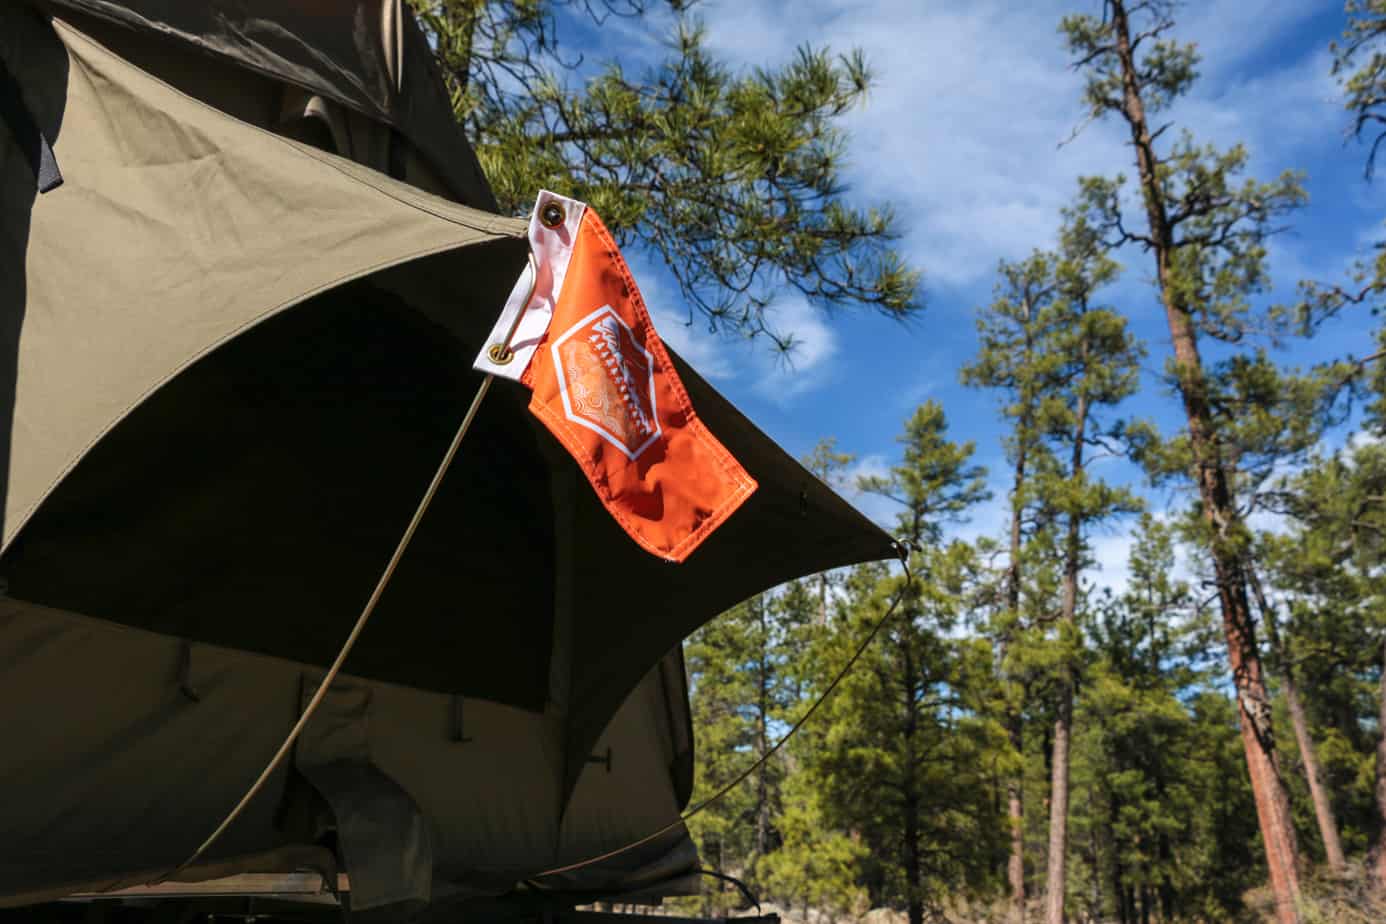
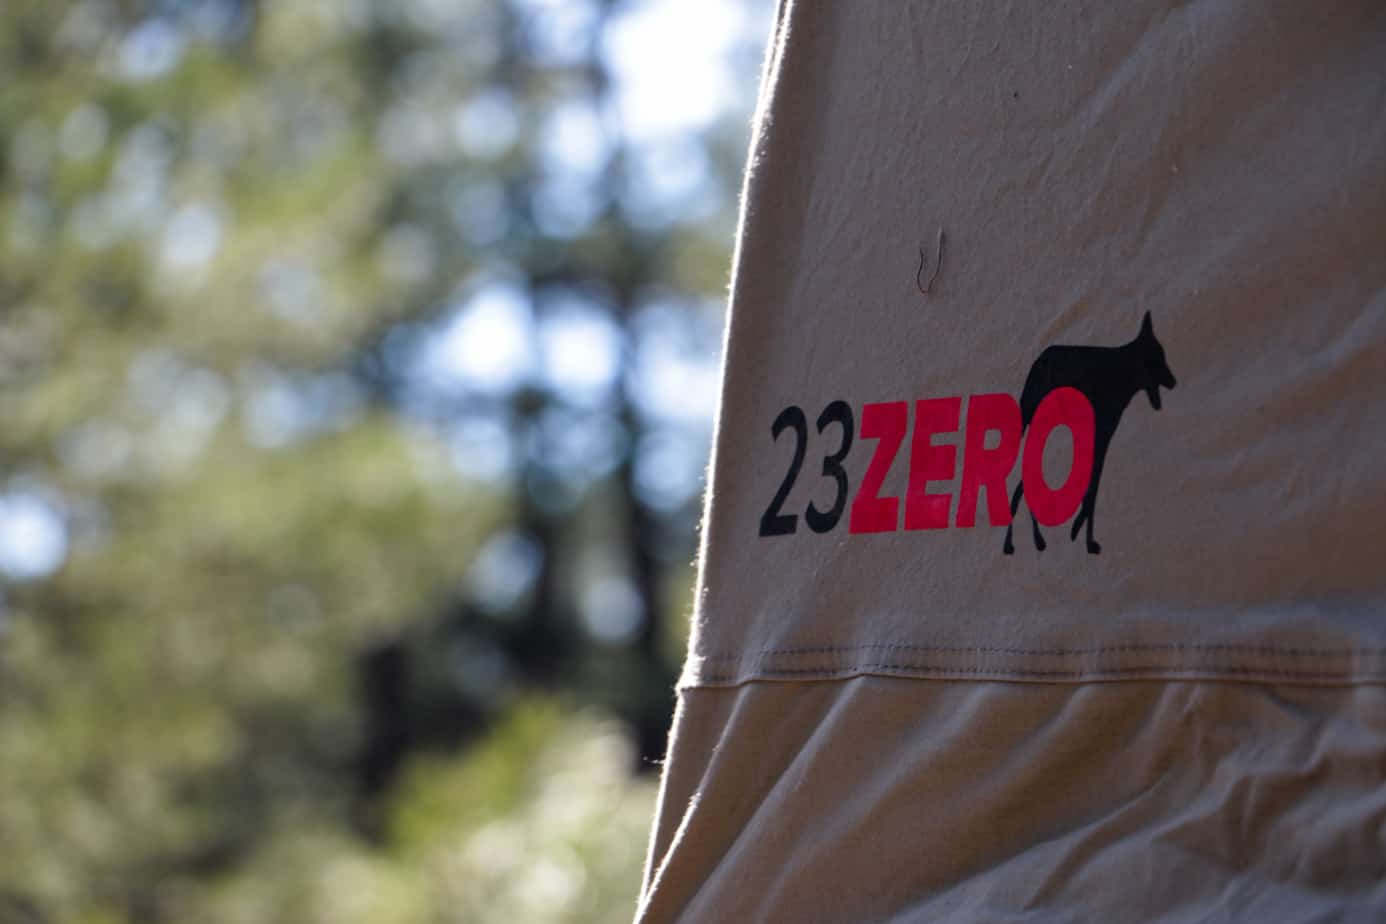
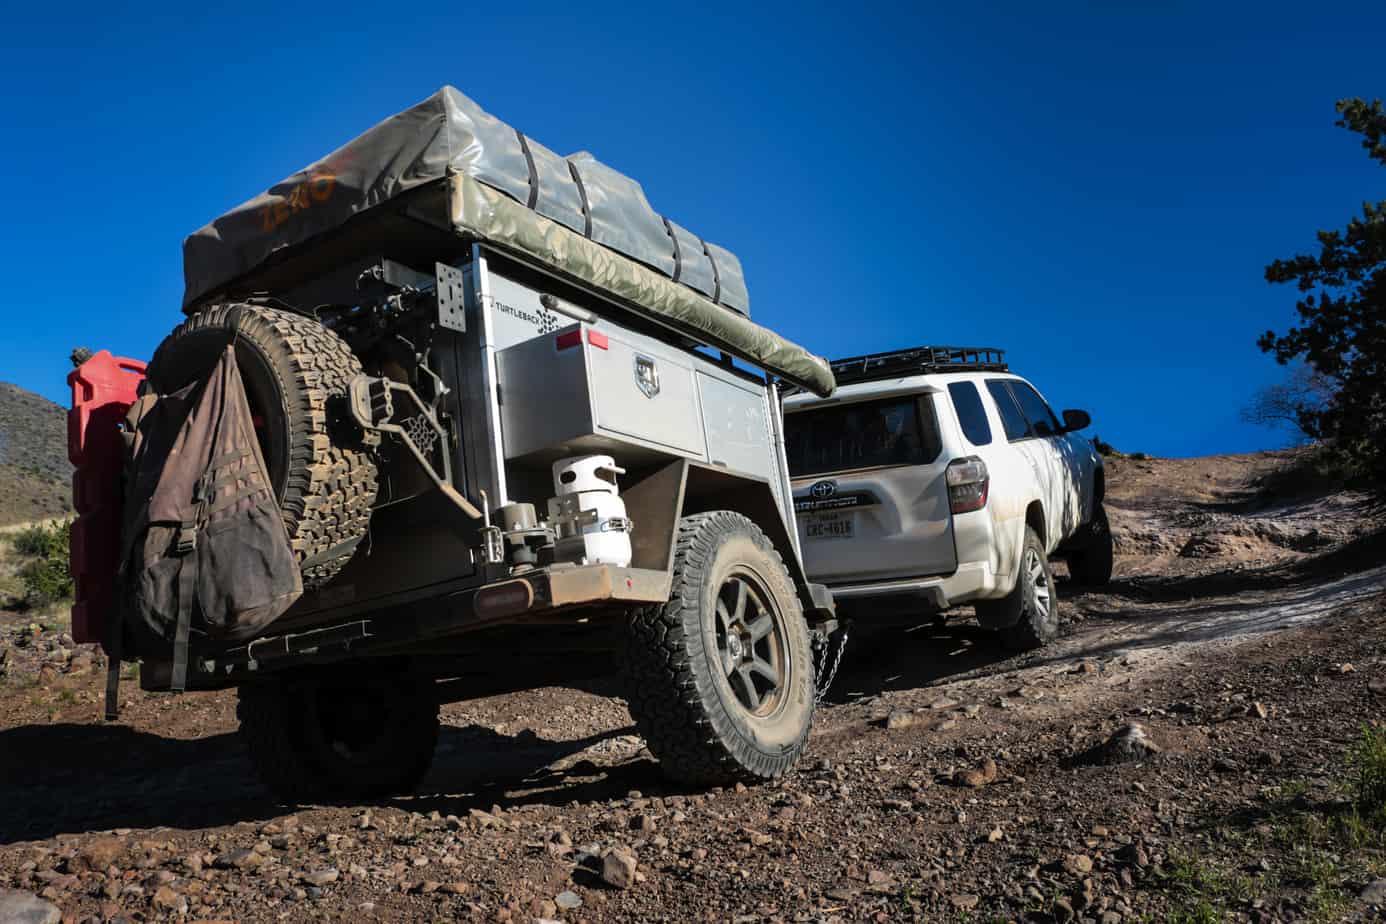
Our Turtleback came with a brand new 23 Zero roof top tent, features and specs can be seen here. As this was my first encounter with the brand I wasn’t sure what to expect, but I can say that I walked away impressed. In nearly every way, this is the tent that bridges the gap between the low end roof top tents and the top of the line South African imports. Though I would say it ranges closer to the South African tents. Made of 260gsm poly cotton rip stop canvas it feels thick and sturdy with an air of classic safari comfort about it. It has all the features you would expect to find in a more expensive tent like covered support poles, a stargazer roof with mosquito mesh, elastic straps to pull the walls in, an adjustable rain fly, heat sealed seams, and even one feature I have never seen before, a snow support rod to prevent accumulation! My favorite feature though is the 3″ thick mattress, which feels downright plush in a tent.
Stowing and deploying a soft-shell will never be as easy as a hard shell, but this is probably the easiest one I have used so far. While most tents require plenty of tucks and folds to the fabric before placing the cover, this one never did. Whether its in the design or pure luck I’m not sure, but everything always went perfectly into place without the least bit of coaxing. The cover itself also helped speed things up, as one side of it remains attached so you can just pull it back on. The downside is that it lays across the trailer’s side storage box when the tent is open, but we can live with it for the savings in frustration.
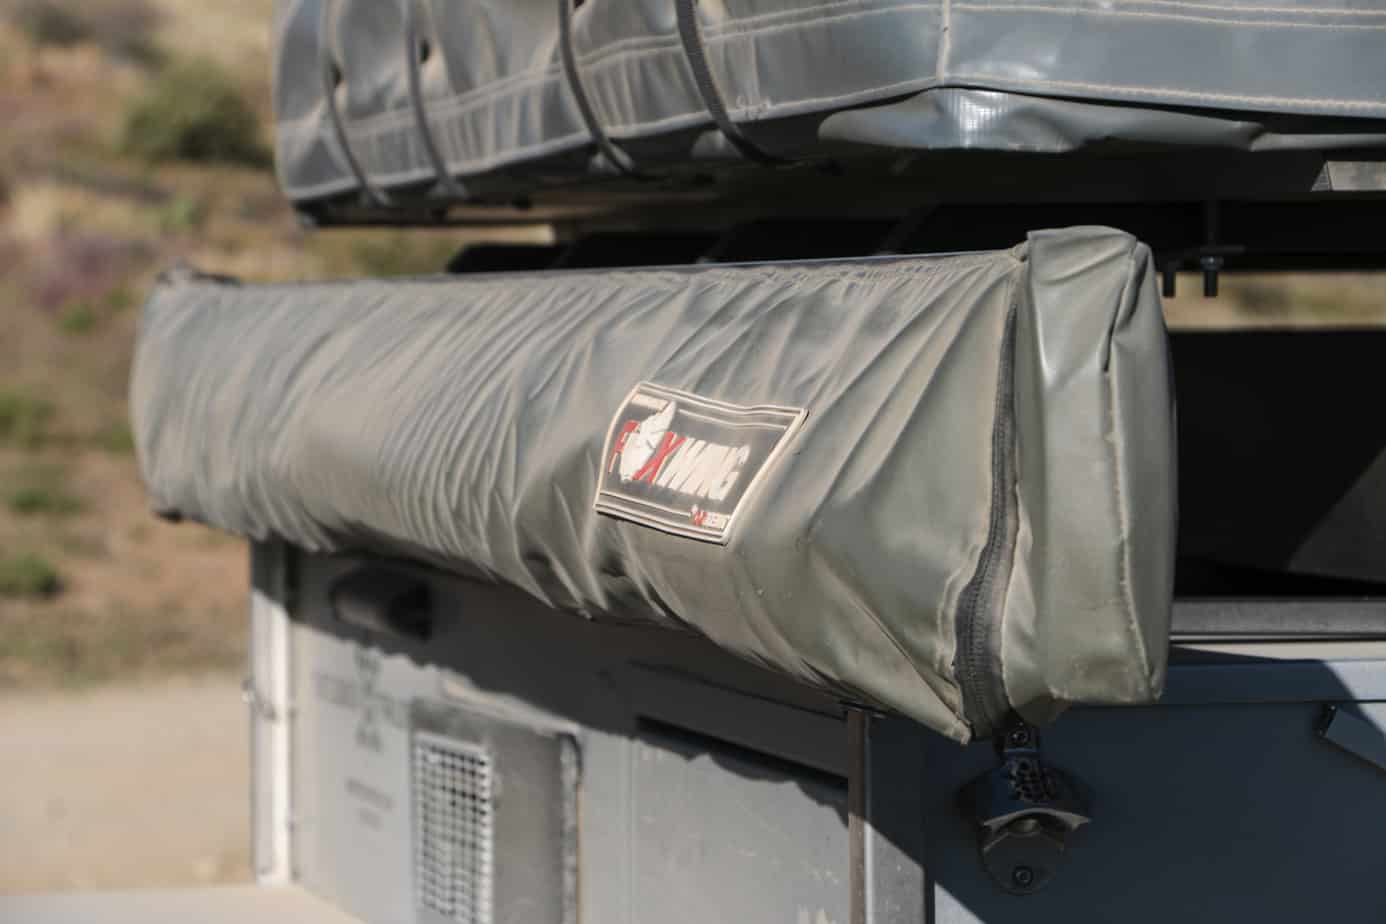
Unfortunately the awning wasn’t quite as flawless as the tent, but let’s start with the positives. The Foxwing 270° model wraps around the side and back of the trailer providing extensive cover for you and your guests. It is very affordable compared to similar products on the market, and provides expansive shade from both rain and sun. Deployment is easy, and once staked down we found it to be quite sturdy even in moderate winds. It also has optional extension sides which allows you to close off the awning as a living space. My reservations with the awning extend to the zipper, poles, and cover. The zipper is undersized for the application, which not only causes it to clog and stick when dusty, but also makes it easy to break while closing everything up. This problem can be alleviated with proper care by using a zipper wax and cleaning regularly, but ideally we’d see a different zipper in the end. The cover is also a little too small for the packed awning, which forces you to shove and tuck to stow the fabric properly. The upside is that once stowed the awning looks great and makes no noise, but a 1/2″ of additional fabric on either side would make the design much easier. Finally the support poles are relatively thin-walled in order to be so light, which allows them to dent easily, and once damaged they will not extend properly to support the awning. A heavier duty storage case or even a PVC tube would prevent this damage from happening on the road, and it seems to be what Turtleback has switched too. Of additional note, the dark green fabric absorbed heat more readily than say a tan or light grey would have, so it’s important to deploy it high enough to prevent heat from radiating down on the shade-seekers below. In the winter and on brisk mornings though, dropping the awning down gives a nice warmth and shelter to the camp space.
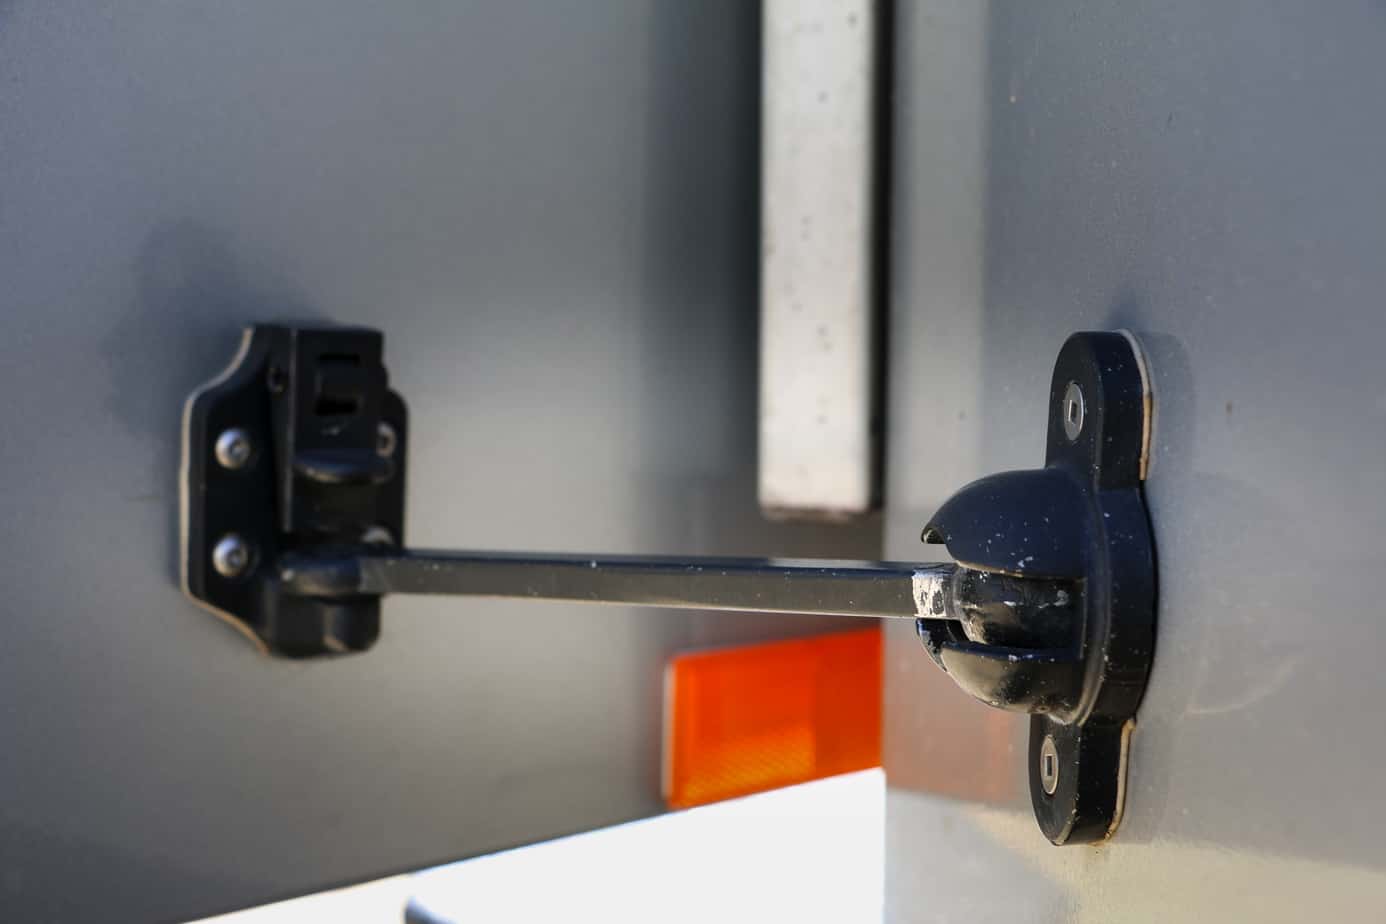
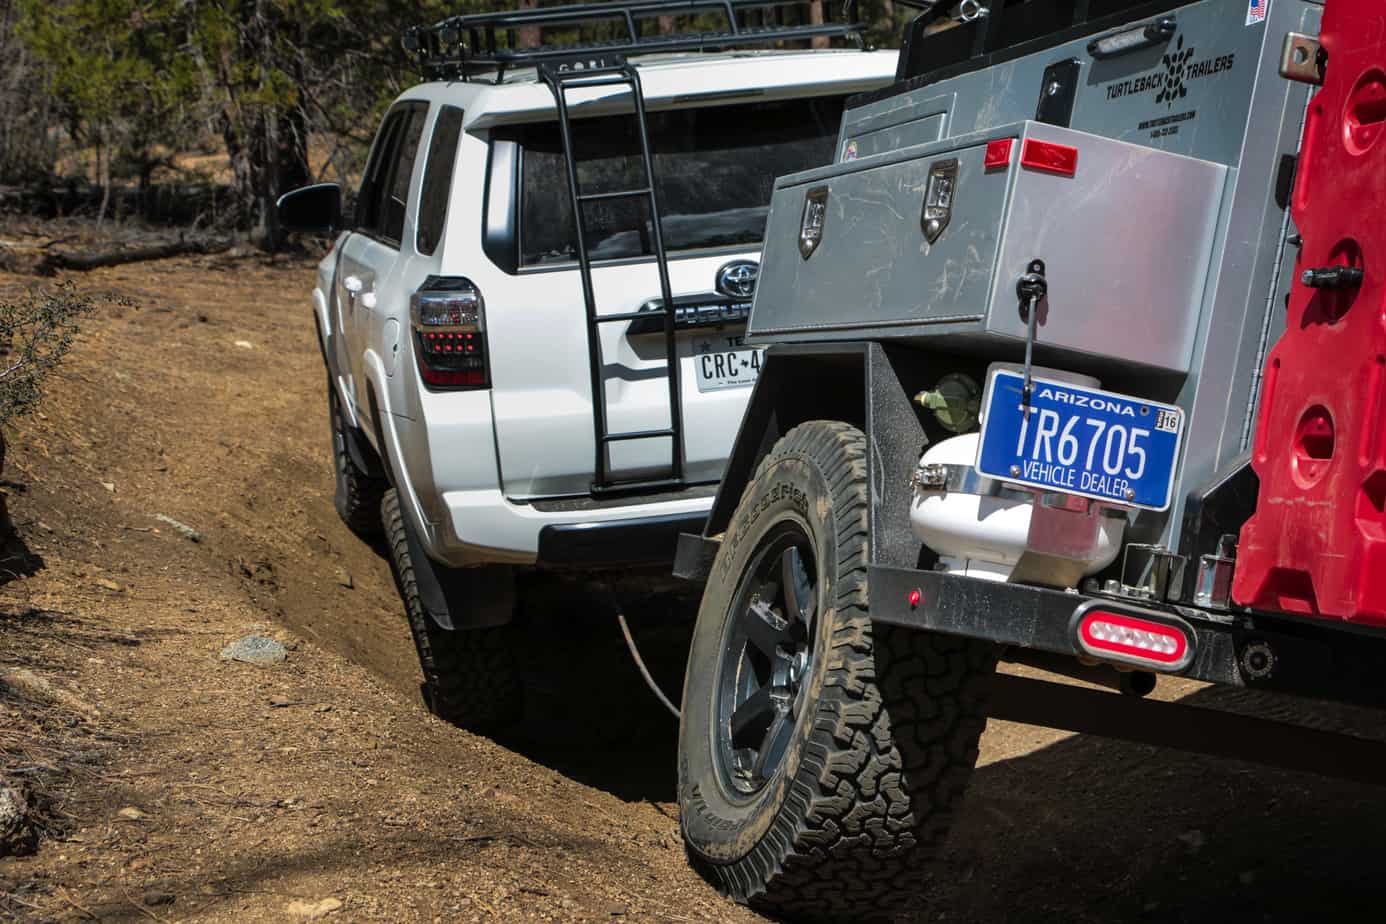
Storage
Summary
Pros:
- Organized and compartmentalized storage, not a big empty cargo bed to fill
- Easy to access lighting for nighttime illumination
- “Junk” drawers for those pesky camp items that never have a place
- 12v outlets inside main box
- Storage for long or bulky items under roof rack
- Very little dust incursion
- Quality latches to hold doors open
Cons:
- Seals will need to be re-seated after a few years (minor)
Details
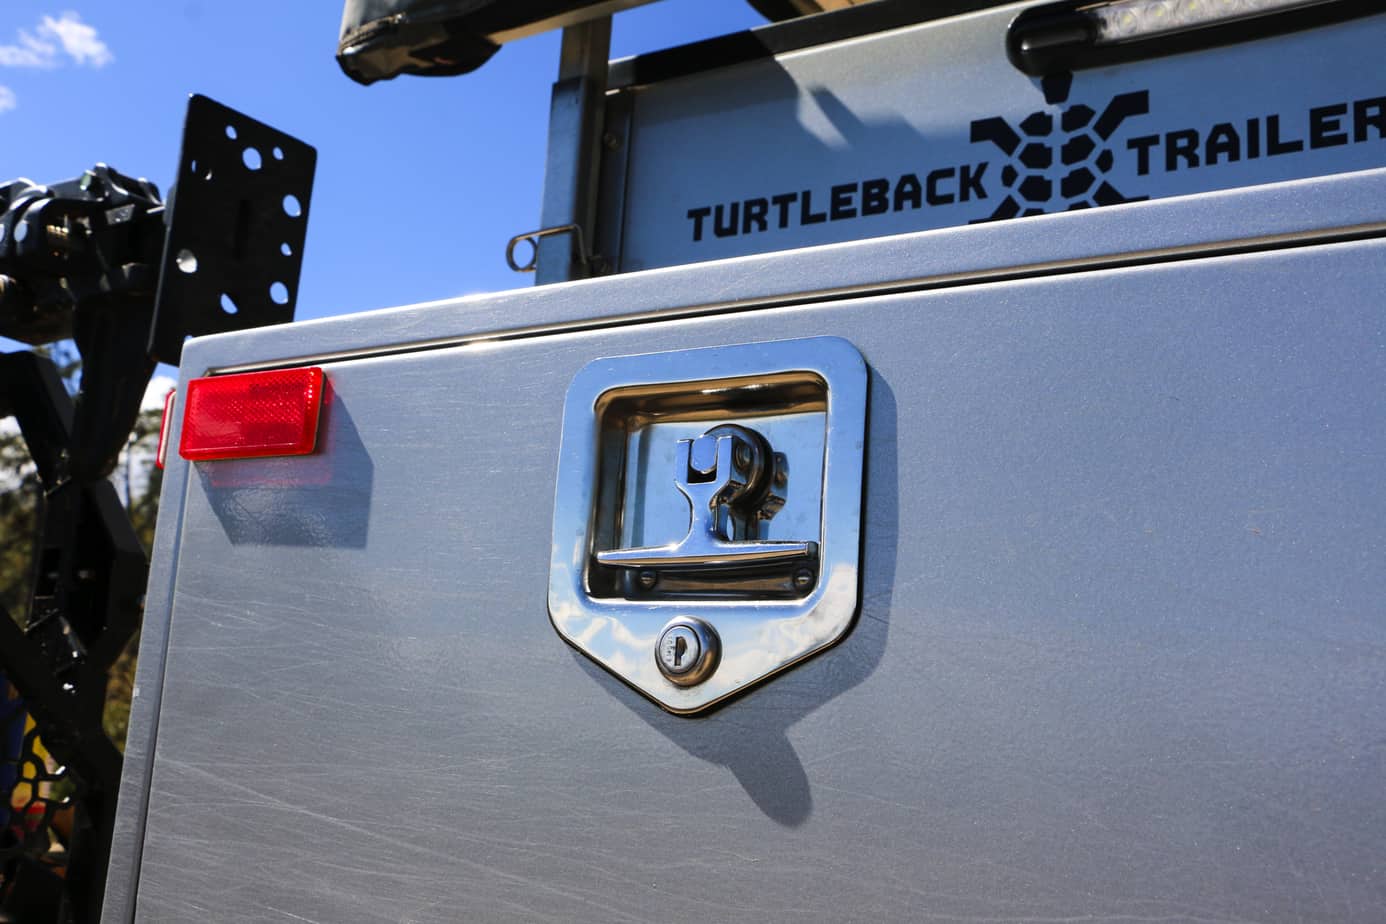
I mentioned earlier that the Turtleback set itself apart by not being an empty cargo box with parts thrown at it, but that doesn’t mean it’s short on space. Instead of leaving everything to rattle around in one box, this trailer separates it into four different areas. Up front you’ll find a large nose box with plenty of room to accommodate dirty gear you want to keep separated from other equipment. Your electronics system is here though so you’ll need to be careful about proper placement. Behind that you’ll find two boxes on the sides of the trailer, each perfect for wheel chocks, leveling blocks, paper towels, marshmallow roasting sticks, flip flops, and all that miscellaneous crud you never have a spot for. Then of course there is the main box, which will house the majority of your bags and equipment. Once again Turtleback is all about the details, and you’ll find interior lights wired to switches on both sides of the trailer, making it easy to see what you’re doing at any time of night. There were also three 12v outlets inside this compartment, which will allow you to charge computers, fridges, and other gear on the go.
Now you are probably thinking, all my camp gear won’t fit in that small box… but by the time you’ve allocated all your cooking equipment to the kitchen, your sleeping bags and pillows to the tent, and your recovery gear to the vehicle, you’ll find that things are becoming quite organized and spacious in that bay. Additional storage is found underneath the roof rack where you can secure and long bulky items that require more length. Our test trailer had two huge lifetime tables, as well as room for oars and fishing poles.
Despite our best attempts to get dust or water into the boxes, the seals remained tight throughout our trips even in storms and heavy silt. The one exception was a few tablespoons of water which made their way into the side box after extended direct pressure from a hose. This was not surprising, as any trailer’s seals will compress after extended off-road use. A quick adjustment was able to fix the issue and reseal the box.
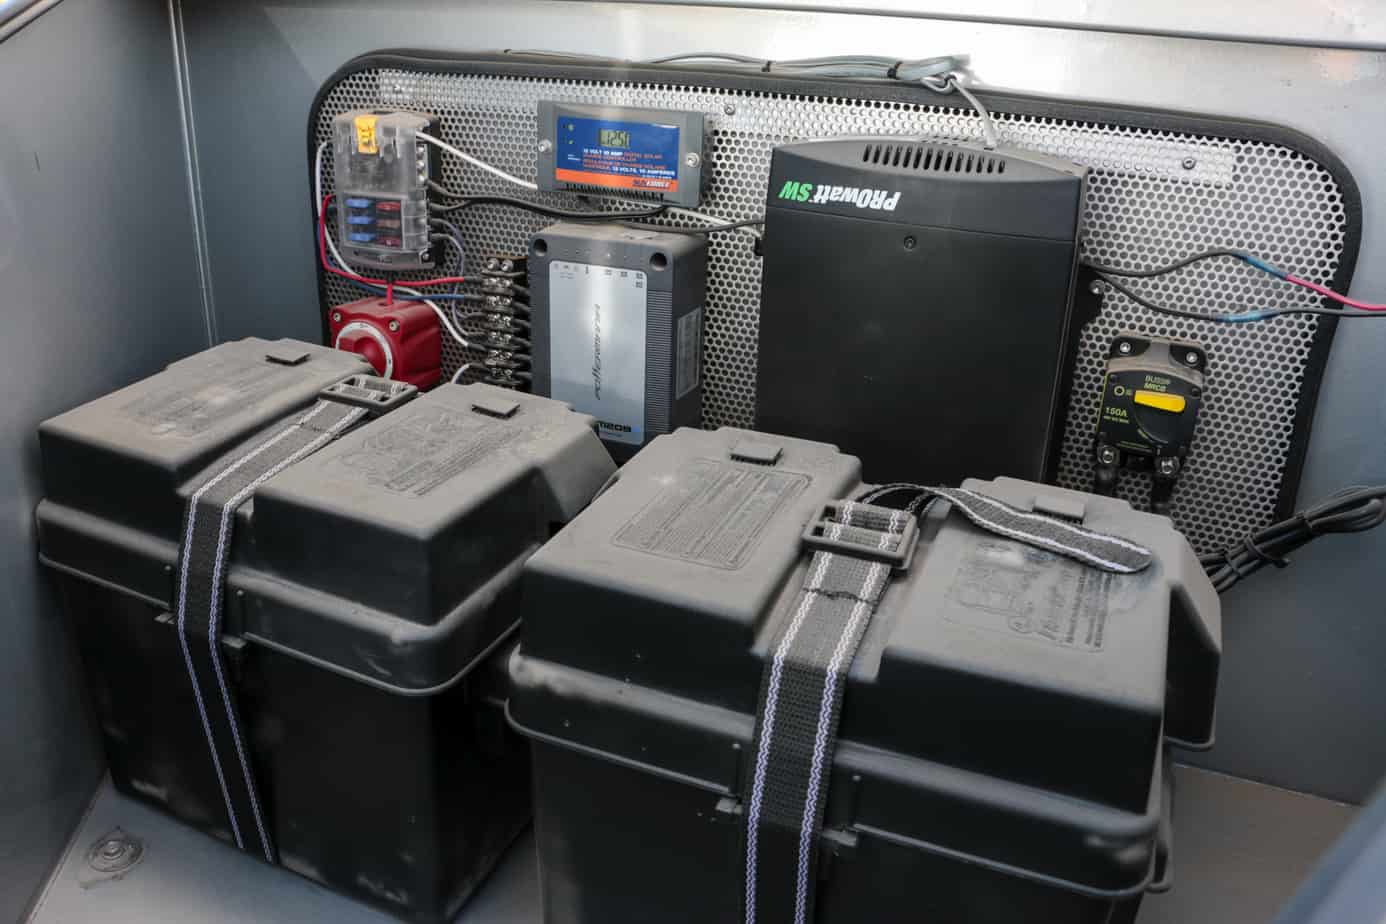
Electronics
Summary
Pros:
- Organized layout
- Manual with full wiring diagram for easy modifications
- Dual deep-cycle batteries for extended camp periods
- High quality components and best practice connections give long term reliability
- Excellent lighting system with high visibility and low ambient options
Cons:
- None found
Details
Wiring a high quality electrical system can be a tricky business, and we’ve seen malfunctions ranging from failed lights to faulty switch panels plague trailers. To say Turtleback’s system was a breath of fresh air then would be an understatement. Two deep-cycle batteries, a solar controller, pure sine wave inverter, easy access circuit breaker, Blue Sea switches, panels, and fuse blocks, all connected with double-crimped heat shrunk USA made wiring. It makes me feel a little warm and fuzzy inside just thinking about it. Despite my love of their best practice wiring methods, there was something I appreciated even more, their organization and documentation. As you can below, everything was mounted in an easily serviceable location without a tangled mess of wiring. What’s more they created a full schematic of the trailer so no matter what issue you have or who works on it, you can simply look at the manual and know where everything is.
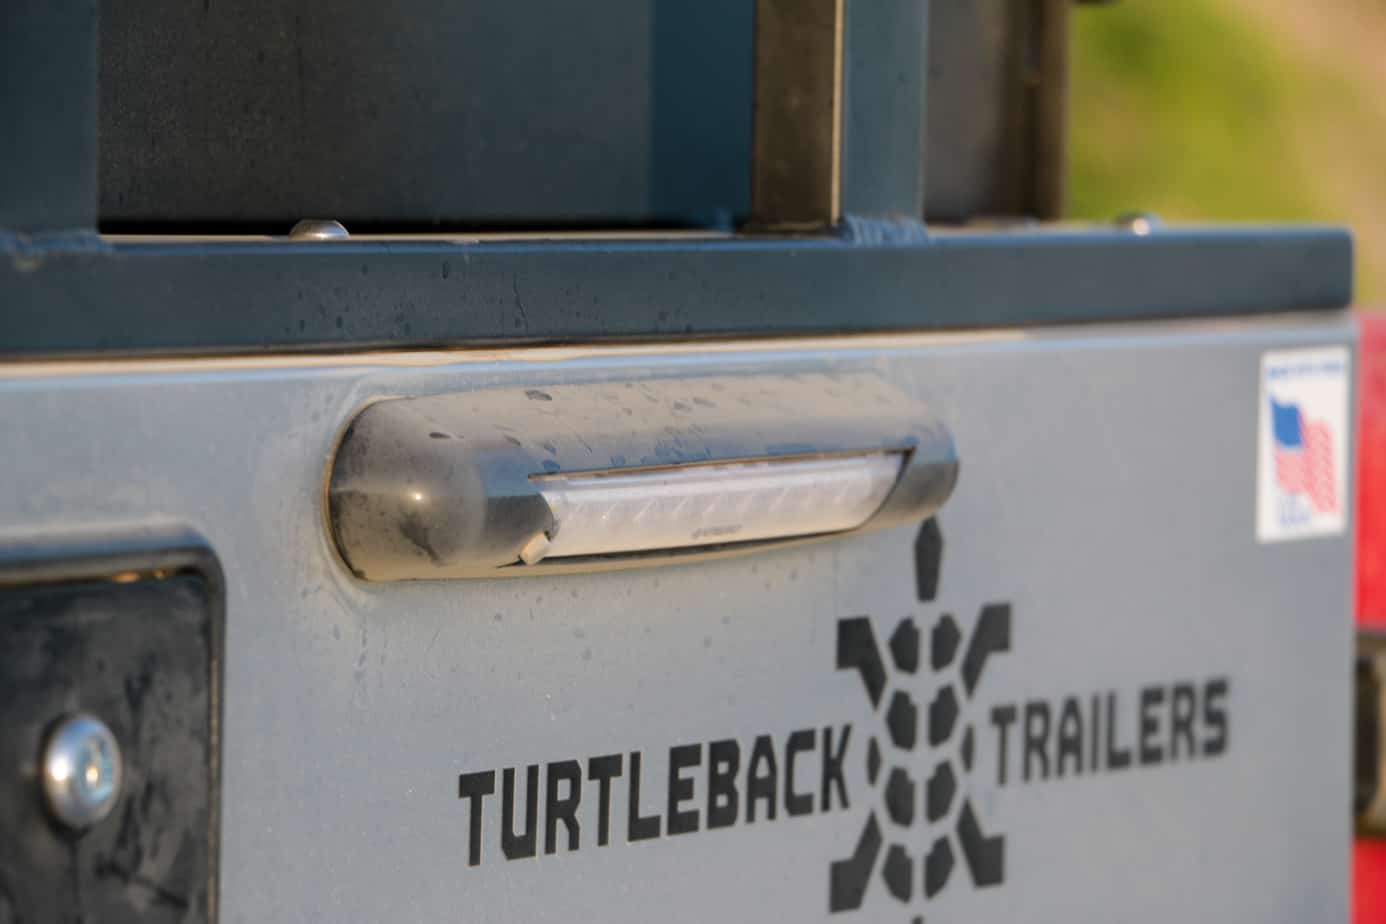
With all that power there’s no reason to skimp on lighting, and skimp they did not. From bright LEDs on the sides and back of the box, to the soft underglow for maintaining night time visibility, this trailer has some of the most useful coverage we’ve seen. Ill admit that the green color on the underglow wasn’t my favorite, however it does make a lot of sense for their branding.


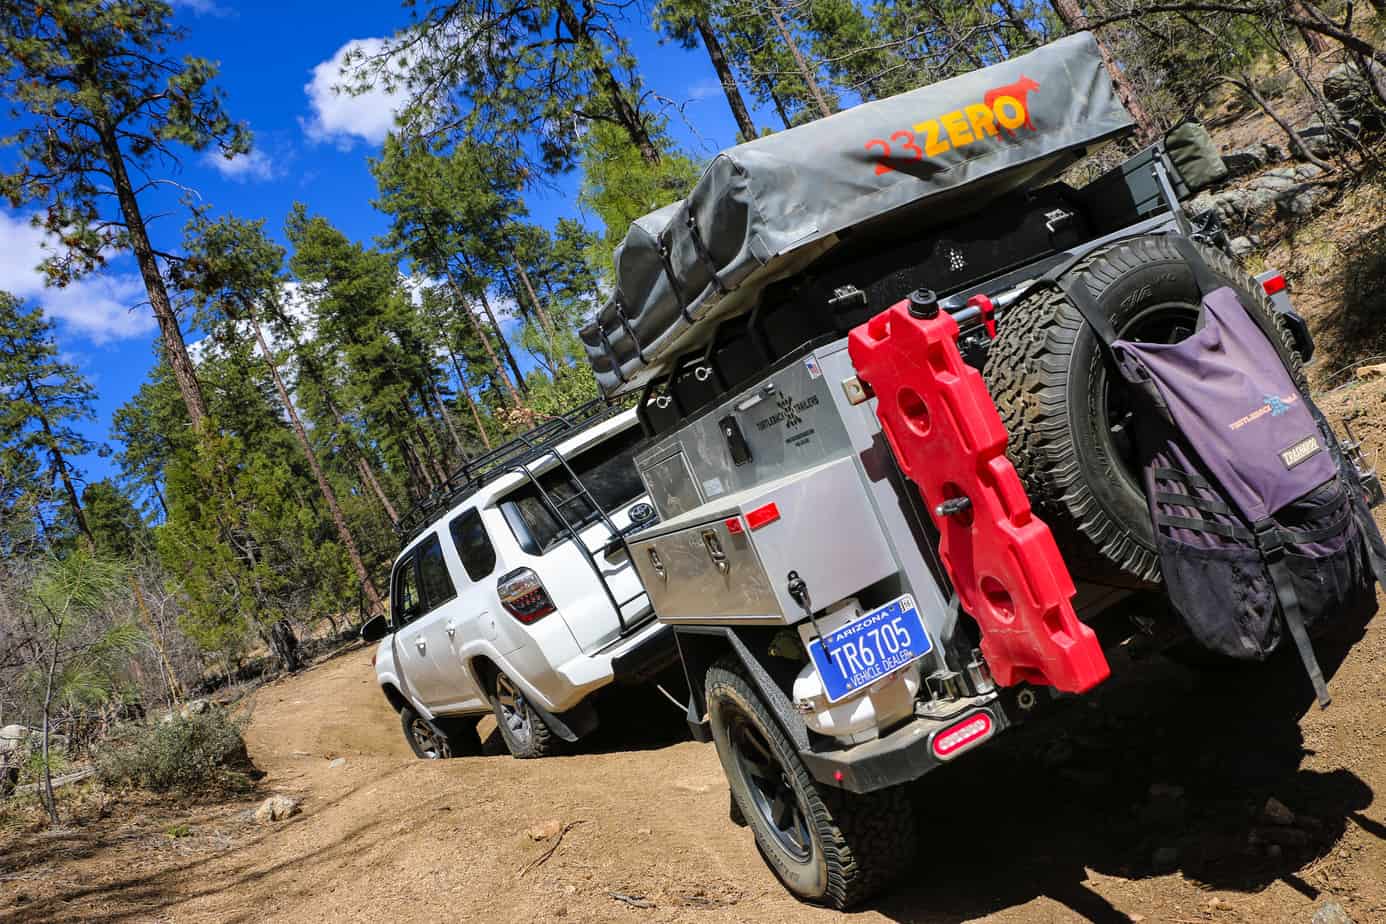
Field Performance
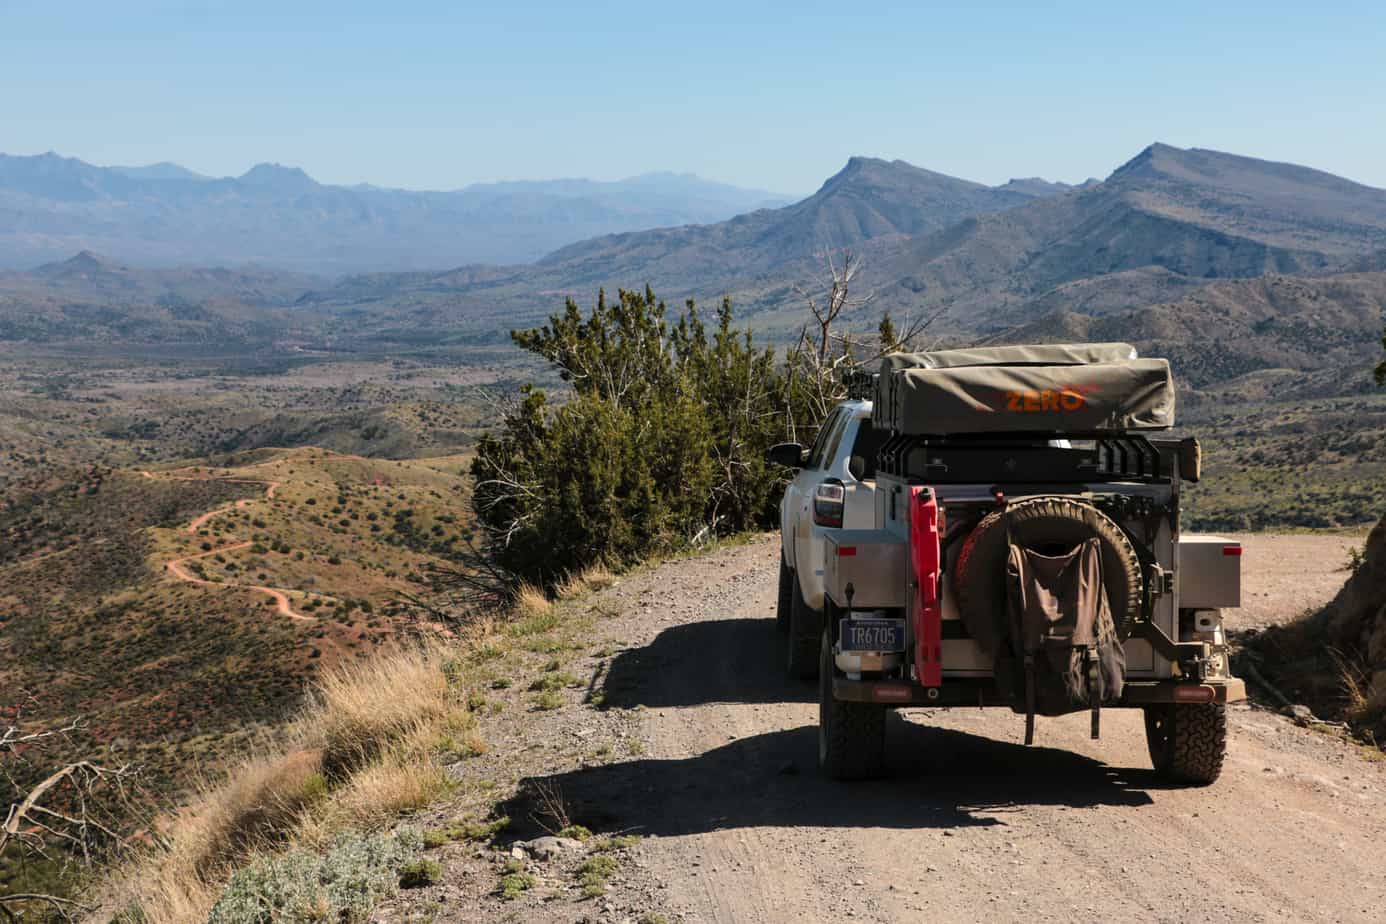
In the few weeks we had this trailer, our team covered close to 700 miles of dirt and pavement throughout Arizona. We traveled long stretches of corrugation, made steep and loose climbs, traversed icy passes, and tackled cross axle ravines to try and find every strength and weakness of this great trailer. In the end we were very pleased with it’s performance, but that doesn’t mean it was perfect.
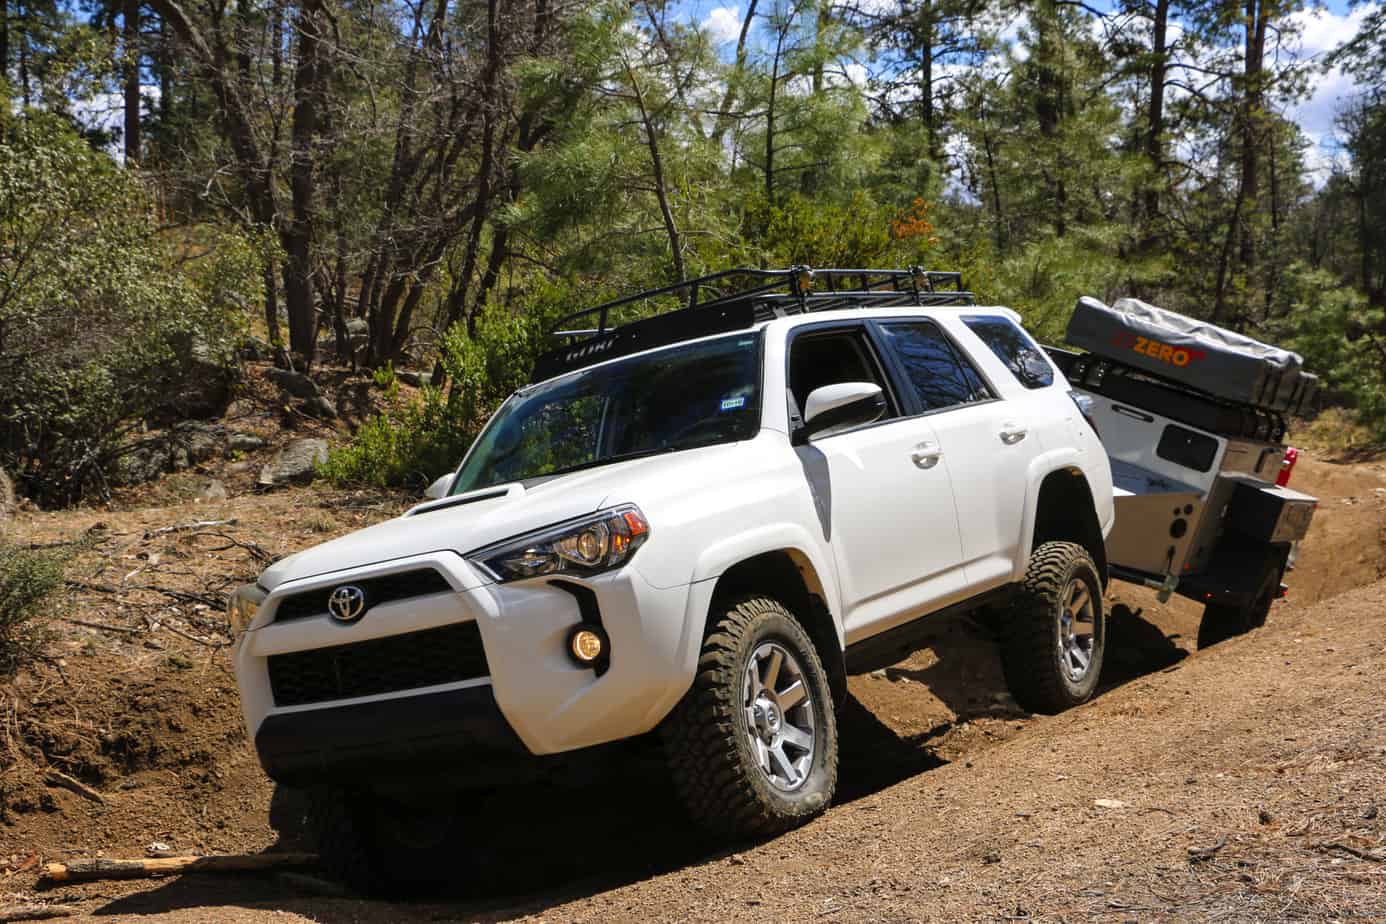
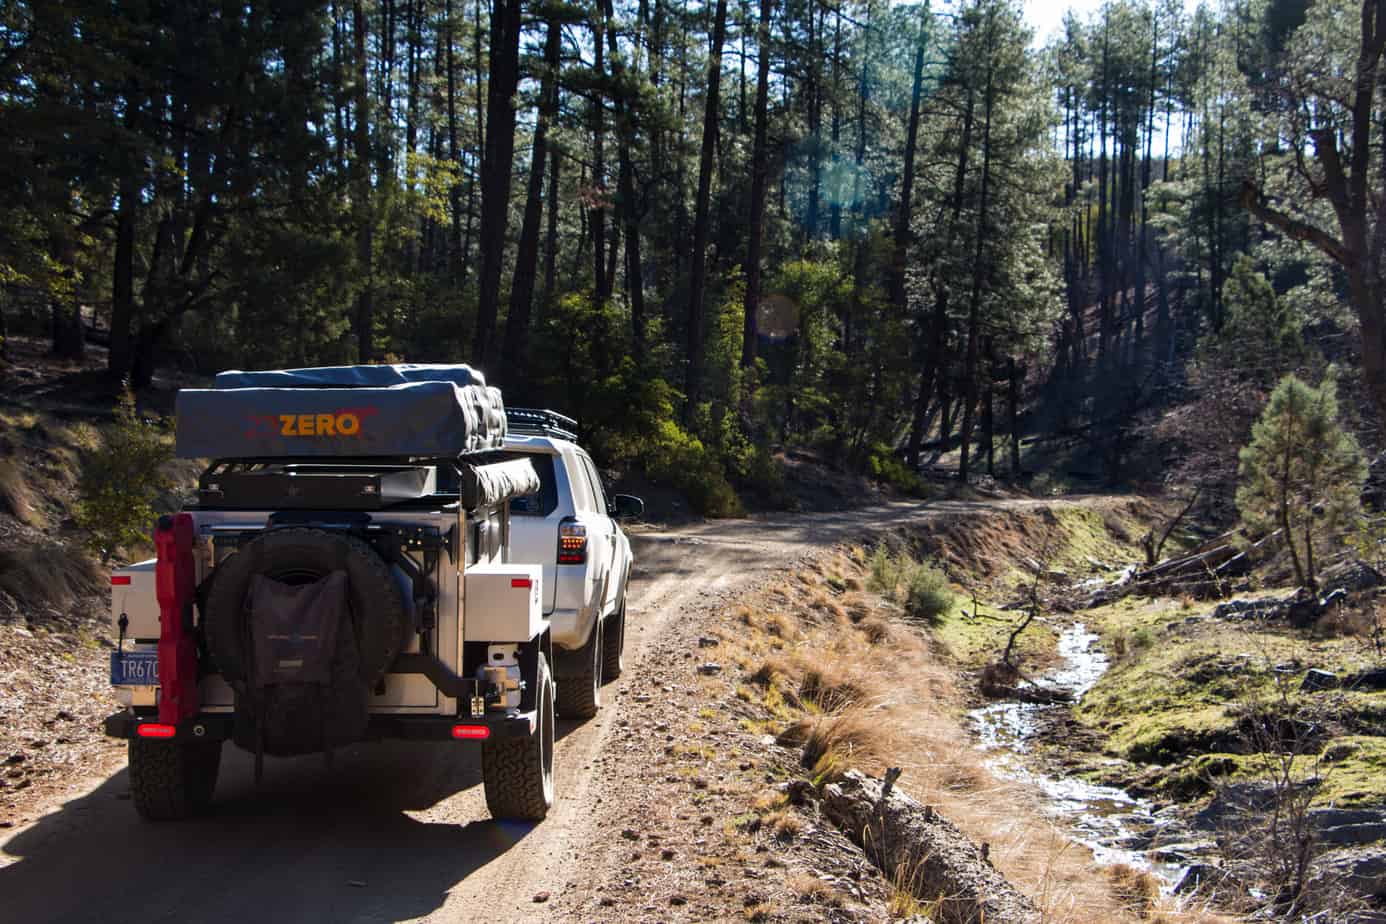
On the highway the Turtleback is very well mannered, and tracks with the vehicle flawlessly. The stout torsion suspension keeps it low and well balanced and the additional width helps to increase stability. Our test model’s tent sat just above the roof line of our 4Runner, so while there was some additional wind resistance it wasn’t as significant as taller trailers. The LED lights give it plenty of visibility to other drivers at night, and even large bumps in the road didn’t cause much of a disturbance in handling. The one drawback on the highway was weight. At 1300-1500lbs dry, it can become quite heavy when loaded with water and equipment. The 4Runner saw a mileage drop about equal to that incurred by our So-Cal teardrop, and it performed best around 55-65 mph.
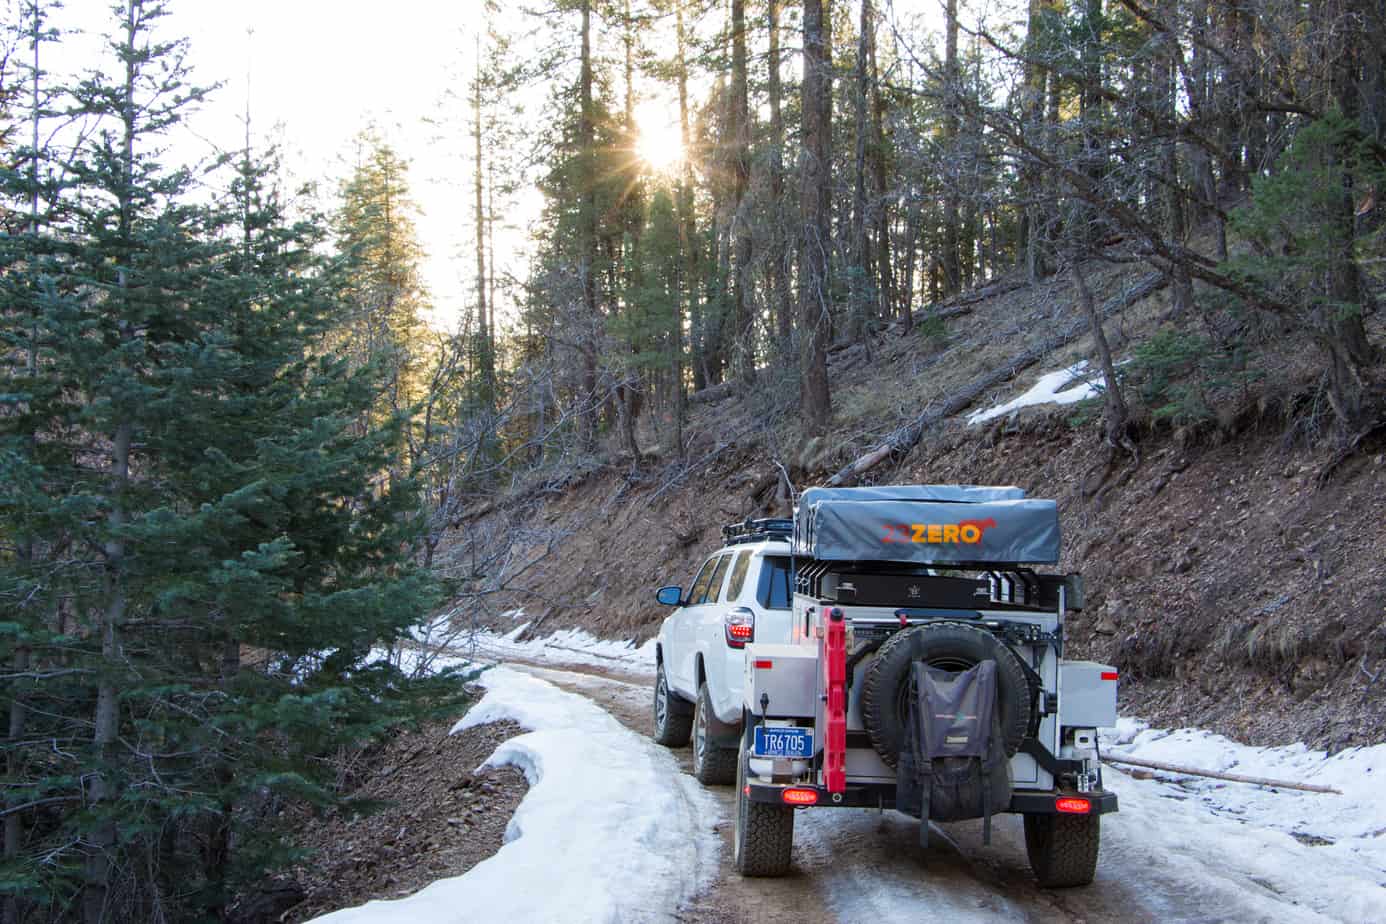
Off-road the Turtleback really settled into its groove and the weight became less noticeable. Forest roads were smooth without as much of the side to side motion we experienced with other torsion axle trailers. This is mostly thanks to their special vulcanized cartridge which is sprung to 2700lbs with 3500lb components. The lower weight rating gives it a softer ride while maintaining the durability and serviceability of the torsion platform. Each axle is held on with a simple bolt up system which can easily be swapped in the field in less than 30 minutes.
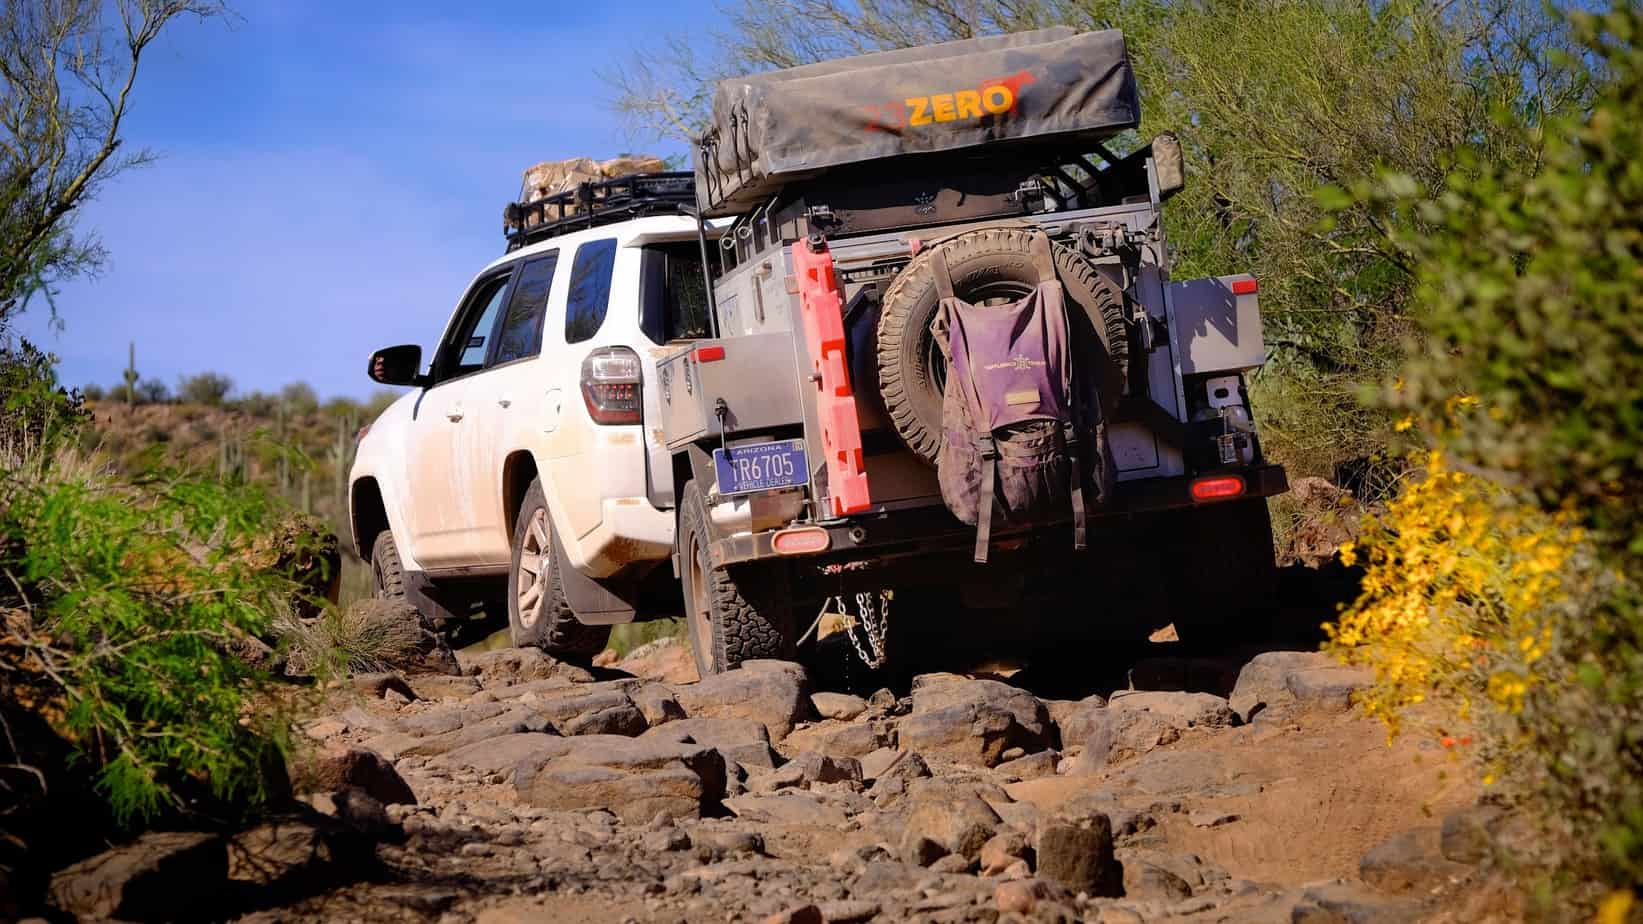
On rough roads we did find the usual troubles with this style of axle. Rocks, dips, and bumps all tended to cause the trailer to bounce as the suspension was not able to compress quickly enough, and the lack of a shock limited the ability of the system to dampen and control the compression/rebound cycle. The result was less stability and more jolting of the trailer and cargo. Fortunately its low stance and reduced weight rating improved the ride when compared to every other torsion axle trailer we’ve tested, but it still limits your travel speed on the dirt.

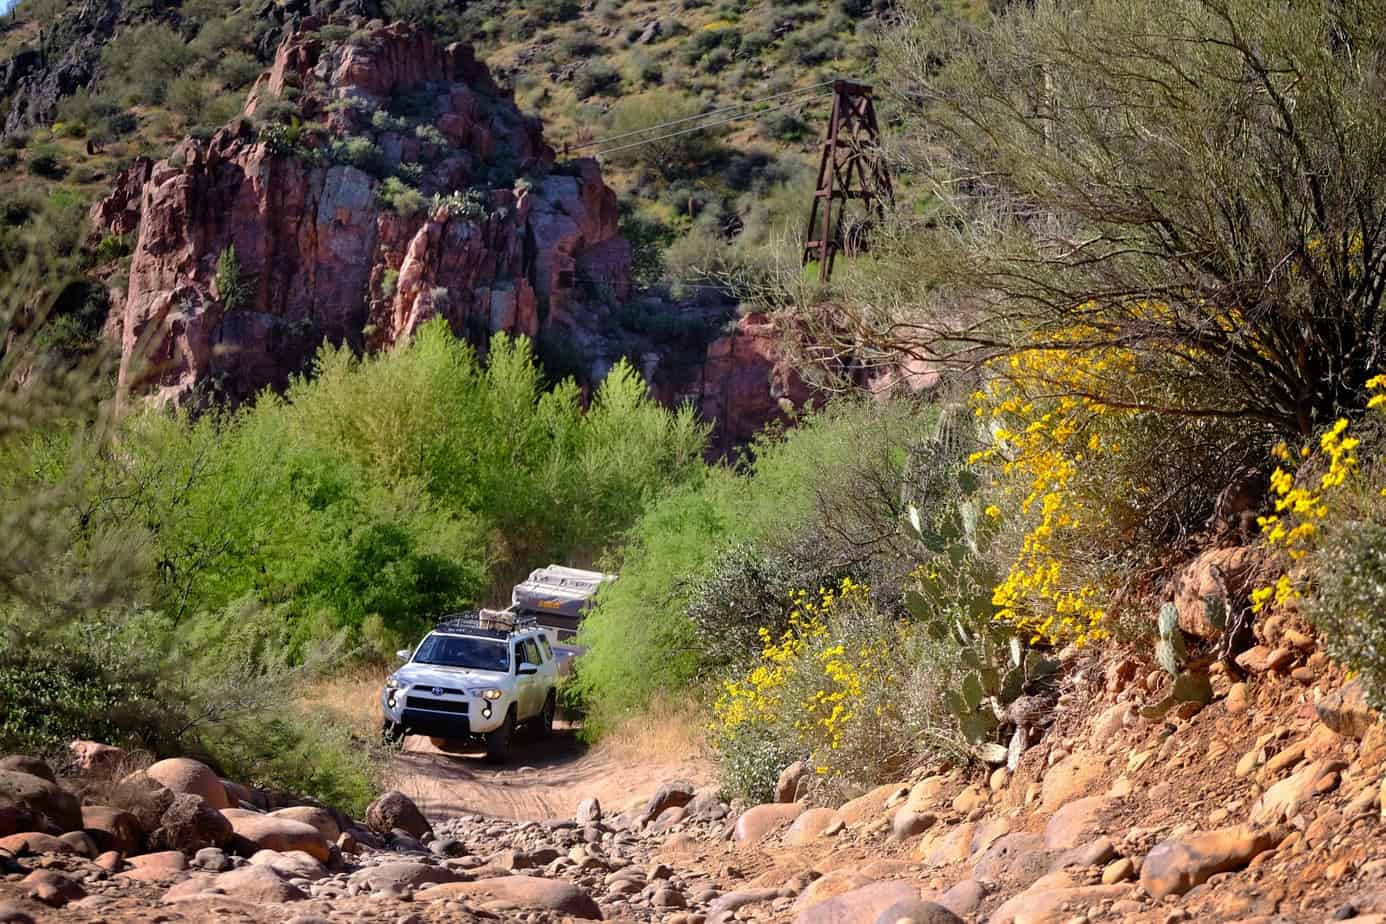
Though bumpy roads weren’t this trailer’s forte, it shined on technical terrain and cross axle ravines. The wide stance gave the it tons of stability on off-camber sections of trail, and the low weight distribution given by the water tank and other equipment just improved it further. Clearance was never an issue despite the lower body and fenders, and the tongue length seemed to be perfectly matched to our 4Runner. One of my common complaints with most trailers is their narrow track-width which makes it hard to place your tires on rocks properly or see when backing up. Turtleback seems to have nailed it though, as I was able to easily guide it between trees, around boulders, and over ledges with ease.
Final Thoughts
Although the Turtleback may look like other off-road trailers, I walked away with a very different impression. It felt more comfortable, we used the features and accessories more often, and I enjoyed myself more than I had with many other products. It took me a while to pinpoint why, but I think it’s because everything was so easy that it became a home on the trail. Instead of having to rip open boxes and bags to assemble our camp kitchen, we simply pulled two levers and a stove and sink were waiting for us. We weren’t fiddling with tiny camp utensils and tables, because we had the space to use whatever we wanted. Our clothes and gear was easy to locate inside because there were convenient light switches wherever we needed them, and best of all each component worked smoothly because it was designed to go there, not adapted to fit. The culmination of Dave’s attention to detail with his team’s hard work has created one of my favorite trailers to date. While it isn’t perfect, it is good enough that I miss using it every time I head out without it in tow. If you’re tired of the same old cargo box formula and are looking for a purpose built four-wheel drive touring trailer, you might just find it in a Turtleback.
For more information and pricing, check out Turtleback’s website and blog here.