

Editor’s Note: This article was originally published in Overland Journal, Spring 2018.
I still remember my very first overland trip, a 4-day journey across El Camino Del Diablo, the infamous border road with Mexico that crosses the most remote region of the Sonoran Desert. The track has been in use for over 1,000 years, including the first European crossing in 1699 by Eusebio Francisco Kino, a Jesuit priest. Unlike the Italian padre, I had far more equipment, but was ultimately much less prepared. My Isuzu Trooper was loaded way beyond gross vehicle weight rating (GVWR), with gadgets and gear stacked floor to ceiling. On a heavy steel Con-ferr roof rack, I had packed the heaviest items, including nearly 200 pounds of fuel, water, and an extra spare tire. To add insult to injury, I towed a trailer, stuffed to the gills with things I never needed or even used. The things I’d brought reflected my lack of experience, both in what to pack, and in how to load and properly secure it. Throughout the trip, we suffered from broken and damaged equipment, misplaced items, and the frustration of spending 20 minutes to find the salt and pepper. This article is about the lessons learned from that experience and countless others, and the resulting best practice that has become part of the Overland Journal mantra: keep the payload low and limited, always below GVWR, and ensure that everything is secure and organized.

THE FUNDAMENTALS
While there are many specifics discussed in this article, the most critical are the subjects of GVWR and center of gravity (COG). They are the foundation for all things load related and directly affect the performance of the vehicle and safety of the occupants. The most egregious error the overland traveler can make is to allow gear and accessory accumulation to build until space runs out, instead of when the capacity of the platform has been reached.
GVWR is a combination of the curb weight and payload. I prefer to use GVWR as it permits heavy items to be removed from the vehicle such as rear seats, or replacing the truck bed with a lightweight aluminum tray. This reduces curb weight and adds to available payload. Know the vehicle’s GVWR and do not exceed it. There are two ways to approach this: either total up the load of all equipment and accessories, taking into account the number of potential passengers, and buy a vehicle with the proper GVWR, or continue to pare down your kit until under the manufacturer’s limits. While this is not common knowledge, having a grossly overloaded vehicle can result in denial of insurance claims in the event of an accident. In some countries, including Australia, a 4WD can be flagged for a weight inspection and impounded, even if you’re a foreign visitor on a temporary import permit.
GVWR is determined by the manufacturer; engineering teams spend countless hours calculating limits based upon braking effectiveness, chassis strength, axle and bearing capacities, spring rates, limit handling performance, etcetera. These are all considerations for both durability and safety. An overloaded vehicle is a hazard to the driver and their family, along with everyone else on the road. However, there are tolerances for gross vehicle weight (GVW), and understanding the vehicle is a good way to learn where the payload limits originate. For example, the Jeep Wrangler Unlimited’s payload is initially restricted by the spring rate, followed by the braking performance (North America spec). We are not suggesting that GVWR should ever be surpassed, but changes to underrated components can help provide a buffer should loads need to be temporarily exceeded in an emergency (for example, if a companion’s vehicle breaks down and taking on additional passengers becomes necessity). This also underlies the critical decision of purchasing the correct overland platform to begin with. Only a few modern wagons afford a proper working payload for remote travel. The Toyota Land Cruiser 200 allows for nearly 1,500 pounds (shop for vehicles with seven-passenger seating). For comparison, the Land Cruiser 70 Series can have a payload in excess of 2,000 pounds. A curious surprise is that the Grand Cherokee has nearly double the payload of the Wrangler, and almost 400 pounds more than the 200 Series Land Cruiser.
After GVWR, the next considerations are COG and vehicle dynamics, influenced by where the load is placed in the vehicle. As a general rule, items with the most mass concentration should be stored as low as possible in the chassis and proximal to the center of the wheelbase. The fore/aft location will be determined by the stock weight distribution and interior layout, but the logic remains. The footwell of the rear seats is ideal on most wagons, a perfect spot for water tanks, tools, and recovery equipment. Unfortunately, most vehicles are loaded with everything aft of the rear seats, with anything left over or too bulky mounted to a roof rack. Roof capacity is also established by the manufacturer, and most models have limits of around 150 pounds. There are rare exceptions, like the 200 Series Land Cruiser, which has a factory roof load rating of 440 pounds. The roof is the last place equipment ought to be stored, and generally should be considered reserve capacity with a bare roof rack. For most makes, a simple roof tent is the limit. Once a suspension lift is added, or other changes are made, the COG is further affected. My personal preference is a bare roof rack, or possibly a roof tent on simple cross bars, with a total load of less than 150 pounds. Think of what would happen if a high-speed emergency avoidance maneuver was required to miss hitting a child that ran out into the road.
ORGANIZING THE INTERIOR
Starting from the driver’s seat, the priority is to reduce clutter, loose wires, and unsecured objects. The primary threat is a water bottle or similar object tumbling into the footwell and jamming under the brake or gas pedals. I know this one from personal experience—fortunately, the bottle was thin plastic and was quickly crushed.
Organize accessories and electronics so that they do not impede vehicle operation or distract the driver. This is equally true of things on the dash and gadgets that block the view forward. Make use of the center console and various mounts that keep radio mics, cameras, and displays secured. It is also important to secure quick access items like a bug-out bag, first aid kit, or briefcase. This can be accomplished by securing the bag with the seatbelt and running the webbing through the handles to keep it in place—still easy to grab and go.
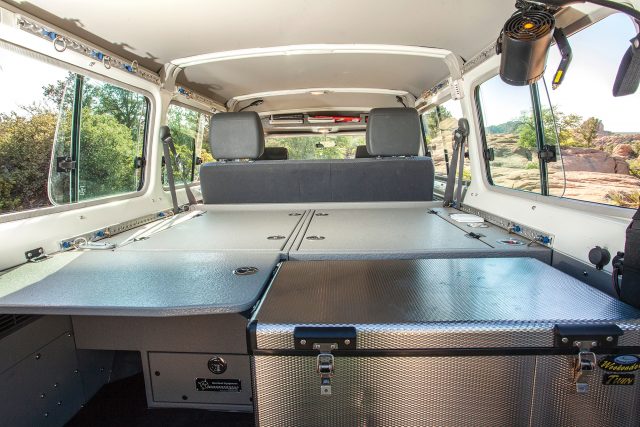
Behind the driver is the best location for dense, heavy items, lashed to the floor using seat rail bolts. I affix heavy-duty hooks and loops to these rails which are perfect for ratcheting down a footwell water tank (Front Runner makes one of the best) or various soft tool and recovery bags. The best solution I have found for this is rock climbing anchor hangers, which easily mount with seat rail bolts, seat belt bolts, or other larger interior anchoring points, and would still allow smaller children to sit in the back seats with ample leg room. Otherwise, I prefer to remove one or both of the rear seats to gain back available payload and cargo volume. This is also a good location to mount an electric fridge and other large items. I use cut pieces of felt or moving blankets to protect expensive interior panels from scratches.
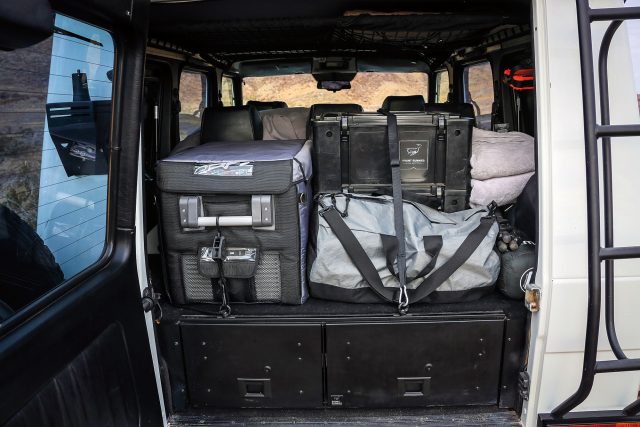
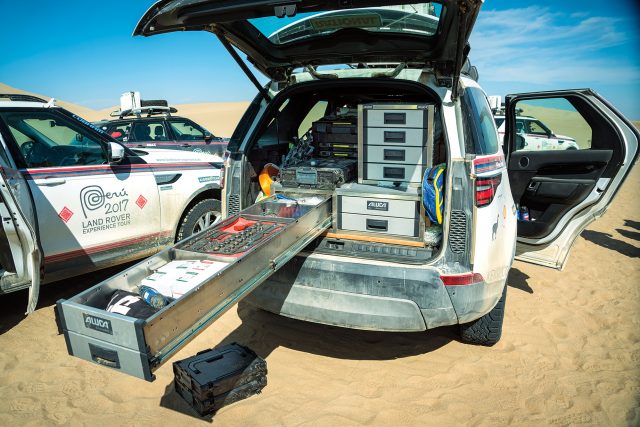
In the back of the vehicle is where I tend to store all of my cooking and camping equipment, conveniently accessible in Alu-Box or Front Runner Wolf Pack storage bins. Pelican cases are certainly durable, but they are also heavy and do not typically nest well when stacked—I reserve those for camera gear and exterior storage options. This is also an area of the vehicle where a drawer system is popular, and they can add considerable organization opportunities to the process, but they do come at a payload cost; be sure to add that into the GVW calculation. I have owned several vehicles with drawer systems and many without, and both have advantages. For long trips, I prefer drawers, as night after night of camping requires an emphasis on livability and accessibility. Inside the drawers, keep cooking gear, toiletries, and other quick grab items. On top, lash light items such as sleeping bags, tents, chairs, and tables, keeping everything low enough for the driver to still see backward via the rearview mirror.

EXTERIOR STORAGE
The most common means of exterior storage is a roof rack or truck bed. In a pickup, space can seem endless, particularly when a shell is fitted. Many of the same rules apply here, including stowing the heavy items further forward and lower down. For this, a bed slide or drawer is particularly convenient; there are several new durable offerings from Decked and TruckVault, among others. On top of the storage slide, lash weatherproof boxes with lighter contents, moving the items rarely accessed toward the cab. With an open bed, dust, rain, and theft become the greatest concerns, so careful consideration should be placed on each—most issues are easily solved by employing a canopy or bed-level rack. If a net is used, it is worth noting that we have had the best success with the LoadTamer brand, originally designed for securing cargo to skids on aircraft; they have also survived my best attempts at flight over Baja topes.
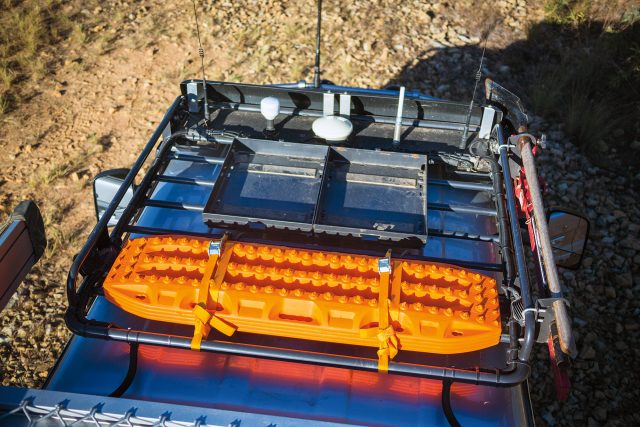
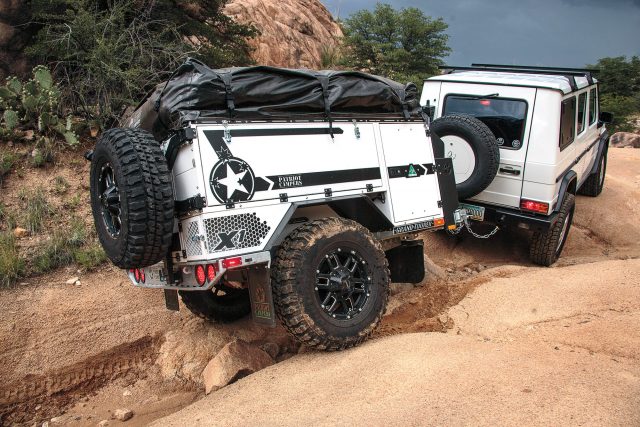
The roof rack is saved for last, as it should be the final choice for mounting heavy items to a well-thought-out overland vehicle. A roof rack is a valuable piece of kit and serves as an excellent option for reserve capacity (think firewood), but it should not be considered for installing five NATO cans full of fuel or a spare tire if other locations are available. It is a good place to mount traction ramps, shovels, and duffels filled with clothing or bedding. This is not to say roof tents and other roof-mounted accessories are prohibited, but care should be taken before committing to raising the COG of the vehicle. The exterior of the vehicle can also be an option to store items that are able to endure the elements, like strapping a set of Maxtrax to the rear tire, or a table mounted to the underside of a rack. Caution should also be used with bumper mounted racks (e.g.,Wrangler) as they impart significant leverage on the rear suspension.
As with any skill, success depends upon experience and an openness to learning new techniques. Sure, we have all seen the Camel Trophy Discovery models with 600 pounds of kit strapped to their roofs, but that was because there were four adults in each vehicle. My general rule is that with one or two occupants, the roof should have only an empty rack or just a roof tent. With four occupants, the rack will need to carry tents and other lightweight bedding. In smaller vehicles, four or more passengers may not be an option and will require either a larger vehicle or possibly a trailer.
For me, the greatest practice for loading and lashing came from when I was a firefighter. It was shocking to see the injuries caused by flying objects inside a rolled vehicle. The second-best skills builder resulted from riding adventure motorcycles. Once I realized that it was possible to travel around the world with all necessary kit strapped to a moto, it was easy to pare down my essentials and fit everything into a typical 4WD—with room to spare.

ESSENTIAL KIT
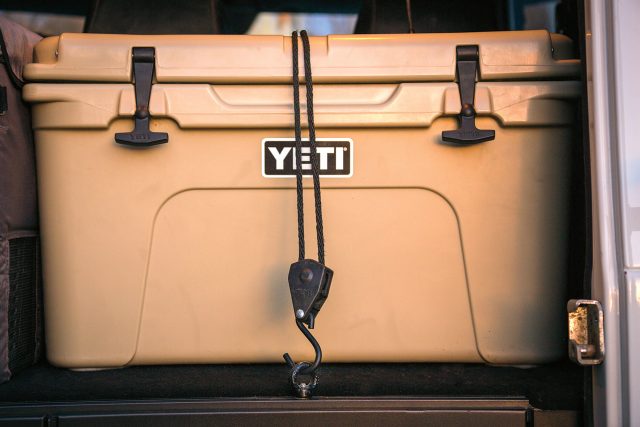
PERFECT BUNGEE

The Perfect Bungee Adjust-AStrap has proven to be durable and predictable for lashing soft bags and lighter interior loads. The length can be adjusted, and the quality is excellent with a lifetime guarantee.
$6 | BIHLERFLEX.COM
SHOCK STRAP
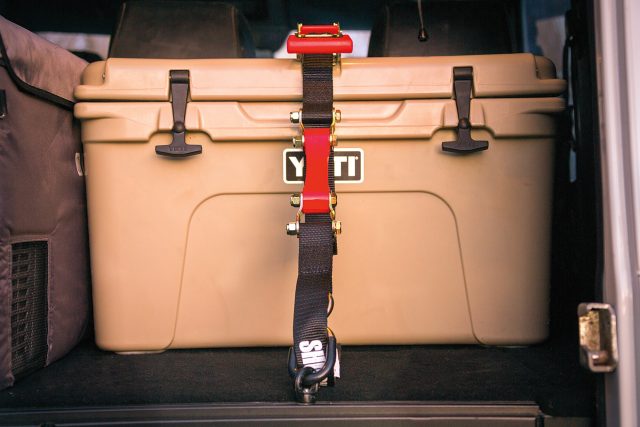
The ShockStrap is a webbing ratchet system that includes a urethane anti-shock feature and a 1,000-pound capacity. It is appropriate for all rack and bed loads, and the 1.5-inch model is available in 15- and 7-foot sizes.
$40, $36 | SHOCKSTRAP.COM
QUICKIE (1/4 INCH)
A 1/4-inch ratcheting tie-down that works well for securing rigid and soft interior loads. It is also easy to tighten and loosen for frequent access.
$19 | QUICKIETIEDOWN.COM
QUICKIE (3/8 INCH)

This 3/8-inch ratcheting tiedown with a built-in tightening lever and 650-pound capacity is ideal for securing all loads, including rack and bed loads.
$29 | QUICKIETIEDOWN.COM
STRATCHIT
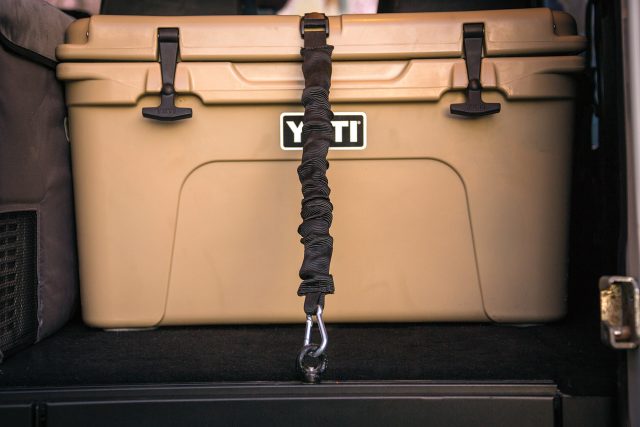
The 1-inch Stratchit is a lower cost, quality option for securing all interior loads. The short bungee makes this a hybrid system that can be used with rigid and soft goods.
$36 (PACKAGE OF TWO) | FRONTRUNNEROUTFITTERS.COM
TIE DOWN
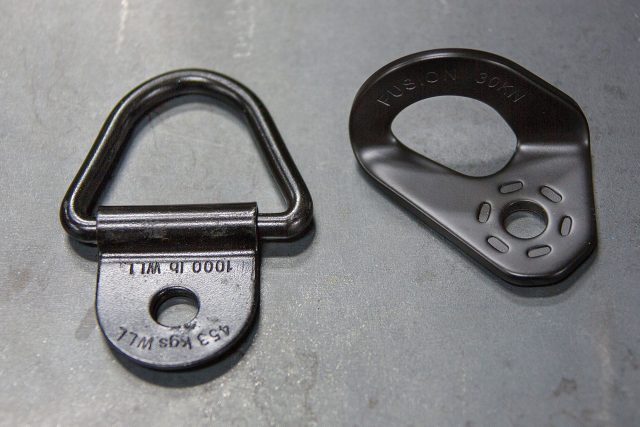
Tie-down points are the cornerstone of lashing and many options are available. Just a few minutes searching online yielded low-cost and properly rated options like these.