Editor’s Note: This article was originally published in Overland Journal, Gear Guide 2013.
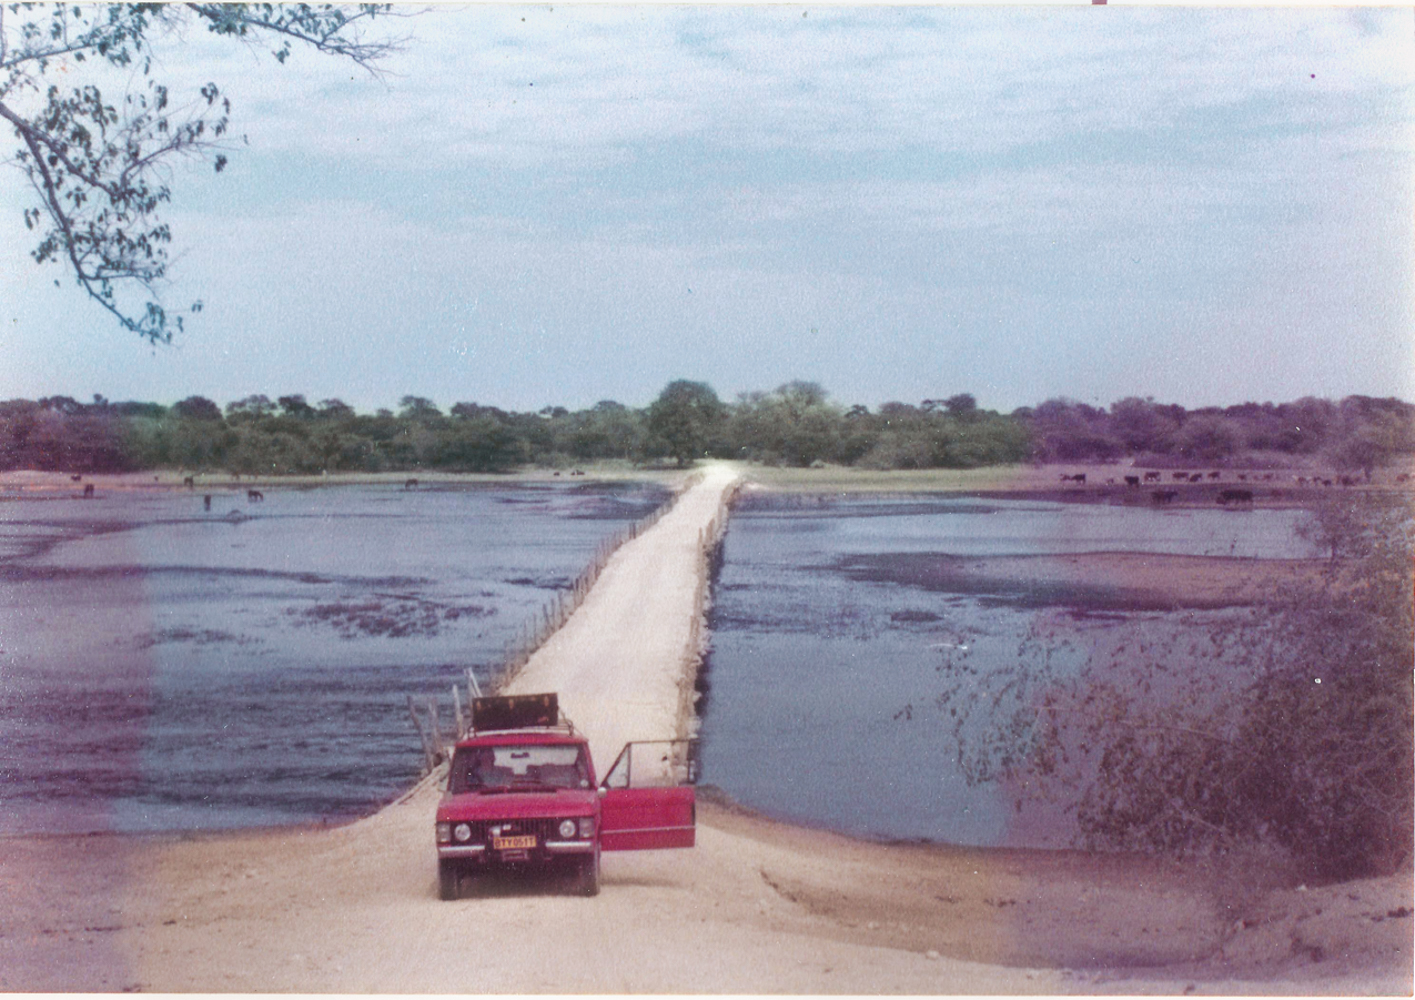
There are certain events you never forget. While some drift away on the winds of memory, those that stay with you define your attitudes and perceptions for life. Camping by the banks of the Boteti River in the Kalahari Desert, Botswana, when I was 10, is something that has stayed with me with lasting clarity. It was 1982, and the drive in had been long and dusty, on winding, soft desert tracks with not a soul to be seen, save thousands of wildebeest dying of thirst and stopped in their migration by the Trans-Kalahari veterinary fence. When we reached the Boteti it was just a trickle. The banks were steep and sandy and far from the water. Pulling the Range Rover off the track as the sun was getting low, my father chose a spot on the bank and committed to it, driving straight down to the beach and on to the river. The descent was fairly technical, with maybe 60 feet of loose, soft sand. I remember the discussion clearly. My father said glibly that getting up the bank in the morning would be very difficult; my mother suggested that the winch might come in to use. We camped by the river that night in the open, with just an awning over our heads. My mother swears to this day that she woke up with a large hyena standing over her.
Morning brought the inevitable climb up the bank. I really hoped for some winch action, as I’d never seen it done before. All but my father got out to lighten the load and he took a good run at the bank. What I remember best is how easily the Range Rover made it look. Fully loaded, with a 45-gallon petrol tank from a semi in the back, along with camping gear for four, it sailed up the slope with an ease that defied reason. Well, my reason at the time. From that moment on, the Range Rover became godlike in my pantheon of automobiles and spurred my desire for the Range Rover in this project build.
The last installment of any build article usually involves a free-for-all of details and items that didn’t get completed before, and this one is no different. Among the things that I had yet to check off the list were the switch for the air conditioning, the EGT (exhaust gas temperature) gauge, fix the doors, build a tire rack and install the winch and locker.
On not Getting Stuck and Getting Unstuck
I still contend that the first piece of recovery gear any overland vehicle should have is an air compressor. It doesn’t have to be large or particularly fast, but being able to adjust tire pressures will help keep one from getting stuck in the first place and aid in getting out of many situations. I had an ARB compressor left over from the donor Range Rover for this project. It mounted easily on the driver side fender top, under the bonnet where the ABS pump used to be. In fact, the power line for the ABS pump was requisitioned for use to run the compressor. The frame-mounted air tank, previously used as a reservoir for the air suspension, became the compressor tank.
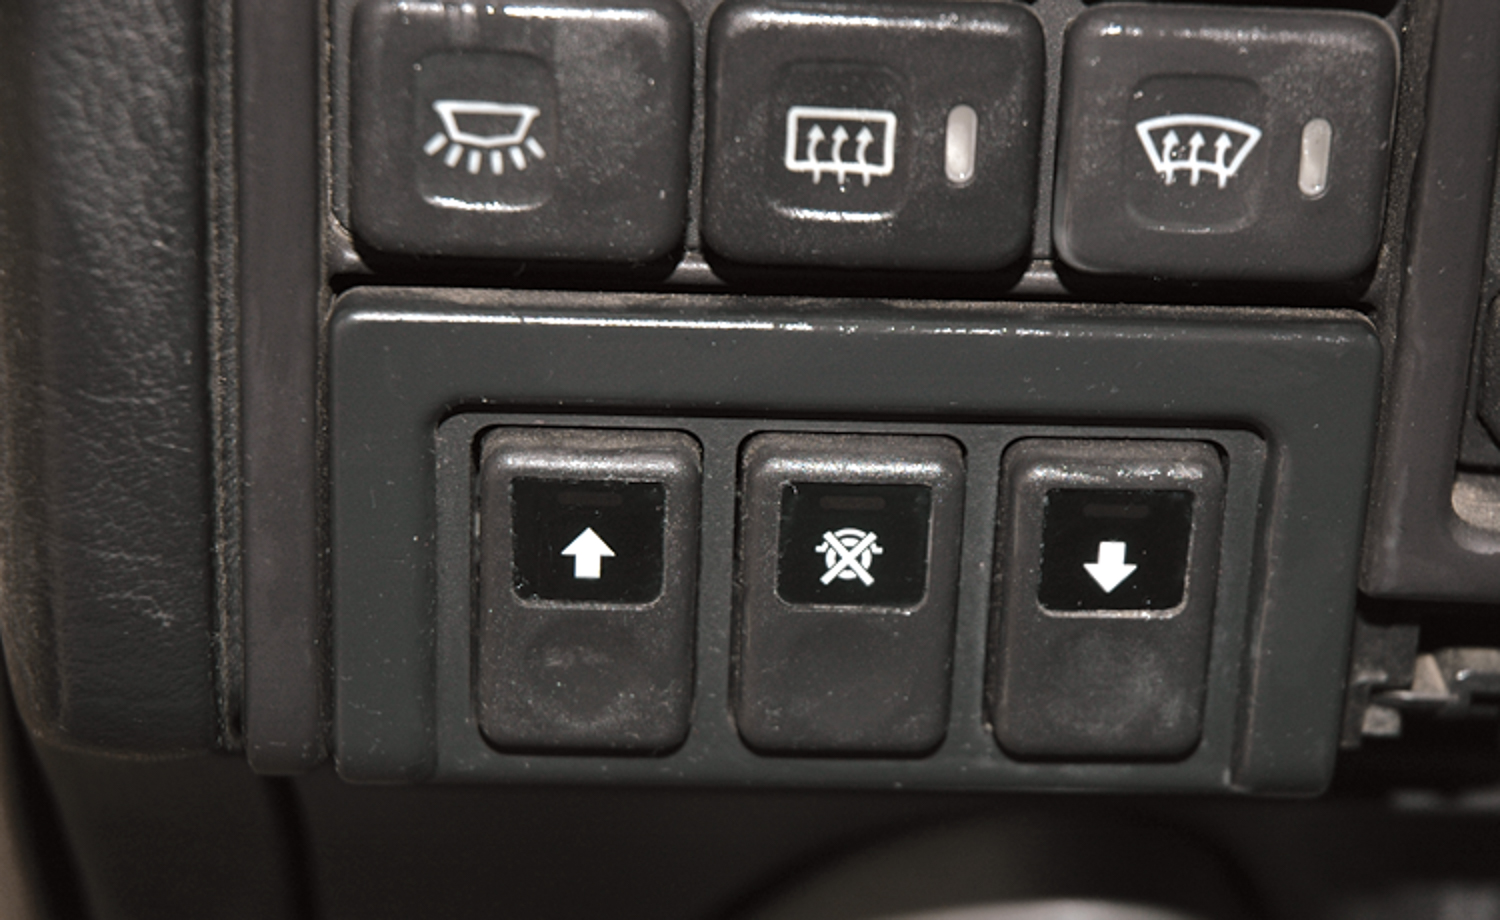
Though I’ve driven plenty of vehicles with lockers, I’ve never owned a vehicle equipped with one. That changed this summer when I installed an ARB air locker into the rear axle of the Range Rover. I kept the gearing the same and just re-did the differential. With the ARB compressor up front and the locker in the rear, it was just a matter of finding controls for it all. Land Rover came to the rescue here. The controls for raising and lowering the air suspension are a three-switch panel, which proved perfect for the locker and compressor; the center switch is for the compressor and the lowering button (arrow pointing down) for the rear locker. Should I decide to add a front locker in the future, the suspension-raising button (arrow forward) will be perfect.

The only issue was that the suspension controls are buttons, not switches, so I had to use a flip-flop relay module to control the locker relay (this seemed a better option than wiring up a latched relay set). Push the button once to activate and again to deactivate. The flip-flop module also has a connection for an activation light, which I wired to the traction control light in the instrument binnacle. Now, Traction Control indicates the locker is engaged.
The final addition for recovery was the Ramsey Patriot 9500 UT winch from the Gear 2009 Overland Journal winch test. It slotted easily onto the ARB bull bar and took possession of a synthetic line and safety thimble from Viking.
Land Rover Bits and Pieces
In the previous article I described the installation of the air conditioning, and the fact that I just had an alligator clip to switch it on. To improve things, I wired up the AC switch on the dash. That’s a little more complicated than it seems, due to the fact that the condenser fans were controlled by the now removed ECU. I traced the lines and wired the fans directly to the AC switch, eliminating the need for the ECU.
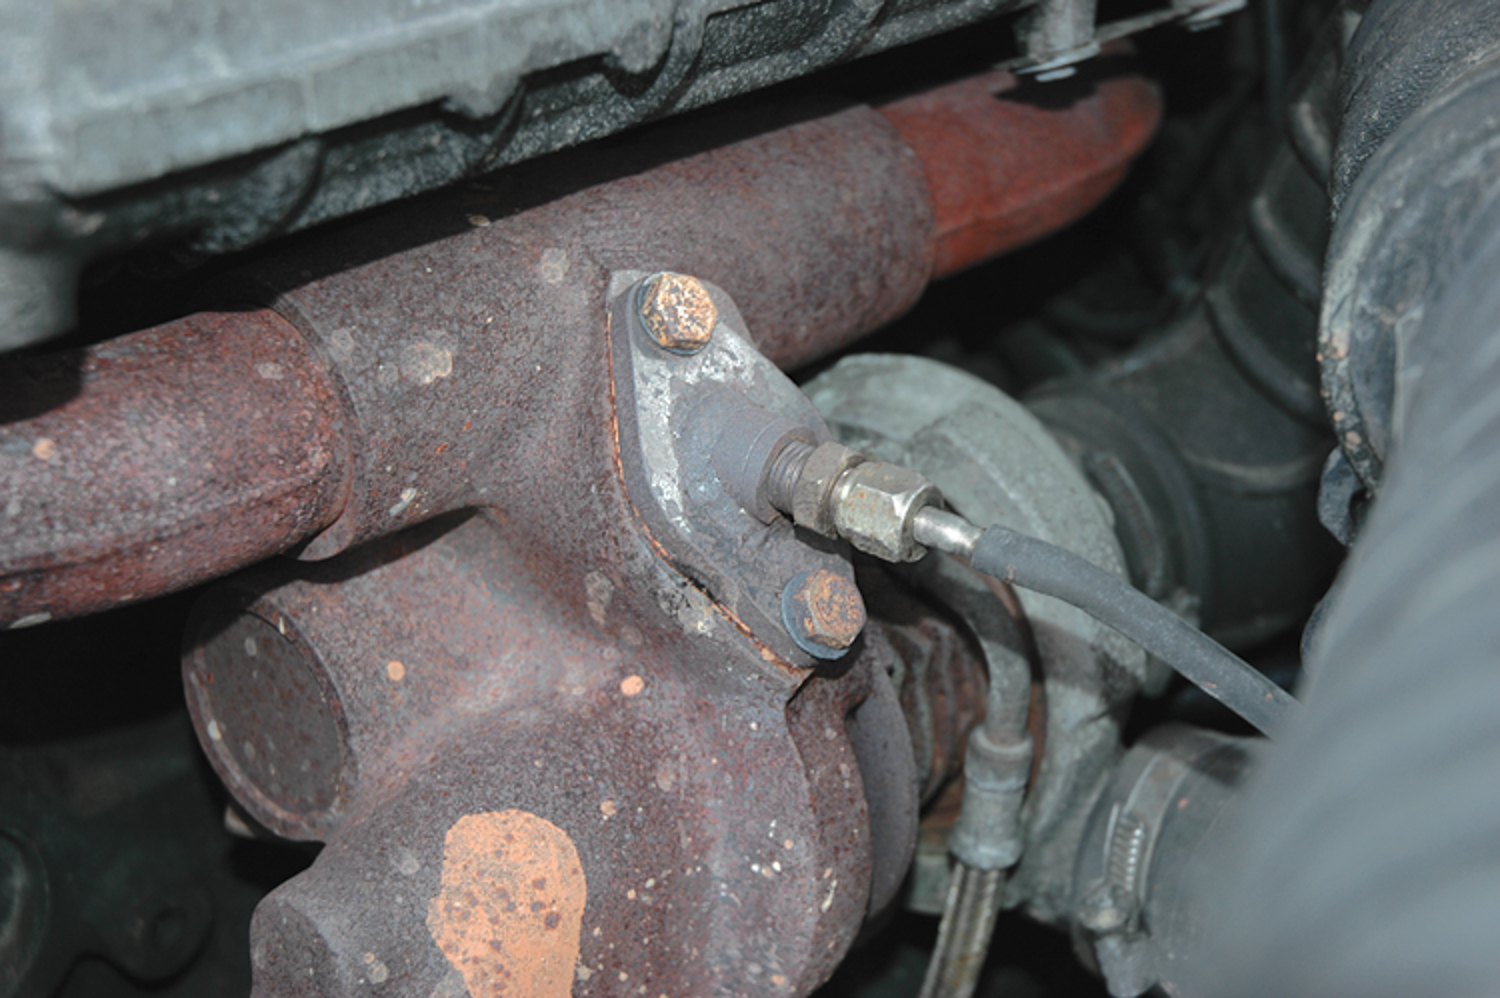
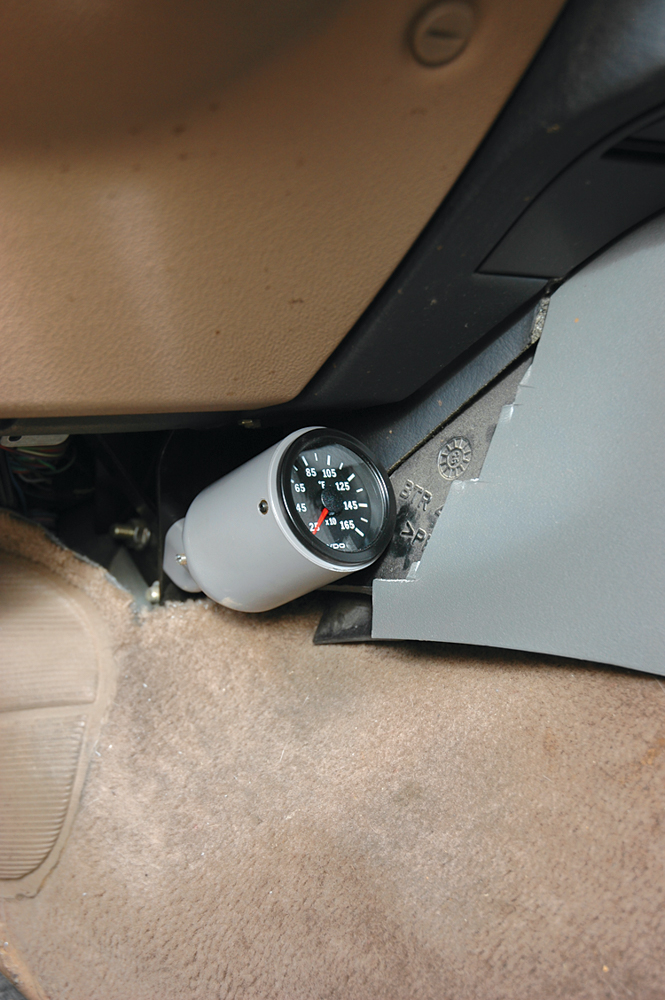
For the diesel, an EGT gauge is a great diagnostic and peace-of-mind item to have. I’ve never been a fan of adding gauges to the top of a dashboard or even to the A-pillar, but mounting locations are hard to find in modern vehicles. I ended up getting an A-pillar mount, and fitting it on the transmission tunnel under the dash. Though not the perfect location, I can see the gauge while driving and it is well out of the way.
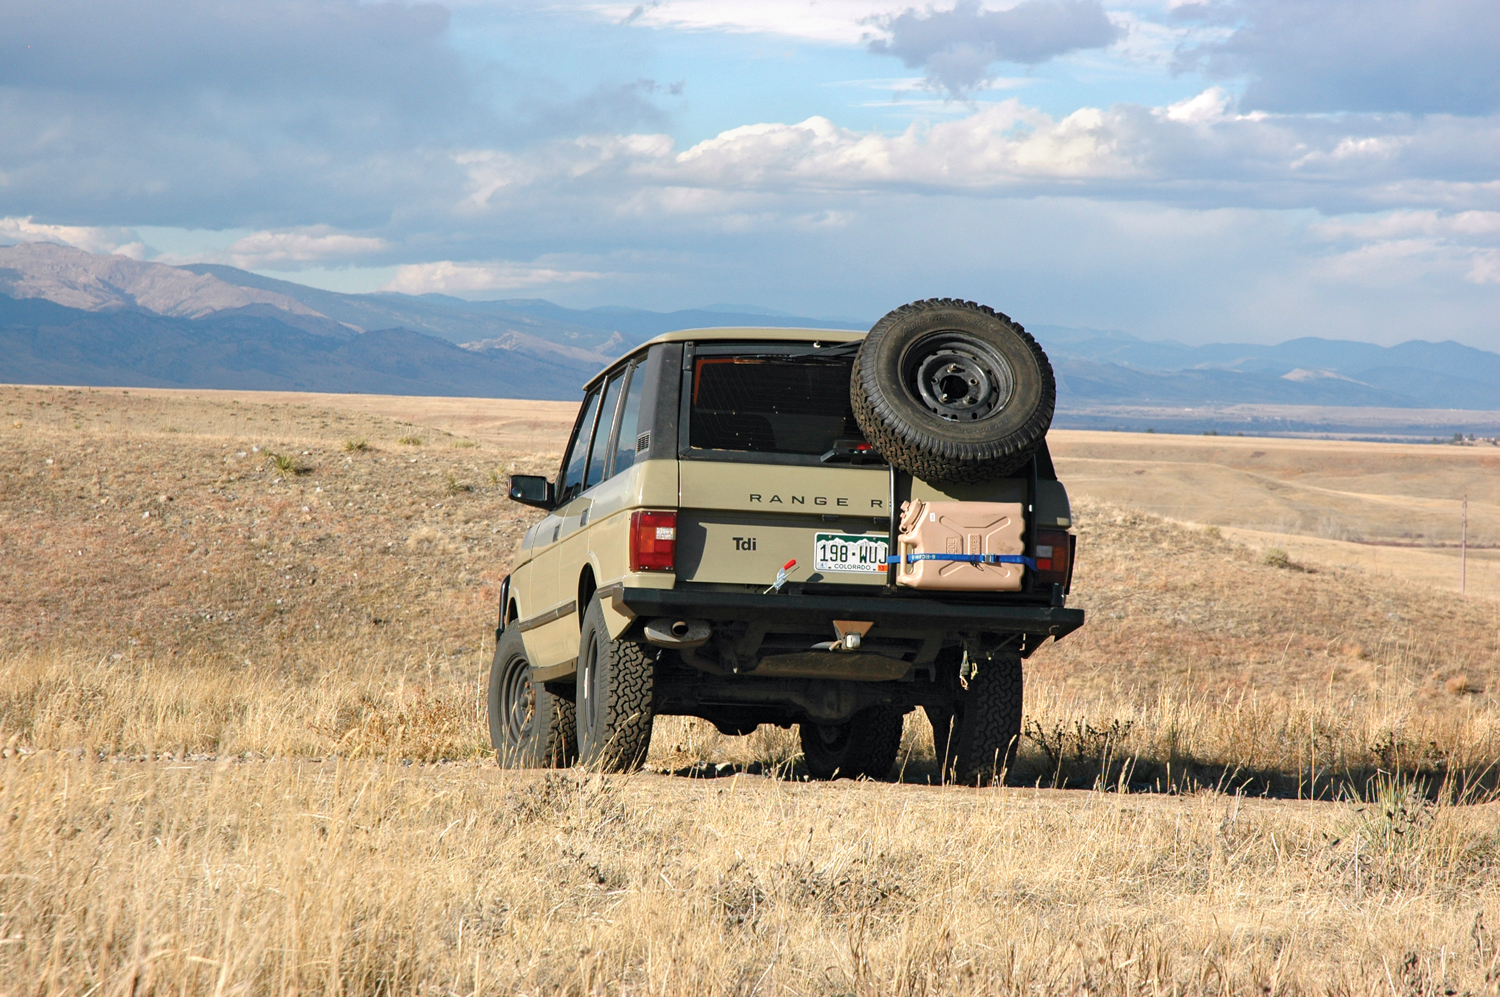
Tire Rack
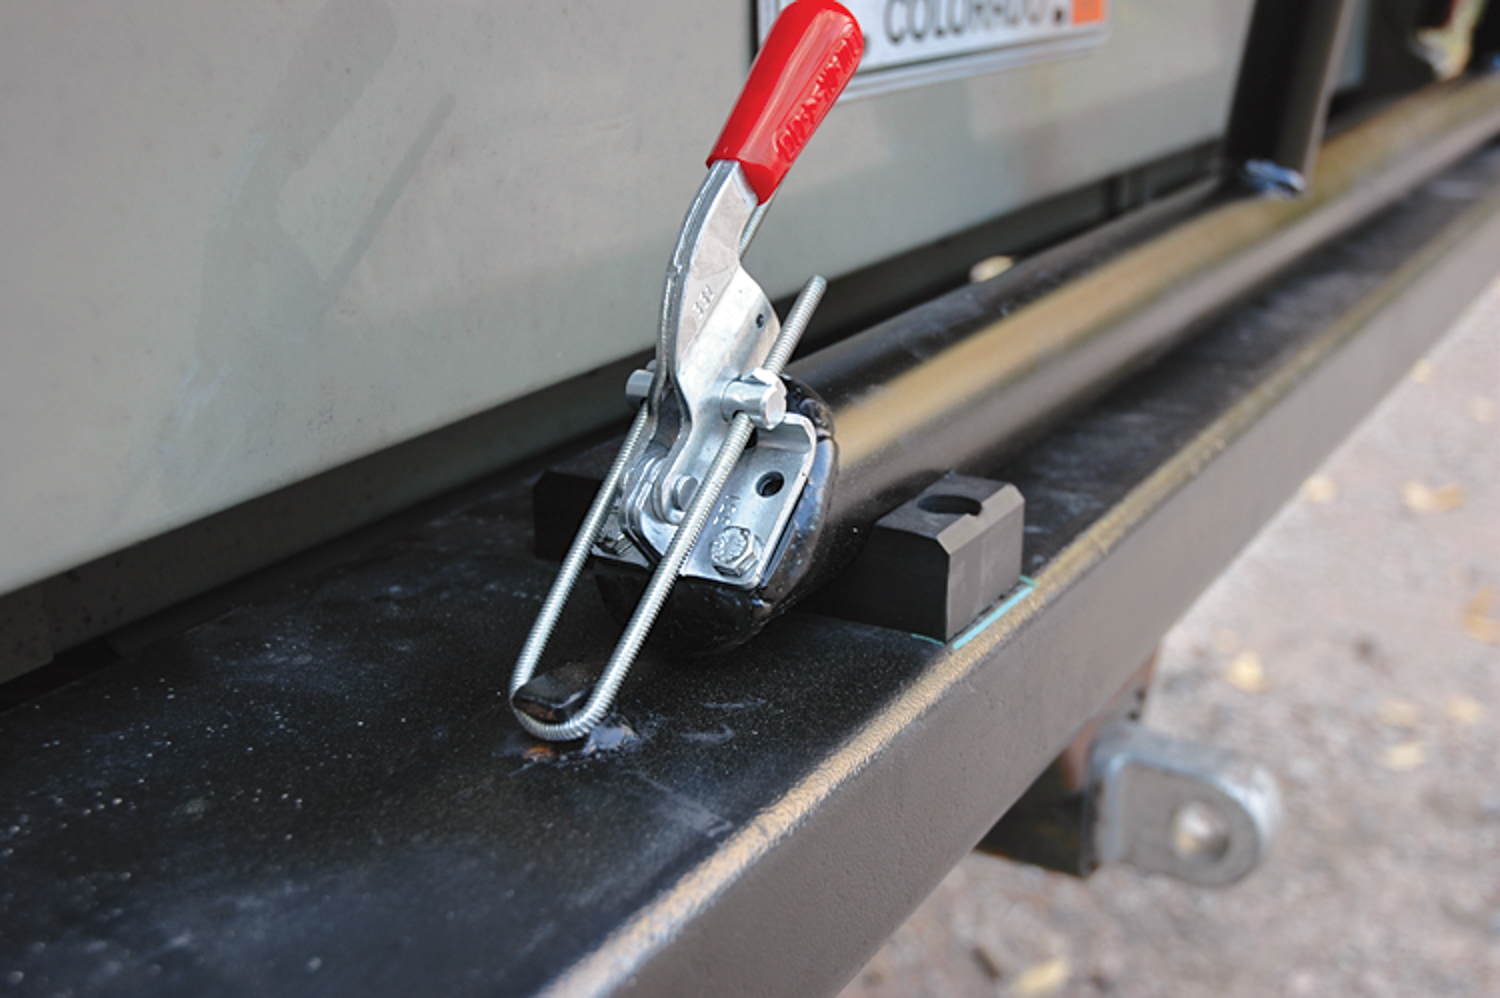
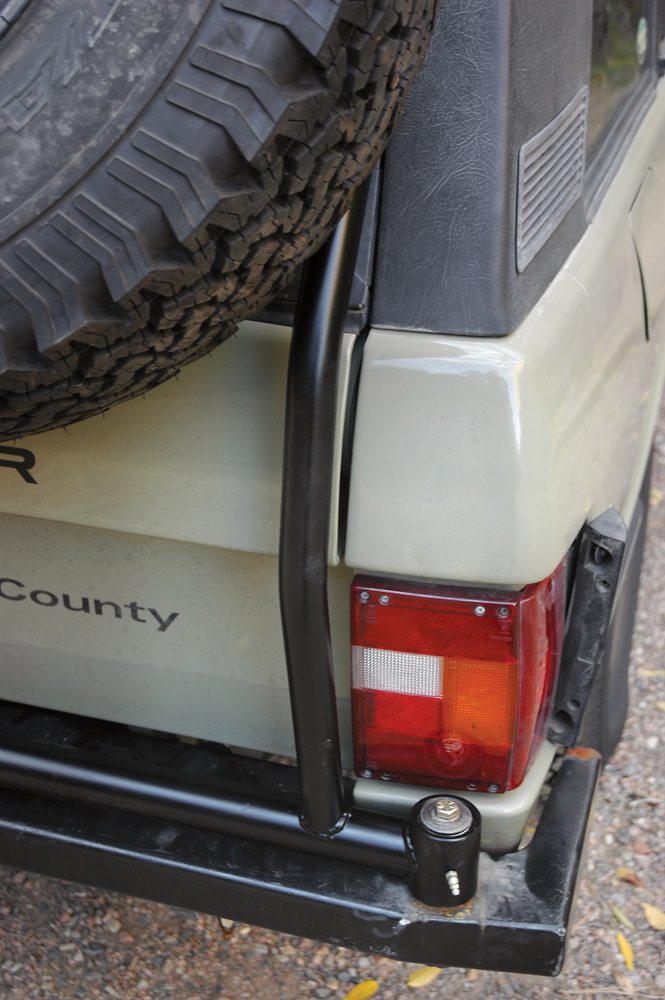
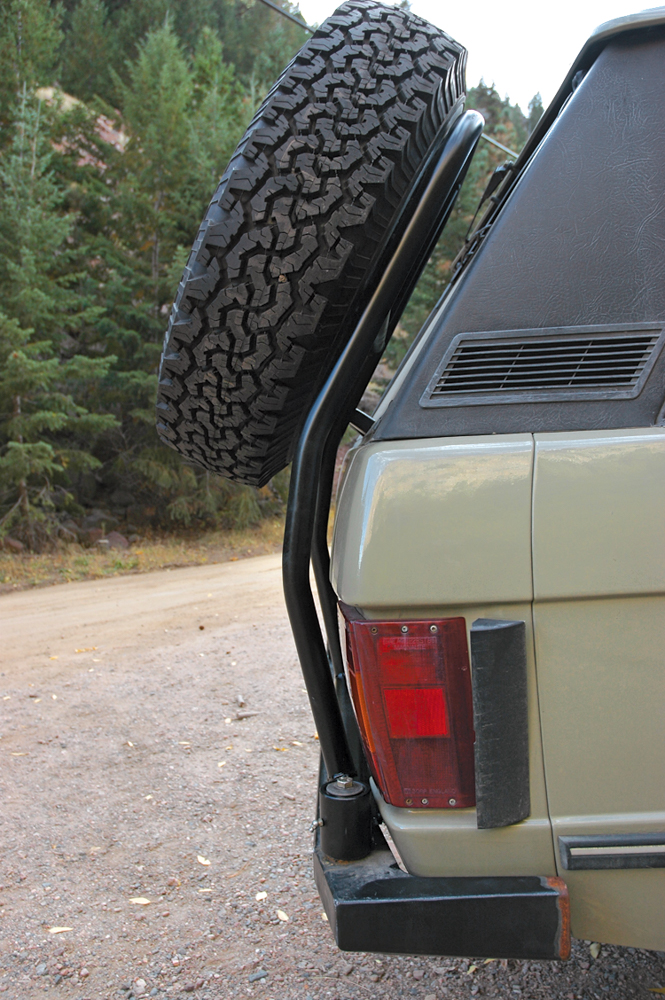
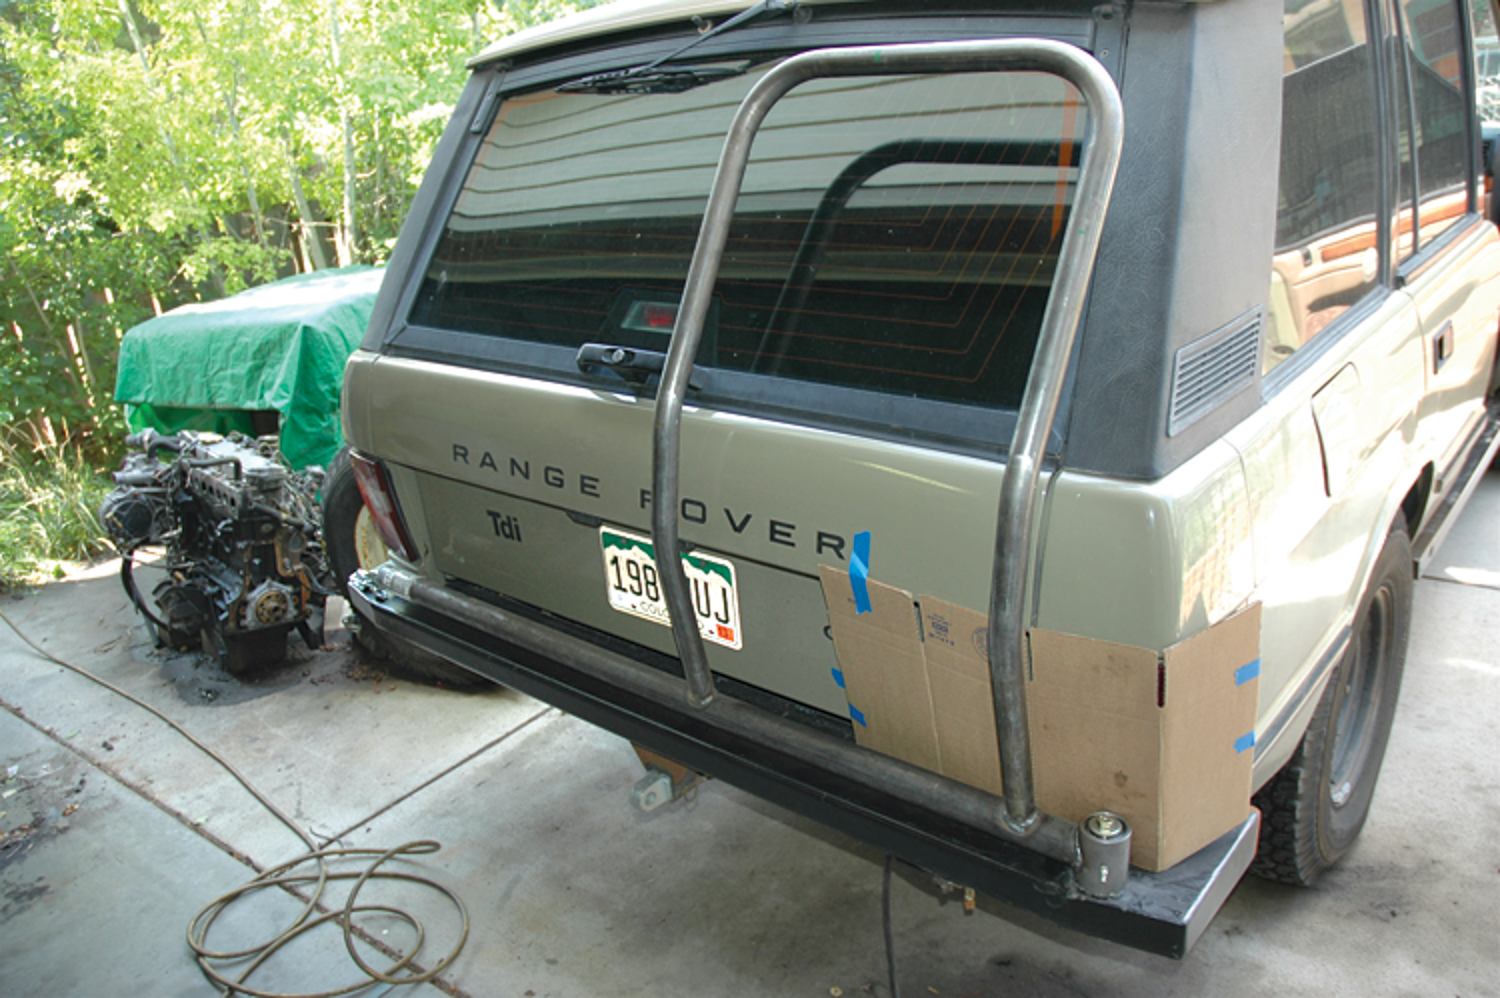
The final addition to the Range Rover had to be a tire rack. The stock spare wheel looms large in the load bay at the best of times. Now running the larger BFGoodrich 235/85R/16 Mud Terrain tires, the spare didn’t fit the stock location. For some reason, there aren’t any good commercial options for a swing-out tire rack for the Range Rover Classic. Several companies have tried, a few have promised, but most have realized there is not much of a market. Columbia Rovers supplied me with the rear bumper and had originally said they might be interested in making a tire rack, but their money is now in Toyota products. Fortunately, Keith at Roving Tracks came to the rescue and helped me come up with a solution. Over the course of several weekends spaced over the summer, we managed to design and build a rack that will hold a spare wheel, mounted high over the rear window, and a jerry can below. The bearing mount for the swing-away was kept as small as possible to reduce interference with the rear light. The rack follows the rear curve of the Range Rover very closely, and any movement while traversing corrugated tracks would have resulted in contact with the body. To address this we reinforced the bumper with a significant amount of bracing and tied it into the frame on either side. As it turned out, I am very happy with the appearance and function of the rack.
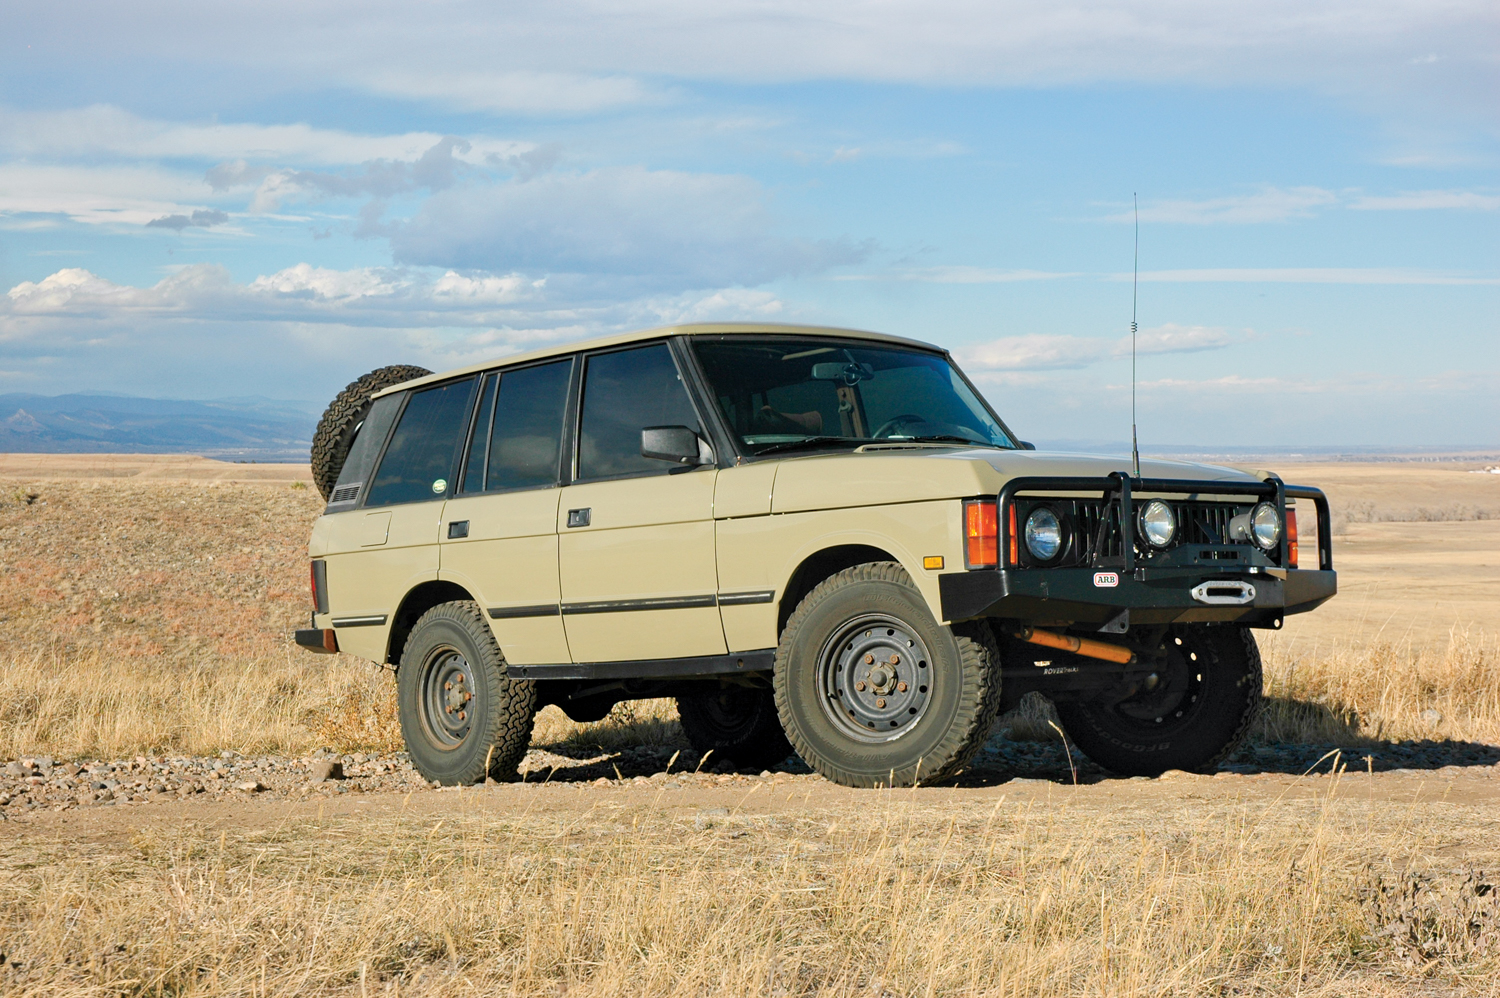
Conclusions and Comparisons
After three years of slow progress, my Range Rover has become something very different from the Range Rover that inspired it; yet I feel it holds the core of what an overland-capable Range Rover should have. Gone are many of the creature comforts, replaced by a diesel engine, body and undercarriage protection, cloth seats and rubber floor mats. The final version is 280 pounds heavier than the original in curb weight, mostly due to the extra steel and those very heavy wolf wheels. But for all that, I can reliably get 600 miles on a tank of diesel in mixed use driving, and easily cross most terrain I have the desire to tackle. The trip we took across the Mojave, detailed in Part II of the build (Overland Journal 2012 Gear), showed that this vehicle can be comfortable and capable, economical and practical, and still be a head-turner in town. I get almost as many looks and comments in the Range Rover as when I’m driving my Defender 110. And why not? This is a truck that carries compromise well and lends itself to daily driving as well as long trips through Mexico. While the Range Rover we drove through the Kalahari was one of the first, a 1973 2-door, my current example is one of the last, a 1995 4-door County Classic. Together, they bookend 20 years of the Range Rover Classic, a supremely capable and comfortable overland platform.