Editor’s Note: This article was originally published in Overland Journal, Gear Guide 2012.
We were on the Mojave Road on the eleventh day of a three-week tour through Utah, Nevada, and California (on as much dirt as possible), when I reflected that we had experienced no vehicle problems so far. Any Land Rover owner knows that such thoughts just beg a major disaster on the following day: timing belt failure, exploding differential, or seizing power steering pump—something major. I’ve set up a lot of vehicles for extended overland travel, mostly Land Rovers of various descriptions. What I have found is that there are key items that need to be addressed to tease greater reliability out of the marque as well as to get the most out of the overland experience in such vehicles (the solid axle versions, as my experience doesn’t extend to the newest independent suspension models).
It’s been a full year since the first installment of my Range Rover Classic build-up, and a lot of changes have been made. Unlike other builds where the project is completed before any trips are undertaken— revisions being made later—I decided to take a different tack. Get the obvious and inevitable modifications out of the way and immediately take the vehicle on a long trip. This, I decided, would allow verification that the modifications should have been made, were done properly, and reveal areas where further changes should be concentrated. If there is one thing I have learned, it is that an expedition vehicle should be as simple as possible, while still getting the needed job done. Obviously, the needed job aspect will be different for everyone, and my wife Connie and I have been slowly finding that the equipment required for us to enjoy a trip is diminishing.
Overland Vanity Mods
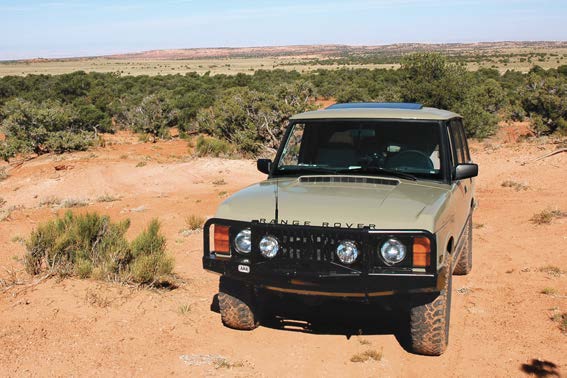
To completely derail myself, I’ll take all that talk of reliability and doing the needed job, and throw it out the window for a minute. An overland vehicle needs to look good. As mentioned in the first article, the Range Rover came into my possession with its paint and clear coat badly damaged from years in the Nevada sun. My options were to leave it, get it repainted the same color (cheaper) or change the color completely (more expensive). I decided early on to change the color—Epsom Green is fine, but not my favorite. Initially I looked at colors that adorned the first Range Rovers in the 1970s. As a subtext, this build pays homage to my family’s overland Range Rover from when I was a child (see Heart of a Range Rover, Overland Journal, Gear 2011). That truck was Massai Red, and though my father loved the color, I was never as much a fan. I considered Bahama Gold or Sahara Dust, but finally settled on a completely non-Rover shade that I was introduced to by Mario at Adventure Trailers. The color…olive grey.
Getting the paint job proved harder than choosing the color. Having never painted a car, I had no idea that the cost was so high; the first estimate was close to $10,000. In order to keep in the spirit of a budget build, I found a low-priced option: a friend of a friend with access to a paint booth. It didn’t lead to the best paint job in the world (call me cheap), but option II, at $700, suited my wallet and overland needs just fine. She looks great from 10 feet away or more, and that’s perfect for this vehicle.
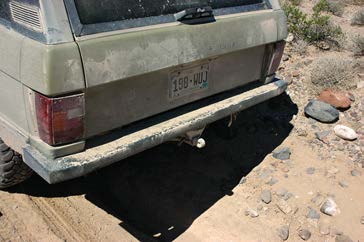
I’ve never been a fan of chrome on vehicles, so an early decision was made to eliminate all the nasty silver stuff from the Range Rover. (I’ll never understand why Land Rover decided to add chrome to any of their models anyway.) This mainly involved removing and replacing the rear bumper, but I extended it to the door handles as well; Range Rovers came with silver handles. A call to John at RoverDude was in order to get a set of black Discovery I handles; bling removal, job done.
The last vanity modification is the true nod to the 1973 Range Rover of my childhood. I replaced the stock plastic horizontal-slat grille with the earlier, vertical-slat metal version. While I was at it, I also installed metal headlight surrounds I’d sourced several years ago; though they did show their age. After a quick trip to the powder coater, they added the perfect classic look to the Classic.
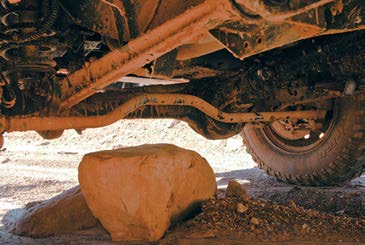
Undercarriage and Steering Protection
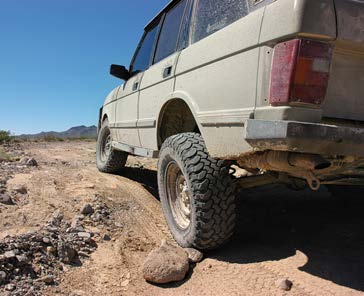
The most vulnerable section of any overland vehicle (apart from tires) is its underbelly. Different models have their own weaknesses in this department, and Land Rover is certainly no exception. The steering damper, which is behind the front axle and positioned lower than the axle tube, seemed to be inviting every rock on the planet up for a damper-crushing party. The tie rod suffers from the same issue, with significant forward-motion-halting consequences should it contact anything. Luckily, Keith of RovingTracks (formerly RoverTracks) has designed the perfect solution. A steering relocation kit that moves the damper to the front of the axle and elevated to the same position as a stock Defender. They also offer a high-clearance, high-strength tie rod. A new OME damper from ARB added that familiar yellow slash under the bumper.
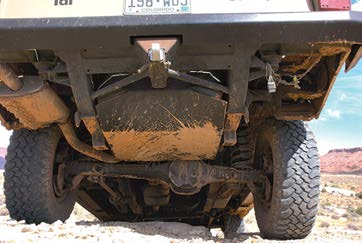
Continuing rearwards, I installed rock sliders from Rovers North and a rear crash plate from Columbia Overland. The crash plate replaces the stock fuel tank support while providing full-width protection for the tank. Both of these additions proved invaluable in Nevada when an old mining track paused in a wash at a base of a dry waterfall. Forward progress involved a few low speed crunches that may otherwise have proved damaging.
Protection, in my view, also includes bumpers. The chrome eyesore at the rear had already been discarded, and a heavy-duty metal version from Columbia Overland took its place. At the front, an ARB non-SRS Bull Bar bolted right in and provided the required platform for a 2m antenna and two Baja Designs SolTek Pre-Runner HIDs. I’ve always loved the look of the ARB bar on a classic, and it will be further enhanced with a winch later on.
Load Bay and Overlanding Gear
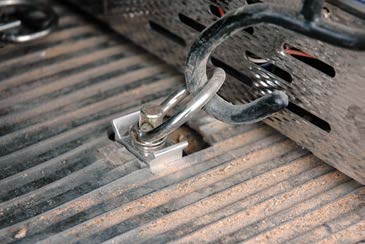
Those who have listened to my lectures and classes will know that I consider a fridge to be the first and most important living space addition to any overland vehicle larger than a Smart Car (I’m still not convinced on the Smart Car). I decided to follow my own advice—a National Luna Weekender was soon sitting in the back of the Range Rover. This is the same fridge that won Editor’s Choice in our recent fridge review (Overland Journal, Summer 2010) and started its long-term testing life by being abused in a three-week, no re-supply, high-ambient-temperature experiment devised by Connie. No problems to report so far. Placement of the fridge required a few additions to the truck. Aviation track tie-down points, used in load bays of cargo planes, were fitted when the fuel tank was removed for the crash plate installation. The rear carpet was also removed and replaced with rubber mat; the tailgate received the same treatment.

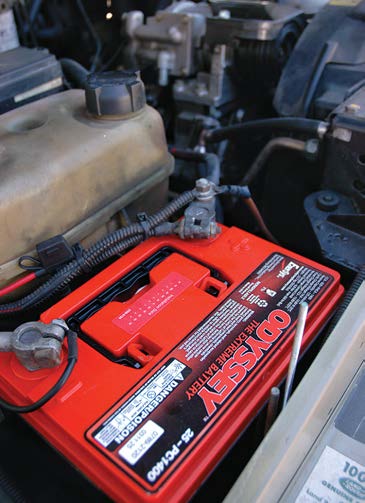
To power the fridge, an Odyssey PC1400 Group 25 AGM battery replaced the old and tired Red Top that came with the truck. I used the ARB 12v/24v wiring harness to run a line directly from the battery to the fridge, fuse included. No need for a dual battery system here as I set the National Luna to cut off at its highest voltage protection setting. We found that we could easily last for two days in Death Valley without running the truck, so long as the fridge was full. At this pace, the Odyssey had plenty of juice left for starting the Rover’s small diesel.
Storage was handled with a couple of Wolffpacks, South African ammo crates. For accommodation on the trail, we used an Enclosed Double Swag from Southern Cross Canvas Products, Australia, kindly given to me by Lisa at ARB USA.
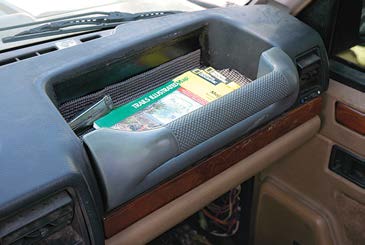
My final load bay modification was actually in the dashboard. Since I had already disabled the SRS system there was no point in keeping the airbag assembly on the passenger side. I sourced a grab handle from a British Discovery I, and installed it. The fit isn’t perfect, but it does allow a deep cubby for loose gear stowage as well as a modicum of support for the passenger when high-speed desert shenanigans ensue.
Creature Comforts
“Death Valley? We have no AC; forget it!” Not a direct quote from Connie, but close enough. So began my quest to get the air conditioning restored. It actually turned out to be very simple since I had already installed the compressor. A few custom hoses and a recharge resulted in exceedingly cold air—matched only by the huge loss in engine power. I didn’t have time to wire up the AC switch before we left, so the solution was an alligator clip on the ground line from the relay; which the passenger could attach to metal under the dash when needed. This, along with the power loss, resulted in some comical times preparing to pull away from stop signs or going up hills. It went something like this.
“Kill the AC; we need power!”
Muffled from under the dash, “I’m trying, I’m trying…stupid wire.”
Needless to say, restoring the AC switch function remains the highest priority for moving forward.]
When I installed the 300Tdi for Part I of the build, I decided that renewing the timing belt only made sense. I made the mistake of not replacing the front main crank seal when I did the job; resulting, a few weeks later, in a massive oil leak. Neighbors began to give me foul looks when I parked, so I had to take a day to pull the timing cover and belt to replace the oil seal.
The final modification for this stage of the build was a new set of shoes. I’d been running 265/75R16 BFGoodrich Mud Terrains since the start, as I had a set on hand at build time. But this was not the ideal size; I wanted something skinnier. BFGoodrich came to the rescue with a full set of five 235/85R16 All-Terrains. This truck will see a lot of highway and a lot of variable conditions, so I consider the All-Terrain the perfect tread choice. Going slightly narrower than the 265/75 eliminates some of the fender contact issues, as I have no desire to modify the bodywork on the Range Rover.
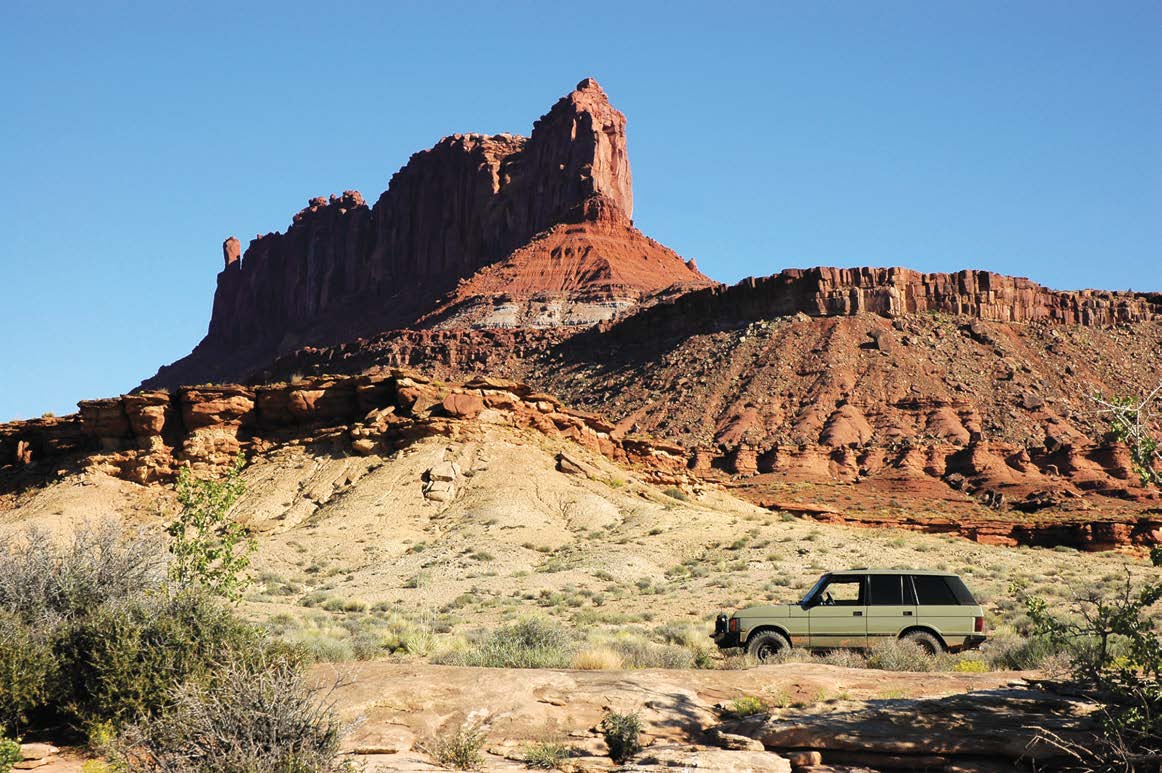
Three Weeks on Trail
We got off Interstate 70 in Green River, Utah, and would remain on dirt and secondary routes until we reached Barstow, California. We spent four days in Glen Canyon National Recreation Area (as well as the Maze section of Canyonlands National Park) and another four days crossing Utah and Nevada before dropping into Death Valley via Titus Canyon on the track from Tonopah to Rhyolite. After our final five days trekking through Death Valley and over the Mojave Road, the trip meter read 3,200 miles. The 300Tdi averaged 21 mpg with roughly 45 percent on dirt.
I’m happy to report that all the modifications worked well, if not perfectly. The only issues we had were with the incomplete AC system and the doors. After an amazing dousing with bulldust south of Bonnie Claire, Nevada, the door latch mechanisms decided to rebel, making opening difficult, and locking impossible.
I was very happy with the choice of medium duty OME springs, and found the Nitrocharger Sport shocks provided perfect damping. The diesel was a joy, so long as the AC was off, and all the steel added for protection proved up to the task (though we certainly didn’t push it). In the load bay we had plenty of space for the three-week-no-resupply experiment; though one of the goals of the next stage will be moving the spare tire out of the rear so we can put the seats back in. That will involve building a tire rack for the rear bumper. And the major failure…it didn’t arrive. I only opened the hood once on the trip for a fluid check. The Range Rover proved to be comfortable, capable, lots of fun, and quite reliable—door issues notwithstanding.