
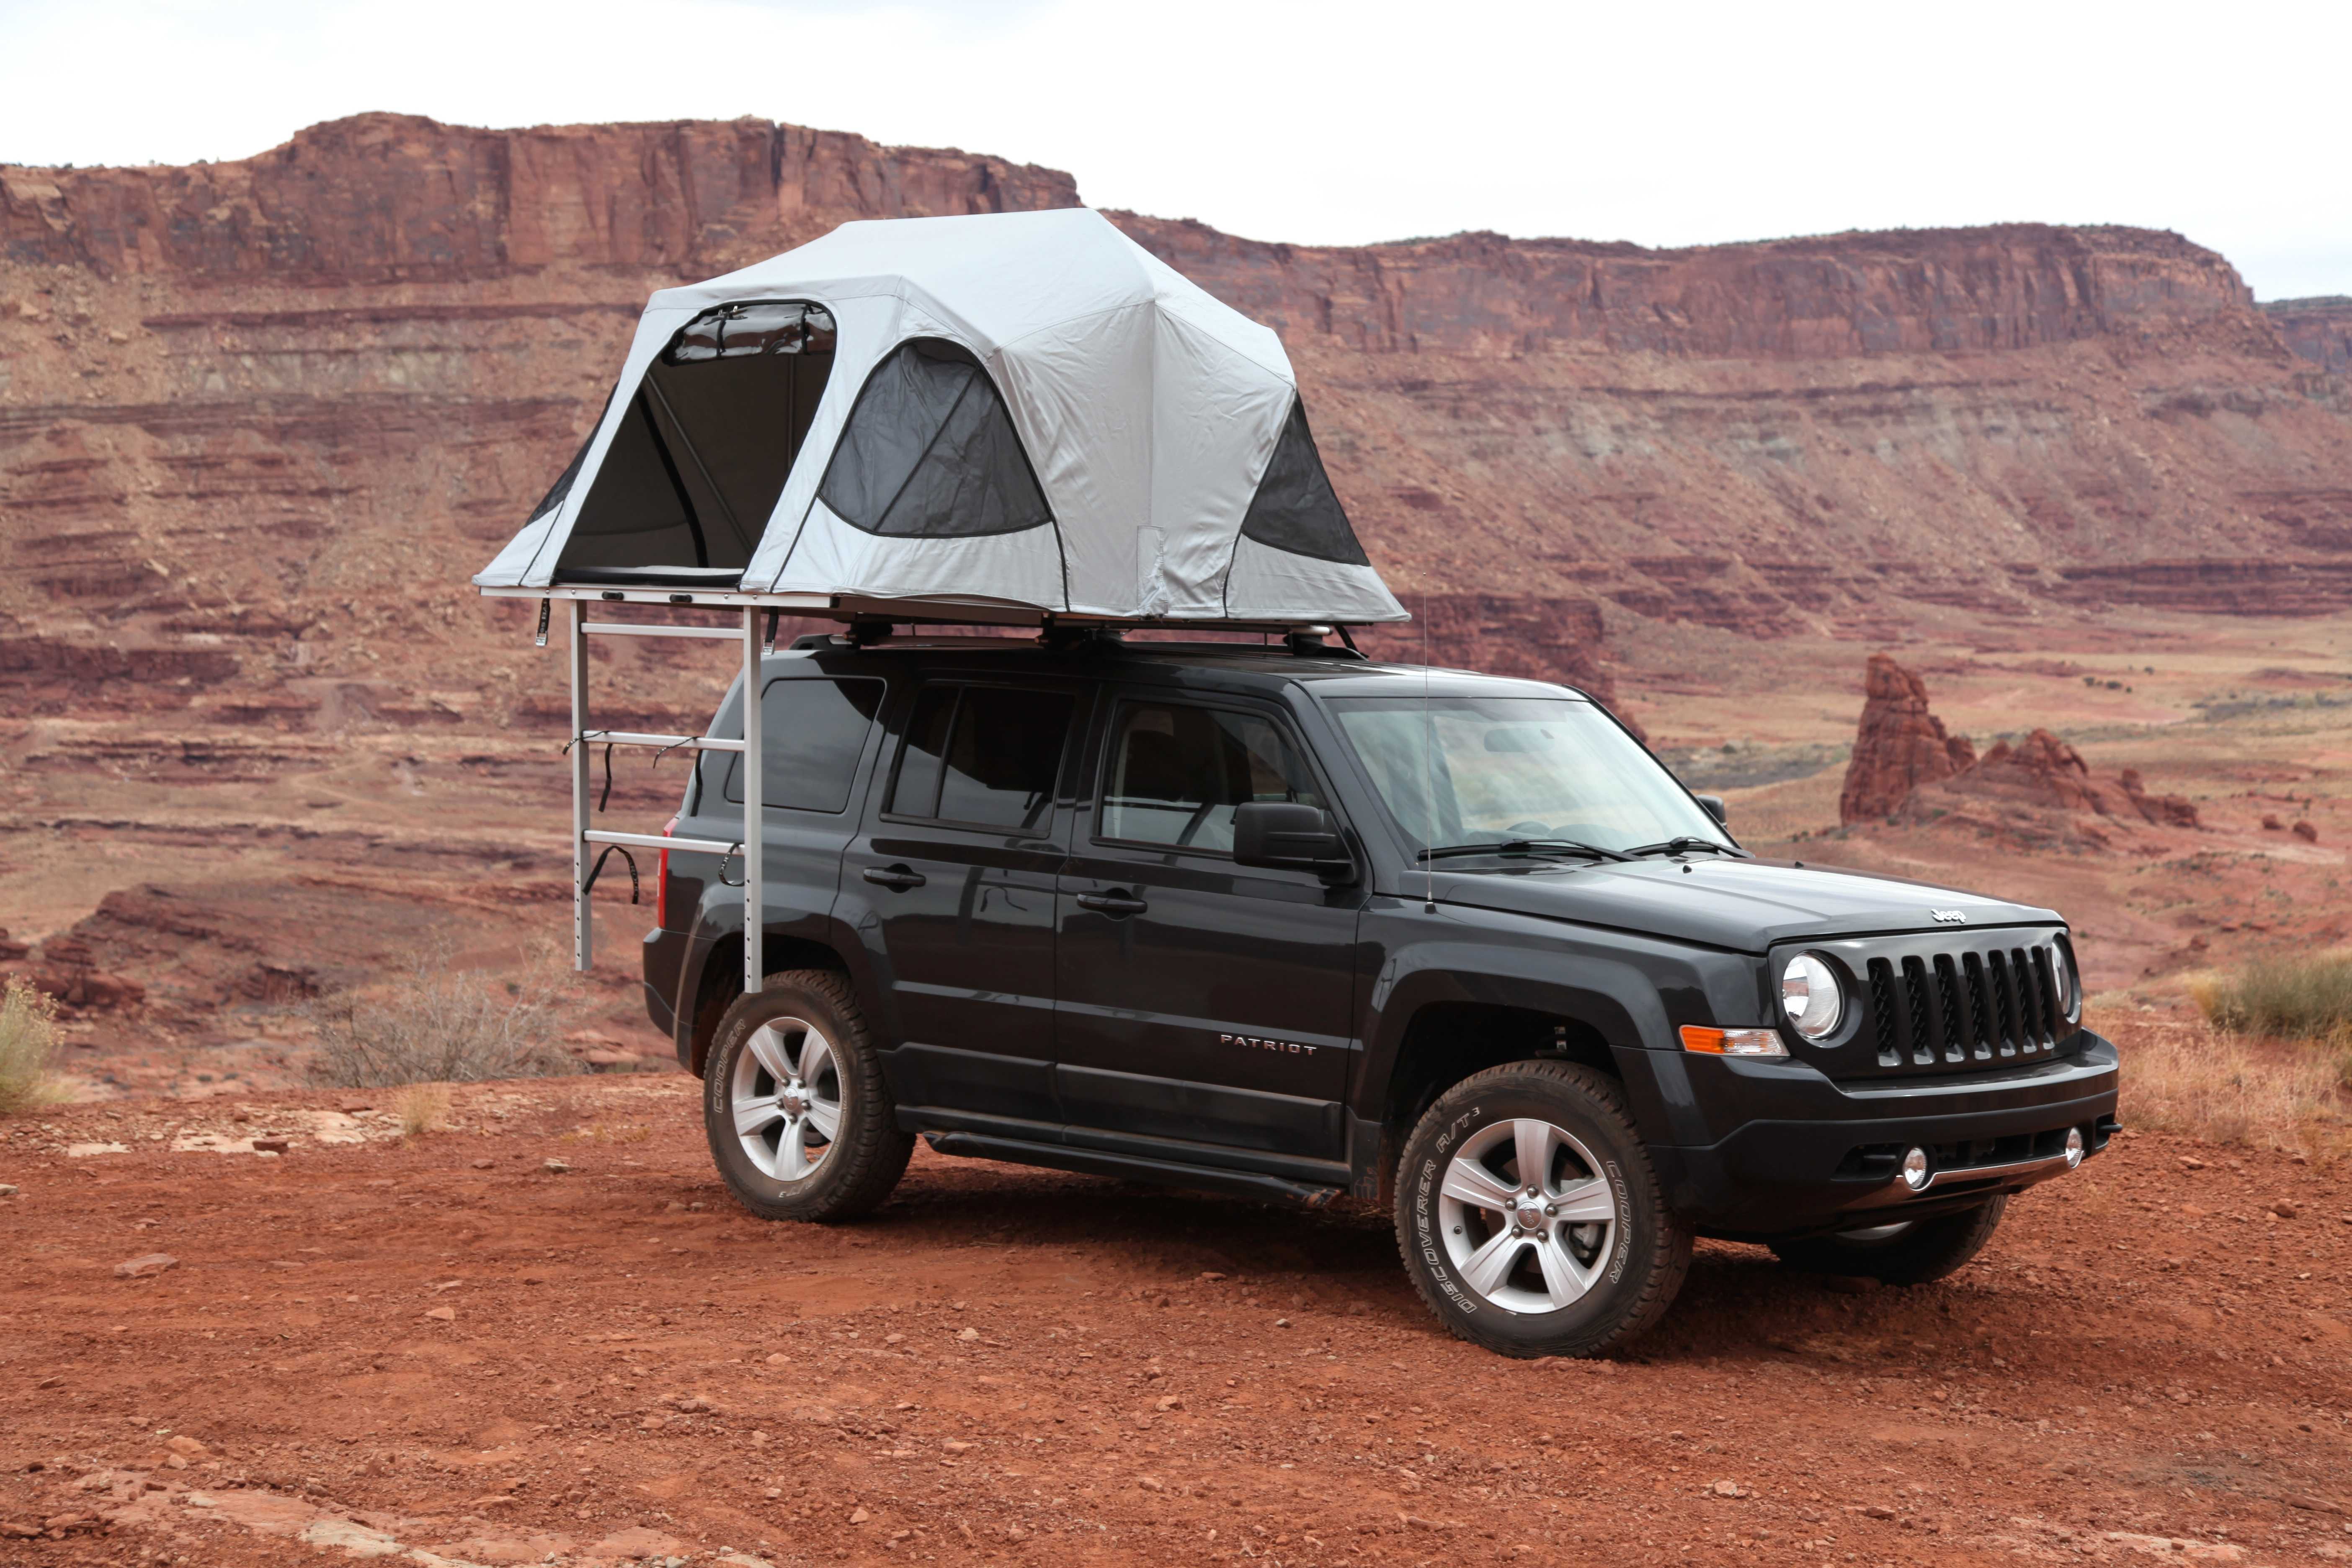
A couple of weeks ago I published our first impressions of the new James Baroud Horizon Vision roof top tent, a product I believe has the potential to bring new roof top tent users into the fold with its impressively low weight and compact size. In the months since first installing it on our Expedition Portal Jeep Patriot, I have had several opportunities to evaluate it in a variety of settings from warm nights in the desert to the cold of a Rocky Mountain winter. Given my previous evaluations of James Baroud tents, I had high expectations of the Horizon Vision and I was not disappointed.
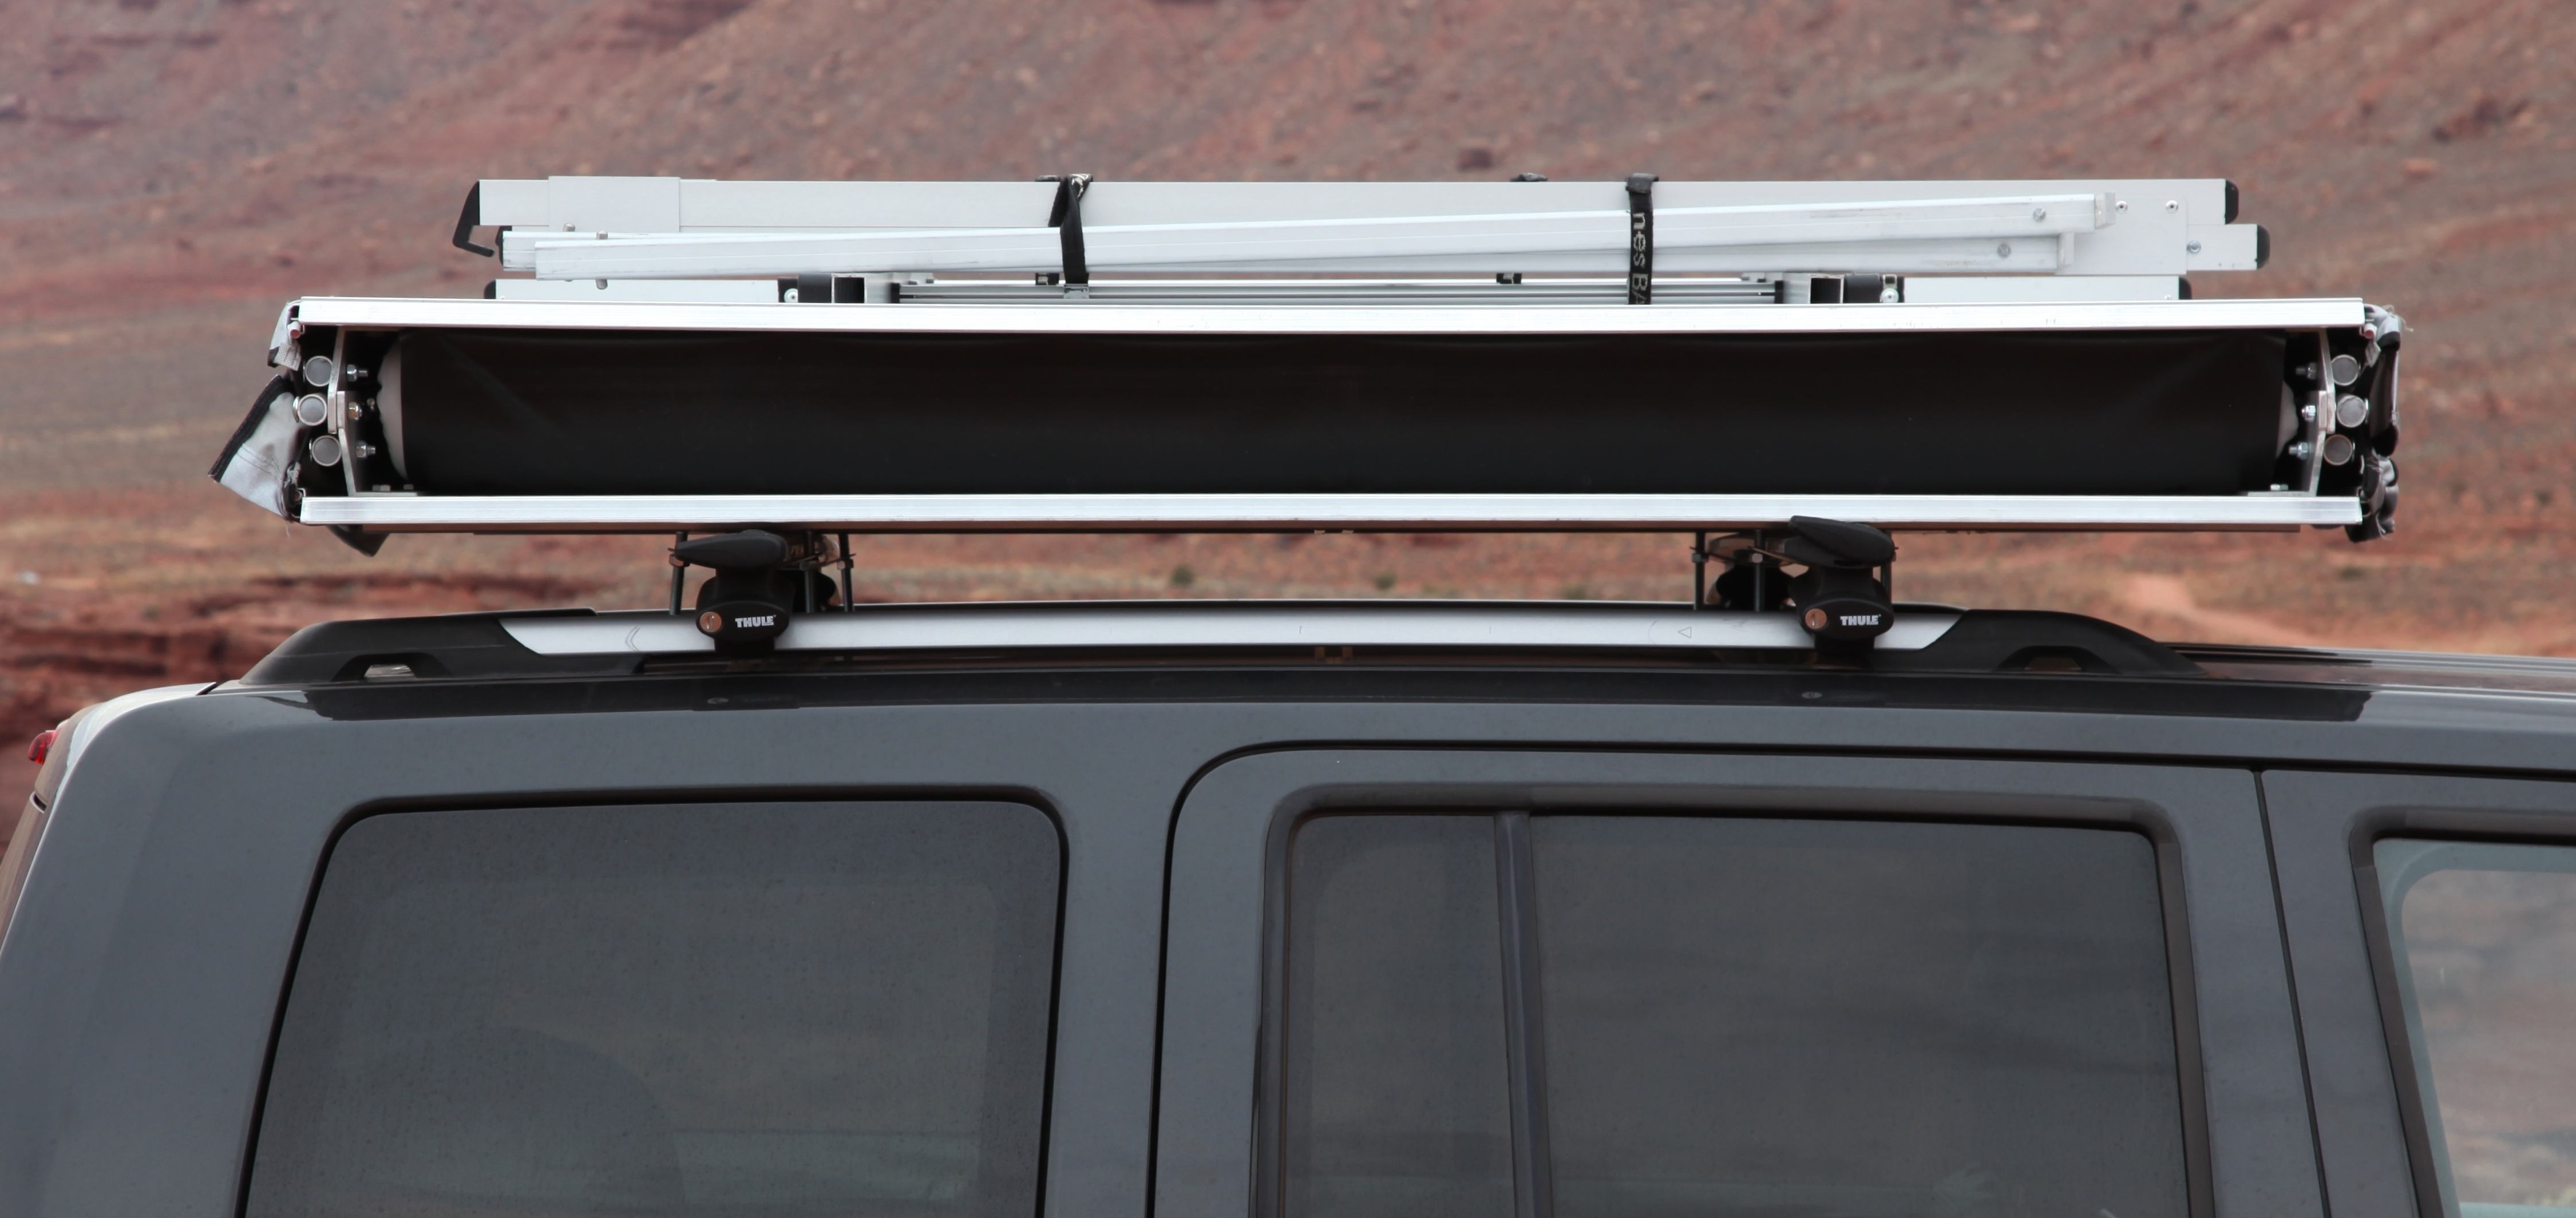
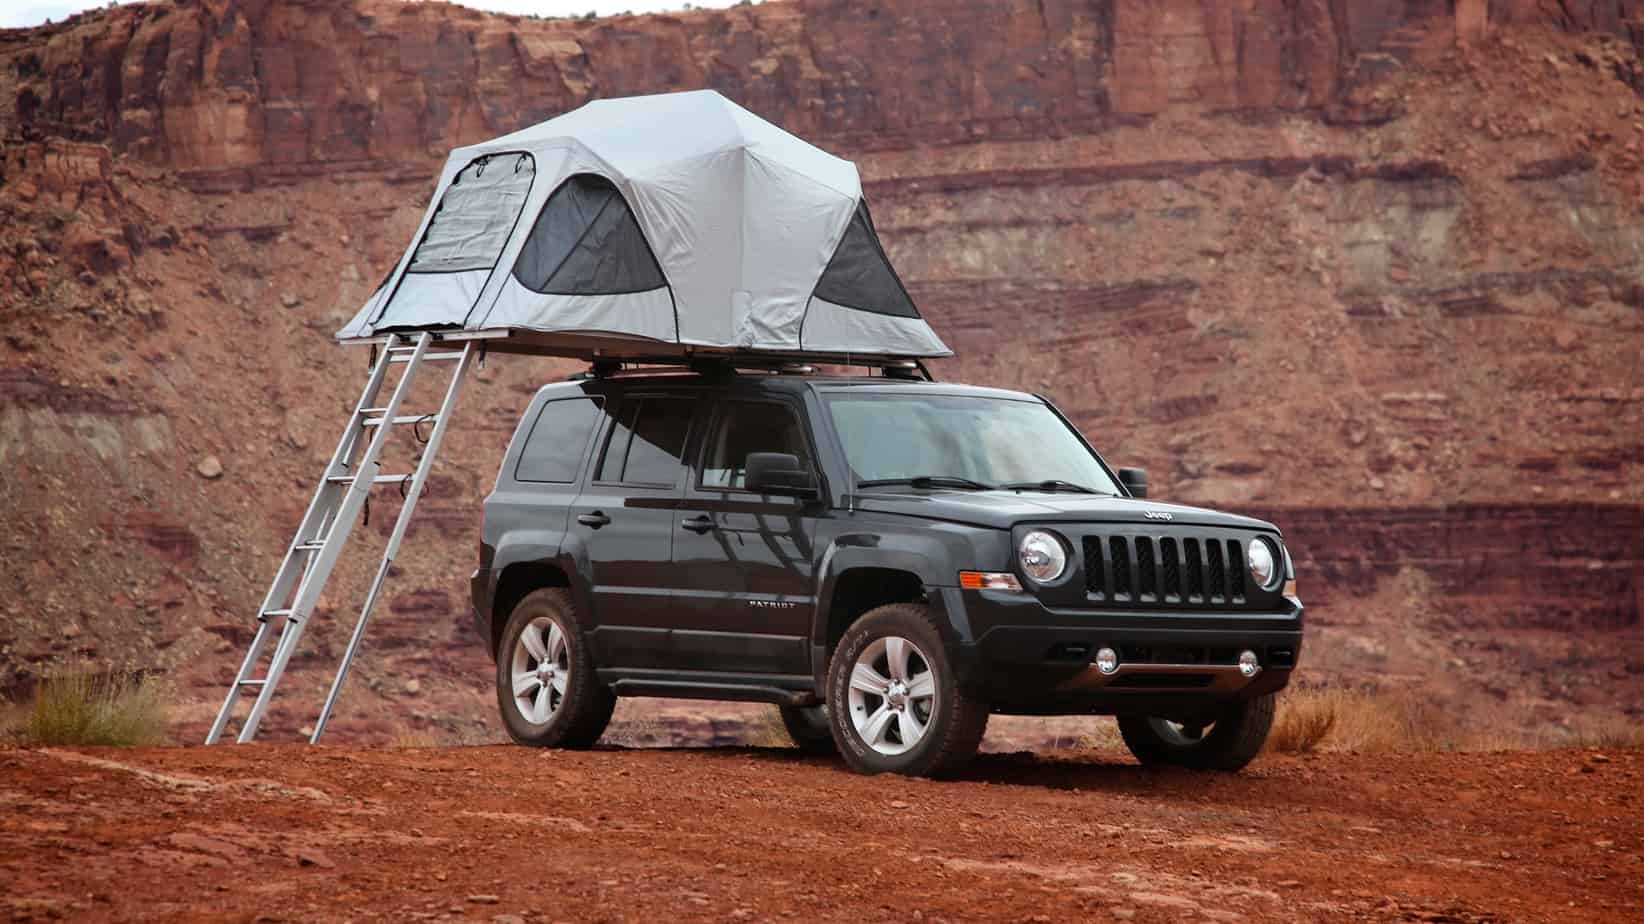
What sets the Horizon Vision apart from its contemporaries is its small collapsed size and low weight. At 88 pounds and just 59x43x9-inches when collapsed, it is ideal for most small SUVs and wagons, something not easily attainable with most of the current offerings, some of which clock in at a whopping 165 pounds. This is however not just a story of size and weight. James Baroud tents are smartly designed with a host of features and conveniences unique to the brand.
Installation
One of the benefits of a lighter weight tent is obviously the ease of installation. Lifting the tent onto our Thule Aeroblade base rack was a piece of cake for two people. With the tent in place, the four mounting brackets were inserted into the two full-length aluminum mounting channels at the base of the tent. Once the eight nuts were secured, the tent was ready for the road. The total time to install took less than 17 minutes with one wrench.
It is worth pointing out that the two parallel mounting channels are 31-inches apart and run the length of the tent base. If your vehicle has rack towers that fall directly below the mounting channels, your fitment options could be limited or at the least, slightly complicated.
Setup
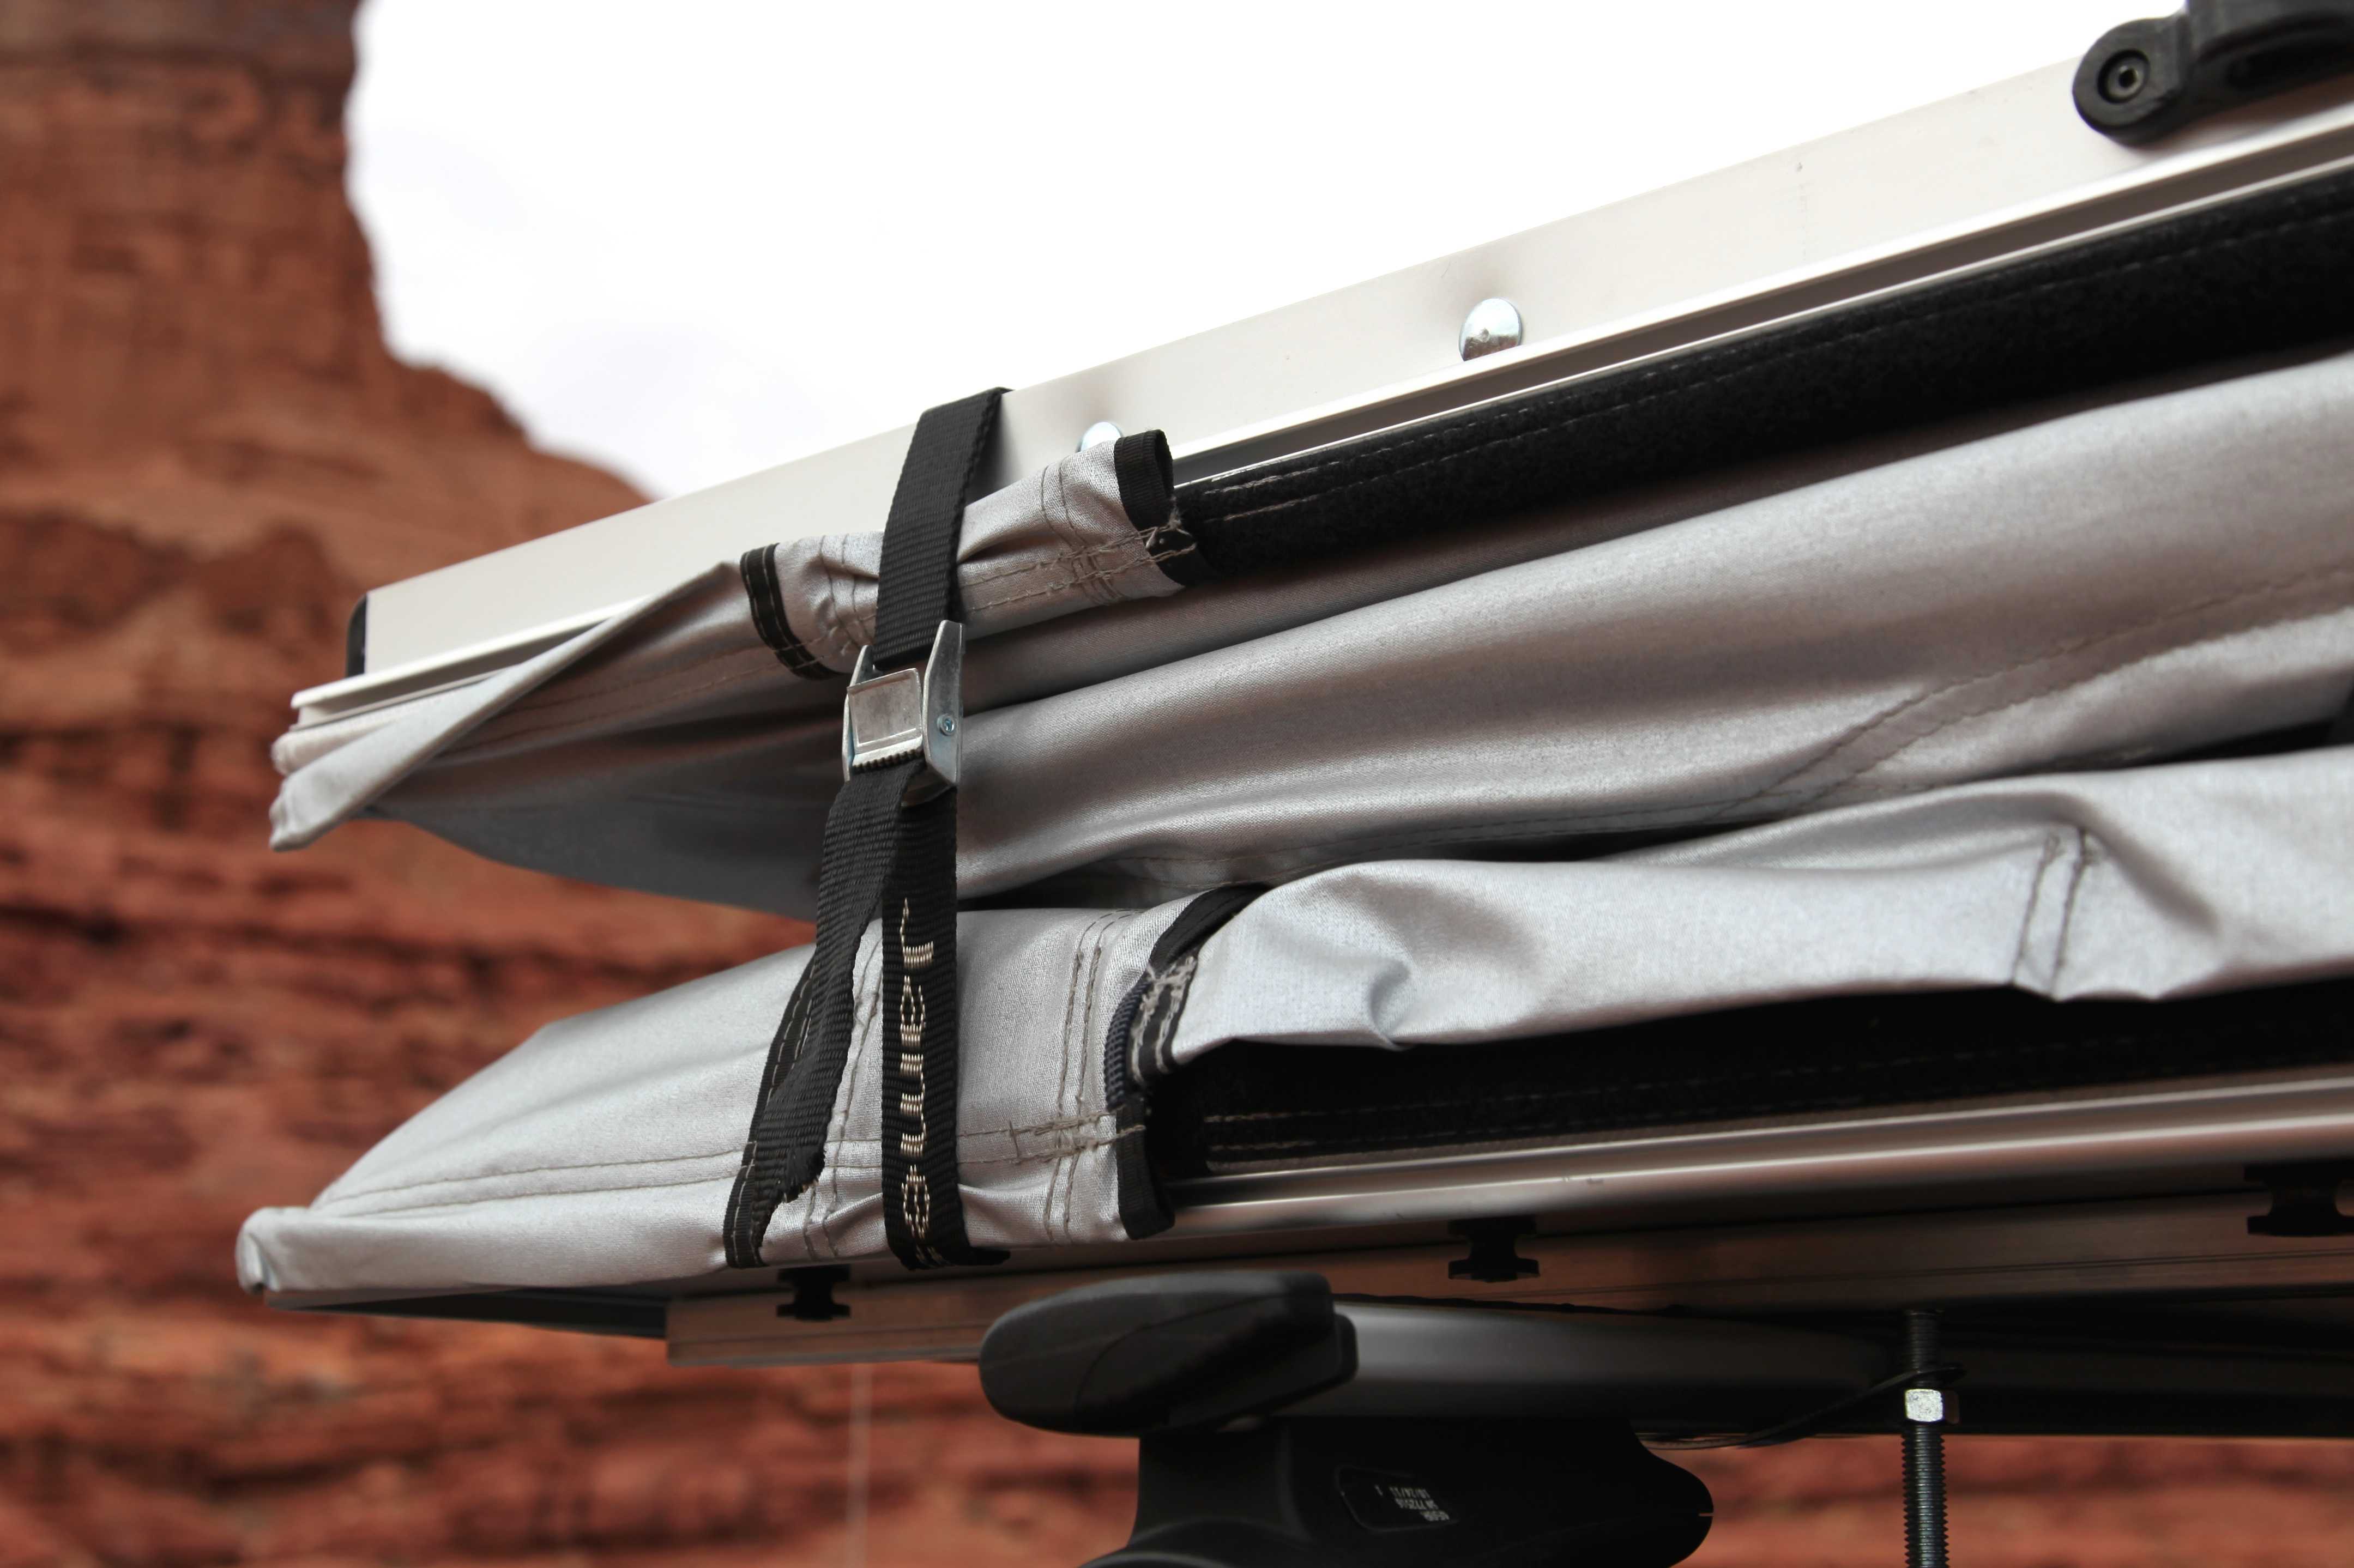
The setup procedure for the Horizon Vision begins with the removal of the cover. This is the most time consuming aspect of setup and takedown as the cover is attached at several points via an elasticized cord running around the perimeter of the cover. Don’t read that as difficult. I can have the cover removed in as little as 60-90 seconds.
Once the cover is removed, the next step is to retrieve the ladder and two support legs from the top of the folded tent. After releasing two cam-buckle straps on the far side of the tent, all that is needed is a slight amount of encouragement, and the hydraulic struts inside the tent do the rest. With one fluid motion, the tent unfolds with the support leg assembly hanging downward. The final two steps include attaching the support legs and the ladder. In all, the process takes less than four to five minutes––with very little effort.
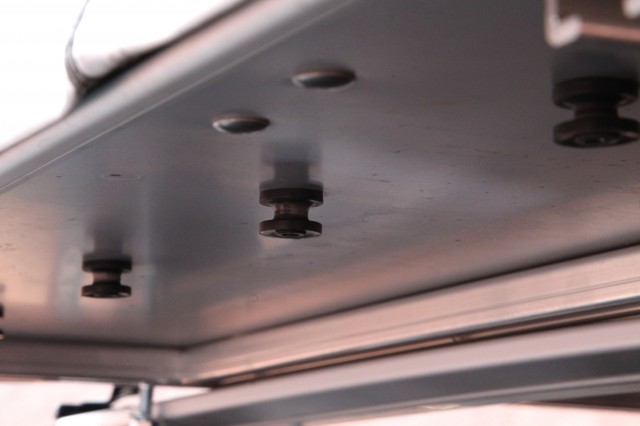
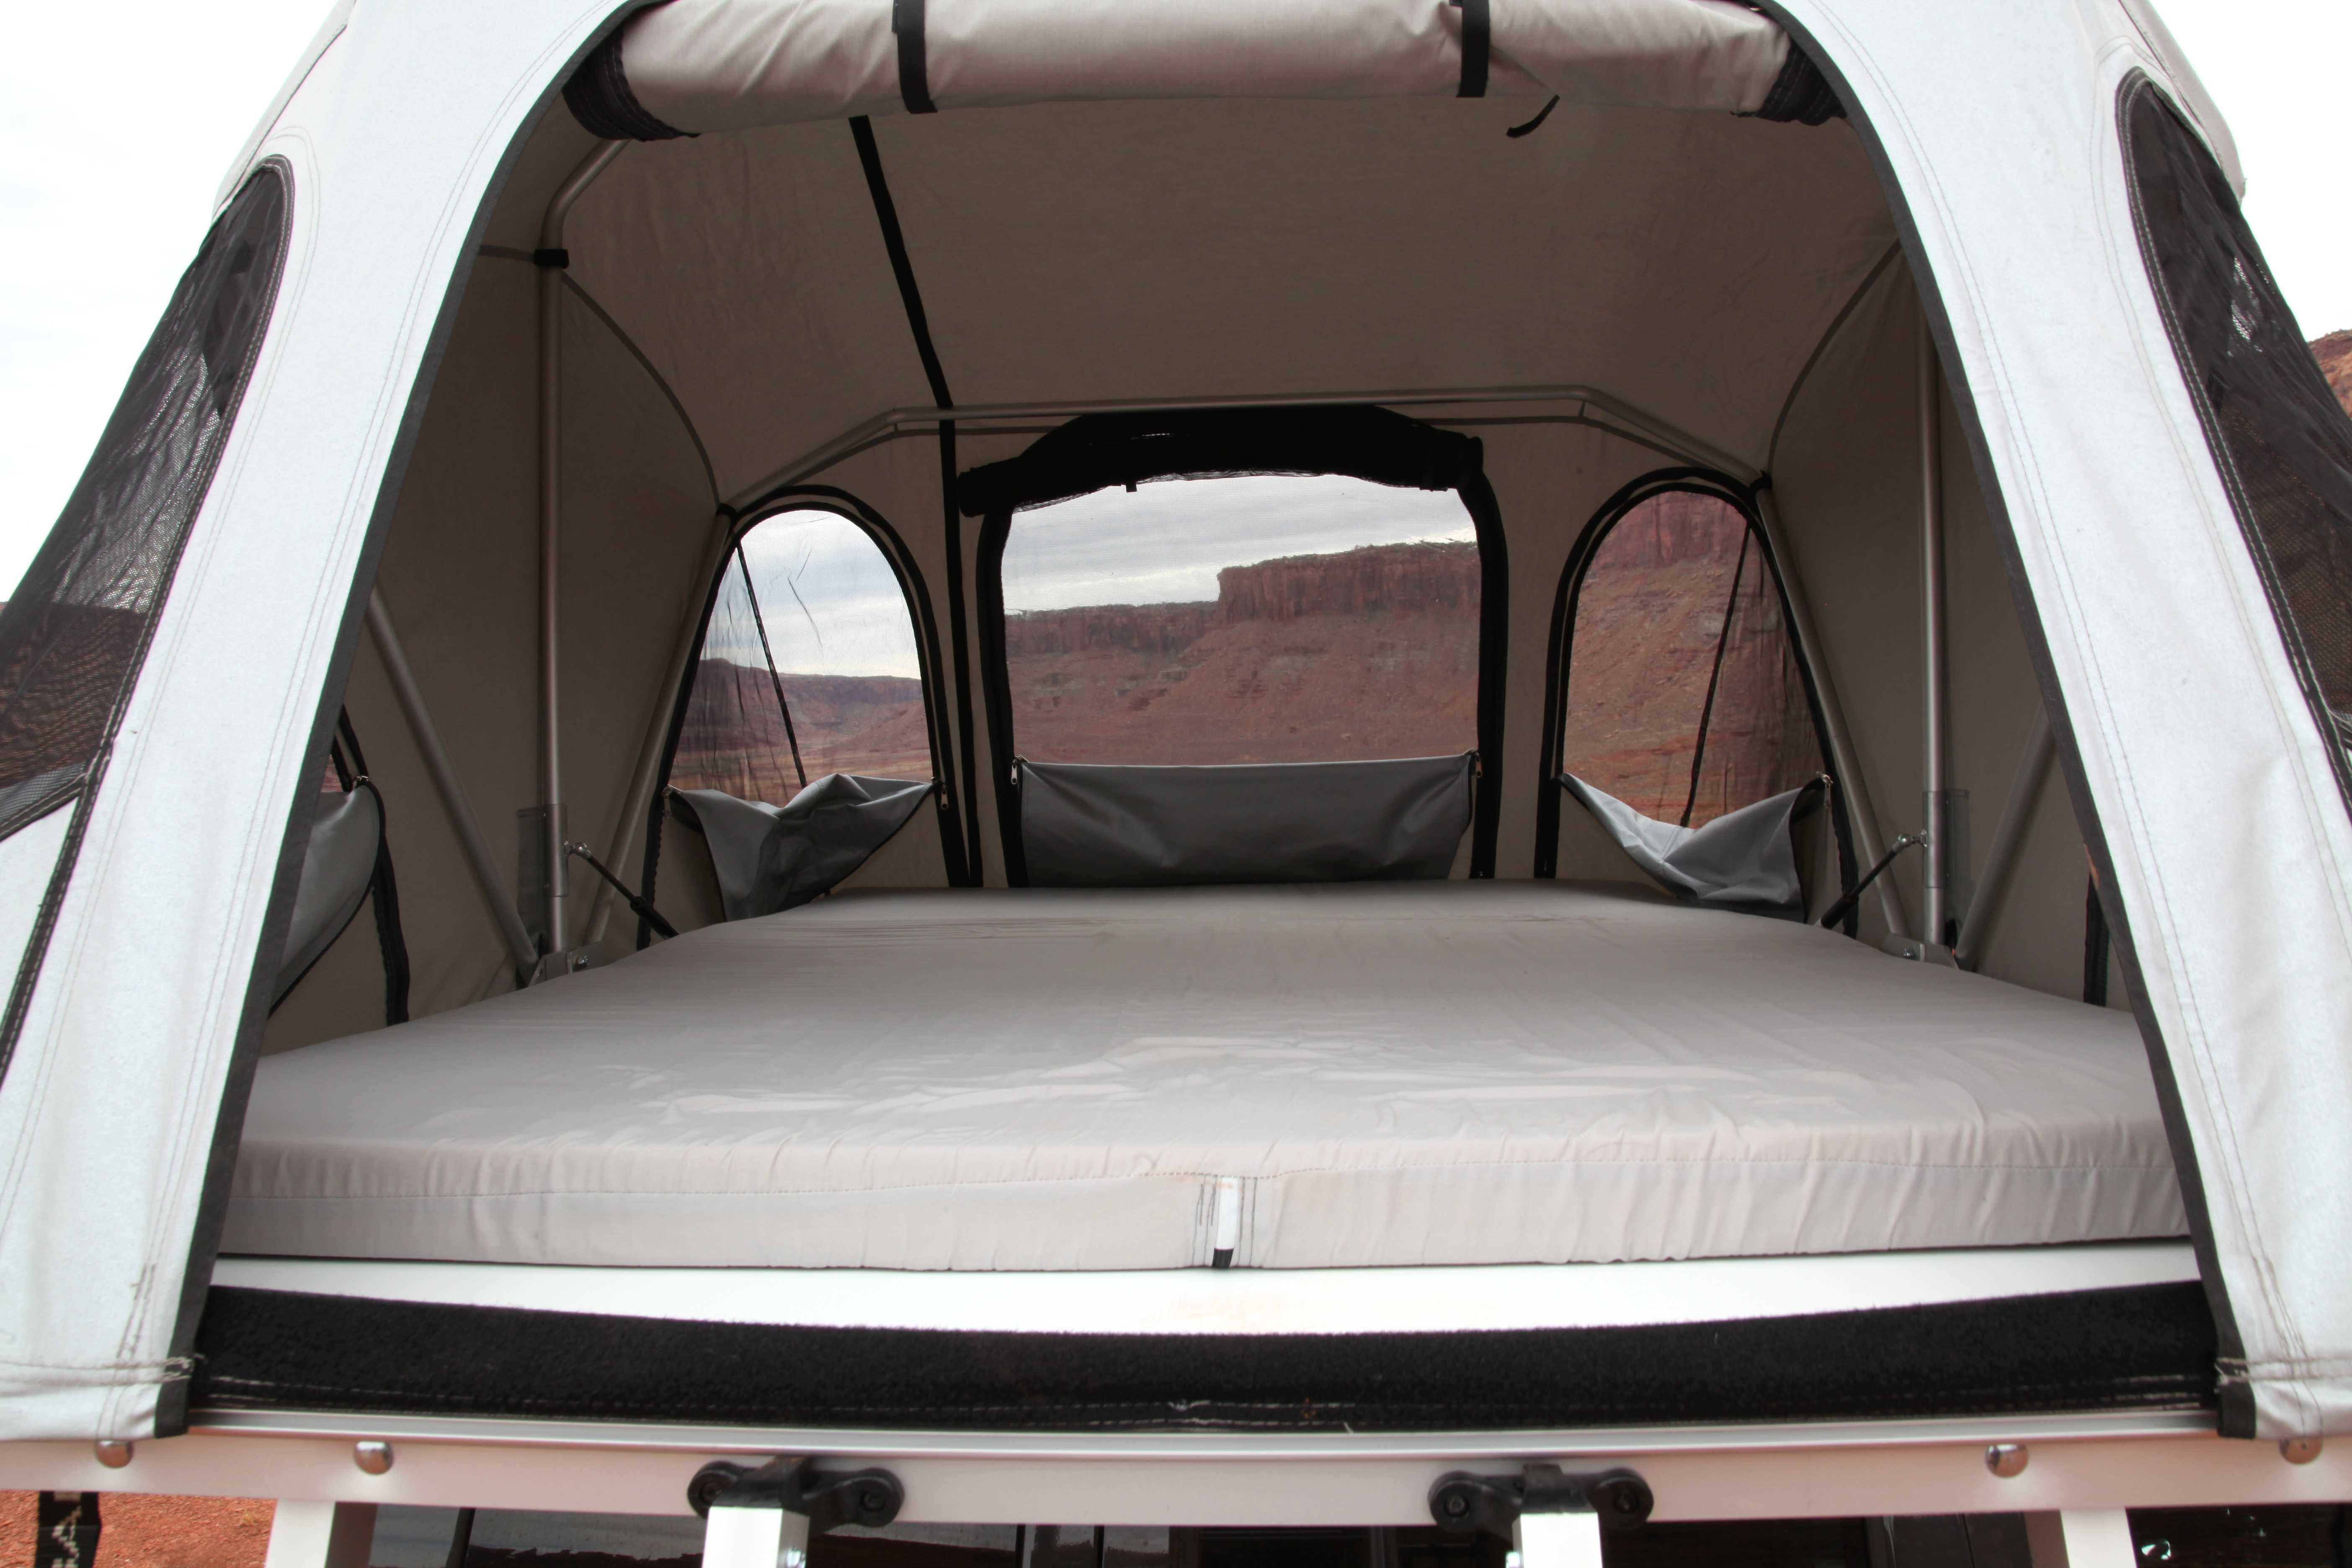
(above) The cover attaches to the tent via elastic cord fixed to small black knobs at the base of the tent. An elegantly simple design. The tent platform has channels to accept the optional room enclosure.
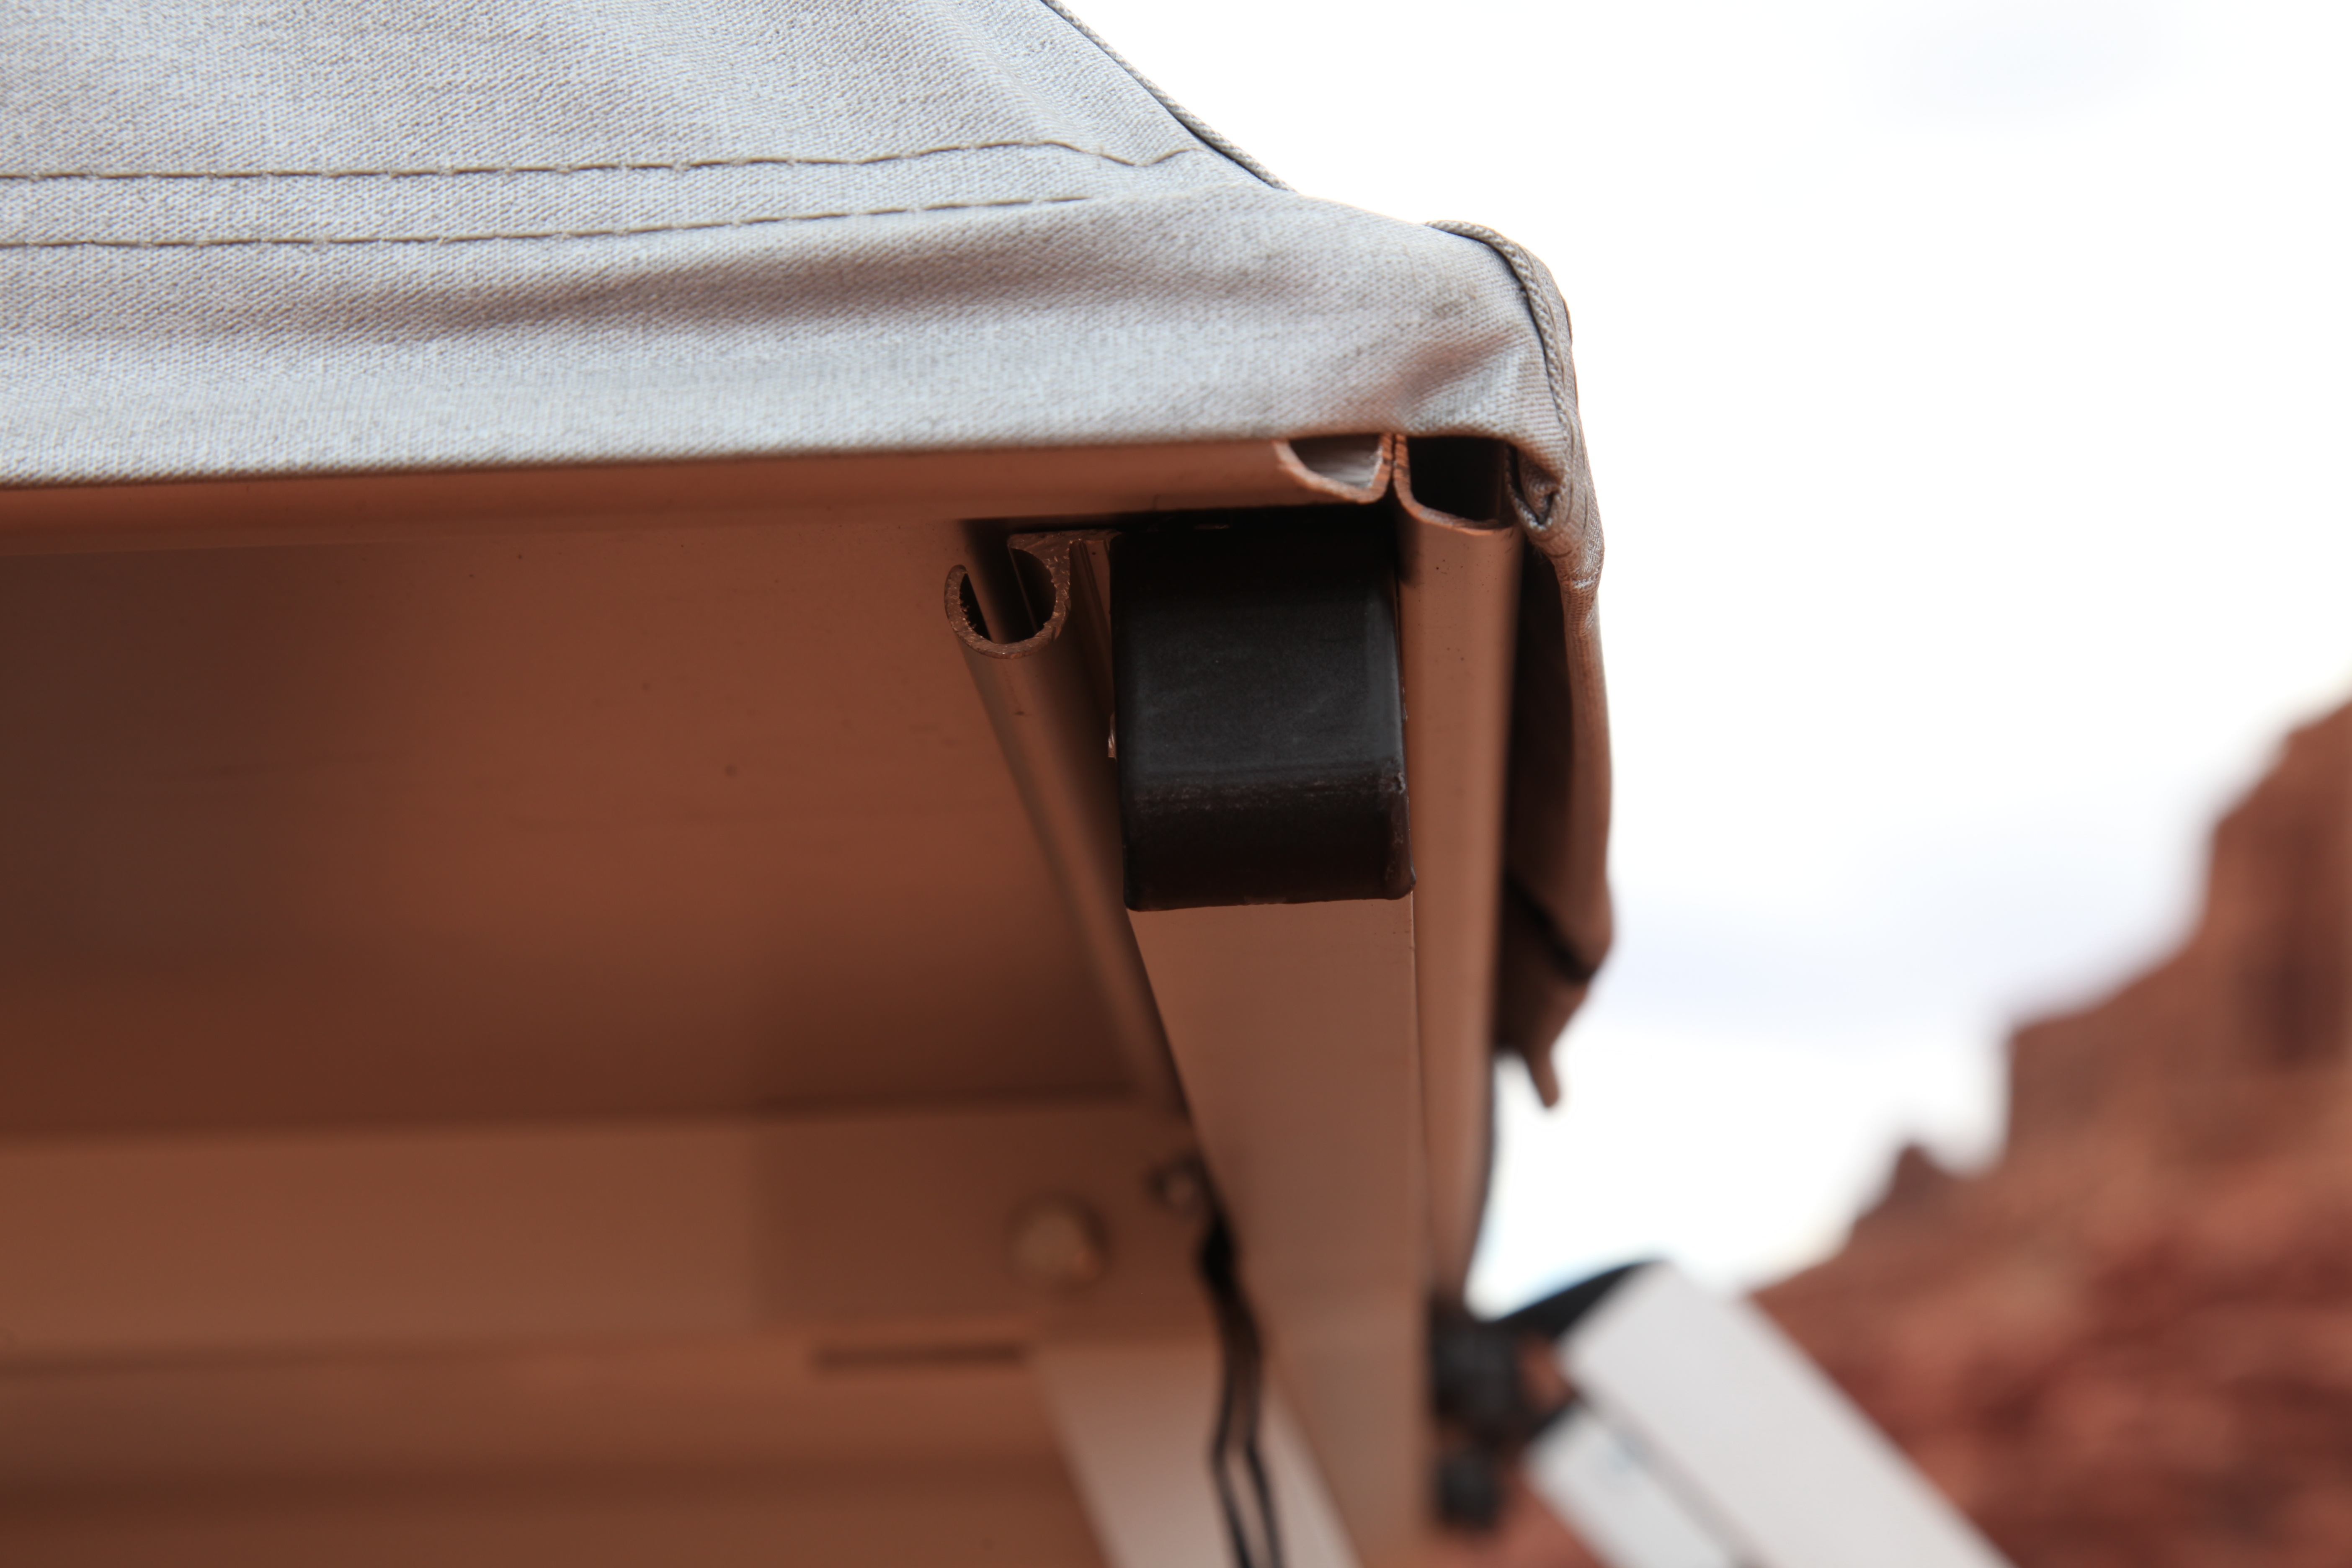
(below) The ladder and lower support legs affix to the folded tent via four velcro loops which are held captive to the tent and as such will not get misplaced or lost.

Once the tent is unfolded, the upper portion of the support legs hang, ready to receive the lower sections. Installing the lower sections takes but a minute or two with little fussing or effort.

The support legs permit the ladder to be positioned at a desired angle. It’s important to note, the support legs facilitate the support of the tent on a wide range of vehicle heights. Whether mounted to a tall SUV, or on a low wagon or crossover, the support legs offer excellent stability. The ladder has ample range to accommodate tall or low rooflines as well.
Takedown
As you would assume, stowing the tent is simply a reversal of setup. With the ladder and support legs detached, the user pulls on the internal webbing strap attached to the far side of the tent platform and the tent returns to its collapsed position. I do find it necessary to grab the frame members while I tuck the tent material into the frame so it doesn’t stick out of the side of the platform, but it’s a quick process. Once the tent is folded and the two cam-buckle straps secured, the ladder, support legs, and cover can be reattached. The total time to stow the tent averages around seven minutes for a solo user. Two people can have the tent road-ready in as little as four to five minutes.
I think it’s important to not only give kudos for the brief time required to set up and stow the Horizon Vision, but also for the ease of operation. There is no awkward fiddling or strenuous efforts required. Inserting the lower support legs is just about the only real effort required and takes all of 60 seconds to complete.
*I would like to thank Gary E who commented on my previous article about this tent, which can be read [HERE]. Gary asked if bedding and pillows can be left within the confines of the tent when collapsed. I think this has much to do with the bedding and pillows used. I am an ardent fan of two sleeping solutions, one being the Thermarest Vela Down Double comforter, and the other the Big Agnes Down Comforter. Both are so light and compact, they fit in the collapsed Horizon Vision perfectly. For pillows, I tend to favor Nemo Equipment’s Luxury Fillow pillows which also fit in the tent just fine when collapsed. Bulky comforters and pillows are effectively incongruent with the compact mission of the Horizon Vision, and as such––just won’t fit. Chose your bedding properly and this is a non-issue.

Features
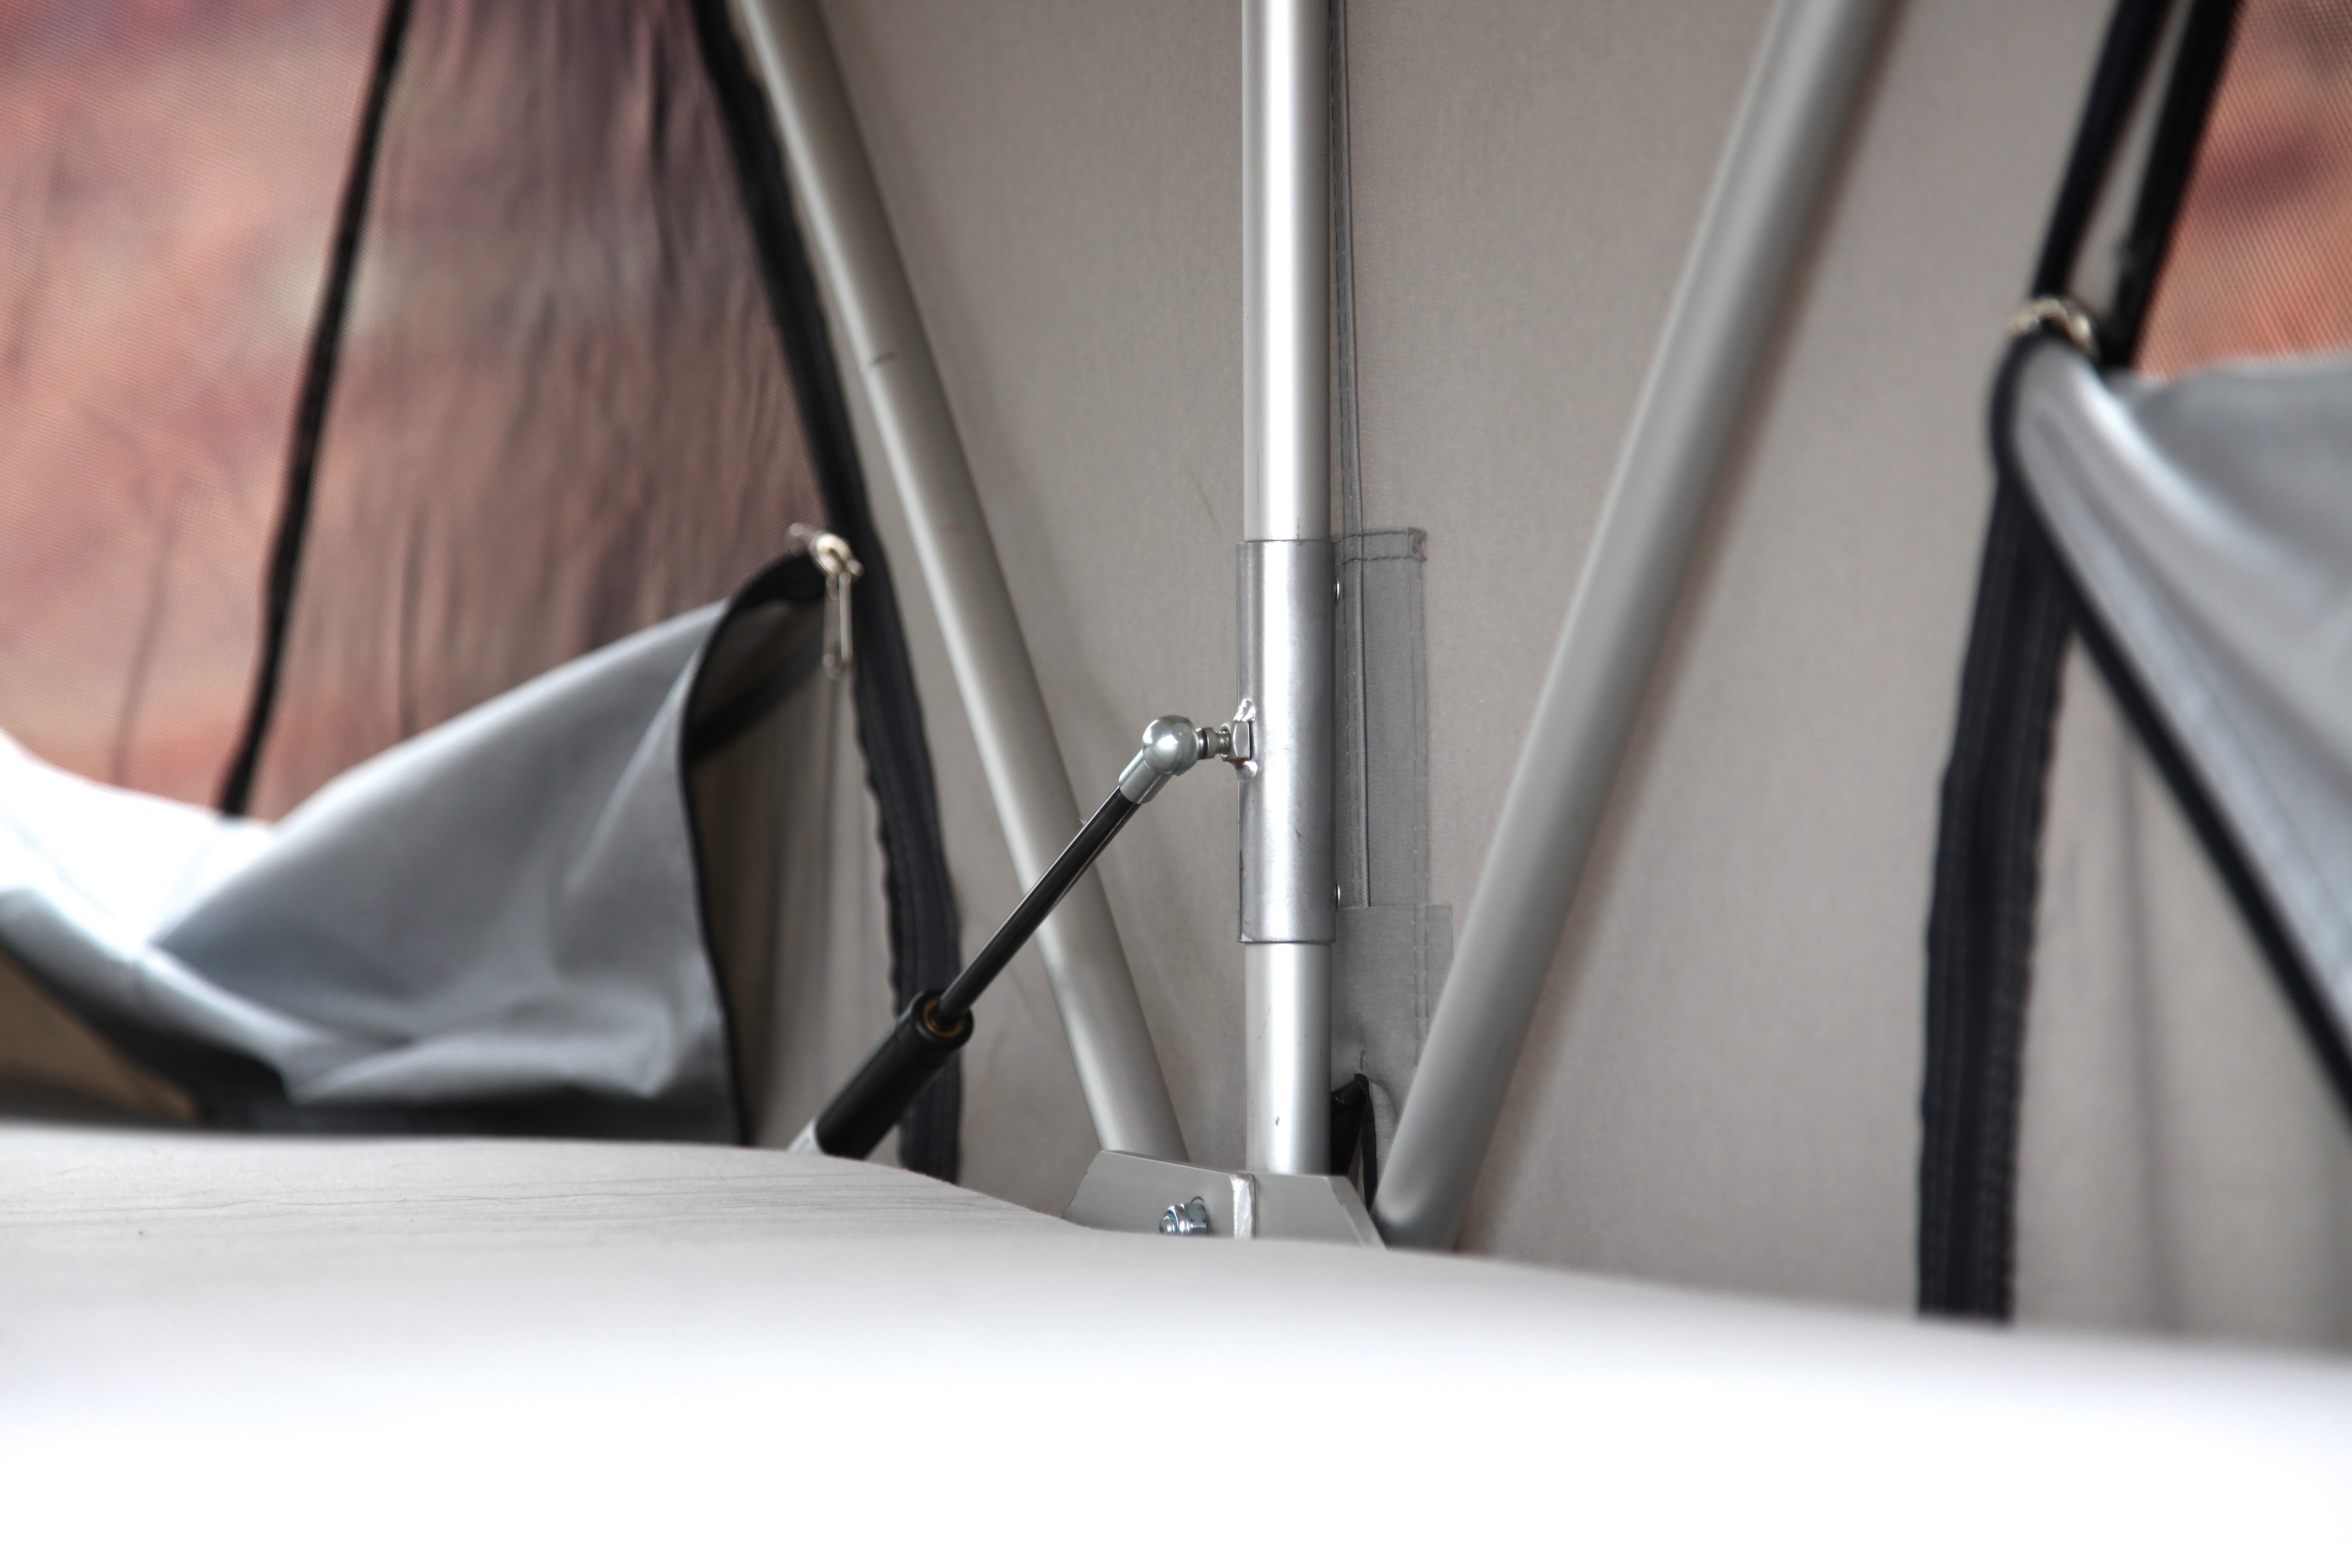
There are a couple of features worth discussing, namely the use of the support legs. This initially seemed like a design afterthought, but in use I can see the logic behind them. Because of the lightweight aluminum construction, the outer aspect of the sleeping platform does require additional support. Also, by employing the two support legs, it permits the user to position the access ladder at a preferred angle. It does add to the complexity of set up, but the benefits are just-worthy.
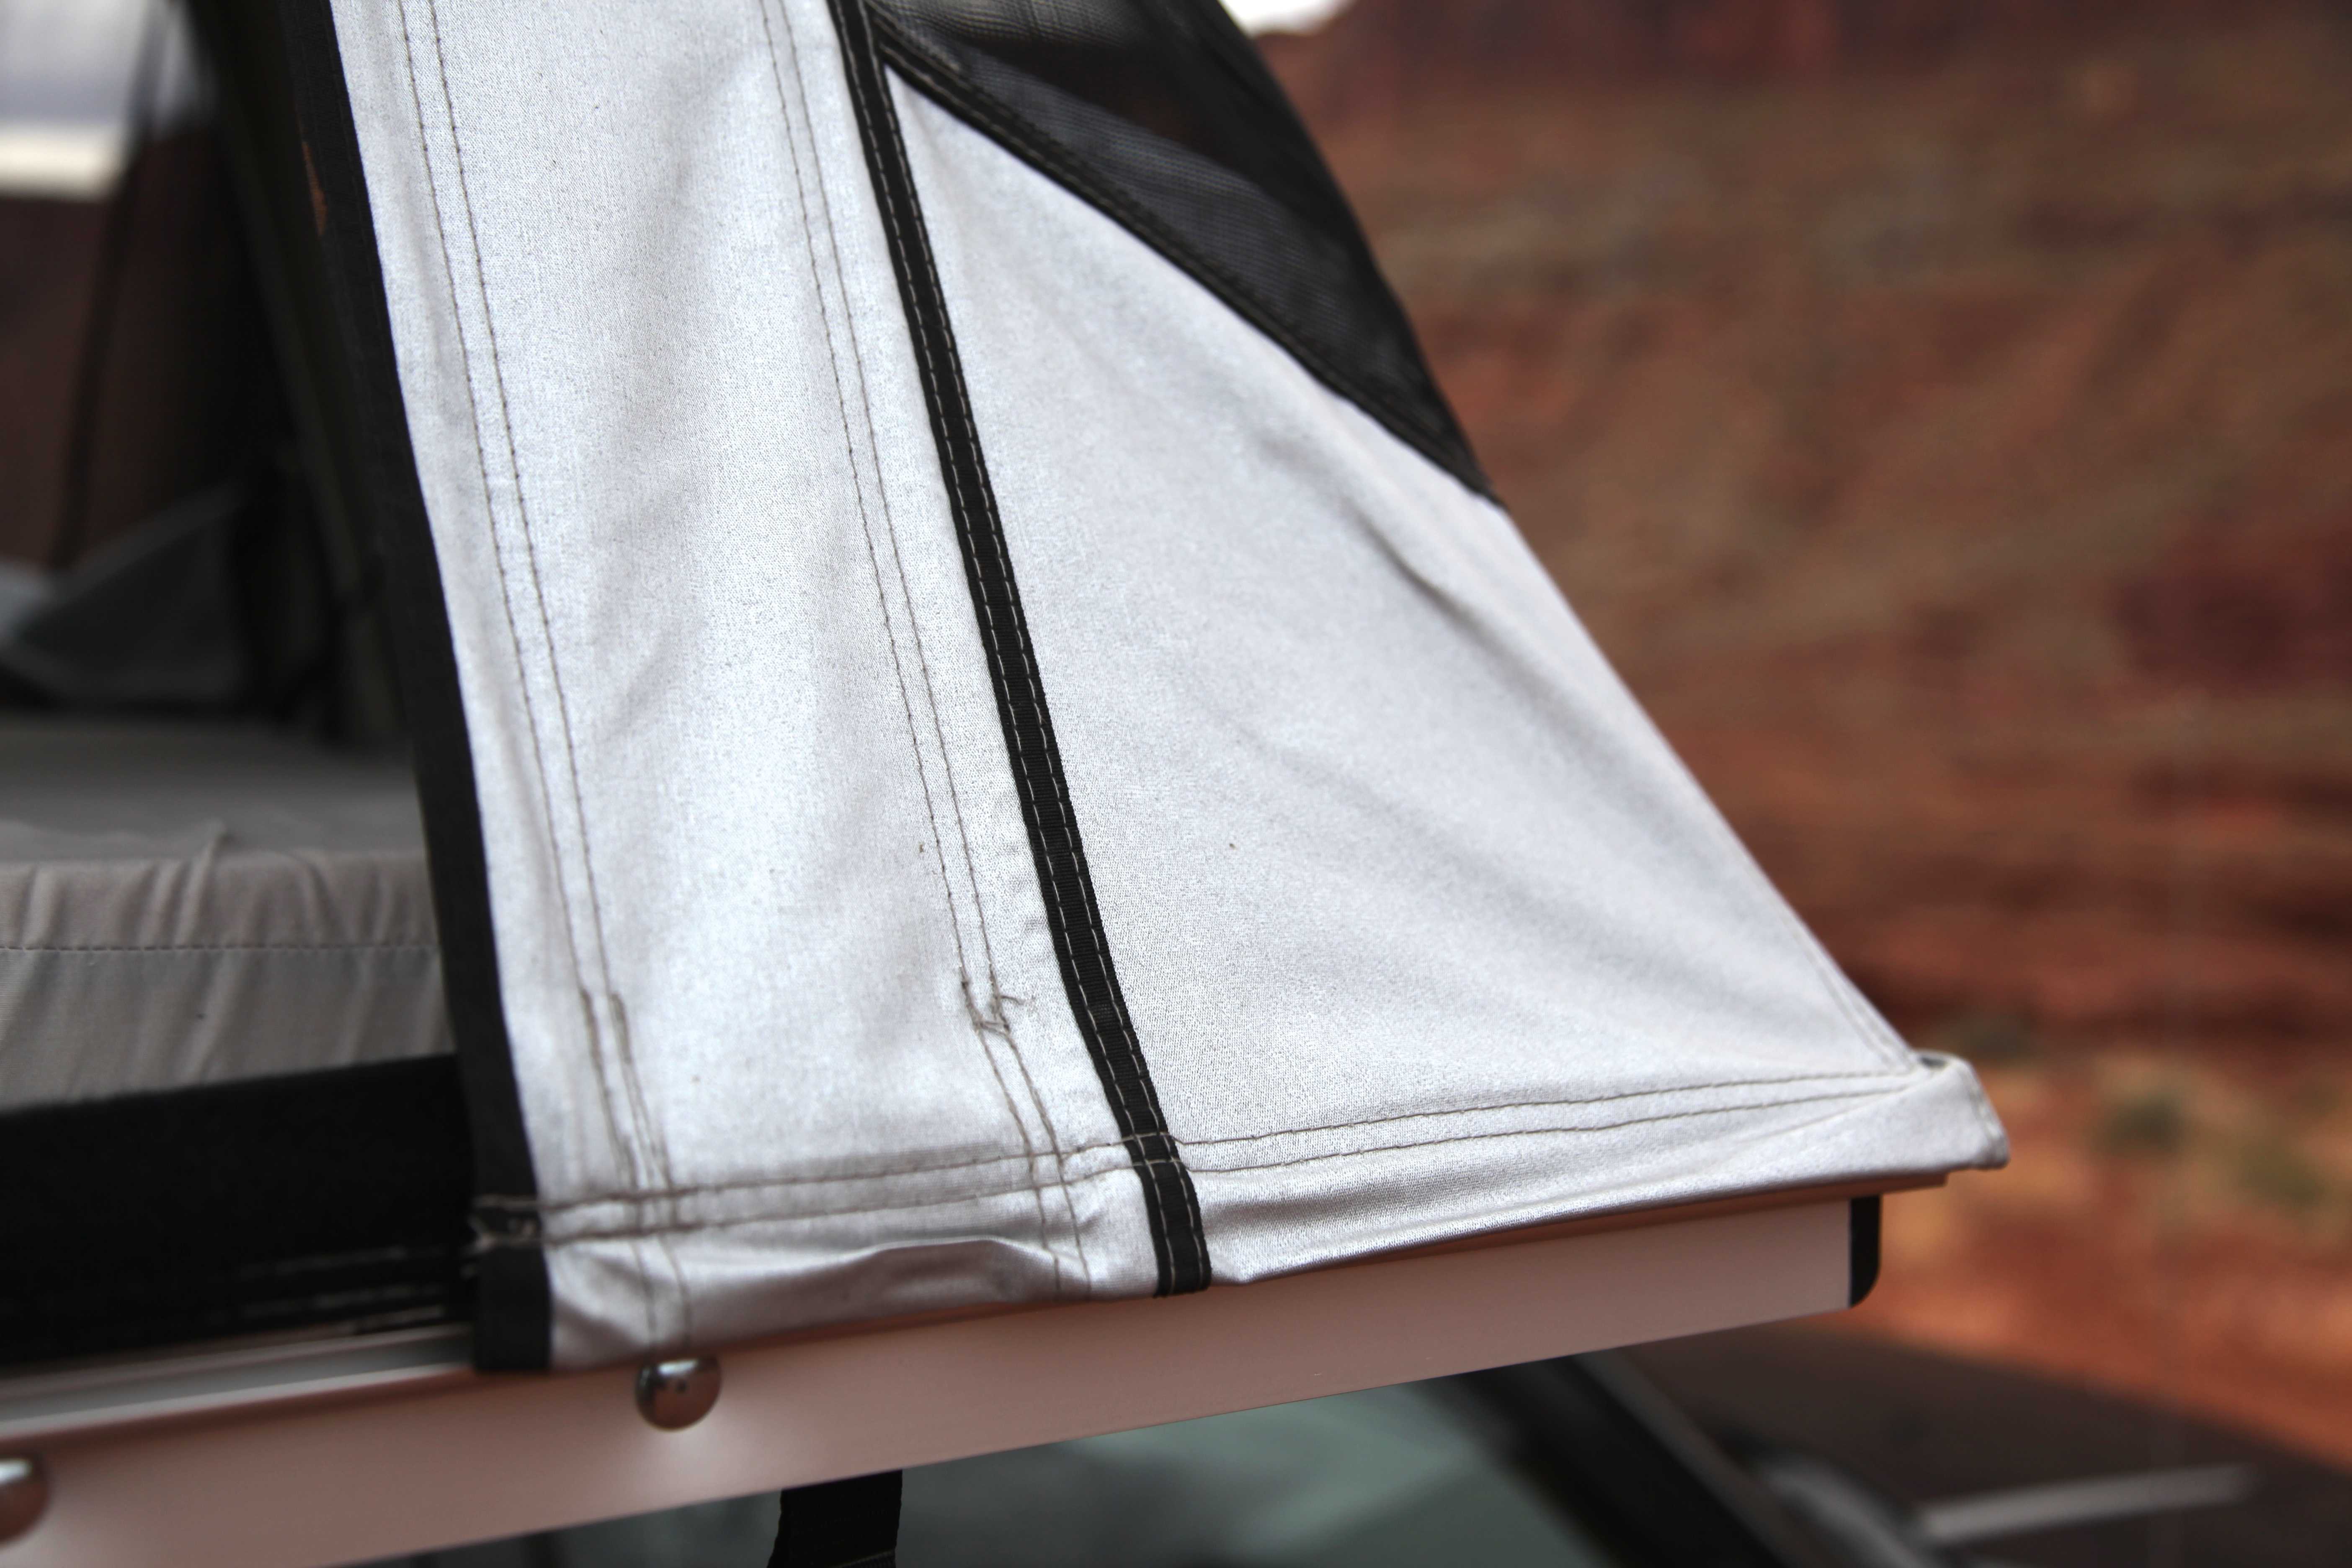
One of my grievances with other tents is the lack of windows, or poor placement of the windows. The four large zippered windows on the Horizon Vision allow for excellent views and unparalleled ventilation. The nickel-plated sliders and large gauge zippers don’t snag and are easy to secure, even in the dead of night.
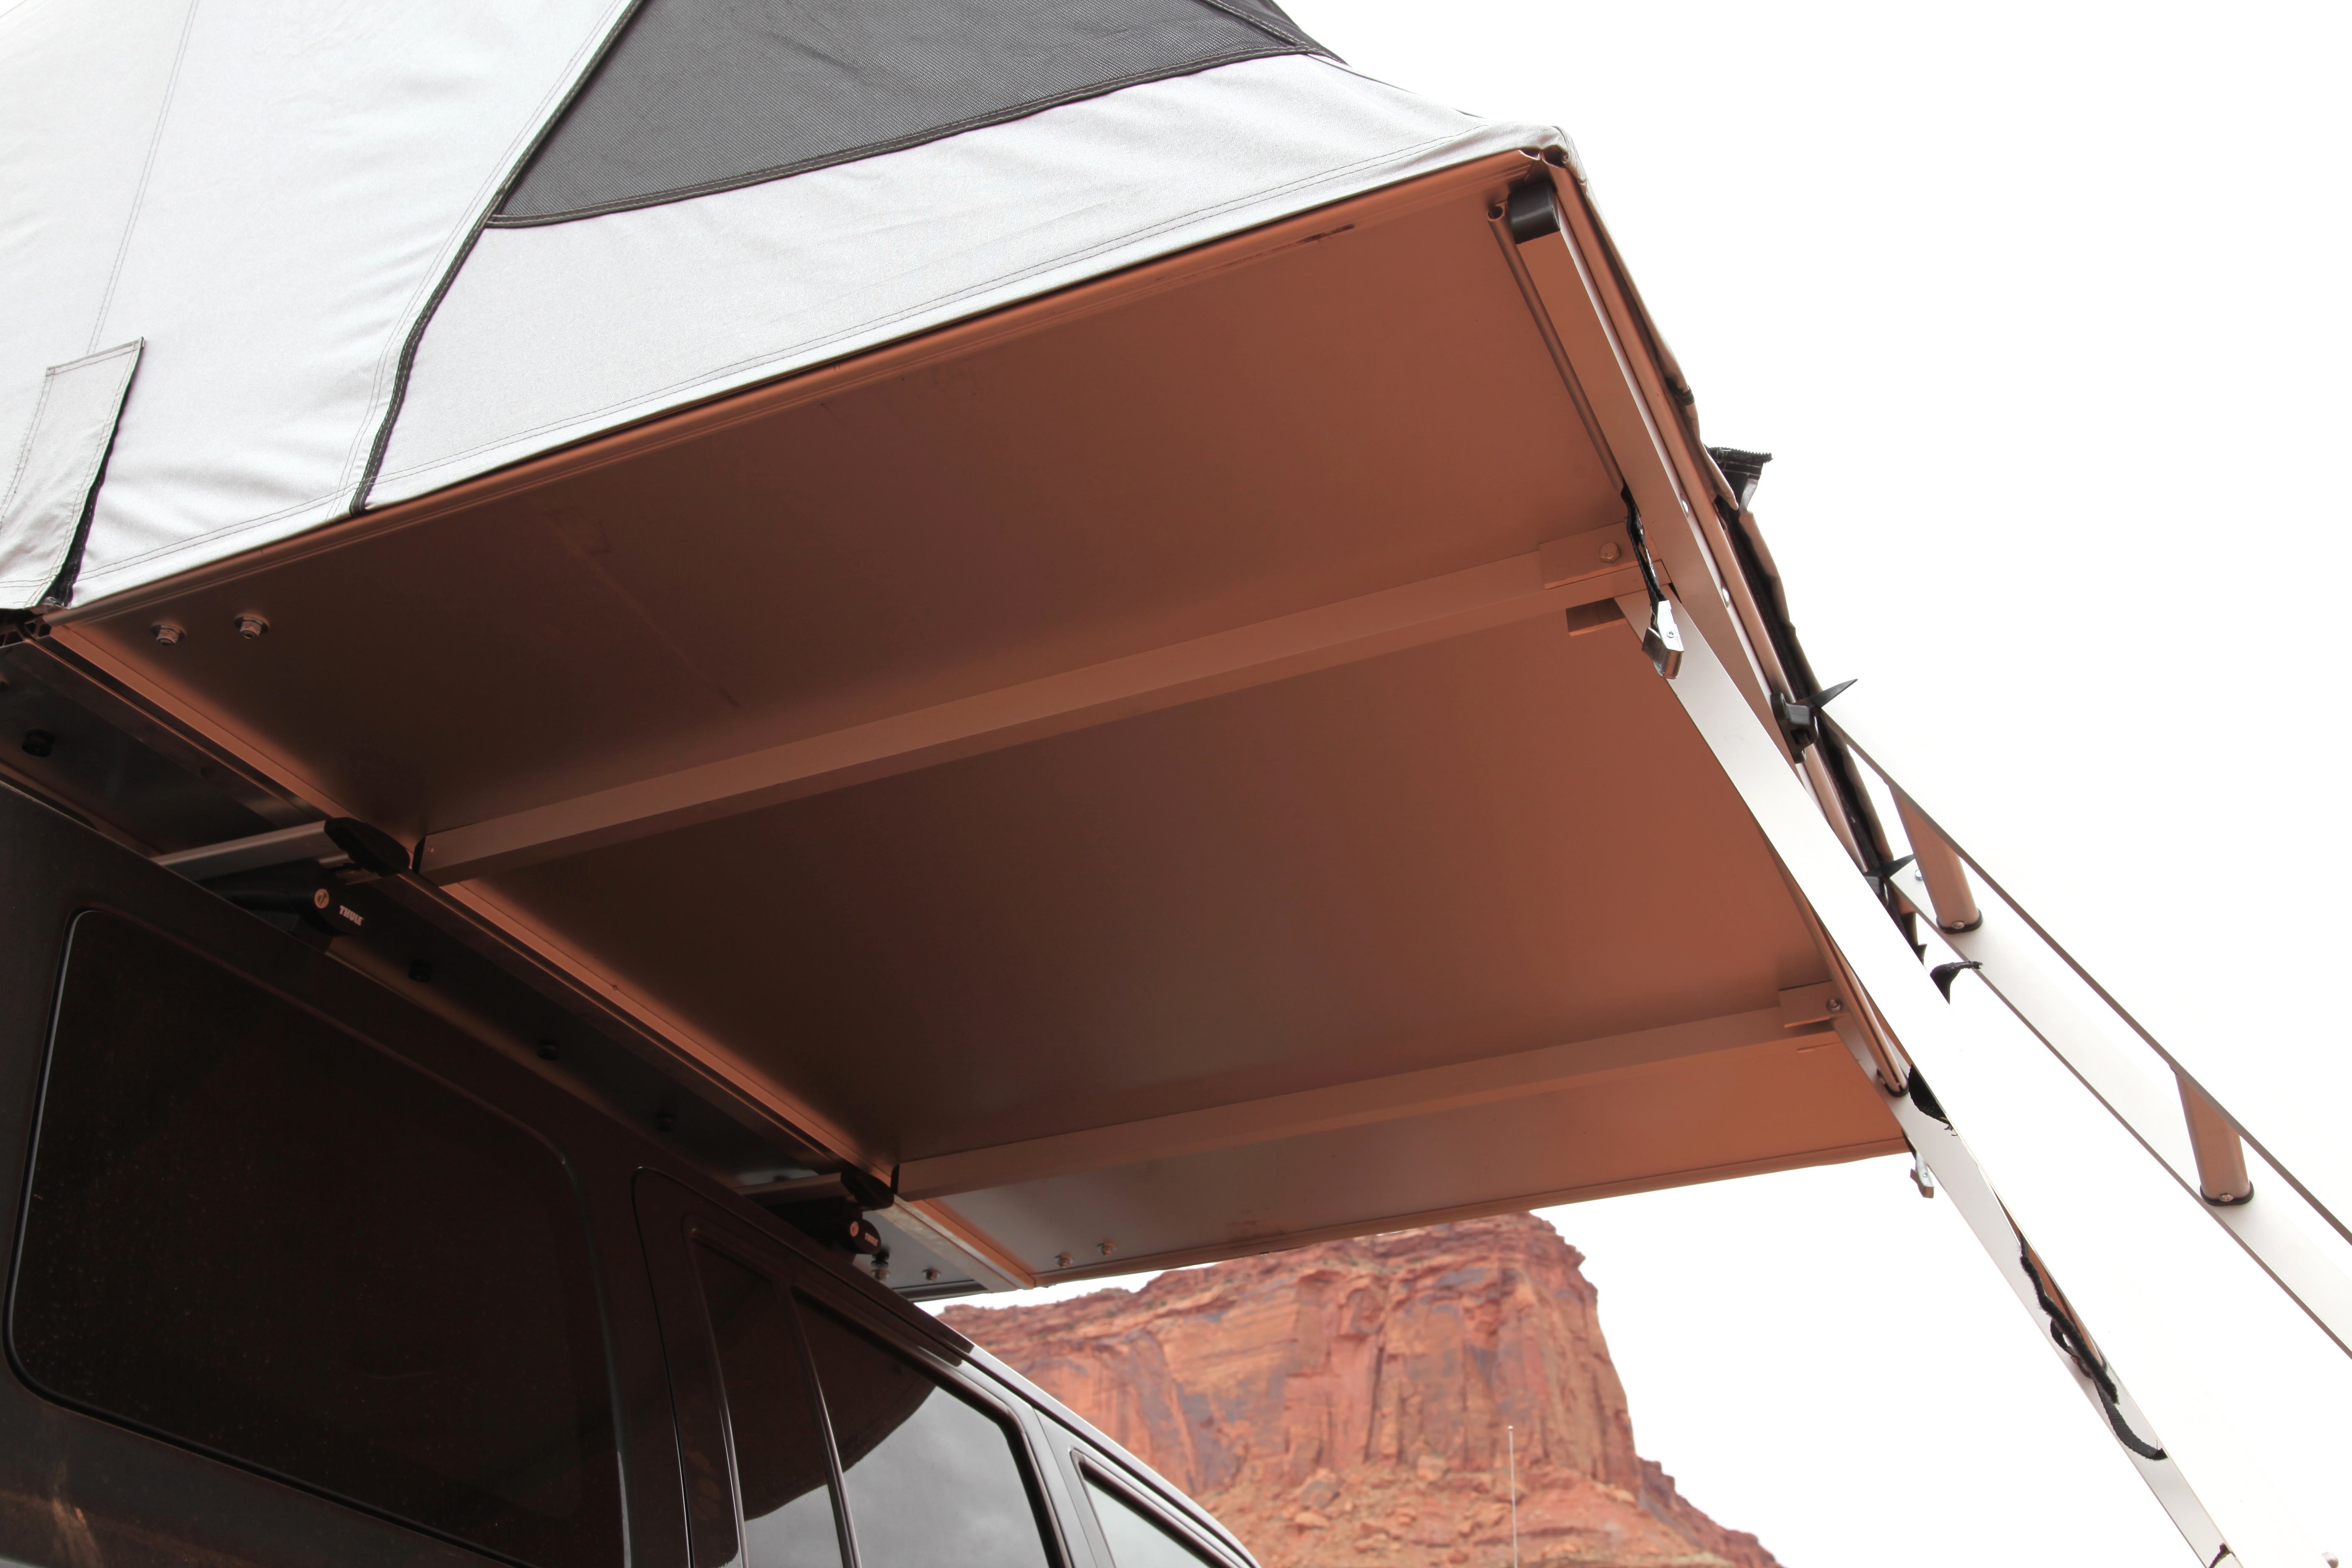
The all-alumium structure is surprisingly solid and the wide support legs add to that stability.


The dual-door design not only improves air-flow, it makes for a convenient pass-through when shuttling gear from the vehicle to the tent. The doors have clear plastic windows allowing the tent to be zipped up in cold weather without blocking out all light, a nice touch in my opinion. I do find the doors have more zippers and sliders than I would like, especially when groggy eyes are searching for the right slider to pull, but the more I use the tent, the less bothered by that peccadillo I become. They do add greatly to the versatility of the door panels.
The two-part ladder attaches to the tent platform via two plastic hooks and never feels as if it might inadvertently disengage. I can see how the ladder might be a tad narrow for some, but the rungs are angled for reasonable foot comfort, even with bare feet. Given the mission of the Horizon Vision as a lightweight tent, I can see why James Baroud kept the ladder as light and small as it is.
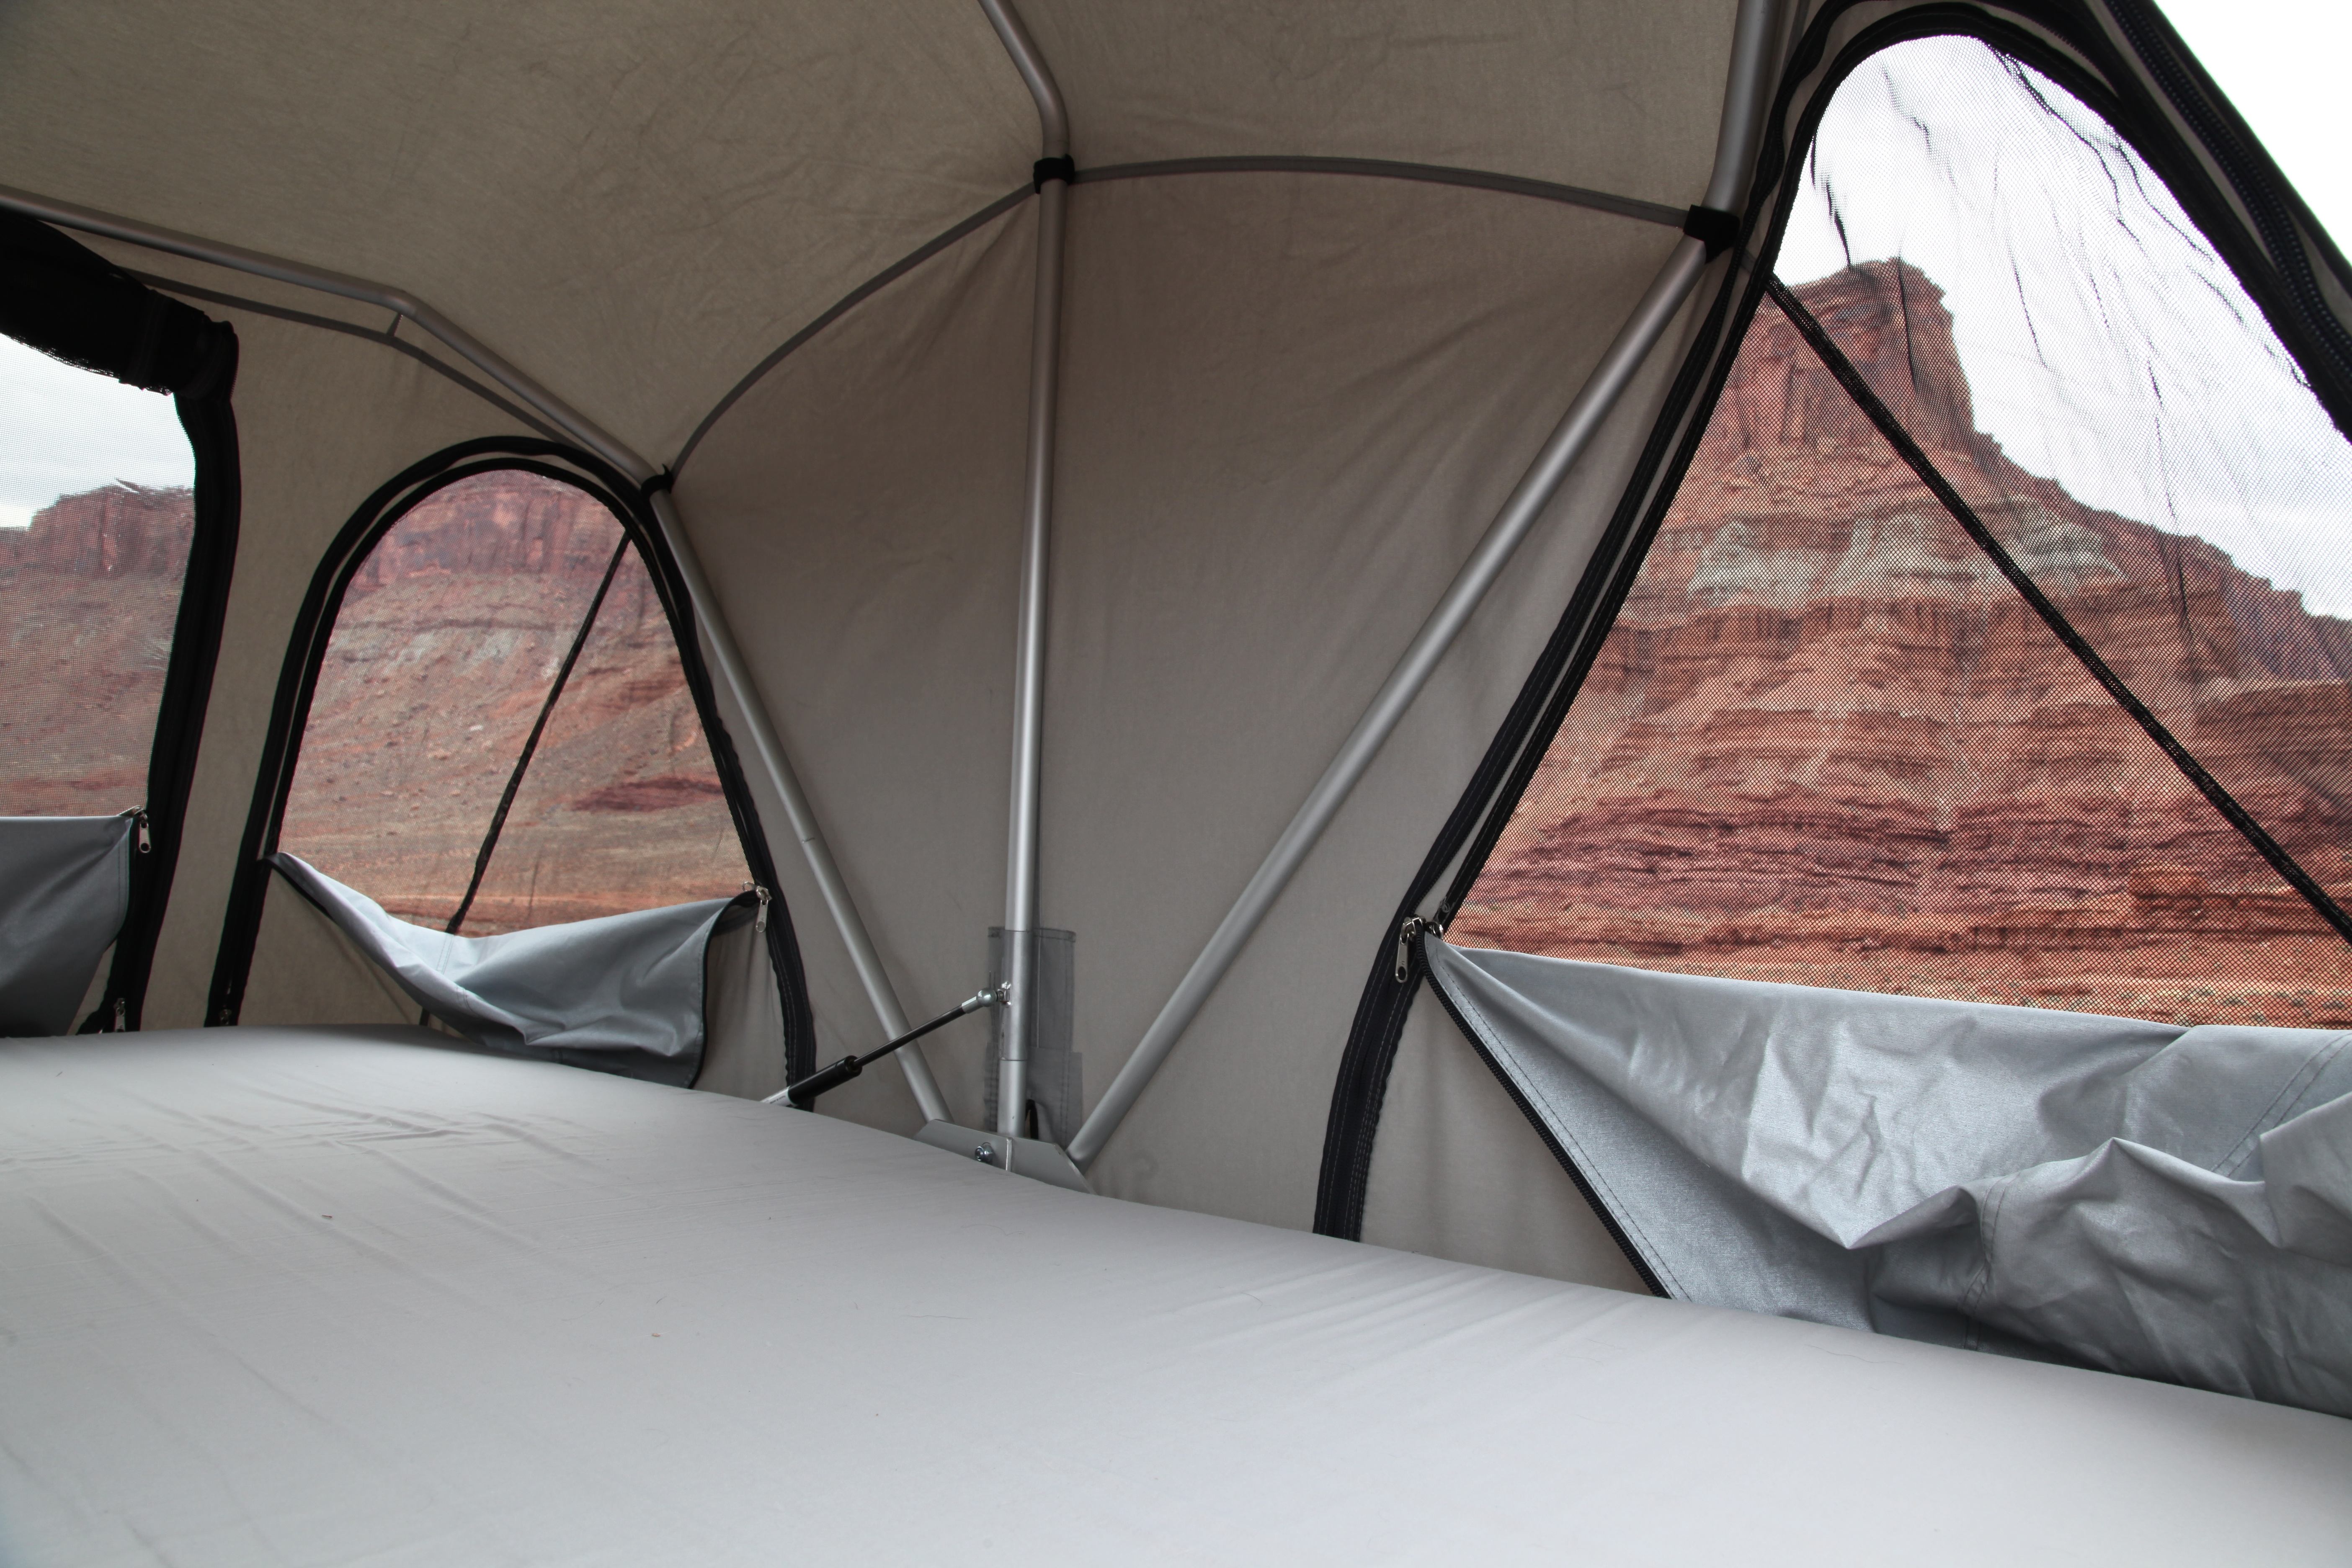
The light colored interior combined with the oversized windows makes for a nice habitat, unlike many tents which can be dark and dreary. The struts positioned on each side of the tent are small and positioned out of the way as to not be cumbersome. The interior of the tent feels open and cleanly designed.

Weatherproofness
One of the glorious benefits of living in the Southwest is our fabulous weather. This once again required I break out the garden hose to test the Horizon Vision’s waterproof claims. With a minimum of seams placed smartly to assuage the threat of leaks, the untaped seams of the tent did surprisingly well to fend off the ingress of water. The tent is sewn with thread made from the same proprietary material as the tent body, with each seam stoutly built. There are a few places along the tent were some of the stitching holes are stretched just slightly and did permit a few drops of water to enter the tent. The easy solution wast to treat those few holes with seam sealer, a process that took all of ten minutes.
Because James Baroud tests each tent model in wind speeds up to 70 mph, I have every inclination to believe it will withstand any ugly meteorological event I’ll ever endure. I’m also looking forward to some winter camping as the snow flies. I just received the insulating Thermal Liner Kit and look forward to putting it to task.
Sleeping Comfort
This will always be the most subjective aspect of any roof top tent review, but I can give points for those things that impact a good night’s sleep. The tent has superb ventilation, something much needed for summer use. The aluminized synthetic tent fabric also reflects sunlight further reducing the buildup of unwanted heat. If you prefer to sleep in complete darkness, that fabric produces a dark interior that often has me sleeping in well beyond sunrise if I forget to leave one or both of the clear plastic windows open. The sleeping platform is more than large enough for two adults. At 87-inches in length and 59-inches wide, and I can also sit up with ample headroom thanks to the 47-inch peak height.
With regard to the sleeping mattress and the comfort it provides, there’s no way to award that component a fair score. Goldilocks had a heck of a time finding a bed that was just right. I will say, for my preference the mattress is very comfortable, if not a teeny bit firm. I would rather it be a touch firm than too soft and prone to compress and bottom out. I will say the mattress is sufficiently warm. During a chilly night with temps in the low teens, I was not chilled from below at all. I also have not noticed any unwanted creaking or motion with the sleeping platform.


Road Manners
Because of the low profile shape of the collapsed tent, I was pleasantly surprised to discover it didn’t completely crush my gas mileage. Many similar tents have an imposing vertical front that is anywhere from 12-inches to even 14-inches tall. The 9-inch tall Horizon Vision does catch its fair share of wind, but my mileage numbers only fell from 24 mpg to 22 mpg with the addition of the tent. Those mileage numbers were evaluated over 2,500 miles, so I feel they are accurate, even if anecdotal. I also don’t notice any additional wind noise, but that is largely affected by the model of the vehicle and placement of the tent on the roof.
My overcome nitpicks
Having reviewed countless products over the years, I’ve come to learn that my immediately perceived negatives are often misplaced. I was initially put off by the Velcro at the bottom of each door. It seemed unnecessarily strong creating a minor struggle at times. In talking to Jim Oostdyk at James Baroud USA, he mentioned that every James Baroud tent is wind tested to speeds up to 70mph, and the stout Velcro is necessary to achieve that level of storm worthiness. That works for me.
I will admit that I still get a little befuddled by the complexity of the door with its many zipper sliders and layers, but I can’t deny the utility of the design and the useful options provided by it. I file that rather benign nitpick under user preference, or perhaps the need for just more practice. In the end, I wouldn’t change a thing about the door design.
Final Impressions
As I have said in other evaluations, I am not typically drawn to the charms of roof top tents. The James Baroud Evolution Evasion I tested earlier in the year started to redirect that opinion, and the Horizon Vision has won me over––completely. On a recent trip to Moab to get the above images, I arrived late in the evening after a long day at the wheel, found a camping spot, and within a matter of minutes was sawing logs inside the Horizon Vision. The next morning with equal speed and ease, I was back on the road well rested, perhaps more than usual.
For a smaller SUV or wagon, the Horizon Vision really is a smart option. Fitted to a Subaru or other small vehicle, it is proportionate and doesn’t upset the handling of the car, although it is noticeable. Even for a full-size truck, it has multiple advantages. Given the superior materials and detailed construction, the three-year warranty seems like ample coverage against any potential defects. It’s a beautiful product that once again, was long overdue. Every time I walk to the car now, I want to go camping.
The value proposition
With a retail price of $2300, there is no denying this is a committed purchase for most buyers. Over the last few years we have seen RTT prices fall dramatically, but we’ve also witnessed a steep degradation in quality, performance, longevity, and unfortunately service and warranty assistance. Given the venerated reputation of James Baroud and their dedication to the satisfaction of the end user, I feel the Horizon Vision more than justifies its price tag. This cannot be an easy product to manufacture, and the materials alone cannot be cheap. I also had to put this tent within the context of my previous sleeping solution, which was a $700 ground tent portaged in a $700 Yakima cargo box. The Horizon Vision is a far superior setup.

The Little Overlander: Expedition Portal’s Jeep Patriot
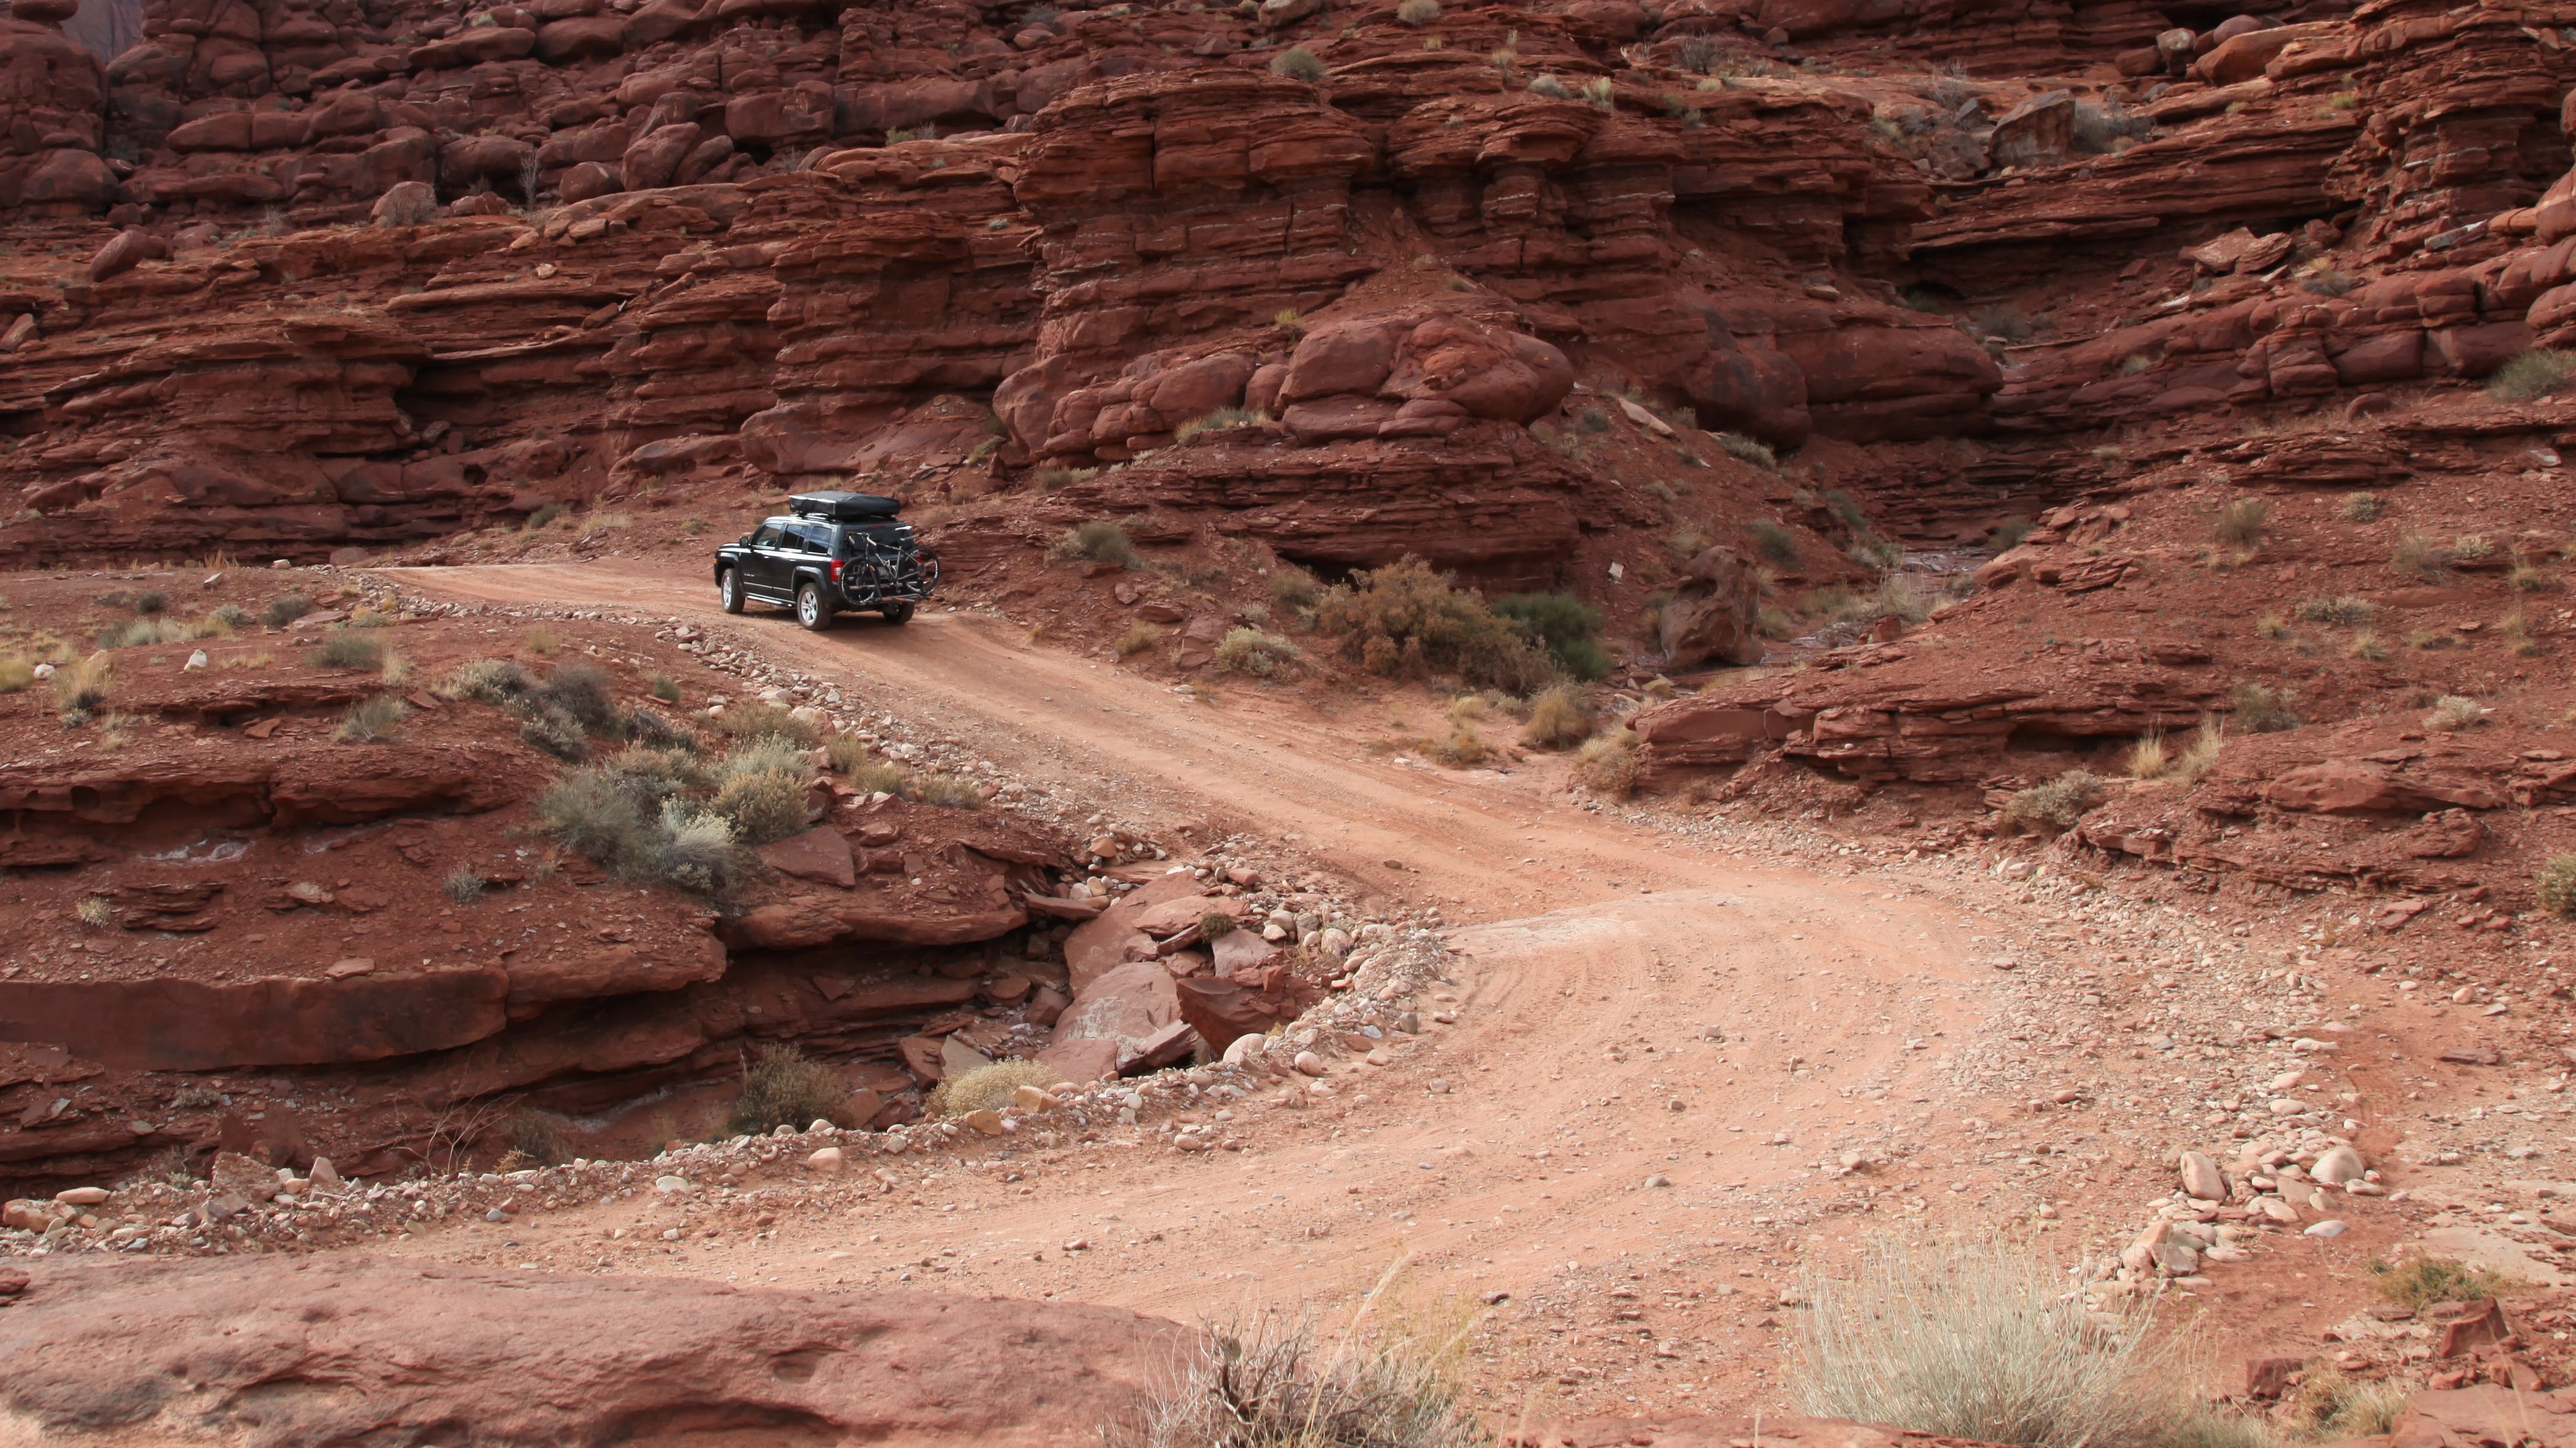
For many overlanders a proper rig must be capable of traversing the worst roads imaginable. For some of us, our overland travels involve mostly gravel roads and a good bit of tarmac. This is often the terrain of the ubiquitous Subaru but there are alternatives. The 2011 Patriot may not seem like an obvious choice for mild adventures, but it has proven a perfect platform for knocking down a full day’s pavement to get to a far away trailhead or remote camping spot. Paired to the lightweight James Baroud Horizon Vision, it is even more enjoyable.
Our little overlander has been fitted with a Rocky Road Outfitters lift kit, sliders, and Cooper AT3 tires. It also has a 40 quart ARB refrigerator, and Goal Zero Yeti 400 power pack mated to dual 15 watt solar panels.
You can read more about our Jeep Patriot [HERE].