It all began in 1963 with a 1958 VW panel bus. My journey to find the “perfect” rig has been an interesting quest. I have gone through vans, trailers, and truck campers, and one thing that has become evident is there is no perfect choice, only a continual refining of my requirements. What worked for me at any particular time in my life changed as circumstances changed. I’ve realized that compromise is the predominant truth, and simplicity is the guiding star. That philosophy was especially brought home sailing around the world in a 32-foot ketch for five years. That experience reinforced my belief that you can be happy living in a small space, and the fewer gadgets you have combined with a quality-built vessel equates to a happier and more successful voyage. My wife and I have constructed a trailer and two campers with this mantra in mind, and while we might be considered a little weird, it has worked for us.
Choosing a Truck
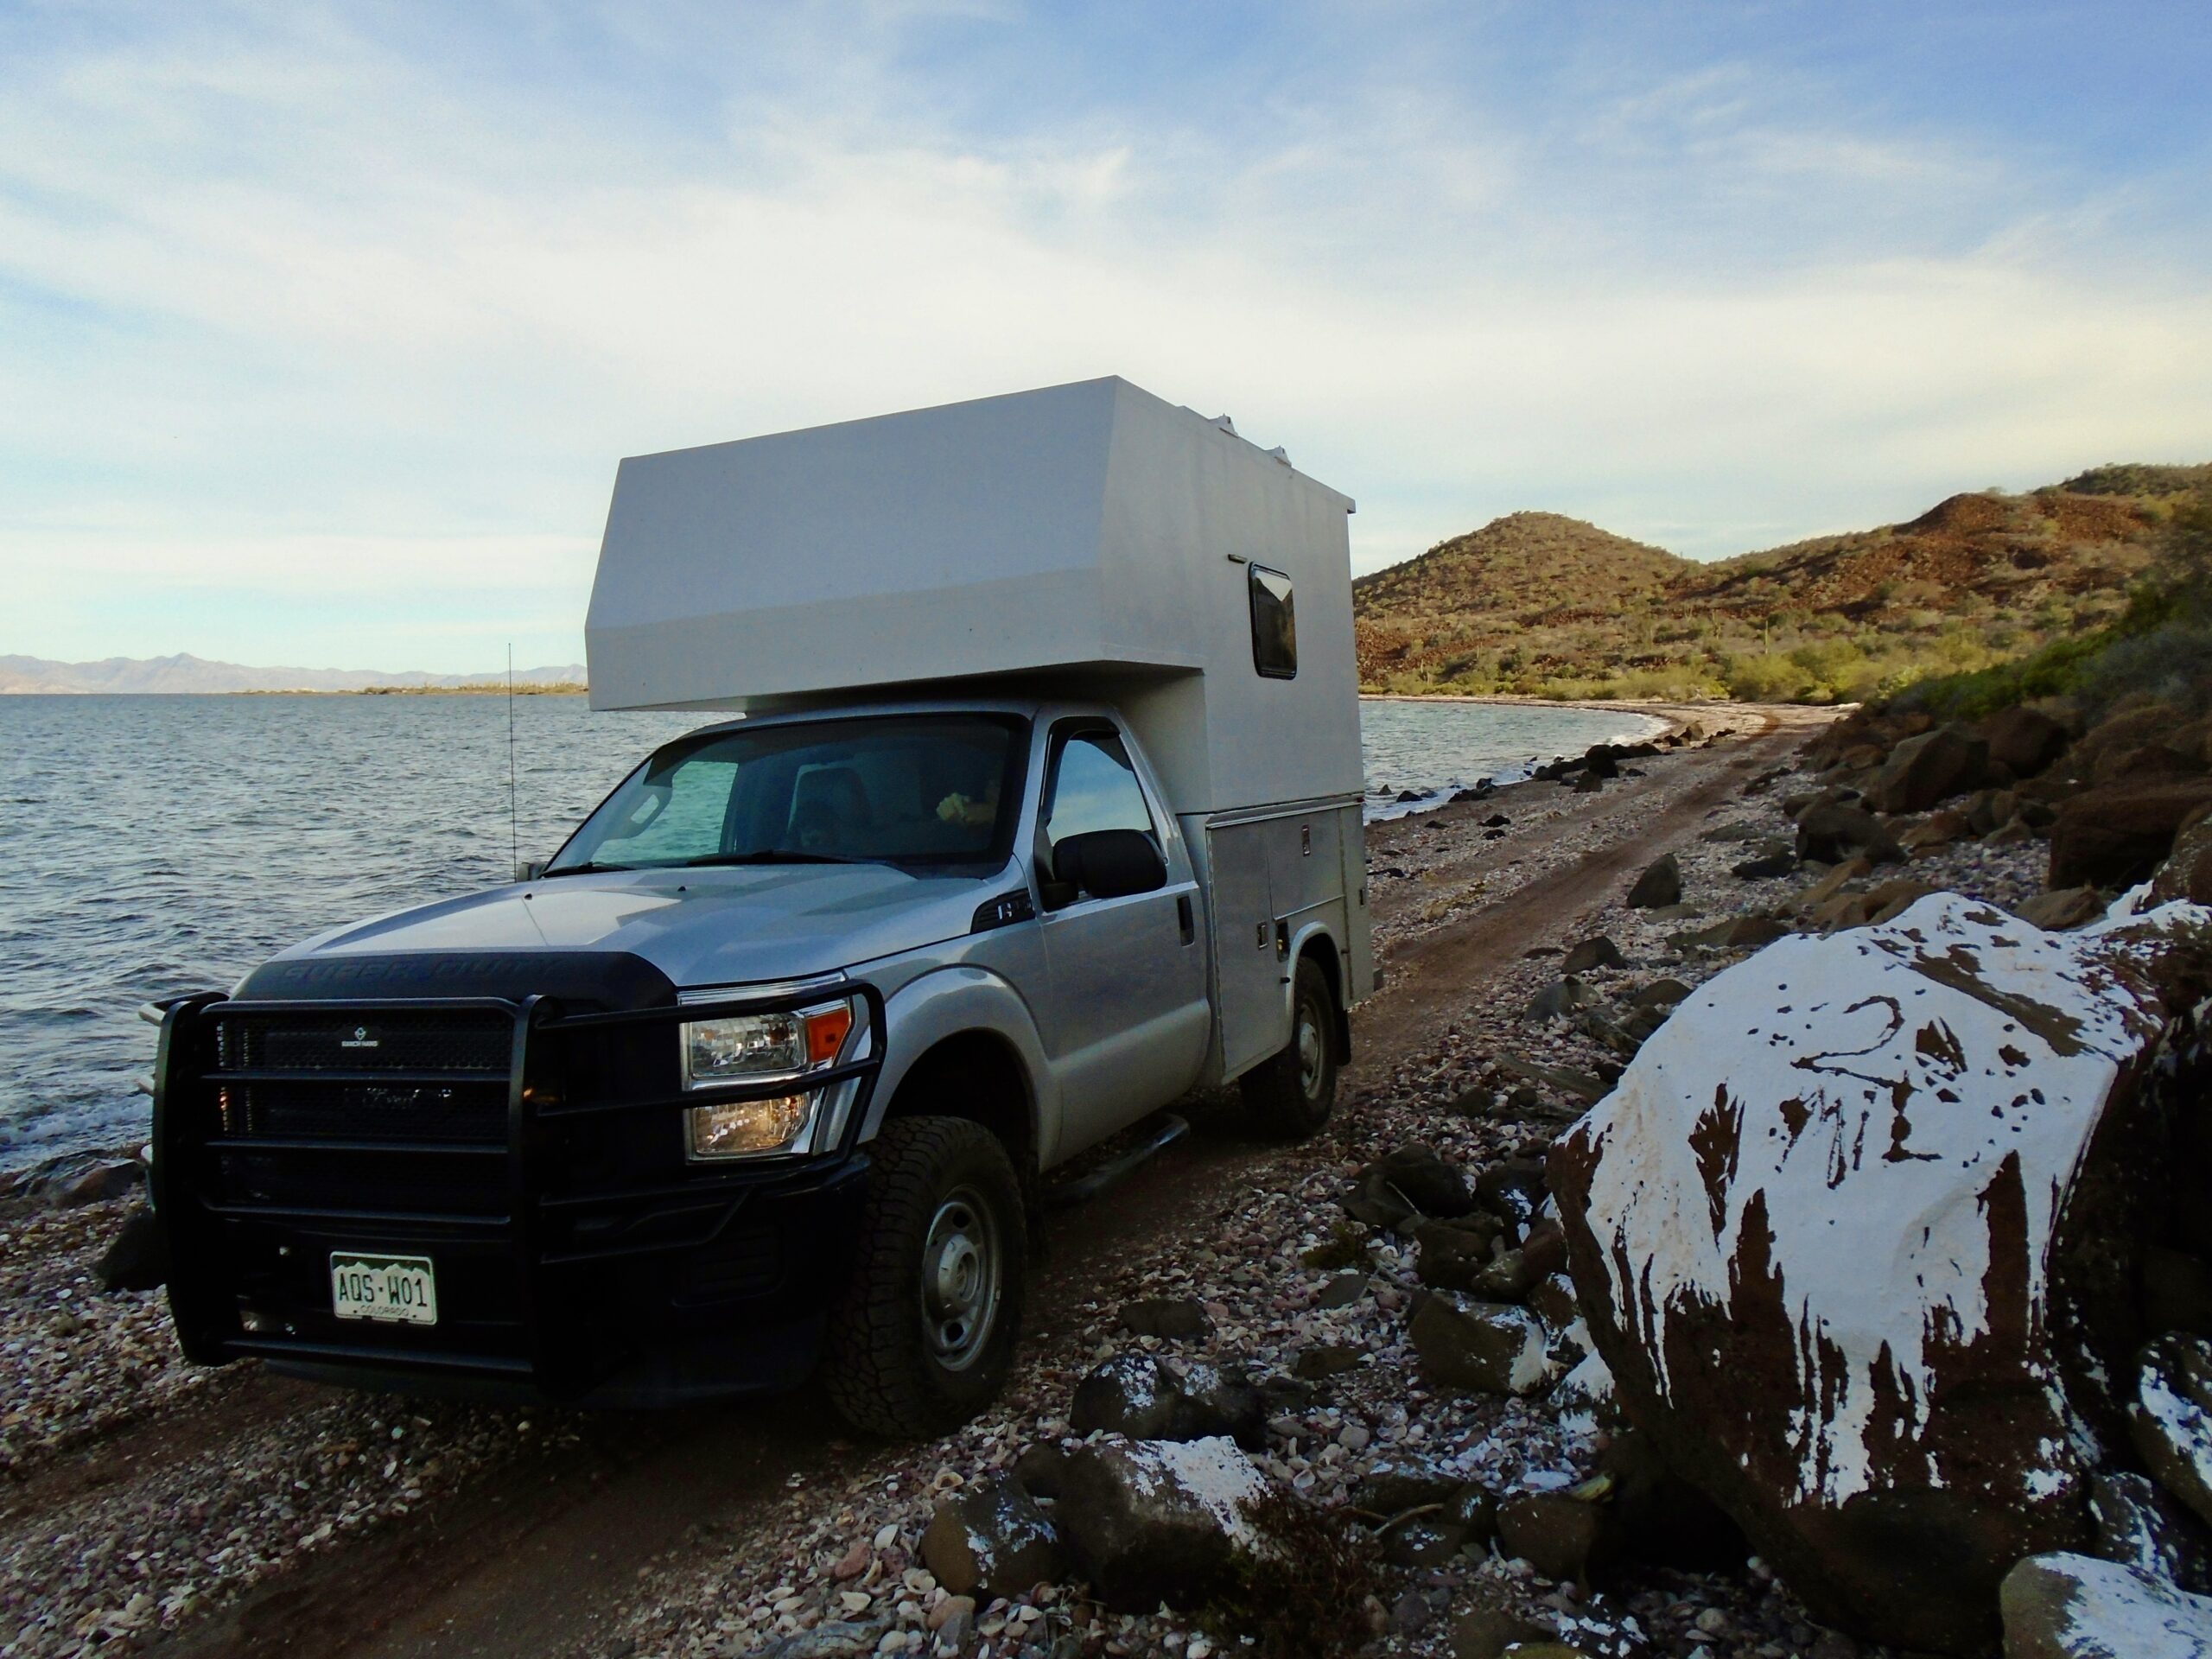
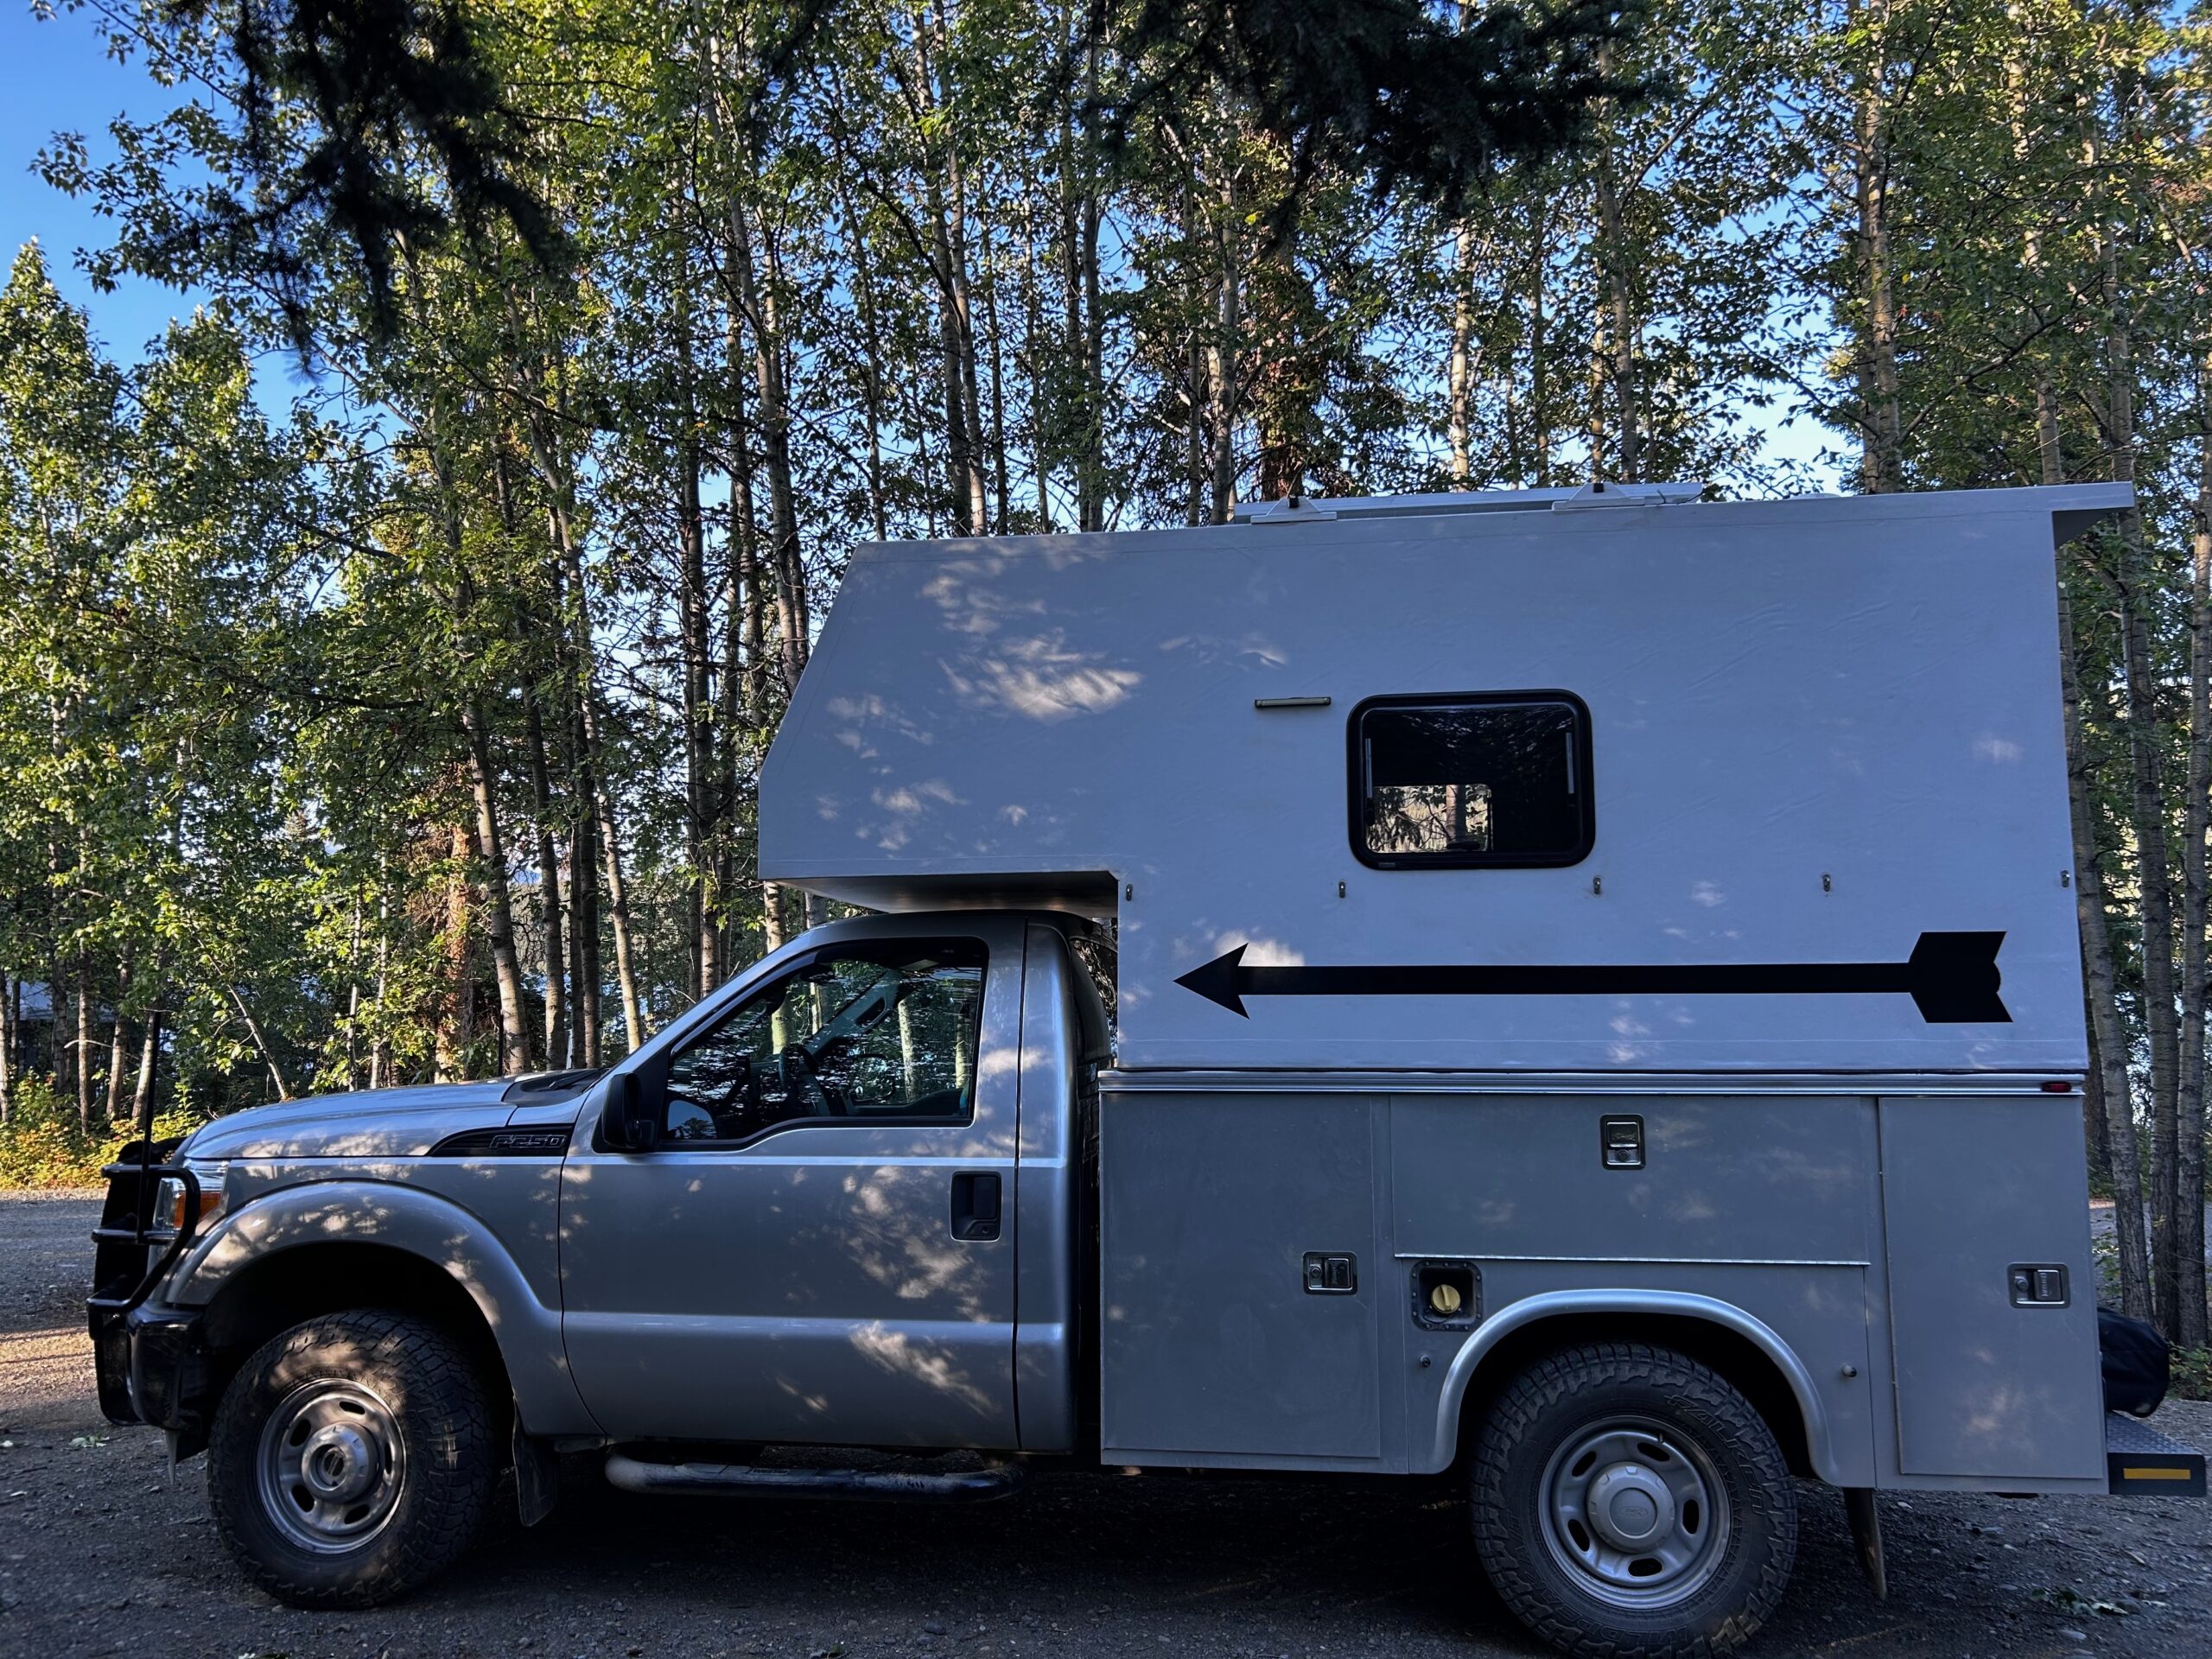
I completed the present build on a 2013 Ford F-250, which I purchased from government surplus with 20,000 miles on the clock and a service body attached. The truck is a 4×4 with a 6.2 liter V8 gas engine, single cab, short wheelbase, eight-foot bed, locking rear differential, and a 35-gallon gas tank. This makes for a vehicle that can be used on moderately challenging 4WD trails to get me to those remote locations I love. The only modifications to the truck have been Falken Wild Peak 265/70/17 E tires, which are two sizes over stock, and a Timbren Suspension Enhancement System, which maintains the stock ride height and has improved the handling characteristics. A Ranch Hand grill guard was also added for front-end deer protection. During highway driving, it performs quite well with limited motion in high winds and no porpoising, resulting from a 45 percent front and 55 percent rear axle load and most of the weight located low down. On dirt, 4×4 tracks, and beaches, it goes about anyplace I would drive, even without the camper attached.
Planning the Camper
Some of the priorities I set for this build were light weight, not extending the camper beyond the sides and back of the truck bed, and including no vents or compartments on the sides of the camper. Construction took seven months, and the most challenging aspect of building anything as a one-off as this with no schematics requires careful planning. It’s like chess; you have to think three or four moves ahead of what you are working on. A lot of time was spent just laying out the basic outline of where everything would work in conjunction with all the other components.
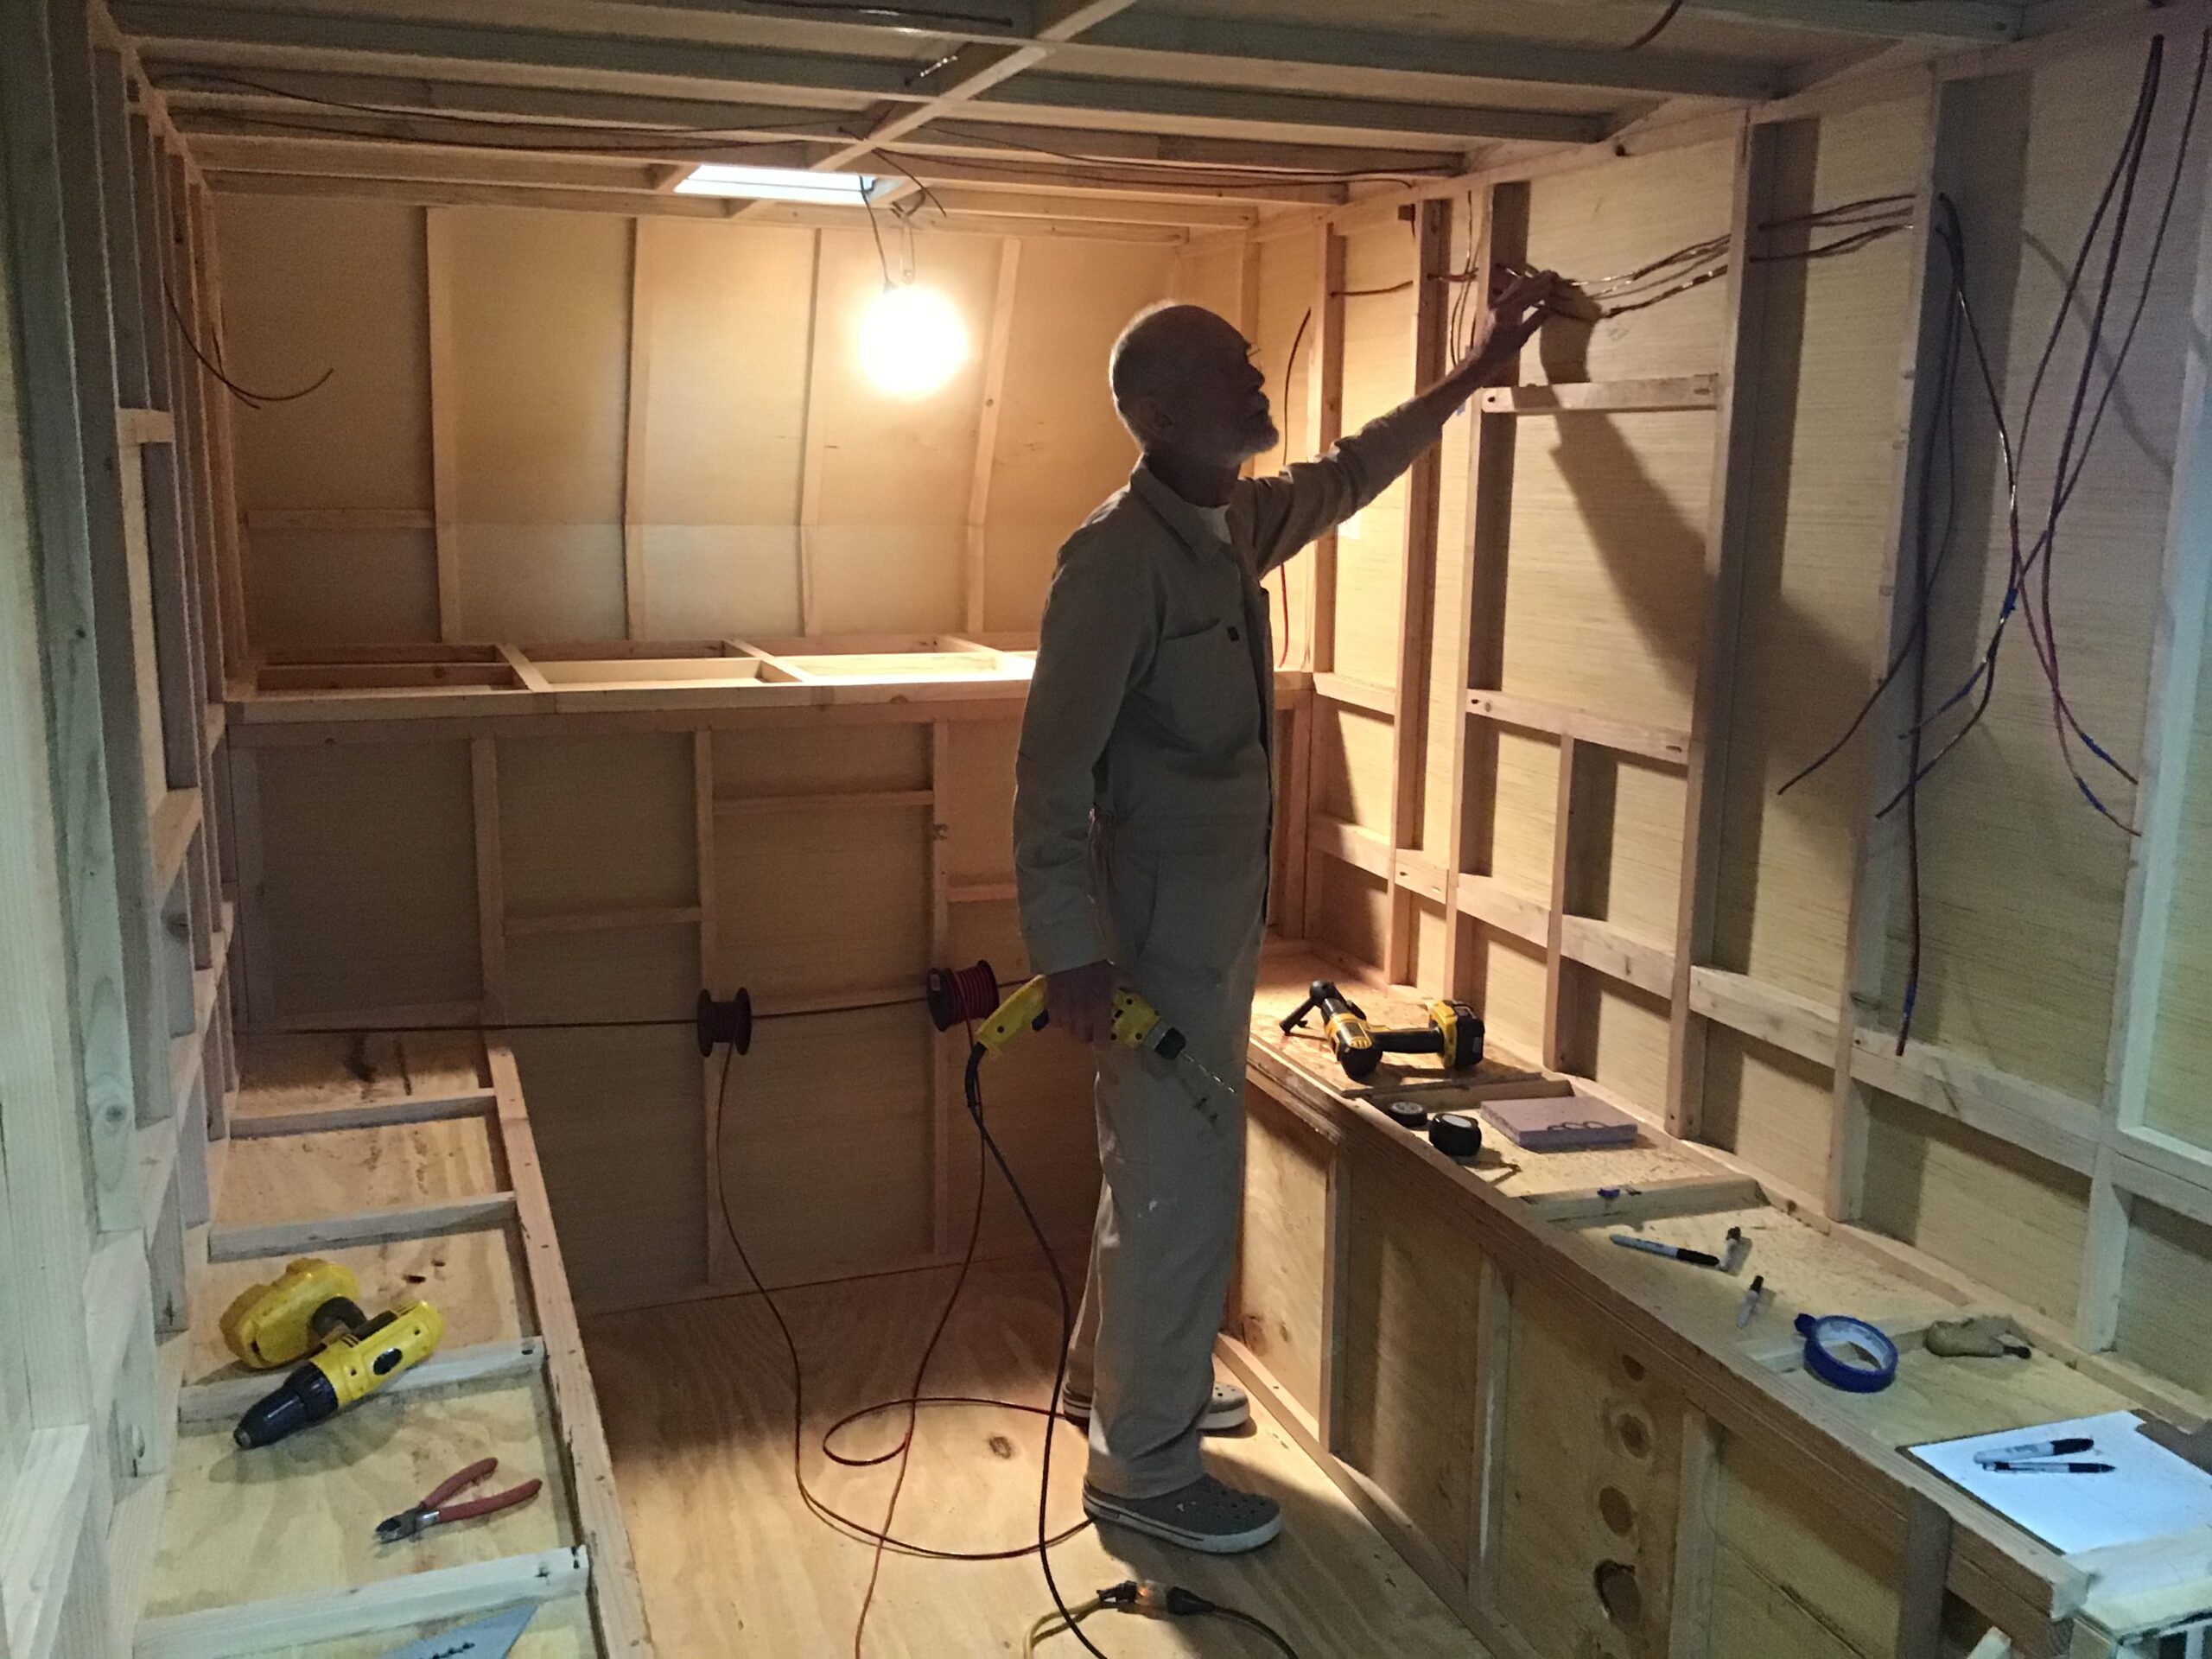
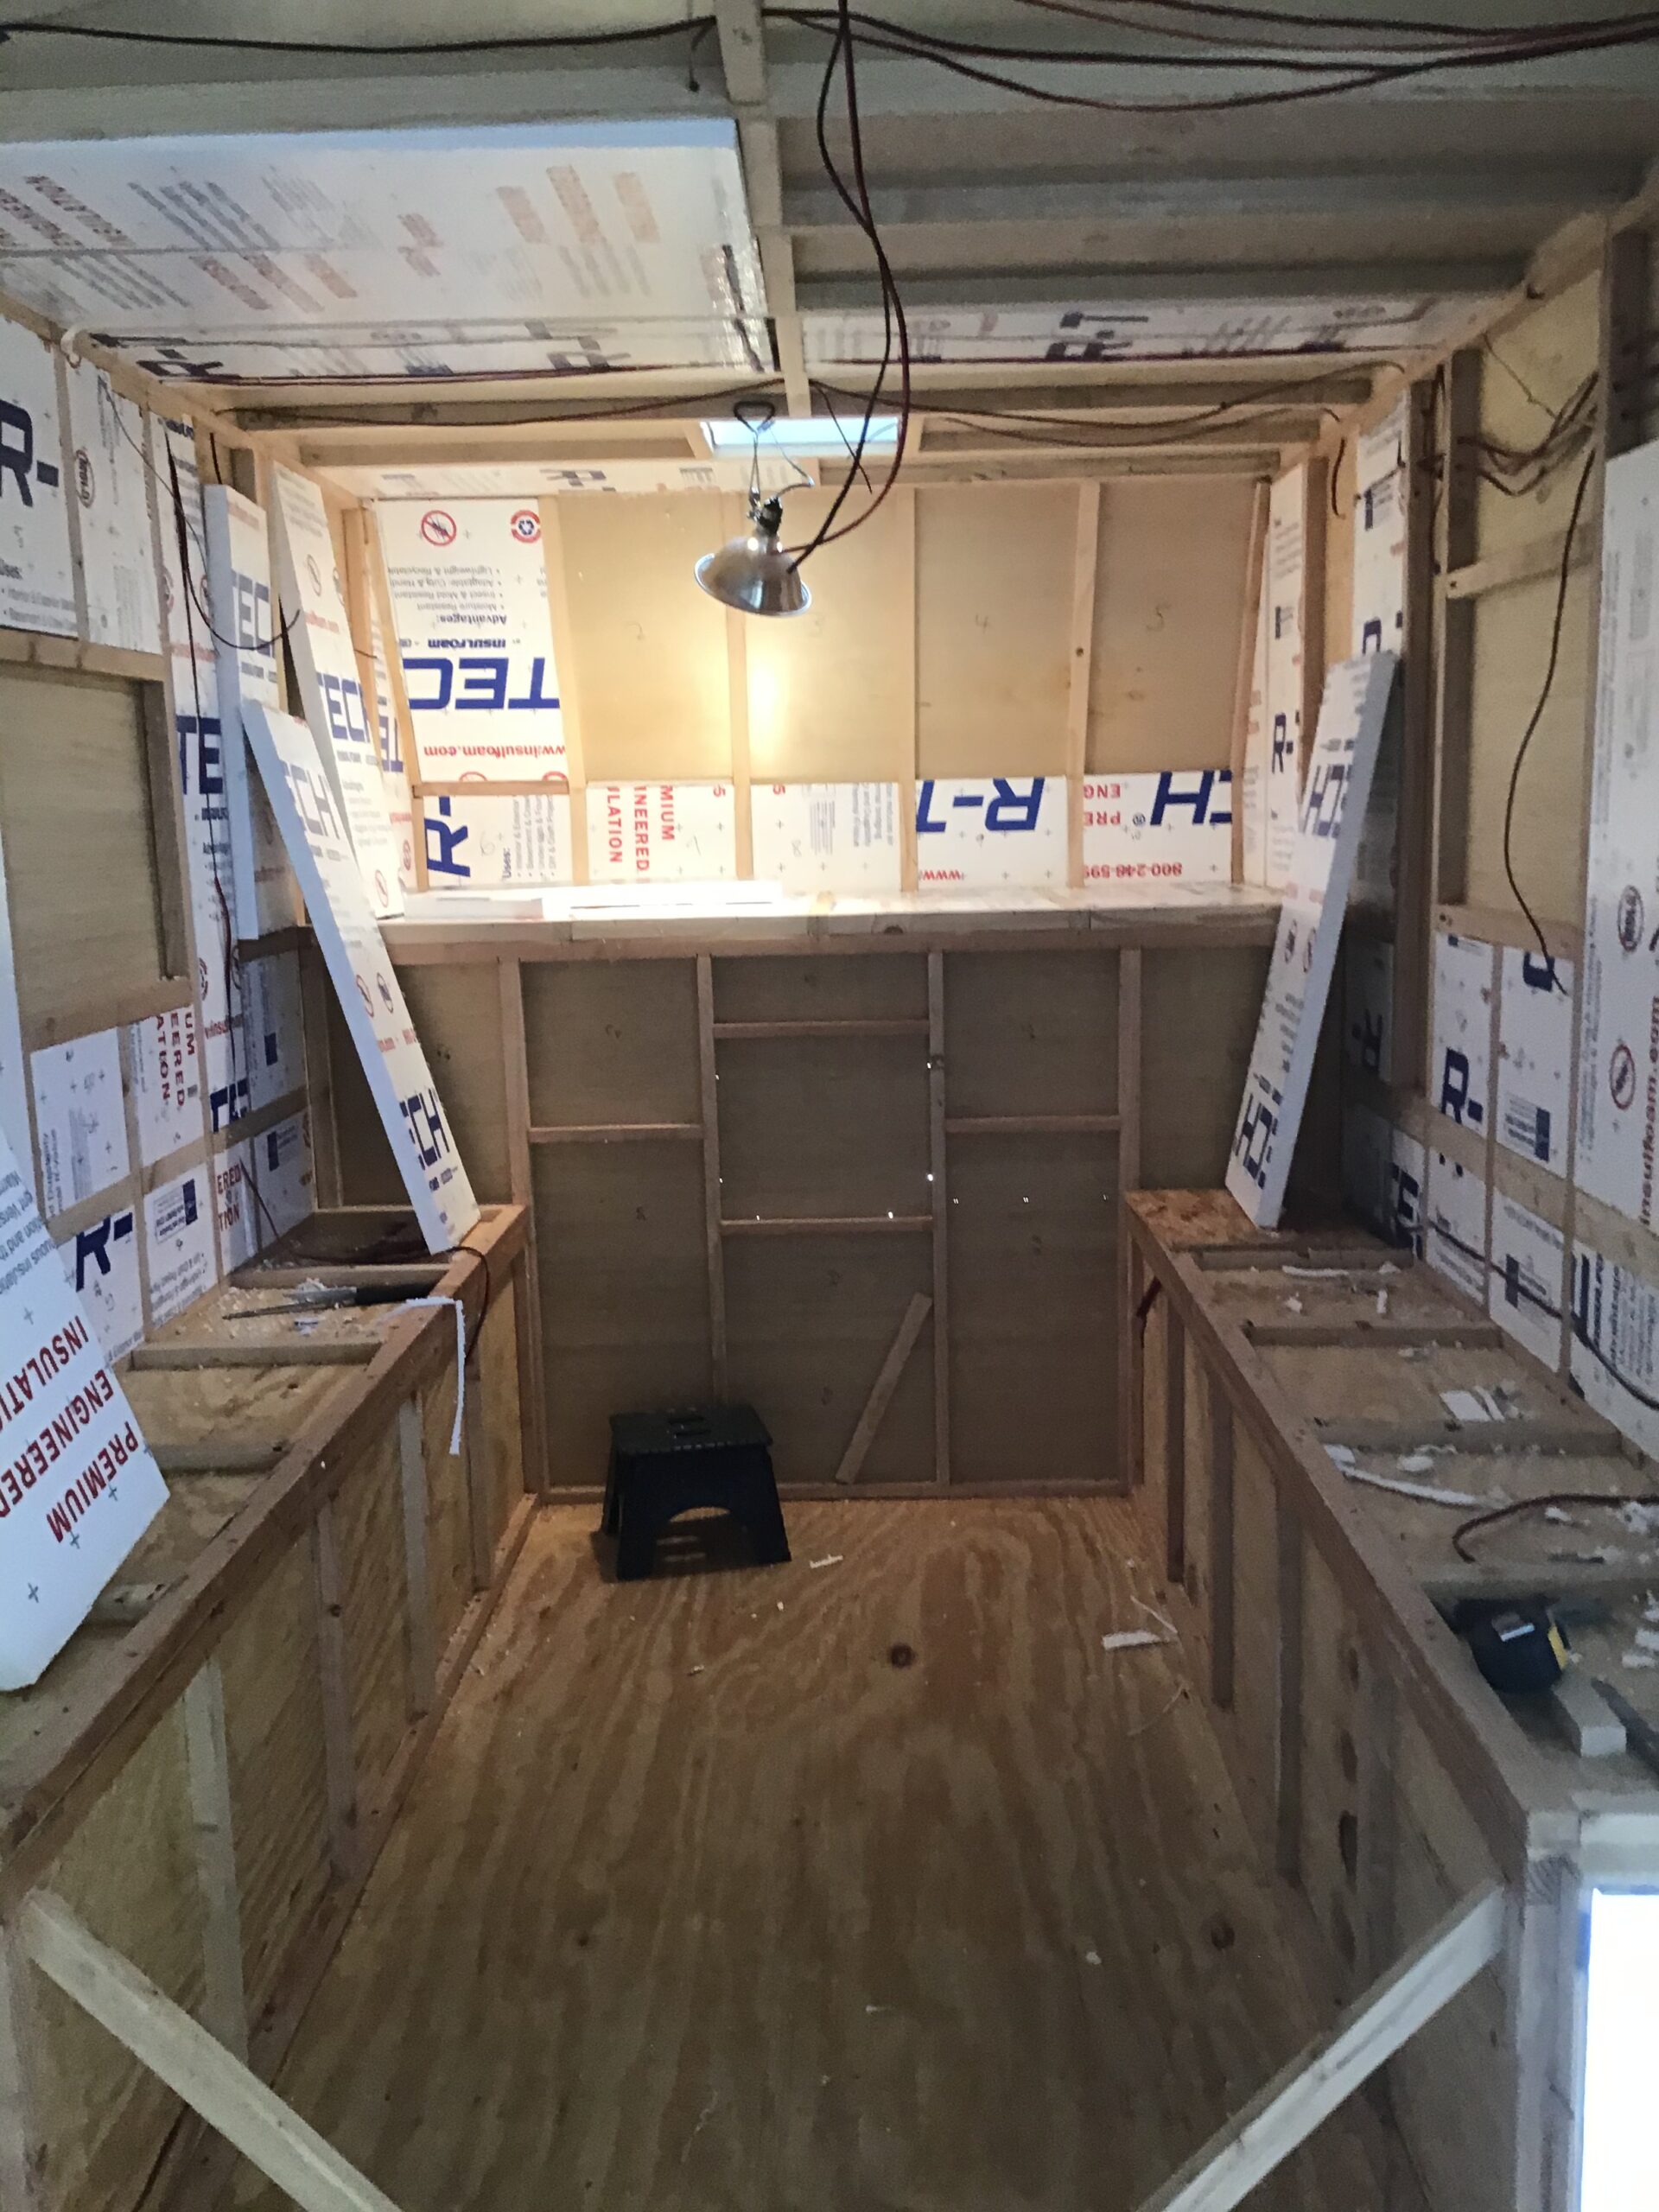
Weight is a prime consideration, and my method of building uses a composite approach. All building components work together for a robust structural whole: wooden frame, rigid 1.5-inch foam insulation, 3/16-inch plywood on both the interior and exterior, and fiberglass cloth saturated with two or three coats of epoxy resin on the exterior.
The actual build was a quest for lightness and strength, and fir and spruce were used in most of the framing, with stronger Douglas fir in the corners and high-stress areas with red oak around the door enclosure. All the walls and roof were constructed on a flat work table to ensure a more accurate alignment using glue and screws. After the exterior ply was applied using galvanized staples, the fiberglass cloth and epoxy were applied, and the process was much easier on a flat horizontal surface. Each of the walls and roof were constructed individually and then assembled to the base using glue and screws, and then an additional strip of fiberglass was applied to all corners, exposed edges, and high-stress points.
After the wall and roof assembly and with the rough electrical wiring in place, the entire interior was tightly fitted with 1.5-inch rigid foam insulation with one-inch denser foam used in certain areas. Both types have an R rating of over five. Following the insulation, the interior was fitted with 3/16-inch plywood using galvanized staples.
The interior framing and cabinets are constructed with pine, and the cabinet doors were built using the frame and panel method, which was quite labor-intensive but has proven to be strong and warp-free. The interior trim was finished with two coats of polyurethane, and the cabinet panels and walls were given two coats of interior paint. The outer walls and roof were sanded and coated with a special primer, and they received three or four coats of exterior house paint.
The camper is bolted through the floor directly to the frame of the truck in the back and to the service body in front using 1/2-inch bolts with compression springs, allowing for a small amount of flex and movement. The lower box of the camper fits snugly into the bed with one-half-inch clearance on either side and only one-eighth of an inch where the wings of the camper meet the top of the service body. The service body builder Knapheide, which is first-rate, also uses springs to attach the body to the truck frame in front. Since storage is always the Achilles heel with any camper, a service body with multiple exterior compartments seems a possible solution.
The total dry weight of the 8-foot long, 79 3/4-inch wide, and 7-foot-high camper totals 1320 pounds. When completely loaded with 40 gallons of water, 35 gallons of gas, a five-gallon LP tank, copious amounts of food and equipment, two people, and a dog, the entire weight of the combined truck and camper is just under the gross vehicle rating of 10,000 pounds at 9880 pounds. A lot of that weight can be explained by the truck’s curb weight, which is 7,140 pounds.
Power and Light for the Interior
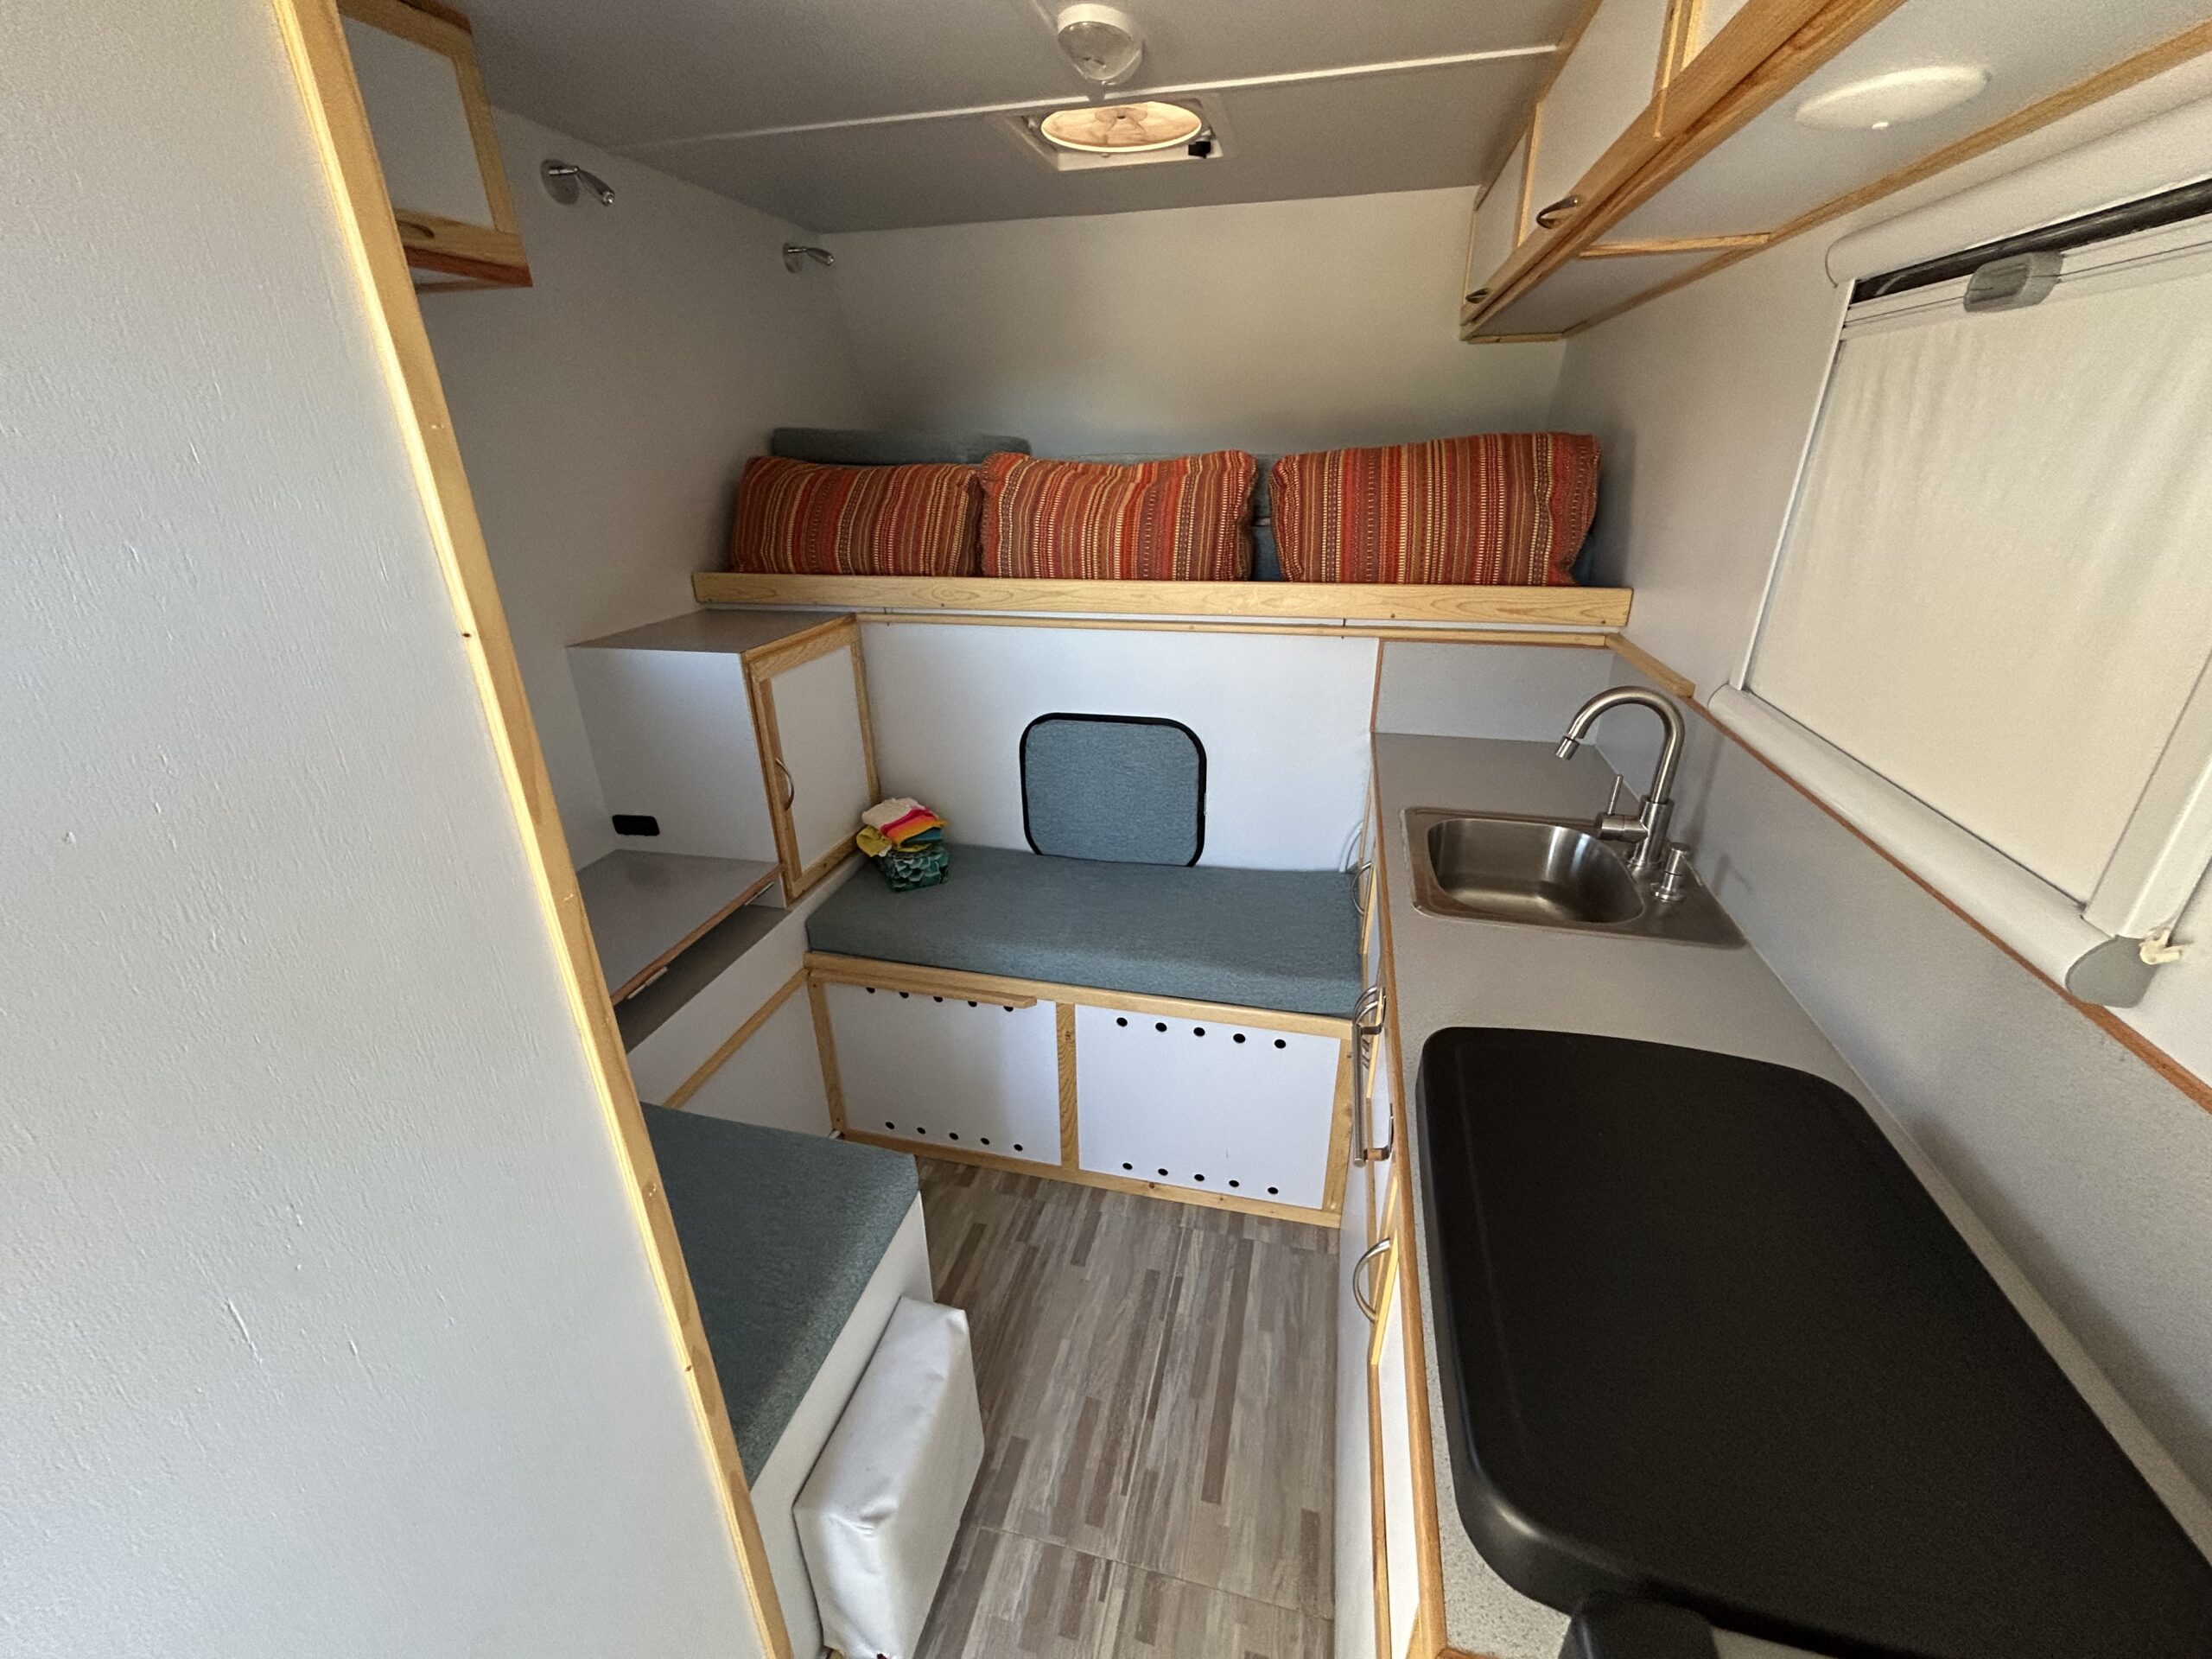
The sleeping quarters are mainly over the cab and just under queen size with an 18-inch pull-out extension. All the bedding stores in decorative pillows, and the bed is made up and taken down each day. It’s a hassle for some, but it’s my job and not too painful. The table is attached with open-end stainless hinges and is easily removed and stored under the bed or dropped down to fill the sitting area for a longer mini couch.
Ventilation and light are supplied by two Arctic Tern dual pane acrylic windows with attached shades and screens, a MaxxFan 10-speed in/out fan over the bed, and a MaxxFan exhaust and light unit in the head. A point to remember is that any window, single or dual pane, only has an R-value of one or two, so keep them at a reasonable size if you value insulation.
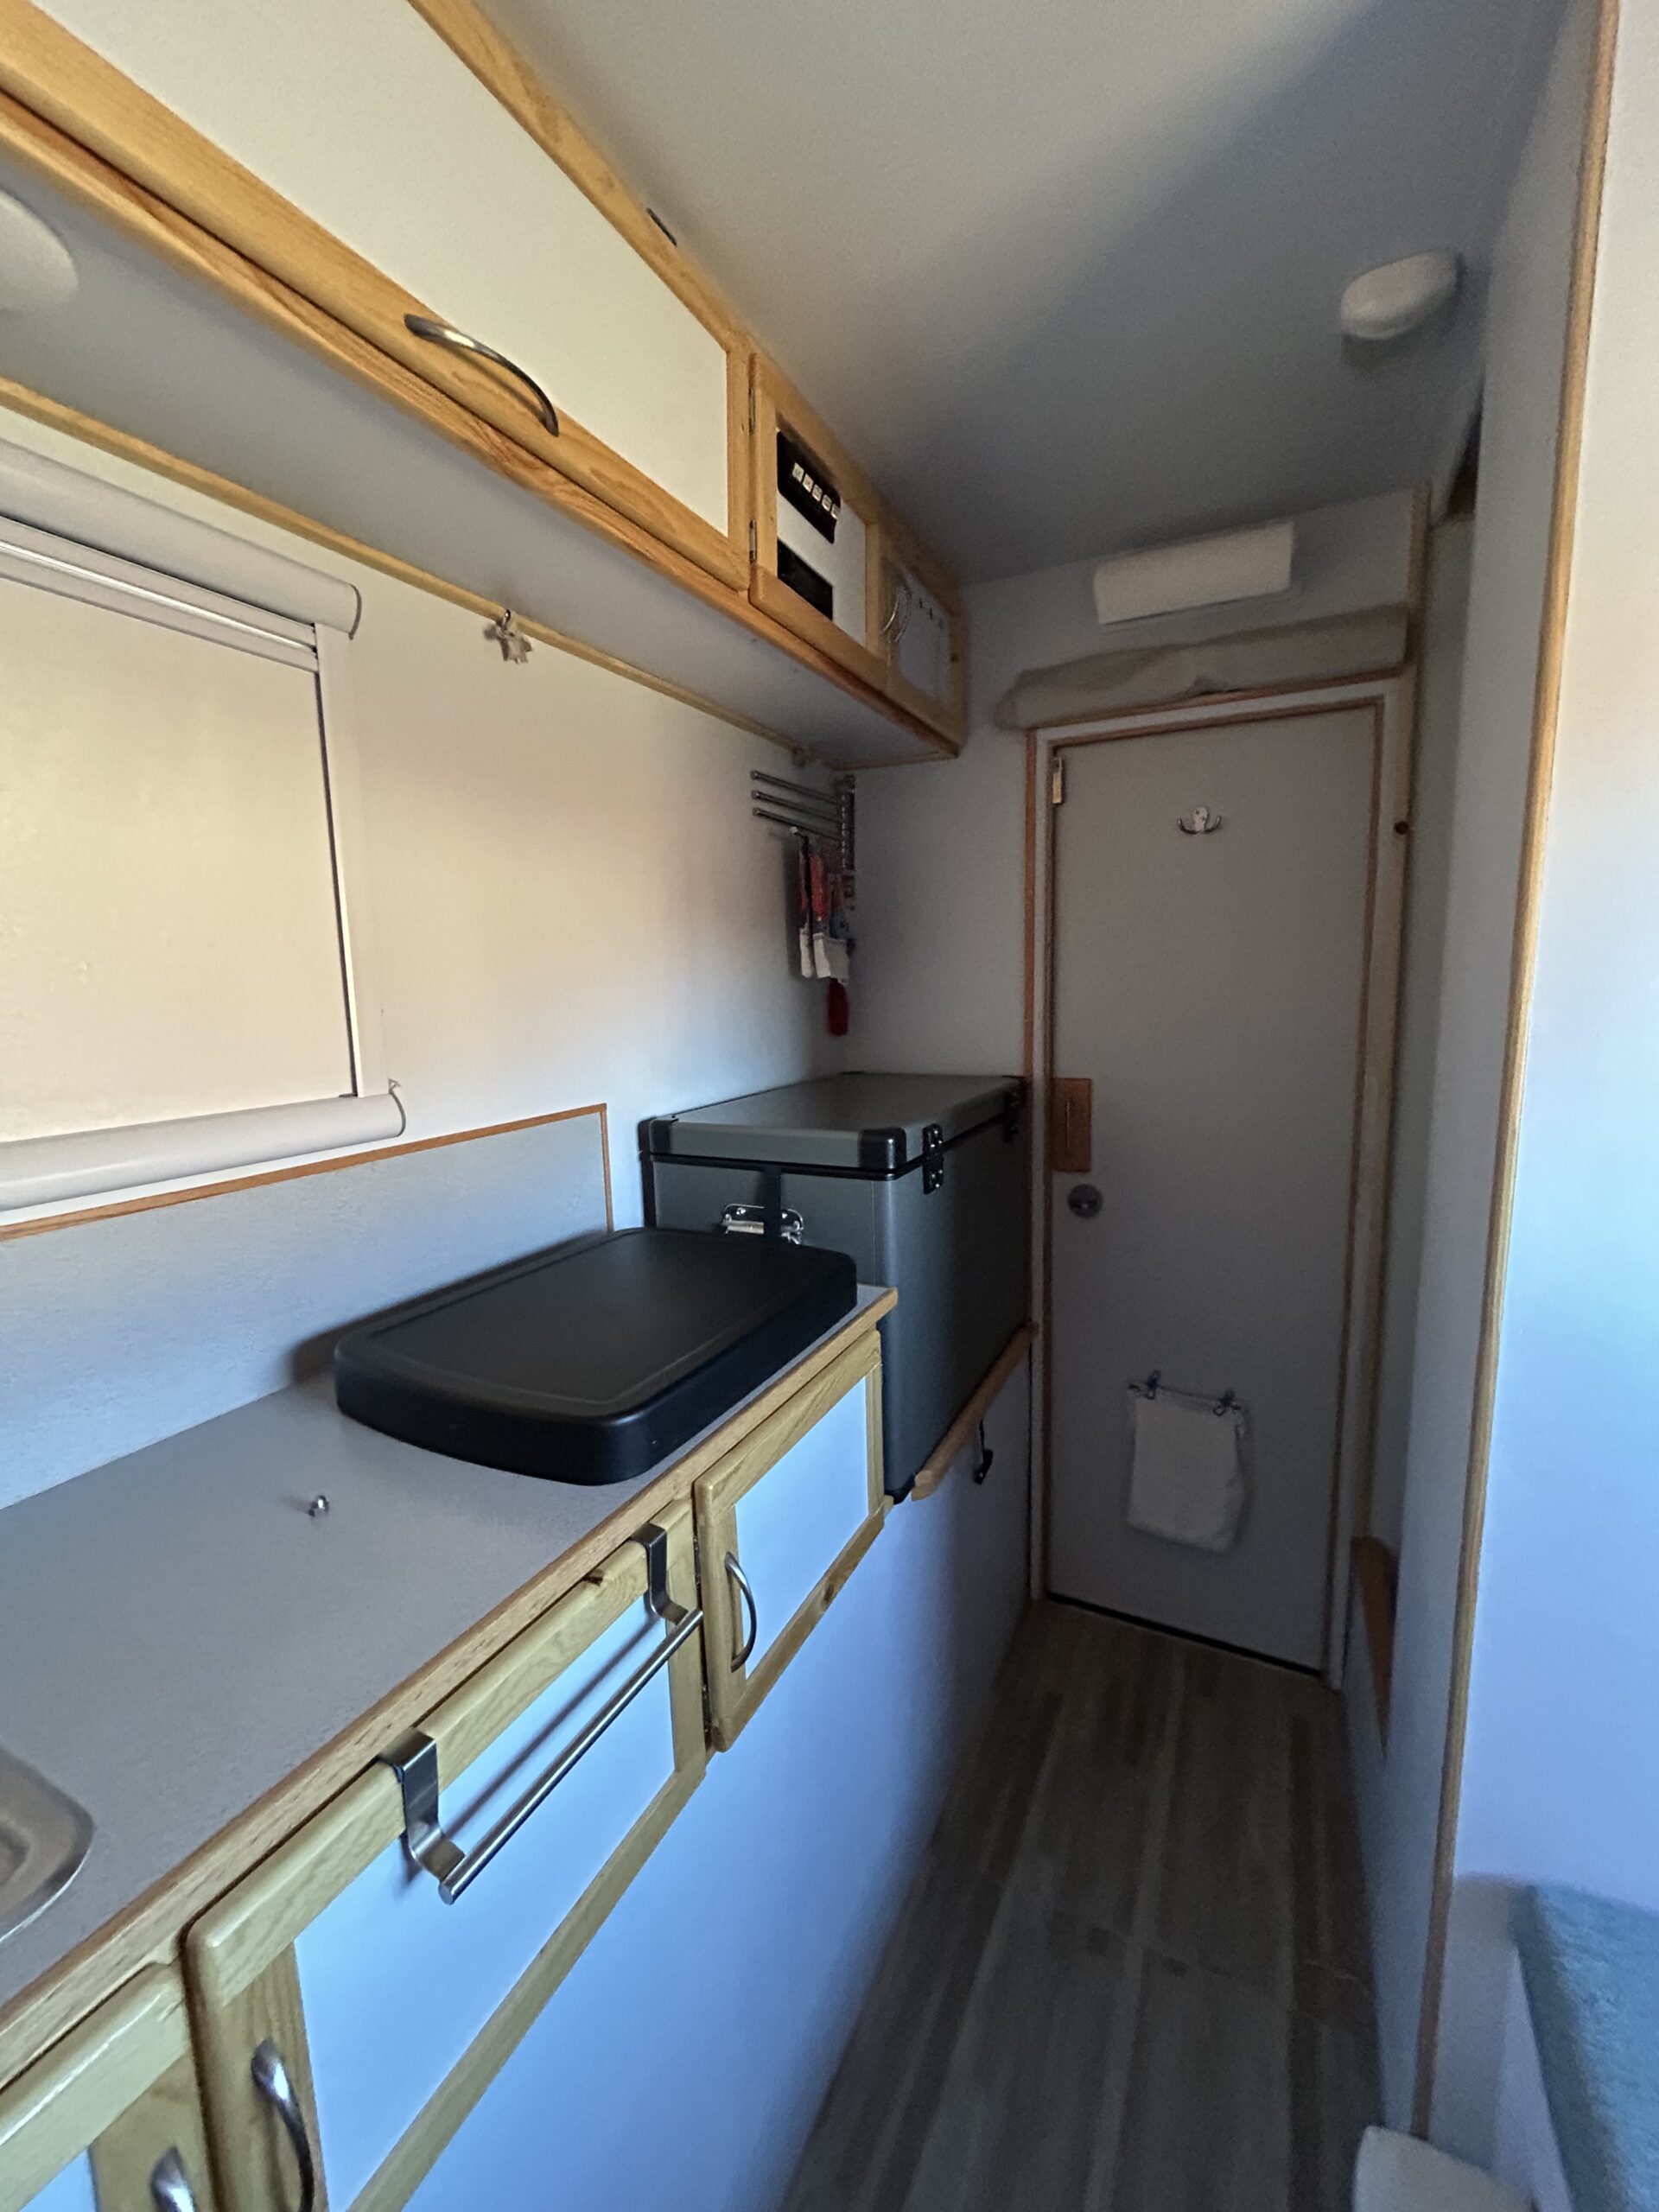
The electrical system consists of two 150-watt Rich Solar panels on the roof permanently mounted on one-by-one aluminum square stock, one 100-amp SOK lithium battery, a controller, and a fuse panel. There are two reading lights over the bed, two overhead lights in the cabin, one under cabinet light in the galley, one headlight, and three outside lights. There are also 12 volt and USB ports and a radio. The biggest power consumer is the Iceco chest fridge, which uses a spare 2.5 amp while running and has worked flawlessly. While less attractive than a built-in fridge, the thermal efficiency of a chest fridge and the ability to remove it from the other camper or put it in the car makes it very worthwhile. With the limited power consumption, the two 150-watt panels and the SOK battery are overkill, but you can never have enough solar.

Cooking is accomplished on a Flame King two-burner LP stove with a fold-down cover. Heating is via an LP Wave 3 catalytic wall-mounted unit, which is silent and doesn’t use electricity. One or two 5-gallon LP bottles are carried depending on the length of the trip and the expected temperatures.
Water Needs
The water supply is a 40-gallon tank mounted all the way forward and centered in the camper. I installed a five-inch clean-out/filling port in the top, eliminating the need for an external filler by running a hose in through a window or filling with a jerry jug or bucket, which is sometimes necessary for the backcountry. The tank has outlets for the kitchen faucet and outside shower via a SeaFlow pump. A drain outlet hose runs into an external compartment, which can also fill containers outside the camper. Another point to remember is that water equals range. The more you have, the longer you can stay out, and with a large tank, you don’t always have to fill it to the top.

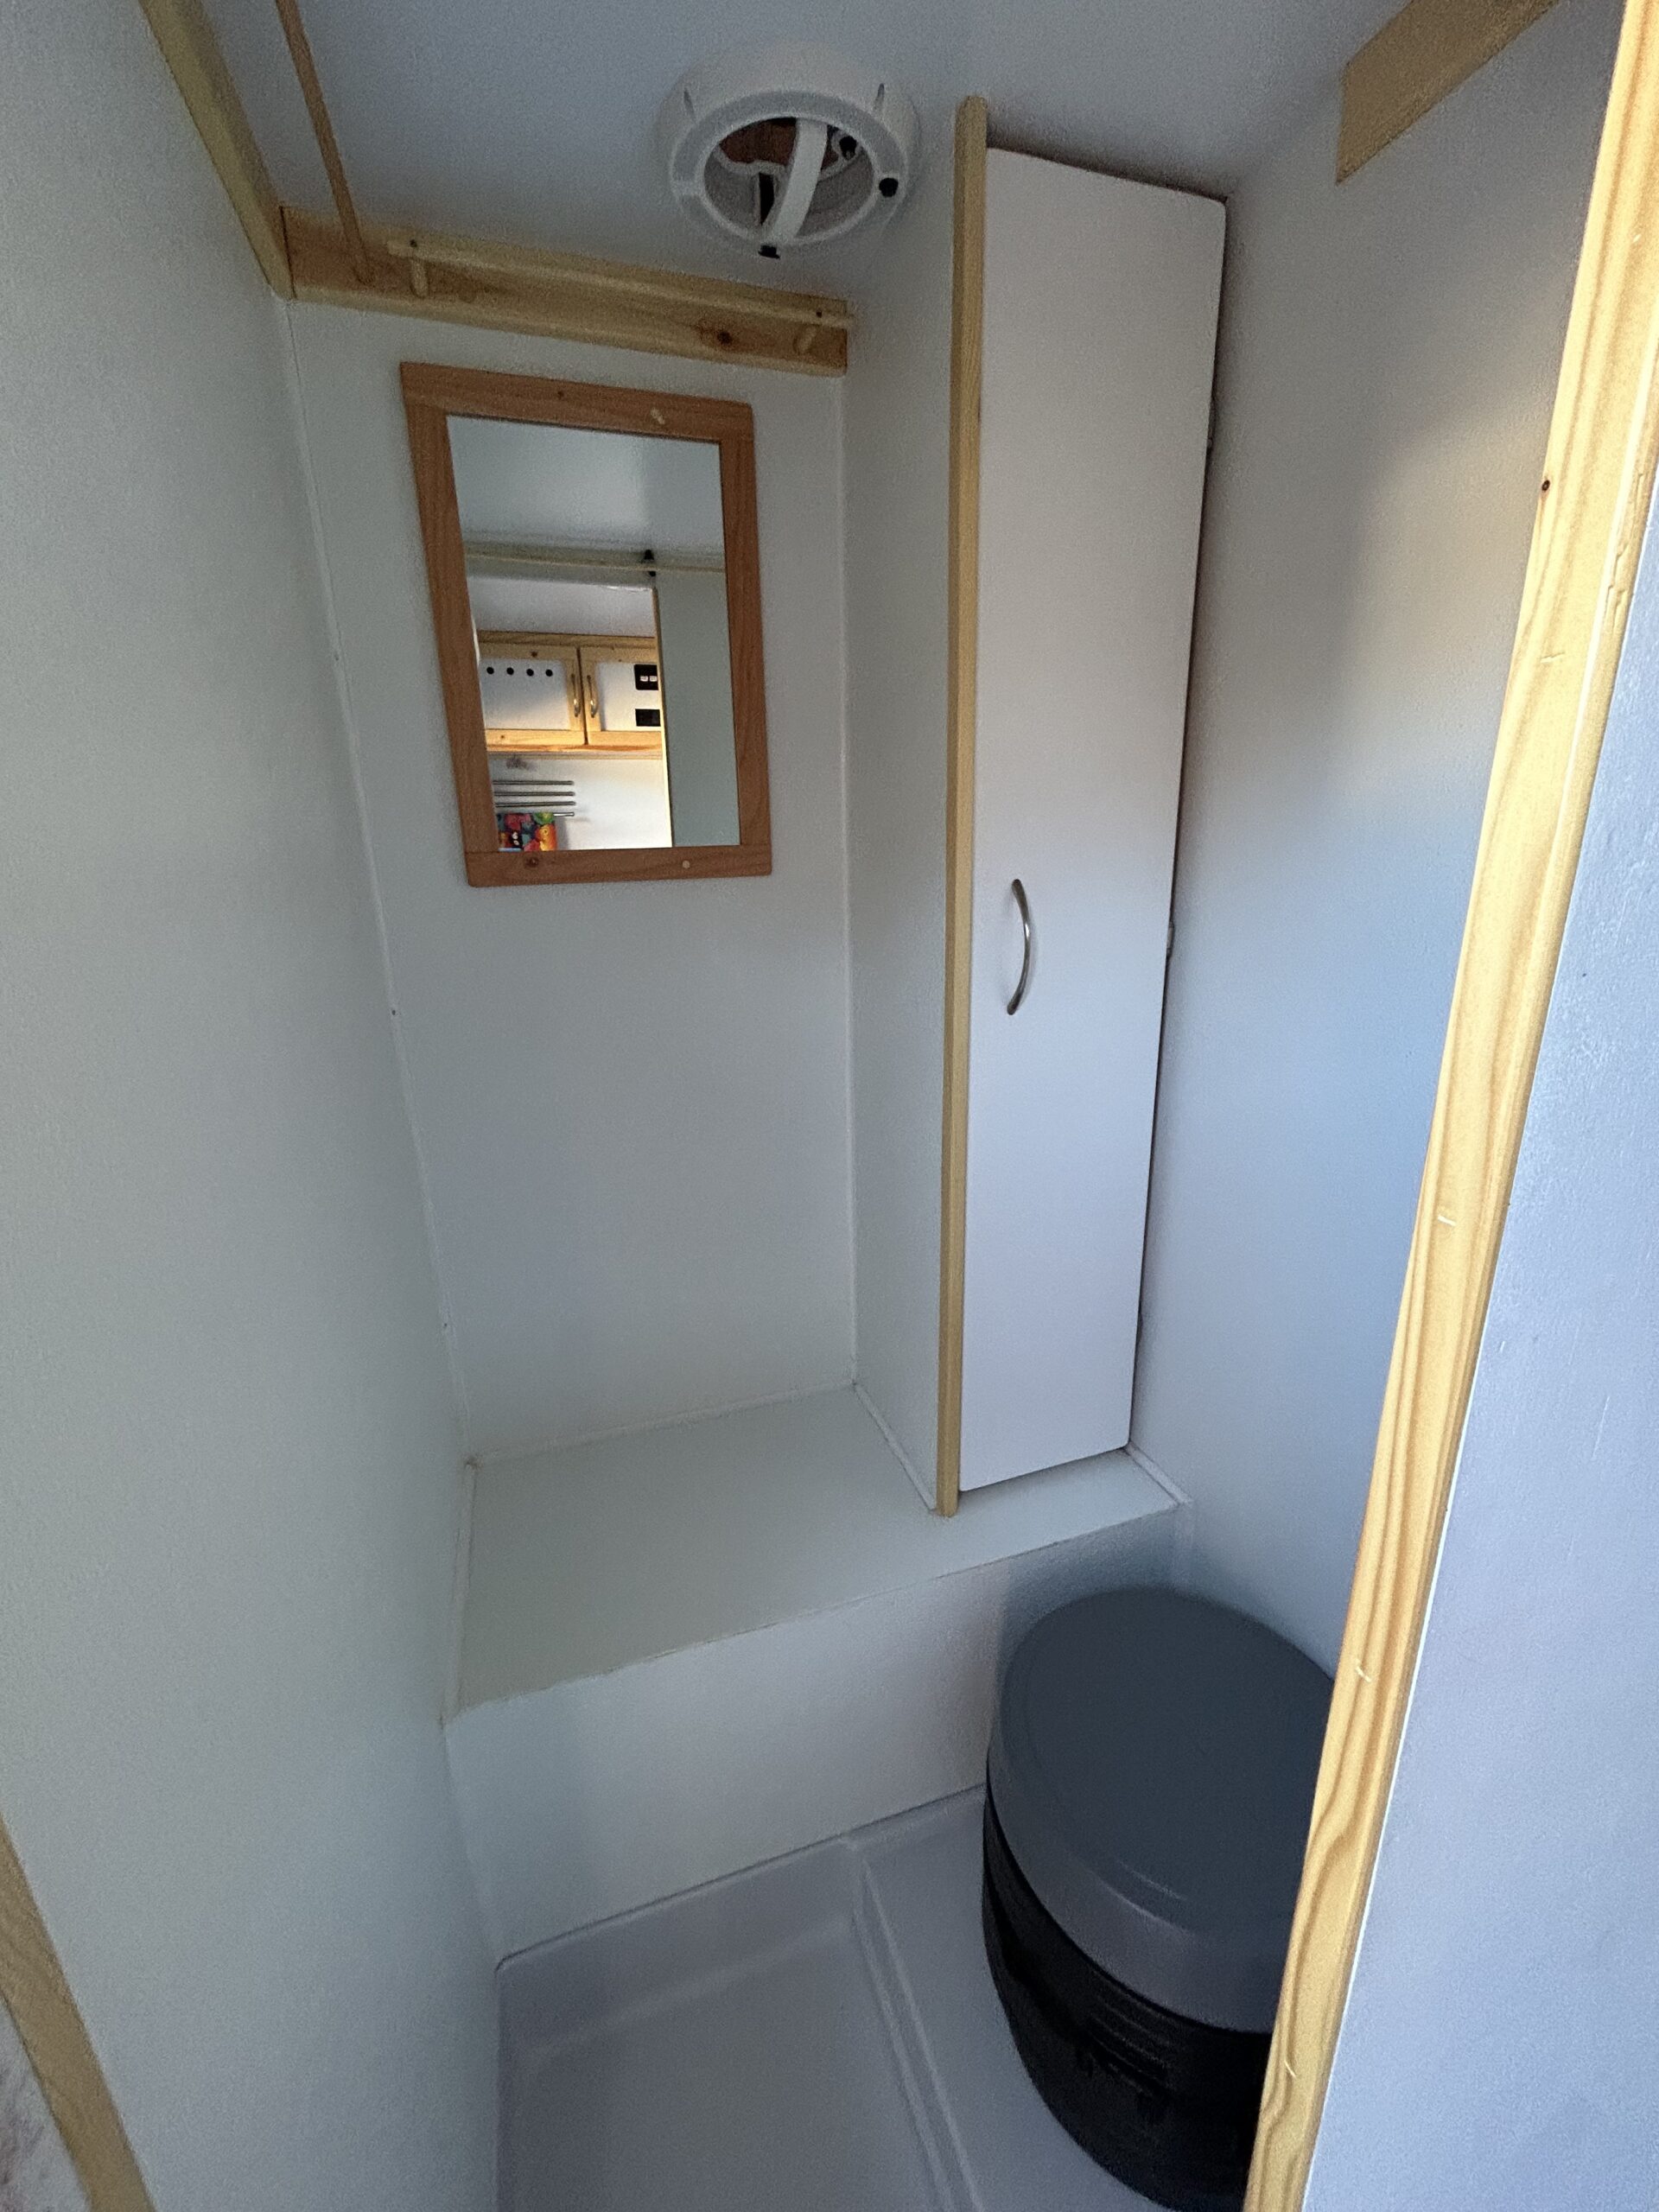
The shower/toilet stall is lined with fiberglass panels. Showering is accomplished using a one-gallon pump-up insect sprayer with an extended hose and kitchen sink sprayer head. The sprayer is filled to two-thirds capacity, and a kettle of hot water is added. With a little practice, it works great. It is the same system we used in our sailboat and in previous builds. When the weather and privacy are right, we just move outside. This method eliminates the need for a water heater and the associated plumbing and weight. The toilet is a simple $40 Reliance with a seat and tight lid.
Hitting the Road
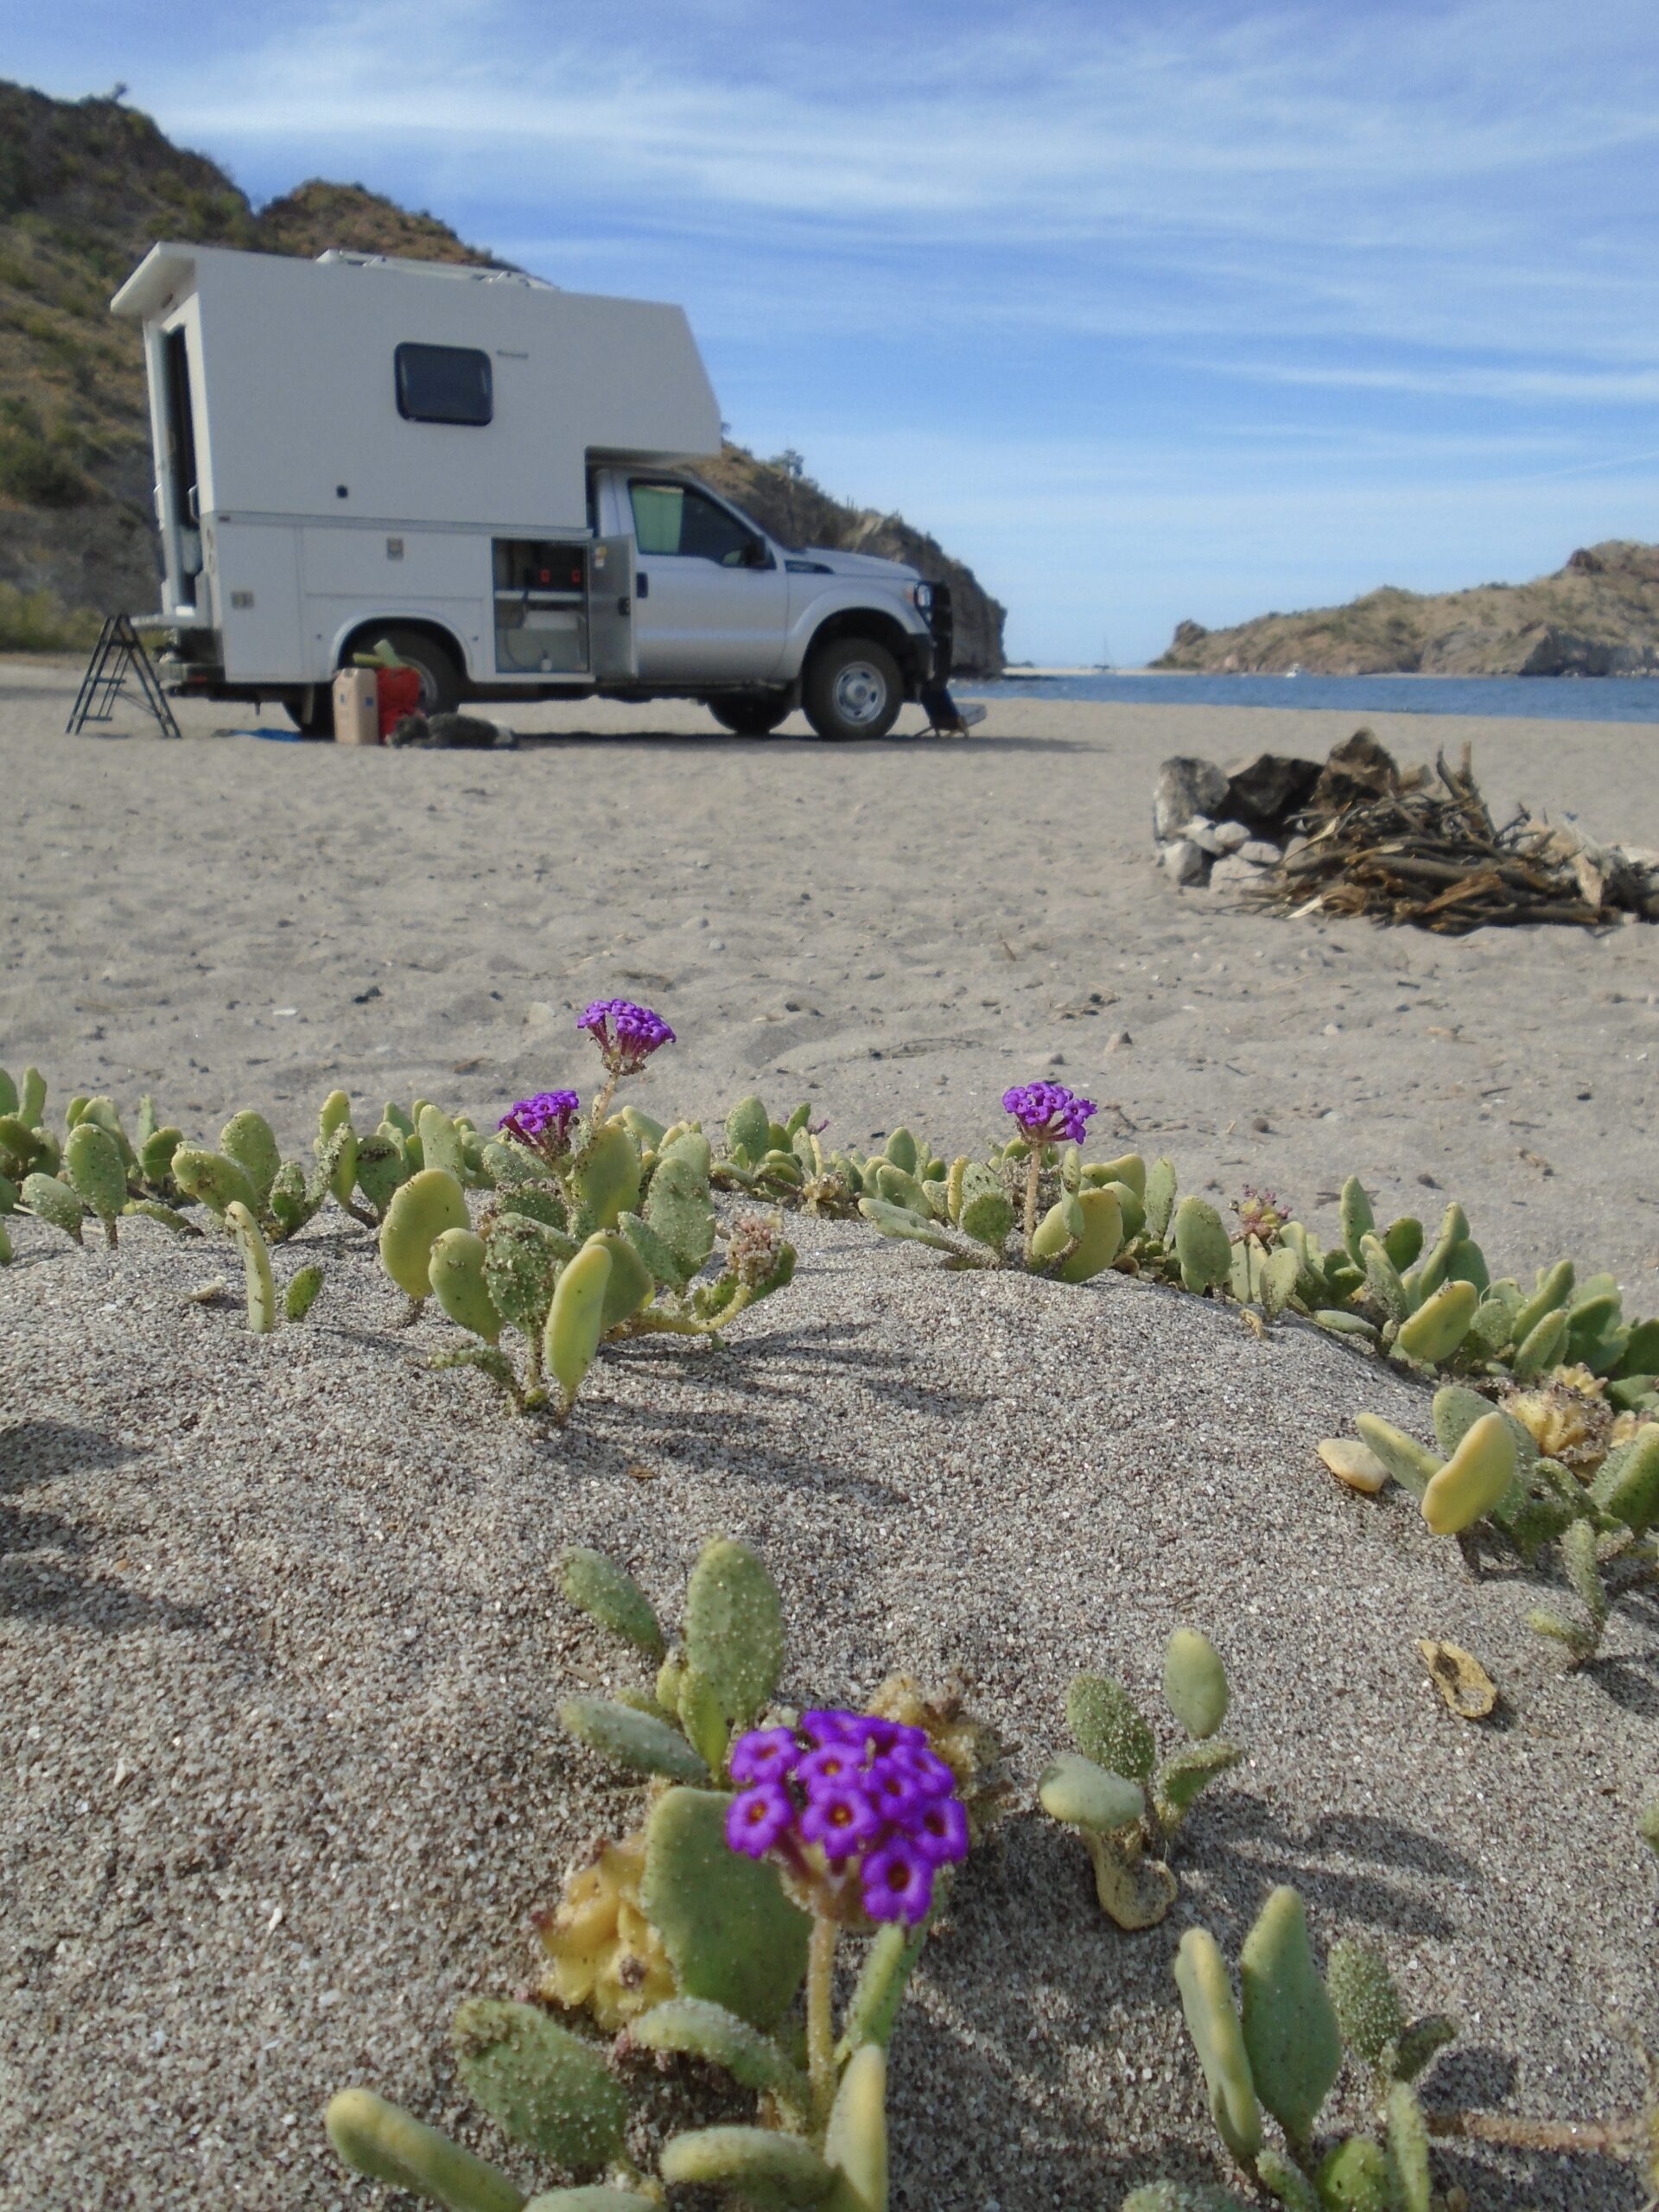
The maiden voyage with this rig was a six-week, 2000-mile trip around Baja, which involved over 250 miles on rough dirt roads, occasionally in four-wheel drive, to reach those delightful remote locations that still exist if you have a sturdy rig and a high tolerance for self-flagellation. All in all, the rig performed admirably with no breakdowns or problems. This summer was a further test with a two-month 8000-mile return trip to the Yukon and Northwest Territories with a round trip up the 1000-mile Dempster Highway to the Arctic Ocean. Conditions on this road were sometimes challenging, with potholes, corrugations, dust, and atrocious mud.
I am often asked why I didn’t build a pop-up roof camper instead of having a seven-foot hard model, which can be a problem on narrow, overgrown dirt roads. Pop-ups are indeed popular and are decidedly more aerodynamic in the down position and can fit into a container for international travel but, in my opinion, suffer from the inability to hold heat in or keep heat out, and for me, a light sleeper, to keep outside noise down. With canvas construction, you are still living in a tent. Also, many models lack cabinets on the raised portion, cutting down on storage—yet another compromise.
By now, it should be apparent that my rig, and everybody else’s, is a collection of compromises, and the trick for everyone is to understand what is important to them and where and how they plan to travel and then to try to find a rig with as few compromises as possible. There is no such thing as an “ultimate” rig. One of my heroes, Yvon Chouinard, founder of Patagonia, once said with a high degree of accuracy, “The more you know, the less you need.” The total cost of this build (during the pandemic when building materials were sky-high) came in under $10,000.
If you yearn for a more adventurous travel experience in the remote outback, a significant compromise might be needed, and a smaller, lighter, and more robust camper may be your passport. Whatever you decide, the most important thing is just to do it and get out there and enjoy this beautiful blue and green ball we find ourselves living on.
Read more: 1969 Chevy “SubyLander” Suburban Camper
Our No Compromise Clause: We do not accept advertorial content or allow advertising to influence our coverage, and our contributors are guaranteed editorial independence. Overland International may earn a small commission from affiliate links included in this article. We appreciate your support.


