Ever since I received my learner’s permit many many moons ago, I’ve been fanatical about European vehicles. Seventeen of my previous vehicles have been German cars, the outliers being a lifted ‘72 Chevy pickup in college called “The Pumpkin” and more recently a few Mercedes Geländewagens.
My passion for European vehicles eventually led me into my dream career. My brother and I own a European automotive facility and we enjoy every minute of it. However, successful business ownership is a grueling undertaking which consumes your entire life and then some, especially in the early stages of building the business from the ground-up.
After 12years of pouring all of my time into the business, it was finally time to start enjoying life outside of work again. Having been an outdoor adventurer before the start of the business, I yearned to get back out and explore, yet this time I wanted to meld my passion for vehicles and my affinity for the outdoors. This is how I got hooked into overlanding.
At the time I was driving an Audi Allroad, which does fairly well off-pavement on mild terrain. Since I was getting more and more involved in volunteer search-and-rescue, and needed a vehicle to haul more gear and my dog, I started looking at other more offroad-friendly vehicles. Being quite the perfectionist, I struggled for a long time in finding a truck to meet all of my needs and wants. I quickly learned that it doesn’t seem like the “perfect truck” exists. Sacrifices have to be made, you learn to live with a fantastic something-or-other, and just forget the rest and continue on. For me in this journey, since I wanted to stay with something of European descent, I was fairly limited in vehicle choices. I’d always coveted Unimogs, Pinzgauers and G-Wagens. Their military history and utilitarianism and rawness speak to me. It’s like that go-to tool in the garage which you always reach for when you need the job done.
The G-Wagen was the obvious choice since this vehicle would eventually be my daily driver. I appreciate the G’s heritage in being built by 4×4 mega-haus Magna-Steyr, its history with the militaries and governments and municipalities, its over-the-top beefy chassis, its rarity and uniqueness and boxy looks that have basically stayed the same since 1979. I consider it akin to a Porsche 911; a genuine iconic classic. Sadly, most G’s in the USA are known for their boulevard cruising capabilities, perhaps because that’s how MBUSA has marketed these trucks in the States. At least here in the PacNW, there isn’t a plethora of such Gs like there are in sunnier states. However, as I would quickly come to learn, Oregon seems to have a higher majority of enthusiast-owned W460s and W463s. Soon enough I looked forward to waving to other G owners I encountered on the street and they waving back as we both knew the rarity of seeing a G-Wagen. The camaraderie has been truly special; it’s a tight knit group which gets together every year for events such as the G-Wagen Treffen held in Philomath, OR on a G-Wagen enthusiast’s family winery.
Going in, I knew the sacrifice on such a vehicle would most likely be fuel mileage, lower availability of aftermarket components, and that while I desire the utilitarian/bare bones Gs available in Europe, here in the USA we get more of the ”bling versions” than not. My ultimate mission was clear; in order to use it for its originally intended purpose as a cross country vehicle, I’d have to create my own flavor of G-Wagen here in the States.
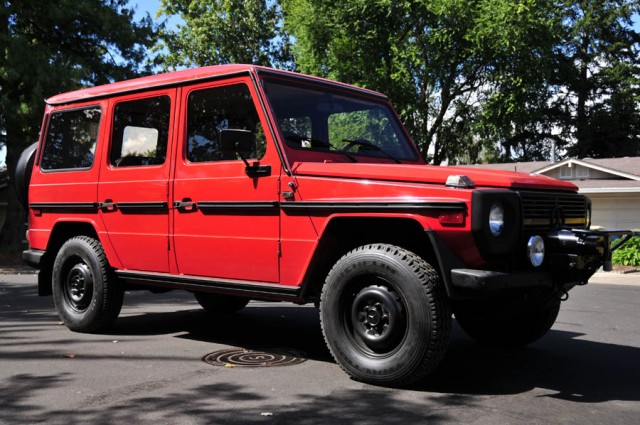
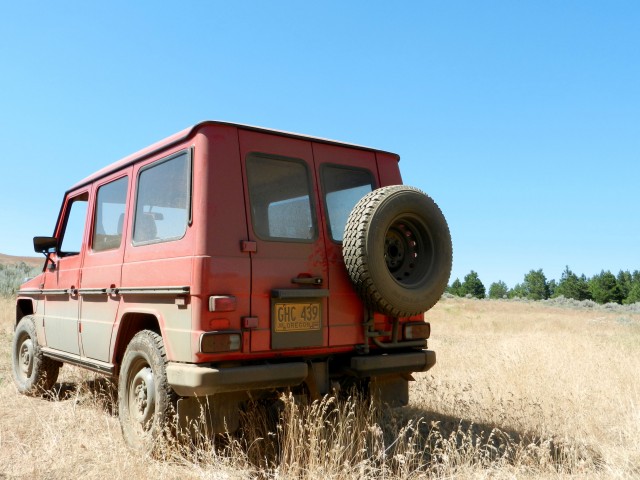
1980 300GD “Radio Flyer”
Since I was green to Gs, I began at their beginning and started looking for the earlier W460 chassis which have manual windows and vinyl seats, vinyl flooring, no a/c, diesels, no electronic modules, etc.
I ended up finding on eBay, one of the most rust-free W460 examples seen in the USA, and in my hometown of Portland, OR of all places! It turned out that the seller was a client of ours, and even smaller world yet, I later found out that another client of ours’ father’s local Portland Mercedes shop performed the original 1981 federalization and she distinctly remembered riding in my G when she was a little girl!
The ’80 300GD, nicknamed Radio Flyer for its bright red color, was fun and unique and novel, however I should have taken my “googly eyes” off when test driving it a few times before purchase. Being used to much more powerful modern vehicles, the sheer powerhaus (ok, being facetious here) of the 3.0L “OM617” I-5 diesel’s 88bhp/125btq failed to put me back in my seat in a 0-60mph test just for giggles, which resulted in a repulsive 88seconds. Hrrmmm, when a lot of overland trips in the Pacific NW begin with pavement and steeper hills, that doesn’t make it much fun to drive, now does it? Well, unless you enjoy driving 20mph up a mountain grade with hazards blinking, semi-trucks passing you at the speed of light.
I enjoyed the blast from the past for about a year, getting heavily involved in the G-Wagen scene, but I was quickly realizing the Radio Flyer may not be exactly what I originally had in mind. Thoughts of transplanting an OM606A (3.0L I-6 24V turbo diesel) crossed my mind, kind of building an ICON-esque G-Wagen, but even though I thankfully have the resources and shop facility for such, I wasn’t too keen on starting a long-term project. I want to be out exploring in the vehicle, not consistently building it in the shop. So, I ended up selling Radio Flyer, my Allroad, and another German classic, and decided to focus on one vehicle for everything; a W463 G-Wagen.
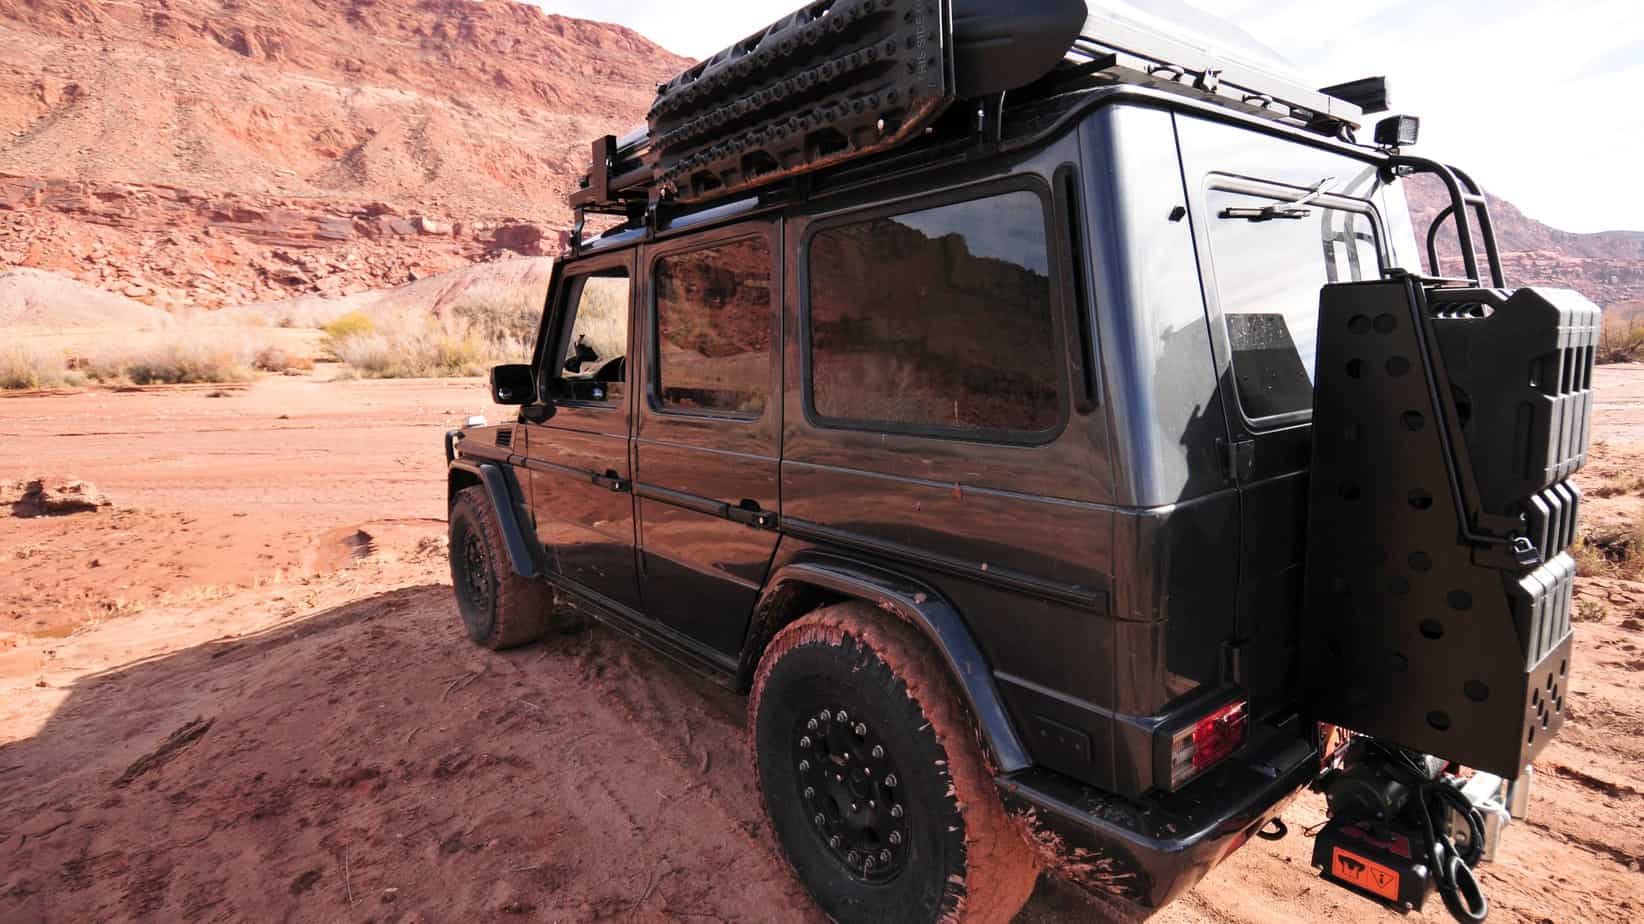
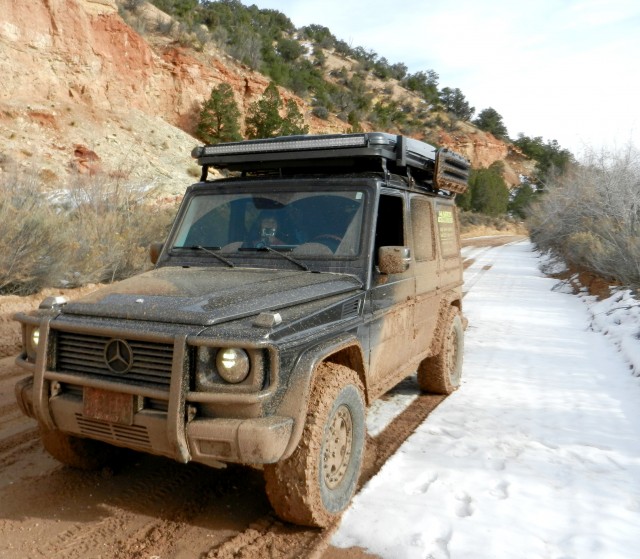
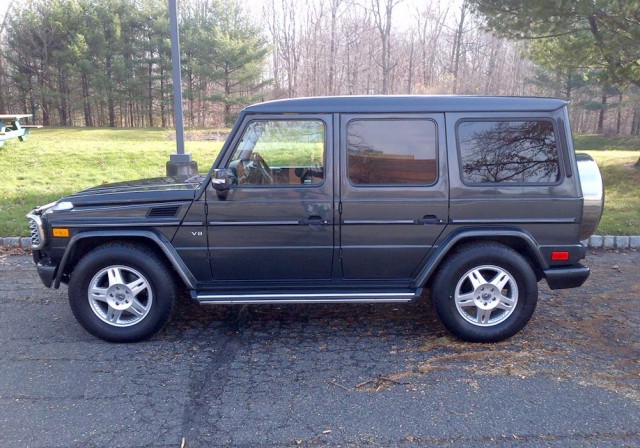
2003 G500 “O’erlandewagen”
At this point I had a better understanding of what I wanted in an overland vehicle, specifically another G-Wagen. Yes, I could have solved the power/MPG equation with the OM606A swap into the W460, but again, I didn’t want a year-long side project which would prevent me from doing what I started after; getting back outdoors and exploring.
Since the G-Wagens are built like a brick house, they’re inevitably heavy (my G500 weighs ~6900lbs, ~7400lbs fully loaded for a longer excursion), and hence need a potent powerplant to propel them. In the USA, starting in 2002, Mercedes equipped the Gs with nothing less than 5-liter V8s. With the vehicle’s weight and a thirsty V8, I realized there was no easy way to get around less-than-optimal fuel mileage. I knew I’d have to live with this sacrifice, but at least I could solve the power dilemma I had with Radio Flyer.
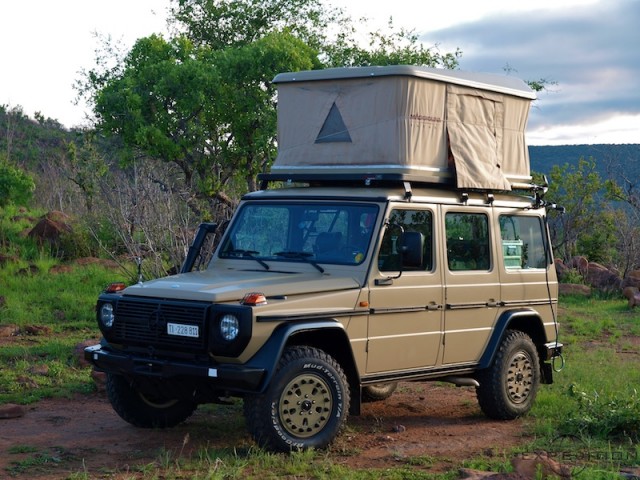
Digging further and further into the G-Wagen forums, I came across Unicat’s Entdecker. It’s based on the euro-only W461 military-chassis’d “Green Line” G and features simple manual seats/windows, rubber flooring which you can spray out through the drain holes in the floor, powerful and efficient turbo diesel; it’s exactly the type of G that I was aiming to create. Why didn’t I just buy an Entdecker and start exploring? Well, first off it’d take many armored trucks full of loot to federalize a W461 chassis, and moreover, I knew that over time I could create my own version of it Stateside, tailored to my own needs, for a lot less money.
After more and more forum posts (what would we do without the WorldWideWeb?), talking to many overlanders, doing lots of research on available products, making lists and more lists and weighing the pros and cons of them all (this interaction and research is what drew me into the business 15 years ago), I finally had a solid revised plan of what would be a more modern and useful real-world G-based overlander.
After 6months of diligent searching, I happened to find my ’03 G500, again on eBay. It had been originally sold and resided in Oregon, then moved to NY/NJ for 2years where it stayed inside in the winter. The previous owner towed his Lotus Exige with the G, and in order to fit the G in his garage, he lowered it ~1” with Brabus suspension. Other than this, it was unmodified, very well-maintained, and mine!
A few creature comfort modifications
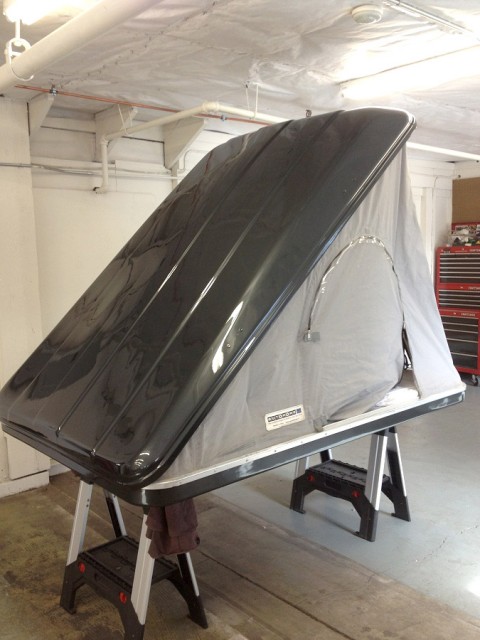
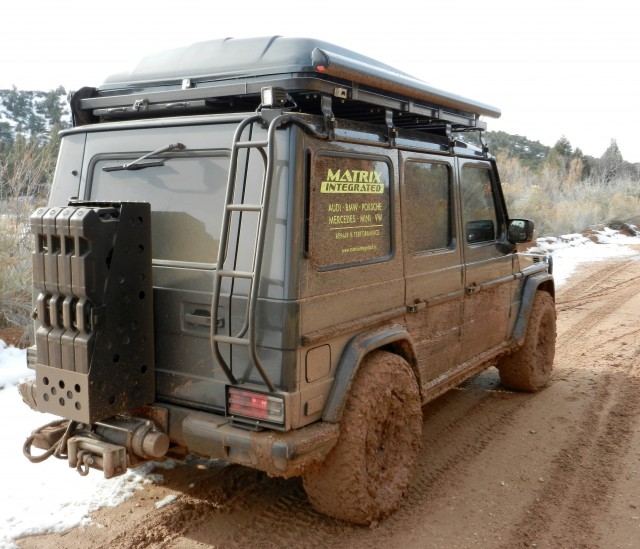
I decided I wanted to build my G around a few key creature comforts that would make overlanding that much more pleasant. While I dreamt about the Autohome Columbus Carbon rooftop tent in order to save weight, I started with a Columbus Variant in fiberglass (purchased from ExPo classifieds). Since they only come white and my truck is Tectite Grey, white on grey would look a bit odd (remember, think cohesiveness of the Entdecker). So I had one of our body shops color match the RTT and then our tint shop lined the full exterior with paint protection film for the trail.
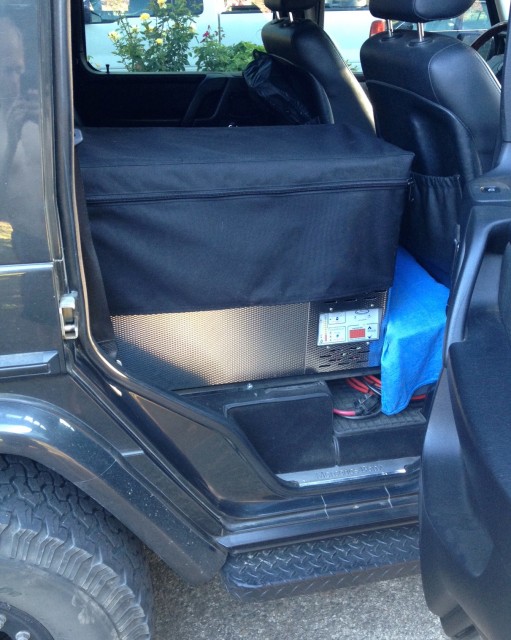
Next I sourced a National Luna 50L Weekender fridge/freezer. Since I wanted to be able to take 2 couples in my G, I removed the “40” section of the rear seat and we nutserted the fridge plate/fridge to the right rear floor. With these two additions, the simple ability to pull into a dispersed site, pop up my RTT and be asleep on a memory foam mattress in less than 3minutes is relief after a long drive. And if I feel like a late night snack, I can just pull some Ben & Jerry’s ice cream out of my freezer and enjoy it in bed.
Suspension/chassis/drivetrain
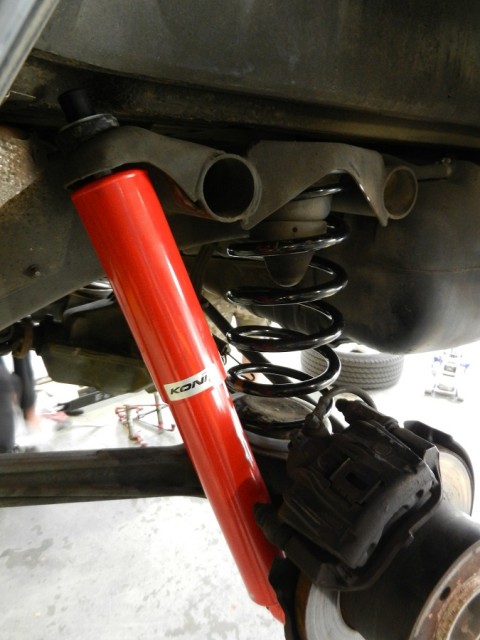
After lots of research of available options, I went with OEM Mercedes heavy duty suspension consisting of Red3stripe front and Brown2stripe rear springs along with massive Koni HT Raid dampers. I felt that Mercedes/Manga-Steyr engineers would have invested more time and money into their color-coded spring options than anyone in the aftermarket would. Moreover, since I knew I’d be loading up my G with more camping equipment, it only made sense to choose a spring combo that ticked the boxes of load capacity and a bit more ride height clearance (~1” lift over factory, ~2” over the previous Brabus susp). To keep the front damper shafts from possibly being nicked by rocks, I had Outerwears build a custom set of their damper covers to my specs.
Wheels were a difficult decision. What comes factory on the G500s are 18s, which aren’t bad, but I wanted a bit more tire and wheel protection for airing down. First off, there aren’t a lot of subtle 5x130mm wheels available. I searched and searched for factory steel wheels from other Gs, Sprinters, Touaregs/Cayennes, but none were available in the specs I was looking for. I thought of taking one of these steel wheels and having it custom sized, but then concerns of longevity grew in my head. About this time another long-time German car nut friend and fellow G-Wagen owner was starting to distribute Hutchinson double beadlocks. Well fancy that; the Entdecker also runs Hutchinson’s, as it’s what Mercedes offers for their military wheels. If it’s good enough for Unicat, it has to be good enough for me. The cast (forged are only offered for special projects and military applications) DOT-approved Hutchinson beadlocks would be about the same price as a customized factory steel wheel, and I’d be able to really air down without concerns of losing a bead. WA-1207 Hutchinson’s were ordered and installed with 285/75/16 BFG AT KOs in E load.
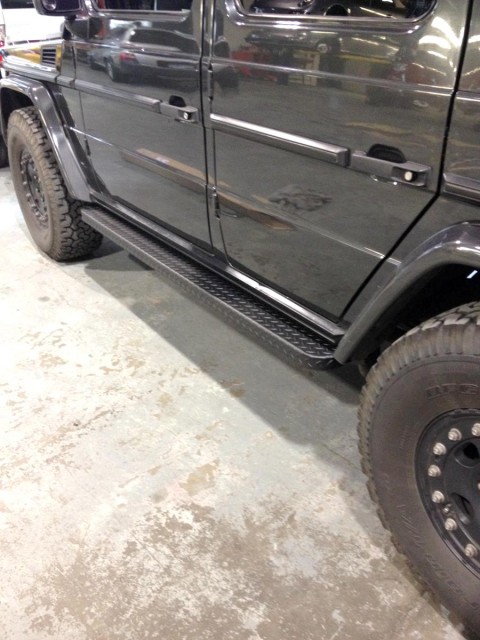
I have also added G-Wagen Accessories sliders to keep the catalytic converters intact, as well as their aluminum diamond-plate side-steps for ease of entry and side-sill protection. Triple differential lockers on the W463 from the factory are a very useful feature, even if they’re electronic-pneumatic-hydraulic and prone to vacuum leaks over time. You need to be mindful of when you want to use them as they take a bit of distance to fully lock up, but once locked, they help the beast of a G crawl through pretty much anything.
Exterior
In order to easily mount the Autohome RTT to the roof, I went with Front Runner’s Slimline roof rack in the 2.4M length and Tall version. I was impressed with their aluminum build quality and their various bolt-on accessories, including Autohome-specific mounting brackets. Their Tall version allowed me to stow their stainless/aluminum camp table underneath the rack using their specific mounting brackets. This feature helps utilize the under-rack area for maximum utility and efficiency.
Due to living in the NW where it tends to drip liquid sunshine quite often, I added a Fiamma F35 Pro awning to the rack, custom ordered from Italy in the obscure 2.2M length. Since it comes in a light Titanium-colored aluminum hard cover shell, I completely disassembled it, sent the shell off to our powder coater, and now it resides in stealth satin black like almost everything else on the truck. I also performed the same treatment to the factory brush guard.
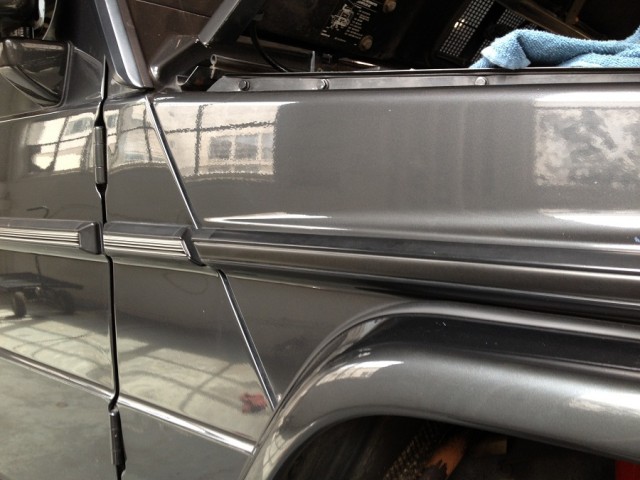
Entdecker aside, I prefer subtle vs outlandish, and this has been my goal with my build. If one looks closely, you’ll notice a few “European touches” to my G like no FMVSS-esque side markers, no 80’s vintage stick-on side trim/rub rails, custom clear-tinted markers, de-chromed everything, etc.
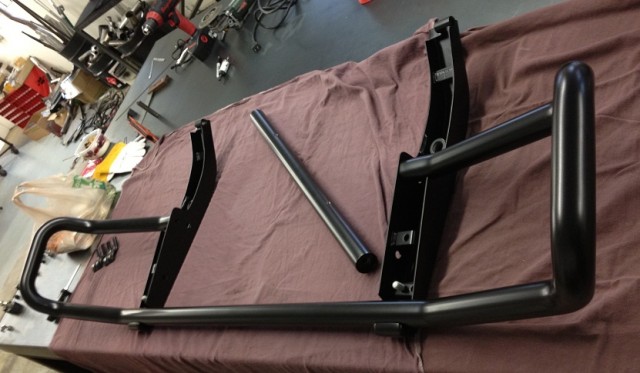
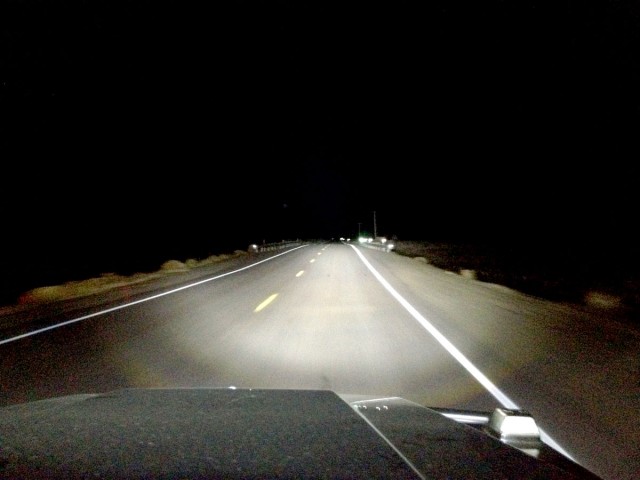
When I first drew up my own Entdecker concept, I visualized four Hella Rallye lights on the front of my roof rack and two on the factory brush guard. However, the more I worked with my stealth approach the more I realized that an LED bar would be more appropriate. I re-arranged the RTT and was able to barely fit a Rigid Industries 50” E-Series LED bar on custom brackets on the front of the rack. The light output is simply beyond words, and makes nighttime driving less fatiguing and much safer. I also added a Rigid Dually D2 to the rear and mounted it to a custom bracket off of the G-Wagen Accessories rear ladder. This ladder has a built-in wiring conduit hole, keeping the wiring hidden from view. As well, I recently was the first G in the USA to incorporate Nolden’s bi-LED headlights which use OEM Osram components. For around-town driving, these lights are also much easier on the eyes than the factory halogens.
Most of my overland trips to date have been extended weekend trips within the Pacific NW. Thanks to ExPo, I’ve met some great friends whom I’m starting to travel with more and more. One big trip I just completed was a trek down to the SW(Grand Staircase, Old Mojave, Death Valley, etc) with an LC80 friend; everything from frigid temps to summer temps, snow/ice to rock ledges, sloppy mud to sand.
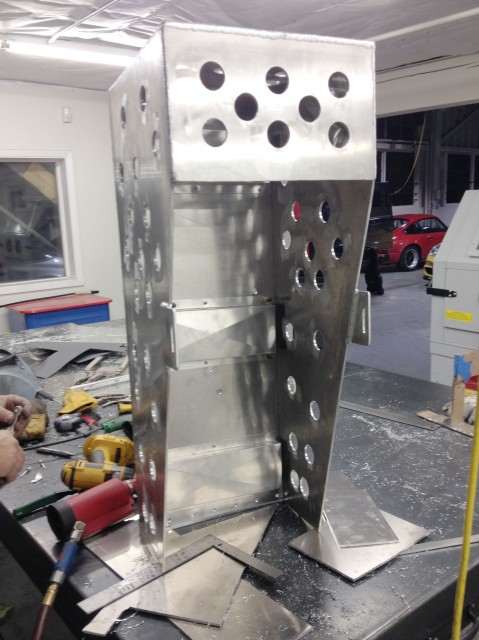
Since I also have numerous plans of longer-range trips like many of the BDR(Backcountry Discovery Routes), Colorado, Montana, Alaska, fuel range has always been a concern. Since I average about 11-13MPG mixed, have a ~285mi range with the factory tank (and that’s being friendly on the throttle!), and auxiliary fuel tank options are very rare/expensive/small for the USA G’s, I started planning a fuel solution for our recent SW trip. I had the racecar fabricator next door build a custom aluminum RotoPax holder (powder coated in satin black) based on my own cardboard mock-up design. Since I wanted to keep any more weight off the roof rack, this solution uses the factory cargo door mounts to hold four 4gal RotoPax (in custom black of course). This provides me with ~160miles of extra range, for a total of ~445miles. Yes, still not great, but it is improved over factory.
Two black Maxtrax were added to the roof rack via custom brackets, as well as a Fiskars axe and Bully shovel using Front Runner’s brackets. Everything remains black, stealthy and unobtrusive.
Interior
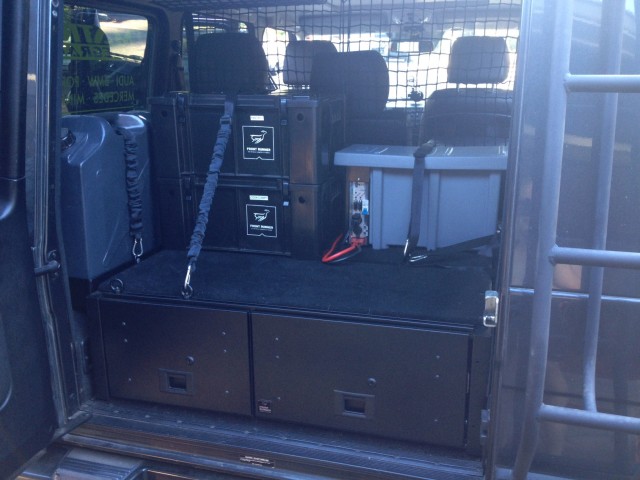
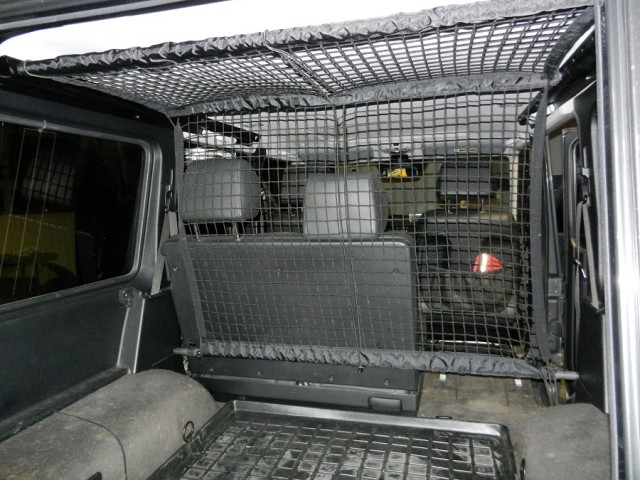
Alongside the National Luna Weekender50 fridge and its accompanying National Luna Portable Power Pack with Deka group31 AGM battery, I added Front Runner’s cargo net setup with black aluminum extrusions and telescoping carbon fiber support poles. This keeps my dog safely in the rear and allows me to store soft goods up in the “balcony.”
I had our tint shop add window tint film to the LF and RF windows which matches the factory dipped glass. Also added to the insides of all windows was 3M’s Crystalline heat-reflective window film which greatly reduces interior temps. This is especially important for not only passenger comfort when traveling, but also my dog.
When we added the custom RotoPax fuel can holder to the rear cargo door, we moved the spare wheel/tire to the right rear of the cargo area, using the factory tie-down points and factory spare wheel mount on another custom-built aluminum bracket of my own design (mount was powder coated satin black like everything else).
Initially, the remainder of my cargo management had included a large red trunk which contained my chains, spares, recovery gear, etc. This was the same height as my rear “60” seat when folded down, allowing for a sleeping platform if ever needed. This trunk sat next to the Power Pack and also an ARB air compressor in-box. They were covered by custom quilted black cargo blankets. (The seamstress also produced the custom black fridge cover to keep the interior all black and covert.) I used to strap two Front Runner water jerry cans on top of the red trunk, even designed a custom black aluminum square holder for them, but I scrapped that in favor of another custom holder over the left rear wheelwell which uses the factory tie-down points in order to mount. In the end, this initial cargo setup proved to be frustrating when I needed something out of the red trunk, as I’d have to remove everything on top of it to gain access to the trunk items.
However, since a drawer system was ultimately on my list, I had sketched many ideas and saved many pictures from other online builds, in order to create the ultimate custom drawer system for my needs. I was headed in this direction until Front Runner came out with their own dual drawer system for the G-Wagen. Keeping in mind many of the lessons I’ve been learning throughout this build process, I decided to forgo the completely custom route (potentially the same amount of money, but a whole lot more time), and just install the FrontRunner drawer system. We ended up custom mounting the drawer system as it’s originally meant for the euro-W461, but in less than 2hours we had installed the drawer setup, again using the factory cargo tie-down ring locations so that no new holes were drilled into the vehicle. Thankfully, the custom water jerry tray from the first setup is still retained. The spare wheel/tire mount is currently being re-located due to the drawers. On top of the drawer system I have added up to four of Front Runner’s Wolf packs, to keep gear organized and easily stackable.
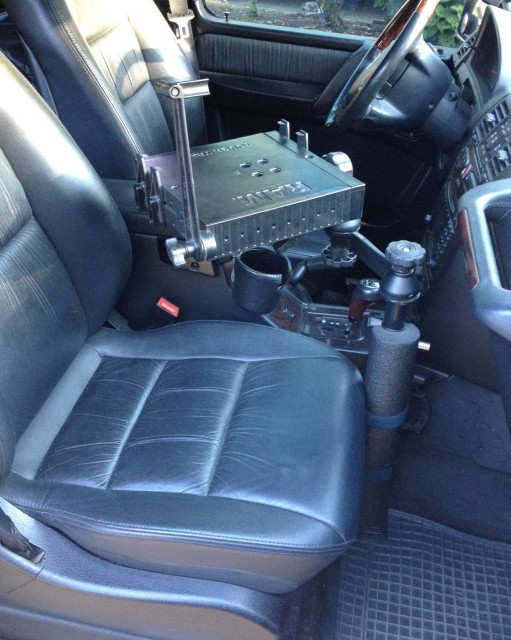
I also sketched up a custom RamMount laptop mount for my MacBook Pro running DeLorme’s TopoNA program. This allows me to keep tabs of my location whether I’m overlanding or searching for a subject while out with my volunteer K9 search-and-rescue team. Attached to the RamMount telescoping leg is a fire extinguisher.
In the end (yeah right, is there ever an end to our overlanding passion??)
Building my G-Wagen has been an enjoyable process so far. I’ve met some incredible friends along the way and learned what gear is needed and what is superfluous (code name; K.I.S.S). I’m quickly realizing however that the way I have my G setup for a bit of comfortable overlanding, it is best suited as a two person plus dog vehicle. Trying to carry four people plus dog and gear gets too crowded, especially for extended trips. However, it’s very difficult to not want friends/family to join in on our adventures. There’s just too much of the America’s (to start) which we want to experience! So, I have begun future plans for a bit larger of an expo vehicle for these trips.
Yet for now, as my lessons have been teaching me; enjoy what you have while you have it and just get out there. So with my topo program within arms length, Hutchinson beadlocks, factory triple lockers, rooftop tent, and fridge/freezer, hopping in the “O’erlandewagen” for a trip to somewhere yet explored is pure bliss.


