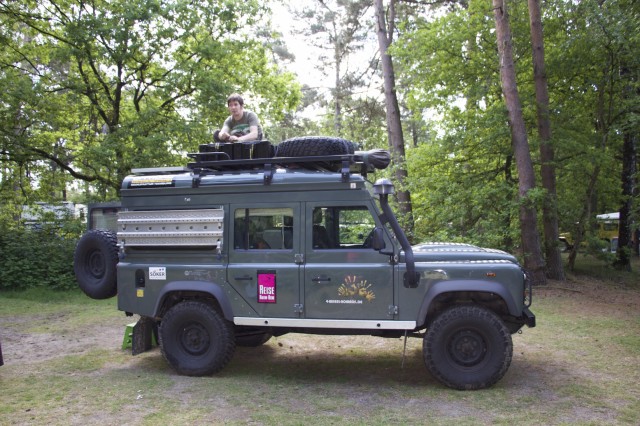
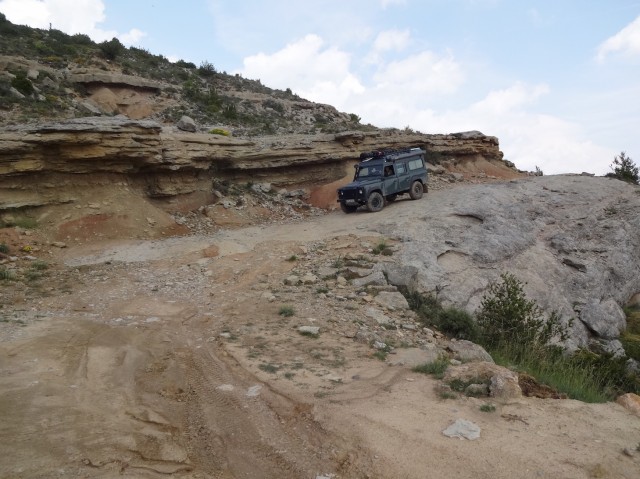
I have always wanted to own a Land Rover, it is one of my childhood dreams. I absolutely love its simple and classic design, what I would call “expedition image”. The Land Rover Defender has impressive offroad capabilities and, due to its riveted, multi-panelled structure, is also highly versatile and can easily be modified and converted. In 2011 we bought a brand new Land Rover Defender “Puma” (2,4l engine) and started converting it into a proper overlander, ready for worldwide travel.
As a family travelling with young children, a low budget version with a bed on boxes put into the rear of the vehicle was not what we wanted. We opted for investing money on a thorough conversion. We also decided not to buy a ready converted Land Rover but did everything “step by step” to make the vehicle exactly suit our own personal demands. All alterations, additions and coversions are based on our own experiences we made on shakedown trips to Scandinavia, the Pyrenees and the Carpathian Mountains and Transsylvania in Romania.
The most important decision was to go for a wedge shaped pop top roof. You might say that roof tents fit the Land Rover’s expedition image better, but we wanted to at least be able to sleep the complete family inside the vehicle. What we like about the pop top is that the overall design of the Land Rover is not changed and people not that familiar with Land Rovers might not even notice that our vehicle has a pop top. As we live in northern Europe, a pop top has positive aspects when it comes to windy weather conditions as it is really stabile. The lying surface with mattress and sleeping bags can be hinged up easily which then provides standing height inside the Land Rover. We have a very comfortable customized latex/slatted-frame mattress in the pop top made by “Fanello” in Switzerland. From comparisons with other pop top conversions, we would recommend those manufactured by “Ex-Tec” in Germany, “Alu Cab” in South Africa and “Mulgo” in Australia.
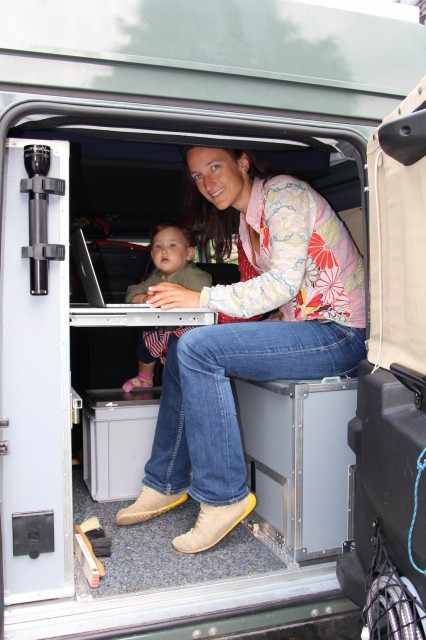
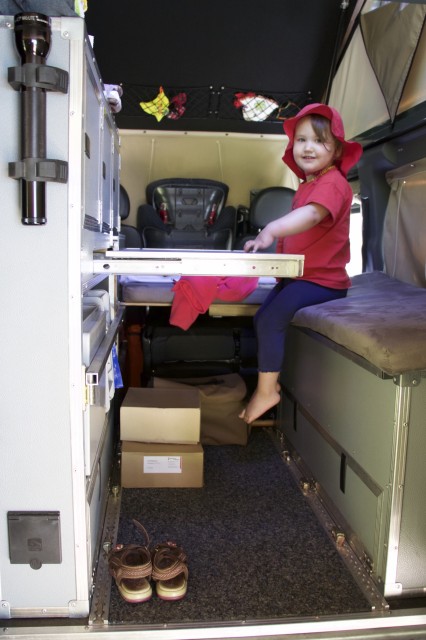
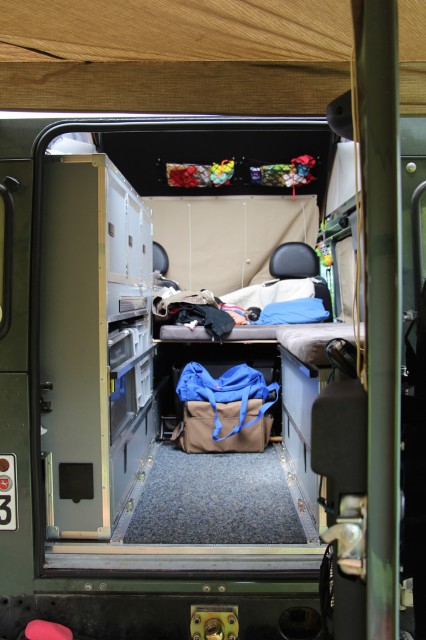
Us parents sleep “upstairs” in the pop top and our two children sleep below. We collapse the rear bench seat, add a plank and cushions and the children have a 1 by 2,2 metre bed. As long as they are young this is sufficient, our plans for the future are to convert a Sankey trailer and add a rooftent for us parents and the kids can sleep in the pop top.
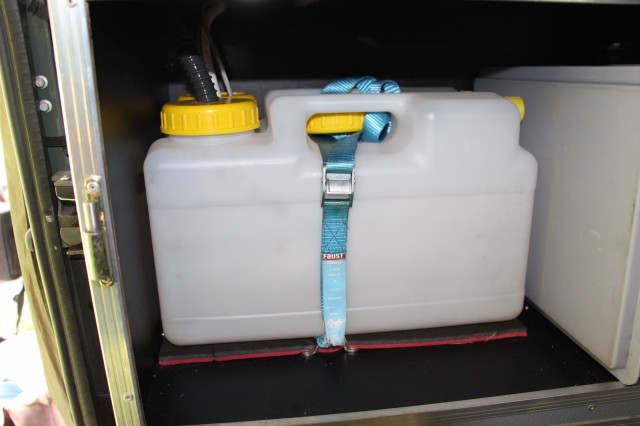
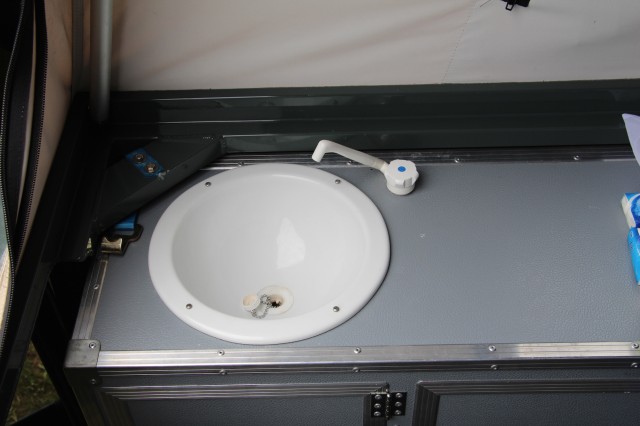
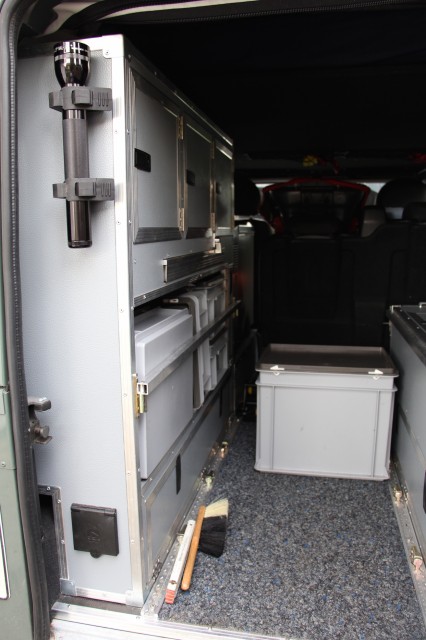
As we plan to live in the Land Rover on a more or less permanent basis, we decided to install a proper cupboard/locker system. The tall cupboard on the driver’s side provides enough room for a lot of gear and clothes, and also is the place, where the small sink is located. In the upper part, there is one compartment for the parents’ clothes, one for the two kids and another one for toiletries. For tightly packing clothes, our “Eagle Creek Pack-It Cubes” are immensely valuable. Every person has two cubes and that – believe it or not – really is enough. In the middle compartment of the cupboard we have enough room for two medication boxes, one box for spares and another box for other bits and pieces. Here, we also inserted a 12 litre freshwater tank and another 12 litre tank for grey water. The sink was originally installed for tax reasons only, as in Germany a vehicle is less taxed when it’s a campervan for which a sink, a table, standing height, a cooker and beds are compulsory. After our first travel-experiences with the sink, we today would not want to miss it. It has proven to be quite useful e.g. in bad weather conditions.
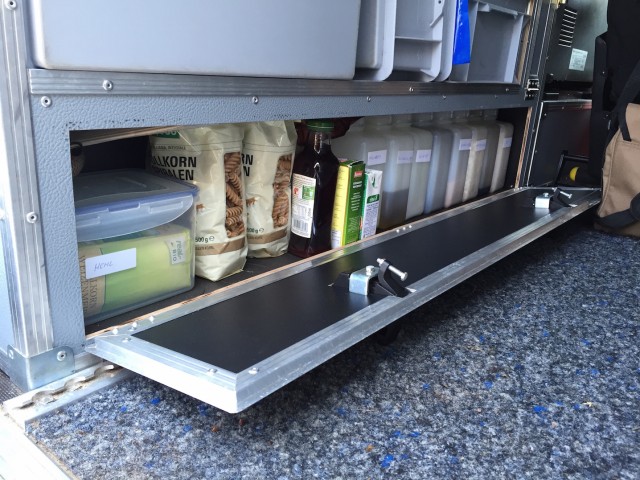
On the passenger’s side we have added a bench box. In the lowest compartments of both the cupboard and the bench-box we store provisions such as canned food, flour, sugar et cetera. In the upper compartment of the bench-box we put shoes, towels, spares and light provisions such as noodles and cereals.
For more water reserves, a 70 litre freshwater tank sits in the footwell in front of the rear bench seat. This tank is connected to a water socket at the back door which can be used to provide a shower, but for showering we rather like to use our solar showers.
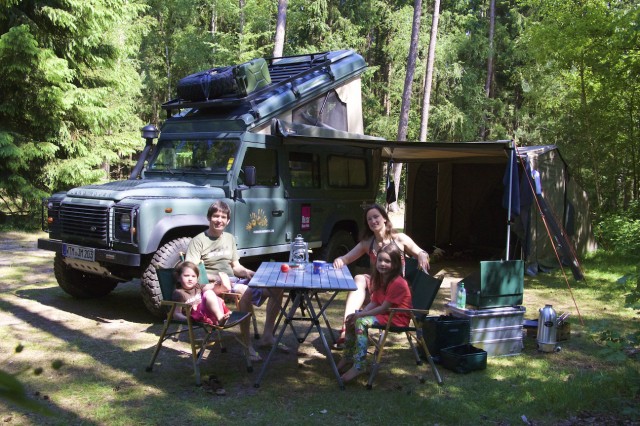
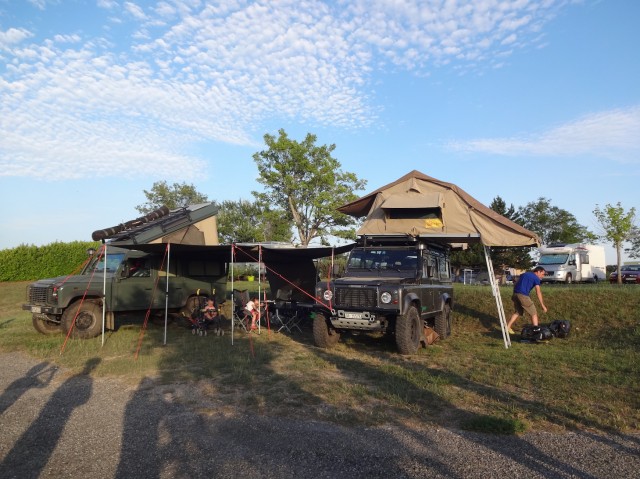
An important and most valuable part of the conversion is the Foxwing awning. It can be set up within just a few minutes and you can zip side panels to it and create a large camp sheltered from sun or rain. We tested the Foxwing in extremely windy conditions (a thunderstorm in southern France) and it definitely stood the test! We would always recommend the Foxwing!
Where the atmosphere is relaxed and we plan to stay longer, we have four additional beds in the Oztent RV4. This also can be used for guests and sometimes Anouk, our elder daughter, likes to sleep in the tent. The Oz-Tent can be set up in just a few minutes and is made for hot climates. In rainy or hot weather, it can be a great help: we set up the Oz-Tent, put in toys, some food etc. … put in the children … and relax and set up the rest of the camp taking our time. The Oz-Tent also is great if the car has to stay in a workshop for some days – we still have a comfortable place to sleep in! In combination with the Oz-Tent Awning Connector, the Oz-Tent can be zipped to a Foxwing or any other Oz-Tent, to create an even bigger “living room“ (you can also use the awning connector to connect two Foxwing awnings).
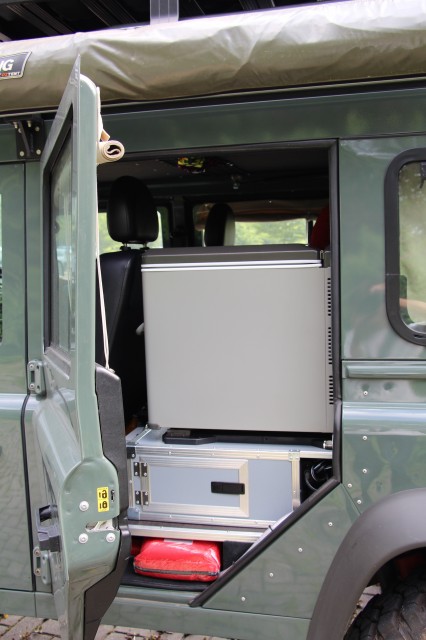
Perishable foods are stored in the Engel fridge which sits on a box directly behind the drivers’ seat where originally the single back seat was situated. The Engel is well reknowned for its electric efficiency and for its reliability and durability even in hottest climate conditions (it’s Australian, so it should be!). It is infinitely adjustable from + 10°C to – 18°C, can be used with 12V, 24V and 220/230V and can be taken out easily and fast. Its “Sawafuji Swing Motor“ also is relatively quiet! Well, at least it has a sleepy-sonorous drone.
To prevent electricity shortage, we have an intelligent double battery system and a solar panel. Because of that the starter battery is not endangered to become drained. Both batteries are linked with a split-charge system, so that the alternator charges both batteries when the engine is running and if the engine is not running, both batteries are isolated. This system has proven to be quite useful in case the starter battery is drained … we simply connect the two batteries manually with a switch and start the engine. In addition to the alternator, the solar panel on the Land Rover’s roof behind the roof rack, also charges the batteries. Staying in one place for about six days in 35° Celsius with the fridge running is no problem for us.
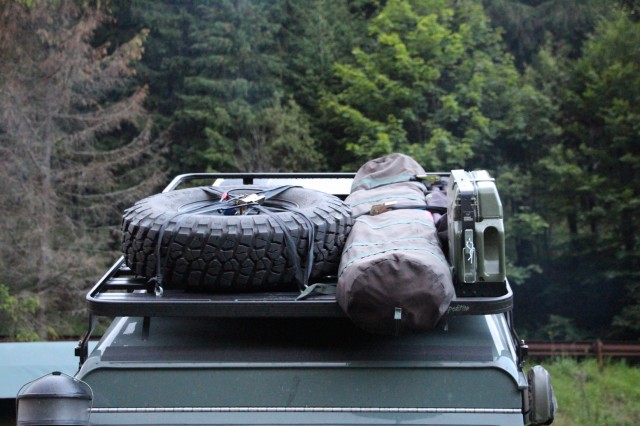
Right in front of the solar panel, we have fixed a Frontrunner Expedition roof rack, which is originally made for the Land Rover Defender 90. Anything put on it adds weight to the middle part of the Land Rover only, which makes it easier setting up the pop top.
We did not change the engine and gearbox and also did not go for a chip tuning. Even though the Land Rover is said to be underpowered, we did not have any problems in that field so far.
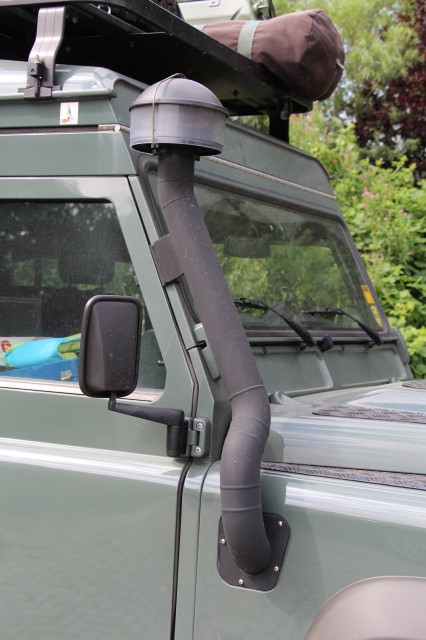
For engine protection we added a snorkel with a Cyclone pre-filter which draws the air the engine needs just a bit higher than normal, where less sand and dust particles are. In addition to that, the Cyclone pre-filter pre-cleans the air the engine “breathes“ in dusty or wet conditions and thus may be a factor in positively affecting the engine’s longevity. The raised air intake also gives peace of mind in water crossings! We chose the Ex-Tec one made of aluminium, simply because it is really solid and also fits the “old school“ look of the Land Rover.
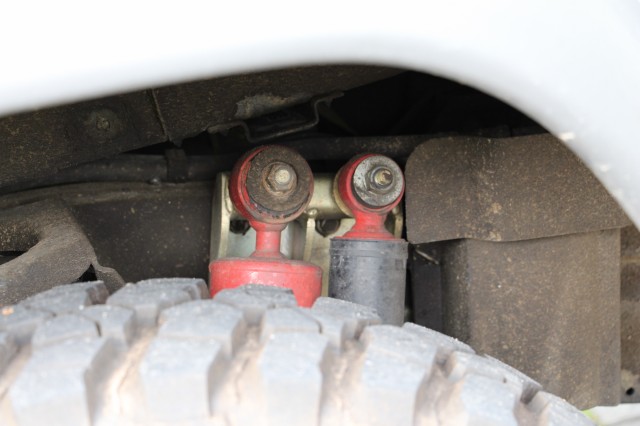
As the suspension of Land Rover Defenders as straight from the factory seems to be in some need of improvement, especially when driving on-road and even more so after the conversion, which increased the gross vehicle weight immensely, we have uprated the suspension and exchanged the original coil springs front and rear with HD OME coil springs. We have exchanged the original dampers with Koni Heavy Track Raid front and rear. At the rear side, due to the weight of the vehicle being more intensive there, we have opted for double dampers Koni Heavy Track Raid plus Koni Heavy Track. This reduces the “rolling“ both on and offroad. Our suspension upgrade goes along with a 2’’ lift, which increases the wheel travel. For the lift, we also had to install a double cardonic prop shaft.
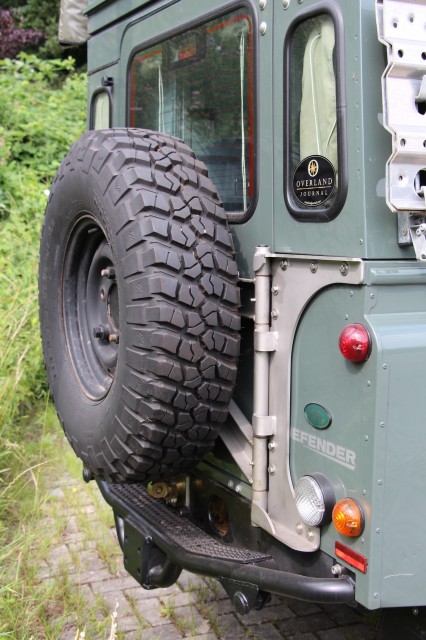
Instead of the “normal“, white Land Rover steel rims, we chose the black HD “Wolf“ steel rims of the Land Rover Defender 130 with BF Goodridge Mud-Terrain T/A KM2 tyres, which have the recommendation to last for at least 100,000 km and accept nearly every terrain.
From experiences in Australia, we chose to carry not only one spare wheel, but two – this certainly adds considerable weight but gives additional peace of mind.
The standard spare wheel carrier on the back door may be OK for on-road use, but certainly not for any serious overland travel on rivet-consuming corrugations. The original door hinges would not be able to withstand the vibrations, so we installed the very robust Ex-Tec HD spare wheel carrier.
Undercarriage protection problably doesn’t seem to be of high importance to many tough offroaders, but we simply know that we sometimes do make mistakes when driving and the alloy bashplate in the front and the steering bar and differential protectors simply reduce possible damage to the vehicle’s underside. As the Land Rover doesn’t have a rear bumper as a standard, we have included that as well. For side impact protection and improved jacking points we have installed rocksliders.
Headlight bars protect the headlights and checker-plate protects the bonnet.
As the 75 litre standard diesel tank of the Defender is not sufficient enough, especially as the fuel efficiency after the conversion has dropped to about 13 litres per 100 km, we installed an additional 45 litre Frontrunner long range tank in the back right corner of the Land Rover. This gives us a range of about 900 km (on-road and “normal“ tracks). The 20 l jerry can on the roof rack provides an additional 150 km range.
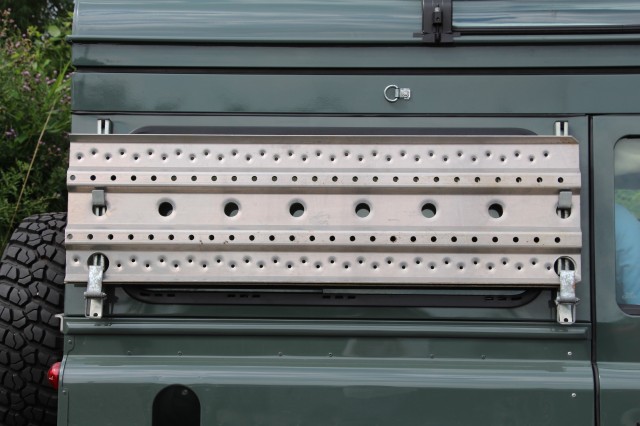
For better traction in sand and mud, we have two sand ladders (PSP) fixed across the rear window at the passengers’ side, which when padlocked also protect the window.
…
This summer – in less than four weeks time – we are going to do a one-year Transafrica overland family-trip along the “Eastern Route”, going from Europe via Turkey to Egypt and then down to Cape Town. This trip was what we always had in mind when planning the conversion, let’s hope the political circumstances will allow us the trip!
To learn more about 4-Wheel Nomads, click on the banner below:


