Hello all,
A friend asked me for a few details on our M1101 and since I sent this in email anyway - why not post it. These details are all available from various sources online but are hard to confirm in some cases and are difficult to verify as actually working. This is after all of our trial and error. I hope this helps others as a single source because it took us a couple of months to track everything down, swap parts and make things work") We wanted to convert practically everything and also match the Land Cruiser 200 series bolt pattern for spare usage in the field. Everything is easy enough to bolt on.
We wanted to convert practically everything and also match the Land Cruiser 200 series bolt pattern for spare usage in the field. Everything is easy enough to bolt on.
As it was advertised on craigslist, in TX we have a lot of surplus release:

Got it home and started disassembly:

First was pulling off the hydraulics and converting to electric. From this:


to this Made in USA Dexter electric with Parking brake assembly:

Drive train Parts:
LH Side electric conversion with parking brake that bolts up to the m110x back plate (reuse the parking brake cables already on it):
http://www.etrailer.com/p-23-112.html
RH Side:
http://www.etrailer.com/p-23-113.html
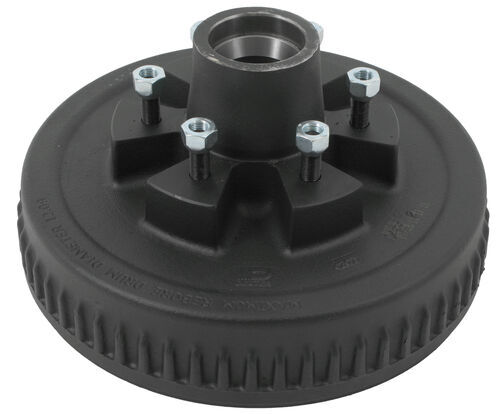
Next you'll need to decide on hub/drums and bolt patterns. I found one 5x150 fitment in Australia to match the Land Cruiser but lack of response and uncertainty on bearings led me to a commonly available Toyota fitment that I could easily adapt. I used 6x5 1/2 from FJ Cruiser, etc
x2 of these hubs: http://www.etrailer.com/p-8-201-9UC3-EZ.html
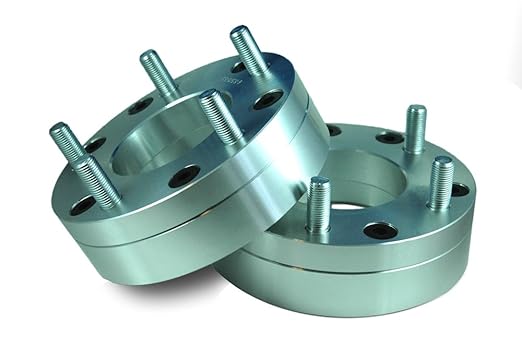
Then to match our 5x150 bolt pattern on the 200 I used these well made adapters: http://www.amazon.com/gp/product/B009N3JTQQ?psc=1&redirect=true&ref_=od_aui_detailpages00
We mounted the same rock warriors and tire size as the 200, here is a trail picture:

Trailer Electrics:
I pulled the 12pin NATO all the way to the under trailer junctions and ran this to each of the wires that we needed instead:
http://smile.amazon.com/gp/product/B0044YQAPW?psc=1&redirect=true&ref_=oh_aui_search_detailpage
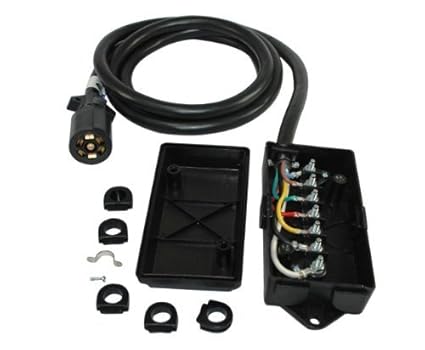
Here is the junction box mounted:

This is the wire cross reference you'll need for a 12 NATO to 7 RV conversion: They also make adapters but I did not find them to be a clean install so soldered, shrinked and wrapped everything myself.

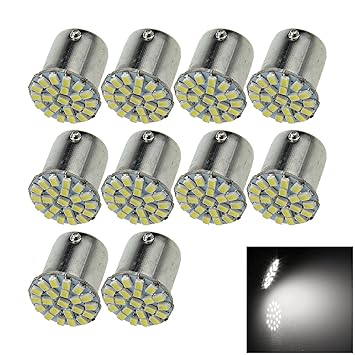
Next I converted all 24V halogens to LED with these, they fit every type of small bulb on the trailer (hard to find this info as shows two bulb types are shown t ype 67 and 97) You can use a :
http://smile.amazon.com/gp/product/B00W566NZ8?psc=1&redirect=true&ref_=oh_aui_search_detailpage
I converted the 24V tail lights to some military take off's on ebay like these:

http://www.ebay.com/itm/new-grote-l...ash=item3f5c0b8745:g:oa8AAOSwuAVWt4yX&vxp=mtr
With the above plan you can reuse all the standard wiring runs that were on the trailer and just focus on wiring between the junction and the tow vehicle - easy enough!
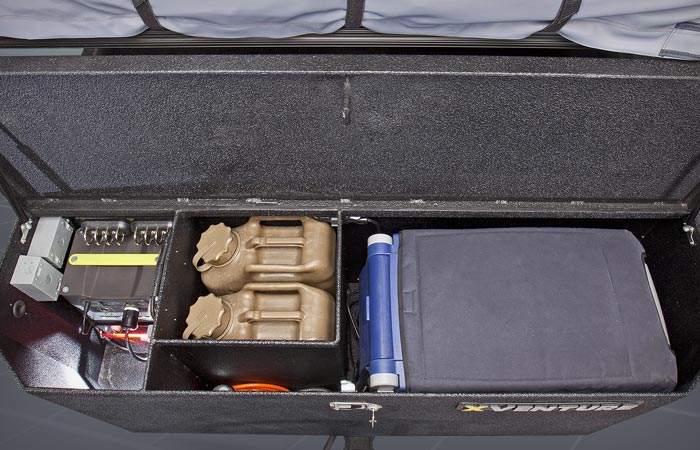
We pulled the pintle and all hydraulics and had a shop fab the only part we didn't do ourselves. We used an industrial welding shop and this was the best design we came up with considering that we would have a large tongue box with fridge and solar generator, etc.
We used a max coupler instead of the pintle :


That you can find here: http://store.adventuretrailers.com/products/Max-Coupler.html
Here is a view of the new steel bracing run from the airlift loops out to the tongue and also the trailer side of the max coupler:

Next we wanted to ditch the drop leg jacks and use something 'infinitely' adjustable instead for uneven ground. These are the only c-jacks we could find with enough height:
http://smile.amazon.com/gp/product/B003VAUUG0?psc=1&redirect=true&ref_=oh_aui_search_detailpage
In use:

Stored:

Mounting points beam to beam:

A friend asked me for a few details on our M1101 and since I sent this in email anyway - why not post it. These details are all available from various sources online but are hard to confirm in some cases and are difficult to verify as actually working. This is after all of our trial and error. I hope this helps others as a single source because it took us a couple of months to track everything down, swap parts and make things work
We wanted to convert practically everything and also match the Land Cruiser 200 series bolt pattern for spare usage in the field. Everything is easy enough to bolt on.As it was advertised on craigslist, in TX we have a lot of surplus release:
Got it home and started disassembly:
First was pulling off the hydraulics and converting to electric. From this:
to this Made in USA Dexter electric with Parking brake assembly:
Drive train Parts:
LH Side electric conversion with parking brake that bolts up to the m110x back plate (reuse the parking brake cables already on it):
http://www.etrailer.com/p-23-112.html
RH Side:
http://www.etrailer.com/p-23-113.html
Next you'll need to decide on hub/drums and bolt patterns. I found one 5x150 fitment in Australia to match the Land Cruiser but lack of response and uncertainty on bearings led me to a commonly available Toyota fitment that I could easily adapt. I used 6x5 1/2 from FJ Cruiser, etc
x2 of these hubs: http://www.etrailer.com/p-8-201-9UC3-EZ.html
Then to match our 5x150 bolt pattern on the 200 I used these well made adapters: http://www.amazon.com/gp/product/B009N3JTQQ?psc=1&redirect=true&ref_=od_aui_detailpages00
We mounted the same rock warriors and tire size as the 200, here is a trail picture:
Trailer Electrics:
I pulled the 12pin NATO all the way to the under trailer junctions and ran this to each of the wires that we needed instead:
http://smile.amazon.com/gp/product/B0044YQAPW?psc=1&redirect=true&ref_=oh_aui_search_detailpage
Here is the junction box mounted:
This is the wire cross reference you'll need for a 12 NATO to 7 RV conversion: They also make adapters but I did not find them to be a clean install so soldered, shrinked and wrapped everything myself.
Next I converted all 24V halogens to LED with these, they fit every type of small bulb on the trailer (hard to find this info as shows two bulb types are shown t ype 67 and 97) You can use a :
http://smile.amazon.com/gp/product/B00W566NZ8?psc=1&redirect=true&ref_=oh_aui_search_detailpage
I converted the 24V tail lights to some military take off's on ebay like these:
http://www.ebay.com/itm/new-grote-l...ash=item3f5c0b8745:g:oa8AAOSwuAVWt4yX&vxp=mtr
With the above plan you can reuse all the standard wiring runs that were on the trailer and just focus on wiring between the junction and the tow vehicle - easy enough!
We pulled the pintle and all hydraulics and had a shop fab the only part we didn't do ourselves. We used an industrial welding shop and this was the best design we came up with considering that we would have a large tongue box with fridge and solar generator, etc.
We used a max coupler instead of the pintle :
That you can find here: http://store.adventuretrailers.com/products/Max-Coupler.html
Here is a view of the new steel bracing run from the airlift loops out to the tongue and also the trailer side of the max coupler:
Next we wanted to ditch the drop leg jacks and use something 'infinitely' adjustable instead for uneven ground. These are the only c-jacks we could find with enough height:
http://smile.amazon.com/gp/product/B003VAUUG0?psc=1&redirect=true&ref_=oh_aui_search_detailpage
In use:
Stored:
Mounting points beam to beam:
Last edited: