midlifecrisis
Observer
So I've been soaking up all kinds or great information from these forums over the last several weeks and I thought I would register and do a post for the setup I am pulling together for my new Outback. I'm going about it a little differently than anything I've seen, so I thought I would "pay it forward" as it were. in case there is anyone out there that might benefit from what I'm doing and what I am learning in the process.
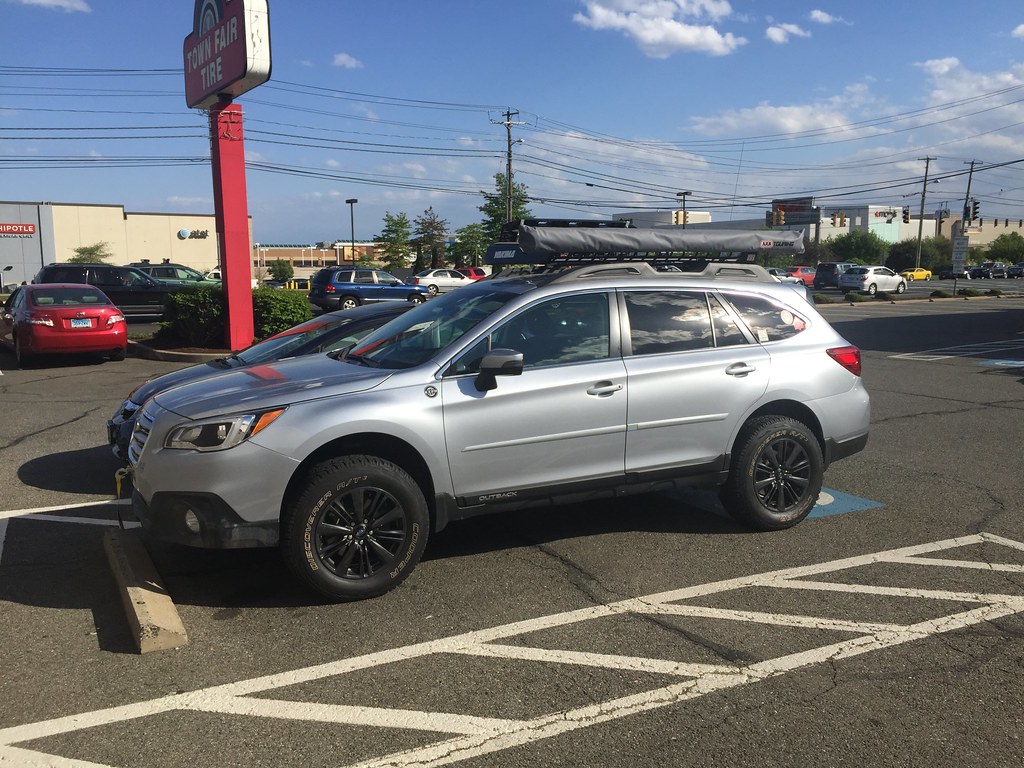
The basic backstory is I have always wanted an Outback but due to legal restrictions (I was married to someone who didn't) I was never able to have one. Well, things change...and thanks to the Law of Unintended Consequences I now have a 2015 3.6 Limited, and a lot more free time on the weekends and evenings. Consequently, the dog and I have big plans for some epic road trips, aggressive car camping/backpacking, etc. so I needed to do a few things to have the little bugger be exactly what I want.
First and foremost, I wanted to do a sleeping and storage platform in the rear cargo compartment. I love being able to operate out of the car and do dry camping. Campgrounds are cool, but being out in the boondocks is my preference, generally. Most folks I've seen in my searching have simply flopped the seats down and built some storage on top of the deck. I decided to get a little more aggressive and remove all of the rear seats, cover panels, etc. to get the most room. The way I see it, with one person and a small dog the backseat is trash storage and really wasted space.
So I did a little research and development, pulled everything out and developed a design. Well, as these things go, I would say I developed an initial design. I've been at it a little over a week (evenings mostly) and I think it's probably evolved considerably at least twice and "the plan" changes in small ways almost constantly. A better idea pops into my head and I adjust.
Here is the original rough idea on Google SketchUp. If you aren't using this free program I would highly recommend it.

It's a little unsettling tearing apart a brand new car, but if you wanna make an omelette....

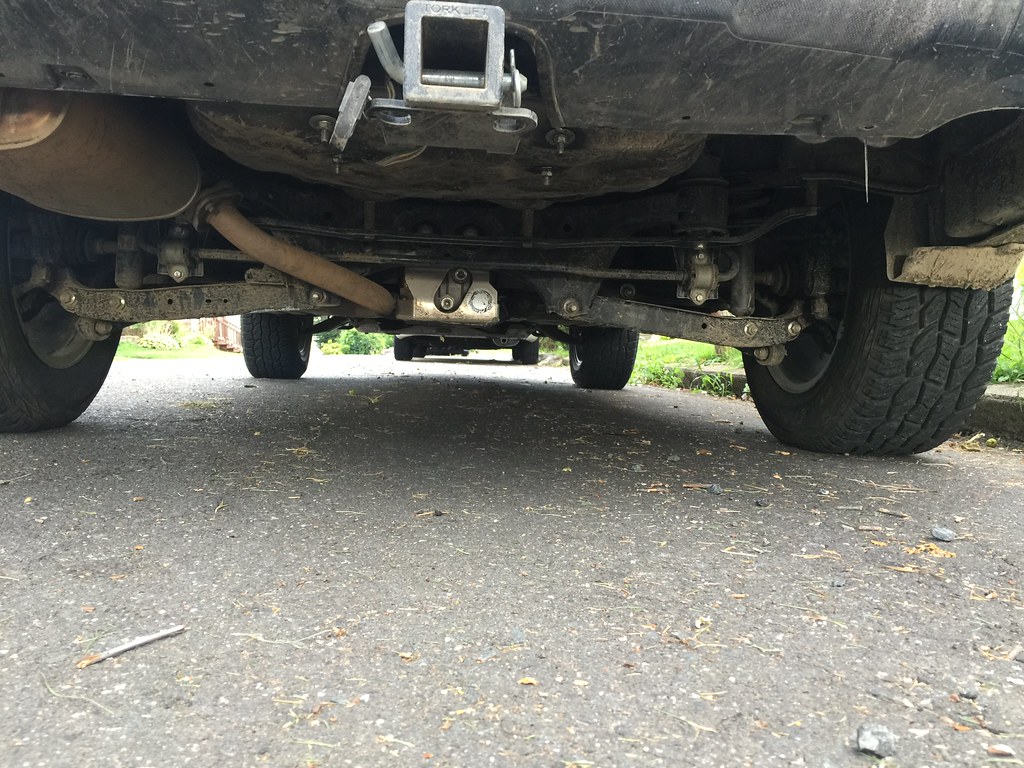
Here is the setup I used for establishing where everything was located, deciding on where my bearing points would be and most importantly defining elevations of all the bearing points, items to "miss", etc. I then used all of that data to determine what my overall height of the platform would be to give me a good mixture of storage space under the deck and wallow around room above. It's also important to take the time to really analyze the heights so you are sure to have enough "meat" on the stringers. With all the crap under there to work around and over, it would be easy to get a stringer that gets too thin and weak.
This Frankenstein Special is essentially a batter board routine (a system used for setting concrete forms) and a small hand laser. All you are doing is establishing a reference height as it's all about things being relative to the vehicle. The little laser made it nice to be able to drop a tape down from the datum elevation to any given location...like the precious few flat spots under there!

I took measurements everywhere I knew my apparatus would bear and simply wrote down the reference distance right on the spot.
This is jumping ahead a little bit, I've already built the "headboard" and the "foot board" and the two side rails. The side rails are pretty wild with probably 20 cuts to get them right. Even with the up front work, there is still a fair amount of trial and error as you run into little peaks and valleys and wires and whatnot that you have to juke around. No big deal though and once you get one side the other is almost identical with the exception of one bump, so you can trace out the other side using the first as a pattern.

Starting to get some of the cross pieces that define the storage areas installed in this shot.
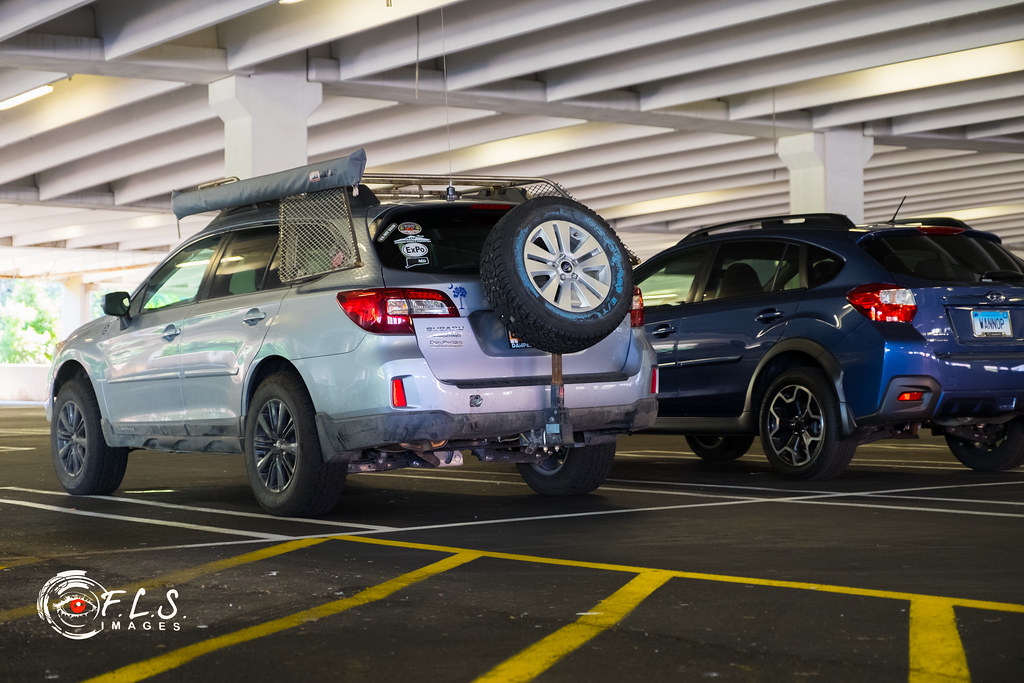
Two things here: One, I decided I wanted to have substantial onboard water with a pump. I saw the tank that Grant used that sits up in the footwell behind the front seats, but that didn't work well with what I was trying to accomplish. Second thing is I intend to get a full size spare and put it either on the cargo rack or potentially out back...haven't decided yet. Regardless, the Jenny Craig factory spare won't be going with me next summer when I head to Alaska (for instance), so I opted to work out using the spare tire well for my water tank and pump location. More on that later.

Originally I had thought that I would need the platform to be in 4 quadrant pieces to be able to get it in and out of the car, but as it evolved, I found that the rear section could be in one piece instead of two, so my over all piece count is three. Here you can see the front piece behind the driver starting to take shape. This is also a good shot showing the Gramma's Teeth cross piece under there. Like I said, there's a lot of crap to work around.
You'll notice that in a previous picture the head board was a single piece. I essentially "land locked" the platform at first by building everything in single pieces to get it all aligned and settled properly on the bearing points, and then I cut them into there respective quadrant parts for in and out mobility. That way I knew that everything would screw back together really pretty and line up, as opposed to doing the separate quadrants by measurements and then trying to get them all mated up.

Here are all three quadrants roughed in and sitting in their places. This was before what has come to be known as the "Great Refrigerator Remodel of 2015".

This is a happy site! Crap from Amazon! I'll do a run down of the gear I'm compiling for this build later on, along with all of the costs for the platform and the gear.

Here you can see in the quad behind the driver that I have revised the layout to accept the Edgestar 43 quart 12 volt refrigerator. I do NOT want to be dealing with coolers and blocks of ice when I'm on the road for 3 or 4 weeks, no way, no how. The Edgestar is a beast (size-wise) and most people either just dump it in the back for dragging out manually, or do some sort of roll out system with heavy duty cabinet glides like Grant did. I have not received the unit yet, but working from the dimensions I believe I have it sorted to be able to sit in a stationary location and still be able to fully open. I may slide it north and south a few inches during travel to be able to recline the seat more, but that remains to be seen and is a First World Problem at worst. It'll be strapped down in that location real pretty-like.

I made the rear four hatches with removable bottom panels to make getting at the water tank, pump and fittings more user friendly. Obviously the whole damn thing comes out in a pinch, but I'd like to be able to deal with small issues without going totally yard sale. You can see my cardboard water tank mockup (patent pending) peaking out of it's little nesting location.
I'm having a 16 gallon RV tank built for that spot, which will supply hot and cold running water just like momma and daddy had in their house. More on the hot water part later.

Page 2.....
The basic backstory is I have always wanted an Outback but due to legal restrictions (I was married to someone who didn't) I was never able to have one. Well, things change...and thanks to the Law of Unintended Consequences I now have a 2015 3.6 Limited, and a lot more free time on the weekends and evenings. Consequently, the dog and I have big plans for some epic road trips, aggressive car camping/backpacking, etc. so I needed to do a few things to have the little bugger be exactly what I want.
First and foremost, I wanted to do a sleeping and storage platform in the rear cargo compartment. I love being able to operate out of the car and do dry camping. Campgrounds are cool, but being out in the boondocks is my preference, generally. Most folks I've seen in my searching have simply flopped the seats down and built some storage on top of the deck. I decided to get a little more aggressive and remove all of the rear seats, cover panels, etc. to get the most room. The way I see it, with one person and a small dog the backseat is trash storage and really wasted space.
So I did a little research and development, pulled everything out and developed a design. Well, as these things go, I would say I developed an initial design. I've been at it a little over a week (evenings mostly) and I think it's probably evolved considerably at least twice and "the plan" changes in small ways almost constantly. A better idea pops into my head and I adjust.
Here is the original rough idea on Google SketchUp. If you aren't using this free program I would highly recommend it.
It's a little unsettling tearing apart a brand new car, but if you wanna make an omelette....
Here is the setup I used for establishing where everything was located, deciding on where my bearing points would be and most importantly defining elevations of all the bearing points, items to "miss", etc. I then used all of that data to determine what my overall height of the platform would be to give me a good mixture of storage space under the deck and wallow around room above. It's also important to take the time to really analyze the heights so you are sure to have enough "meat" on the stringers. With all the crap under there to work around and over, it would be easy to get a stringer that gets too thin and weak.
This Frankenstein Special is essentially a batter board routine (a system used for setting concrete forms) and a small hand laser. All you are doing is establishing a reference height as it's all about things being relative to the vehicle. The little laser made it nice to be able to drop a tape down from the datum elevation to any given location...like the precious few flat spots under there!
I took measurements everywhere I knew my apparatus would bear and simply wrote down the reference distance right on the spot.
This is jumping ahead a little bit, I've already built the "headboard" and the "foot board" and the two side rails. The side rails are pretty wild with probably 20 cuts to get them right. Even with the up front work, there is still a fair amount of trial and error as you run into little peaks and valleys and wires and whatnot that you have to juke around. No big deal though and once you get one side the other is almost identical with the exception of one bump, so you can trace out the other side using the first as a pattern.
Starting to get some of the cross pieces that define the storage areas installed in this shot.
Two things here: One, I decided I wanted to have substantial onboard water with a pump. I saw the tank that Grant used that sits up in the footwell behind the front seats, but that didn't work well with what I was trying to accomplish. Second thing is I intend to get a full size spare and put it either on the cargo rack or potentially out back...haven't decided yet. Regardless, the Jenny Craig factory spare won't be going with me next summer when I head to Alaska (for instance), so I opted to work out using the spare tire well for my water tank and pump location. More on that later.
Originally I had thought that I would need the platform to be in 4 quadrant pieces to be able to get it in and out of the car, but as it evolved, I found that the rear section could be in one piece instead of two, so my over all piece count is three. Here you can see the front piece behind the driver starting to take shape. This is also a good shot showing the Gramma's Teeth cross piece under there. Like I said, there's a lot of crap to work around.
You'll notice that in a previous picture the head board was a single piece. I essentially "land locked" the platform at first by building everything in single pieces to get it all aligned and settled properly on the bearing points, and then I cut them into there respective quadrant parts for in and out mobility. That way I knew that everything would screw back together really pretty and line up, as opposed to doing the separate quadrants by measurements and then trying to get them all mated up.
Here are all three quadrants roughed in and sitting in their places. This was before what has come to be known as the "Great Refrigerator Remodel of 2015".
This is a happy site! Crap from Amazon! I'll do a run down of the gear I'm compiling for this build later on, along with all of the costs for the platform and the gear.
Here you can see in the quad behind the driver that I have revised the layout to accept the Edgestar 43 quart 12 volt refrigerator. I do NOT want to be dealing with coolers and blocks of ice when I'm on the road for 3 or 4 weeks, no way, no how. The Edgestar is a beast (size-wise) and most people either just dump it in the back for dragging out manually, or do some sort of roll out system with heavy duty cabinet glides like Grant did. I have not received the unit yet, but working from the dimensions I believe I have it sorted to be able to sit in a stationary location and still be able to fully open. I may slide it north and south a few inches during travel to be able to recline the seat more, but that remains to be seen and is a First World Problem at worst. It'll be strapped down in that location real pretty-like.
I made the rear four hatches with removable bottom panels to make getting at the water tank, pump and fittings more user friendly. Obviously the whole damn thing comes out in a pinch, but I'd like to be able to deal with small issues without going totally yard sale. You can see my cardboard water tank mockup (patent pending) peaking out of it's little nesting location.
I'm having a 16 gallon RV tank built for that spot, which will supply hot and cold running water just like momma and daddy had in their house. More on the hot water part later.
Page 2.....


.jpg")


")
