Camping Gear Reviews, A Ton

Corey

OverCamping Specialist
FYI, besides this and the cloned thread on three other forums I frequent, I recently made a camping gear review blog which goes into more detail on a few things.
It can be found here.

http://backcountry-camping-gear-reviews.blogspot.com/

Will be breaking this up into several posts, as there is a ten picture limit per post here.
This review is from a trip I just got back from up to Mt. Rainier National Park.
I will link to that trip later in this thread.
Link to camping trip

I have been buying tons of new camping equipment this season as seen by this thread.

Most of the gear I have picked up from Cabela's.
Most of my old camping gear was from my tent trailer days, and simply to big to transport in the FJ Cruiser.

Here are the reviews:

mountain_notepad.gif


Pett toilet system

I like it, well half way :(
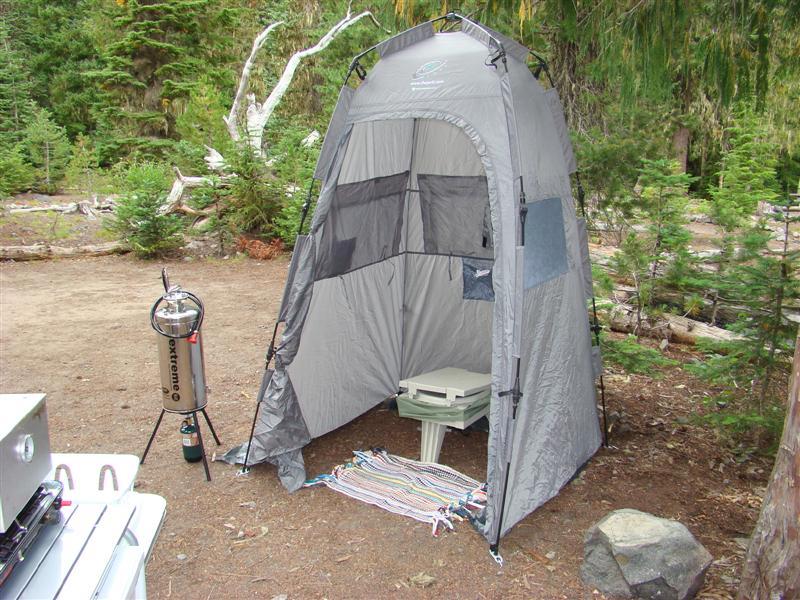
The privacy tent deploys and sets up in a minute.
No poles to attach, they are already sleeved into the tent fabric.
However taking down the tent is a major PITA.
And it is to small to use as a shower tent.
I will be looking at a much bigger double duty crapper/shower tent for my next outing, and leave this one at home.

Now to the crapper.
Very stable, unless you lean to the side to wipe, as it has three legs, and not four.
Standard size seat, so it is fairly comfortable
The bag system that Pett uses are pretty cool.
When done, simply zip up the bag (two used) and toss it into your garbage bag you have in camp, or toss the bag in a trash receptacle if one is close by.

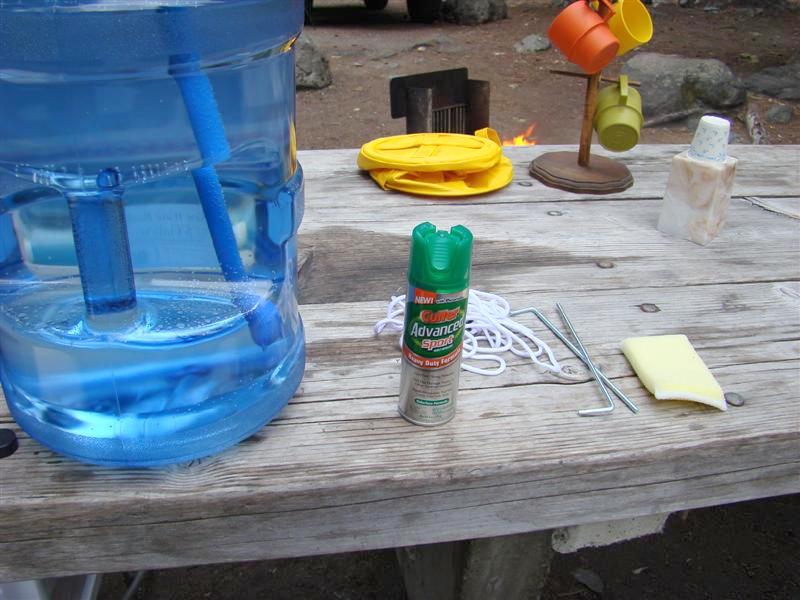
One bad thing about the tent, the guylines they give you for extra hold down in a wind (the four corners also stake down) are slippery, and they slide on the plastic rope things that are suppose to keep the rope taut with the stake.
In other words, the guylines are useless.
You can replace them though.

I give it two thumbs up, the toilet that is, and not the tent
bigok.gif


Pros:
* The shelter is very easy to setup.
* The toilet is comfortable to sit on.
* The Wagg Bags make it easy to get rid of your waste.

Cons:
* The shelter is a PITA to take down and put away.
It should become easier over time I would think.
To small to really shower in, will be looking for a much bigger one.

pett.jpg


mountain_notepad.gif


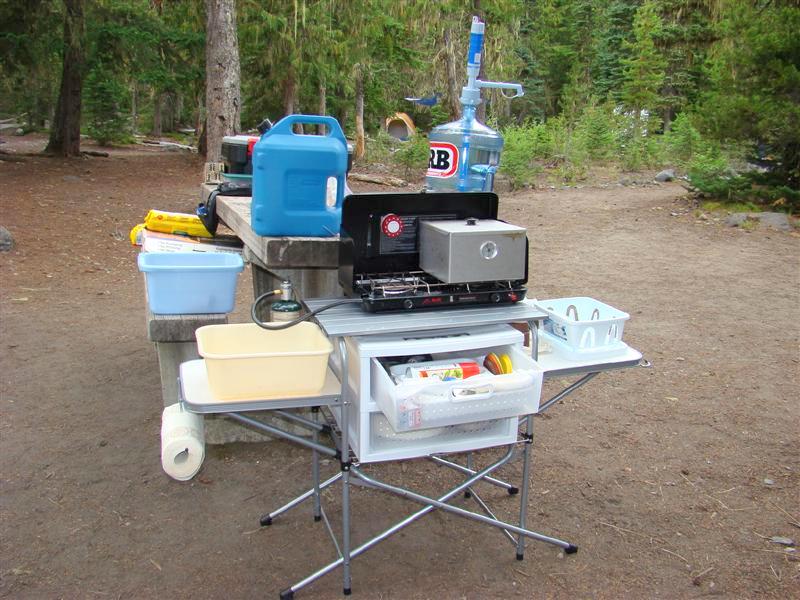
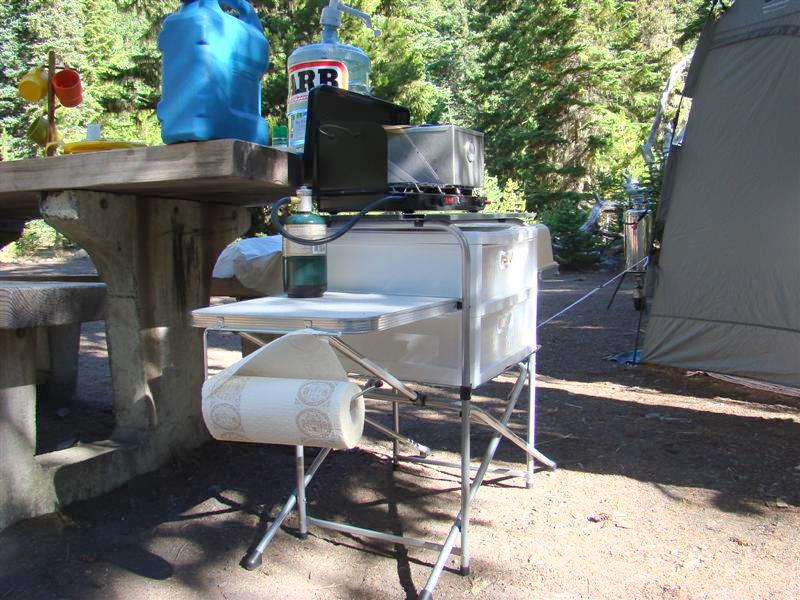
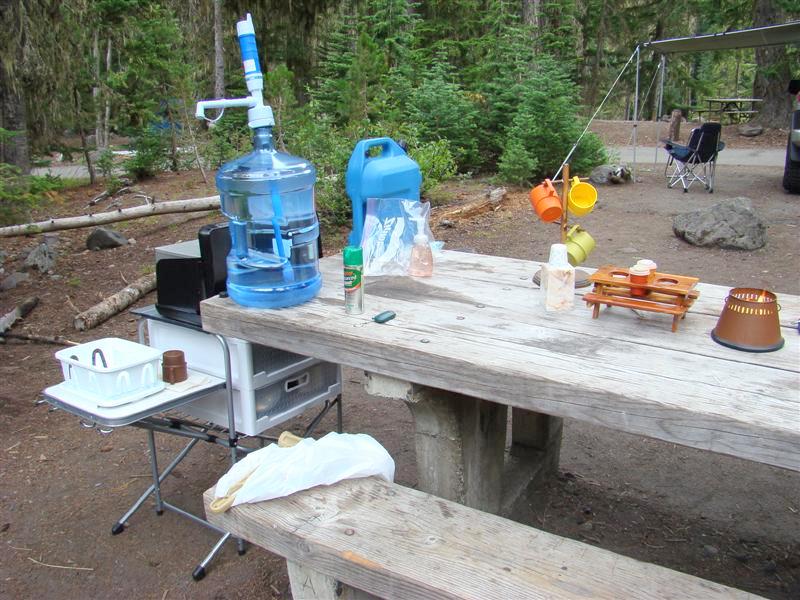
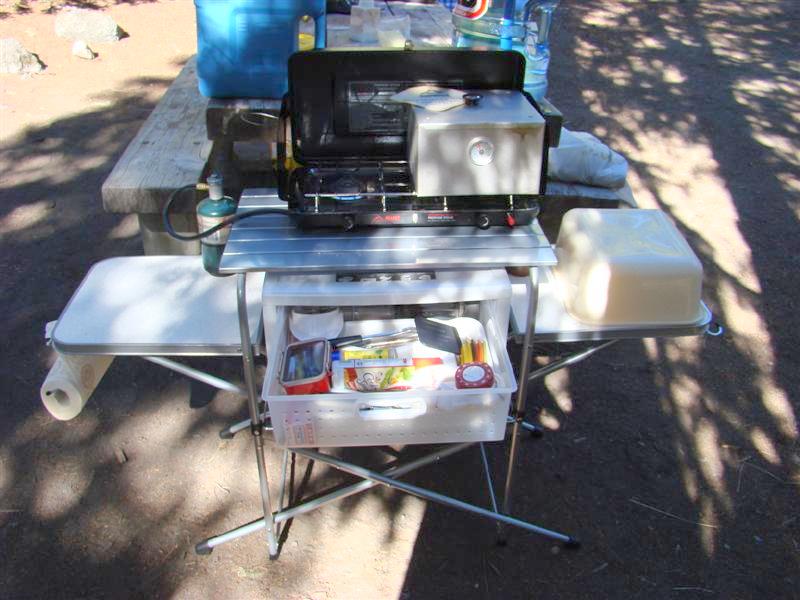
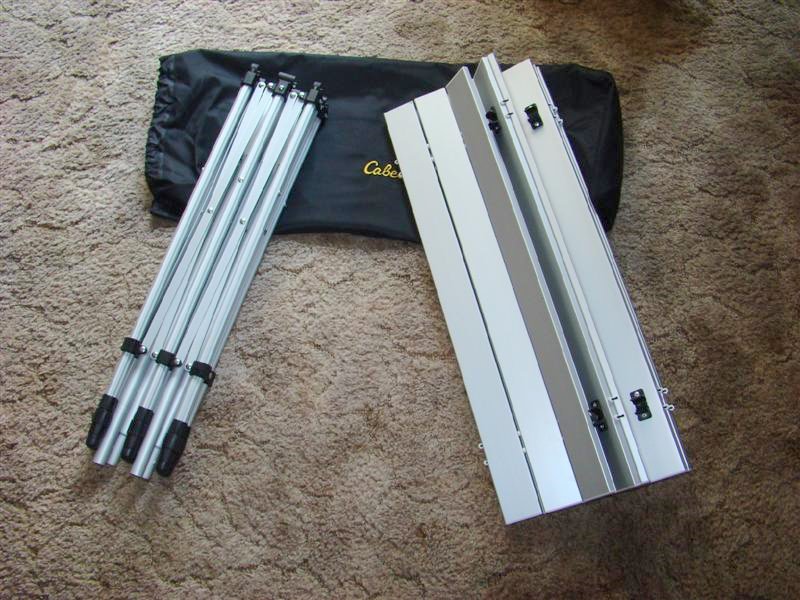
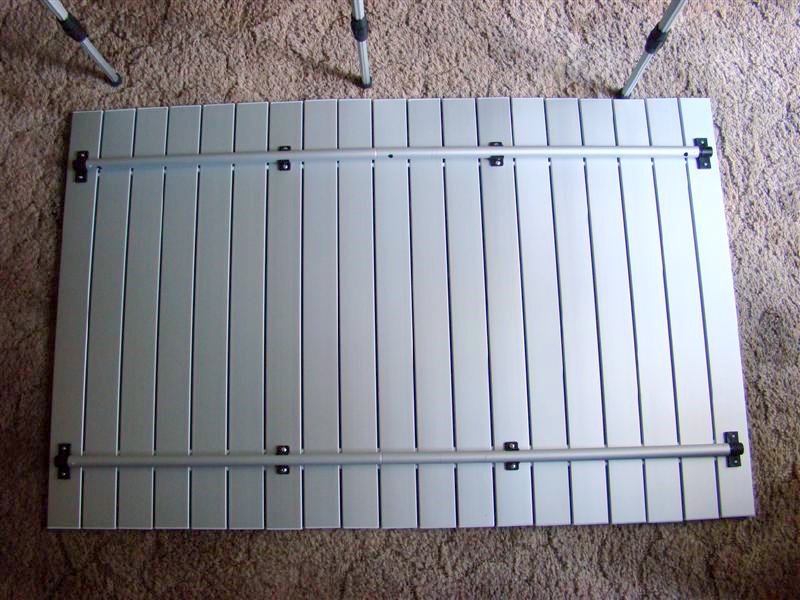
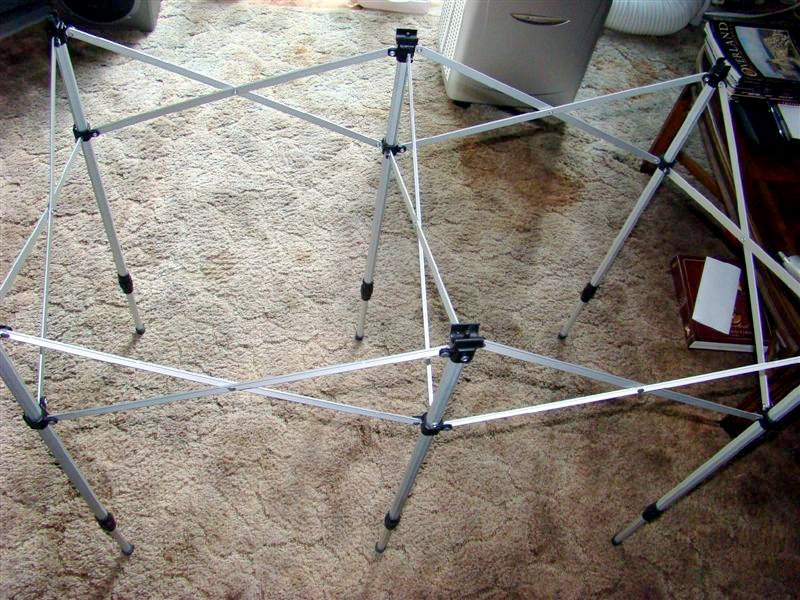
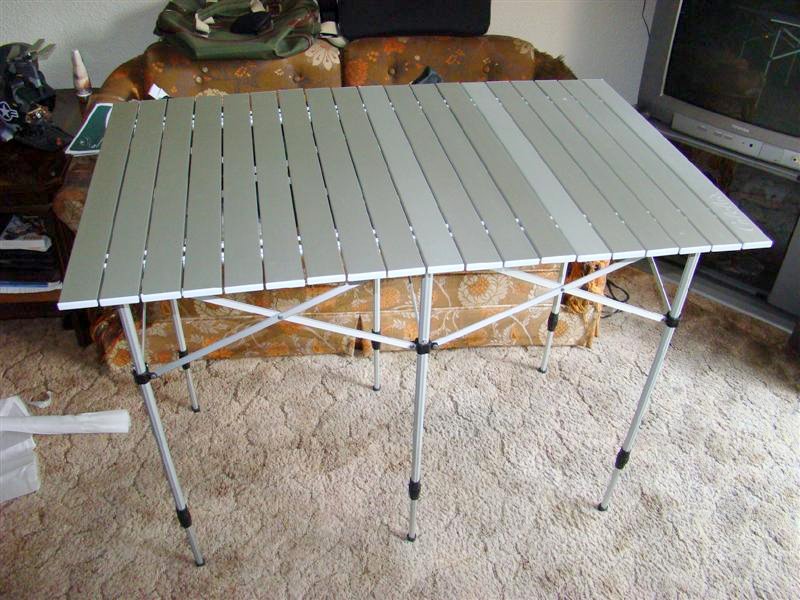
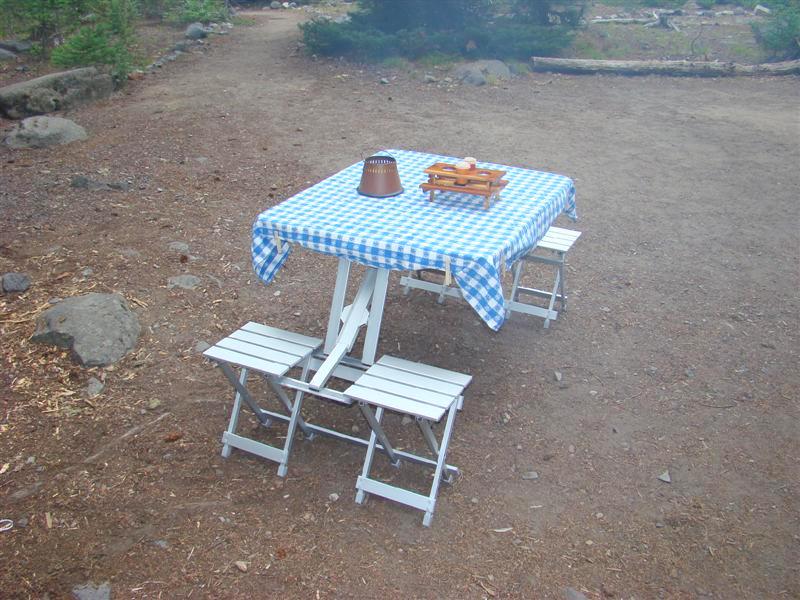
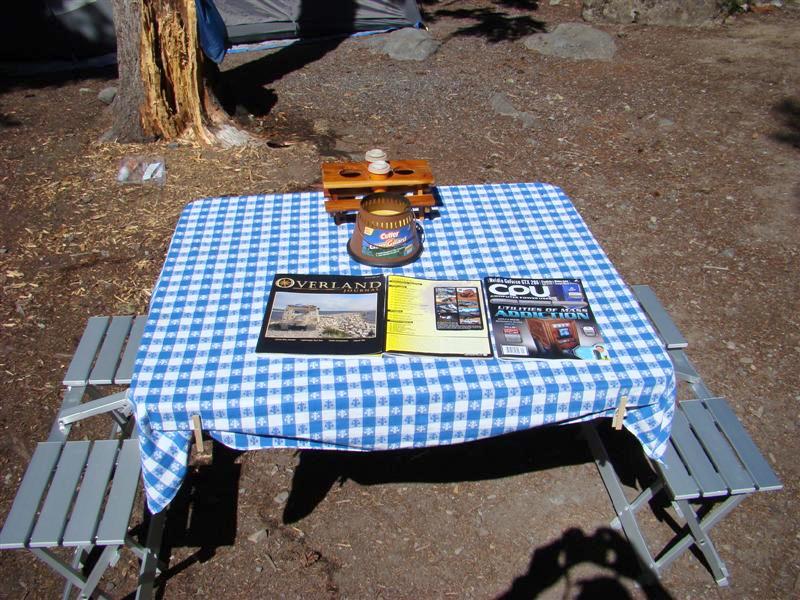
Cabela's Picnic Table

One person can set the whole table up in just a few minutes.
It deploys very fast, and is just as easy to take down for packing.

It is amazing that such a small package expands to a dining table big enough to seat four.
A little cramped with four, but it can be done.
It is very stable too.
I give it two thumbs up
bigok.gif


Pros:
* The table is a lot more comfortable than I thought it would be.
* Takes up very little room in the rig when folded down.

Cons:
* Can not really think of any, as this little table rocks the woods.

picnic_table1.jpg


picnic_table2.jpg
 
Last edited:

Corey

OverCamping Specialist
Part II

mountain_notepad.gif
Cabela’s Instant Cooking Station

Once setup you have three surfaces to use.
I used the middle one for the propane stove.
I am using one of the other sides for the wash basin, and the other side for the disk drying rack.

Below the middle shelf I have two of the Sterilite drawers stacked together.
The upper one holds my silverware and cooking utensils, and the bottom one holds the pots and pans and other miscellaneous stuff.

I give it two thumbs up
bigok.gif


Pros:
* Kitchen takes up little space in the rig.
* Sets up extremely fast/

Cons:
* Can not think of anything.

kitchen1.jpg


Tech tip:
The paper towels were unraveling from the wind.
Take your last sheet and poke a hole in it, and stick it through the rod to keep it from doing that.

kitchen2.jpg


mountain_notepad.gif
Sterilite 2101 Drawers for Cabela’s Kitchen

See above statements.

I give it two thumbs up
bigok.gif


Pros:
* Stackable drawers does not get any easier than this.
They do the job, and are inexpensive.

Cons:
* Can not think of any.

mountain_notepad.gif
Cutter Advanced Sport Insect Repellent

Mosquitoes and black flies love to dine on me when out in the woods.
I use to use 100% DEET, but that stuff is nasty for plastics and nylon.
Never again will I use that stuff.
I used it a lot in the 80s and 90s.

I read up on Cutter Advanced stuff, as they use no DEET in it, they use another ingredient called Picaridin.
The ARMY is even experimenting with the stuff as an alternative to DEET.

Once applied, it kept the mosquitoes away from me 100%.
however a few small black flies would still land on me, but not for to long.

Overall I was impressed with the stuff very much.
And it does not leave your skin greasy like DEET products do.

I give it two thumbs up
bigok.gif


Pros:
* Very effective in keeping the nasty bugs at bay.
* Does not leave your skin greasy like DEET does, and will not harm plastics, nylon clothing, sleeping bags.

Cons:
* A few black flies landed on me and circled me for dinner, wish it would keep them away completely.

cutters.jpg
 

Corey

OverCamping Specialist
Part III

mountain_notepad.gif


Coleman Lantern Stand

Another cool item.
I have owned a Firefly lantern stand (Google that item) since the early ‘90s.
It is a pain to setup.
The Coleman lantern stand however sets up very fast like a camera tripod.
It is adjustable up to around seven feet high, and has a flip out holder to hold your lantern.
It also comes with stakes to help hold it steady.

I give it two thumbs up
bigok.gif


Pros:
* Sets up in seconds, much faster than my old Firefly stand.
* It looks cool, very cool.

Cons:
* Can not think of anything to report.

coleman.jpg


mountain_notepad.gif
Cabela’s 12 LED Lantern with Remote

The remote is cool if you want to climb into bed then hit the remote to turn the lantern off.
However this really does not put out sufficient light to read with unless you have it right next to you.

But if you have to wake up in the middle of the night due to a full bladder and have to relieve yourself, it provides enough light to see to get out of your bedding/sleeping bag and exit your tent to find your bush or portapotty.

Can not really give this two thumbs up either, but it works OK in an enclosed area such as a tent.

Pros:
* Compact
* Remote control is very cool.
* Lit up the inside of my roof top tent pretty good.

Cons:
* Not enough light output to read by for this old mans eyes.

Sorry, I forgot to snag a picture of it up in the roof top tent.
Here is a picture I found with Google though.

s7_516426_imageset_01


mountain_notepad.gif
Maggiolina AirLand Roof Top Tent (my penthouse)

This root top tent rocks!
I slept nine hours almost both night in it.
Way more sleep than I get at home.
The nice thing about the AirLand is it sets up much like a tent trailer does by inserting a crank to deploy the roof.

Simply undo three latches on the roof, insert the crank handle, and crank it up.
The whole tent is setup in less than one minute.
After the roof is raised, you reach inside and pull out the adjustable aluminum ladder.
Set the ladder up against the tent with the hooks on the top, and you are all set to climb inside for a good nights sleep on the 3.1” mattress, or for a quick nap.

All the bedding is already setup if you packed it away that way.
I have the medium size AirLand, and it takes full sheets.
I am using fitted flannel sheets.
The down comforter is a twin size.
The brand I got is cut larger than most comforters, so even a twin is a little big, but it works out very well.
It came with three pillows too, and with the sheets and comforter setup, you would swear you were at home in your bed instead of out camping.
It is extremely comfortable.

Mine is mounted to four Yakima crossbars on my FJ Cruisers roof rack, and it is very stable.

Also since you are up in the air, you do not have to worry about tracking dirt or water into your tent.
Your sleeping quarters stay a lot cleaner than if in a tent on the ground.

These same tents are used around the world on expeditions, and they do very well in rain and windy situations.

While some campers next to me were cold when they got up, I was toasty.
I slept in my undies, and was not cold at all.
I did touch the comforter top a few times early in the morning, and it was very cold.
It gets cold early in the morning before the sun comes up at Mt. Rainier.
However, I was toasty under the covers.

I give it two thumbs up
bigok.gif


Pros:
* Hard shell design with insulated roof.
* 12v light inside.
* Cranks up like a tent trailer, see a video I made setting it up at my home.
http://www.youtube.com/watch?v=rHd77e7PbIE
* Tent material is pretty much water proof from reading other reviews online.
* Very comfortable.
* Having all the bedding setup is so cool.
* If you like to gab a lot with other campers, surprise, you are in for showing many what the tent is all about.

Cons:
* The price may scare a few off, but like most fine things in life, you get what you pay for with this AutoHome tent.
* I was constantly bugged my whole trip by curious campers.
They would drive by my site, even walk by, and everyone just had to ask me what it was, and how did I like it.
Being the good camping ambassador that I am, I obliged and answered all of their questions, I even let some go up the ladder to take a peak inside.
Be prepared if you get one and are in a public campground, you will draw lots of attention.

airland1.jpg


airland2.jpg


airland3.jpg
 

Corey

OverCamping Specialist
Part IV

mountain_notepad.gif
Camping Lab Awning

Owner Fernando hand crafted me some custom mounts to mount the awning to my Yakima crossbars.
The awning is setup on the drivers side of my roof rack.
The awning is very easy to setup, and once deployed gives you a nice area to sit under to get out of the sun or the rain.

It sprinkled my first night up at Mt. Rainier, so I ducked under the awning for awhile in my camp chair.
I am glad I had the awning.

I give it two thumbs up
bigok.gif


Pros:
* Fairly easy to setup by oneself.
* Seems stable in the wind when staked out with the included guylines and stakes.
* Offers a substantial amount of shade and relief from the sun at the elevation I encountered up at Mt. Rainier at the White River campground.

Cons:
* A little hard to take down with one person.
Take down is easier with two.

awning.jpg


mountain_notepad.gif


Zodi Hotman Extreme S/C Shower

Nothing like getting a warm/hot shower in camp when all you have nearby is a cold river/creek/stream to bathe in.
Been there done that many a time.

The water pressure is not great of course like a home shower, but it helps get the dirt off of you.
I have read that some replace the simple on/off head on it with a kitchen sprayer.
I may end up trying that.

I give it two thumbs up
bigok.gif


Pros:
* Compact little unit.
* Easy to operate.

Cons:
* Could use more water pressure, but then I am use to being a water hog at home when taking a shower with the water pressure on at a good pace.

zodi.jpg


mountain_notepad.gif
Battery powered water drinking pump from Jacks Toolshed

I saw this pump mentioned on Expedition Portals forum by member SOCALFJ.
http://expeditionportal.com/forum/showthread.php?t=15608

This pump fits into the water cooler bottles like you have at the office or at home.
I find it kind of a drag to fill up jugs at home from my Pur water faucet filter in the kitchen.
I do stock my ARB fridge with the 12 oz water bottles you buy at the grocery store, but those would go to quick when you want fresh water for cooking or just a cool quick drink of filtered water.

You can get the five or three gallon water bottles at some supermarkets, and also fill them there with filtered water.

Set a bottle on your picnic table, insert the pump, and you have fresh water for a weekend of camping at the touch of a button.

I give it two thumbs up
bigok.gif


Pros:
* Easier than a hand pump that can be had for these bottles.
* Other campers are intrigued by it, and ask for more information.

Cons:
* Mine did not screw onto the five gallon water bottle like it should.
Perhaps the bottle is not threaded correctly, I do not know.
It still worked just fine though.

pump.jpg
 

Corey

OverCamping Specialist
Part V

mountain_notepad.gif
ARB Fridge/Freezer

Very cool, no pun intended.
I have taken this on outings to Greenwater and served up frozen ice cream bars to the group.
Nothing like having your food at the right temperature just like your home refrigerator.

Virtually silent this piece of fine workmanship is outback proven around the whole globe.
Once you use one of these things, you will wonder why you put up with the mess of using ice for years.

You can buy an add on for this called the “Two Zone” which replaces the lid on it with another compartment.
So you can use one for refrigeration, and one for a freezer.

I highly recommend one of these for your next camping/expedition trip.

I give it two thumbs up
bigok.gif


Pros:
* No more soggy food!
* Room for plenty of food, and you do not have to shift the food around a block of ice.
* Can be used as a freezer too, but not at the same time when in refrigeration mode.
* Draws little power (extremely energy efficient) from the vehicles battery, as you can go close to five days on a healthy battery.
* Temp gauge included to keep an eye on the temperature.
* High tech to keep your perishable food fresh for days.

Cons:
* Temperature gauge is in Celsius, no option to set it to Fahrenheit.

fridge.jpg


mountain_notepad.gif
Foxhill Oven

Not a new item for me, I have had this oven since 1991 or so.
Back before I was introduced to the Internet, I think I saw the ad for this hot little item in Trailer Life magazine or some camping magazine.
I put up a review on this several years ago on YotaTech.
It works as advertised.
Set it on top of your camping stove, and watch the temp gauge go up.
Level off your flame when you get to the desired temp setting, and cook away.

Anything you can cook at home in an oven you can cook in the Foxhill oven, within reason.
It contains a non stick baking pan, so the volume of what you can cram into it will be limited.

They also now offer a dual pan oven, so that offers you twice the baking capacity of the one I have.

I use mine to cook up my Morningstar sausage, and Boca chicken patties for dinner.
You can also use it to heat up French bread.
I am sure you will find this oven very handy around the campsite on your next outing.

I give it two thumbs up
bigok.gif


Pros:
* You can bake, warm up leftovers, and do much more with this oven.
* Has a built in temp gauge on the front so you can time how long to cook your grub.

Cons:
* I can not think of any.
I have had this oven since the early 90s, and have been very happy with it.

stove.jpg


I hope these reviews can be of help to you if you are thinking if getting new camping/expedition gear soon.
Here is a link to the trip where I did this review
 
Last edited:

Corey

OverCamping Specialist
Thanks, I dig that campground there.
Last time I was there was in the early 90s with my kids, and I had a tent trailer back then.

Dang sunburn cut this trip short though.
Note to self, do not nap out in the open, the sun can sneak up on you fast.
 

kcowyo

ExPo Original
Corey said:
Zodi Hotman Extreme S/C Shower

I have read that some replace the simple on/off head on it with a kitchen sprayer.
I may end up trying that.

I would highly encourage you to try it. I picked up a new hose and kitchen sprayer for $7 at Wally World. A huge improvement over trying to pull open and push close the stock unit with soapy hands.

An excellent thread with some great reviews. Very well done Corey - :clapsmile
 

Corey

OverCamping Specialist
Cabela's Deluxe Roll-top Table

kcowyo said:
I would highly encourage you to try it. I picked up a new hose and kitchen sprayer for $7 at Wally World. A huge improvement over trying to pull open and push close the stock unit with soapy hands.

An excellent thread with some great reviews. Very well done Corey - :clapsmile
Thank you very much, and I will search for a new showerhead too.

OK, this is a non field test since I am not camping at the moment.
My table came on Thursday of this week.

Cabela's Deluxe Roll-Top Tables

I just set this up in my home, and it was pretty straight forward.
I would rather be out camping, but I have other commitments this holiday weekend.

Picture one below shows the nice carrying bag it comes in.
The inside has two compartments.
One for the leg and pole system, the other for the table top.

rolltop_table1.jpg


Picture two below shows the contents.
Not shown is the two piece poles that slide into each other.
These are the braces that go along the length of the table to brace it, and they also snap into the top of the leg system to make the top rigid.
The poles are inside the mess of the leg system.

rolltop_table2.jpg


Picture three below shows the bottom side of the table top with the support bracing poles in place.
Notice the hole in the upper right of the picture on the pole.
This hole snaps into the top of the leg system to prevent the table top from shifting back and forth.

rolltop_table3.jpg


Picture four below shows the leg system.
It is not to stable until you put the table top onto it.

rolltop_table4.jpg


Picture five below shows the end result.
The legs extend around 6" give or take allowing you to either raise it up higher if needed, or to level it out on uneven ground.

rolltop_table5.jpg


I would say you could set this up in a matter of a few minutes with practice.
There are no instructions included, so it took me a few extra moments to conclude what the holes in the support braces were for, as I had not noticed the nubs on top of the leg support system until I was ready to set the table on top.

I will be using this table mostly for camping at "unimproved sites" that are not in a normal campground.
Places such as Greenwater where I go 4wheeling and also have camped there since the mid 80s is a prime example.
Tons of beautiful spots up there by creeks and rivers to camp in, just no picnic tables to set your gear on.

I will still dine with the Cabela's picnic table, but this rolltop table would be used to hold my five gallon water bottle and other stuff.

It seems to be very stable though, and I picked it up and carried it off to the spare bedroom with no problems of it wanting to fall apart.
I think this is going to work out very well for me for self contained camping.

If I get time, I will try and setup my Cabelas' shower tent this weekend and shoot some pictures of it.

This coming Tuesday my Kelty Shadehouse 12 will arrive.
Not sure when I will get a chance to set it up.
 

skephart

Observer
Great write up. I need to check out the oven and I am looking at getting an awning for my Xterra. I will have to give camping lab awning a call and see if it would attach to the Xterra rack. Also, I just bought an Engle fridge. I took an 1,800 mile trip to Oregon and loved not having to look for ice. No battery problems either.
 

Corey

OverCamping Specialist
Thanks.
Yes, love the oven, it was a very good find.

My ARB fridge now runs 24/7 in my rig.
My rig has not been started since I drove home from work on Friday.
Tomorrow when I run some errands on Monday, the rig will fire right up.
Very energy efficient.
 

Corey

OverCamping Specialist
Kelty Shadehouse 12

Another non field test.

I have had a picnic table shelter for years that I bought back around '82 or so.
It consists of a large green tarp with five holes in it via grommets.
You use a pole at each end, and a center pole to go on top of the picnic table.

Each pole then must have two guylines on it and staked out at each corner.
Needless to say, it was a royal PITA to setup.
I did it myself for years, then the kids helped me when they were older.

I did not want to use it again after getting back into camping this season, as it takes maybe thirty minutes or so for one person to setup.

Hence my quest to find an easier shelter to setup, and I saw this one online on the Cabela's site.

Kelty Shadehouse 12

This item comes in two sizes.
Shadehouse 10
center height 80"
floor size 10-ft. x 10-ft.
Weight 8 lbs. 3 oz.

Shadehouse 12
center height 85"
floor size 12-ft. x 12-ft.
weight 8 lbs. 14 oz.

I went with the bigger model, the 12' one for additional space.
It comes packed in a nice nylon bag that is not much bigger than some backpacking tents.
This will store very nicely in my rig right behind my drivers seat on top of the Hi-Lift Handle-All unit I have stored there.

Here are some pictures I took today on setting it up.

Here is the bag after you take it out of the shipping box the way Cabela's ships it out.

shadehouse1.jpg


Contents of bag:
Inner nylon bag for the two aluminum DAC poles.
A word on the poles, DAC poles are much stronger and lighter than fiberglass poles.
This is the first product I have own that uses these type of poles, and I like them much better over the fiberglass style.

The shelter itself.

Small nylon bag for the tent stakes and the tie down guylines.

Instruction sheet (which I scanned in)

shadehouse2.jpg


A few pictures showing it setup.
Setup was very easy.
1. Unfold the poles, they are all shock corded, and after assembling one, I laid it on the ground and repeated for the other pole.

2. Spread open the shelter, and start inserting a pole in.
After it is all the way through, use the end pins and lock the poles in in that way so the pole will not move, and also use the plastic clips at each end (one clip per end) to secure the end of the fabric to the pole.

3. Repeat with the other pole.
Inserting the second pole takes a little more time, as the structure starts to raise up in the air, and you have to fight a little resistance in getting the second pole all the way to the end of its sleeve.

4. Once the second pole is all locked in, you can then go to the center of the structure and raise it up manually.
Once positioned, it will stay that way.
After it is where you want it, then you can stake down the four corners and also use the included guylines to keep it stable in the wind.

shadehouse3.jpg


shadehouse4.jpg


shadehouse5.jpg


My neighbors Jeep could probably drive right in underneath the unit and fit.
I am about 5'10", and there was about 6" or so to spare above my head when walking underneath of it.
This should cover the average picnic table encountered in most campgrounds, which is the main reason I bought this for.

Here are the instructions from Kelty that I scanned in.

shadehouse6.jpg


I would say it took me about 10 minutes or so this first time in setting it up.
I am sure it will go much faster the second time, it normally does once you acquaint yourself with setting it up prior to a trip.

Yeah, I know, I still have to setup the Cabela's shower enclosure too.
Maybe this week...
 

Schattenjager

Expedition Leader
Wow!

Corey - I am so happy you joined ExPo! What a great set of write-ups! I am looking for the shower as soon as I log off here! Thanks for the time and thought in your posts!
:archaeolo
 

Super Doody

Explorer
Awesome review and I'm jealous of your toys :camping: What's that miniature wooden table on top of the table? Salt and pepper shaker? Oh yeah you need a bigger TV:elkgrin: :D
 

Forum statistics

Threads
185,528
Messages
2,875,553
Members
224,922
Latest member
Randy Towles
Top