Winch Line Whip Lock: A Tutorial of the Beowulf Lock

Beowulf

Expedition Leader
Winch Line Whip Lock: A Tutorial of the Beowulf Lock

Since it is generally recommended that you keep a full wrap of synthetic line on your drum I figured it might be good to make sure that you cannot pull more line off that drum. To accomplish this I actually use one of nylon webbing sewn into an "8" shape (see below pic ). These do work well, but can be difficult to move into place. Since these Line Locks are getting harder to find, I wanted to come up with a way to do the same thing without one. The general use of a Whip Lock for tidying up the end of rope would prove the perfect method. Below I will show the Winch Line Whip Lock, or if you want to call it the Beowulf Lock you can... :) .

Once tensioned these creates an extremely ridged lock that will keep you from ever accidentally pulling out more line.

Winch Line Lock: Nice, but difficult to move all the way down the other side of the drum to maintain a full wrap. (Stock pics from webstore in England)
step%201.jpg

step%205.jpg


Step one:

Pull enough line through the drum to go the width of the drum twice. If you have the Warn attachment from Viking, just undo the line and redo it to have enough of a tail. (Pics of Superwinch EP drum)
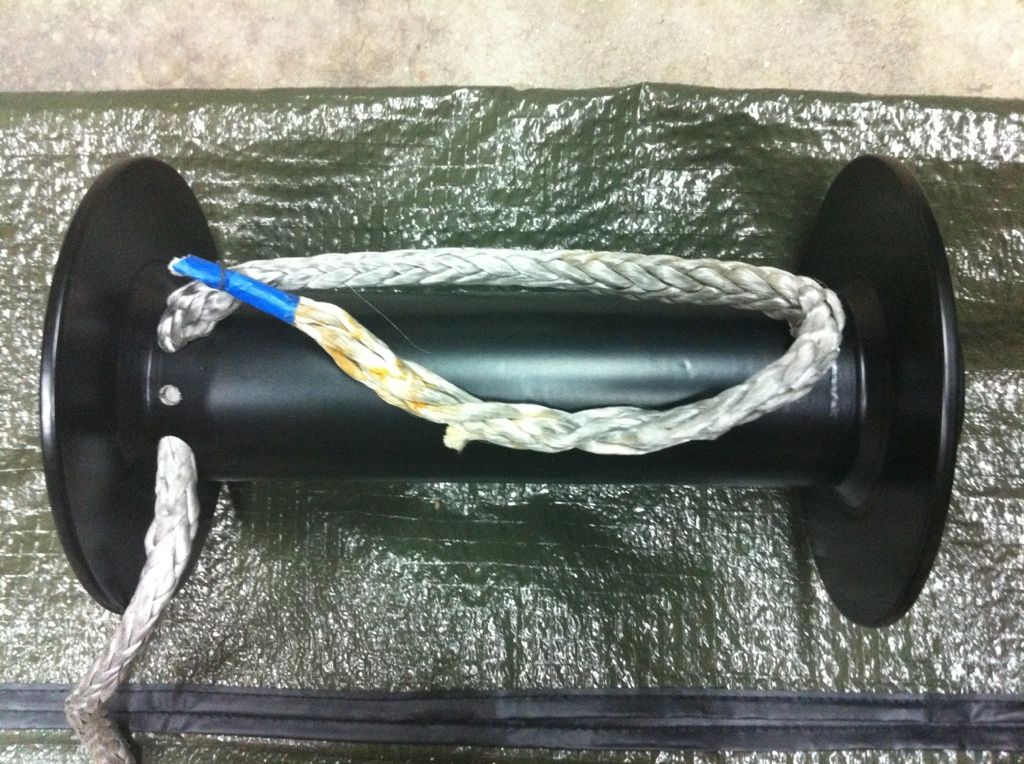
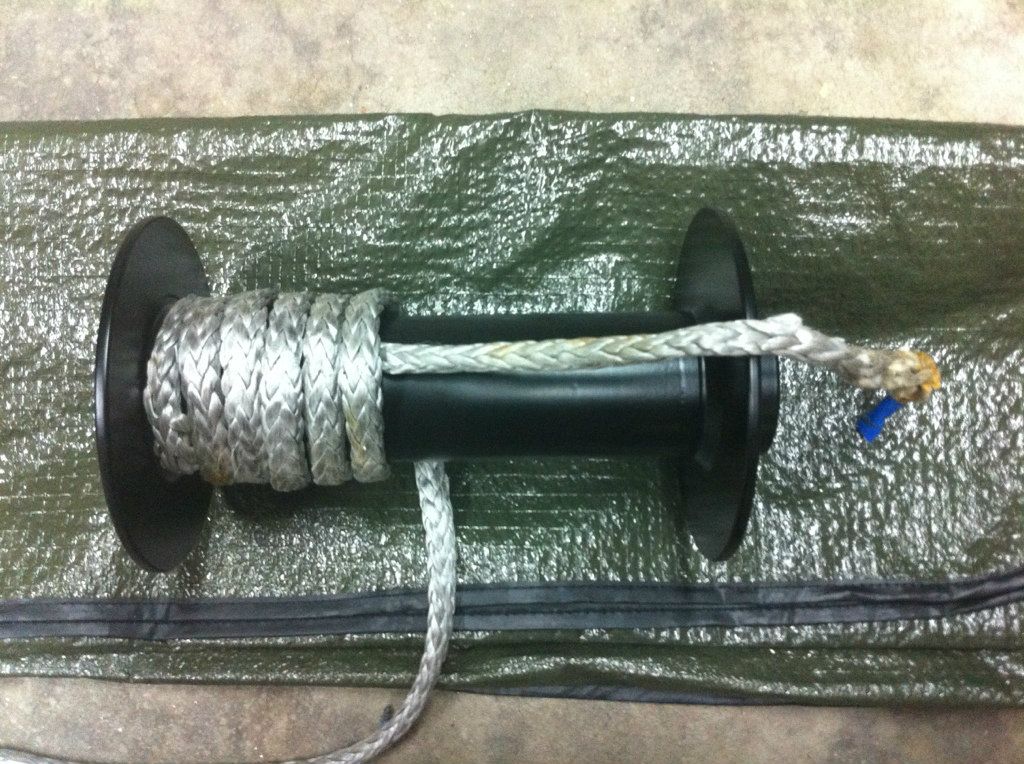
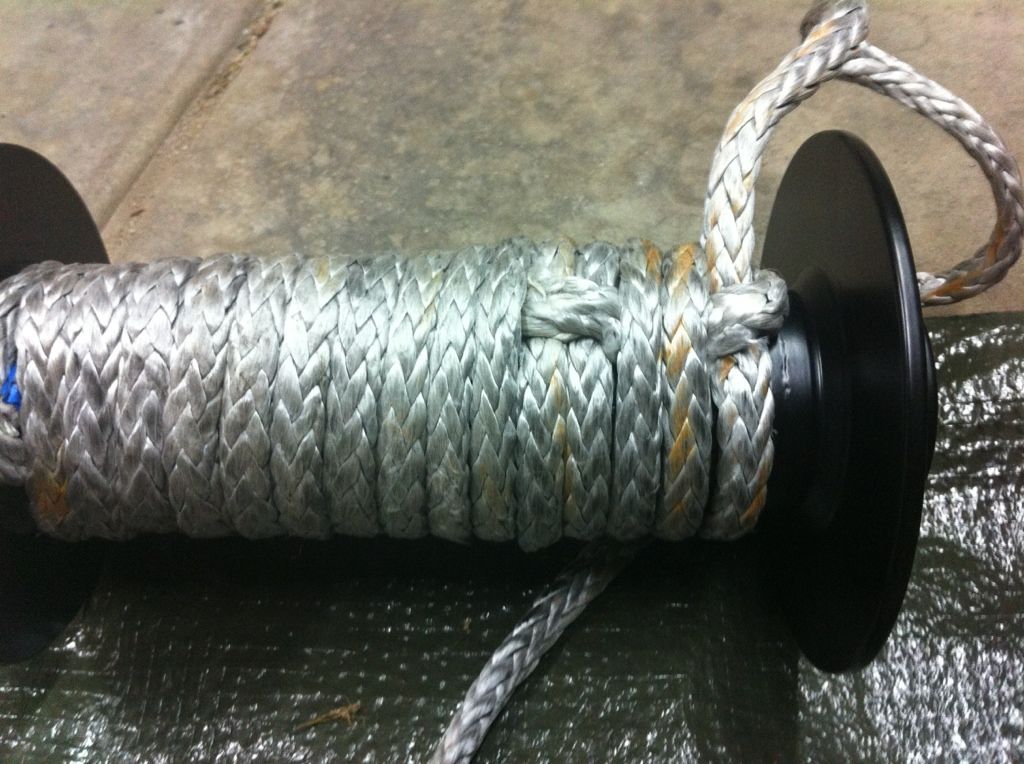
C47FB045-8A92-4DAA-9171-B1785612609C-14633-00001524E1CE120A_zpsec44256f.jpg


Step Two:

Wrap the line over the tail extending down to where you want the Line Lock. I choice to have it all the way at the end of the drum.
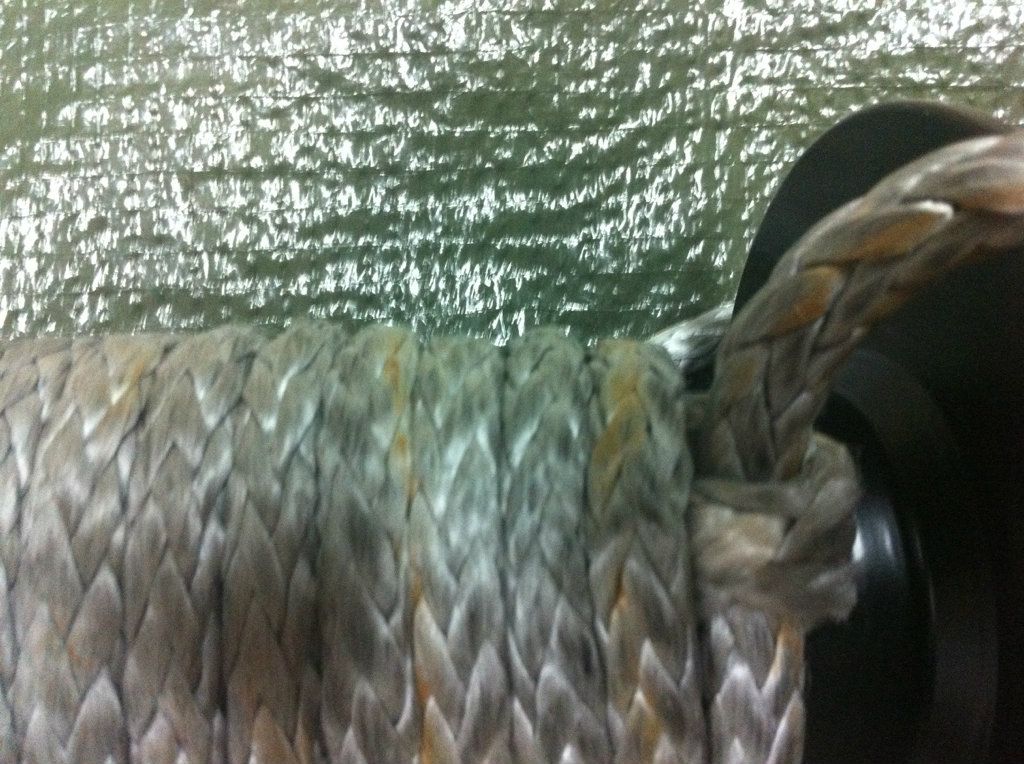
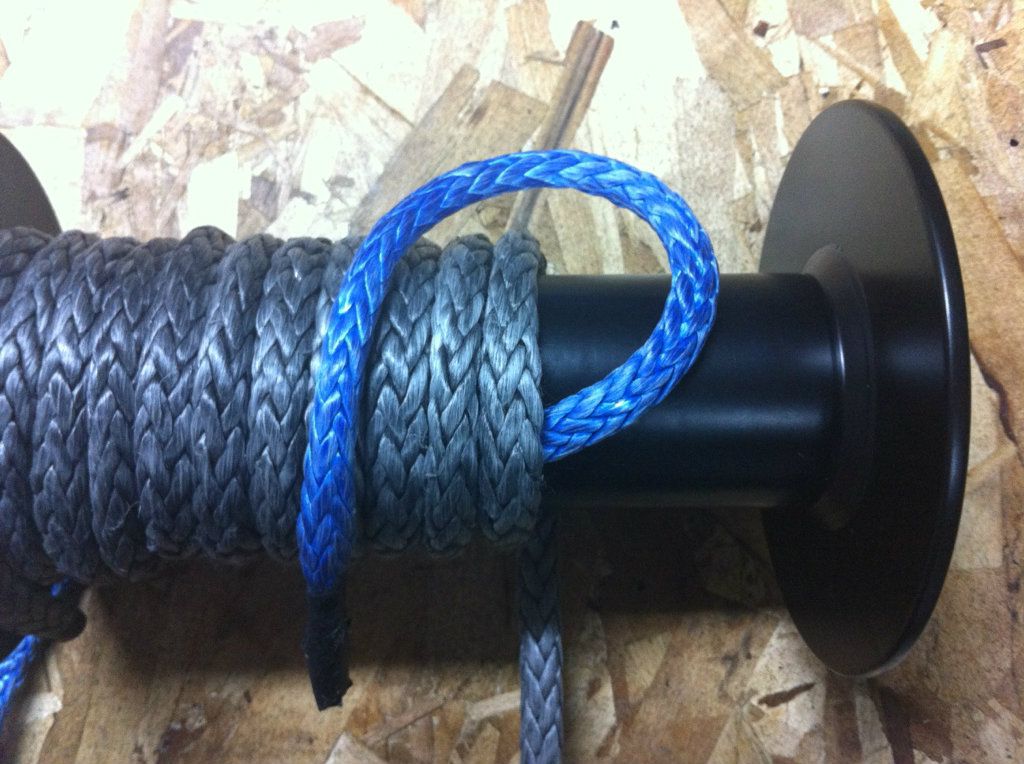
102C8CA5-2CC2-4715-AFAD-1E5F06A4DAF7-14633-00001524E8C8315F_zpse1d2dc1e.jpg


Step Three:

Loop the Tail over the last wrap and start to feed it under all the previous wraps.
9266D0F3-B194-4CA6-80E1-9738BC652892-14633-00001524F7FA63B3_zpsd4535230.jpg


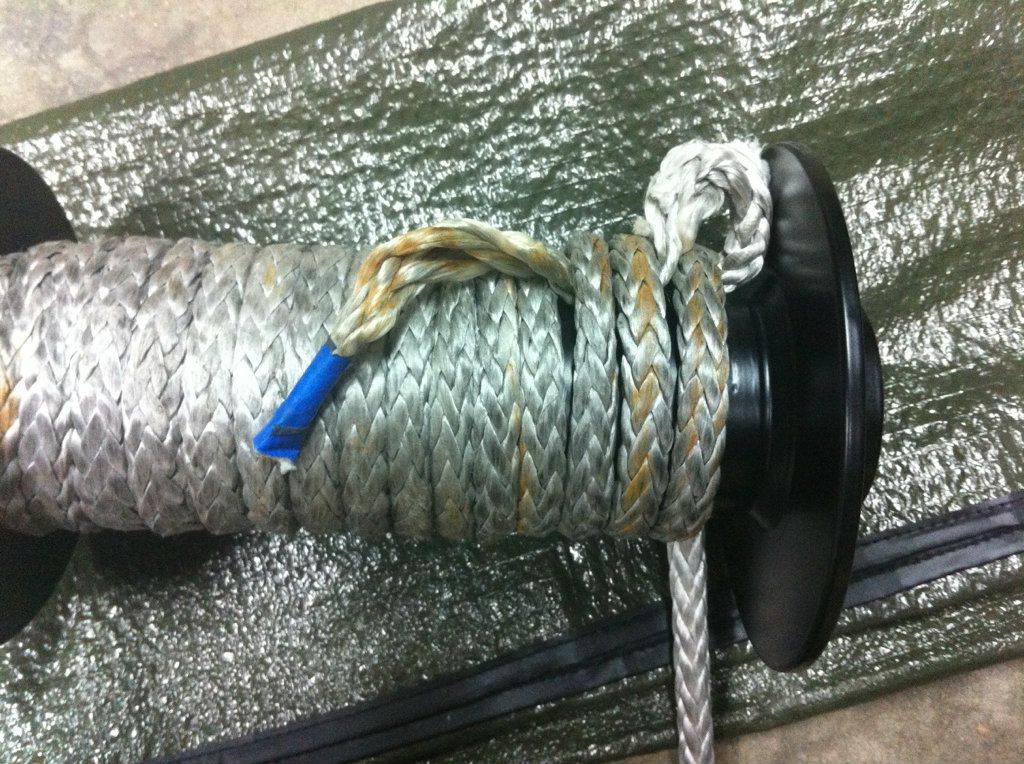
Now under all the wraps.
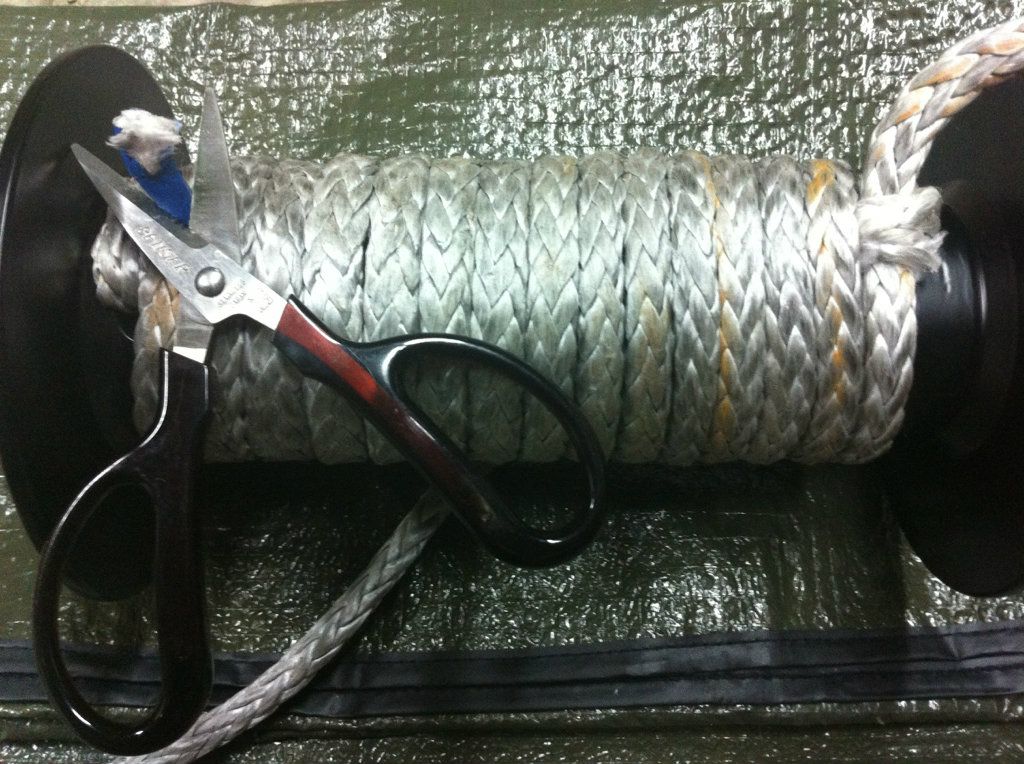
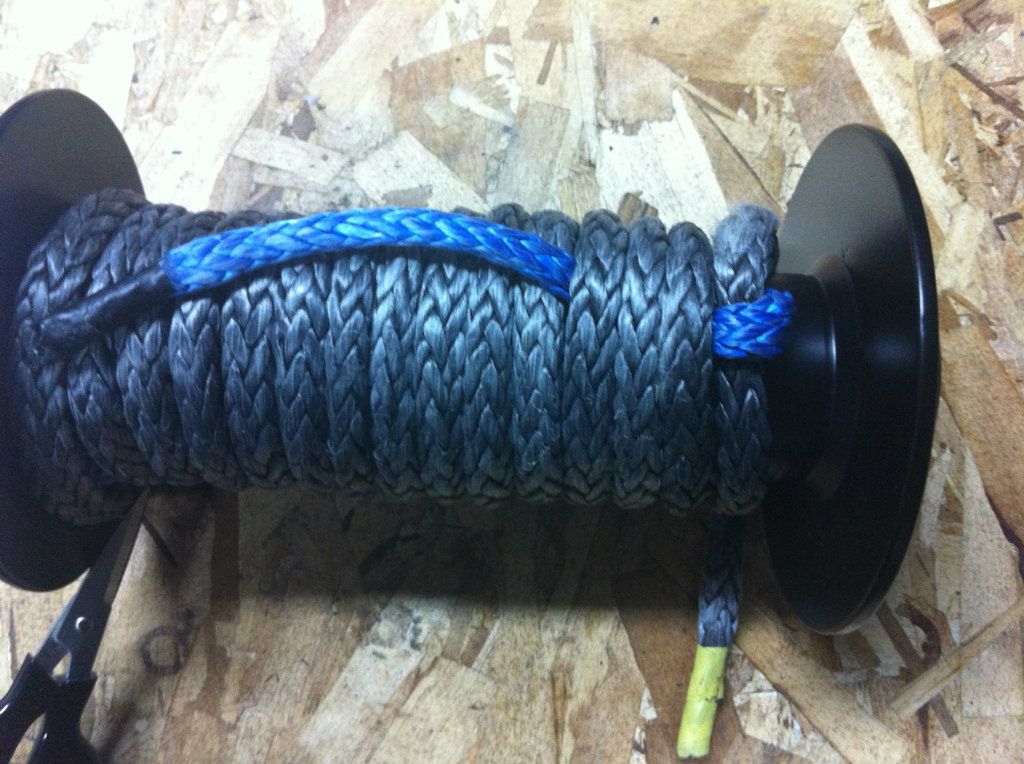
46DF848B-D9FB-4336-9285-CD4480BF1ECF-14633-00001524FED61C69_zpsfaa68a09.jpg


Step Four:

Tighten all the wraps as best you can and continue to pull on the tail to tighten up the Lock on the Last wrap. Once done you can cut off the extra of the tail. If you had perfect length you could possibly have it tucked without needing to cut anything.
C2C6DFF9-7433-4FCF-A9A0-91A6107C9C8D-14633-000015250A471F7C_zpsddf81fd2.jpg


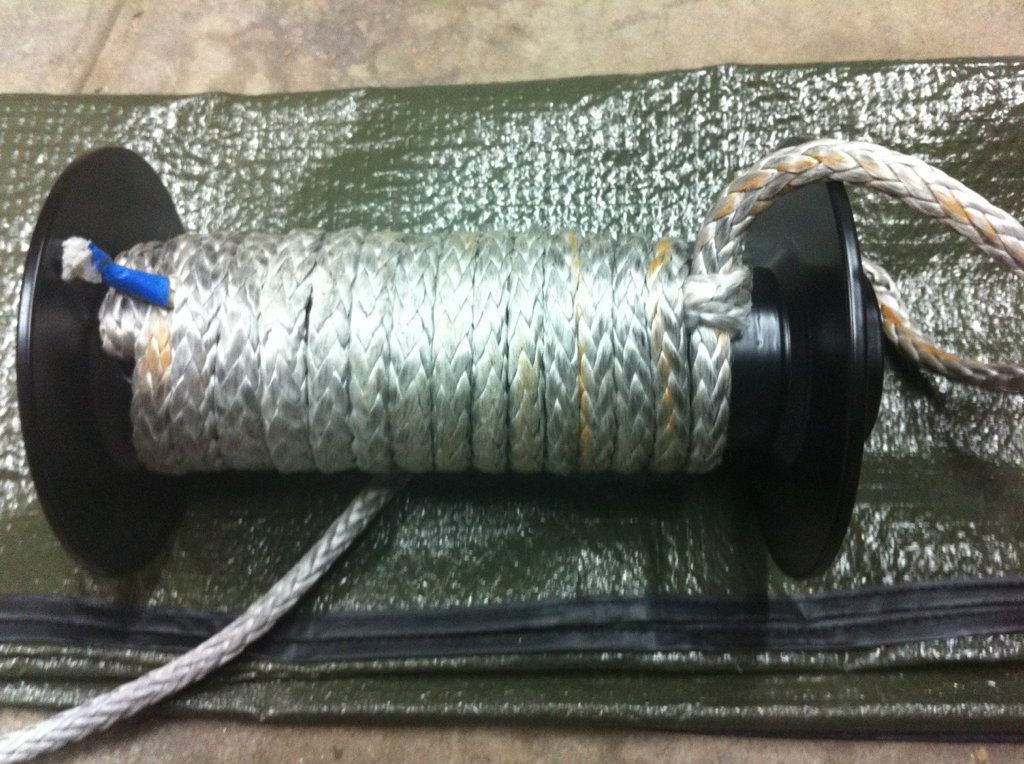
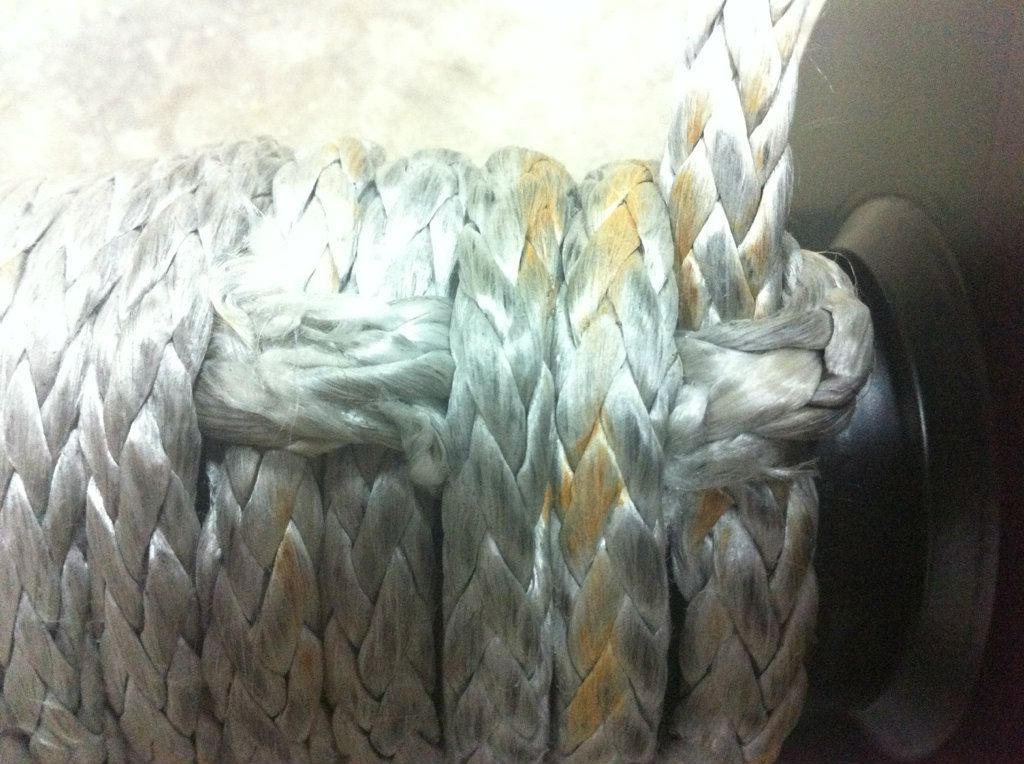
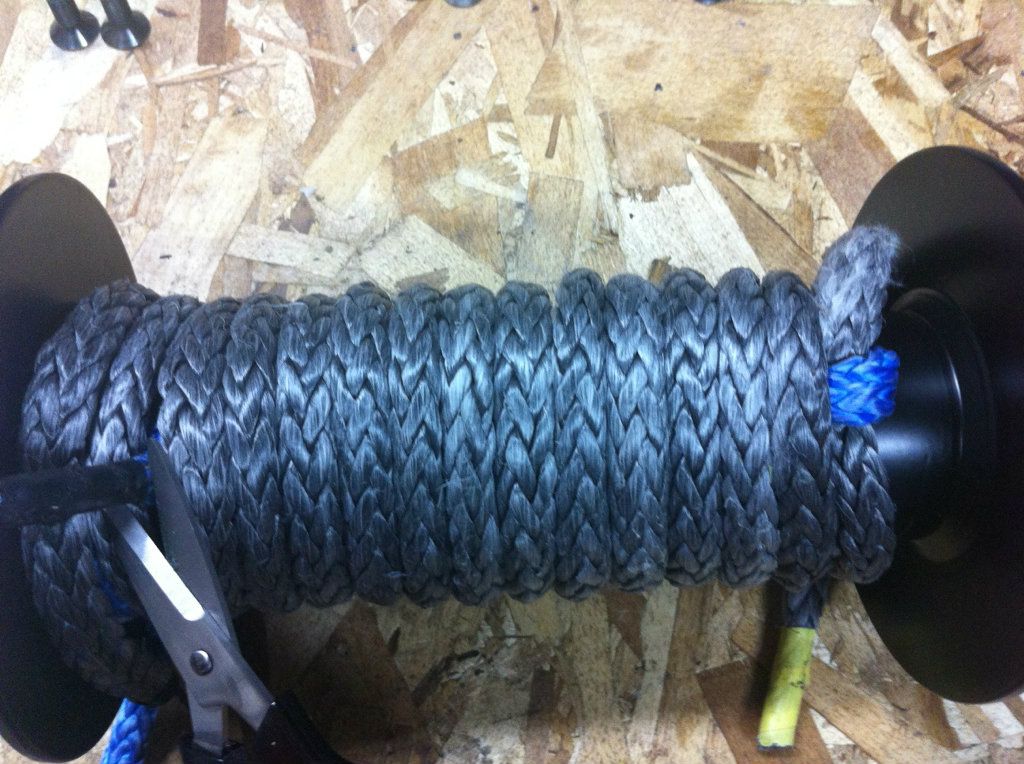
The finished Product:

5E993C20-6D97-44BC-967F-518D85315046-14633-0000152511101F59_zpsdf5fcbff.jpg


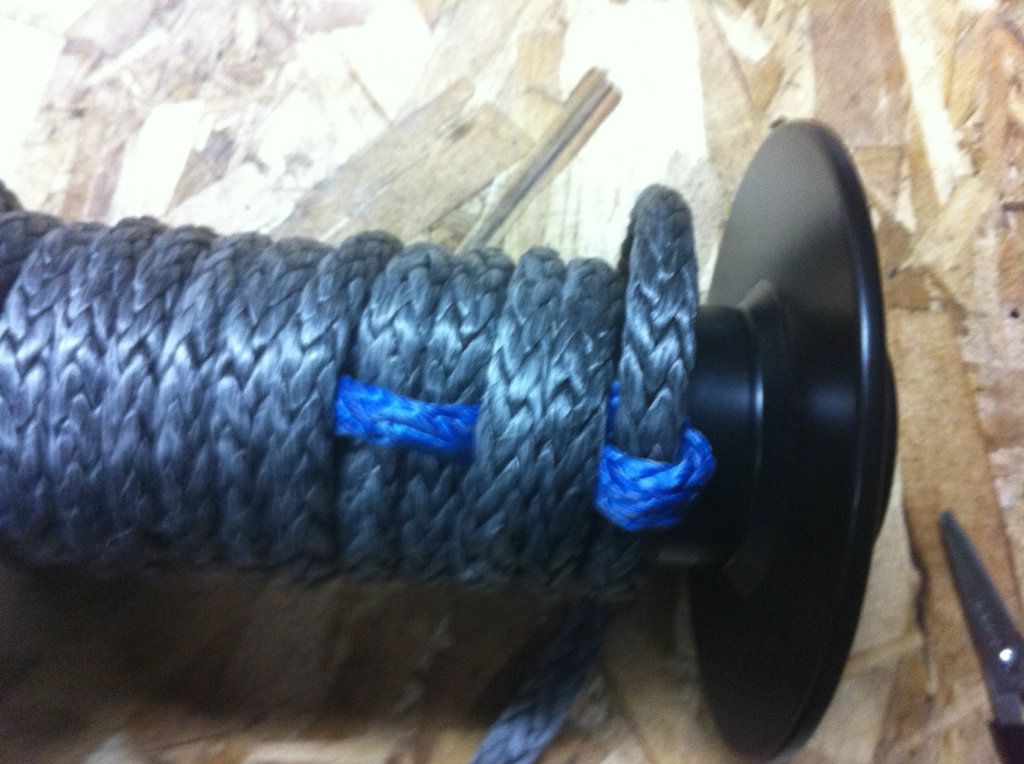
Now, if you think the just over once and under the rest will not provide enough tension you can go over the last wrap. Under the next two. Over the wrap subsequent two and then under the rest.

CA6883CF-5E7B-4555-A5DE-BE1F70B818EE-14633-0000152518D6AA80_zpsc9453673.jpg

4FA0B206-C9B0-4FCB-89D1-E60EF02F7DC5-14633-000015251E88B4E1_zps66a9ef65.jpg


Now here I have shown this with two different colored ropes to highlight the rope placements.

E5B12D8A-8AE0-4C8F-8F3E-5B4EDB22D94E-14633-0000152525597F6A_zps86277f98.jpg

863C05DA-B093-449E-B5BF-AA78449827D7-14633-000015252ADA2F42_zpsce92a850.jpg

51108A50-E82C-4373-95B1-98566EF34A2F-14633-00001525301AEB45_zps632e1db0.jpg

277A5410-64FD-4620-ABC9-513C66E3CFDD-14633-000015253655682F_zps63659234.jpg

F8D46440-DE1D-4048-BACB-871C62036D13-14633-0000152549033497_zps4f50e7f3.jpg

0CD78ACA-5B88-447D-826A-0230293E2E7A-14633-000015254F343359_zps0f549241.jpg
 
Last edited:

Metcalf

Expedition Leader
How does the 1st wrap tension up under the 1st use? I know I fight getting synthetic line tight enough on the 1st layer that the additional layers don't cut down through with tension....
 

Beowulf

Expedition Leader
Metcalf,

The rope will tighten just like it always would. The line will slip through the loop, especially if you don't pull the tail tightening the bite. If you leave it as a fairly loose loop, the line will slip through with less resitance constricting the Drum and buried tail more readily. I would have to recommend leaving the loop realtively loose just so that does happen and when you want to undo the line it is earier to push some extra line back through the loop so you can back off the contricting wraps over the tail.
 

off-roader

Expedition Leader
Cool thread. How I can do this with a spool like the TMax winch without the hole? Also my winch line (Masterpull) just has the attachment point on the end like the one shown for the TMax winch.

I doublechecked with my winch manufacturer (MileMarker) and was told that my winch (SEC12, 12k electric) does not have the holes in it's spool like the one shown. Instead they said what they do to 'anchor' the line on the drum (especially with their military applications) is glue the first wrap onto the drum using a milspec adhesive much like superglue. The glue doesn't have to be super strong since it just minimizes the movement you get on that first wrap.

First question for him was what about when I needed to change the line out? He said you can simply pull the line off (straight up) and it comes off fine albeit some of the paint may come off with it. He added that usually the paint on the spool eventually comes off anyway with use.
 
Last edited:

off-roader

Expedition Leader
Beowulf,

Yes it does look very similar although I can't be 100% sure that the size is the same. Anyone know what size bolt the Warns' use? The MileMarker's bolt size is M6x12. (item 4 on page 16 in their manual at http://milemarker.com/pdf_downloads/sec_instruction.pdf).

I went to Viking's website but unfortunately the instructions for installing that device are limited. Based on the picture, it appears the line is simply threaded into itself and not actually spliced in right?

If so, then it's certainly an upgrade that can be done by me instead of sending my line in to have the end modified.
 

Beowulf

Expedition Leader
Don't know on the bolt size. Just shoot Thor an email and he should be able to answer you pretty quick.
 

Beowulf

Expedition Leader
Off-roader,

Also, the bolt is separate from the little link. You could just use the Milemarker supplied bolt or just go grab a new slightly longer one if needed. You really only need that link which has a nice washer welded to it.

Additionally, you are correct on the fact that the rope is just threaded through itself. Just use a pen, open up a hole in the line, and feed the tail through.
 
Last edited:

off-roader

Expedition Leader
Off-roader,

Also, the bolt is separate from the little link. You could just use the Milemarker supplied bolt or just go grab a new slightly longer one if needed. You really only need that link which has a nice washer welded to it.

Additionally, you are correct on the fact that the rope is just threaded through itself. Just use a pen, open up a hole in the line, and feed the tail through.

Nice. Actually I still have a pocket knife from my Navy days with a spike in it for just this kind of splicing & line work although I've never really had to use it until now LOL.
 
Last edited:

off-roader

Expedition Leader
Update: After contacting them, they updated their website. Not sure if it's because of my question or if they were already updating it. Anyway, it is supposed to work with my winch bolt. Ordered and just waiting on it to arrive sometime next week.
 

Beowulf

Expedition Leader
Off-roader,

That is great. Please post up on how it turns out when you are done. Pics would be great too if you can take some.
 

off-roader

Expedition Leader
received it yesterday thanks to their quick turn around and shipment and the USPS. Will def take pics and post them up.
 

off-roader

Expedition Leader
Ok, went to open the package to install the unit and THERE ARE NO INSTRUCTIONS!! WTH?!?!?

Poor, poor job Viking. As much reputation as you seem to have on these forum, I can't believe you shipped just the unit without any instructions or pictures of an installation whatsoever!??

FWIW, I am own customer service myself and this is really, really disappointing.

UPDATE: Just came back into the house and visited their web page where they thankfully have instructions except the first line refers to non existent last row of photos.

Instructions:


See last row of photos
Install 10" from end of winchline, putting the line through it. Self locking in the drum connector
Thread the winchline through the fairlead & UNDER the drum (rare exceptions exist)
bolt the Drum connector to flange
Lay remaining end of winchline on top of drum, taping end down to hold it in place until winchline is installed
Subsequent wraps will clamp down on the tail of the winchline preventing it from coming undone
Wrap at least 10 wraps & proceed to installing under load.

:mad:
 
Last edited:

off-roader

Expedition Leader
I threaded/installed it based on what I think looks right. It would really help having better installation instructions so I can feel confident it will work when indeed it to.

Will def be calling Viking on Monday to find out why they sent it without installation instructions or pics of how it should be installed. Who knows... They may not have even tried installing it themselves yet which explains the lack of pictures.
 

Beowulf

Expedition Leader
These have actually come on their lines for several years, so I'm hoping they have installed a few. I have installed a few myself. It should be as easy as just removing the terminal from the rope. Running as much line as you want for the tail through Viking's Attachment and then feeding that Tail back through a hole in the Rope on the working end creating a small Bite that traps the Attachment. Bolt on and re-spool your rope.
 

Forum statistics

Threads
188,880
Messages
2,910,498
Members
231,329
Latest member
greggarnett
Top
­