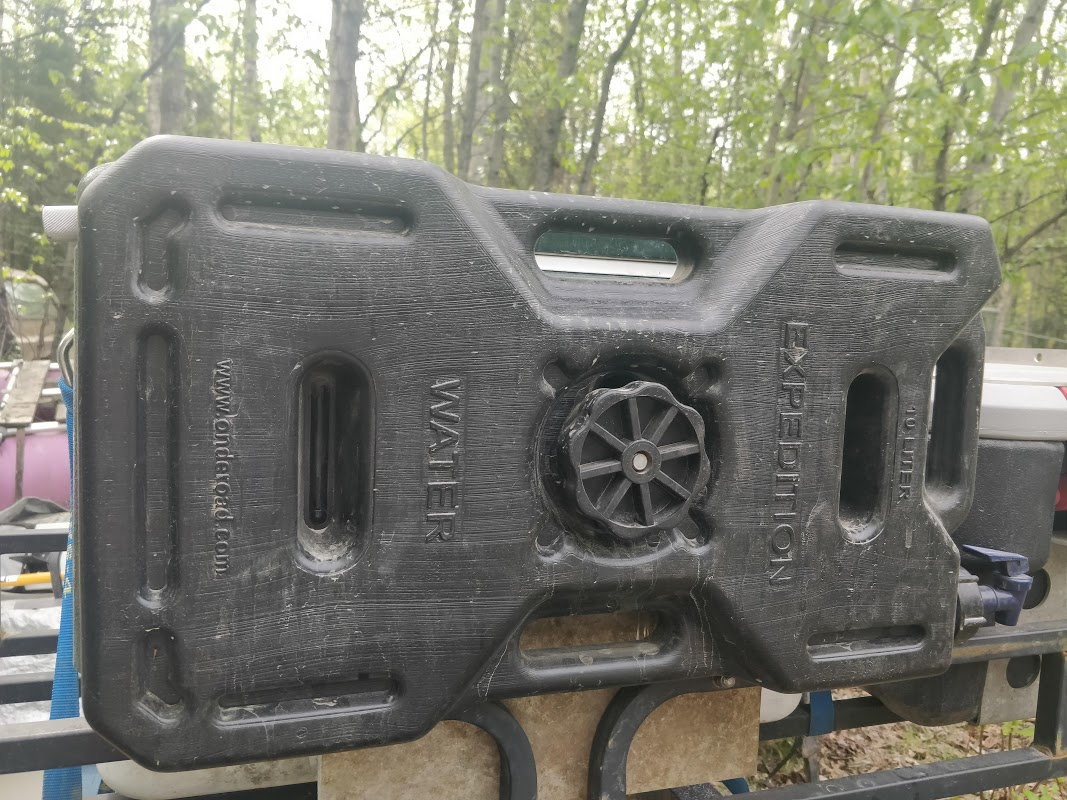
Rotopax 2 Gallon Water Can with Brass Spigot and Vent
Speaking of vents, I recently installed one in a 2 gallon Rotopax water can for a 3-week overlanding trip in my Xterra. The can was stored vertically, easily accessible from the rear hatch. No leaks; no problems.
Rather than mess with hoses or siphons or any of the other gadgets and contraptions we overlanders love to invent in the name of camping convenience, I followed the maxim
simpler is better, less is more - a 1/4 turn brass garden spigot replacing the yellow plastic spout that came with the can. This arrangement requires a vent to prevent vacuum lock so I drilled a hole and added a vent.

I considered and rejected "Mr. Yellow Plug" and similar push-in plastic vents. Internet comments suggest that the Rotopax plastic is too thick for these to "pop" into place. Besides, what pops in can also pop out and few glues successfully bond to the slick food grade plastic used by Rotopax.
I also considered and rejected the "Pops-A-Vent" aluminum vent. Internet comments similarly suggested that the Rotopax plastic is too thick for the fitting to "pop" into place. My emails to the company went unanswered, but it appears from the product photos that if the can material is too thick for the fitting to "pop" it can necessarily only be held in place by a single barb in the fitting and glue. For $14 including shipping it didn't seem like a good bet to me.
It turns out that everything I needed was at Ace Hardware, Lowe's or Home Depot.
Parts List:
Valve - 1/2" brass valve; 1" to 1/2" Sch. 80 PVC reducer bushing; appropriate size washer from the bins at Ace Hardware; original retaining collar from the Rotopax can.
Vent - 1/4" NPT brass air compressor tank drain cock; 1/2" "brass colored" washer; 100% silicone adhesive sealant.


 Assembly
:
Assemble the valve as shown. You will need to evenly sand down the edges of the reducer bushing flange until it fits into the Rotopax threaded collar. The valve fits tightly into the reducer bushing after only a few turns so no sealant is necessary. Try to be gentle with the threads of the bushing if you hold it there with vice grips or water pump pliers during assembly. In the photo you can see that I wasn't. However, this is merely cosmetic because the bushing slips into the slightly larger opening of the water can and any buggered up threads will be out of sight, out of mind.
Drill a hole in your Rotopax can for the vent using a 7/16" or 15/32" HSS bit. (A 1/2" hole will be too big.) Then either cut threads in the hole with a 1/4" NPT tap or improvise a home made tap. (I used a male threaded air hose coupler, tapped it with a mallet to get it started in the hole, then threaded it in by hand.) Use some 100% silicon adhesive sealant on the threads of the drain cock and under the washer, thread in the drain cock, wipe off excess silicone. (With the 15/32" hole it is a relatively tight fit so sealant isn't really necessary and the Rotopax plastic is fairly thick where illustrated so there should be sufficient threads cut into the can to hold the vent in place.
So far so good. No guarantees with thinner cans.
Note: Some may be disappointed with the gravity feed flow rate of a 1/2" valve with small air vent. A 3/4" valve would certainly flow more water but I rationalized the 1/2" valve this way: (1) I already had a 1">1/2" bushing in one of my parts bins, (2) I don't know if there is such a thing as a 1">3/4" bushing that would fit inside the Rotopax threaded collar, and (3) the slower flow with a 1/2" valve tends to waste less water. YMMV
Another Note: For my view regarding the use of brass fittings for containers used to store potable water see Post #33 below.
Just because an item comes from a hardware store does not make it dangerous, it is brass and can be cleaned before during and after. Of course that is just an opinion.

www.expeditionportal.com
.