Pro-Rig V2.0 - Home Built Compact Composite Pop-up

Heifer Boy

Adventurer
Excellent build. I really like the double lift design. Nice and compact when on the road and nice an airy when in camp.

How did the blind water taste test go? Is Sheri happy drinking from the rank now?

My partner has the same issues and we have to carry additional store bought water with us.

HB
 

CoyoteThistle

Adventurer
Thanks HB! Yeah, I continue to be really happy with the way the double lift worked out.

The water filter gets a big thumbs up! No way to taste or smell a difference now between tank water and bottled water. I use an RV hose and Camco filter when filling the tank (big improvement on taste vs. a regular garden hose) but plastic taste was still noticeable. And yes, very happy to not be carrying around and buying bottles of water as much!
 

java

Expedition Leader
Thanks HB! Yeah, I continue to be really happy with the way the double lift worked out.

The water filter gets a big thumbs up! No way to taste or smell a difference now between tank water and bottled water. I use an RV hose and Camco filter when filling the tank (big improvement on taste vs. a regular garden hose) but plastic taste was still noticeable. And yes, very happy to not be carrying around and buying bottles of water as much!
That's great to hear! I was just thinking about a water filter the other day. Care to share which one you used?

Sent from my SM-G950U using Tapatalk
 

CoyoteThistle

Adventurer
Couple fun trips to report on...

First is from a while back. We did chase the tail end of the super bloom down at Anza Borrego back in early April. We managed to coordinate with some fellow camper builders from just up the coast and found a quiet remote camping spot.


The big and the small of home-built campers!

Had good times around camp and managed to get some nice hikes in. The ocotillo wasn't quite in bloom yet, but the annuals were peaking at the slightly higher elevations we visited.


So much to explore out there.


More recently, we managed to get a long 4th of July weekend trip in to the White Mountains. This area has long been on my list of places to visit, but I had never been. We got out of town Wednesday night and camped at Fossil Falls along Hwy 395. This is only about 50 miles from where the Thursday morning 6.4 magnitude earthquake hit, but we must have been on the road by the time it hit because we didn't feel it.

Got up to about 8,000 feet in the White's and found a dispersed camping site out a rough road.


I love the pinon-juniper forests and this was a pretty nice site. We spent three nights here and day-tripped up the hill each day to hike and geek out on flowers and birds and such. Temps were perfect the whole time.

First day we went and saw the oldest trees on earth at the Schulman Grove. The dead or mostly dead trees are pretty striking.


The White Mountains are known as an excellent location for star gazers. We saw some pretty fancy telescopes set up in the campground. Tried my hand at a little night photography.


Next day we went up higher to see the Patriarch Grove. Lots of stops along the way to check out wildflowers. Pretty stunning place.


Got to the grove around midday so popped up the camper and made lunch then headed up the still snowed in (and closed) road about a half mile to see some more old trees.


Trees are bigger up here due to more snow/moisture. Including the supposed largest of the bristlecone pines, the Patriarch Tree.


Saturday was a different hike at Schulman. More flowers, old trees, etc. Neat stuff.


Another try at capturing some stars with some lighting by the fading campfire.


Final day we headed home via Wyman Canyon which drops steeply down the eastern flank of the Whites. Half way down, the dry canyon suddenly gets very wet as a major spring erupts from the ground. This meant lots of vegetation and birds, including more impressive flower shows.


Emerged in to Deep Springs Valley then headed back over Westgard Pass and towards home. Good trip! With scenery like this, we'll be back for sure.


CoyoteThistle

Adventurer
Great to see you out enjoying it! Hows the condensation now? Too warm for it?

Yeah, only done these warm and dry trips lately so no condensation testing. I never got to test the external intake for the heater (i.e., no later season ski trips :cautious:)
 

CoyoteThistle

Adventurer
Interested in the batteries!

Batteries first then!

So, I'll admit to feeling battery capacity anxiety with the current 100Ah LiFePO4. A big part I think is the electric water heater which uses about 35 Amps to get water heated up. There's been several nights we've gone without hot water to conserve Amps. I've been weighing the pros and cons of adding more solar or more battery capacity. Adding to the battery capacity means I break a "rule" of LiFePO4, spend a good chunk of money, and lose some storage space. Adding external solar has it's appeal but its limitations too (clouds, shady camp, snow, etc.).

So, I bit the bullet and bought four new CALB 100Ah cells - the same cells I used for the existing battery. Got them from the same place that I got the others a few years back, Electric Car Parts Company. Best price around pretty much and they shipped the next day - ordered on a Thursday, had them on Monday.

First order of business is charging up the new cells. In order to get all eight cells properly balanced, I bought a small bench charger that can do constant voltage charging. I hooked the new cells up in parallel first and started charging.


I didn't think through the fact that this is now a 400Ah 3.2V battery. I charged at 4.0V and about 5A (max for this little charger). It took a while. I think they ship these cells at well under 50% SOC. I charged while I was around so I could make sure to stop charging when voltages started to spike as I got in to the "knees" at around 3.4V. If I was in a hurry, I would have hooked the cells up in series, charged at 14.2V until hitting the knees around 13.6V.

I pulled the existing battery after charging it up to 13.6V in the camper. I hooked those cells up in parallel and then did a top balance of each set of batteries.


To top balance each pack, I charged at 3.55V constant voltage and let the current taper down to 0.01A. Both packs came down to a resting voltage of 3.50V. I believe I have eight cells at very close to the same SOC.

Oh, the "rule" I'm breaking is on combining "old" and new cells in the same pack. The reason not to do this is that the old cells will drag the new cells down to their level (paraphrasing here). In my case, my old cells aren't very old, they haven't been overcharged or undercharged, and I'm perfectly happy to have all the cells perform as well as the old ones are performing.

I don't have room for all eight cells in a line linked with bus bars so I had to split the battery into to two locations.


Half the battery will go in the current location down low at center. The other half will go up above on the right. I added some anchors for strapping it down.

Now then, time to build the battery. This is a 4S2P battery now - four pairs of parallel wired cells hooked up in series. Each parallel pair is one old and one new cell. The four 200Ah 3.2V cells should all be the same. They will be hooked in series via a busbar or some pure copper 1/0 gauge wire.


The battery monitor/balancing boards are installed on each parallel pair. Pairs are linked with busbars. Here they are strapped together for moving them from the living room in to the camper. Got them in.


Carefully checked and double checked all the connections and hooked it up. Success! The Victron BMV showed 14.00V. Exactly what I would expect from four cells at 3.50V hooked up in series. Everything seems to be working as normal.

Next task it to make a box to cover the new half of the battery
 

CoyoteThistle

Adventurer
We're less than a week out from our first proper winter trip in the camper. We've got about 10 days over t-giving week and we decided to hit the four corners region. Hoping to see some of the touristy areas without the usual summer crowds and get off the beaten track and have some spots to ourselves. Expect it to be cold and maybe snowy, so doing some upgrades on the camper...

First is replacing the cotton fabric on the pop up with something waterproof. Went with PVC vinyl coated polyester in the lightest weight (10oz.). The main reason we used this material is that it glues together with vinyl cement - thus taking most of the sewing out of the process. No stitches means no leaks but more importantly, I'm not sure our regular-grade sewing machine would work with something like a good acrylic fabric (like Sunbrella) and even it it did, the stitching would look less than professional to say the least.

Started working on the window first. The outer layer is clear vinyl.


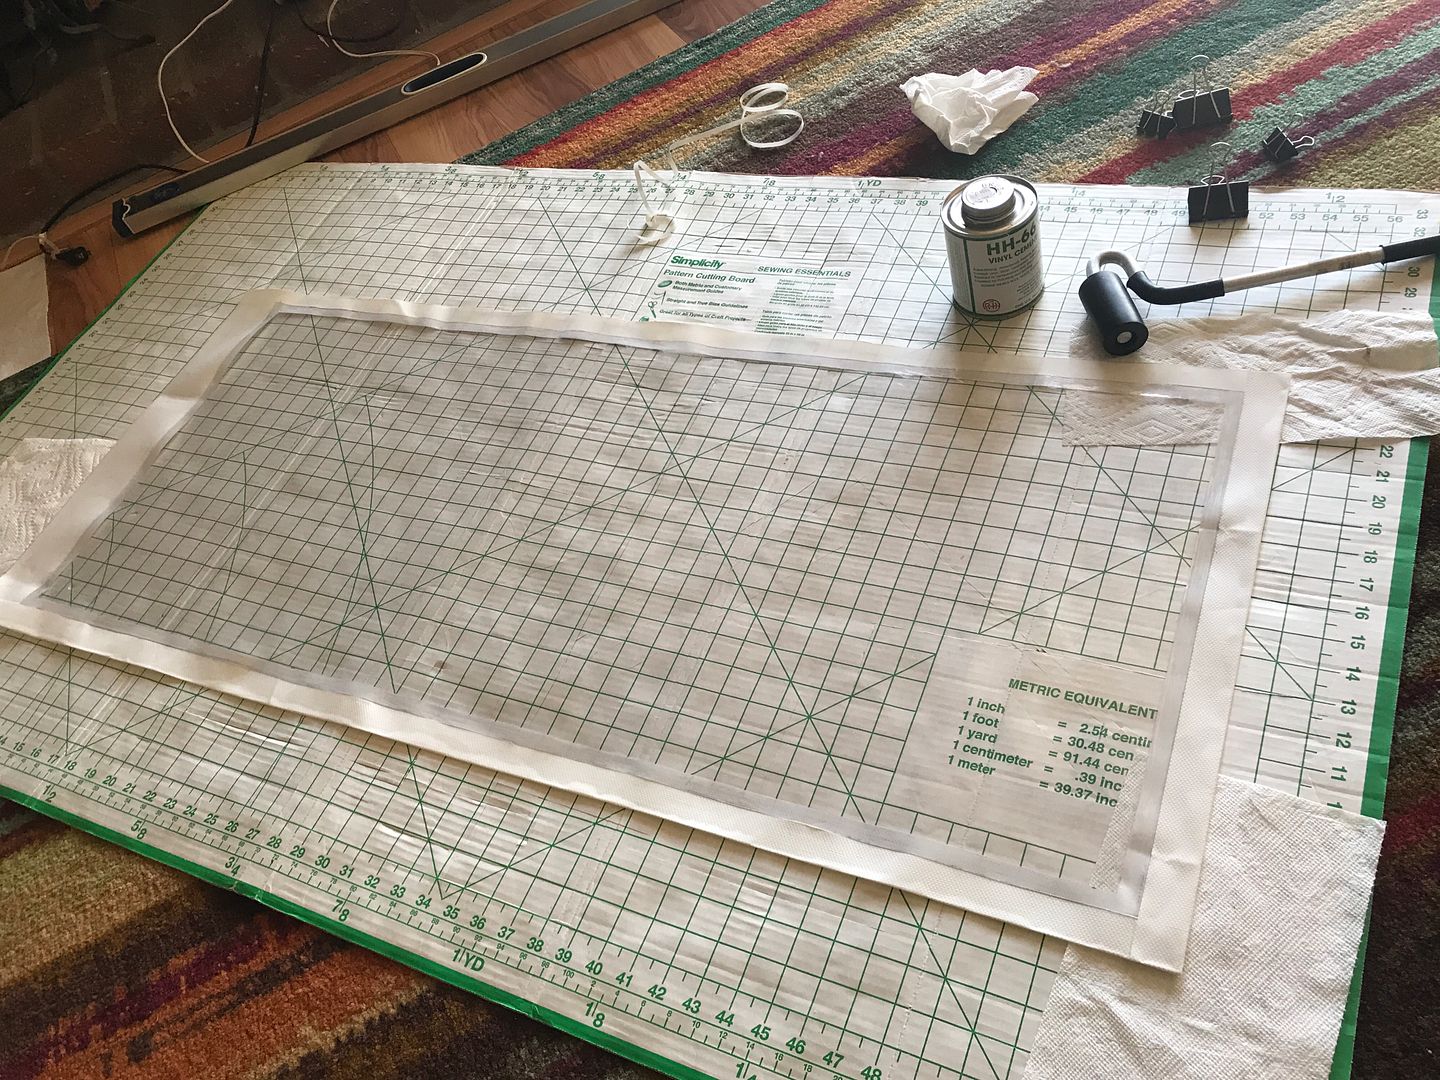
The clear vinyl is framed with the white vinyl material, all glued together with the vinyl cement. The cement is pretty easy to work with. Brush on both sides, give it a couple minutes to tack up, then put the pieces together - if it's really tacky, you only get one chance to line it up right but if you put pieces together when still wet, you can pull it apart and try again.

Only real sewing was for the window screen.


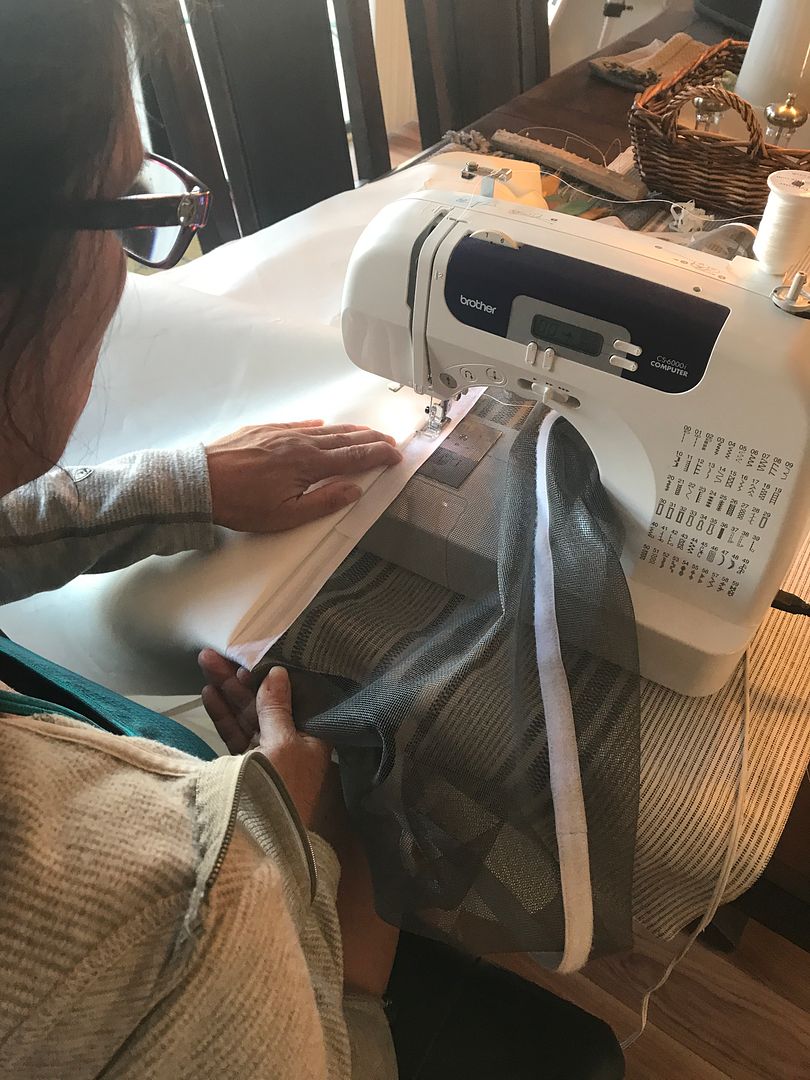
Velcro around three edges and a strip of vinyl on the other. That edge was glued to the inside of the back wall.

Window goes in the back panel of course. Here it is glued in to place.


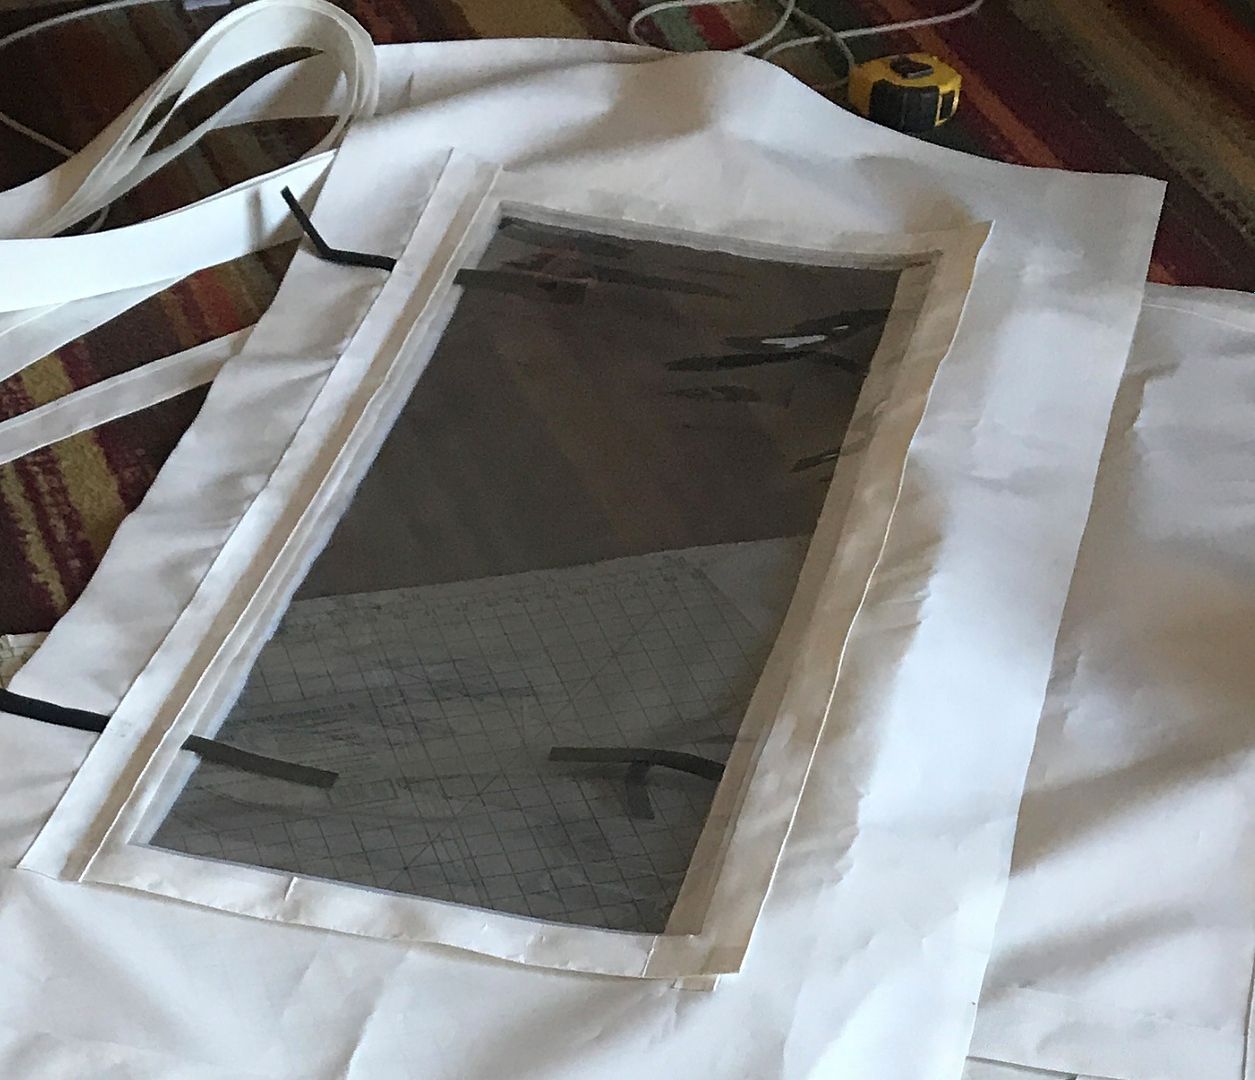
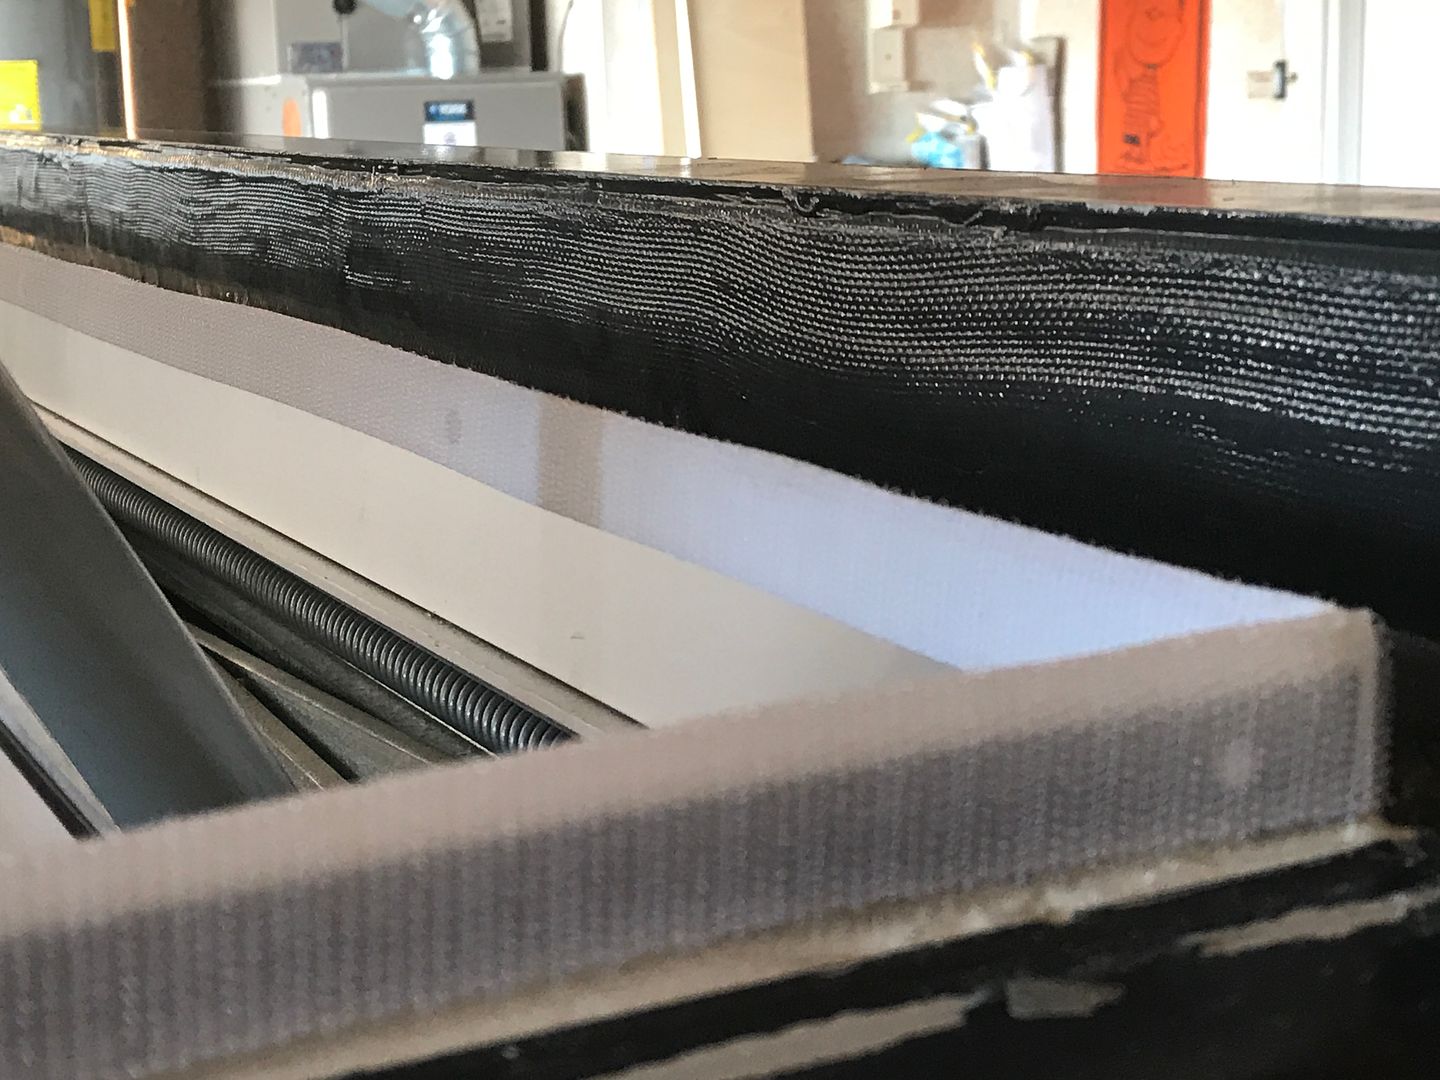
The clear window outside the wall and rolls down in to place. This should be the best for shedding water. It's glued across the top and held closed by 3/4" velcro around the three other sides. The velcro is Velcro Brand with what they call "19 Adhesive", which is formulated to bond better to "low energy plastics". From what I can tell, vinyl is pretty "low energy" and it seems to be sticking well. Again went with adhesive instead of sewing - hope it holds. The edges of the window extend 1.5" beyond the velcro and should help keep water from getting to/through the velcro. The black straps are double sided velcro to hold it when rolled up. The screen is inside of that and a solid flap will go on the inside.

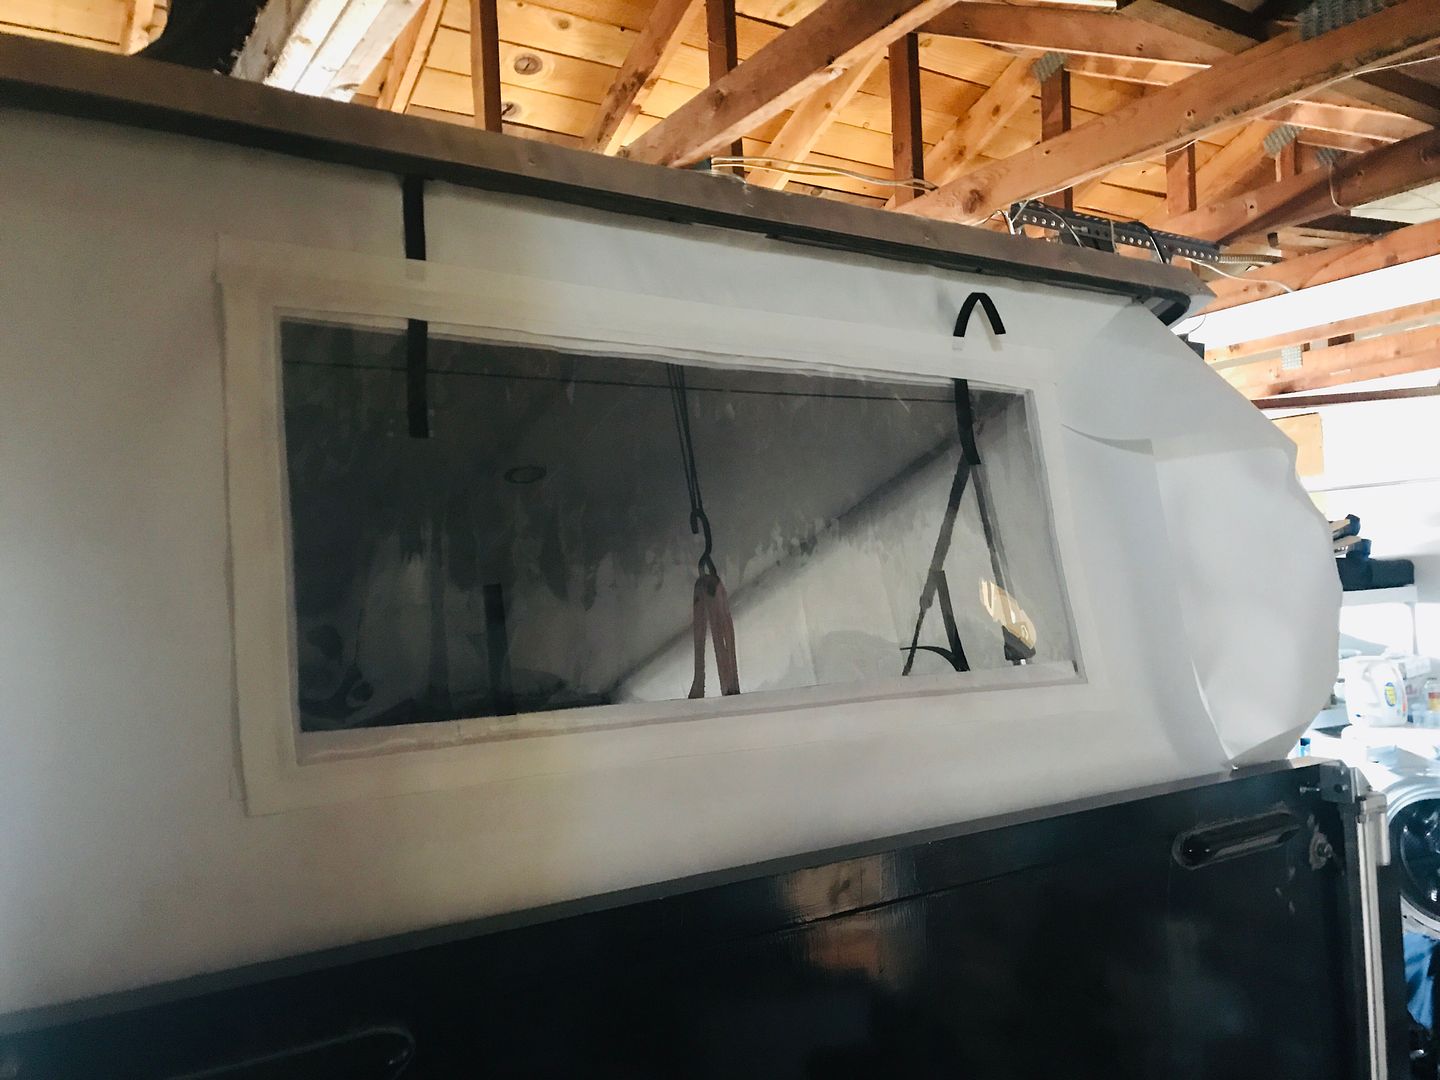
Here's the back panel with the completed window being test fit on the camper


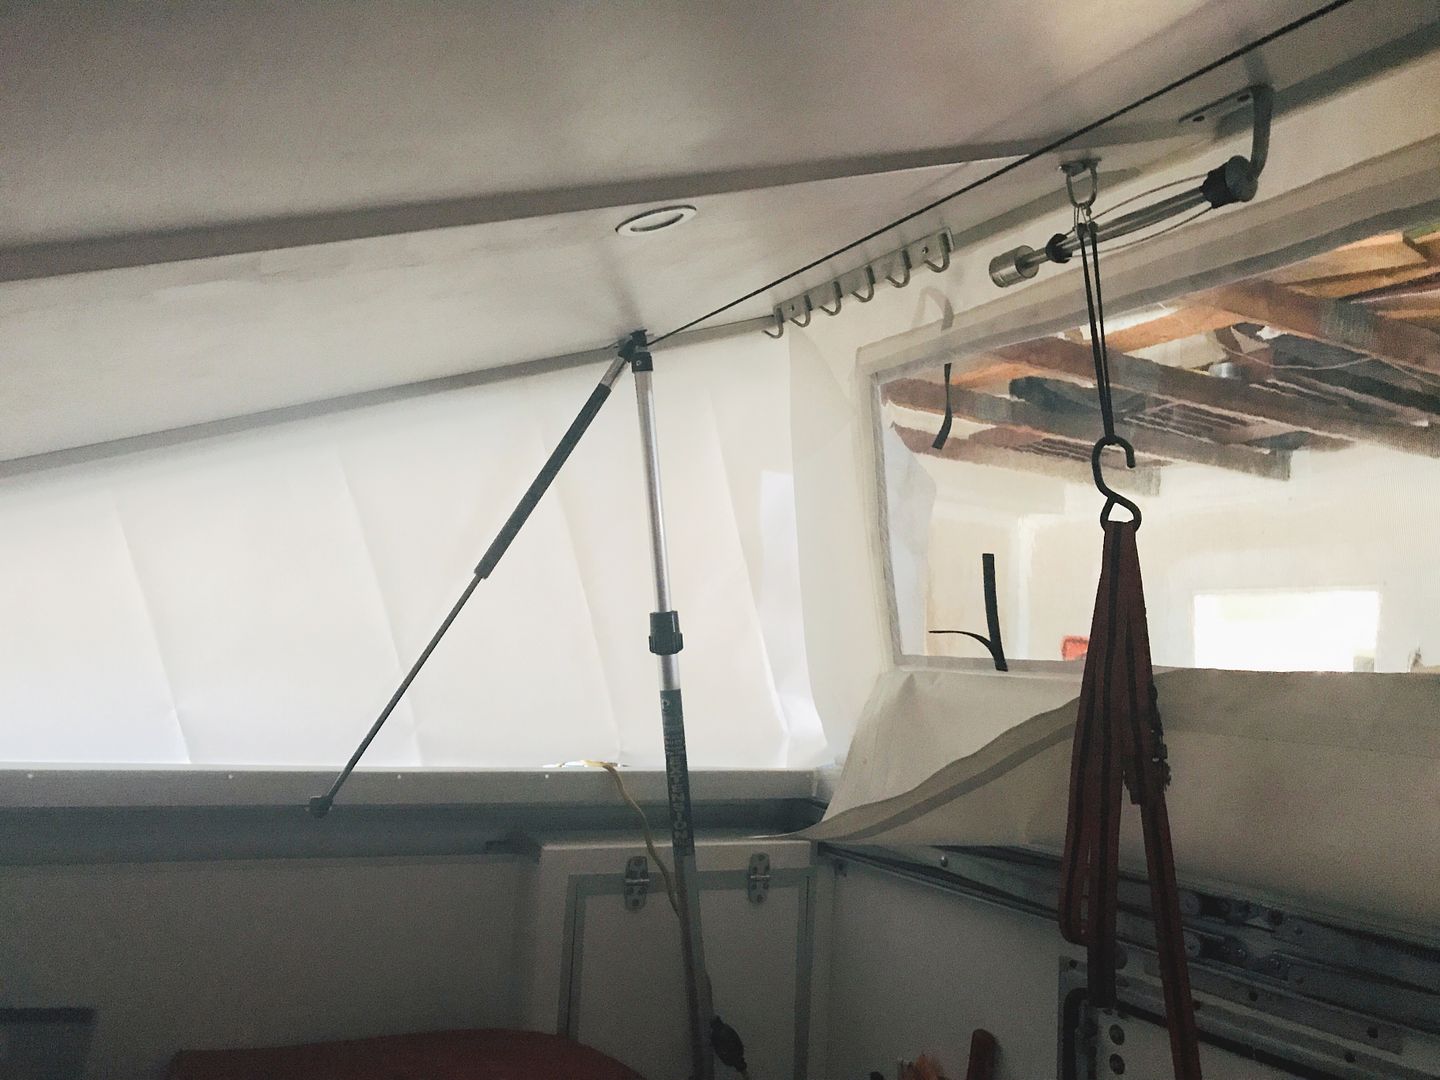
The screen (hard to see) velcro's on three sides to the inside of the wall and rolls down when not in use, as does the solid flap (seen hanging down).

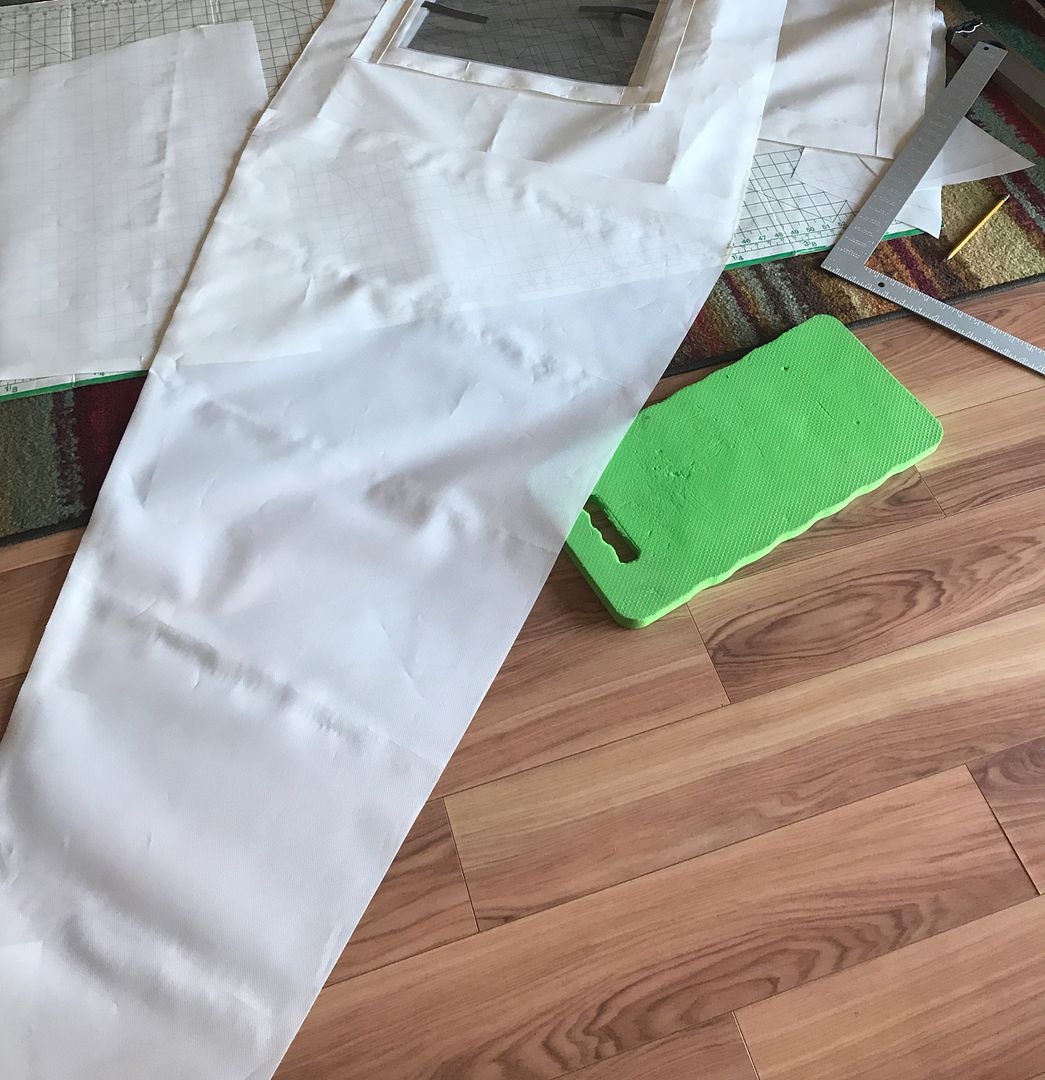
The overall construction is three pieces - the back panel and two roughly triangular side pieces. The above photo shows one side being test fit. The three pieces will be glued together and the whole thing will velcro to the camper.

Here's adhesive backed velcro around the bottom edge of the camper, stuck to the aluminum angle that the old canvas was attached to with screws.


The velcro is inside and out in order to double the area of stick.

Here's the back piece in with a side piece in place. Careful measuring, aligning, and marking to get the side piece to match up cleanly with the back piece.


Then hope we did it right, and cut, and glue.


Repeat on the other side and we have this


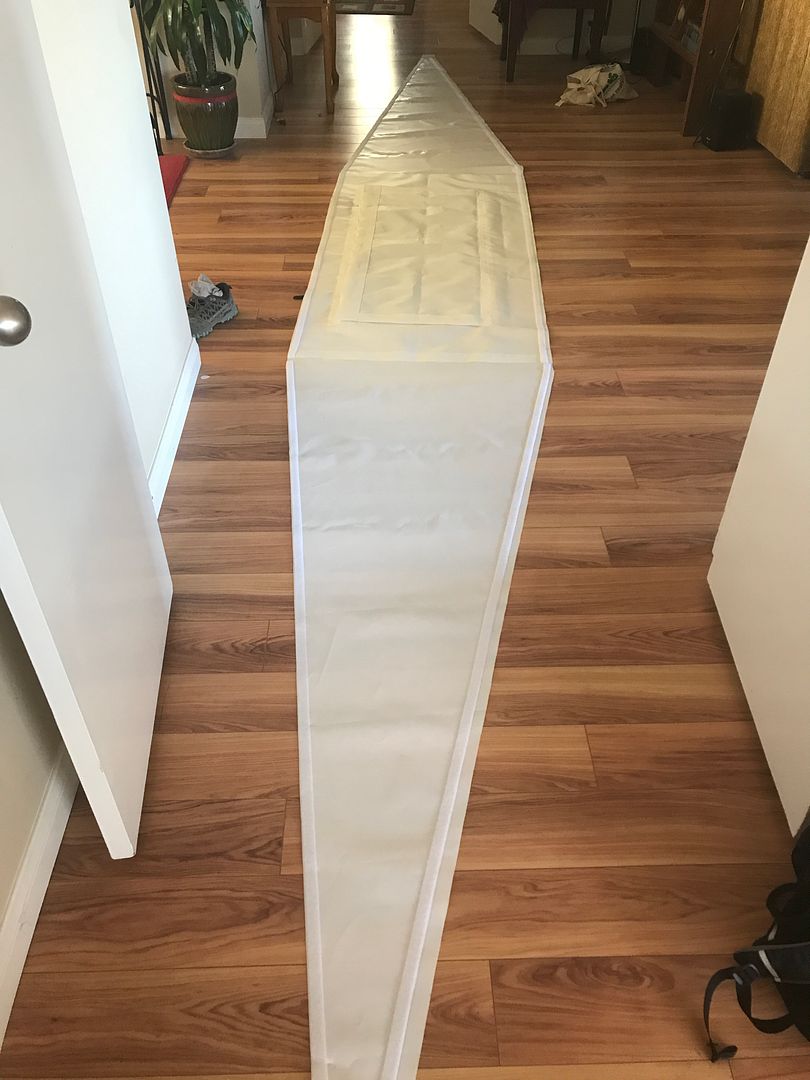
You can kind of see the geometry is trickier than you might think - no straight lines or right angles where the pieces go together. One layer of the velcro is on. Still a few steps to go...
 

CoyoteThistle

Adventurer
It was a bit hectic getting out of town so just getting around to finishing the update here...

Final step on the new pop-up material was gluing on a flap around the edges with the second layer of velcro for attaching around the edges.


Also sewn in to the flaps are shorter pieces of velcro that will hold the deployable insulation layer. Stitching doesn't go through the outside wall, just the flap, so all good and waterproof. Also glued in a couple D-rings on each side to help pull the material in when lowering the roof.

Before test fitting on the camper, we used the new canvas as a template for the insulation layer.


It's 1.9 oz uncoated ripstop nylon - should stuff down small and save space when not deployed and dry out fast if it gets wet. Familiar shape:


The insulation is Climashield Apex at 5 oz/yd. It provides a little more than an inch of loft. Laid it over the ripstop and cut to size.


Went with this insulation because it had a good R-value and has a real light scrim layer that holds the insulation together, therefore no need for quilting. Sewed up the triangle sides, slid the insulation in and sewed up the final edge (like you'd do when making a pillow). Short pieces of velcro were then sewn in every foot along the edges - this stitching went through the insulation to keep it from shifting around.


We overstuffed it a bit and wound up with almost two inches of loft.

Okay, ready to fit it all. It took a couple tries to get the main fabric lined up precisely, but it went in just about perfect. Whew.


Maybe not as tight as the pros, but I'm happy. Inside view:


Couple other upgrades before departure...
 

CoyoteThistle

Adventurer
Final step in the battery was to put a box over the new half of the battery. Space is tight so I went with 1/8" plywood with 1/16" angle holding it together.


Funny looking shape, but it gets a coat of "Pro-Rig White" paint. Final look:


Wedges in tight and there's room for a small basket on top that holds snacks, bars etc.

The next project involved cutting a hole in the roof :oops:. Nervous about this, but with the new non-breathable fabric, we'd need some better ventilation. Went with the MaxxAir roof vent with a reversible 10-speed fan and rain shield.


I added some trim around the inside to get the roof thickness up to 1-1/4" which is about the minimum for this unit.


Followed directions and it went in pretty easy.


Mounted it above the kitchen, thinking that is the place where the most moisture will come from. Wired it up, tested it, and all is good. Until...

The second night of the trip the fan would not power up. Confirmed it was getting power. Lame. A couple days later it started up on its own a few times. Spooky. I have a message in to the company about a replacement - no word back after a couple days. Needless to say, not happy right now on this front.

Anyway, I'll post some shots from the trip next...
 

Forum statistics

Threads
185,896
Messages
2,879,316
Members
225,450
Latest member
Rinzlerz
Top