My offroad 5x8 Cargo Trailer Camper Conversion

Jmanscotch

is wandering
Thanks for the info. I have been googling for hours since I found your build and think I have a game plan. I think I am going to go with a 5x8 utility trailer and enclose it myself, put a bit of a lift on it with some matching wheels and tires and possibly extend the tongue. I think a flat top with a rack is the way to go. I am going to try to make the awning easily swappable between the trailer and the Burb. Probably going to be using aluminum sheeting for the sides with the 2" thick foam insulation and paneling inside and some aluminum diamond plate for the front and top. I want to keep it light! I initially was leaning towards a teardrop/rounded front but this will sit way below the airstream on my suburban so I am going to keep it square and simple. I found the doors and windows online at a reasonable price. With the initial trailer cost around $700 I am shooting for a total material cost of around $2000. I have a lot of the add-ons etc already (inverter, solar panels, tool box etc) but will probably end up going over :/ Thanks again. I will start a new thread for mine soon as not to hijack yours!

Sounds like a good starting point, I look forward to the build thread sir.

Jake
 

techspy

New member
I am having the trailer frame built this week by a local builder. I am going with a 4x6 bed(may go 5x7). Going to look at the builders shop tomorrow at some examples and then decide. It will have an extended tongue to leave room to mount stuff on it. It will be framed as well. Basically like yours looked here but a flat top.


Jmanscotch

is wandering
The time has come to rebuild the rear door. The factory door is pretty flimsy, adding to that, I screwed it up when cutting it down after I shortened the trailer. It hasn't fit quite right, doesn't seal well and isn't much of a use outside being a simple door...so this weekend I dove into designing and building a replacement.

Here's what we started with, flimsy pressed wood frame with aluminum sheet.


The door opening is out of square about 1/4 inch so instead of making a square door, I built it to match the opening. I started by trimming down and framing up some 1.5x1.5 inch angle iron. The angle iron will give me a good surface to mount a weather seal on too.


Next, I wanted to make the door more than just a boring door, so I made up a couple cross brace's out of 1.5x1.5 square tube and came up with a drop down cooking table that'll house the propane stove.


The table is offset to the outside of the door (when open) to give good clearance/access to the galley selves. I also installed new heavy duty hinges to support the new door. I currently went with some sheet metal as a door skin, but I'm rethinking that as the door now weights roughly 60 lbs. I might try recycling some of the aluminum skin from the old 2 doors and see if I can come up with something that looks half decent.

Here's the door installed, with the shelf up in it's stored position:


Here's the self down in it's usable position. I have some butcher block like slabs of wood and I'm planning to finish the shelf with some of it inside the angle iron base.


I had to think up a latch system to keep the table in the stored position as well as something to keep the table from opening beyond 90 degrees/level. I went through many ideas in my head and ultimately came up with this simple fix. A few sections of angle iron welded on to create a hole to place a pin to keep each side up, and the tab will also be the 'stopper' that keeps the table level when down.

In the stored position (pins not installed)


Deployed table, resting on the tabs


I'm going to play around with trying to skin the door with aluminum this week and see how it goes. Should have a finished update this week.

Jake
 

Jmanscotch

is wandering
I'm picking up a new trailer after work, a 2002 Little Guy 4-wide Deluxe.

Anyone interested in it, I'd be happy to do some basic modifications (Jeep suspension, wheels/tires, Lock-N-Roll hitch, roof rack, awning, etc) and sell it to you for a fair price, probably the ~$6,500 mark depending on mods, no mods the $4,000 mark...


Sent from my iPhone using Tapatalk

Correction, it’s a 2005. It’s a very well kept trailer and I’d like to see someone use it.

Jake


Sent from my iPhone using Tapatalk
 
Last edited:

Jmanscotch

is wandering
Trailer sold :) Thanks, back to your regularly scheduled programming.

I'm almost done with the door. We had some wet fall weather move in so as soon as it moves out, I'll jump in and get the seal installed, finish a few touches and offer some picture updates.

Jake
 

Jmanscotch

is wandering
Enjoying watching this build unfold. What paint/coating are you using on your steel?


For the first 2/3 of the work, I was using Rustoleum Truck Bed Coating (not the rubberized under coating). I used it on my last trailer and my opinion on it is;

Pros:

- Easily found locally when I needed a can (AutoZone $10, Lowe’s $8, Walmart $8, Amazon $5)
- Durable enough when left to cure for ~2 weeks before being put in use (much longer than their recommendation)
- good texture, coverage and cosmetic appeal
- easy to touch up

Cons:

- every other can I used was a dud in some way. Clogged, wouldn’t spray product just released aerosol after a little use, they drip and run and get messy, caused me to spray the can upside down and would create runs and ultra wet looking spots.
- if you stopped using the can before it was empty, it would clog the spray tip and the can was a good as done
- a bit pricey for the problems
- due to the good coverage, a can wouldn’t go far

Recently, Lowe’s stopped offering Rustoleum and replaced it with Dupli-color Truck Bed Coating. So I decided to give it a try because it was also $8 and I was frustrated with wasting $40 each trip to pick the problematic Rustoleum.

Initial impressions weren’t good. It went on kinda clumpy, looked gooey as a finished product and just didn’t impress me. That said, after making some adjustments to my techniques, I’ve been impressed with it but I can’t yet report on it’s durability, compared to Rustoleum.

The main thing I noticed during application is keeping it ~14” away from the surface while spraying really cured all the cosmetic issues I had with it (I was spraying much closer as it’s what worked best with the Rustoleum) and it began to lay on really nice, uniform and just look as intended.

The cans (half a dozen I’ve used) have all worked flawlessly, don’t clog, don’t drip, don’t stop spraying product until they’re completely used. You can actually tell there’s little rubber fibers being sprayed along with the other contents of the can too.

At the end of the day, it’s an aerosol spray on bed coating, it’s not the GOAT but when building a trailer in a driveway, needing something that you can work in stages with (compared to something like powder coating), is easily sourced and decently durable...I’d give it a try. I’ve seen powder coated trailers from well know manufacturers have just as many rock chips as mine end up with after a season of use (comparing my trailer from last year that I still get to see and check condition of).

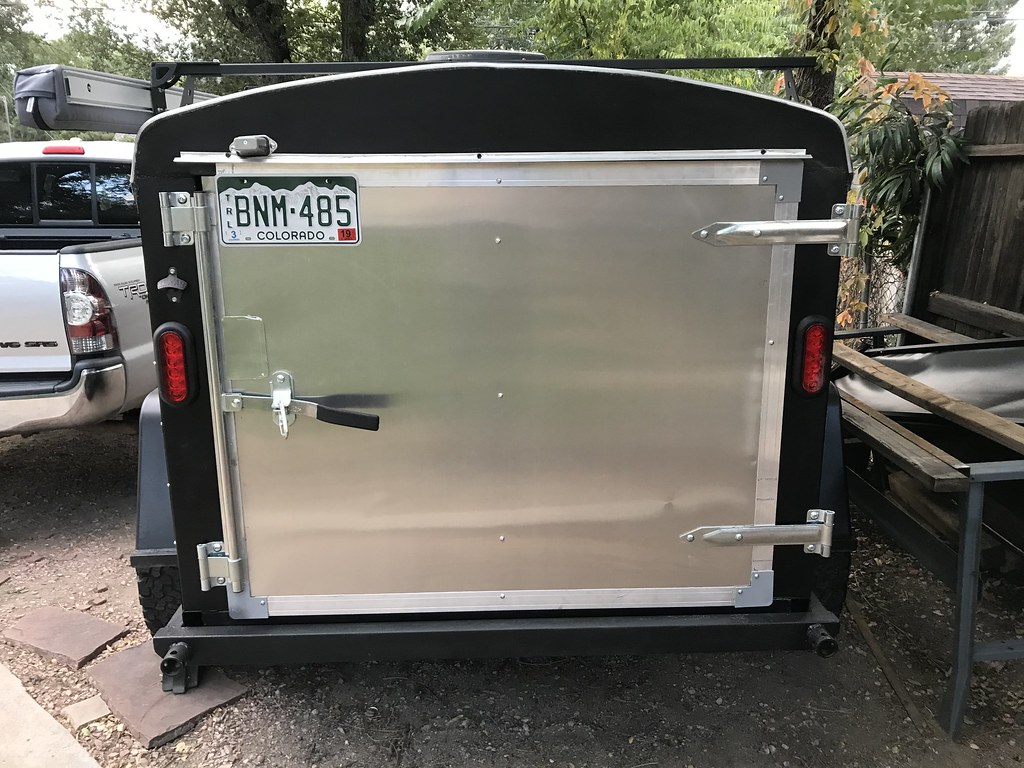
I just purchased some skateboard grip tape to put on the leading edges of my fenders, front landing and such, to limit rock chips. The rest, less wear areas will hold up good enough for me, and can be touched up as needed.

Also, I always wire wheel a lot of the metal and clean with acetone before paint. Only other issues I have is if I don’t let the coating cure for about 2 weeks, and I hit a surface with something hard (being clumsy or working on something around it) it will chip away. After 2 weeks or so, this chipping decreases dramatically.

Jake


Sent from my iPhone using Tapatalk
 
Last edited:

Jmanscotch

is wandering
One quick side note: for any interior surfaces or non wear areas, I’m a big fan of Rustoleum Hammered paint. It’s very, very durable for spray paint in my experience. Get the regular stuff, not the 2-in-1 primer and paint, it’s good stuff but the cans have all the same problem as the bed coating.

The only cons using it for exterior use is it’s more a blue/grey black, not deep black and it seemed to be effected by UV rays rather quickly.

Jake


Sent from my iPhone using Tapatalk
 

Ricer_X_01

Observer
I painted my steel wheels with the Hammered paint a few years ago and its been holding up great. I'm a fan as well.


Nice job with your trailer btw, been following for a little while now.
 

Attachments

  • 12038394_10205160237514116_2779302159066675102_n.jpg
    12038394_10205160237514116_2779302159066675102_n.jpg
    60.4 KB · Views: 108

Jmanscotch

is wandering
I painted my steel wheels with the Hammered paint a few years ago and its been holding up great. I'm a fan as well.


Nice job with your trailer btw, been following for a little while now.

Nice, yeah I forgot to mention the specifics that I’m disappointed with the black hammered in outdoor applications. I too have done some of the gray and silvers and have been more happy with those. The black just seems to miss the mark, but not on durability, just true color issues.

My neighbor did the same on his steel winter wheels, same color and left a chrome lip, and they look great 2 years later. It’s definitely a good product.


Sent from my iPhone using Tapatalk
 

Jmanscotch

is wandering
Pretty much finished the rear door finally. I ended up reusing some aluminum sheet from the old doors instead of the sheet metal, all to save weight. I initially didn't go this route because reusing the aluminum meant it'd have some holes in it and would have to make out of three pieces, but I needed to trim some fat and the ole lady said I couldn't spend any more mula right now to get it done, so it'll work for now. I may redo it down the road, for cosmetic reasons. All in all, it came out ok. I covered two large holes with a license plate relocation and have come stickers coming that'll cover two more large ones.

I used some liquid nail around the exterior edges, some self tapping black screws along some of the frame and some clear caulk on the inside edges to adhere the skins to the door frame.

Door skinned, all flaws in the aluminum are visible :/


Clamping everything together for it to cure in place.


Weather seal installed.


Had to move the rain rail up a bit to clear the door effectively, also here's the shelf up/done.


Stove on the shelf


Took it out this weekend for some 10 degree camping


Next up: figuring out a 90 degree door stay to keep it open and wiring up the license plate light after relocating it.

Jake


Sent from my iPhone using Tapatalk
 

bjeylee

New member
Thanks for the paint beta. I'm looking to use the A/T tongue piece like you did. think that would be sufficient with a 2" receiver welded into it then use the 30" Lock n Roll extension that would slip into that? Trying to save the over all length of my build to make it easier to store in the garage. Thinking the 30" extension would be a good way to do that if the A/T piece was strong enough...
 

Jmanscotch

is wandering
Thanks for the paint beta. I'm looking to use the A/T tongue piece like you did. think that would be sufficient with a 2" receiver welded into it then use the 30" Lock n Roll extension that would slip into that? Trying to save the over all length of my build to make it easier to store in the garage. Thinking the 30" extension would be a good way to do that if the A/T piece was strong enough...

Absolutely, happy to share my experiences.

I had some concerns with the A/T piece too. Initially, I planned to run a full length tongue, from hitch to rear of trailer, for strength. I emailed A/T and asked some information on their setup....and I received a call from Mario (one of the owners of A/T, which was pretty surprising). I told him my concerns with the mount and he went on to assure me that it was designed with software by a certified engineer (either him or one of the other owners, I forget now) and he had no question that if properly welded, it was up for the job. He also said most DIYers do a full length tongue because they're not engineers and are simply relying on "overbuilt" to ensure "built enough"...but ultimately, they're just adding useless weight. Which he's right, we all know we (as amateurs) tend tp overbuild for fear of under building, myself included.

So, your plan seems fine. It's the same general length as my tongue coming off the piece in question, the only difference is the two piece factor versus mine that's one piece. Based on what I know, I'd have zero qualms with going that exact route. If you like, email A/T and talk to them. If they respond like the did with me, you'll be a very informed and happy customer.

For full disclosure, I had a true professional welder weld my 2" receiver tube tongue and A/T piece onto my trailers A-Frame. I am confident in my welding ability for things like fenders, doors, etc but the thing that holds my entire trailer to my truck...I wanted someone with the right welder and the right credentials to handle that. Guy traded me my stock leaf springs on the trailer in exchange for the work. Was a great deal and he did a quality job.

I can tell you while I haven't had but one short season towing the trailer around, I have put it in plenty of frame stressful situations and it's handled them without a whimper, the tongue and A/T piece included.
 

Forum statistics

Threads
185,817
Messages
2,878,508
Members
225,378
Latest member
norcalmaier
Top