My offroad 5x8 Cargo Trailer Camper Conversion
- Thread starter Jmanscotch
- Start date
MateoDiego
Member
In my opinion, that's a perfect combo for a axle. Dexter axles are great quality, common to source parts if ever needed and their EZ Lube hubs are a God send!
So, where did you get your Pro Comp wheels? I am assuming they are the 69 series. Same as the ones I have on my truck. I want the truck and trailer to match so I can use the trailer spares if need be. I bought a 5 sets of wheels and Wrangler tires for the truck at Discount Tires here in AZ last fall. I got the wheels for something like $90 a piece during a sale\promotion. List is $109. 4WheelParts sells them for $93. I am thinking that I am going to ask Discount to price match 4WheelParts price. I bought the tires from them a couple years back so I will push for them to mount and balance for free. The tires, while a little older, will still be under warranty too.
Jmanscotch
is wandering
So, where did you get your Pro Comp wheels? I am assuming they are the 69 series. Same as the ones I have on my truck. I want the truck and trailer to match so I can use the trailer spares if need be. I bought a 5 sets of wheels and Wrangler tires for the truck at Discount Tires here in AZ last fall. I got the wheels for something like $90 a piece during a sale\promotion. List is $109. 4WheelParts sells them for $93. I am thinking that I am going to ask Discount to price match 4WheelParts price. I bought the tires from them a couple years back so I will push for them to mount and balance for free. The tires, while a little older, will still be under warranty too.
Yep, they're the ProComp 7069 series, purchased from 4wheelparts. They were having a sale and I picked them up for about $80 each, which is the only reason I went with them over the steel D window series ones for $50 or so.
Luckily, I have a friend who works for the local Porsche shop and I get free access to their Hunter mounting and balancing machines, so I always appreciate mounting and balancing my wheels/tires myself and for free! I've also done 4 or 5 clutch/transmission/engine swaps using their lifts, tools and such...I hope he works there for a long time lol
MateoDiego
Member
Nice. That is the serious hook up.
Jmanscotch
is wandering
Small update:
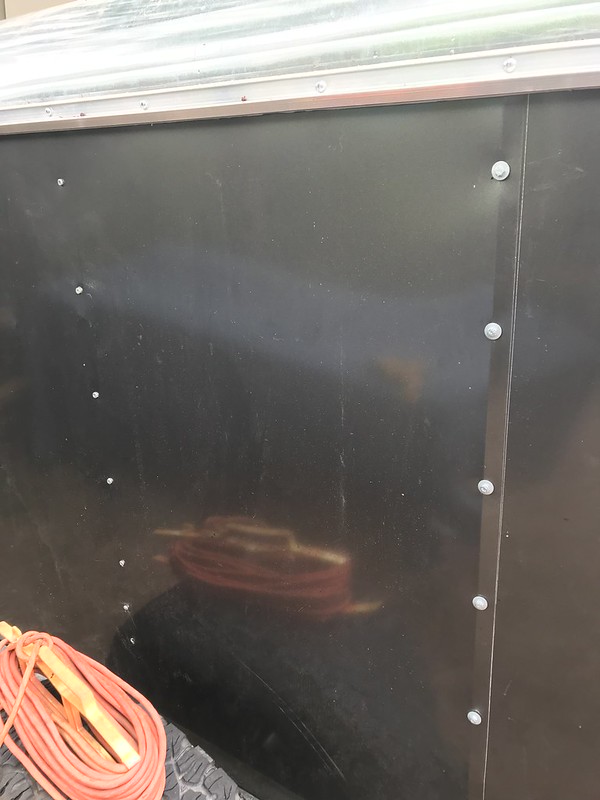
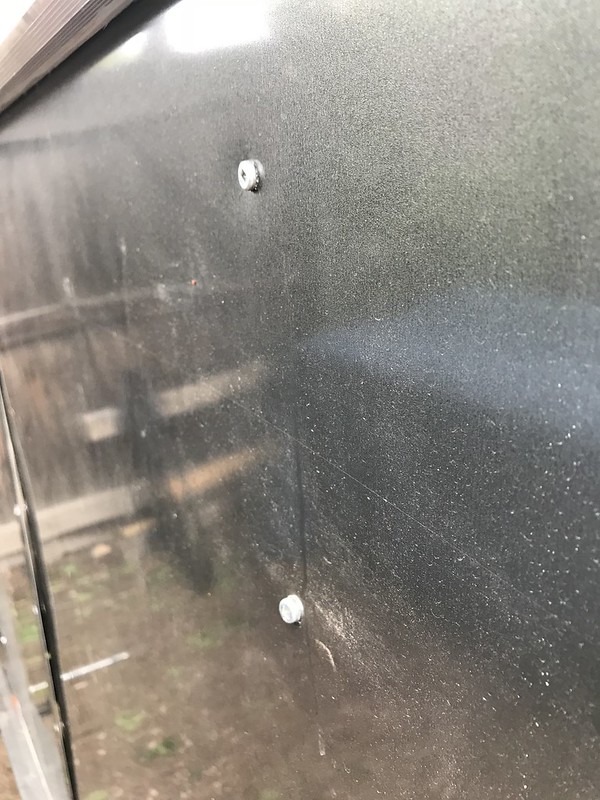
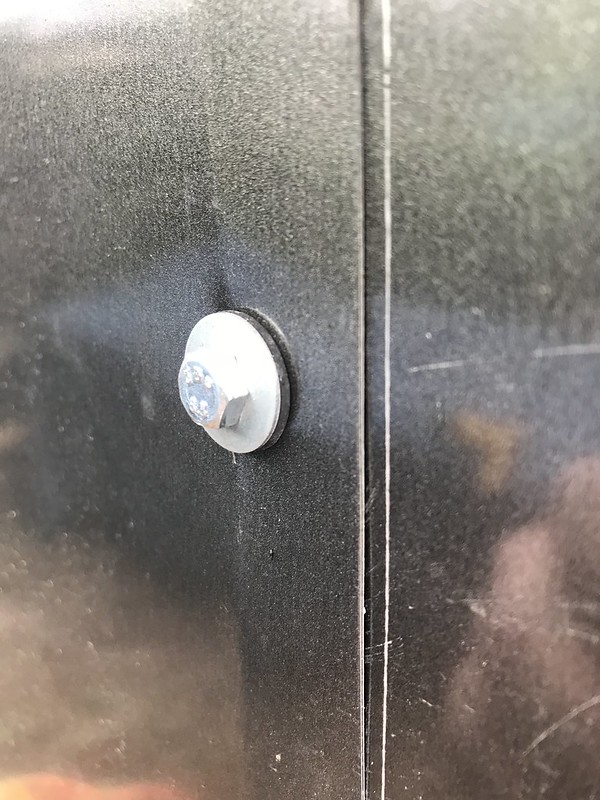
Installed 100 new bolts and nuts to replace the self tapping screws that held the skin and trim on. We have lots of washboard roads around here and I didn't want the screws to rattle out over time. Plus there's was concern of the small headed screws ripping through the aluminum skin.
(small headed screws on left, new bolts/washers/nuts on the right)
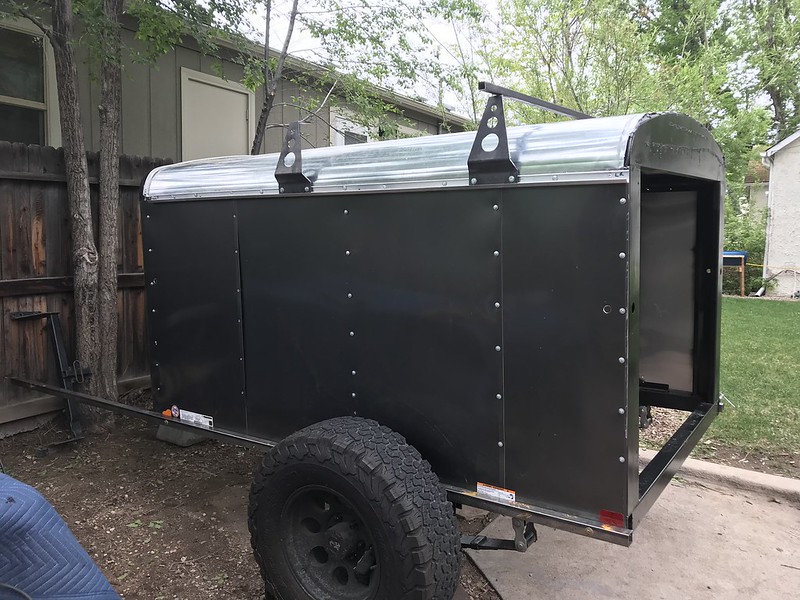
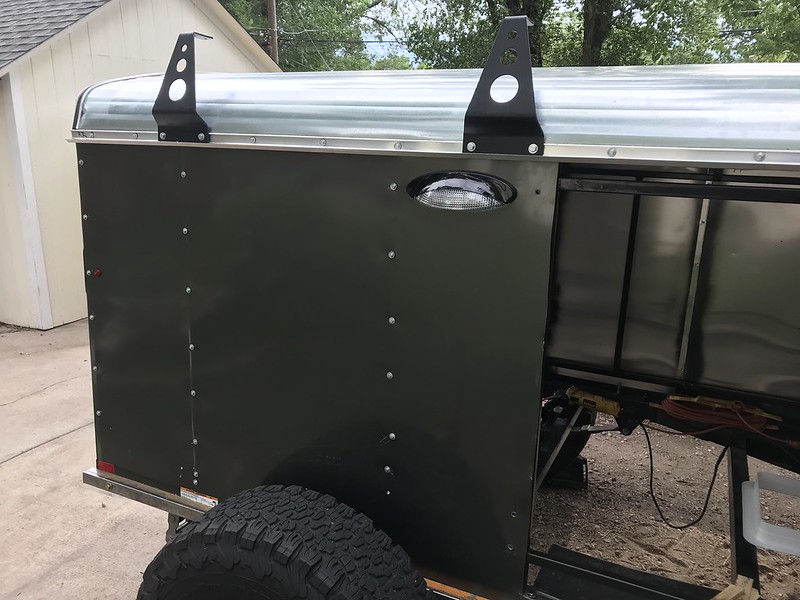
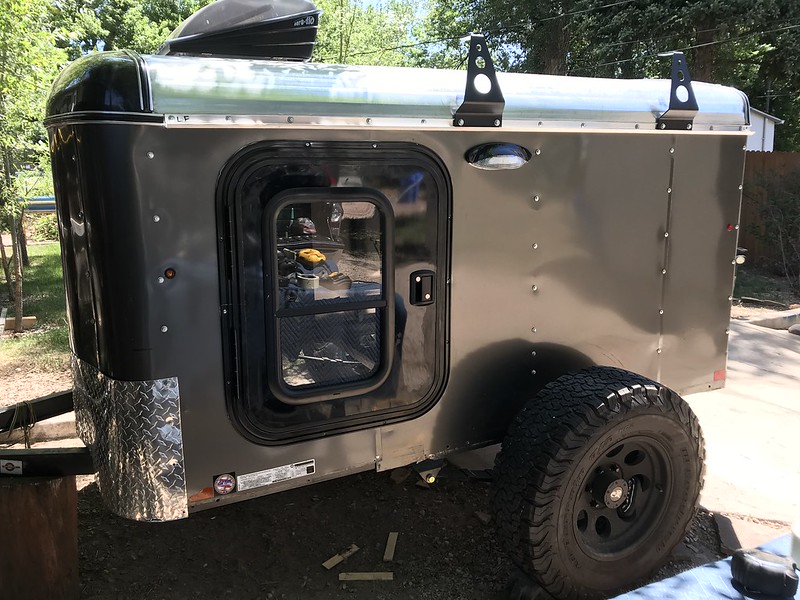
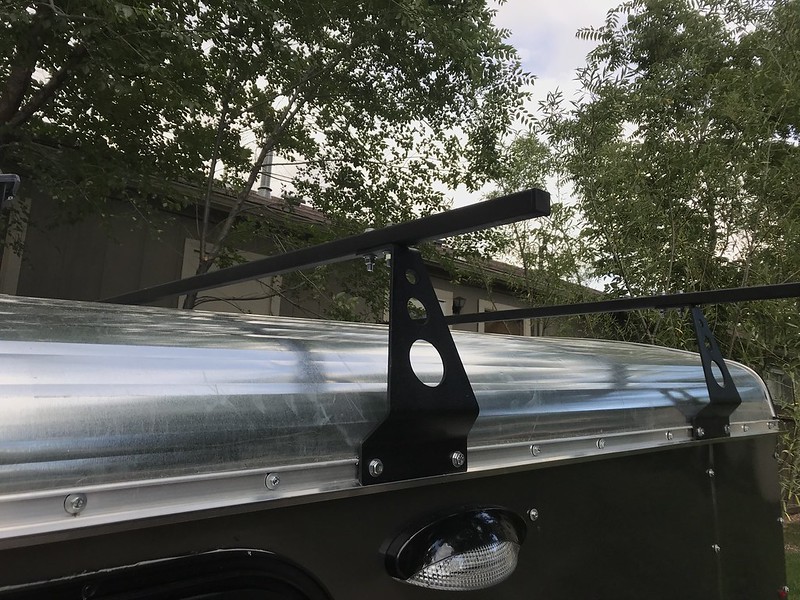
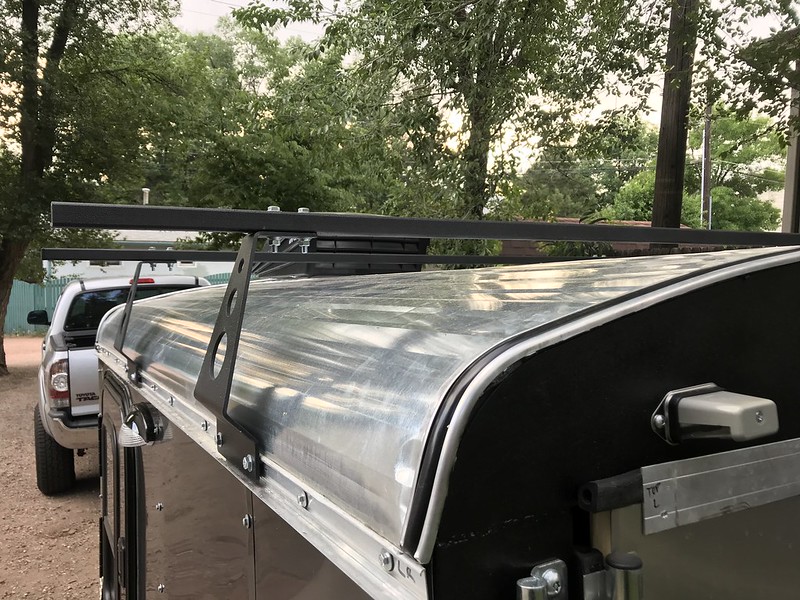
Getting the roof rack finished. Using the no weld towers from Scott and some 1"x" square tube for the crossbars. Also installed the LED porch lights.
The base mounts offer great style and clearance for the roof. They rise enough to clear the roof with plenty of space to flex and will be a great place for the ARB awning to mount to.
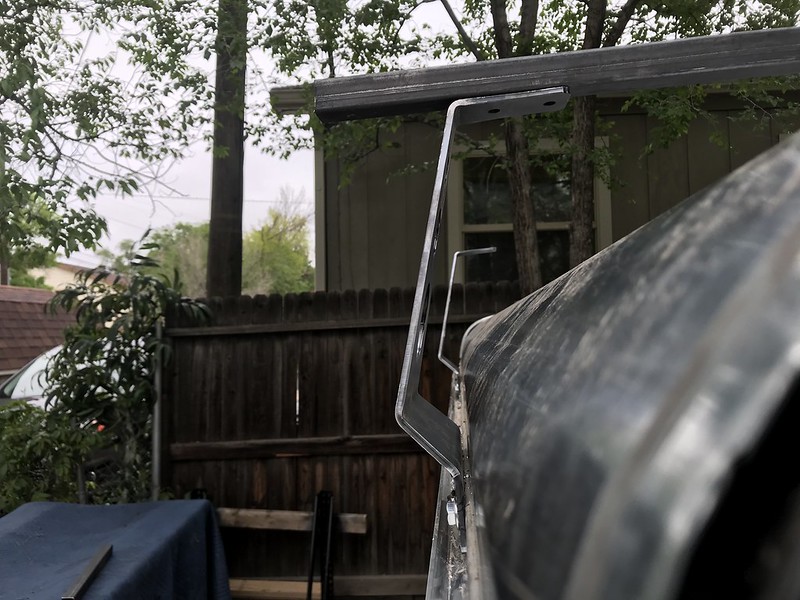
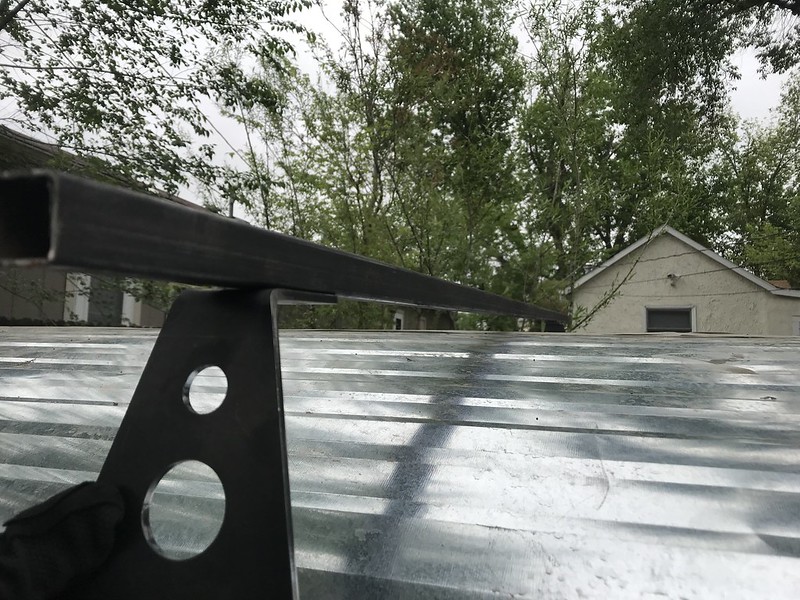
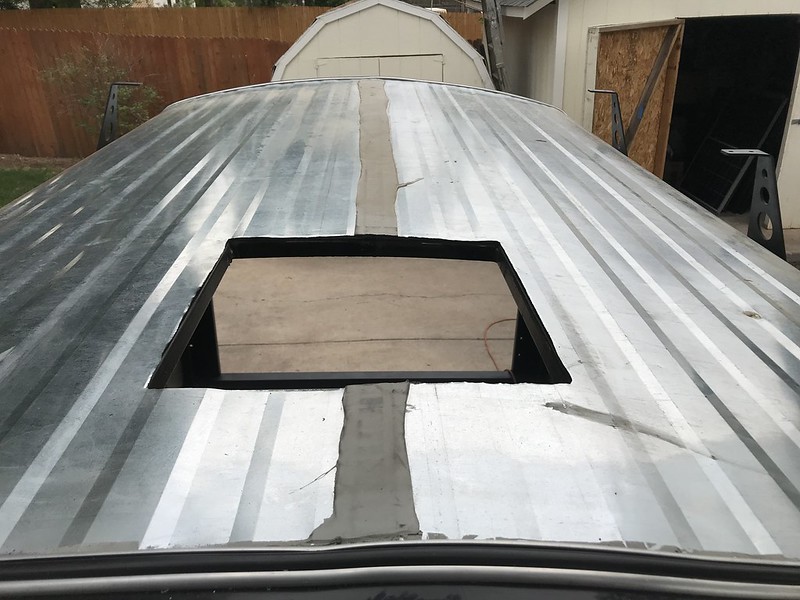
I spaced the crossbars about 36" apart. It seemed like a common spacing and worked well to put the bases mounting in a good sturdy location on the interior framing. I set the entire system back, straddling the axle on center (or real close rather). This will both keep weight in a good location as well as leave me ample room for the roof vent to be mounting at the head of the trailer.
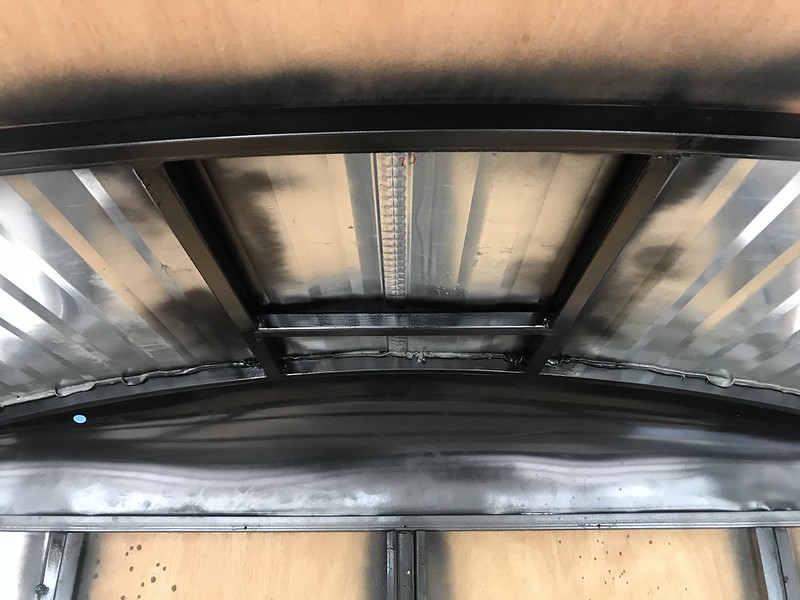
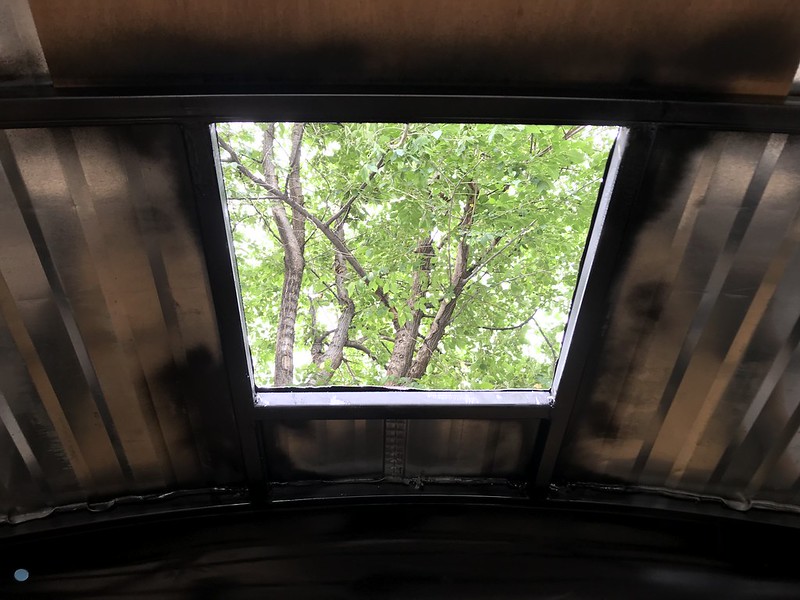
Speaking of; fitted some bracing for the roof vent and did the dirty dead of cutting my first hole in the roof :NC
Finished a few other chores, from rewiring the trailer side of things, finished rebuilding the rear door, applied bed liner to parts of the frame that won't be touched again and prepped the new 2.5" receiver tongue to weld that on this week.
Our doors will be in this week and I'll get those installed, finish the rock rail/sliders and build the front platform and fenders out. Soon, we'll be on the road of building out the interior!
Jake
Installed 100 new bolts and nuts to replace the self tapping screws that held the skin and trim on. We have lots of washboard roads around here and I didn't want the screws to rattle out over time. Plus there's was concern of the small headed screws ripping through the aluminum skin.
(small headed screws on left, new bolts/washers/nuts on the right)
Getting the roof rack finished. Using the no weld towers from Scott and some 1"x" square tube for the crossbars. Also installed the LED porch lights.
The base mounts offer great style and clearance for the roof. They rise enough to clear the roof with plenty of space to flex and will be a great place for the ARB awning to mount to.
I spaced the crossbars about 36" apart. It seemed like a common spacing and worked well to put the bases mounting in a good sturdy location on the interior framing. I set the entire system back, straddling the axle on center (or real close rather). This will both keep weight in a good location as well as leave me ample room for the roof vent to be mounting at the head of the trailer.
Speaking of; fitted some bracing for the roof vent and did the dirty dead of cutting my first hole in the roof :NC
Finished a few other chores, from rewiring the trailer side of things, finished rebuilding the rear door, applied bed liner to parts of the frame that won't be touched again and prepped the new 2.5" receiver tongue to weld that on this week.
Our doors will be in this week and I'll get those installed, finish the rock rail/sliders and build the front platform and fenders out. Soon, we'll be on the road of building out the interior!
Jake
Jmanscotch
is wandering
My father and brother are coming later this month for a long weekend trip and we're going to head into the mountains and get lost. I have a new goal to get the trailer to a usable, if only bare bones, condition in the next few weeks and so my focus has been on the things needed to make that happen.
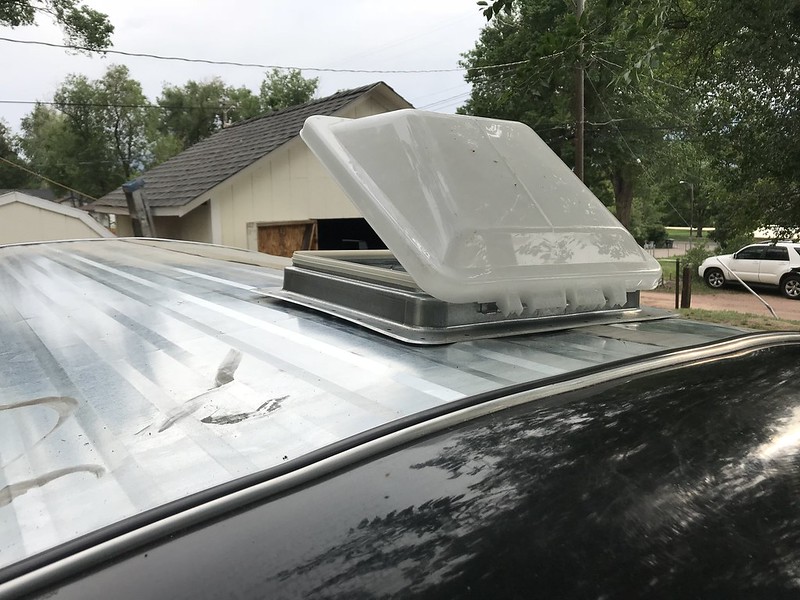
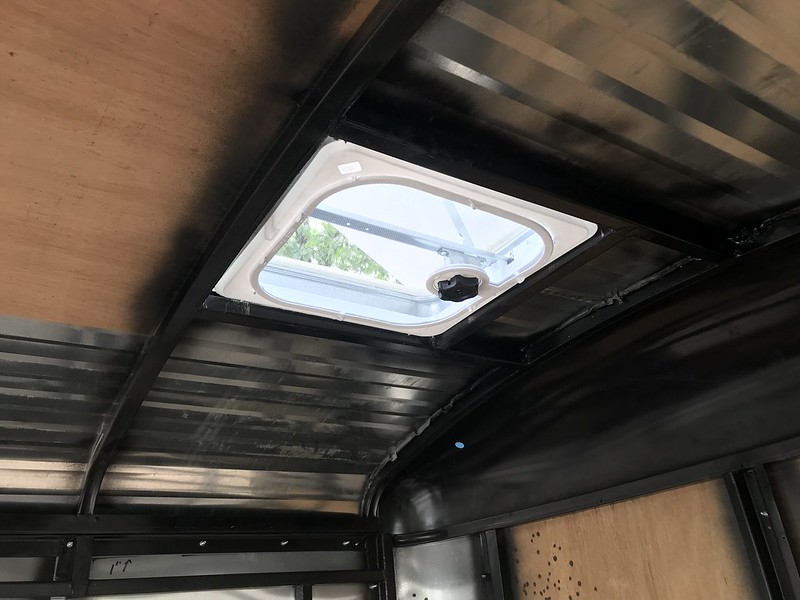
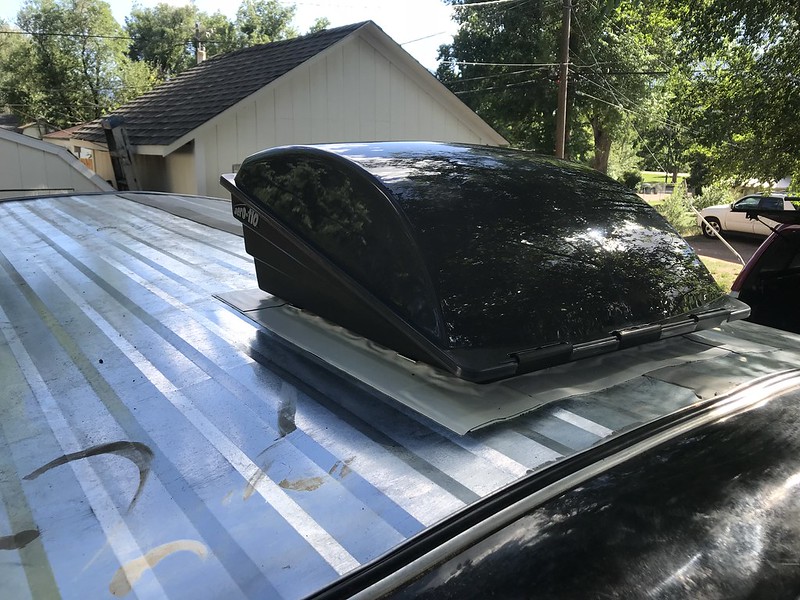
I installed an aero vent cover for the roof vent. This will allow us to keep the vent open in those random summer rains. I used acetone to clean the surfaces where the roof vent would mount, then placed butyl tape under the rood vent flange. Once I dropped the vent into it's cutout, I used #8 by 1" self tapping screws to secure the vent to it's frame. To further seal the vent, I used 4" white Externabond tape to seal the screws and flange joint. I wanted to use their silver/aluminum product so it'd blend in, but it was $80 and the white was under $20 (for 10').
The doors arrived from Challenger as well, so I measure and cut the holes for both, using a jig saw.
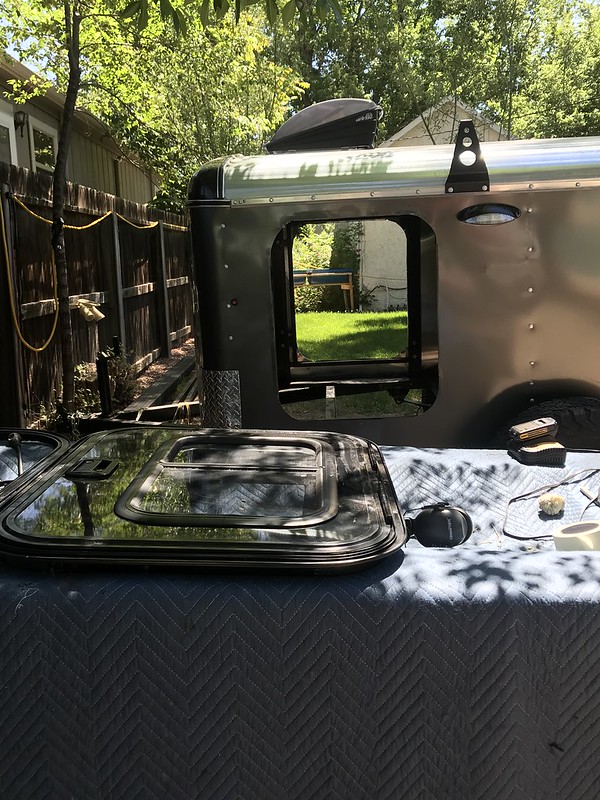
Same installation method as the roof vent. Acetone prep, butyl tape under the mounting flange and self taping screws. I only placed a few screws in for now. I ordered some #10 black oxide self tapping screws so they'll blend in with the door frame better. Once those arrive, I'll finish securing the doors to the trailer, cut the excess butyl tape off that has squeezed out and then caulk the edges with some black caulk to keep the aesthetics nice and neat.
I'm pretty happy with the doors from Challenger. They're 26" wide by 32" tall. They're keyed alike, have windows in them that slide vertically and have a catch to keep the window open with a sliding screen as well. Having the windows in the doors will help save us some real estate on the side of the trailer, which is needed since we'll be building the galley deep into the trailer and it was going to occupy the space windows would've if they weren't in the doors.
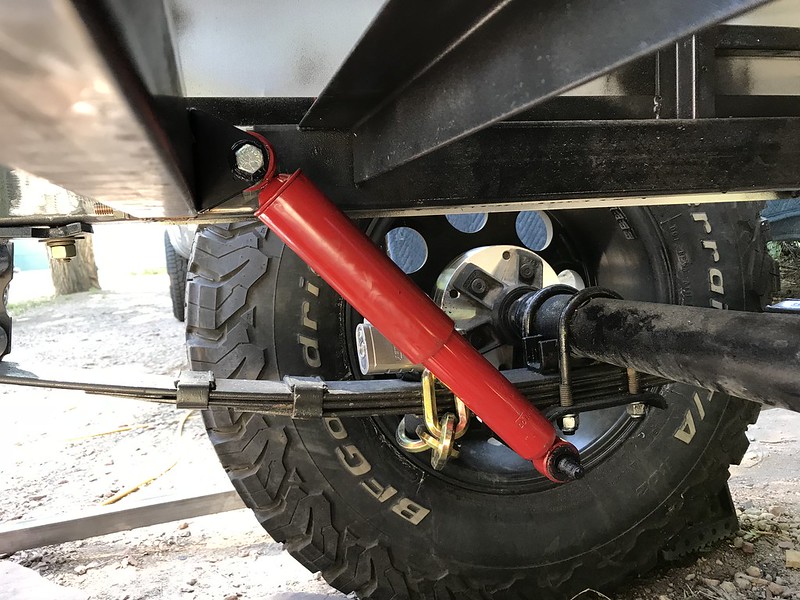
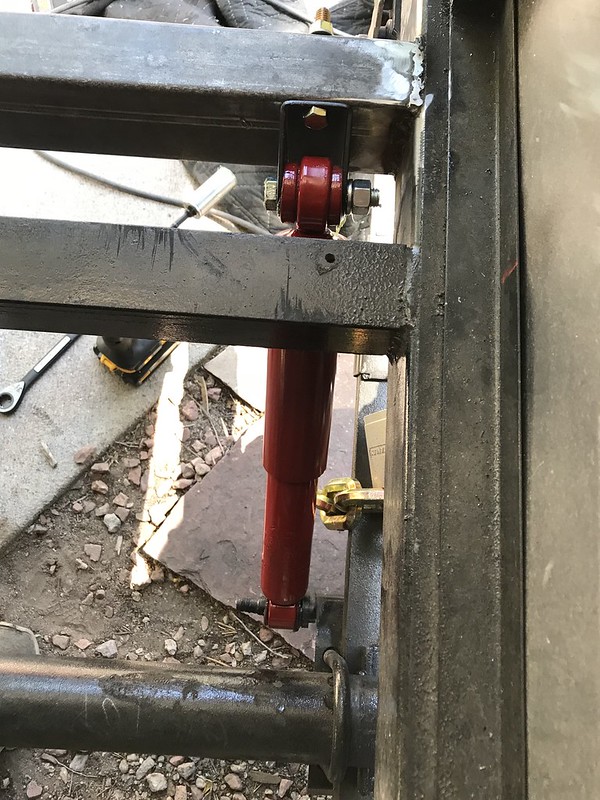
I also finished installing the Jeep CJ-7 shocks by installing the new cross member and bolting the top shock mount to it. The difference they made with my 200 lbs jumping in the trailer was great, so I'm hopeful the ride quality is going to be what I'm expecting on the trailer.
That's it for now. The plan for the next few weeks is to:
- Install new 2" receiver tube tongue
- install fooring
- maybe install insulation and interior side walls
- maybe install sliders, finish fabricating front landing and install fenders
That should get it to a usable state for the trip we're planning. It'd be a good short two day trip that'd be a chance to shake down the trailer and see if there's anything that'd need improved thus far.
Jake
I installed an aero vent cover for the roof vent. This will allow us to keep the vent open in those random summer rains. I used acetone to clean the surfaces where the roof vent would mount, then placed butyl tape under the rood vent flange. Once I dropped the vent into it's cutout, I used #8 by 1" self tapping screws to secure the vent to it's frame. To further seal the vent, I used 4" white Externabond tape to seal the screws and flange joint. I wanted to use their silver/aluminum product so it'd blend in, but it was $80 and the white was under $20 (for 10').
The doors arrived from Challenger as well, so I measure and cut the holes for both, using a jig saw.
Same installation method as the roof vent. Acetone prep, butyl tape under the mounting flange and self taping screws. I only placed a few screws in for now. I ordered some #10 black oxide self tapping screws so they'll blend in with the door frame better. Once those arrive, I'll finish securing the doors to the trailer, cut the excess butyl tape off that has squeezed out and then caulk the edges with some black caulk to keep the aesthetics nice and neat.
I'm pretty happy with the doors from Challenger. They're 26" wide by 32" tall. They're keyed alike, have windows in them that slide vertically and have a catch to keep the window open with a sliding screen as well. Having the windows in the doors will help save us some real estate on the side of the trailer, which is needed since we'll be building the galley deep into the trailer and it was going to occupy the space windows would've if they weren't in the doors.
I also finished installing the Jeep CJ-7 shocks by installing the new cross member and bolting the top shock mount to it. The difference they made with my 200 lbs jumping in the trailer was great, so I'm hopeful the ride quality is going to be what I'm expecting on the trailer.
That's it for now. The plan for the next few weeks is to:
- Install new 2" receiver tube tongue
- install fooring
- maybe install insulation and interior side walls
- maybe install sliders, finish fabricating front landing and install fenders
That should get it to a usable state for the trip we're planning. It'd be a good short two day trip that'd be a chance to shake down the trailer and see if there's anything that'd need improved thus far.
Jake
theblindchicken
New member
Looks great! Keep up the good work.
Love this. I have always wondered why people didn't start with one of these trailers when they were building their own "DIY Teardrops." This just looks RIGHT, all of the home built teardrops typically turn out fugly.
I too have been thinking about converting a cargo trailer and I came across this, though you might want to consider it. Give you sleeping space and leaves the interior of the trailer open.
http://www.mirageinc.com/bed-door-46-34-x-81-fold-out-tent
They are becoming more common on cargo and race trailers.
http://united-trailers.com/media/uploads/0/426_XLMTV-Pop-Out.jpg
Jmanscotch
is wandering
Nice, I like that someone sells that! For our design, it wouldn't work, but I see plenty of folks on TNTTT.com that use the bigger cargo trailers for more on-road adventures and I could see that being a useful addition to plenty!
Jmanscotch
is wandering
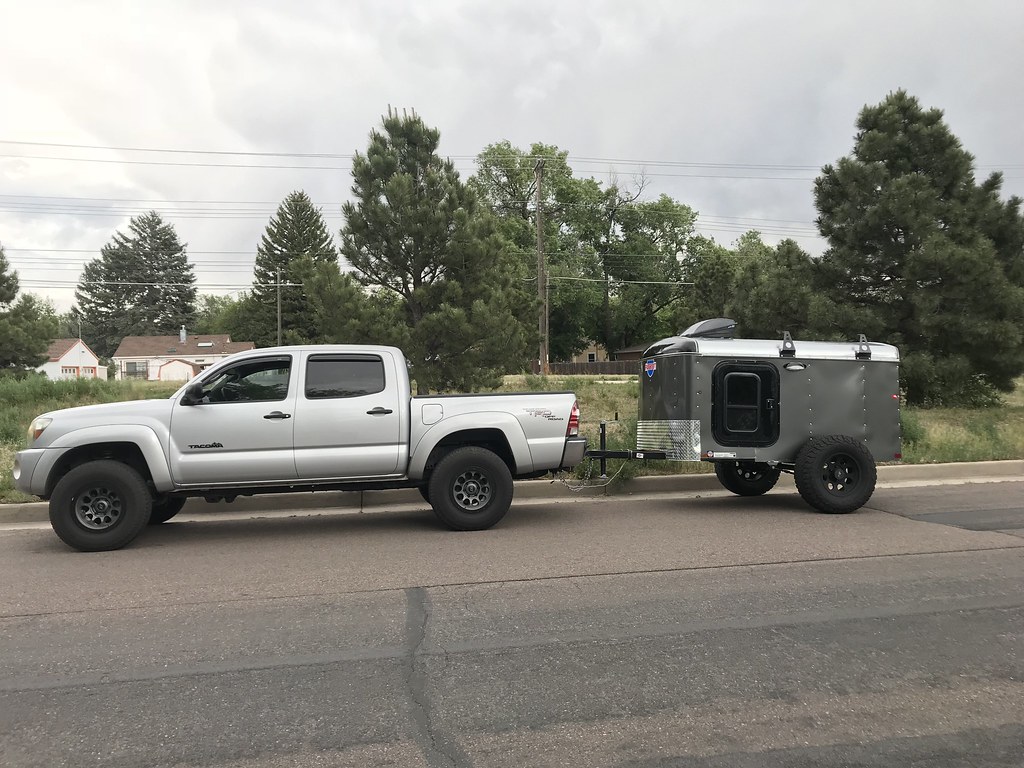
No real update lately. Took the trailer for it's first shake down cruise (to wash some bird poop and sap off of it before sealing it up). It towed great, the shocks and new leaf springs make it ride amazing!
Jmanscotch
is wandering
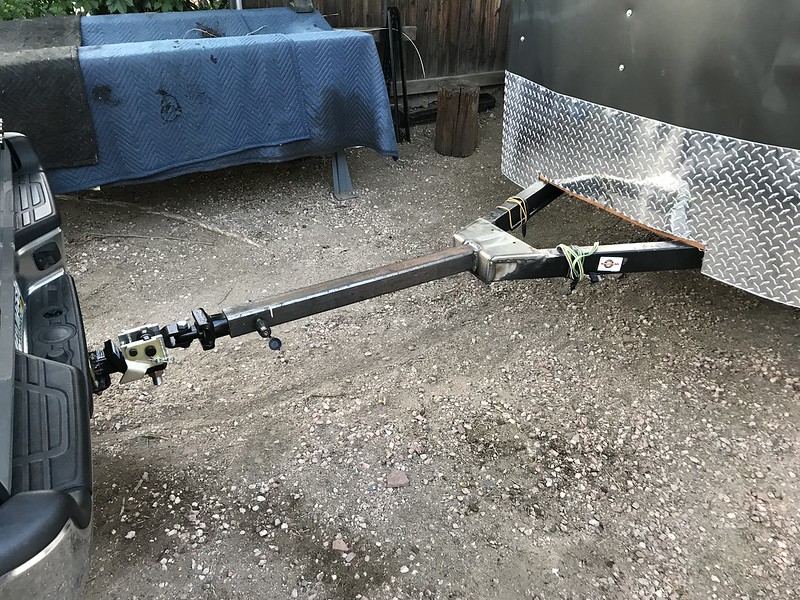
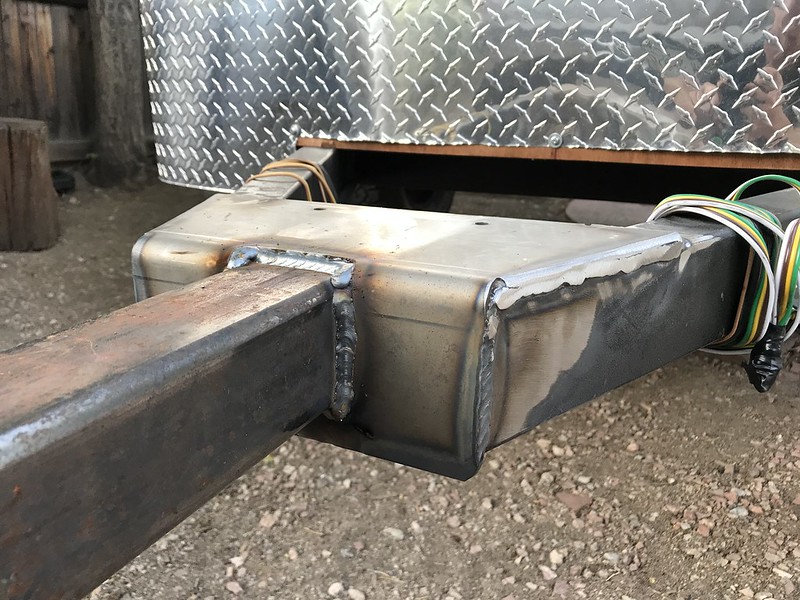
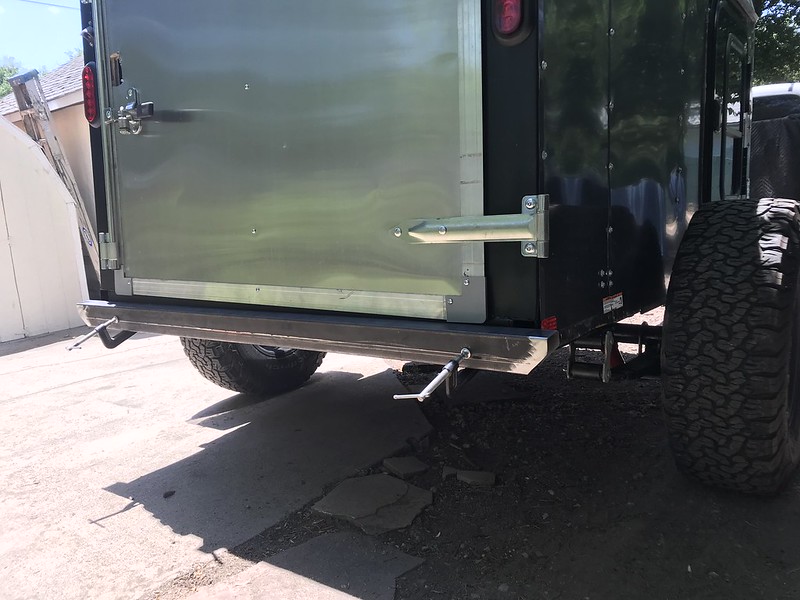
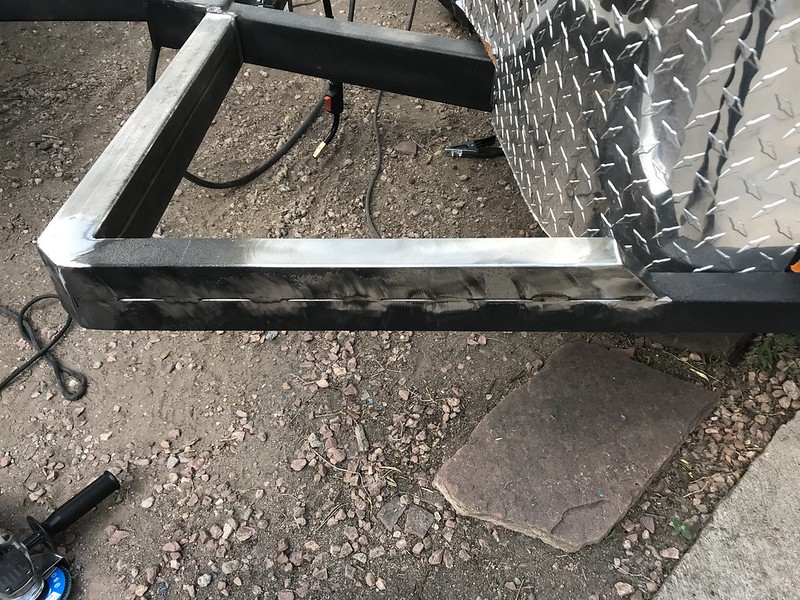
New 2" receiver tube tongue burnt on. It's essentially a 3 foot extension that houses the Lock-N-Roll hitch.
Why 3 feet, you ask...it's the magic number that gives me clearance between the A frame portion of the trailer tongue and my truck bumper. Now, I'll be able to turn the truck 90 degrees to the trailer, which will help in tight turns offroad, turning around and the extension will making backing the trailer a pleasant task. It'll also give me room to build a landing on the front of the trailer to place a tongue box, jack mounts, propane storage and whatever else.
Drawback is sheer length of the setup now, but that's not a huge concern for us and where we intend to take the trailer.
It's going to be a busy weekend, I'll see what updates I have next week.
Jake
Jmanscotch
is wandering
Checked a few boxes on the to do list this weekend, not as many as planned though.
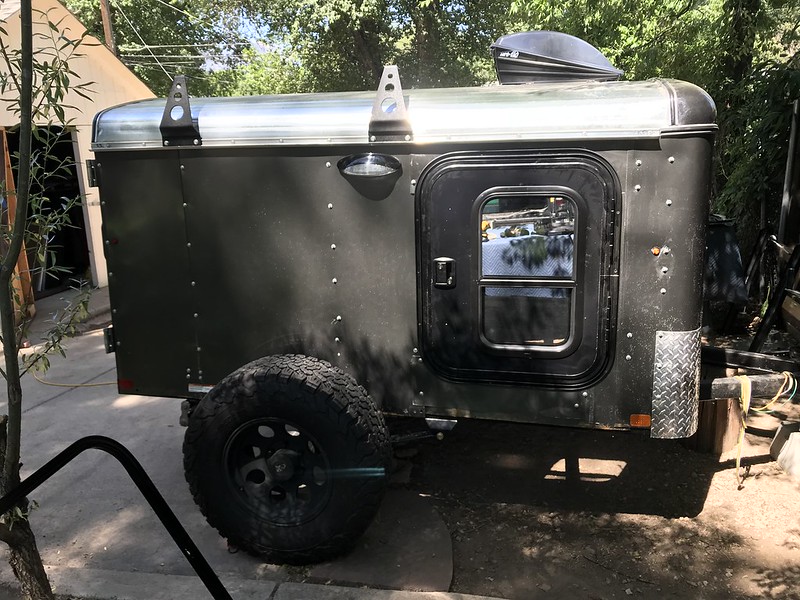
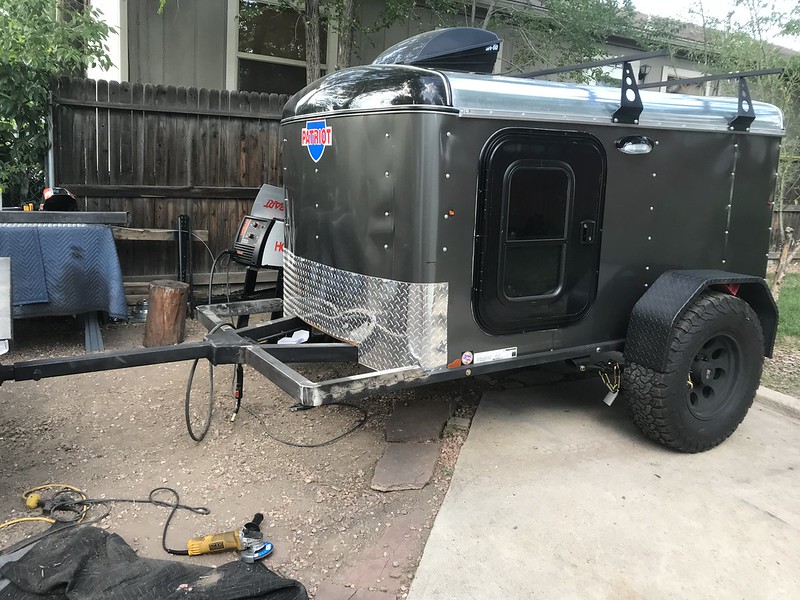
I finished installing the roof rack, came out very sturdy. It's the no weld base mounts with 1"x1" 16 gauge tubing, finished off with plastic end caps, painted in bed liner.
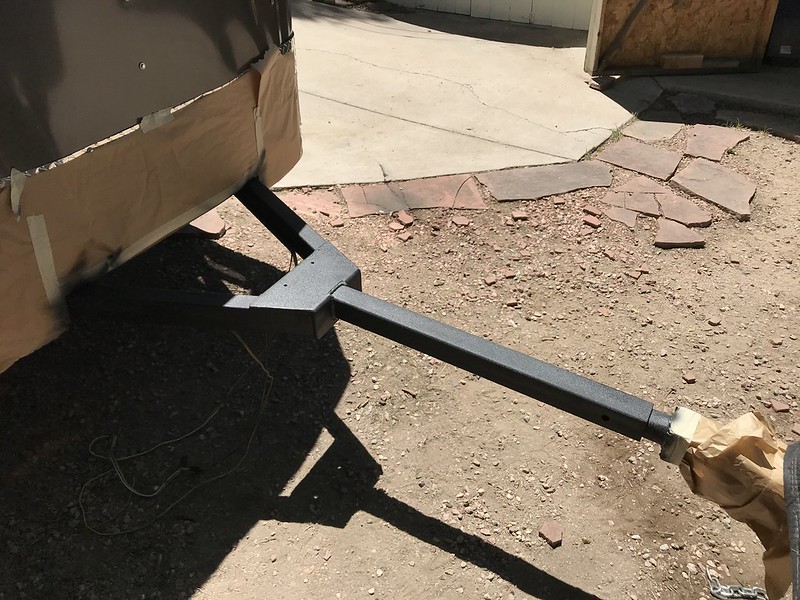
Also painted the new tongue so it wouldn't get crusty with the random thunder storms we've been having.
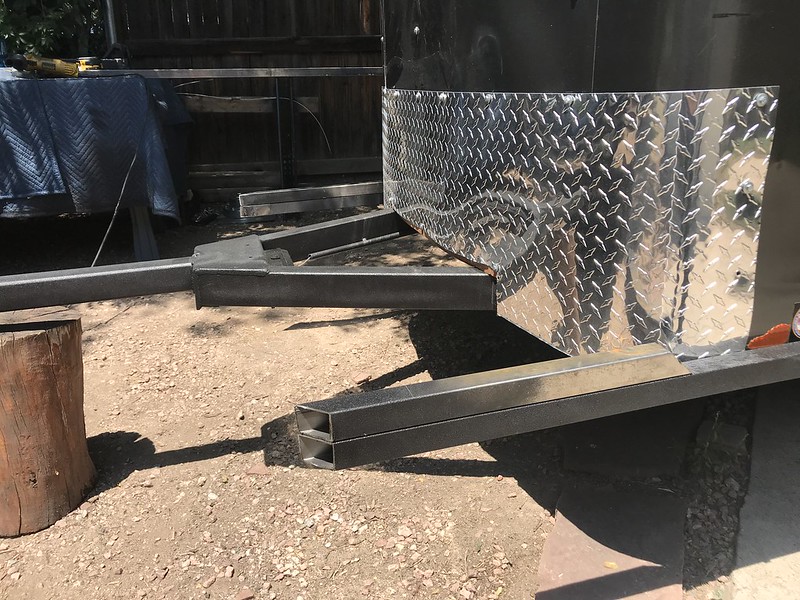
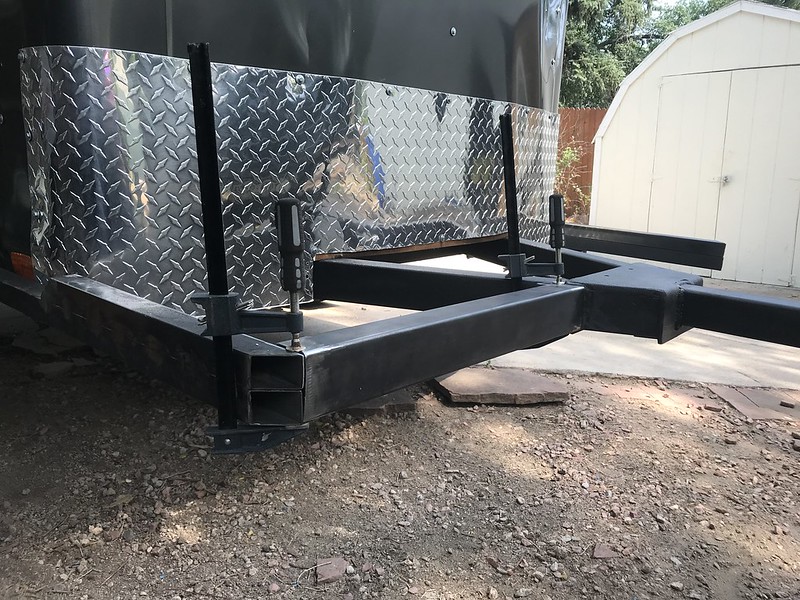
Then I fabricated a simple 2x3 16 gauge rear bumper. Once it was done, I coated it and the fenders I bought. I wanted to get the bumper welded on today, but errands took over and then took the lady out for a little date night as a thanks for her putting up with me being busy in the driveway for the last several weeks/weekends.
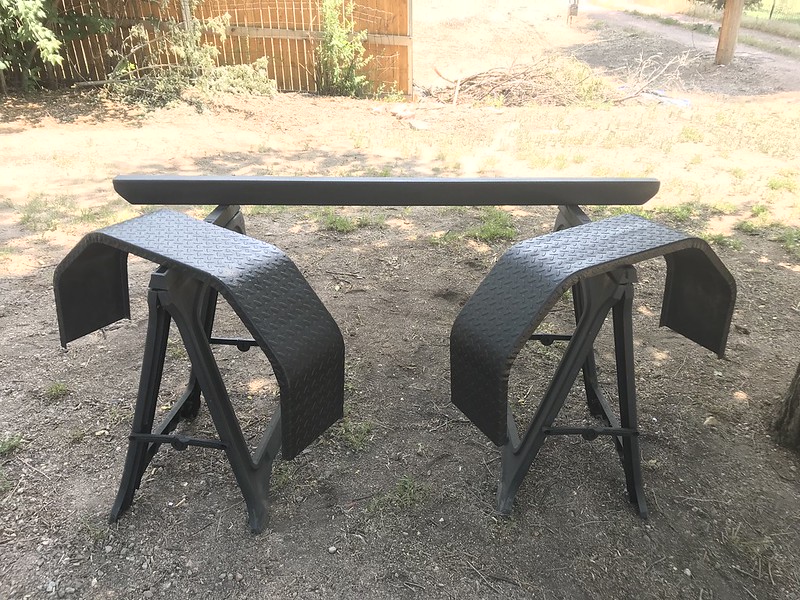
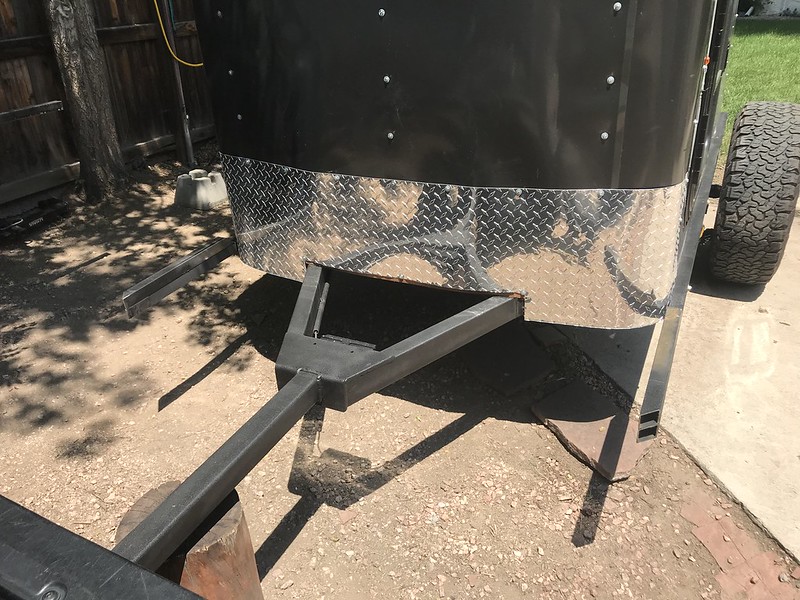
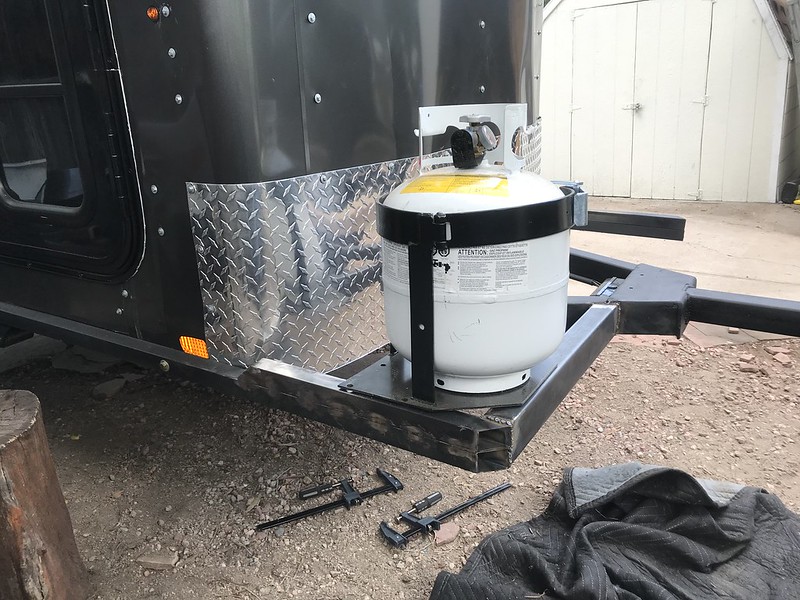
I also finished fabricating the front tongue landing. It's the width of the trailer, so a bit over 5' wide and about 18" deep.

This week I plan to:
- Mount the rear bumper
- Finish the front landing and paint
- Figure out what I'm doing to mount the fenders and keep proper clearance from the tires
- Install the 3 jacks (front tongue and 2 on rear bumper for leveling)
- Finish wiring the 7 pin trailer hardness
- Install the bump stops for the axle
- Rebuild the back door
- Seal the roof and walls again
Jake
I finished installing the roof rack, came out very sturdy. It's the no weld base mounts with 1"x1" 16 gauge tubing, finished off with plastic end caps, painted in bed liner.
Also painted the new tongue so it wouldn't get crusty with the random thunder storms we've been having.
Then I fabricated a simple 2x3 16 gauge rear bumper. Once it was done, I coated it and the fenders I bought. I wanted to get the bumper welded on today, but errands took over and then took the lady out for a little date night as a thanks for her putting up with me being busy in the driveway for the last several weeks/weekends.
I also finished fabricating the front tongue landing. It's the width of the trailer, so a bit over 5' wide and about 18" deep.
This week I plan to:
- Mount the rear bumper
- Finish the front landing and paint
- Figure out what I'm doing to mount the fenders and keep proper clearance from the tires
- Install the 3 jacks (front tongue and 2 on rear bumper for leveling)
- Finish wiring the 7 pin trailer hardness
- Install the bump stops for the axle
- Rebuild the back door
- Seal the roof and walls again
Jake
Last edited:
Hummelator
Adventurer
What made you decide to install the vent fan at the front of the roof as opposed to the rear?
I'm kinda of going back and forth on that for mine.
My windows open towards the rear of the trailer and my head will be at the front so if I want air to circulate installing the vent at the front would be the best option..though I don't know that I want the vent right above my head.
Thoughts?
I'm kinda of going back and forth on that for mine.
My windows open towards the rear of the trailer and my head will be at the front so if I want air to circulate installing the vent at the front would be the best option..though I don't know that I want the vent right above my head.
Thoughts?
Jmanscotch
is wandering
What made you decide to install the vent fan at the front of the roof as opposed to the rear?
I'm kinda of going back and forth on that for mine.
My windows open towards the rear of the trailer and my head will be at the front so if I want air to circulate installing the vent at the front would be the best option..though I don't know that I want the vent right above my head.
Thoughts?
I don't love the placement of the vent either, mainly because I didn't want a little rain getting in and dripping right on our heads.
That said, it wasn't placed there by choice, so much as that's the only practical place I had to put it. I wanted to keep the roof rack right over the axle (and either cargo or the solar panel would mean it couldn't have room in between the crossbars) and the galley will be to the rear, so it could only go on the front.
I don't foresee it being much of an issue. I installed the rain cover so water getting in shouldn't be a concern. As far as circulation goes, it's not an ideal setup for full cabin air circulation, but we typically camp in "desert" climates at a minimum of 8,000 ft in elevation and typically more in the 10,000 - 12,000 ft. Why that helps, even with the days reaching 90 degrees or so, is as soon as the sun goes down, the temp drops dramatically. Most nights, even in the dead of summer, will be 60* or below at that elevation. So super efficient circulation, for cooling purposes, isn't much of an issue. As long as we can get some air changing over, we'll be golden.