Hey Vortec Guys! / Sierra pickup / Suburban / Yukon etc - Finally has Index!

rayra

Expedition Leader
Multiple sets per u-joint set?
Delcos were good enough, I ain't picky.


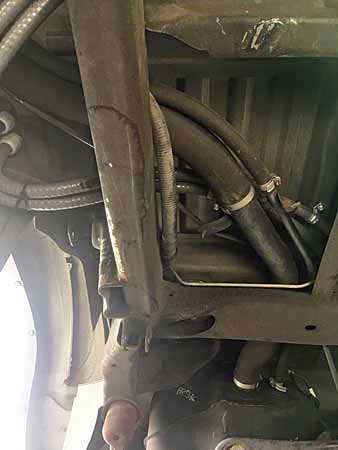
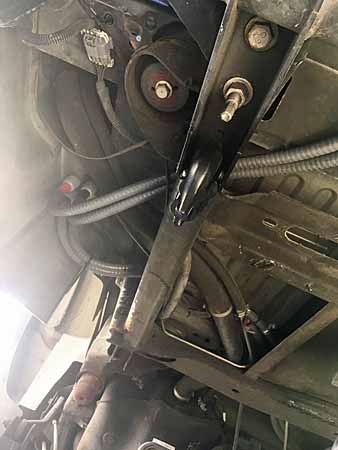
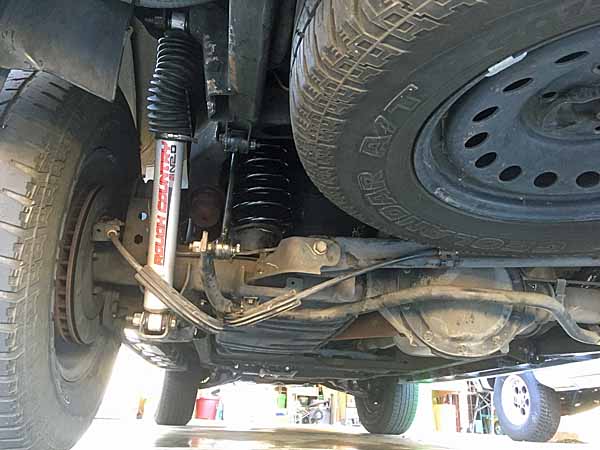
This morning it was reinstalling the front shaft and turning a test drive into a cheeseburger hunt at lunchtime. After I came back my magician's assistant was able to slowly inch the vehicle backward in the driveway while I lay under it seeking the perfect angle to access the grease fitting on the frontmost u-joint. No worries, I had a large rubber wheel chock between the front tire and my rib cage.

/there's a reason I don't have a large life insurance policy, I'm worth more alive than dead.


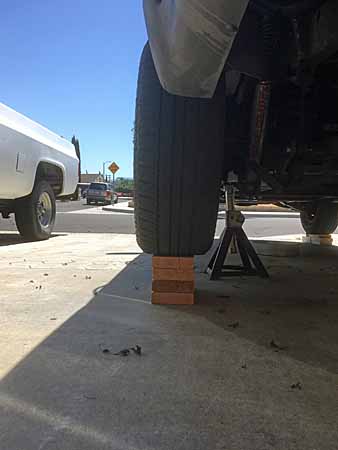
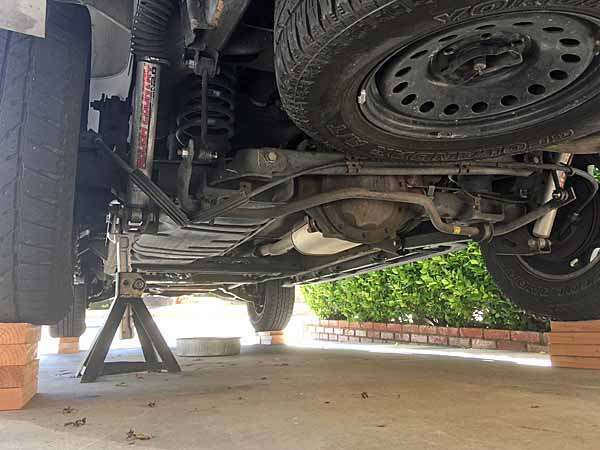
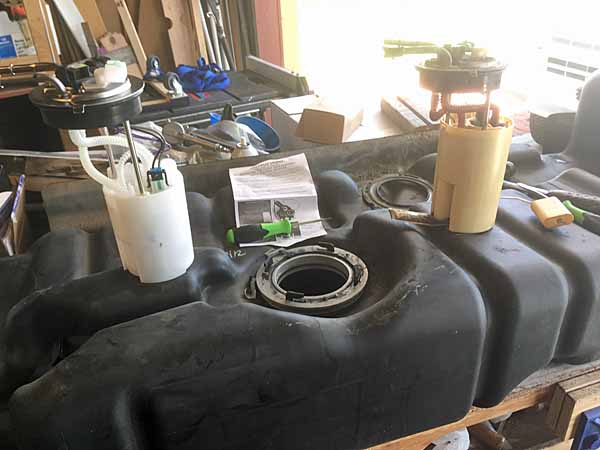
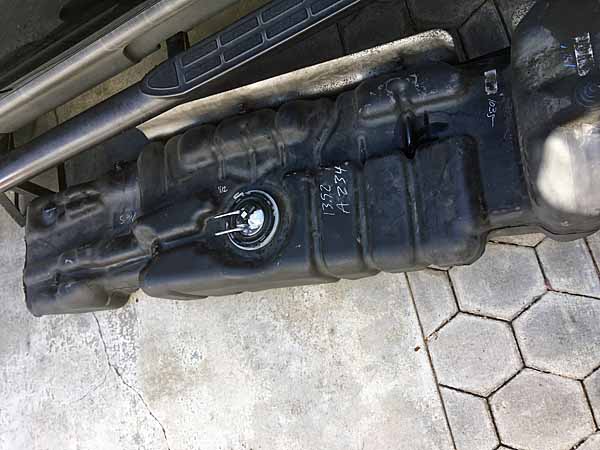
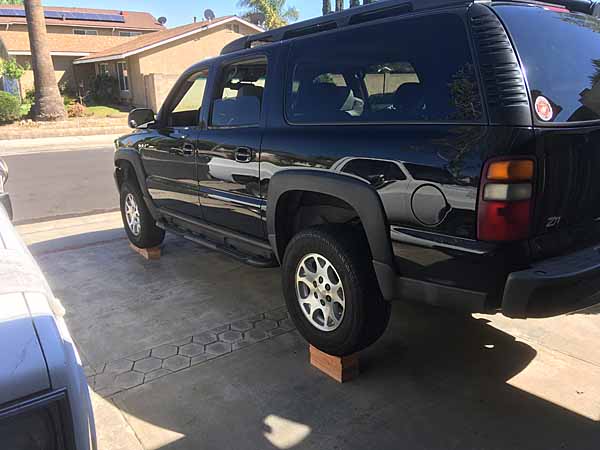
Then the afternoon I rigged the Suburban on the redneck hoist in preparation for the fuel pump replacement and kicked that off with the rear driveshaft removal and new u-joints in it.

fuelpump001.jpg


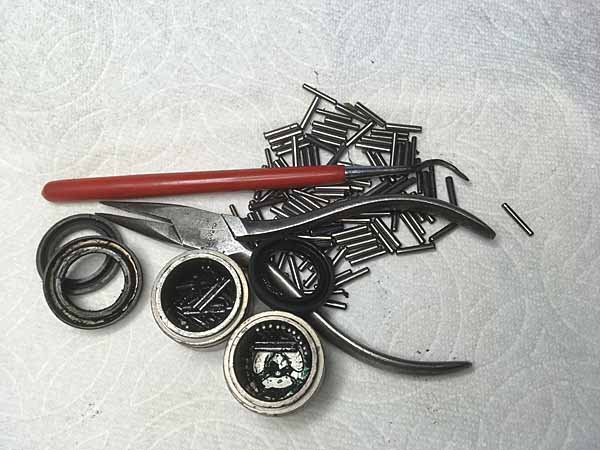
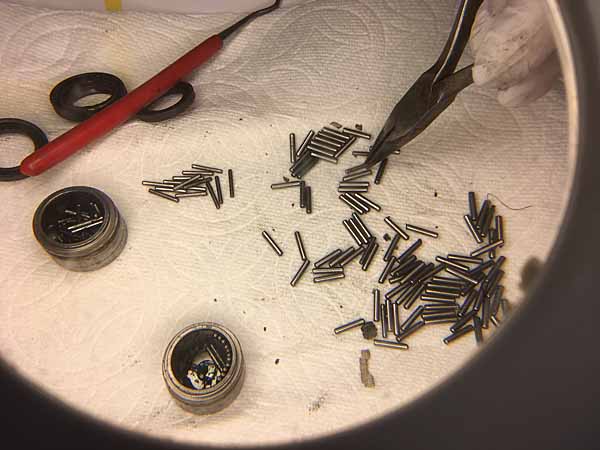
That was going well enough, melted off 4 caps, got the rear end joint fitted, even got the grease fitting facing the right way, then I got the joint set in the front end of the shaft, with the other two bearing caps careful set to the side [in creative writing this is called foreshadowing], while I gloved up and got my hand in the hot yoke ears to push the new naked u-joint towards one side as I set that cap into place with taps from Mjolnir. Then I rolled the shaft over 180deg to position the other side and [here it comes] ... pushed the other two caps off the table on to the floor. Tiny little roller bearings everywhere. Mixed in with the torched trash. Much cussing ensued. Vanna and I got busy imitating a passel of kids after a pinata has been ruptured. For time's sake we just picked up every bearing we could find. Then I got back to setting the 2ns side cap while the yoke was still hot and expanded and it was easy to set the cap, using my barbarian methods.

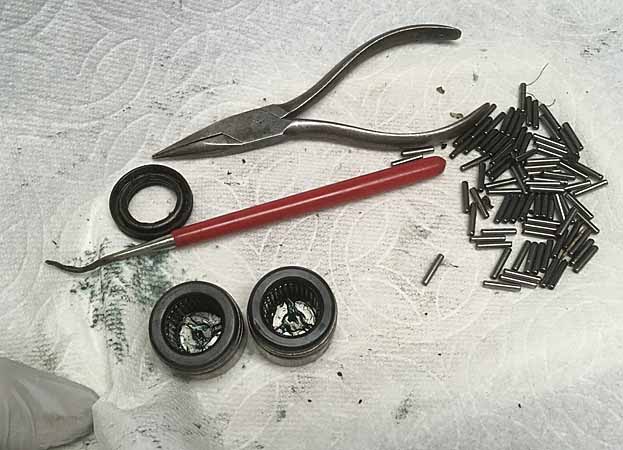
Then I took all the pieces of Humpty Dumpty and his twin brother in the house to make good use of my circular fluorescent / magnifier swingarm lamp on my home office desk and got busy sorting and re-stuffing greased caps. The new bearings are smaller / slimmer than the old. Plus the old ones were covered in cooked grease, while the new had some blue goo. So I set about setting them all about and came up a couple short. Went back thru the gleaned pile and found them hiding out. ta-da, found them all.

ujoints07.jpg
ujoints08.jpg
ujoints09.jpg


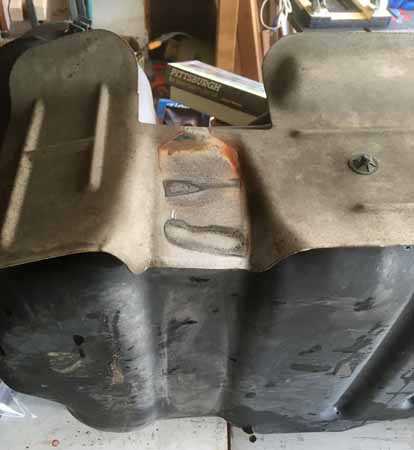
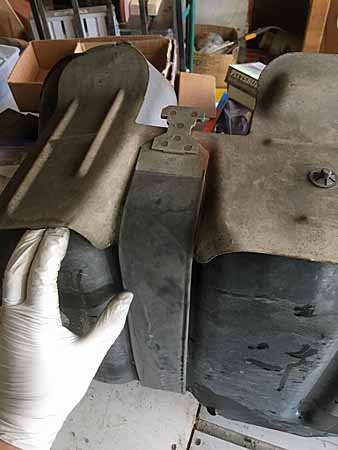
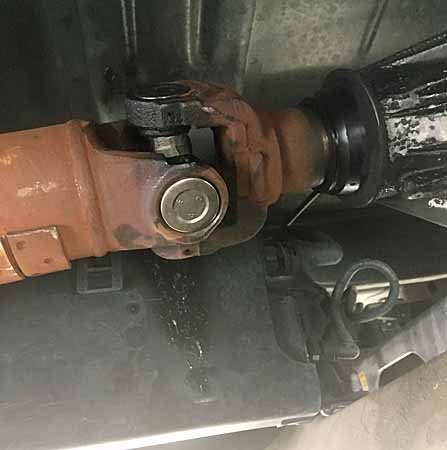
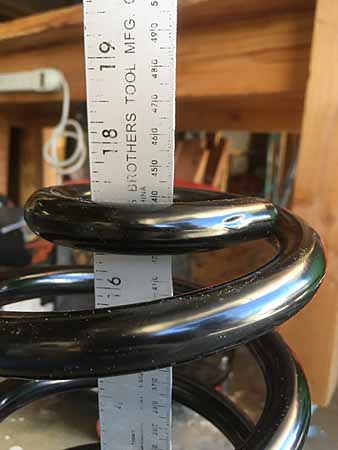
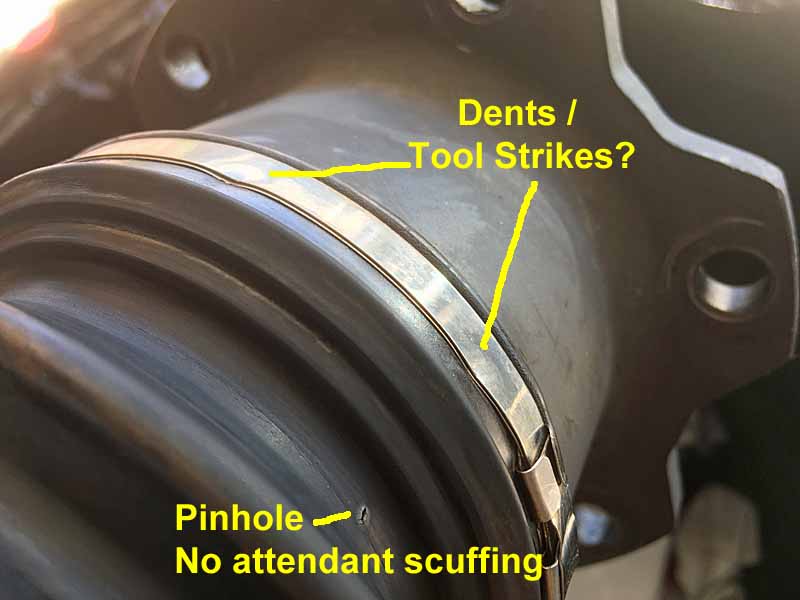
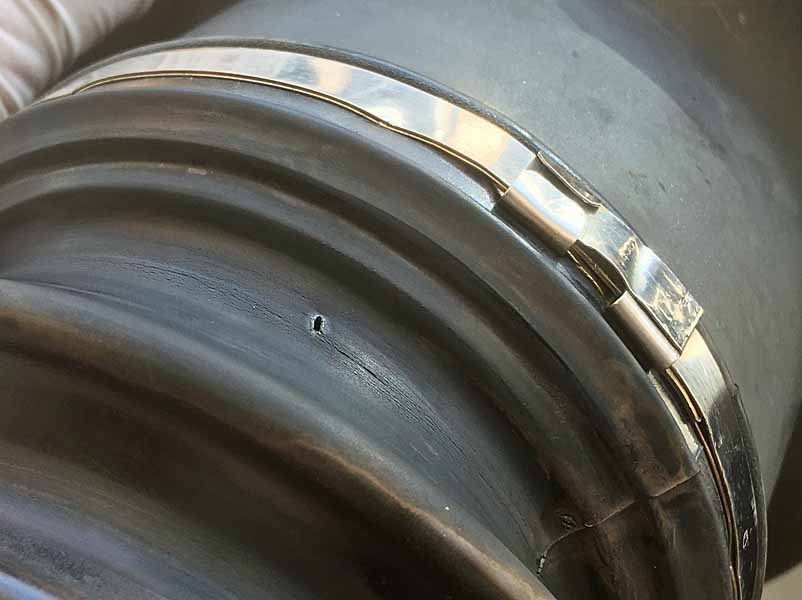
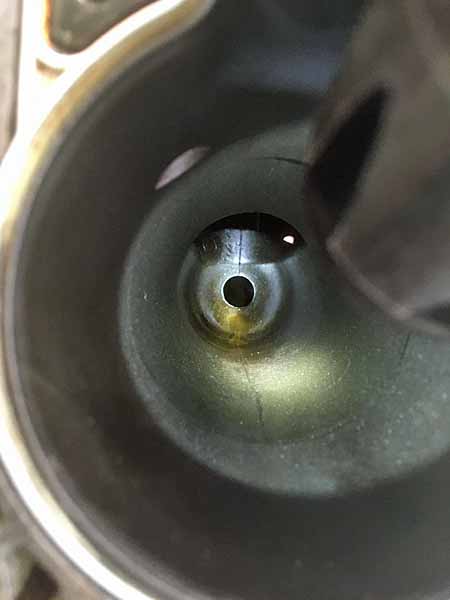
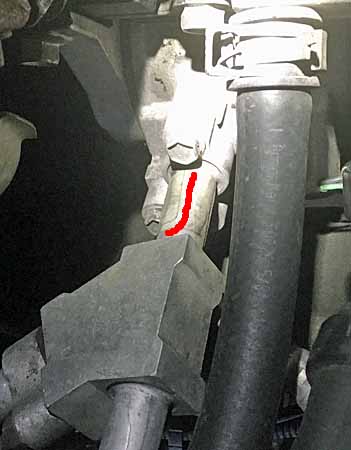
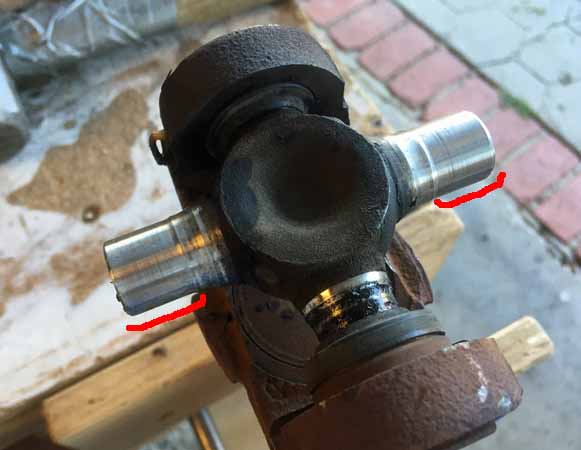
I didn't really test the old u-joints before I took the fire wrench to them. At 146k mi it scarcely mattered, bound to be wear. But I did notice as I set the transmission yoke up for its sacrifice to Pele just how amazingly worn the U-joint shafts were in the needle bearing contact area (highlighted in red)

ujoints06.jpg


Then it was on with the show.

ujoints10.jpg
ujoints11.jpg


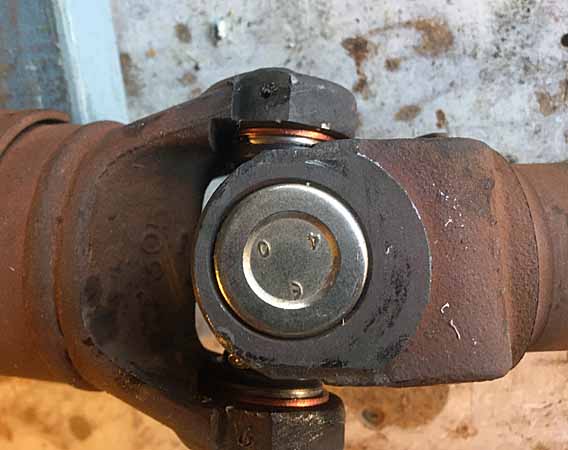
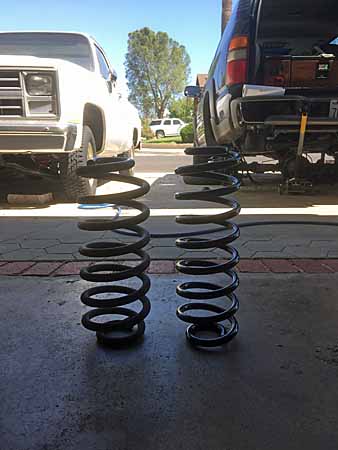
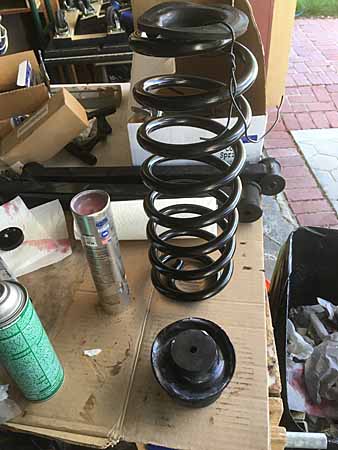
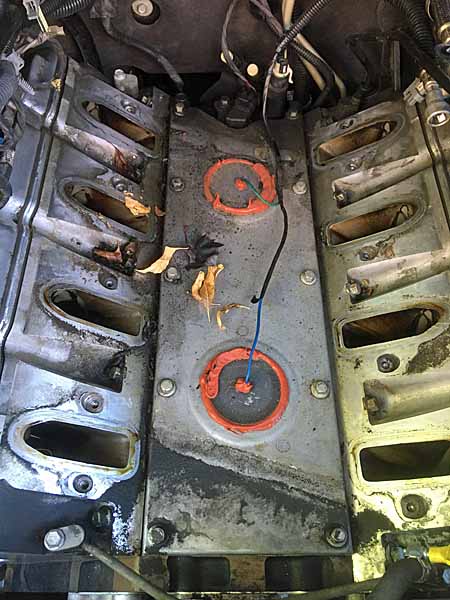
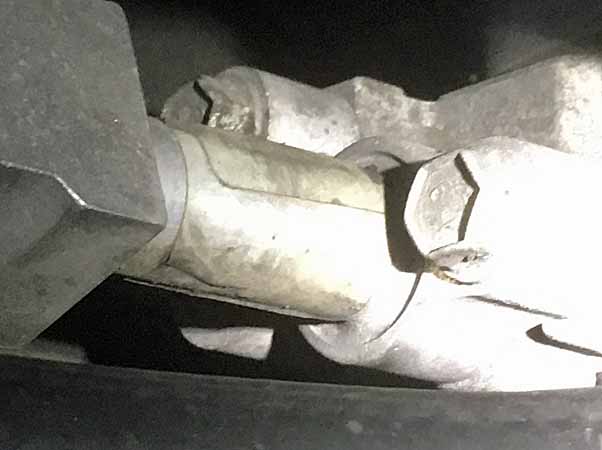
Rear drive shaft ready to re-install after the fuel pump is in.

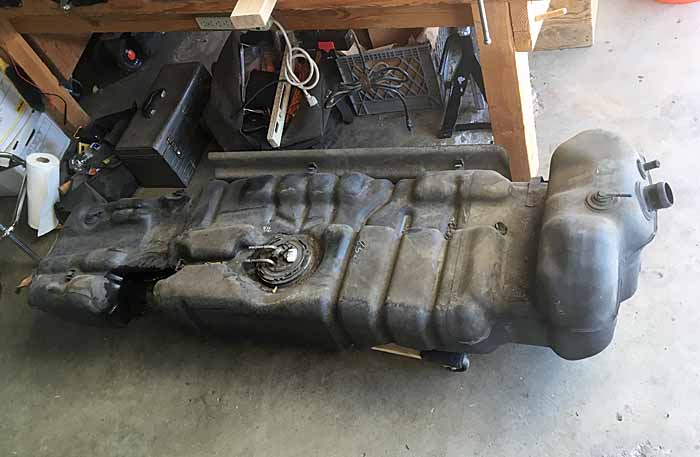
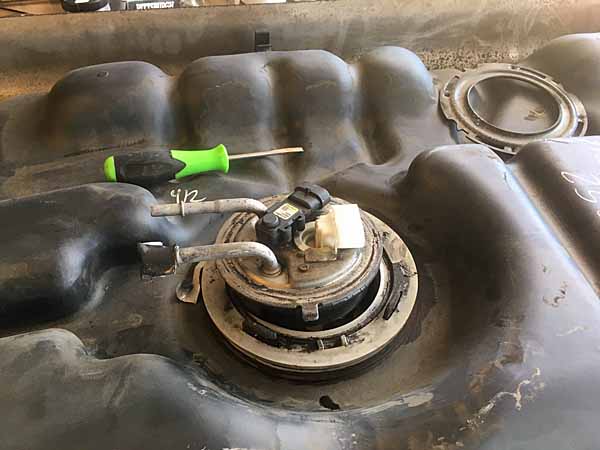
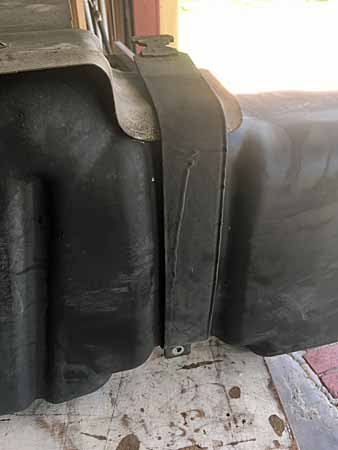
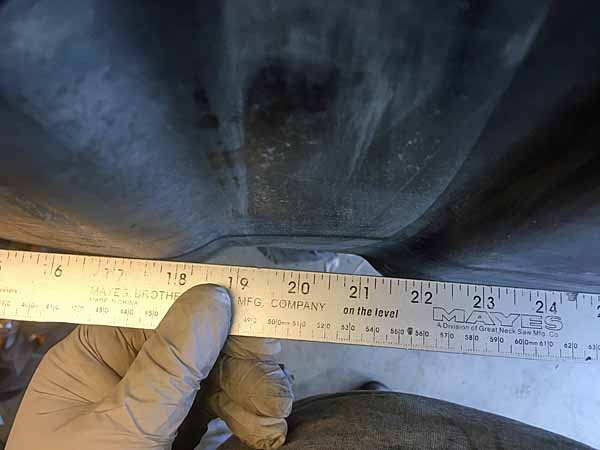
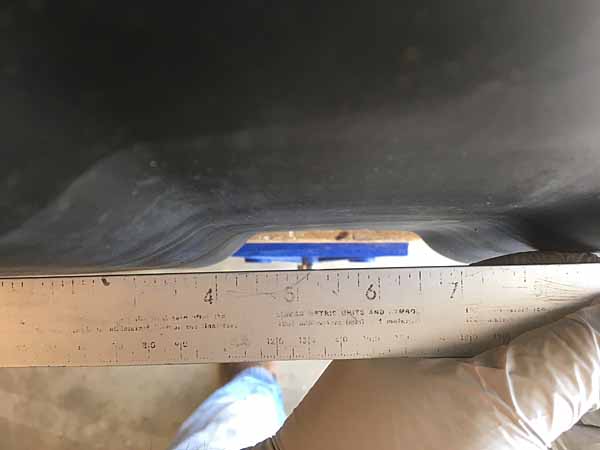
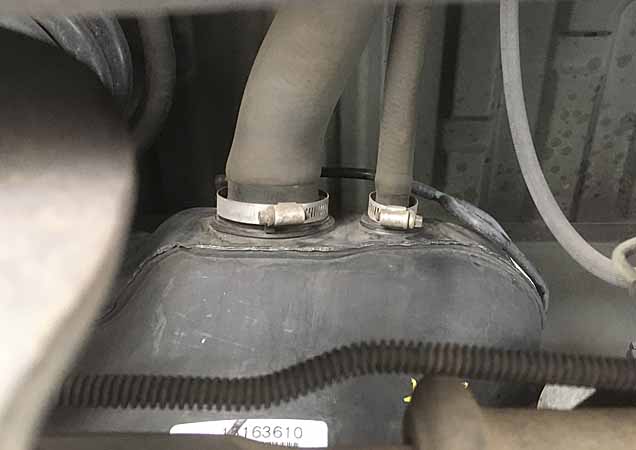
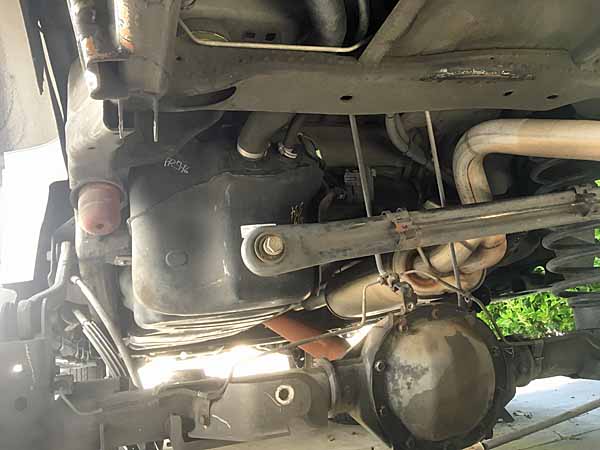
Fuel tank removal probably commences tomorrow after morning classes. I've been scudding around the last couple trips with the 'Low Fuel' lamp lit. So the tank shouldn't have much spam innit. I could probably get away with just tipping the end of the tank down, but I want to finish the tank plate prototyping so will probably remove it entirely. Depends how much of a PITA the plumbing is.
 
Surprised you didn't find a note in the packaging that the caps were matched to a certain side. That if you removed a cap to be sure you place it back on the side they come from. Measuring has gotten so precise that they can measure the pinion OD and the ID of the cap, then select the proper size needles to create the proper clearance.
Yeah in my previous career I worked for a bearing manufacturer. Our plant specialized in engine and drivetrain parts.
 

jgaz

Adventurer
Surprised you didn't find a note in the packaging that the caps were matched to a certain side. That if you removed a cap to be sure you place it back on the side they come from. Measuring has gotten so precise that they can measure the pinion OD and the ID of the cap, then select the proper size needles to create the proper clearance.
Yeah in my previous career I worked for a bearing manufacturer. Our plant specialized in engine and drivetrain parts.
Interesting. I’m not sure I’ve ever seen a note packed with a u-joint.

I was taught to always keep the caps in the original location so that’s the way I’ve always done it.
Also taught to install the grease zerk hole so it’s loaded in compression. I don’t know for a fact that it matters but my boss taught me that way and he wasn’t open to debate.
 

rayra

Expedition Leader
Well I used the caps packed with the joints, not the originals on the shafts. The needle bearings were definitely different size, too. And after having to torch them off they were scrap anyway.

-

'The Eagle Has Landed'

fuelpump005.jpg


lunch break. Then it's:
tape up the various fittings / inlets
blast the grit and grime off the tank.
tip and pour off the remaining gas into a bucket / fuel jug. guesstimating about 2gal remain
do some messing around with the tank skin template pressboard prototype. and taking some measurements and photos of the saddle strap areas.
remove and replace the fuel pump
reinstall the tank, put ~7gal in it.
re-install the drive shaft and grease that rear joint fully.
Fire it up and take it off the 'hoist'.
test drive!

fuelpump002.jpg

fuelpump003.jpg

fuelpump004.jpg


18yrs+ those fuel tank hoses were on. Came right off without trouble. rubber on HDPE. And this Sub was Hecho en Mehico and has lived all its life in SoCal. Zero corrosion issues.
Little bit of struggle disconnecting a few lines, but I had the right hose release tools and once the tank was tilted for access just had to free the two primary hoses from the tank mounts and scoot the tank forward just a little to get some slack on the jaws of the 3/8" line coupling so I could get them spread with the tool and free the line.

The tank shield on the side facing the driveshaft is a flimsy arrangement. It's only rigid when the saddle clamps bind it's bottom edge. The plate otherwise floats on 4-5 studs protruding from the tank plastic, kept on with spring-steel discs pressed onto the studs. I'll take some pics later today while I'm messing with the tank skin idea.
 

rayra

Expedition Leader
well, success. New pump in, transferred the ~2gal we took out and another 20L jug into it and fired it up to run while I put the skid plates back on and jacked it down off the redneck hoist. Took it for a spin inside the neighborhood and throttle response seemed zippy. Lot less drivetrain noise with all new u-joints, too. I never checked the fuel pressure, so we'll see if the 'zippy' impression holds over the next few drives. I think I have the fuel tank aluminum skin attachment figured out, got some solid measurements of the saddle strap notches in the tank bottom.

fuelpump006.jpg
fuelpump007.jpg
fuelpump008.jpg


fueltankskin015.jpg
fueltankskin016.jpg
fueltankskin017.jpg
fueltankskin018.jpg
fueltankskin019.jpg
 

rayra

Expedition Leader
TSB on potential A/C compressor and belt / tensioner issues due to long periods of A/C inactivity.

Found my AC belt tensioner pulley very loose, despite being on the belt. About to go install a new delco replacement and found a TSB alert sticker on the packaging, so looking into it. My strong for years AC was inoperative during a recent warm spell. I hadn't detected any trouble or odd noises as described in the above TSB. But while finishing my front grill power plug installation I found the pulley was loose. And I hadn't got around to troubleshooting the AC as we've been in a long spell of rain fronts. But now it grows hot and it's time to look into it.


and speaking of looking at things under the vehicle, I was looking over various rear suspension linkages in advance of that work and oopsie, I forgot to tighten the ladder clamps on the main fuel filler and vent hoses, when I reinstalled my tank. I've put 32gal of gas into the tank and no visible leakage. Clamps are tight and the rest looked over once more.

fuelpump009.jpg
 

rayra

Expedition Leader
repost from my build topic, my third and final (for the foreseeable future) tear apart of the rear suspension and coil springs. Some Moog HD factory replacements. And some thorough silicon greasing of all the bushings / mounts in the rear suspension. Got rid of a lot of squeaks and getting ready to do some towing in a few months.

I didn't get started out there today until just before noon and it wound up being a long slog on a hot day. Pulled the rest of the suspension apart, all but the top control / trailing arms. With the vehicle rear braced about 8" in the air and the floor jack under the rear differential, it was easy to remove the rear wheels and disconnect almost everything and then lower the rear axle until the rear coil springs practically fell out. A little rocking of the axle was enough to get them free, even with the 2" spacers in the spring stack.

coilsprings02.jpg
coilsprings03.jpg
coilsprings04.jpg


couple undercarriage shots showing long fuel filler path on these vehicles and the extra power cabling and conduits that I added.

coilsprings05.jpg
coilsprings06.jpg


The new Moog HD 'stock' spring replacements stood about 5/8-3/4" taller uncompressed than the original springs with 145k mi on them. Ride height went up about 1/2" at the rear hubs. Now at 38-5/8" at the rear. I put the 2" steel spacers back in, as well as the poly spring seats top and bottom. I used the last of the silicone grease in the old tube to hand-grease all the suspension components as things were re-assembled. And the new tube in the air-powered greaser to really fill the bushing spaces on the Spohn lower rear trailing arm upgrades. Did that before tightening their mounting bolts, to allow the grease to ooze all over. Spohn should be happy to know I took the effort to swap sides when I reinstalled those so their brand sticker is now visible down near the rear brake discs / calipers (I installed them 'backwards' the first time, but they're symmetrical, doesn't really matter). I also finger-greased all the mount flanges before putting the various bushing-fitted parts back together. Ever flange and bushing on everything. Track bar, sway bar, sway bar end links, the lower arms, the shocks, all of it.
When it was all done all the suspension squeaks were gone. Should be quiet for a very long time.

coilsprings07.jpg
coilsprings08.jpg
coilsprings09.jpg
coilsprings10.jpg
coilsprings11.jpg
 

rayra

Expedition Leader
re-post from my build topic

welp, got the CV axle swapped, the original is back in. Not liking what I found on the leaking one I took out. I changed both front axles about 14mos ago, <5k mi. I cannot recall the exact timing. But a couple weeks ago I took my Sub into a hole in the wall one man shop that I've used twice before to get my alignment done. This after a year+ during which I basically changed the entire front suspension and steering. Basically rebuilt the entire front end. Including new CV half axles. I got things close and left my oldest pair of tires on front, getting chewed up as everything was off.

So I tried to take it in during the holidays, guy was closed for the holidays. So several weeks ago I started doing a series of projects on the vehicle (documented here and elsewhere) and right about the same time as the alignment, I saw some grease cast in the passenger front wheel well. I cannot be sure if it was days before the alignment or days after. And also I would think if it was before, the alignment guy would have brought it to my attention. It's literally right where he was working. The squared-off wrench location on the inner tie rod shaft is right adjacent to this boot is in fact right in plane with this damage.

So I fortunately had retained one of the old CV shafts as a spare. They were functional when they were pulled at 140k mi. It was the wheel hubs that were worn the hell out. So I did both as part of the same evolution.
Thus this morning I could just pull the leaking CV and swap in the 'spare'. So the vehicle can be driven while I figure what to do. It will cost me almost as much for a replacement boot and the specialty tool needed to stretch and guide it over the CV knuckle, as it will to just buy another complete CV of the budget brand I'd bought. And doing the latter I won't have to mess with all that grease mess.

Here's a couple pics of the pulled part and the oddities and tool damage. The pin hole thru the bellows doesnt have any attendant scuffs or marks that ought to be there if it was a plier or open end wrench strike. I don't want to say 'looks like a deliberate puncture' but oops there I just said it. And the two dents on the band clamp do look like tool strikes.

CVbootleak04.jpg
CVbootleak05.jpg


Anyway, swapped and degreased, ready to roll. But not yet going anywhere. Friday morning the intake manifold comes off, the knock sensors come out, galley plate comes off, as I try to find and correct an oil leak in the high rear of the engine block. Got a new galley cover gasket, new intake manifold gaskets. Really ought to get a new screen or oil pressure sender, no better time to change it. And need some more RTV to re-seal the knock sensor boots.

And still have an AC leak to find and deal with.
 

rayra

Expedition Leader
Four years almost to the day, that I last did some engine surgery like this.


well spent this morning excising my intake manifold and clearing the way to go after presumptive oil leaks in the upper back / top deck area of the motor. And it certainly looks oily enough for there to be some.

I also found a similar array of rat / mouse poop, and a chewed up snail shell supper. Definitely have some local rodentia that like to climb up on top of warm engines to shelter for the night.

engineoilleakhunt200502-01.jpg
engineoilleakhunt200502-02.jpg


It's been 2-3yrs / ~10-15k mi since the last time I had this apart and cleaned it all thoroughly. And this is after degreasing yesterday. Somewhere in the upper front I am blowing oily sooty schmutz and I have no idea from where. The oil filler tube is properly seated and sealed, as are the valve covers. All my radiators / condensers are dry and clean, so it's not coolant, trans oil or R134. At least not from those sources or airflow direction. Factory air intake works, in good order. There's one fuel vapor vent / solenoid on the top front of the vortec manifold and it was wobbly-loose despite being bolted tight. IT should be under suction when the engine is running and the vent solenoid (evac) is triggered, so it should not be blowing ******** all over. The throttle plate has a coolant circ / warmer line attached, no signs of leaks on it.
That's going to take some more examination / detective work.


On to the upper back deck / end of the galley cover plate. 'yep, there's yer problem right there'.

engineoilleakhunt200502-03.jpg


Oil sender on the right, middle I think is the crank/cam position sensor? Left is the sopping wet flow area that corresponds roughly to where I have oil trickling down, having my Sub mark it's territory. Rains down and over the starter location. I'm probably going to cover the intake runners and hose some degreaser on that back shelf area and down the back of the block and transmission bell and carefully hose it down, before continuing with disassembly on the knock sensors and galley plate. And on that crank sensor setup. After first seeing if any bolts are loose. I have a galley cover plate gasket to install and it looks like my knock sensor sealing job is holding great since the last time.


Last is a shot down the front chamber of the Vortec manifold.

engineoilleakhunt200502-04.jpg


Very little oily residue. the blurry gray gasket around the edges of the image is the gasket / plane that the throttle plate bolts to. Just air goes in here, and the fat line from the PCV dumps into the top of the manifold, about that shadowed recess, top middle of the pic. The half-dollar? sized hole center-back is part of where the air enters the main chamber of the manifold before flowing down the intake runners to the heads. These motors are port-injected, the fuel spray is right before the transition from manifold plastic to aluminum head intake runner. So basically a lot of oily air swirling around with the fuel only injected right at the end.

so after lunch and some cold water, and rigging a patio umbrella for some shade, I'll get back to rectifying the oil leak and hopefully get it all back together and running by dinner time.
 

rayra

Expedition Leader
repost from my build topic. Been working on my new winch install some more, but along the way my AC crapped out and been doing various things about that. Stuck a can of R134/sealant/leak dye in it morning of Mother's Day, before a ~135mi drive. IT was cool but not cold, knew it wasn't enough coolant but went with it as long as the compressor pressure switch was activating, since I knew I had a leak. visited with folks for the day, then shot another 12oz of R134 in there got it up to the low end of the desired pressure range, cold the whole way home at 80mph. Today not so cold. Also got my ordered UV flashlights today, so played 'CSI' this evening.

'well there's yer problem RIGHT THAYER!'

ACLeak01 CSI spy.jpg
ACLeak02 CSI spy.jpg
ACLeak03 CSI spy.jpg
ACLeak04 CSI spy.jpg
ACLeak05 CSI spy.jpg


main line from compressor to accumulator, cracked right at the fitting / attachment to the compressor. $88 at Rockauto, $113 at Autozone, plan to call NAPA in the a.m. And am willing to drive down to the wrecking yard on a quest if I can pull one for ~$40 or less. I have a list of other stuff I need to look for down there anyway.
 
Well that was timely. I had the AC tensioner go out this winter and decided to hold off replacing it when I really needed it. What a pain in the backside. Reaching it from the top is impossible as it is hard to see the bolts. Reaching it from the bottom side is a tight squeeze with everything in the way. Get all that done only to find out the compressor is not cycling now. Short out the pressure sensor on the accumulator. Sure enough AC clutch engages. Got two of those tall cans of R134a at the part store. OUCH $60 for two!! Now I wished I had gotten some with dye. I think mine is the same problem as yours as it appears to wet dirt around the compressor area.
 

rayra

Expedition Leader
Well that was timely. I had the AC tensioner go out this winter and decided to hold off replacing it when I really needed it. What a pain in the backside. Reaching it from the top is impossible as it is hard to see the bolts. Reaching it from the bottom side is a tight squeeze with everything in the way. Get all that done only to find out the compressor is not cycling now. Short out the pressure sensor on the accumulator. Sure enough AC clutch engages. Got two of those tall cans of R134a at the part store. OUCH $60 for two!! Now I wished I had gotten some with dye. I think mine is the same problem as yours as it appears to wet dirt around the compressor area.

I posted a GM maintenance alert doc, seems to be a known issue if the AC / Defroster is not used for a lengthy period of time. I don't know the mechanics of the problem but it seems like maybe some sort of fluid/oil accumulation that might act like hydro-locking. My AC was strong and cold from day1 ~5yrs ago when I bought the vehicle. Then a protracted period of not driving it much over this fall / winter and when I finally went to use the AC during a heat wave in Feb, I got nothing but warm air. Never heard or noticed any significant event / noise. Just didn't work anymore. Took a can to get enough pressure in the system to activate the switch. A week later, no workee. I just figured that an o-ring failed. While busy with finishing my winch power plug wiring I noticed an oily stain on the thick rubber / wrapped line near the radiator fill / overflow and started worrying about a failed line. So started digging around online looking for diagnostic clues and how-to stuff and found that service bulletin.
It didn't read like any kind of compressor fault, and my system did work fine with enough R134 in it this past weekend, so I'm hoping I can just replace the hose and re-charge and be back in business.
And figure next winter remember to operate the system regularly. Unless I find some better info somewhere.
 

Forum statistics

Threads
185,533
Messages
2,875,612
Members
224,922
Latest member
Randy Towles
Top