Build - Fiberglass & Foam Truck Camper

underkill

Active member
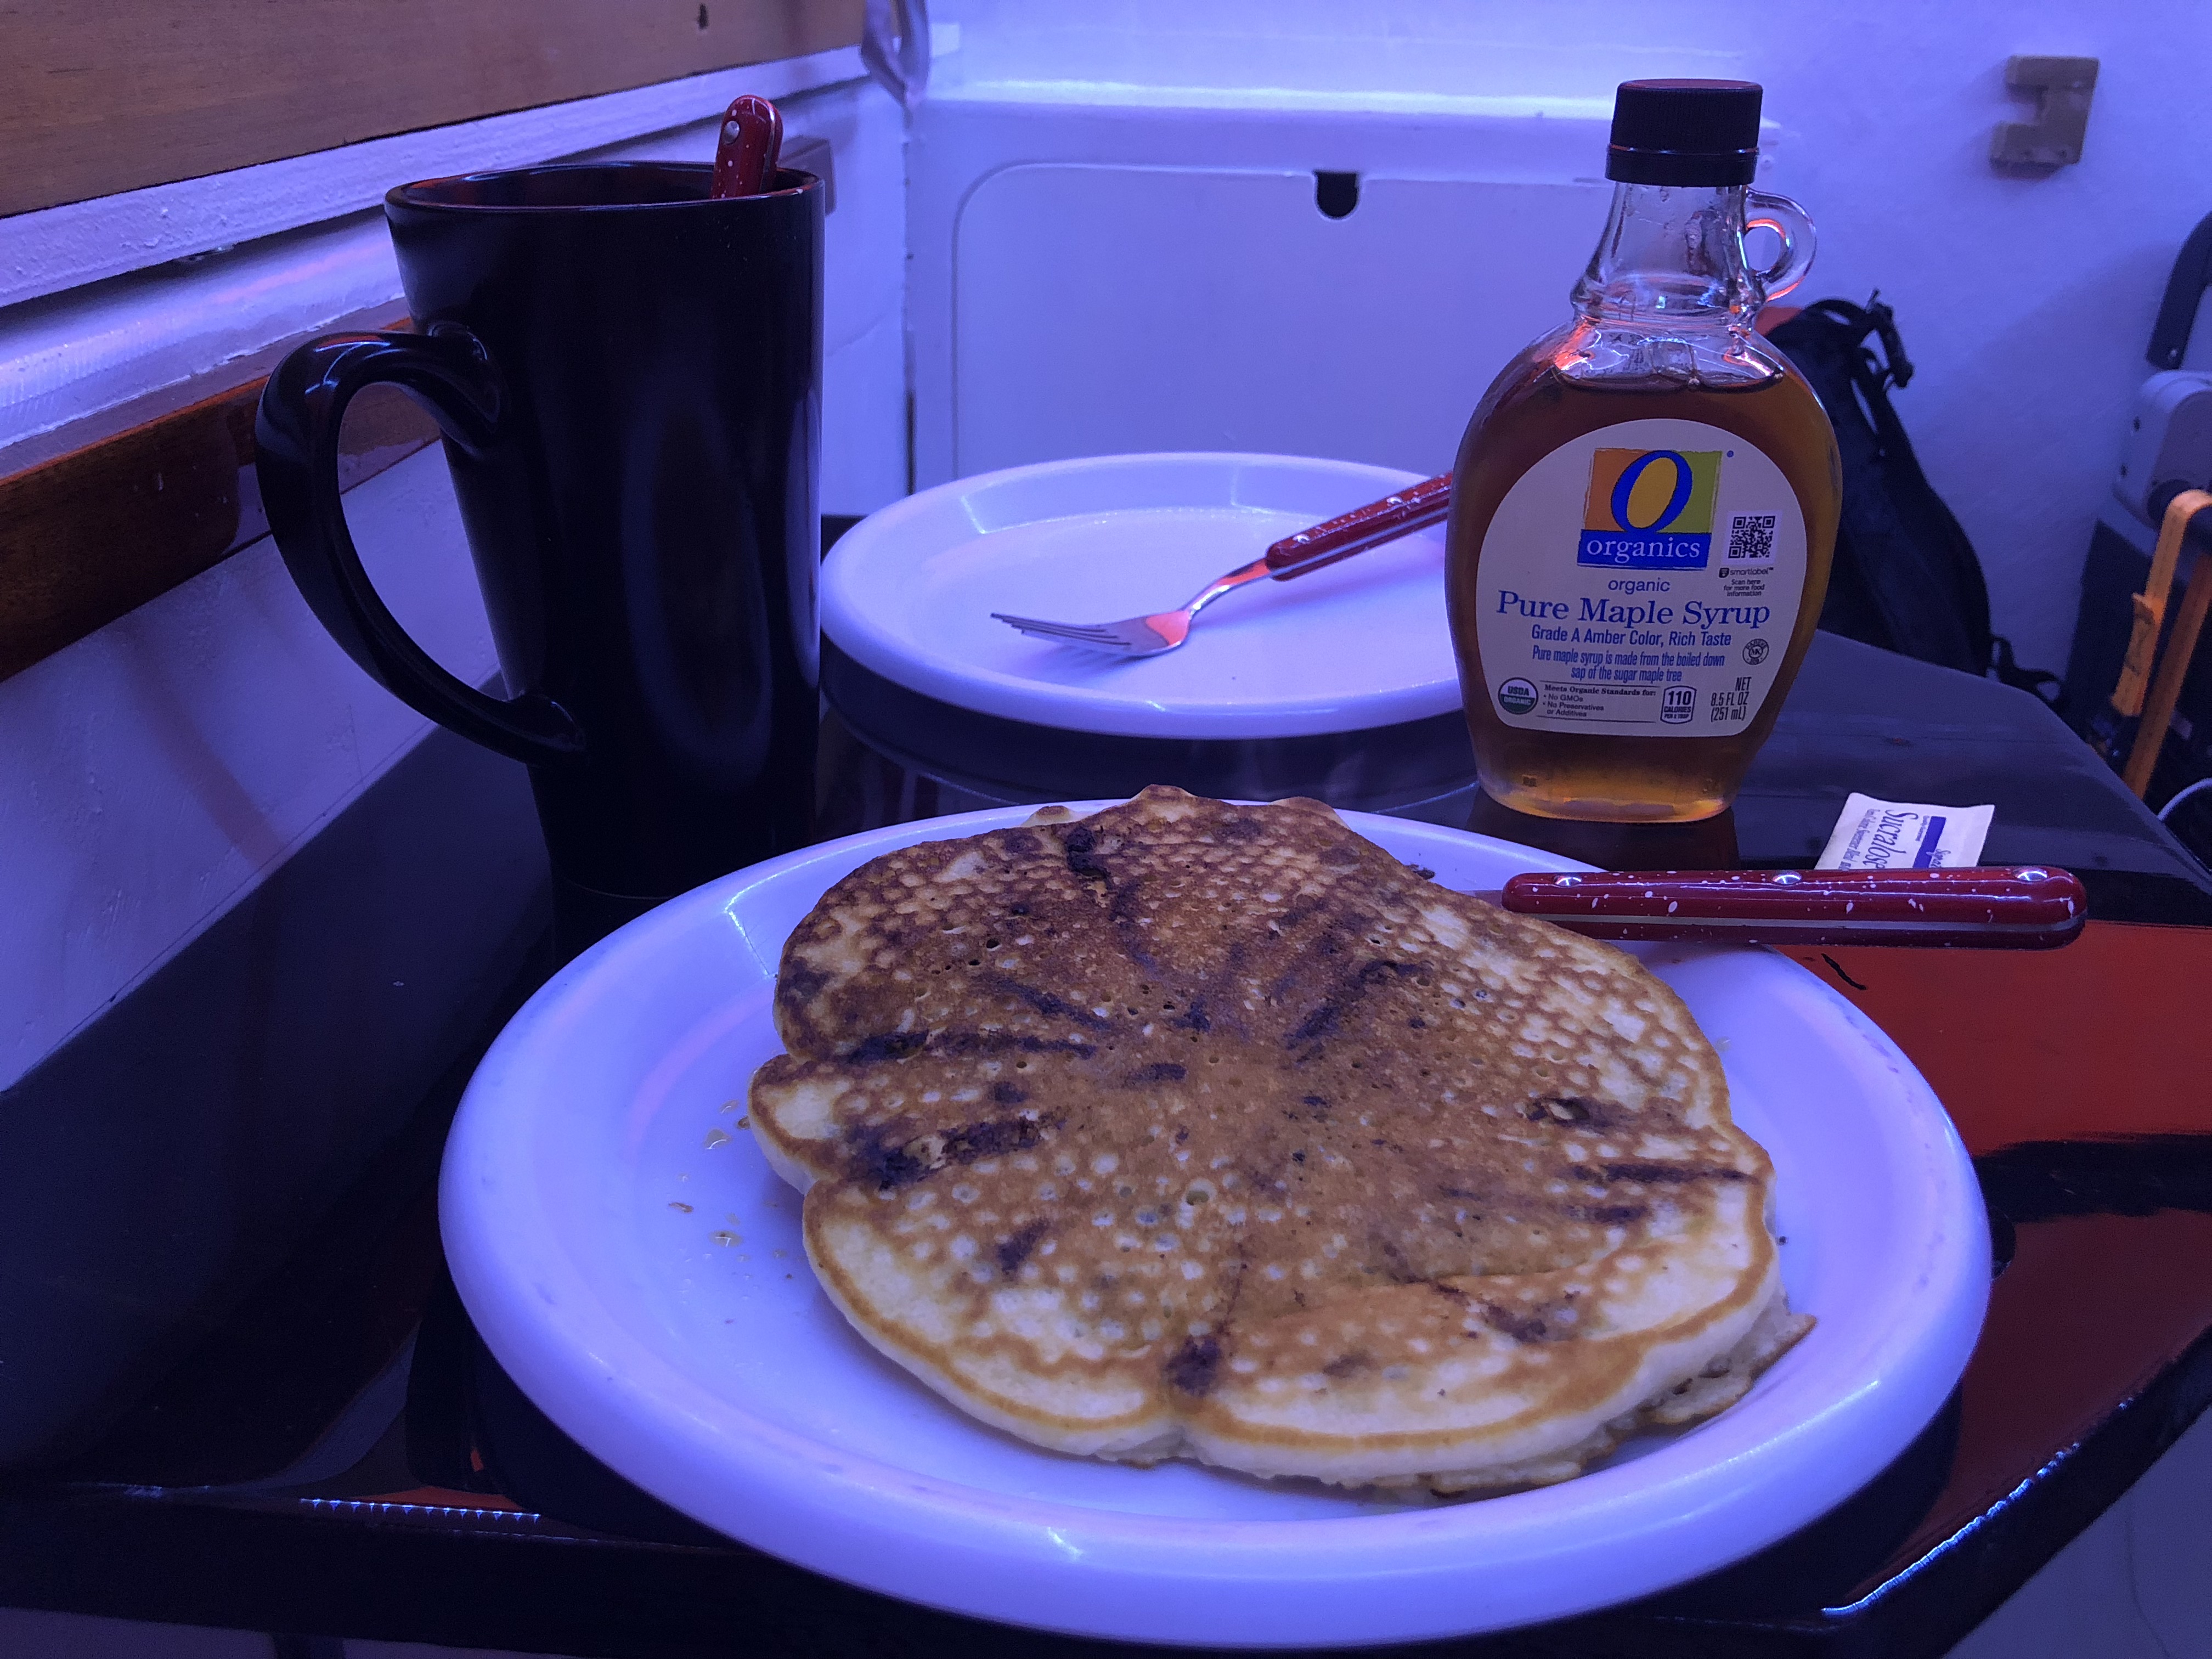
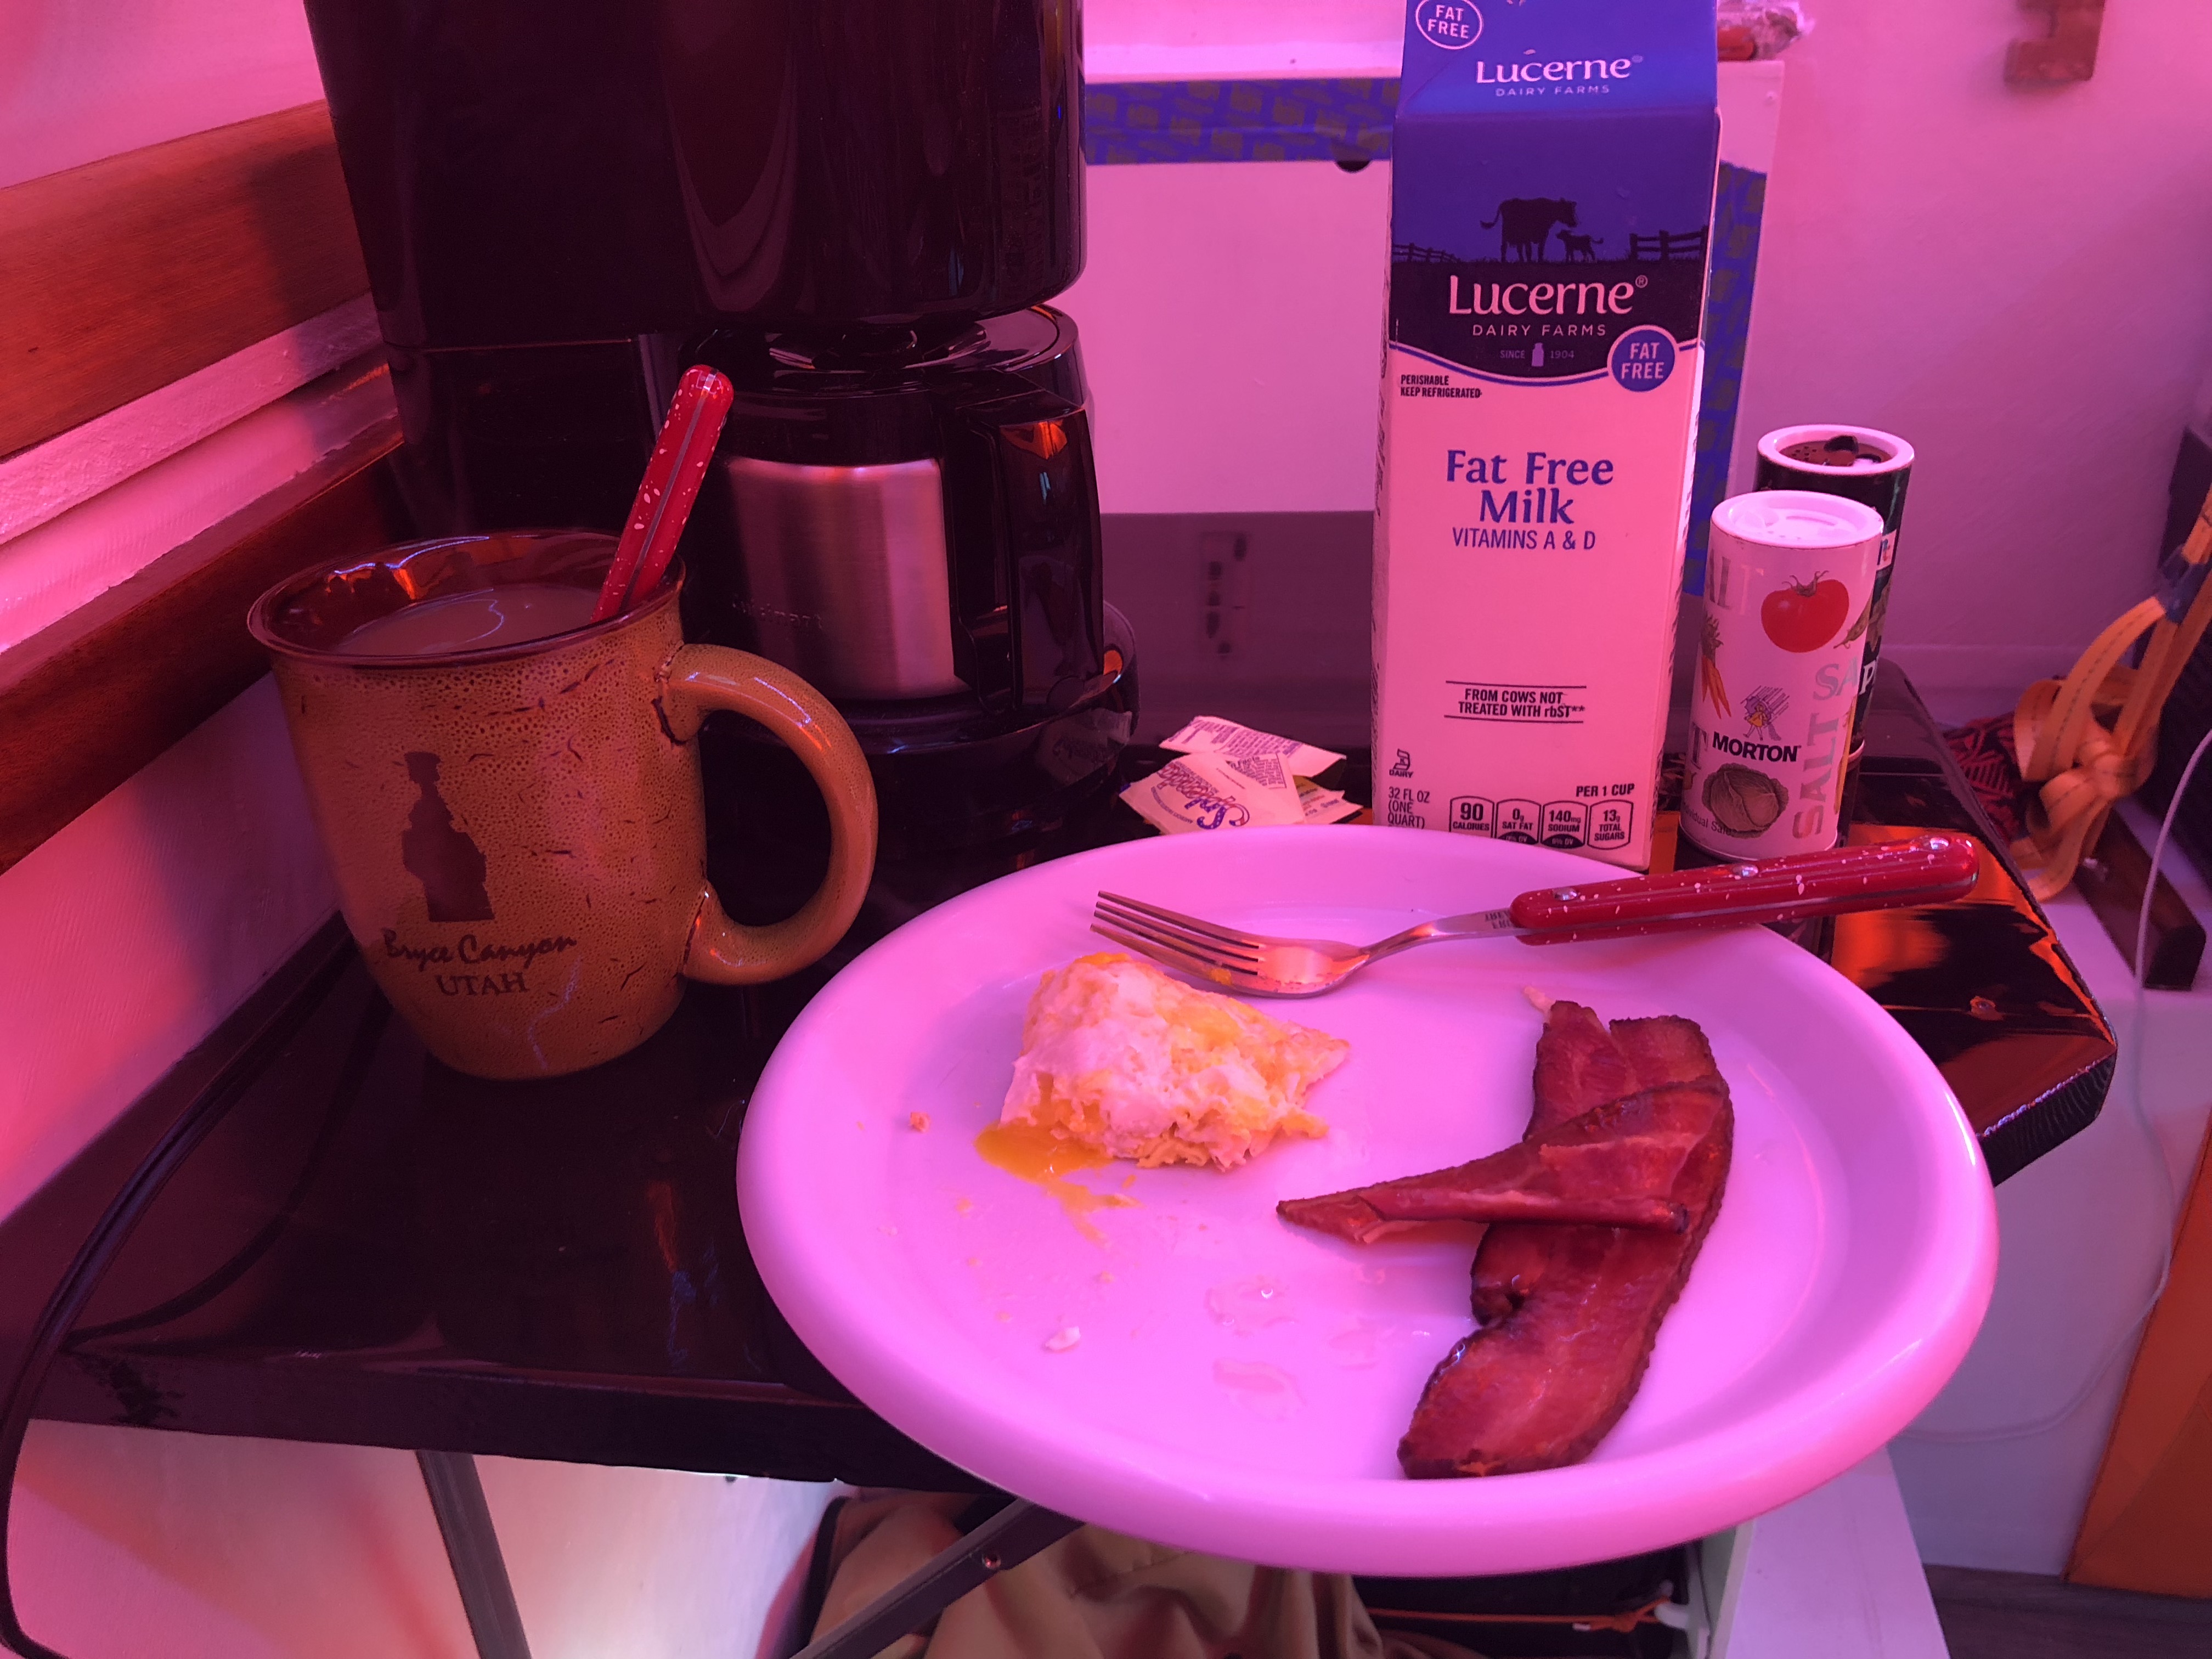
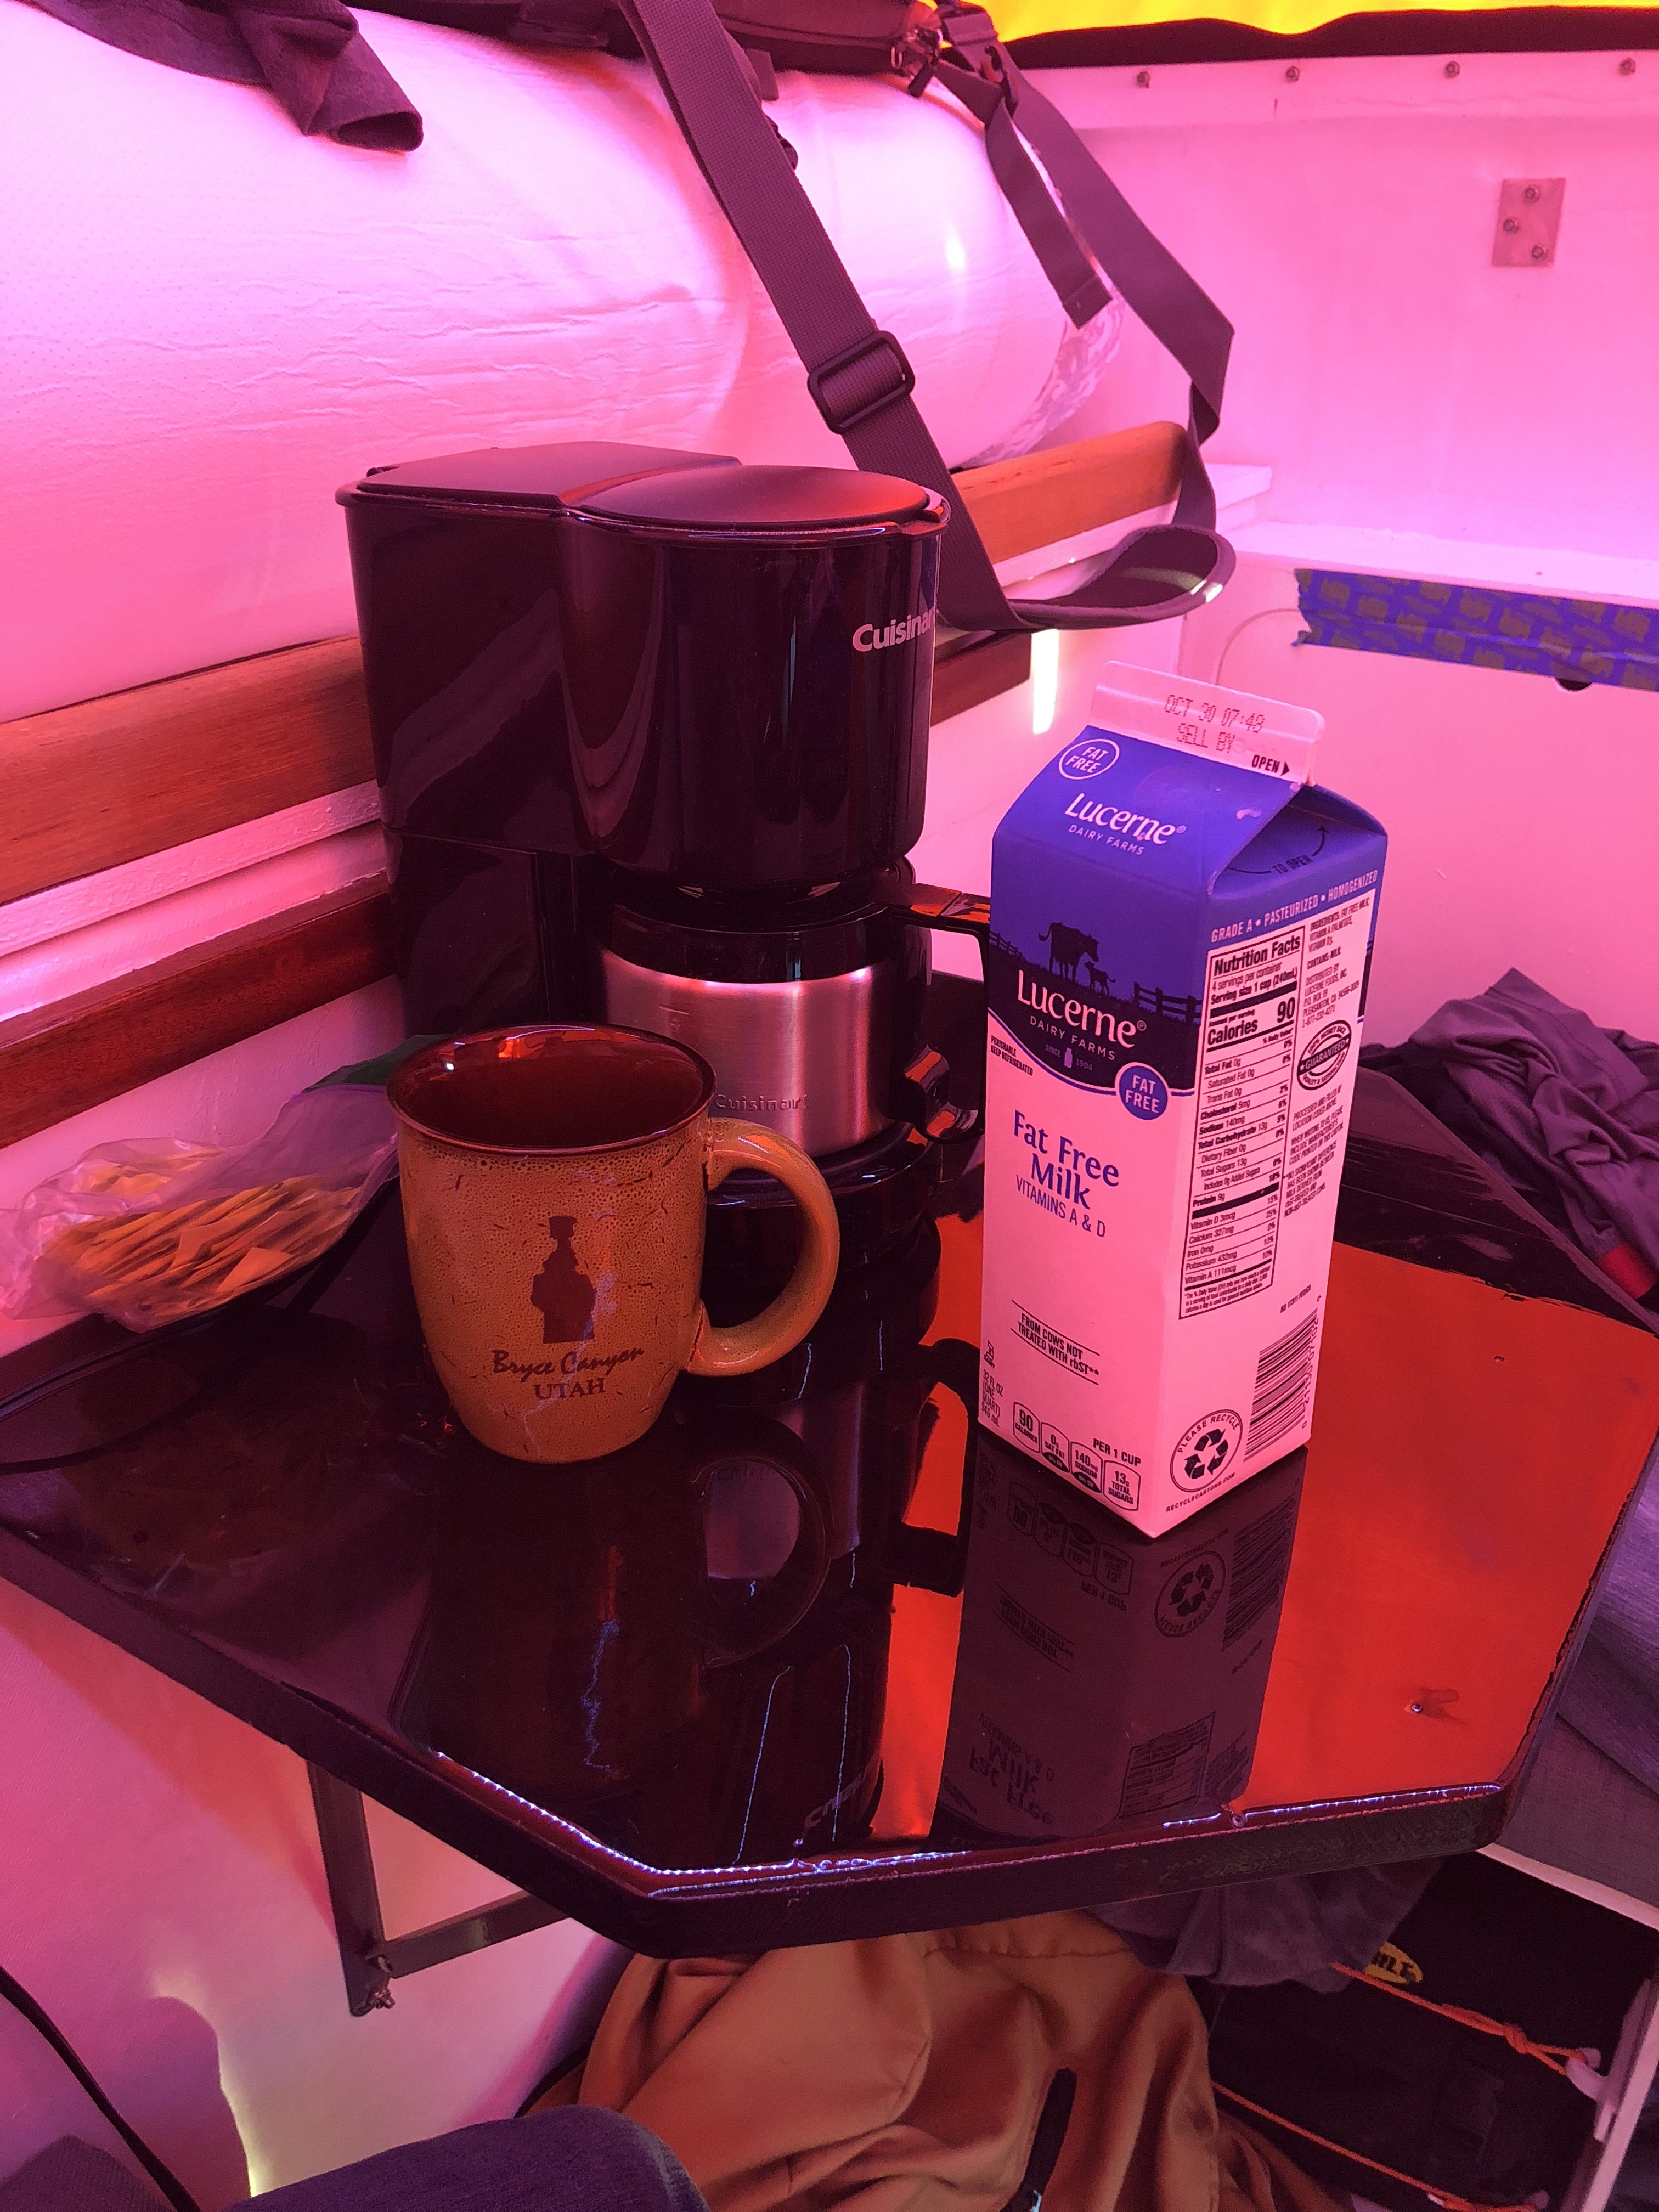
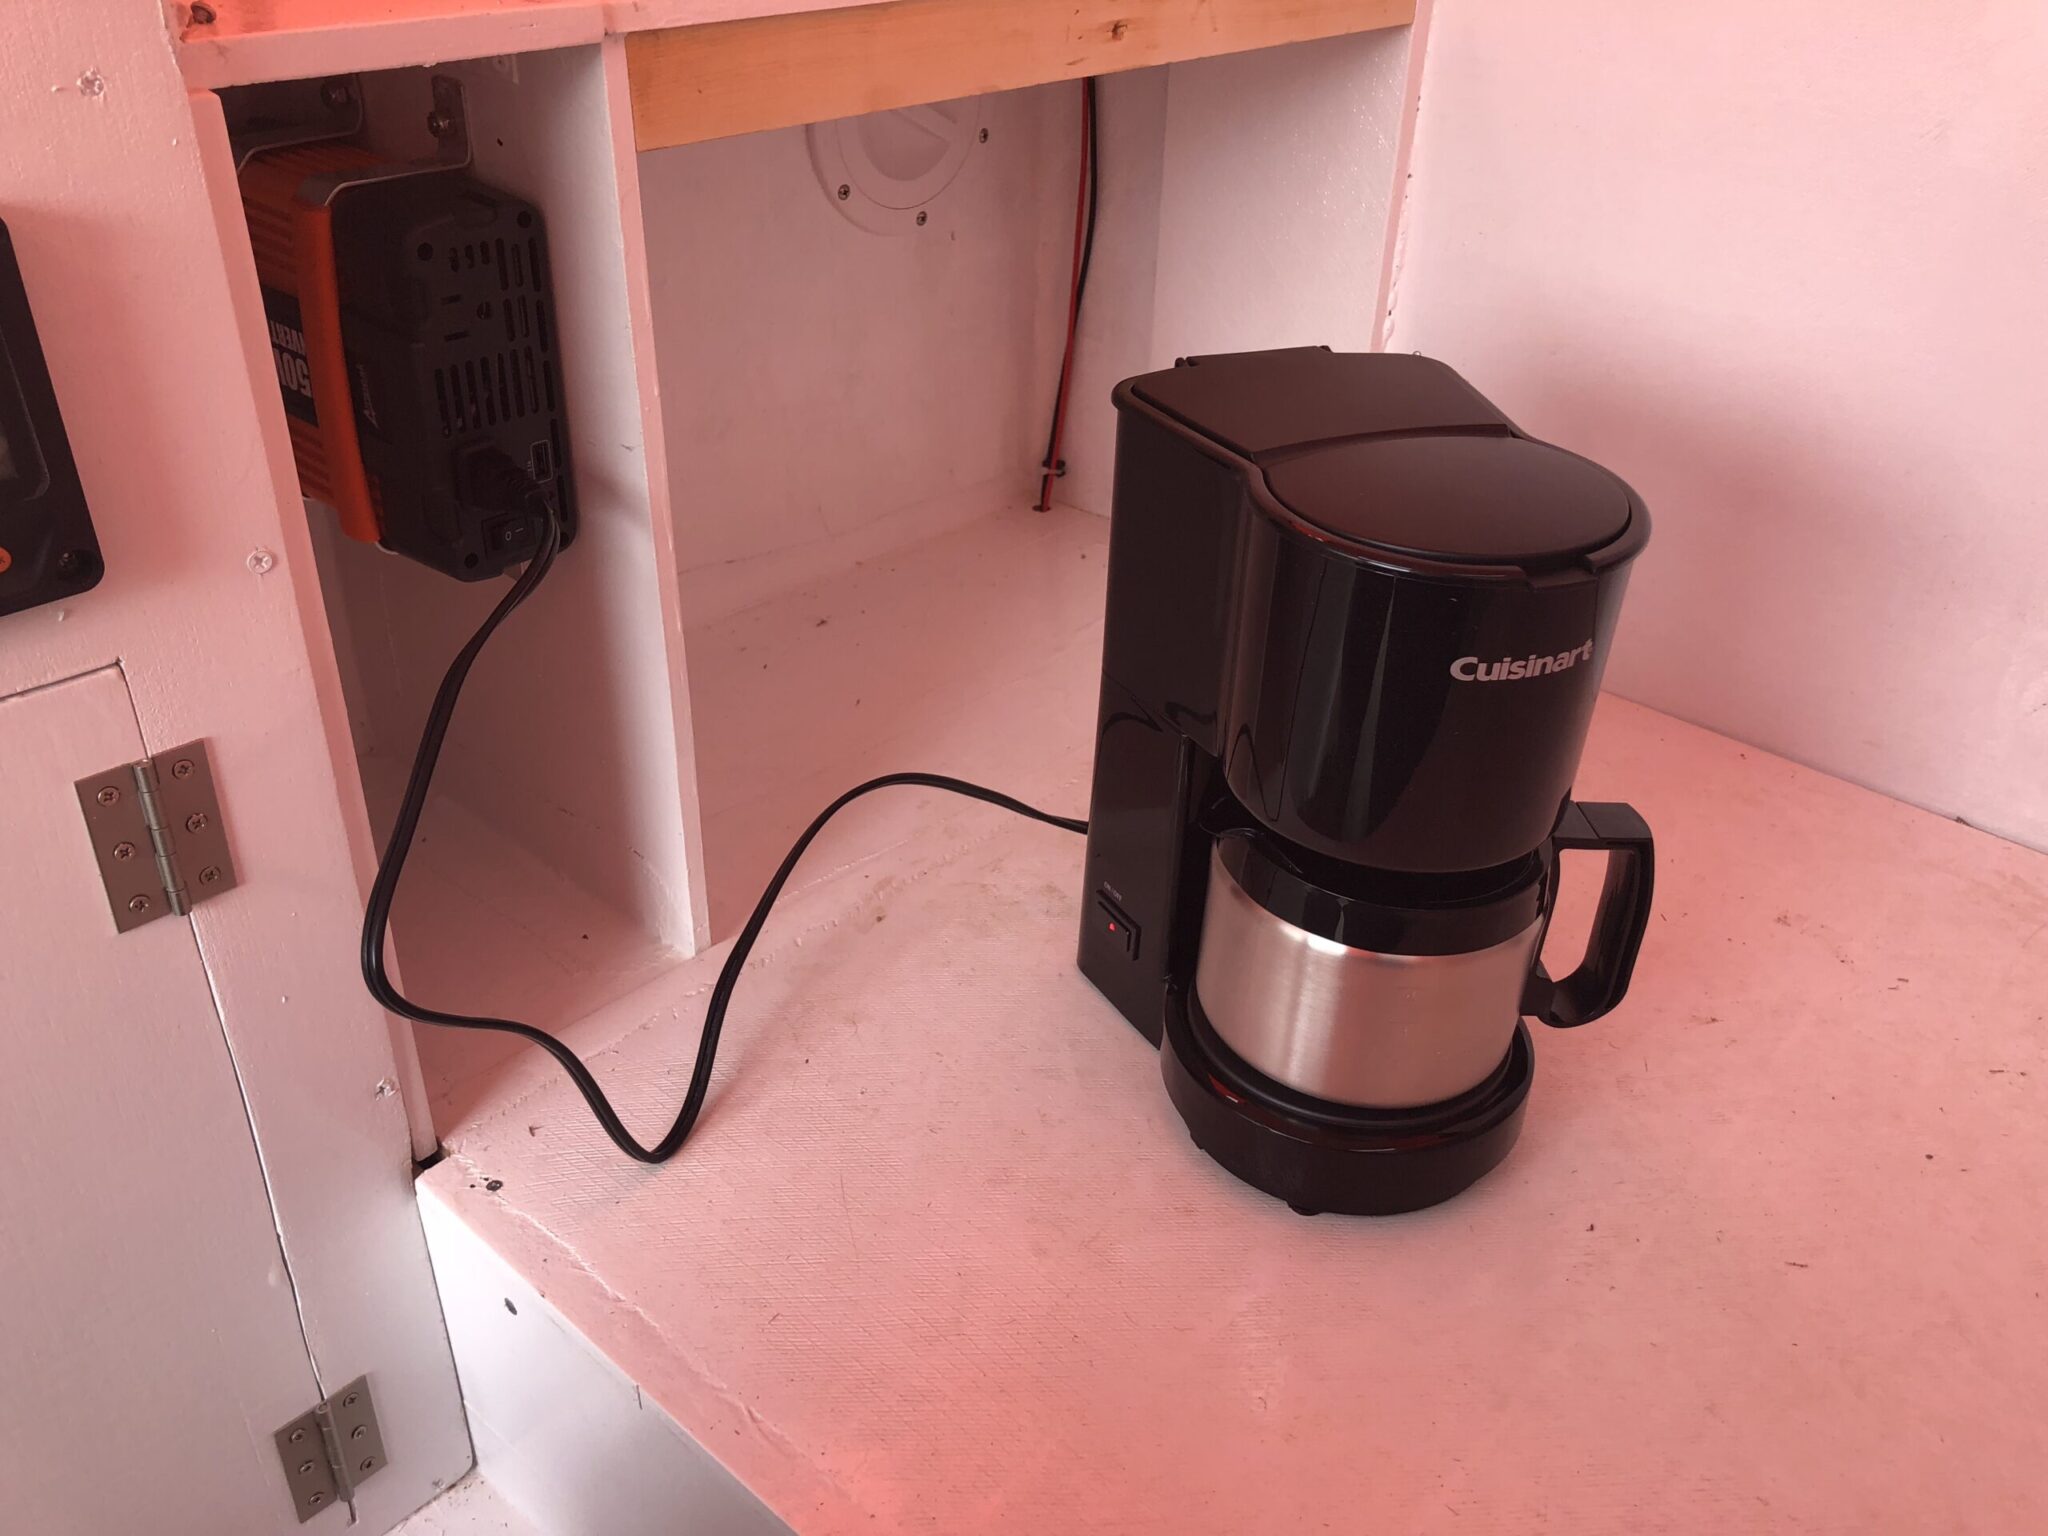
Since we have been backpacking people, camping people, and boat people, I’ve pretty much tried every way to make coffee. My current non-electric favorite is pour-over coffee because it’s easy and I honestly actually like the taste of drip coffee to french press. However, we actually have a really ************ battery bank and electrical setup in the camper, so I was wondering if I could just forego the complexity of boiling water in favor of just pushing a button instead. (if you overcook water, it burns. Lessons learned. I don’t cook anymore). I found a little 4 pot unit that advertised a fairly low watt rating. It also had a stainless steel carafe instead of glass. I figured that would probably be a safer bet in a moving vehicle.

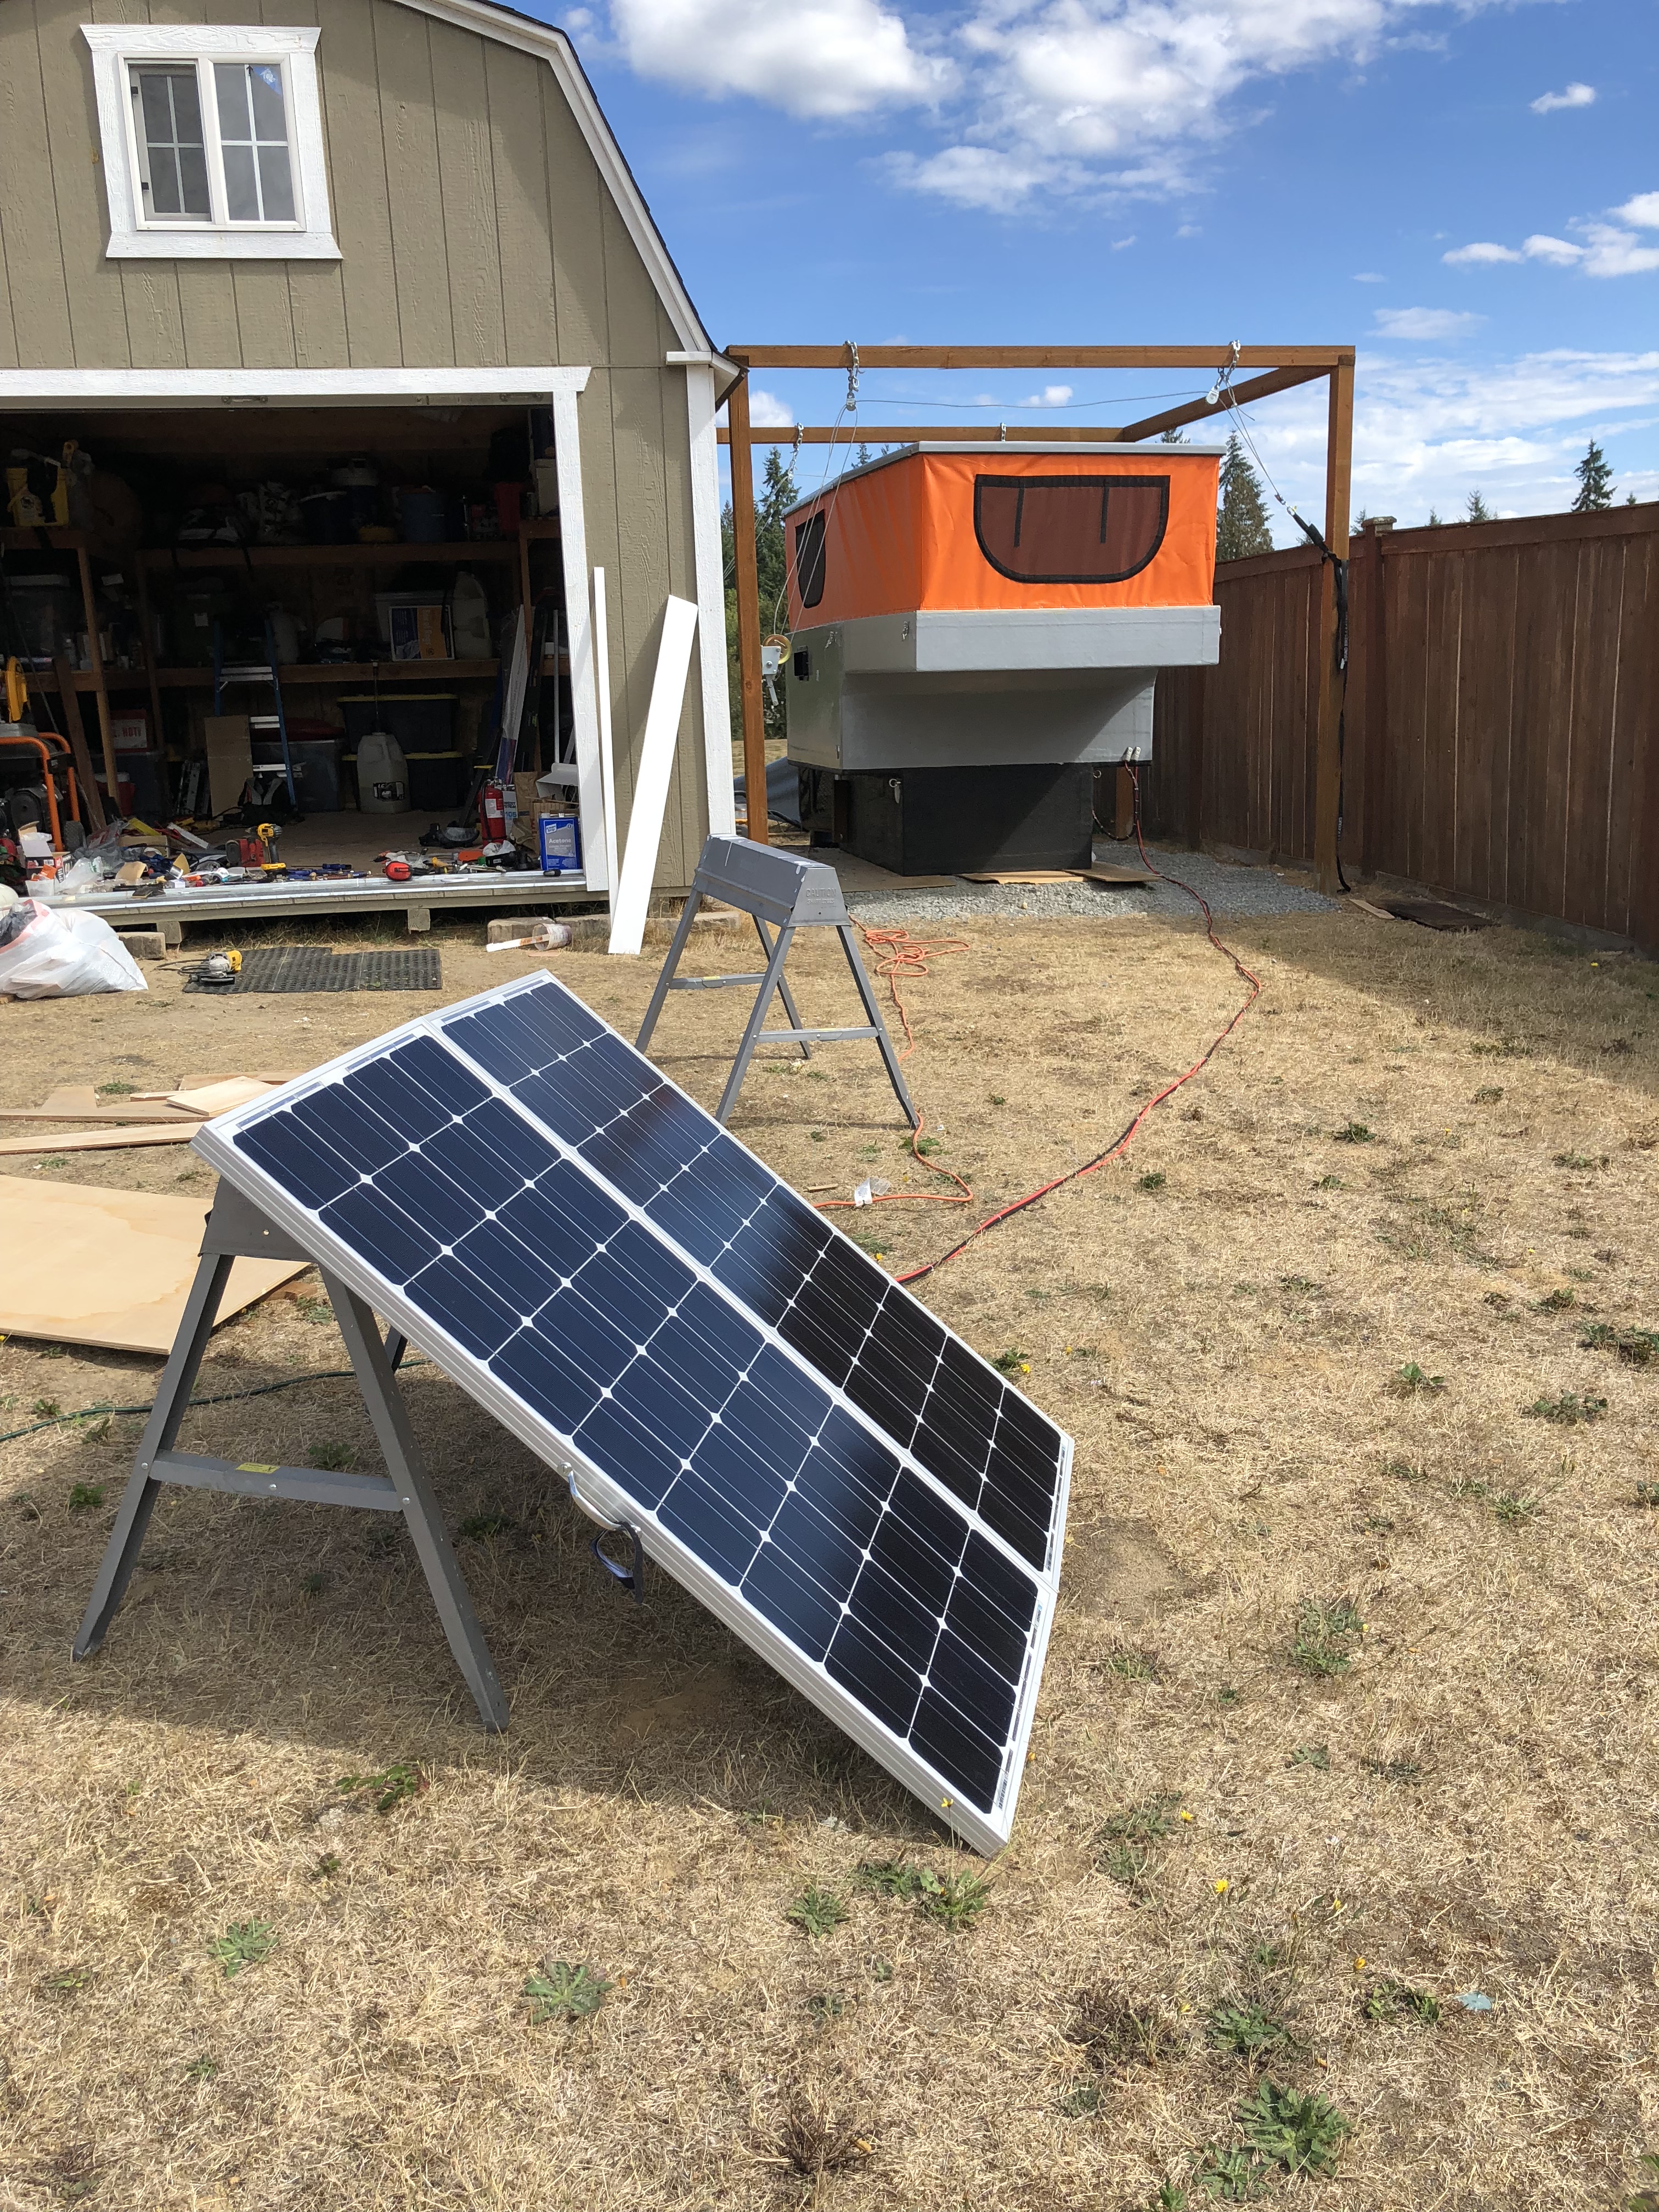
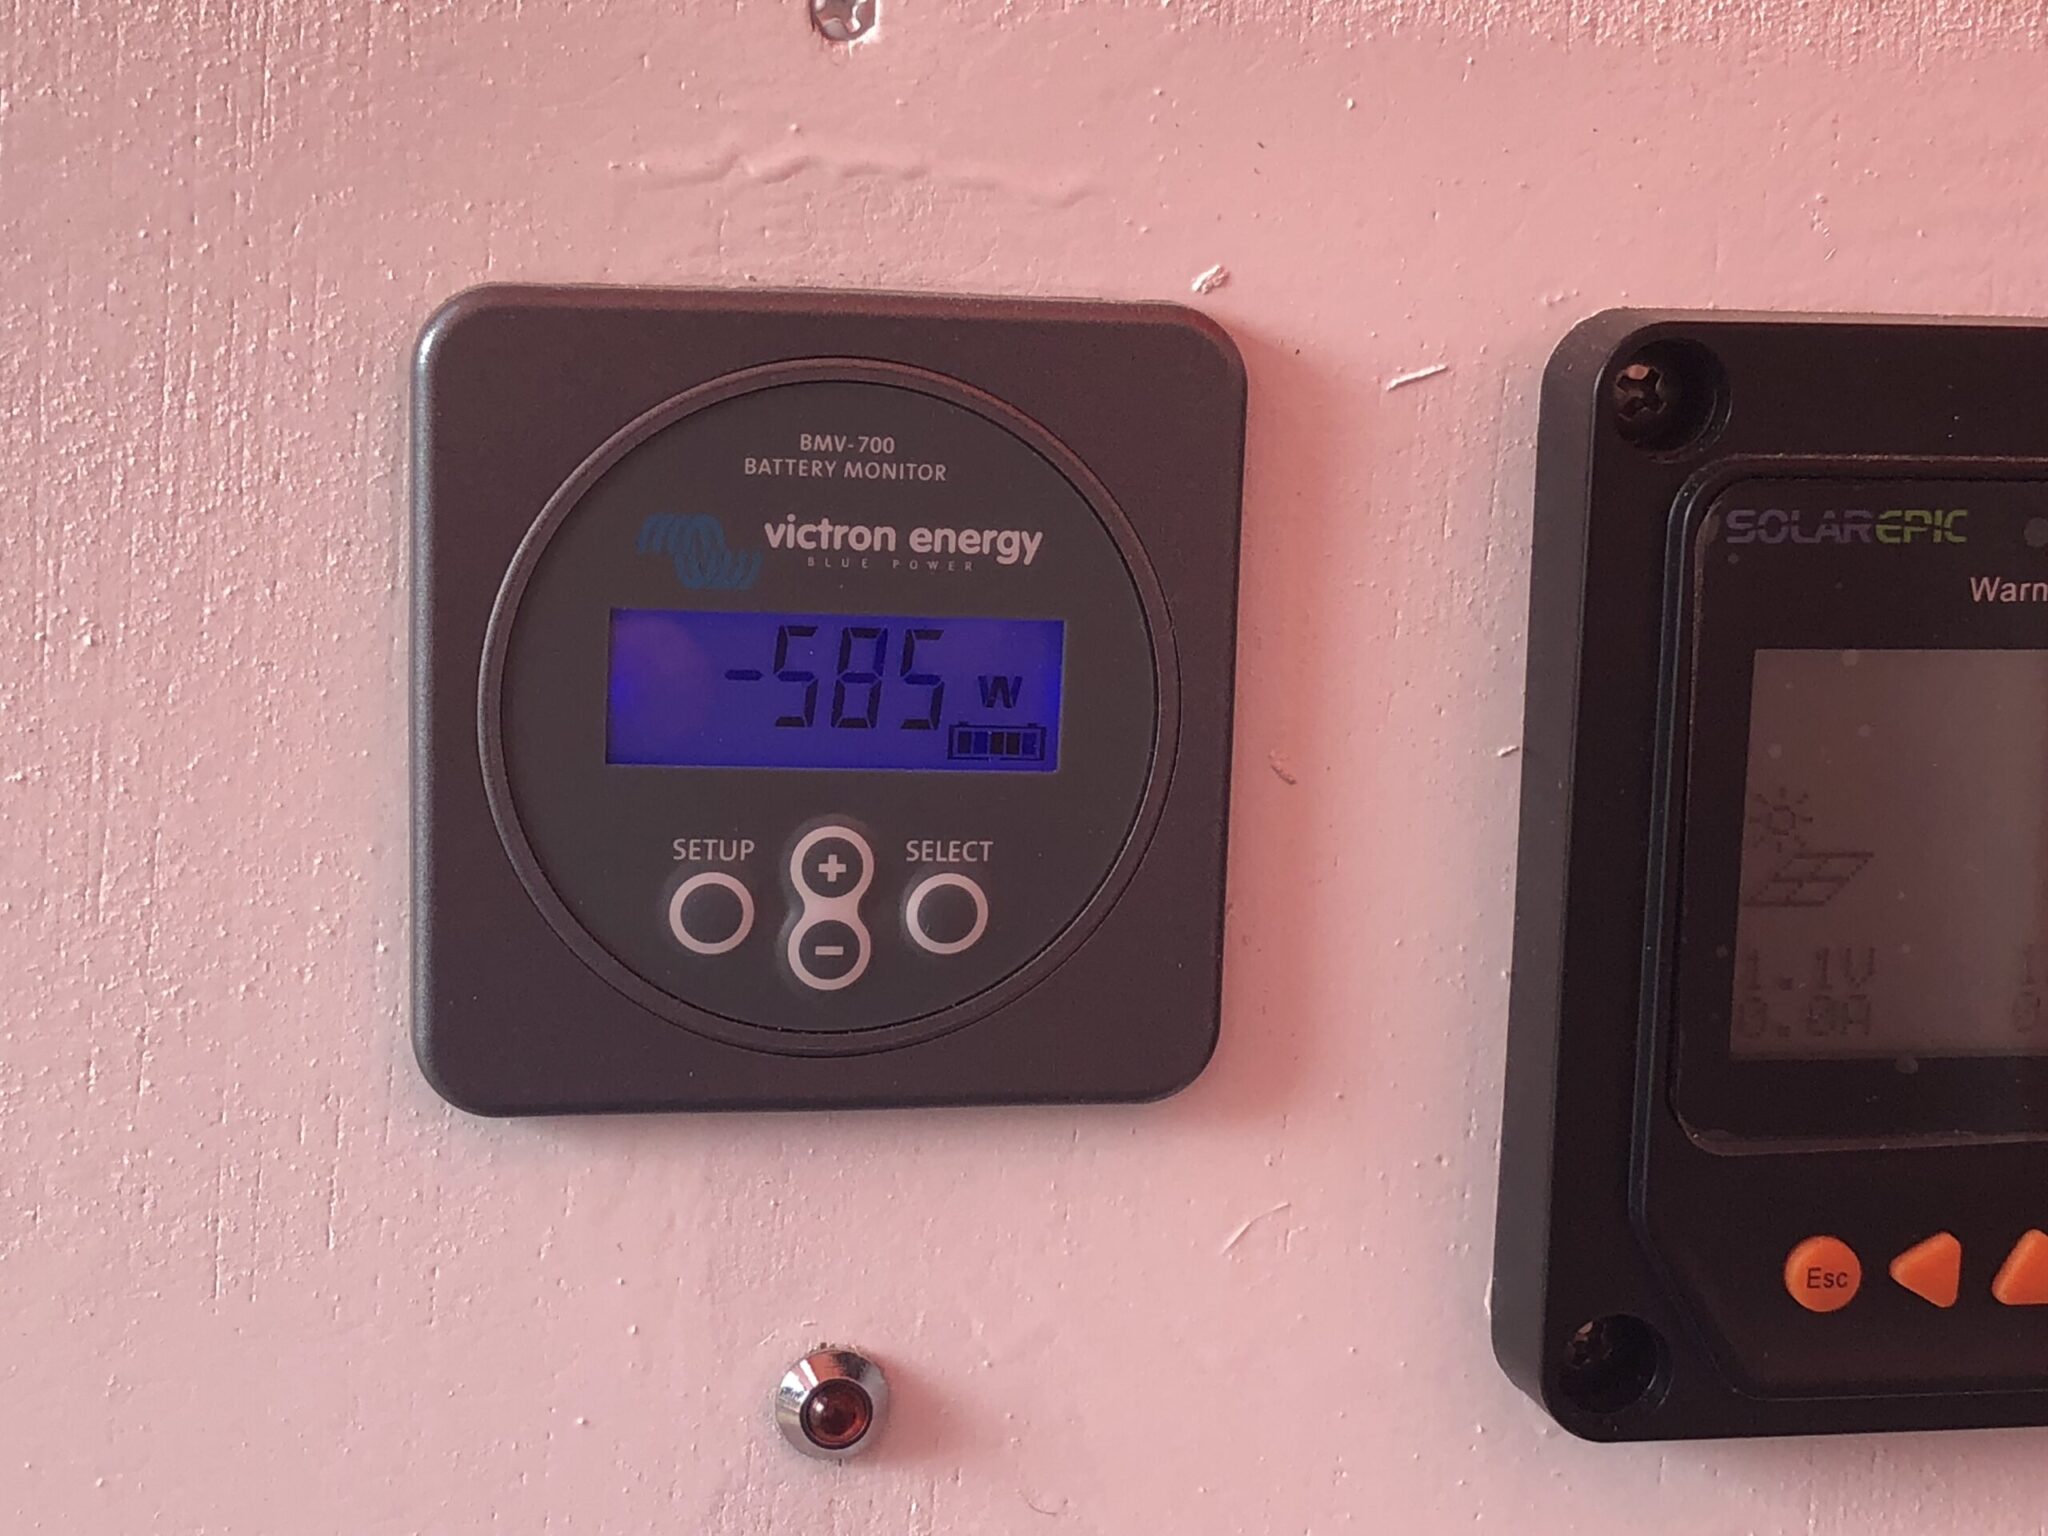
Jason, who has known to be fairly stingy with system usage, gave me the green light to get a small electric coffee pot and see what happened. We bought the 750 watt power inverter and installed that last week. Today while Jason was out golfing I wanted some coffee and decided to give it a shot. The final verdict was: 4.2% battery life drop, and 5.7 amp hours used at 585 Watts. Overall not bad at all! Especially since we can charge the battery back up with the truck or the solar panels.

IMG_0697.jpg

The power draw was pretty low. The little pot only runs for maybe 5 minutes.
IMG_0694.jpg

So now, no matter how the rest of our trip goes, I will at least have coffee available!

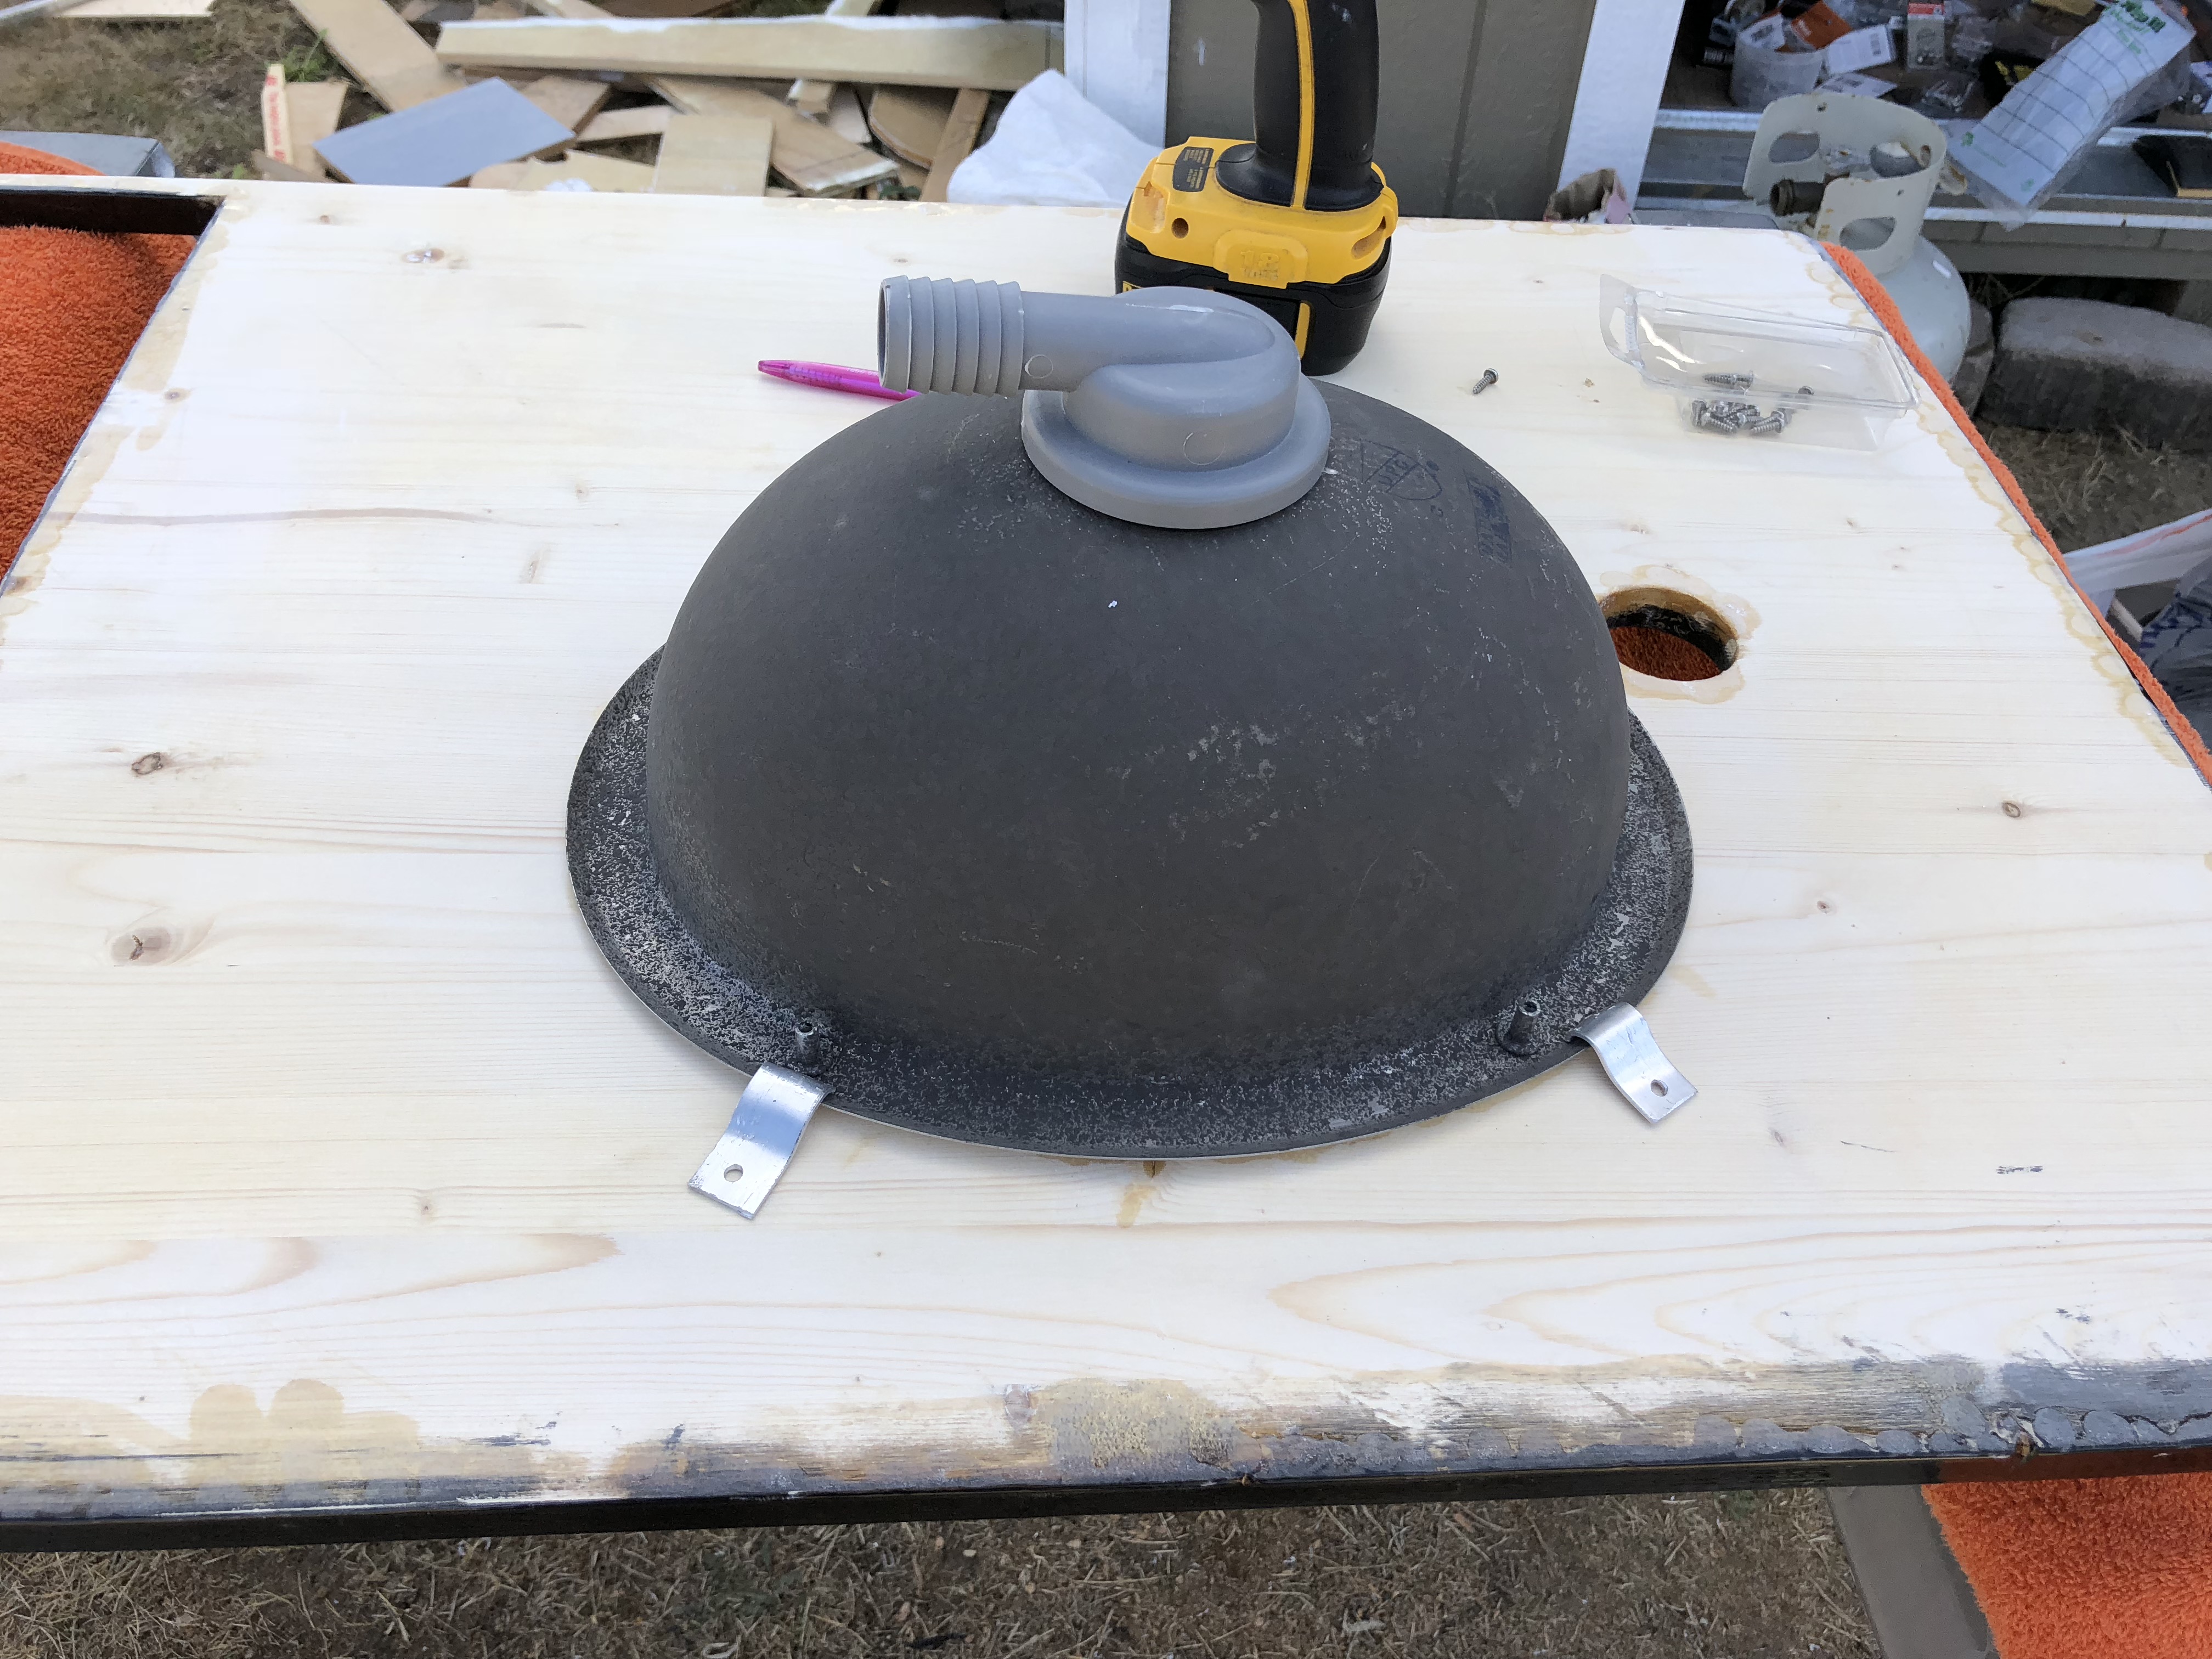
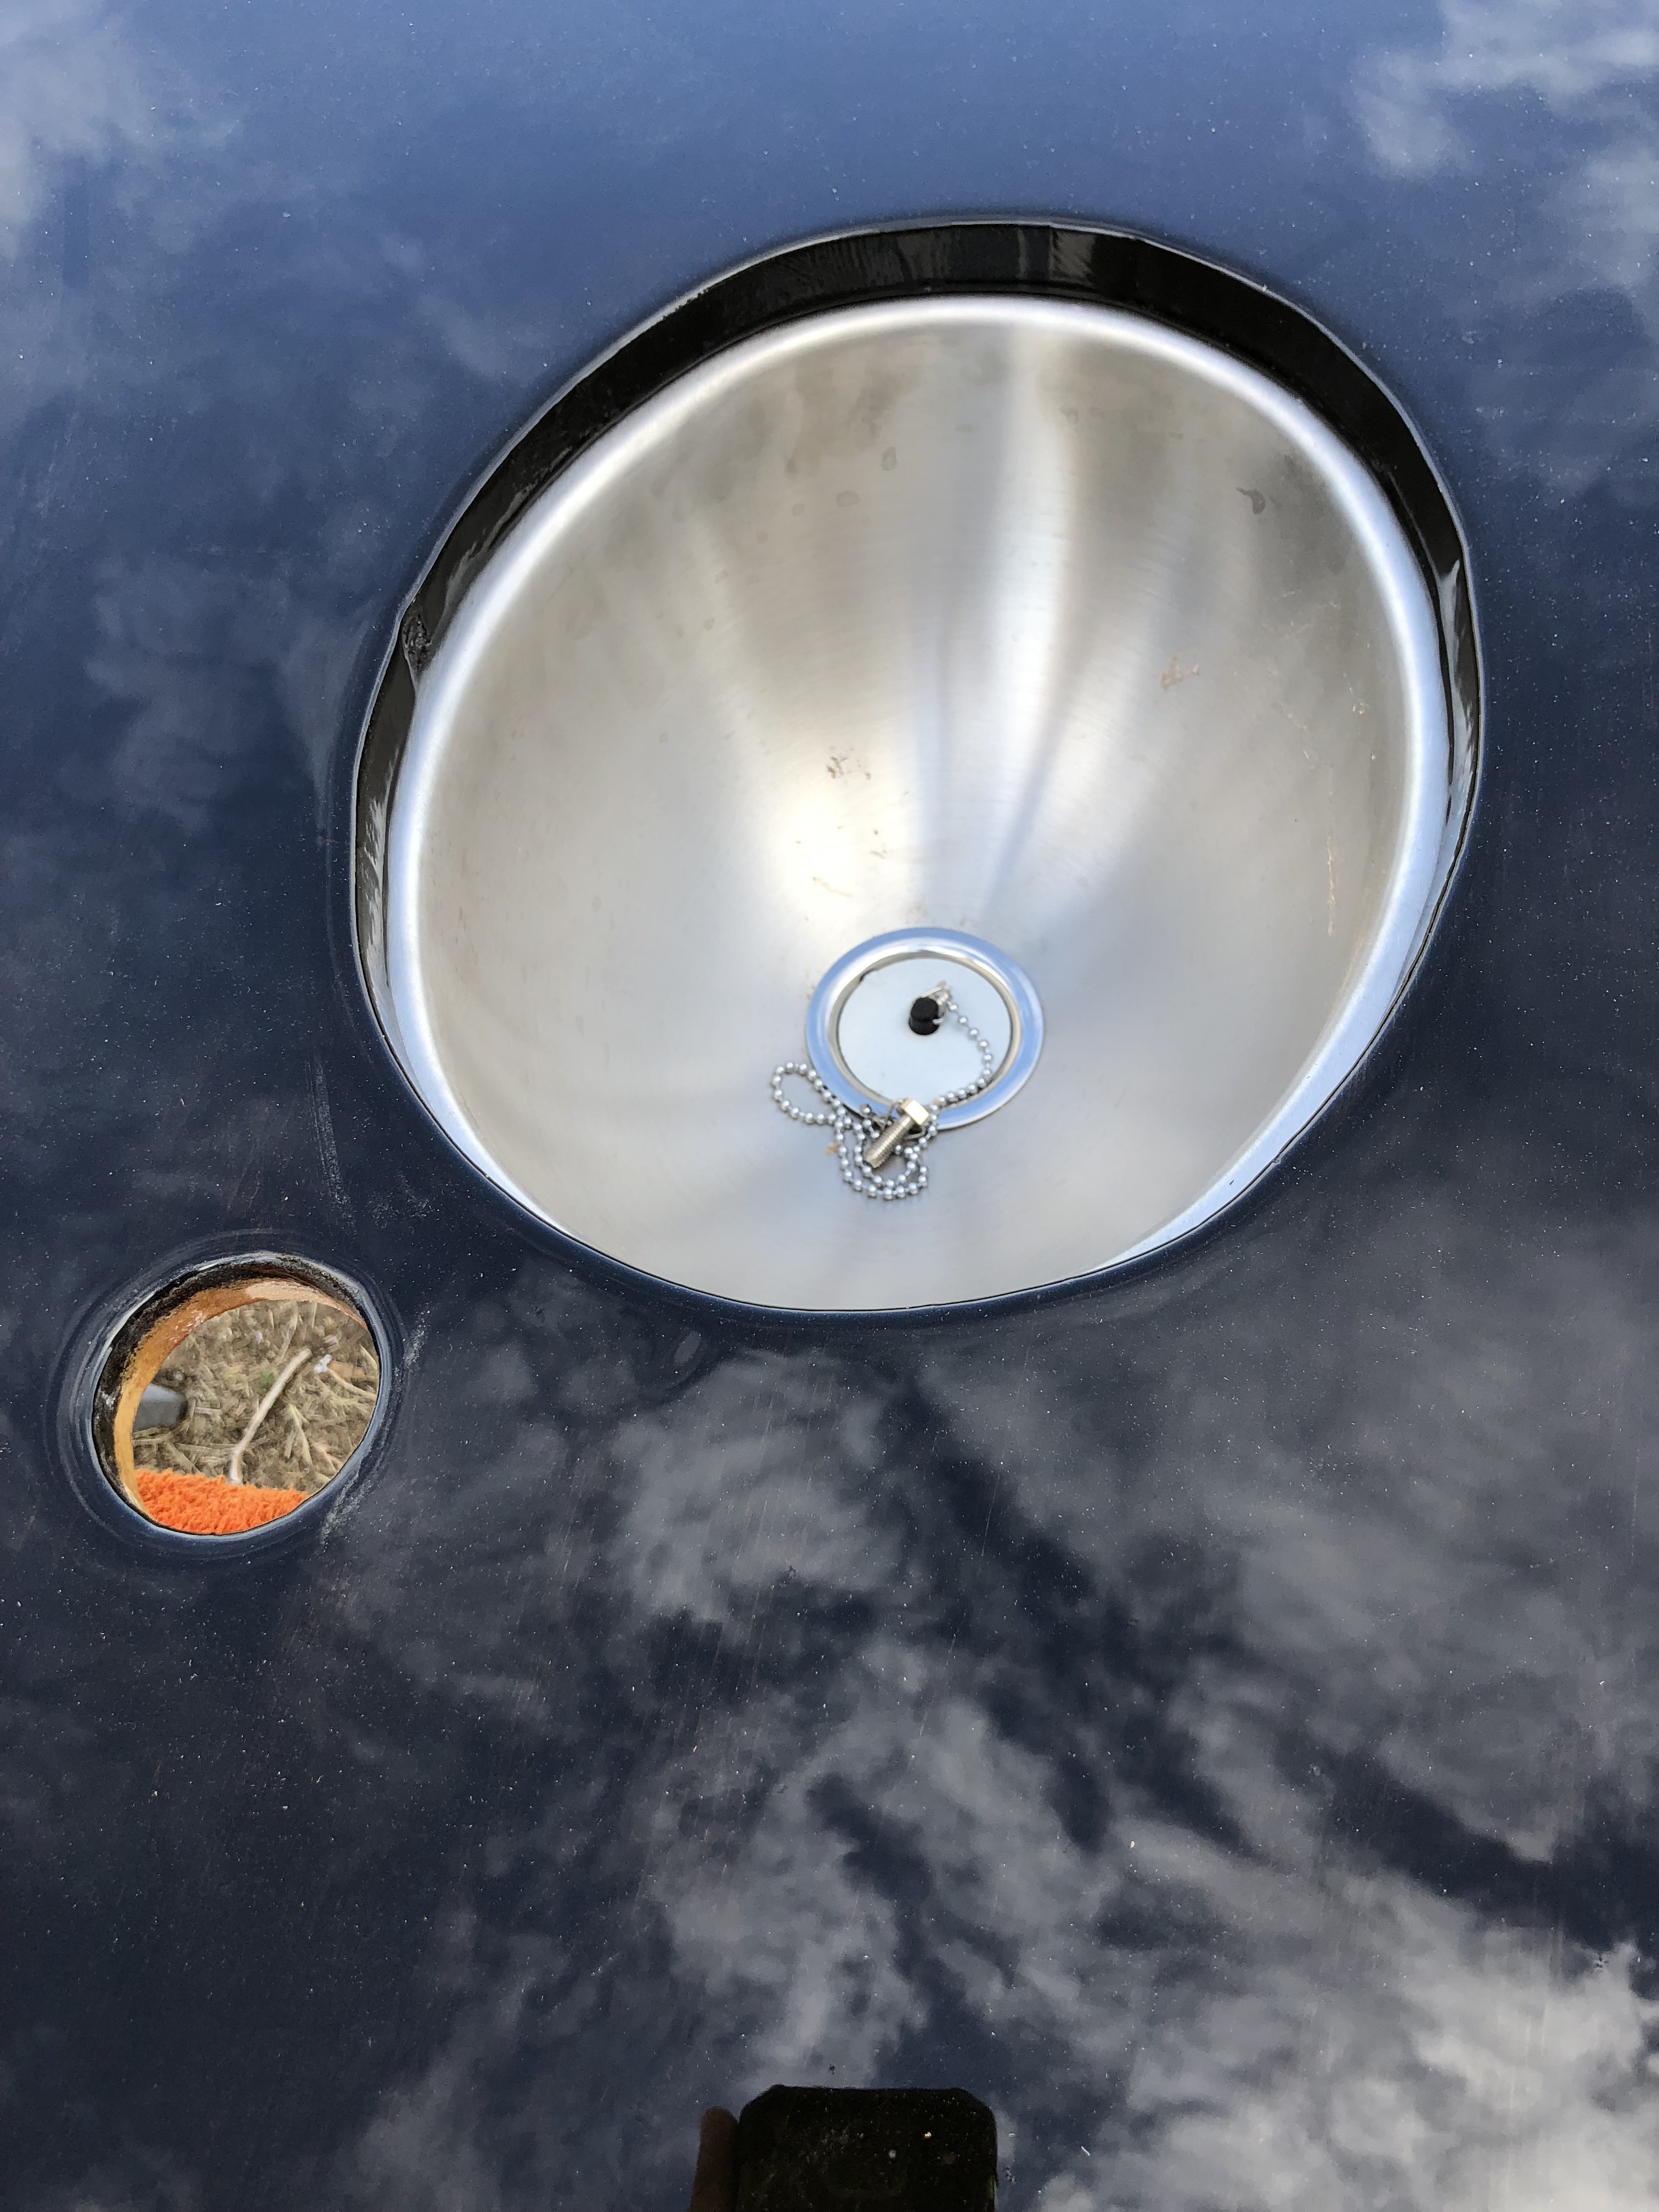
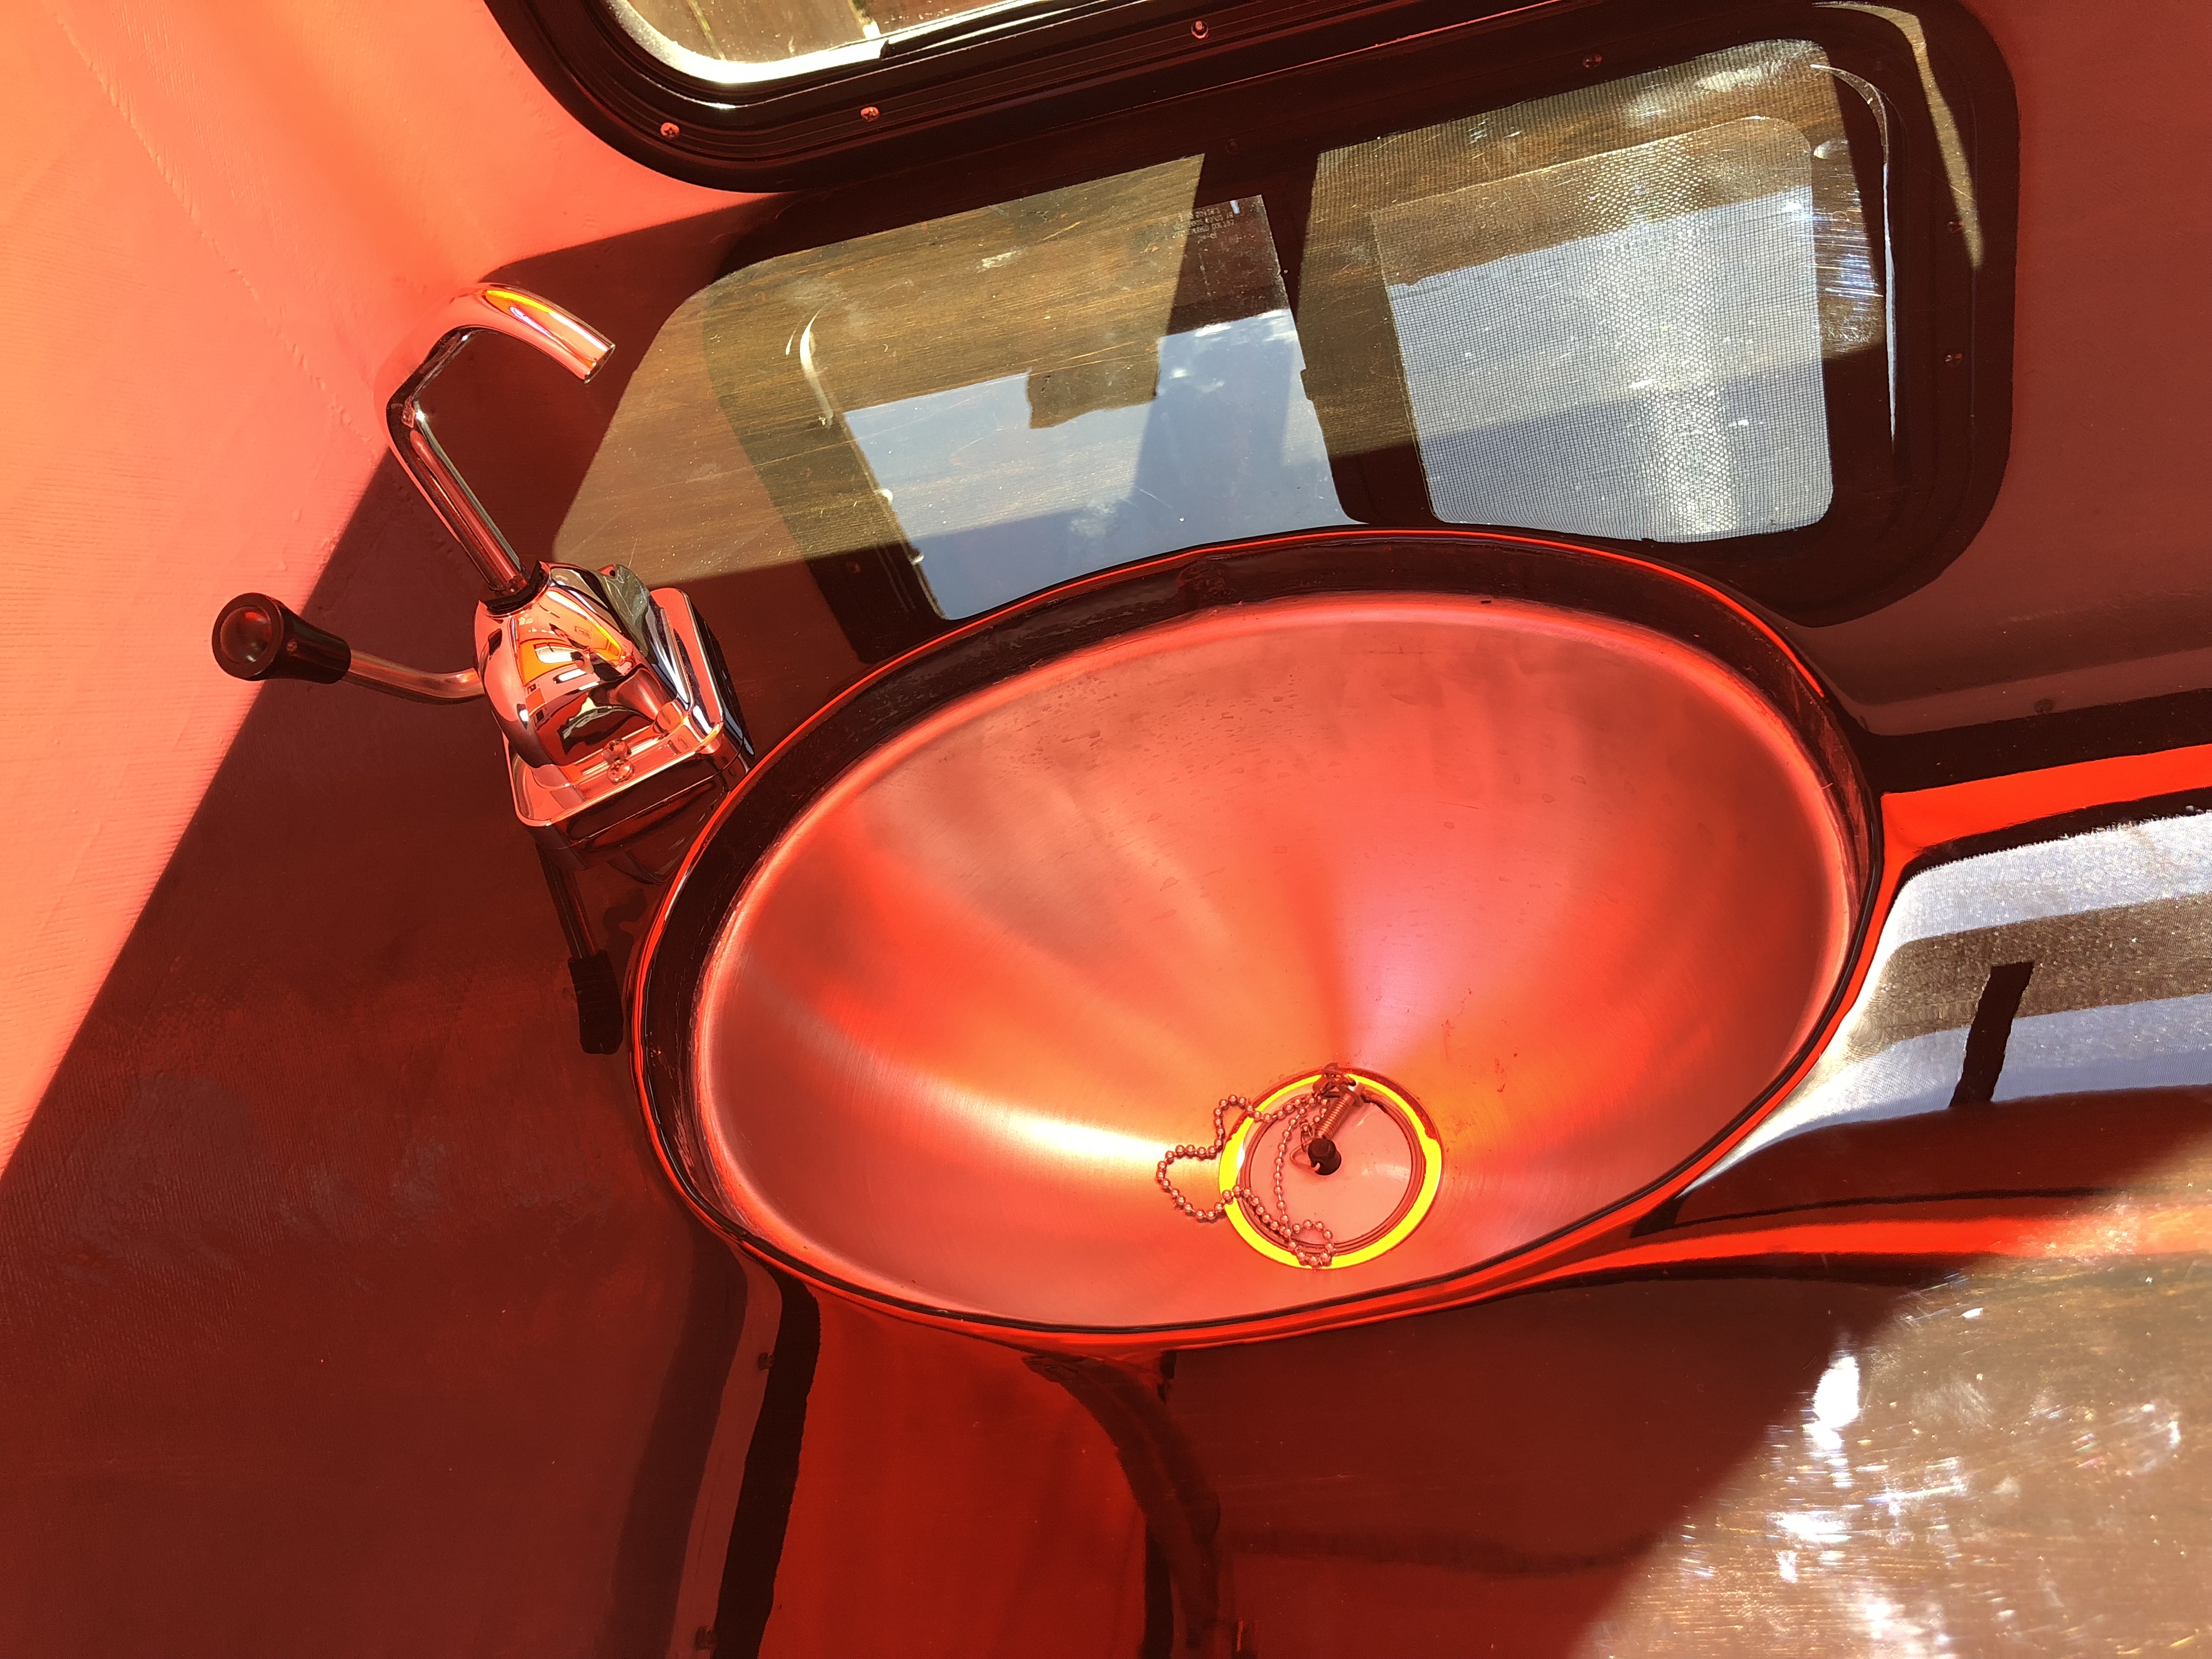
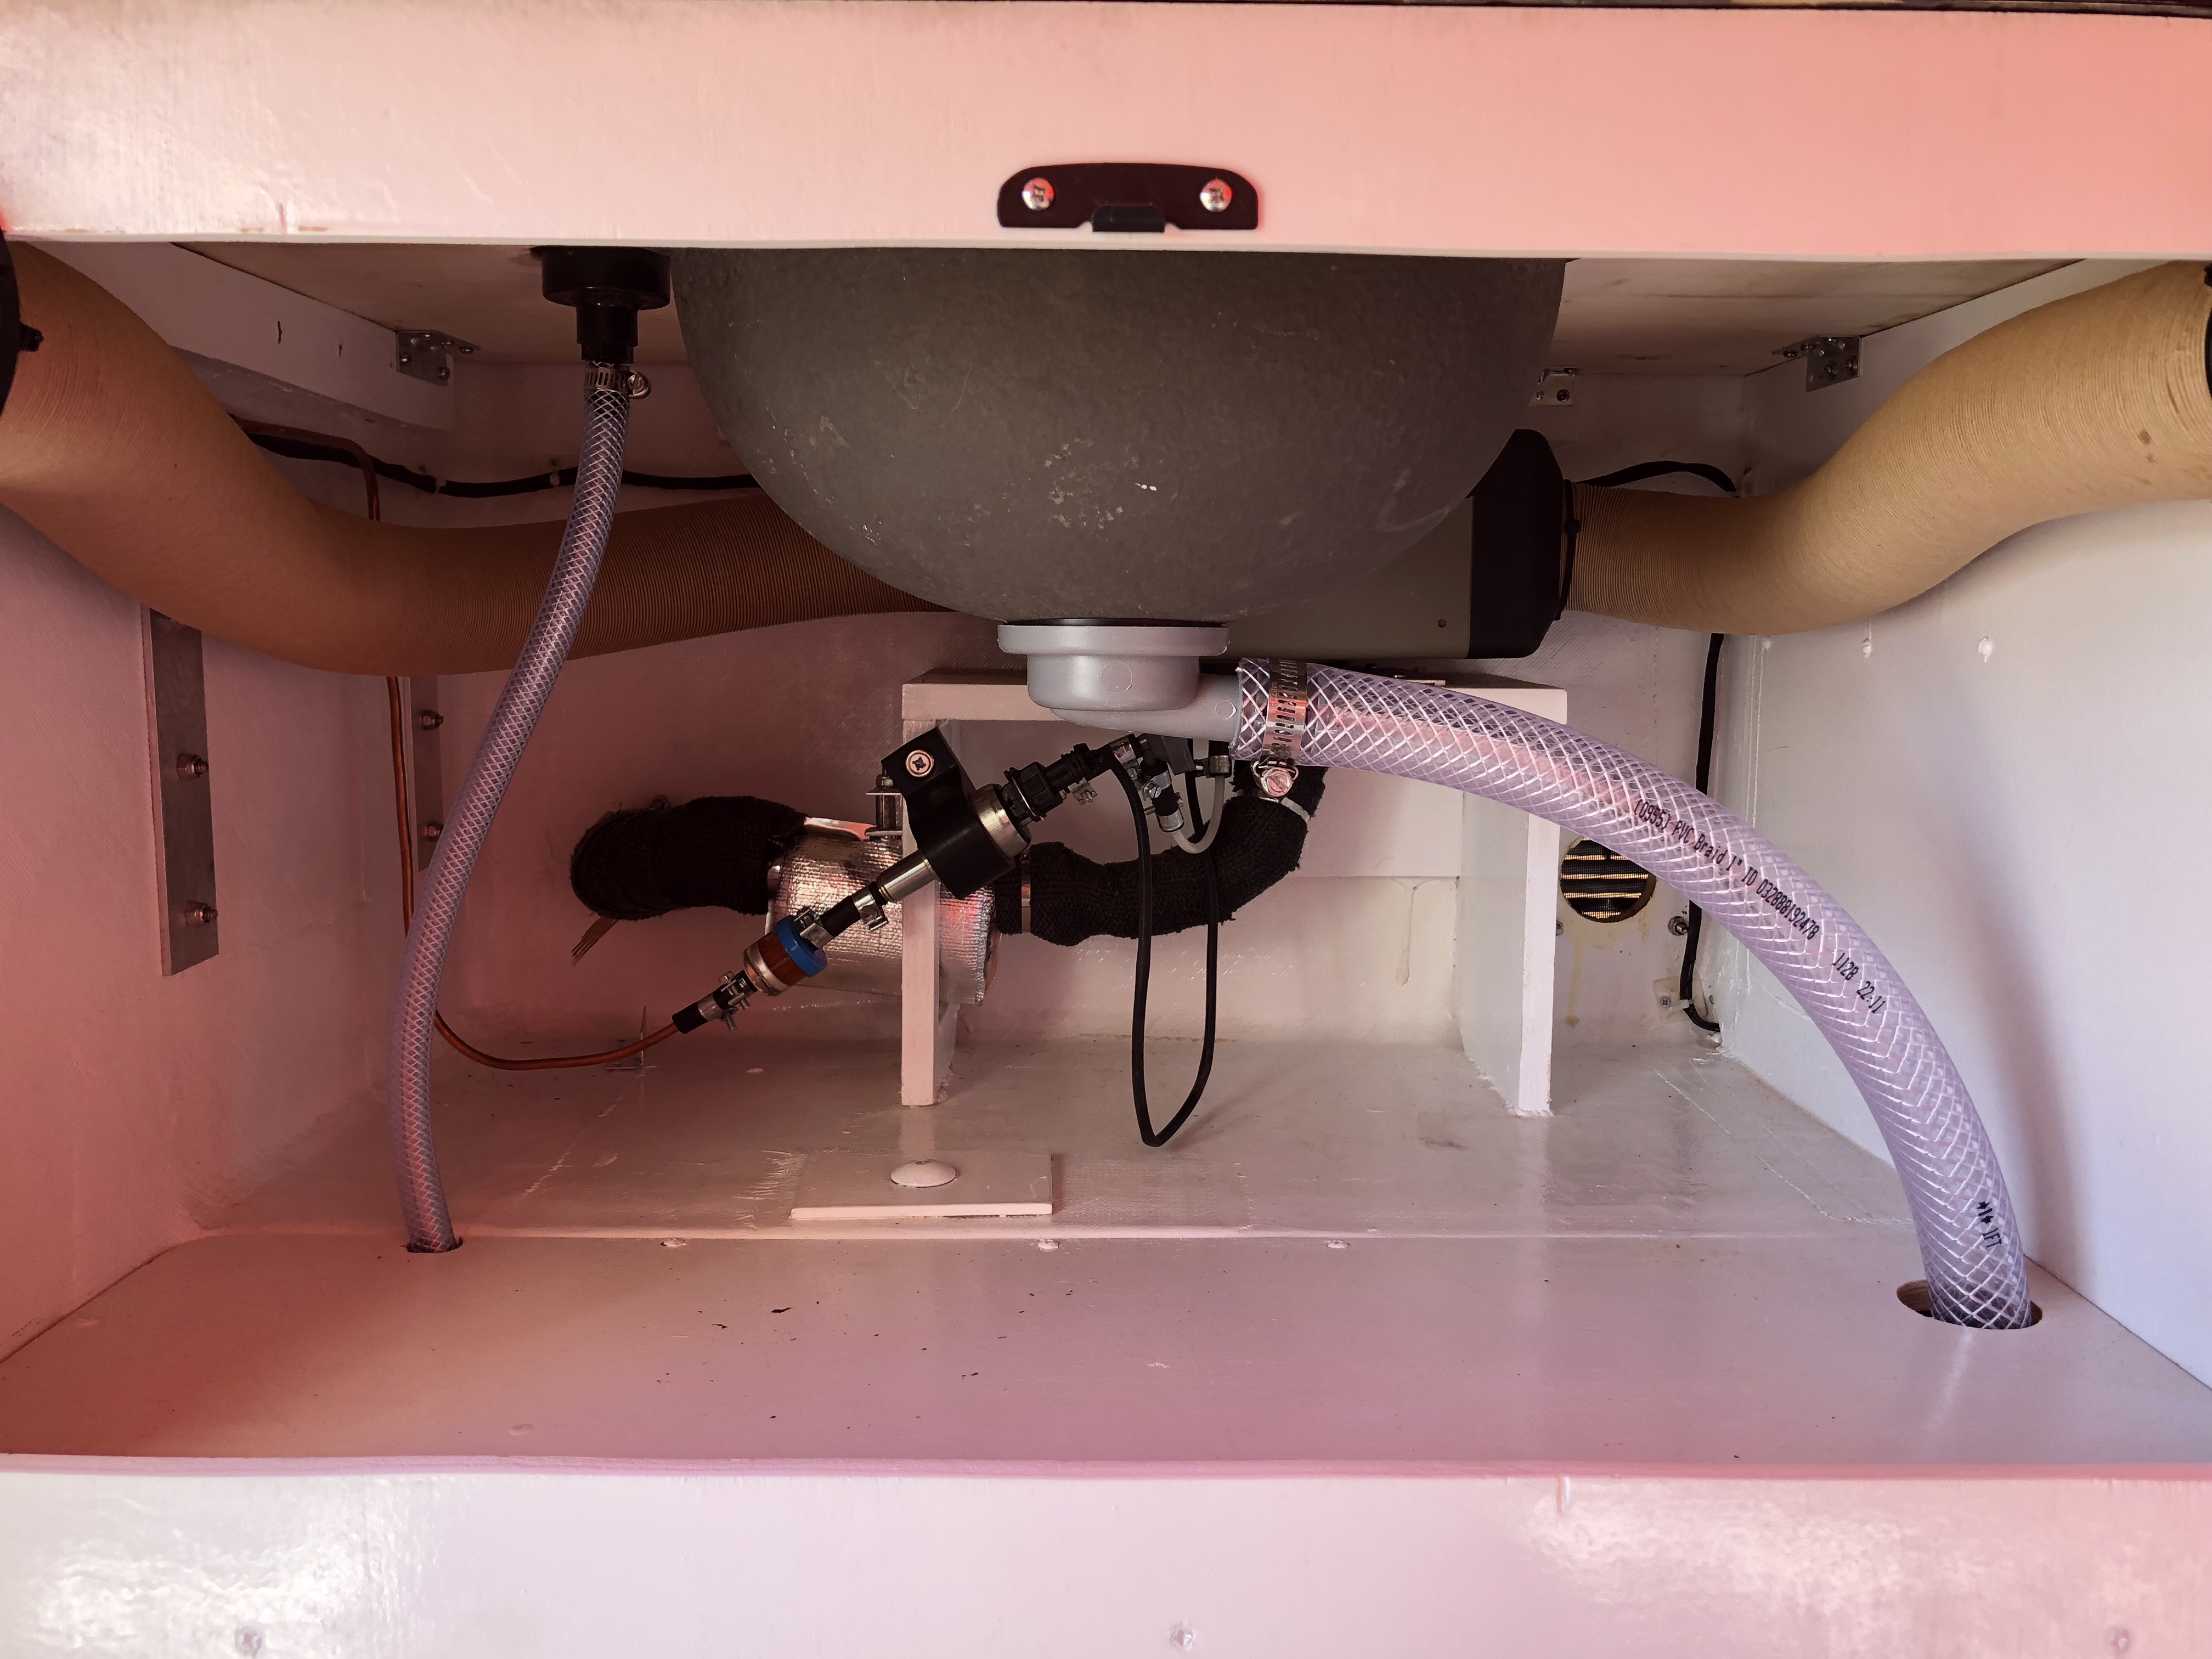
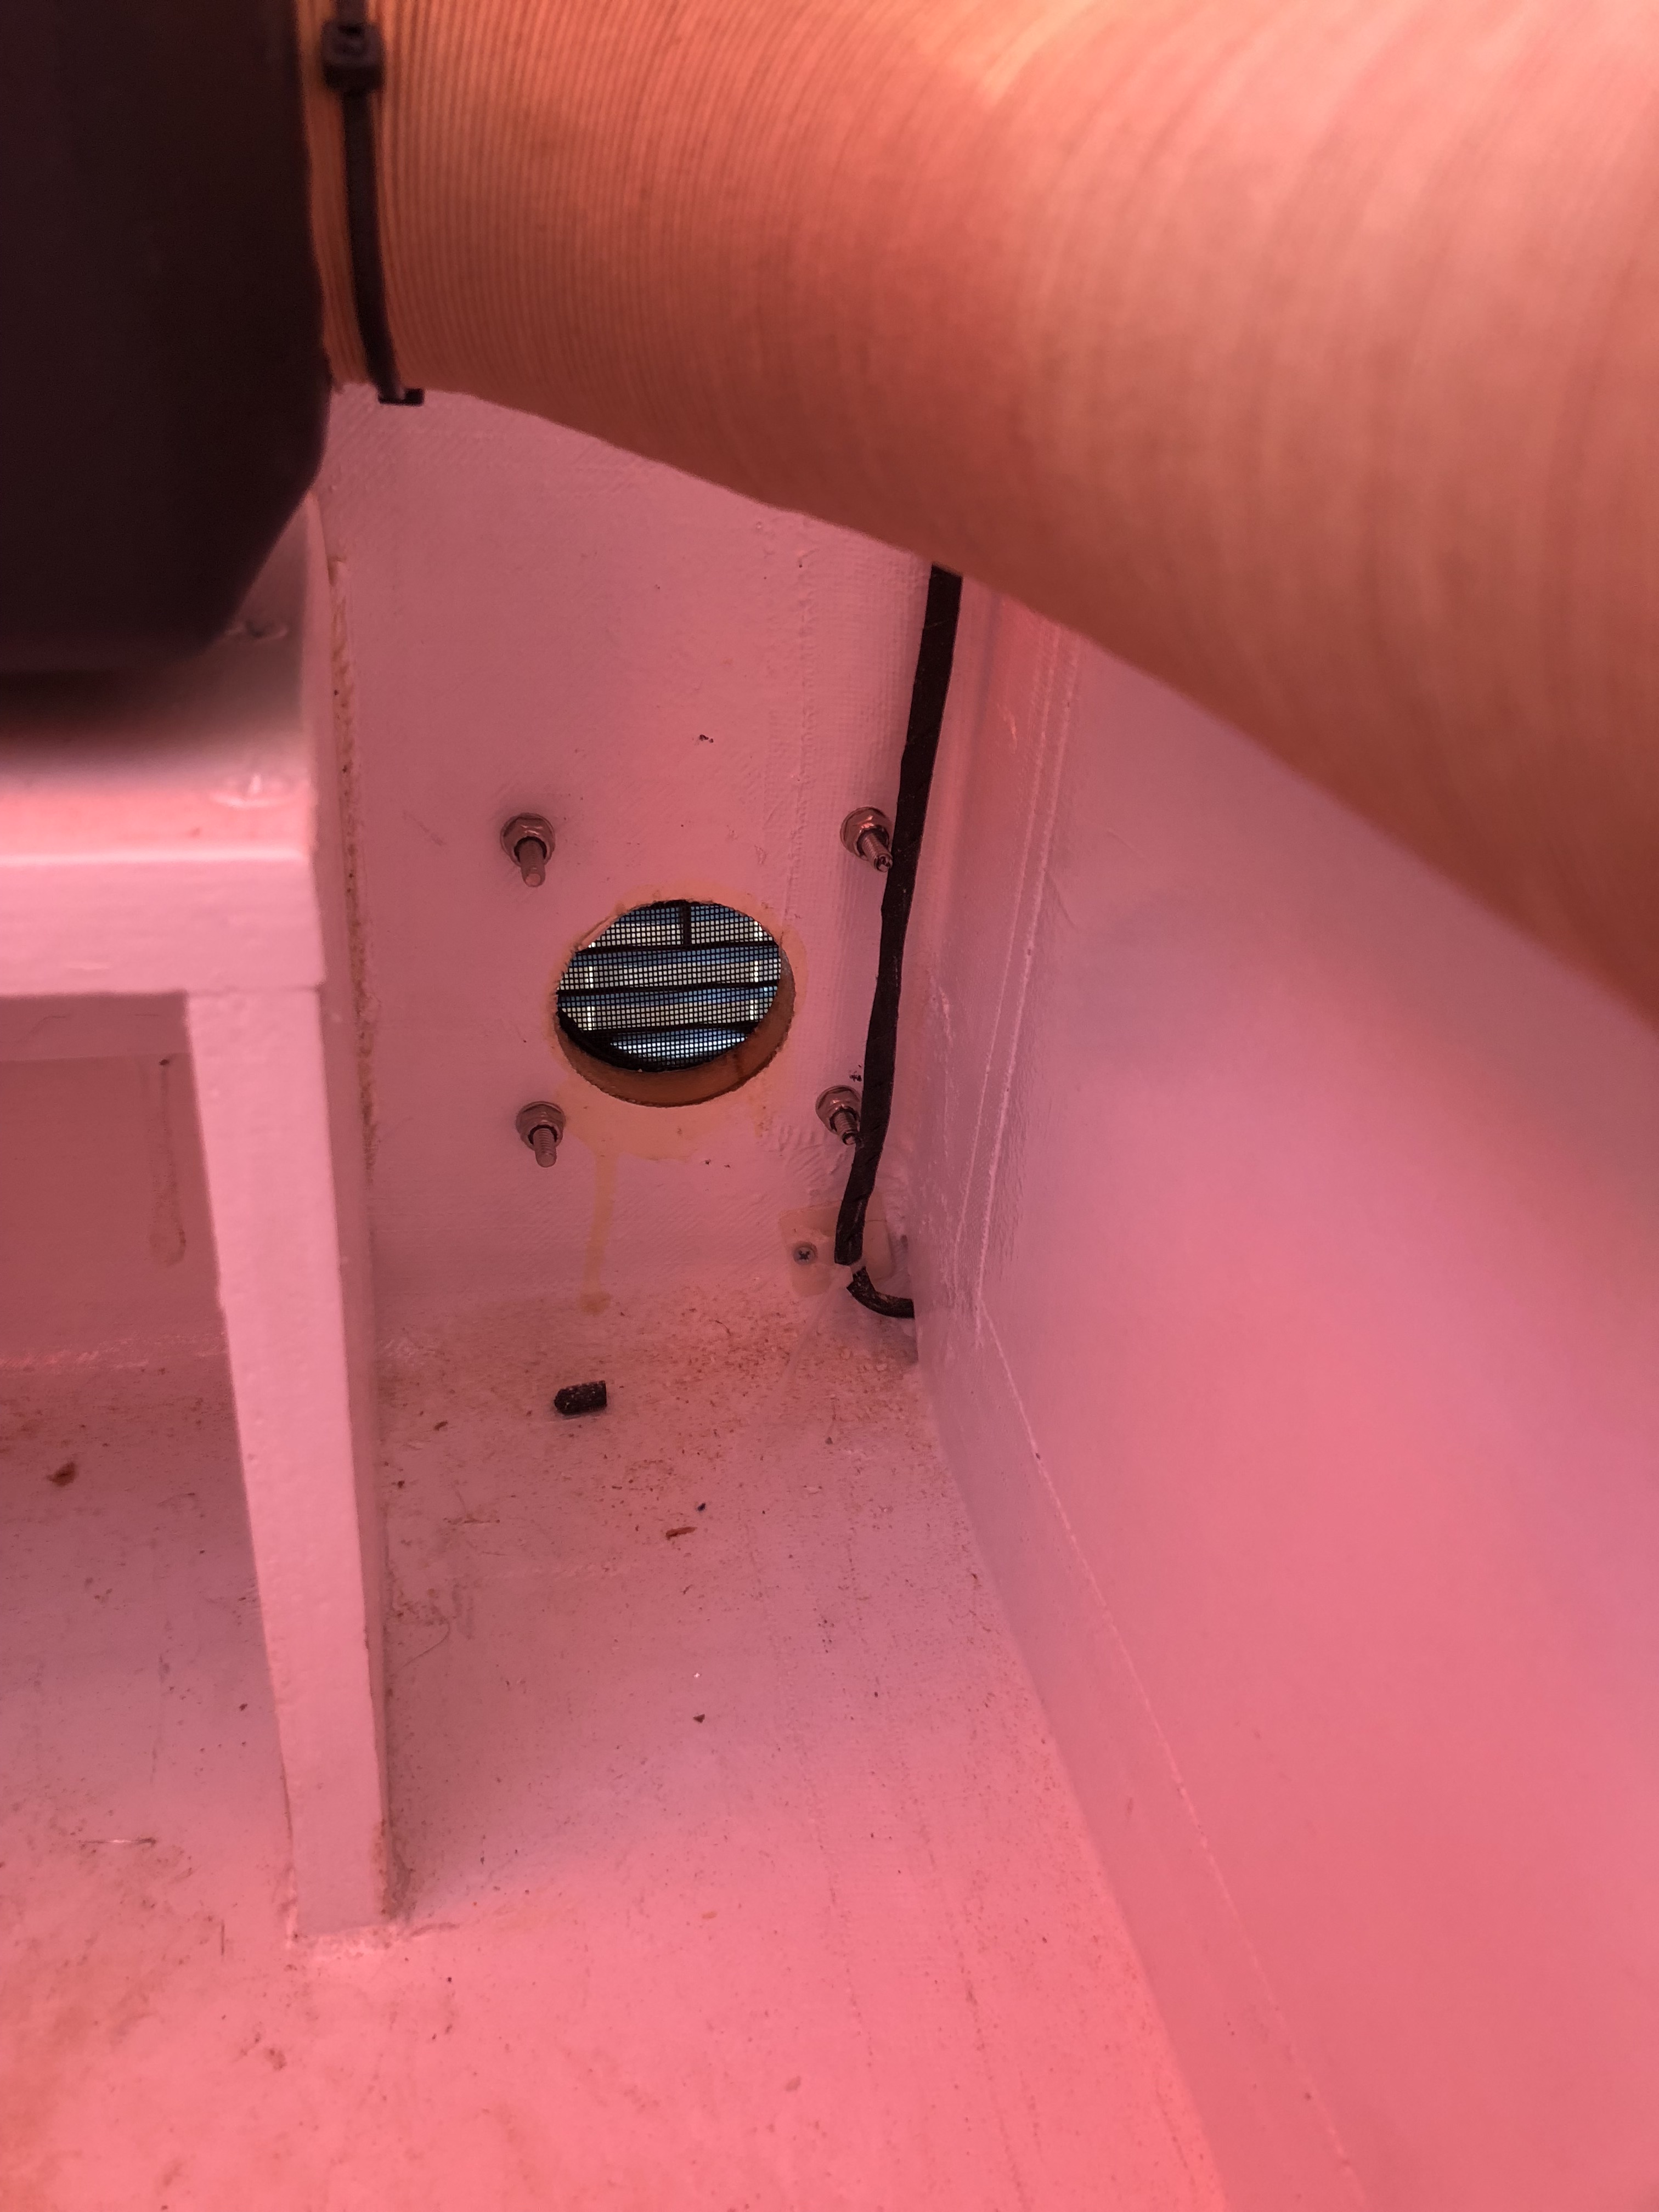
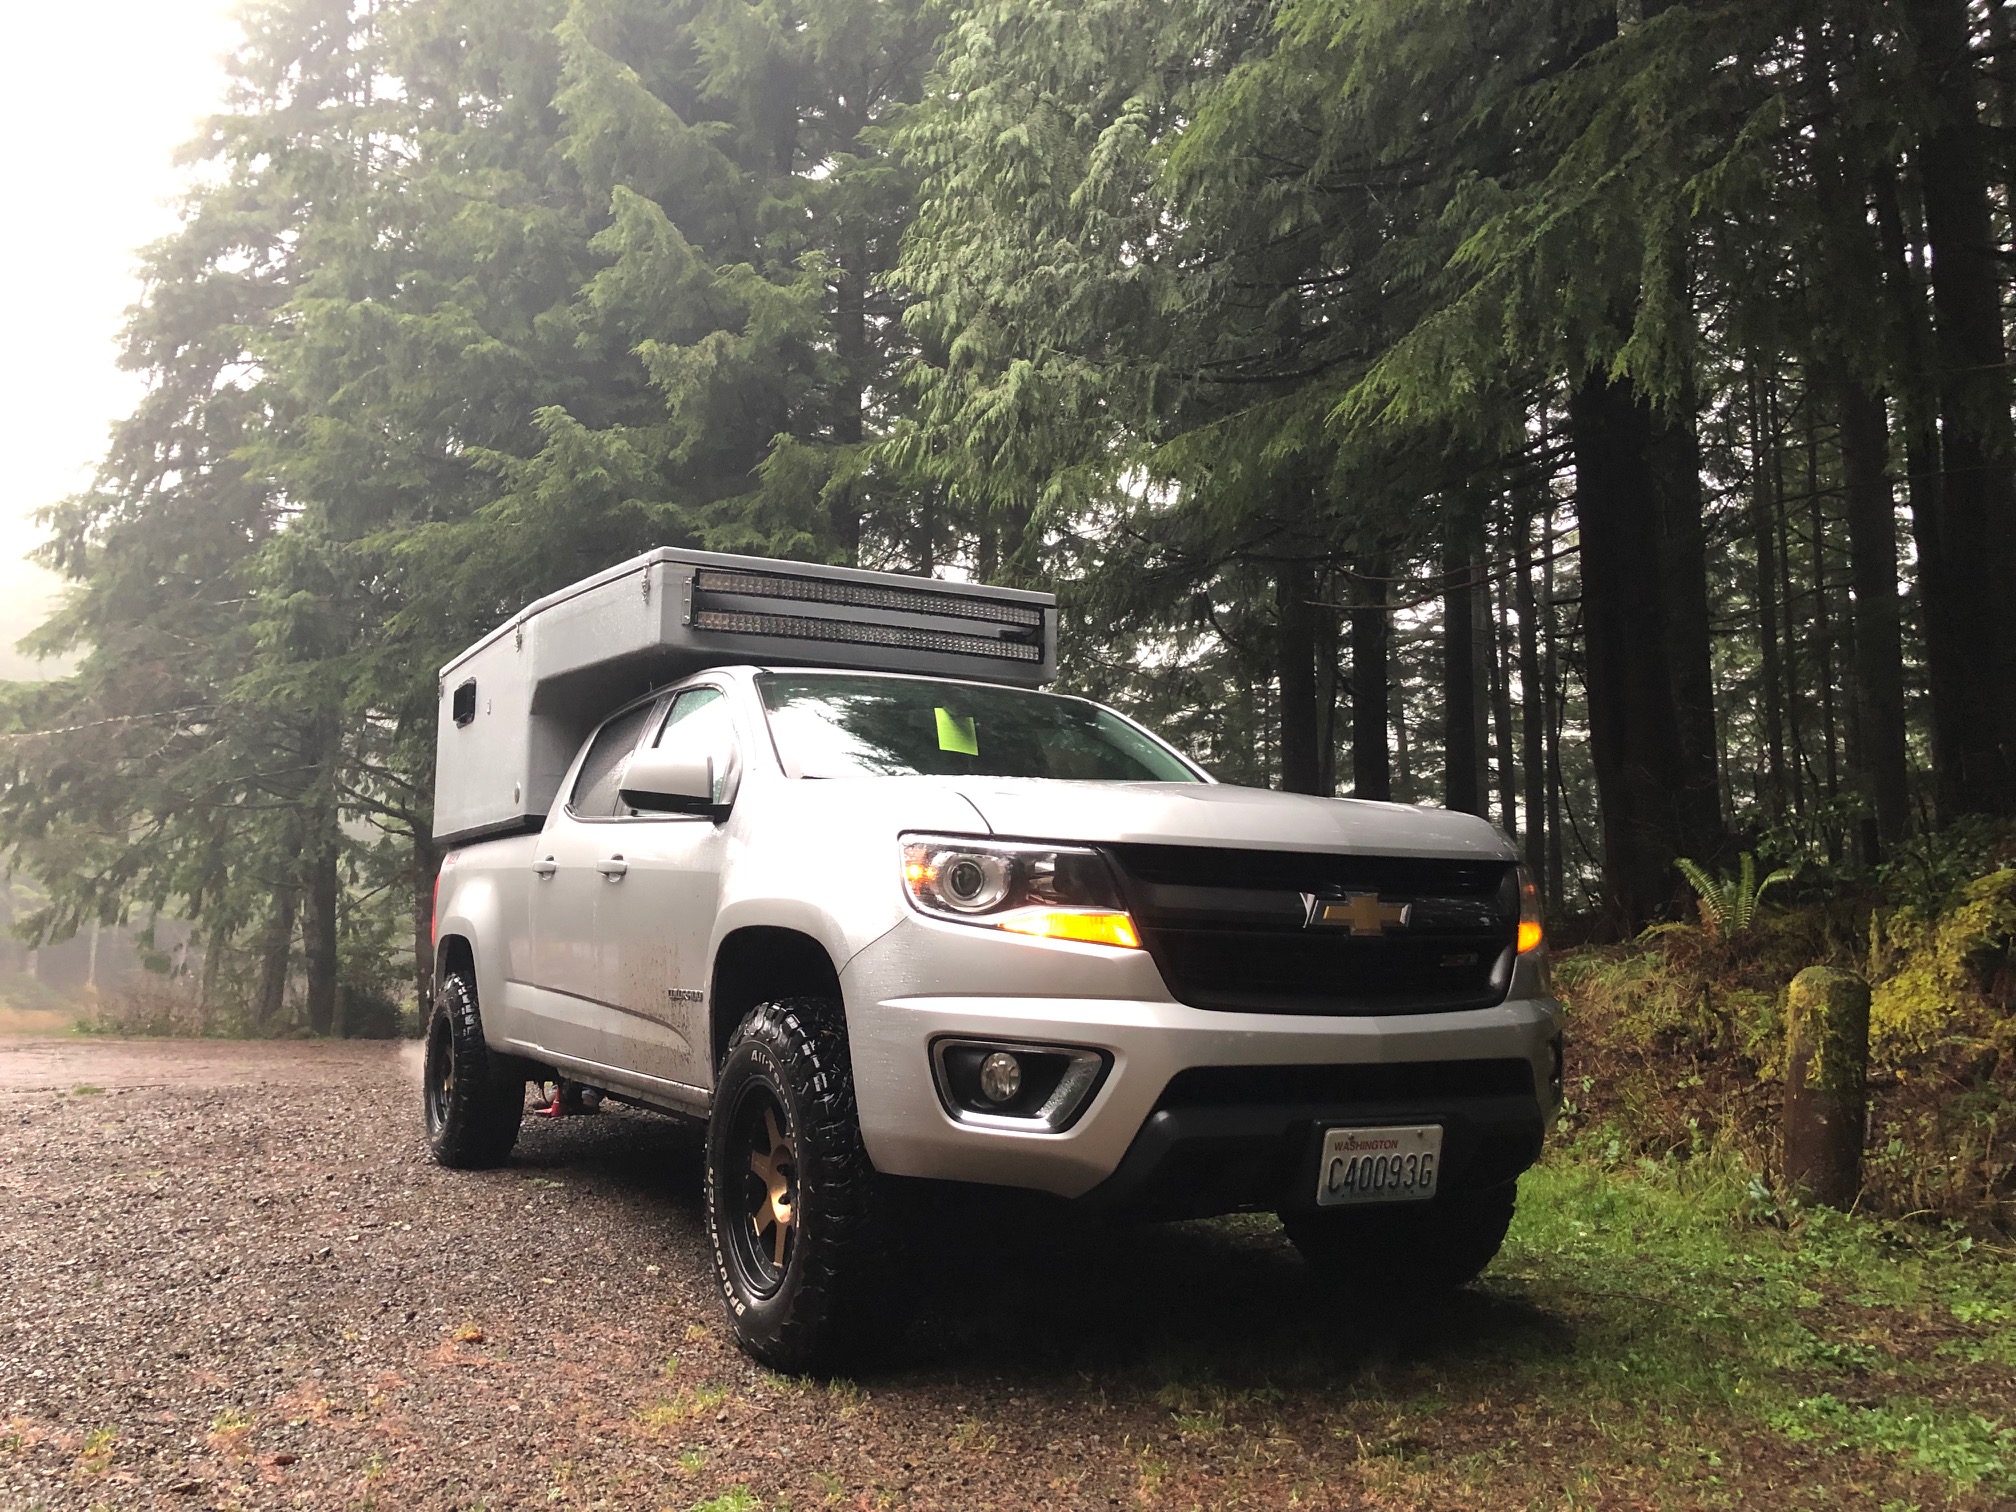
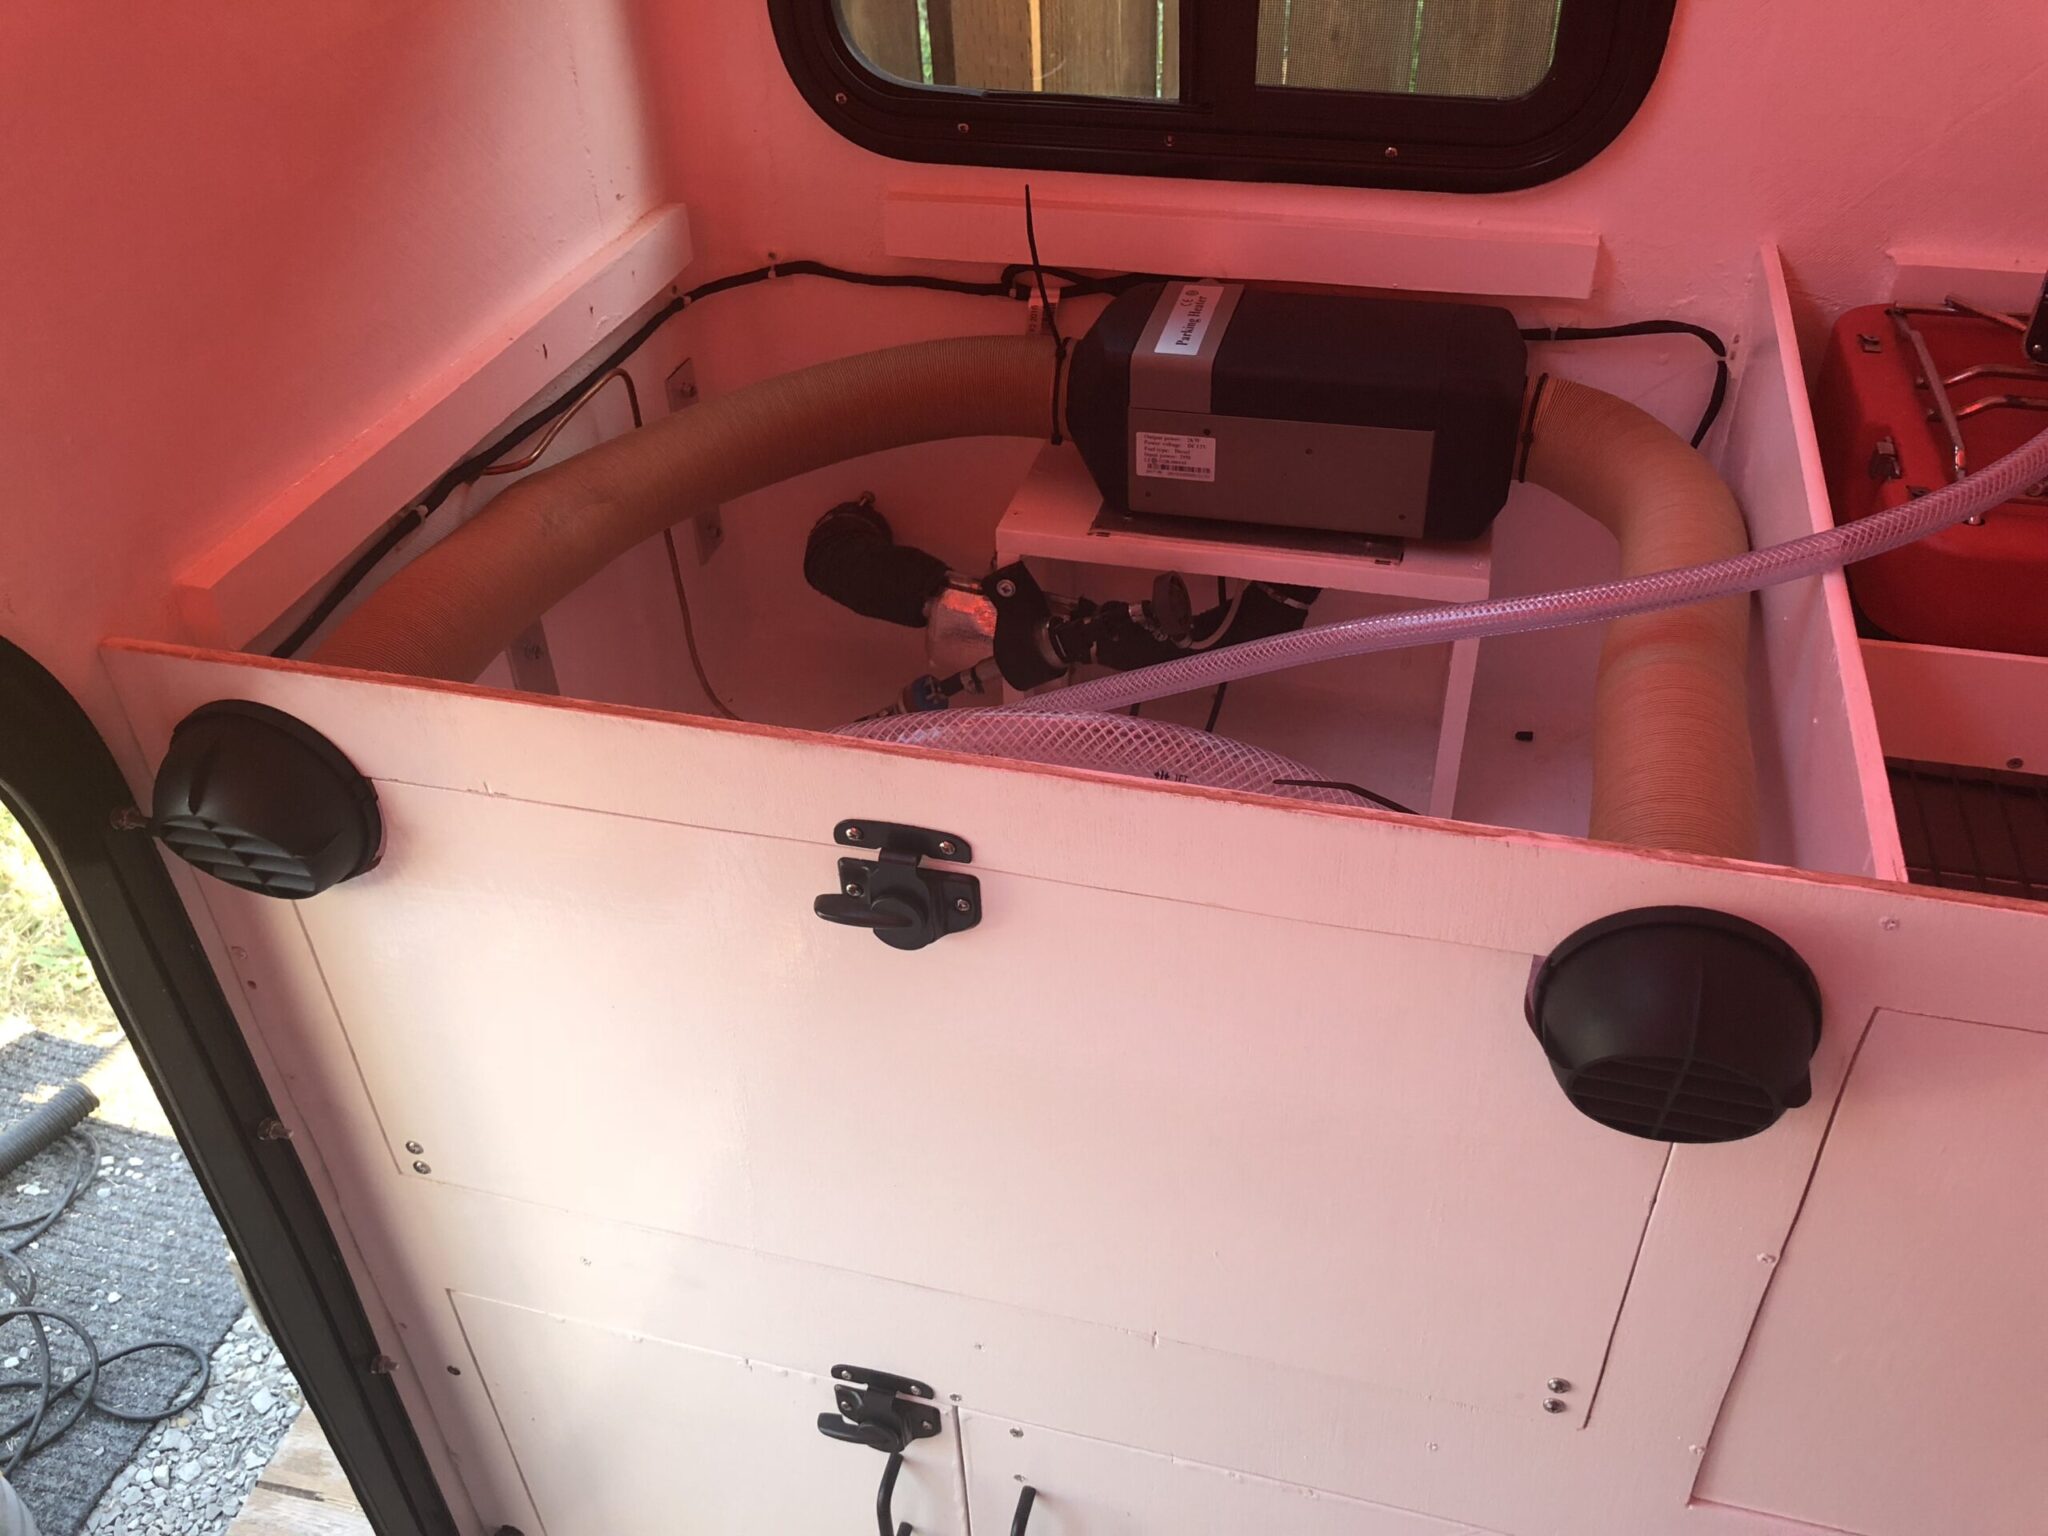
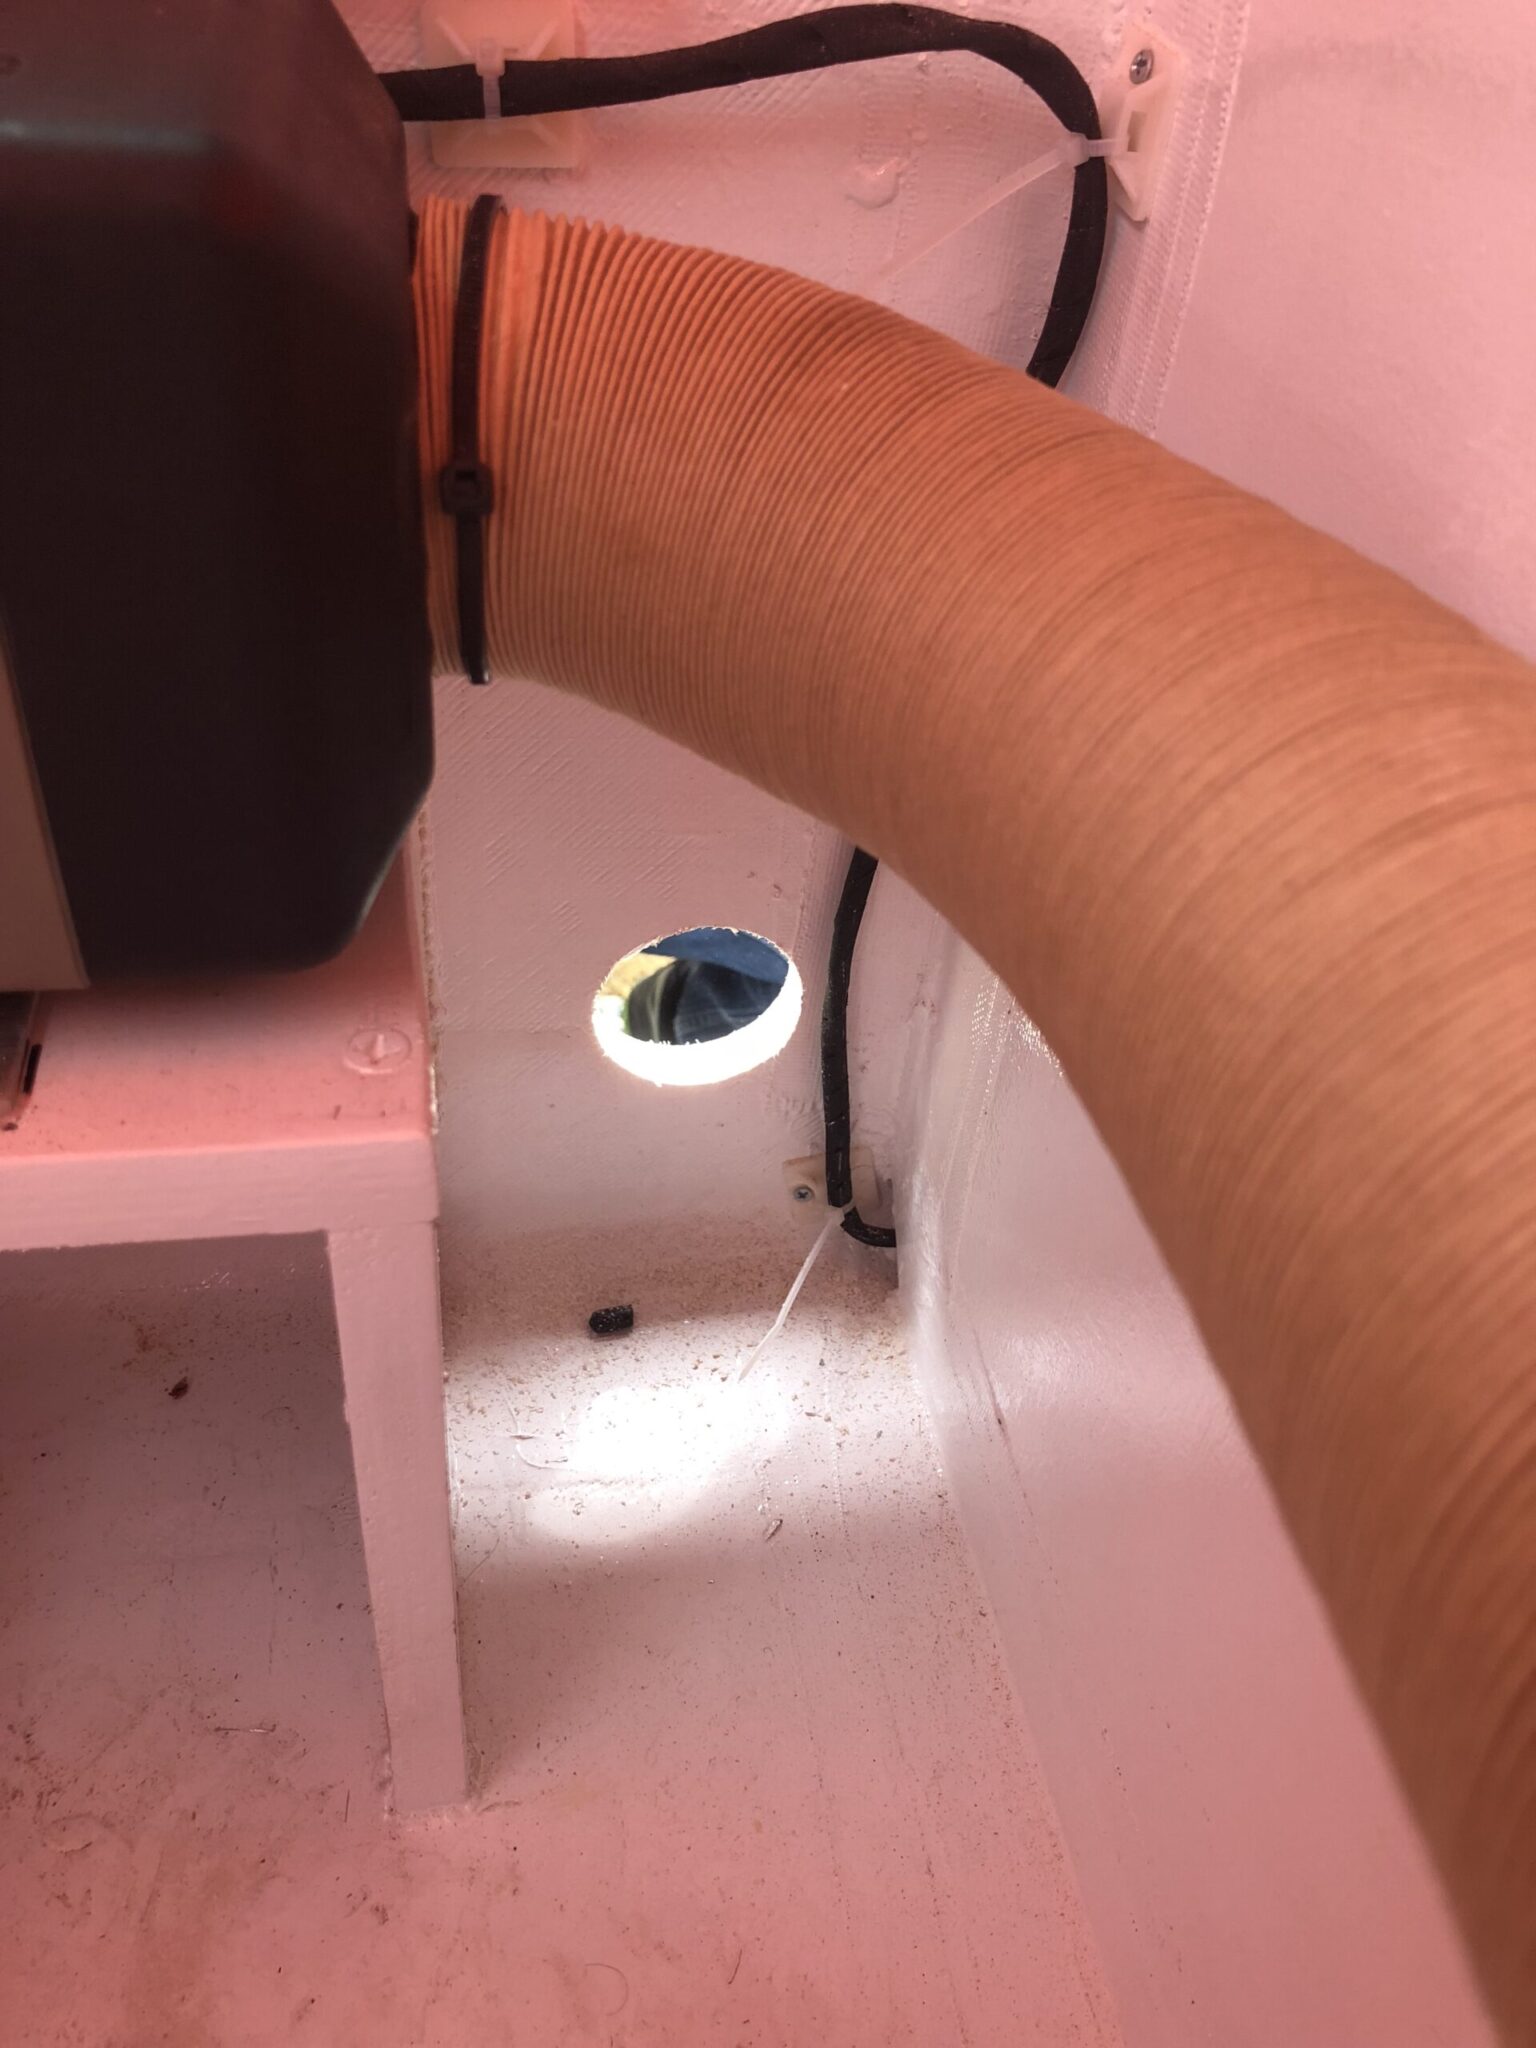
Now, making coffee and golfing weren’t the only things Jason and I accomplished today. We really like not dying of carbon monoxide poisoning and were having concerns about the pickup for the heater being located in the same place the exhaust is routed in case there was a leak. The solution was to run the main air pickup from inside the cabin itself instead of from the cabinet. We also added a vent to the shell for fresh combustion air to the engine.
IMG_0671.jpg

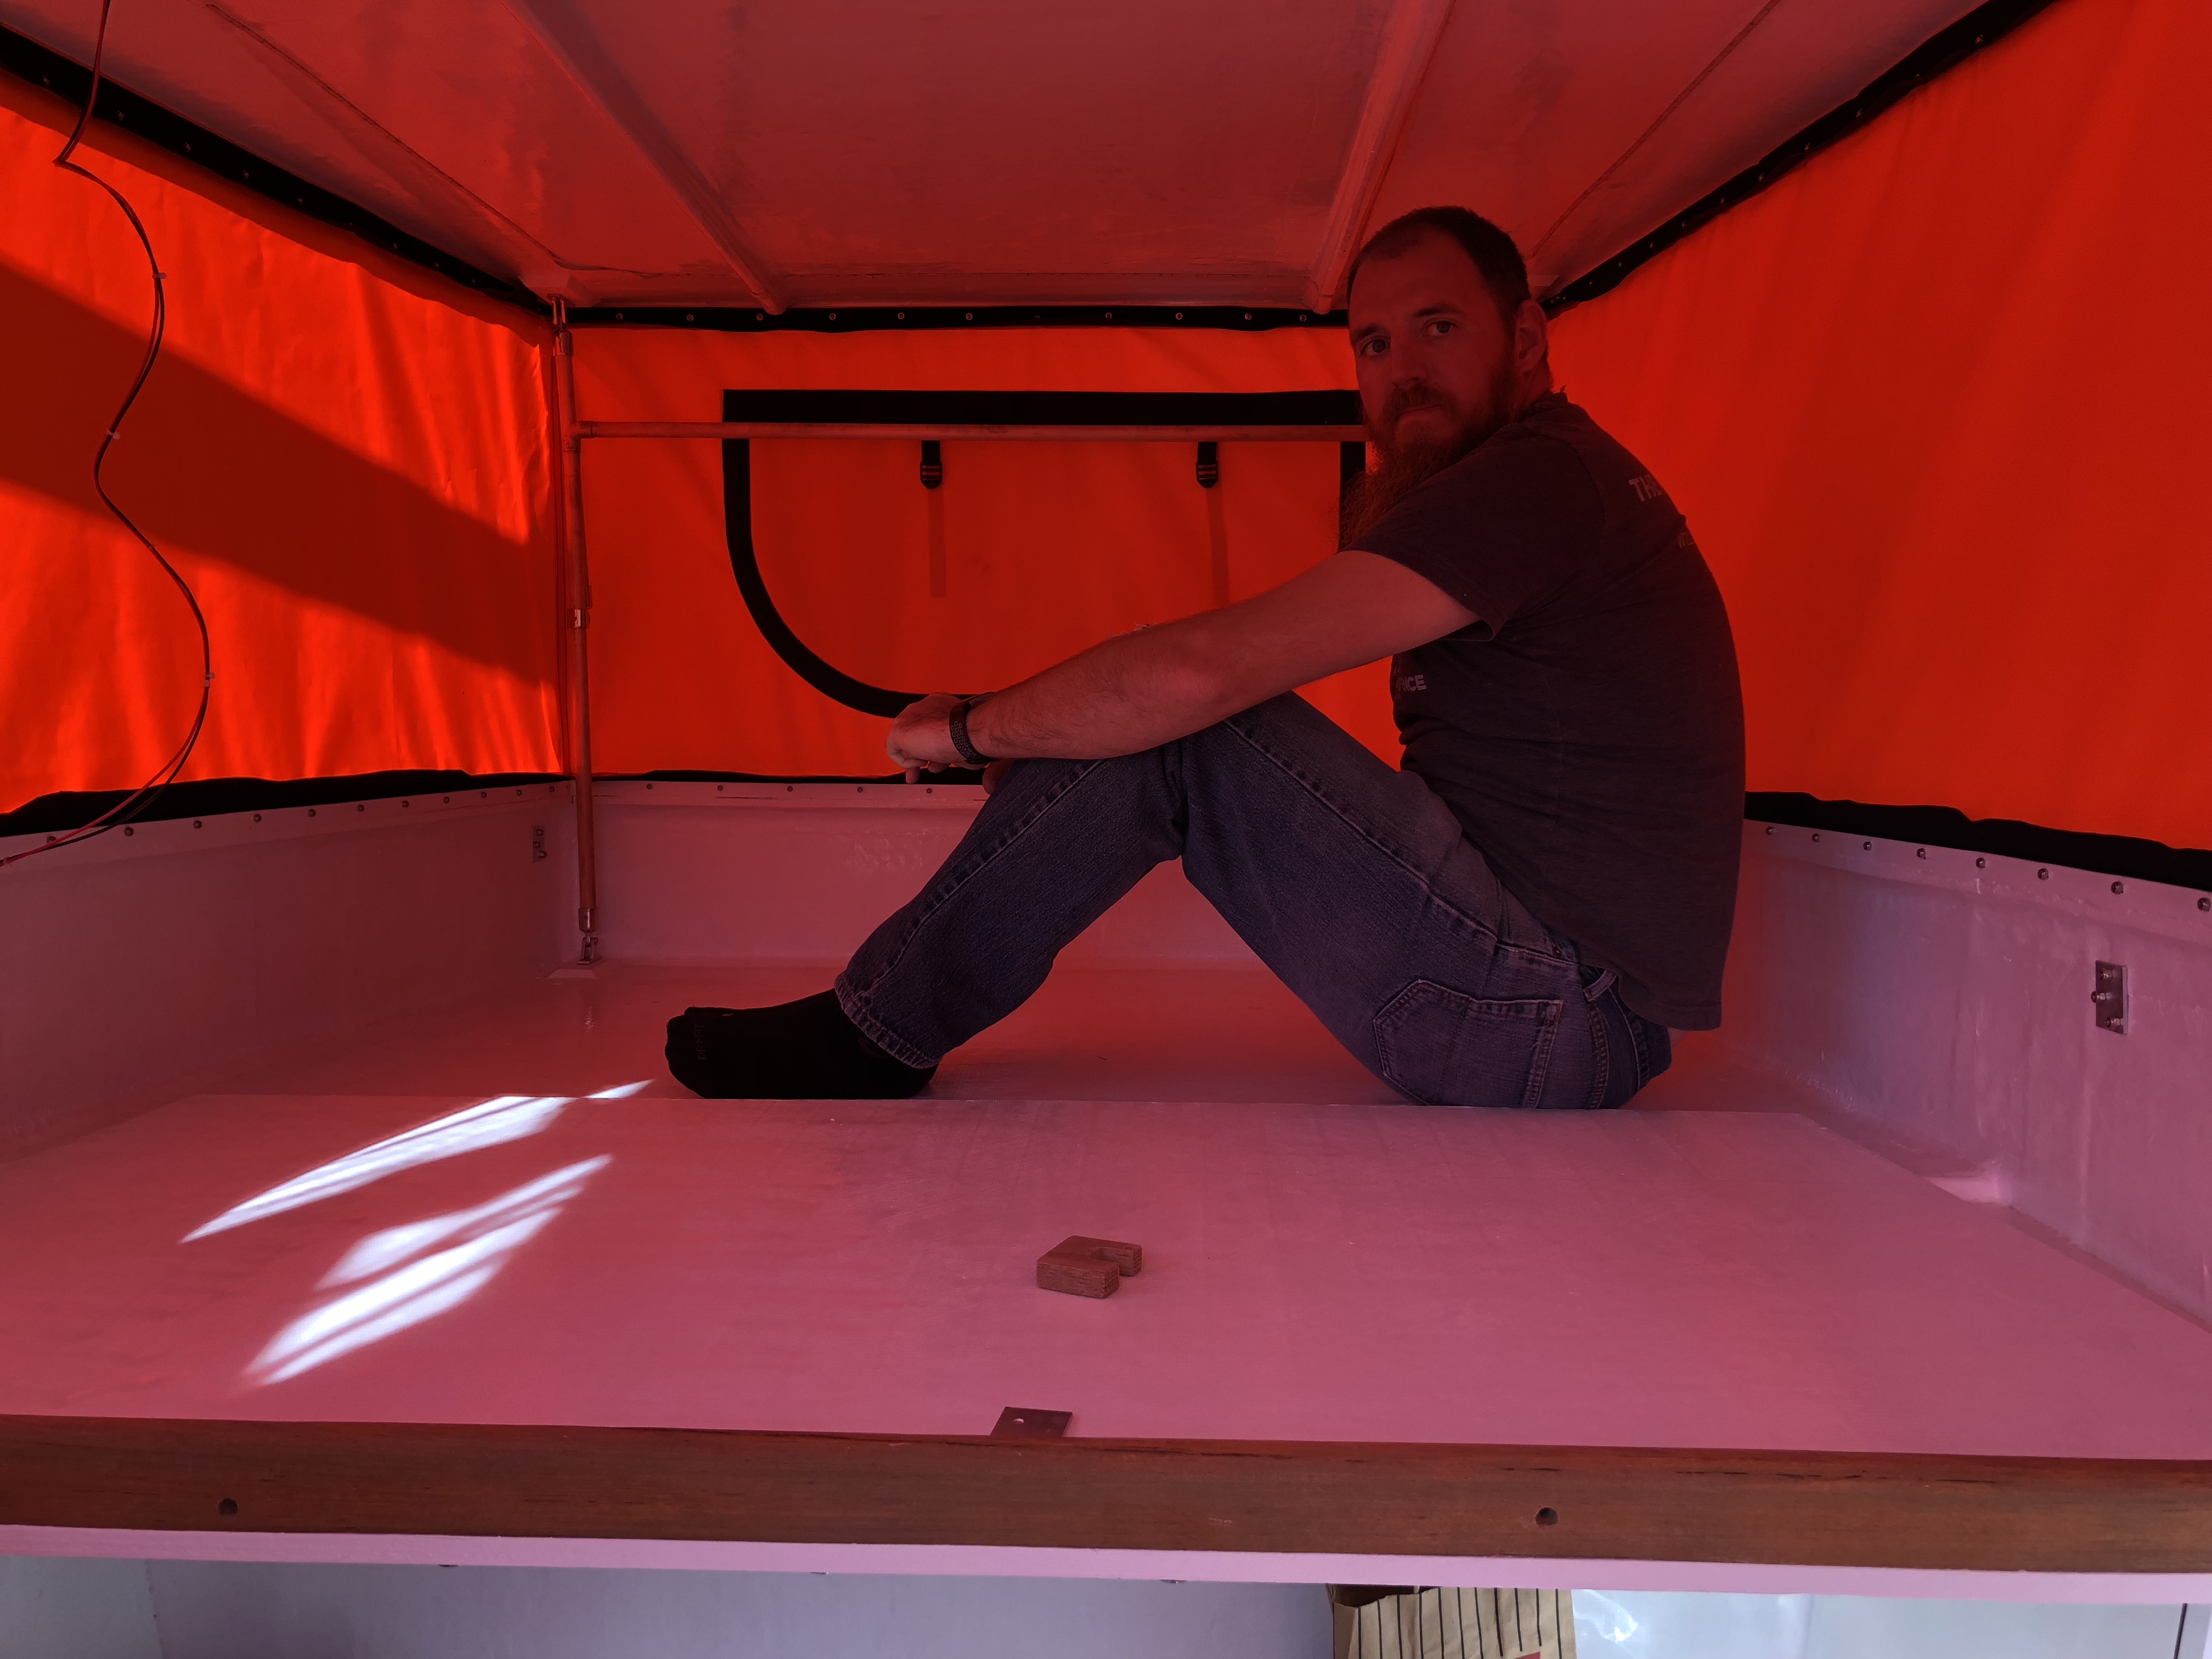
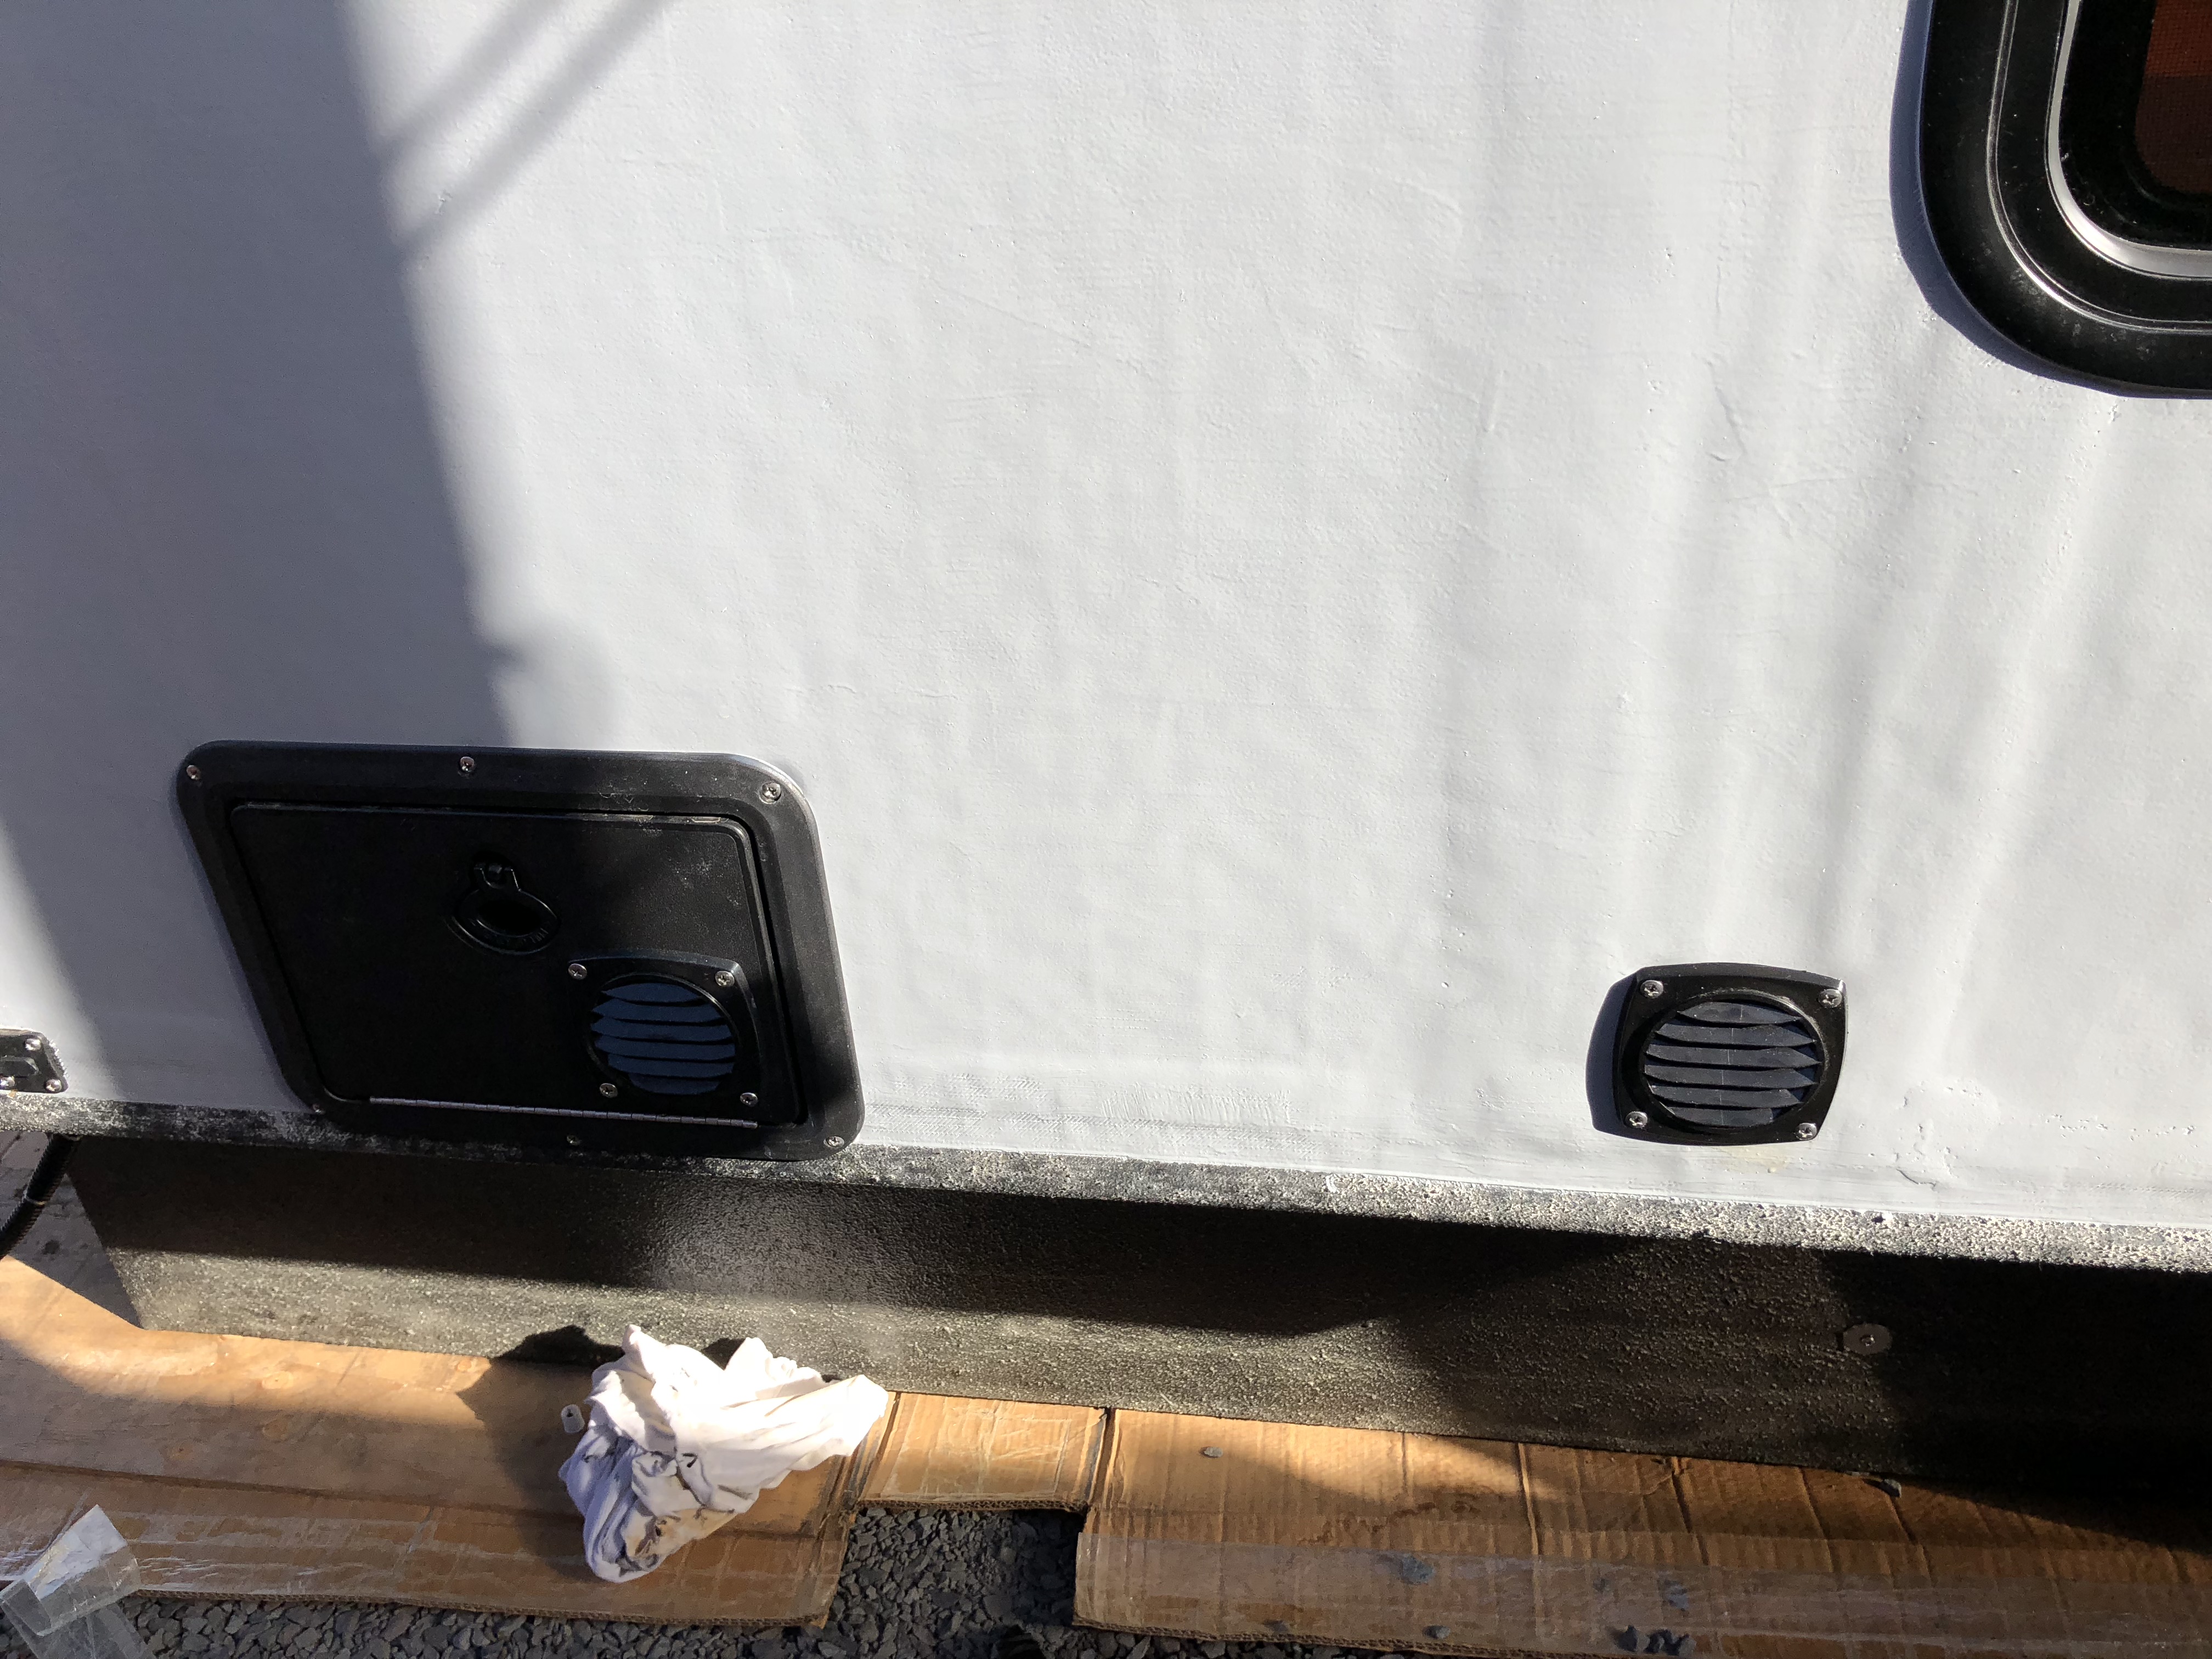
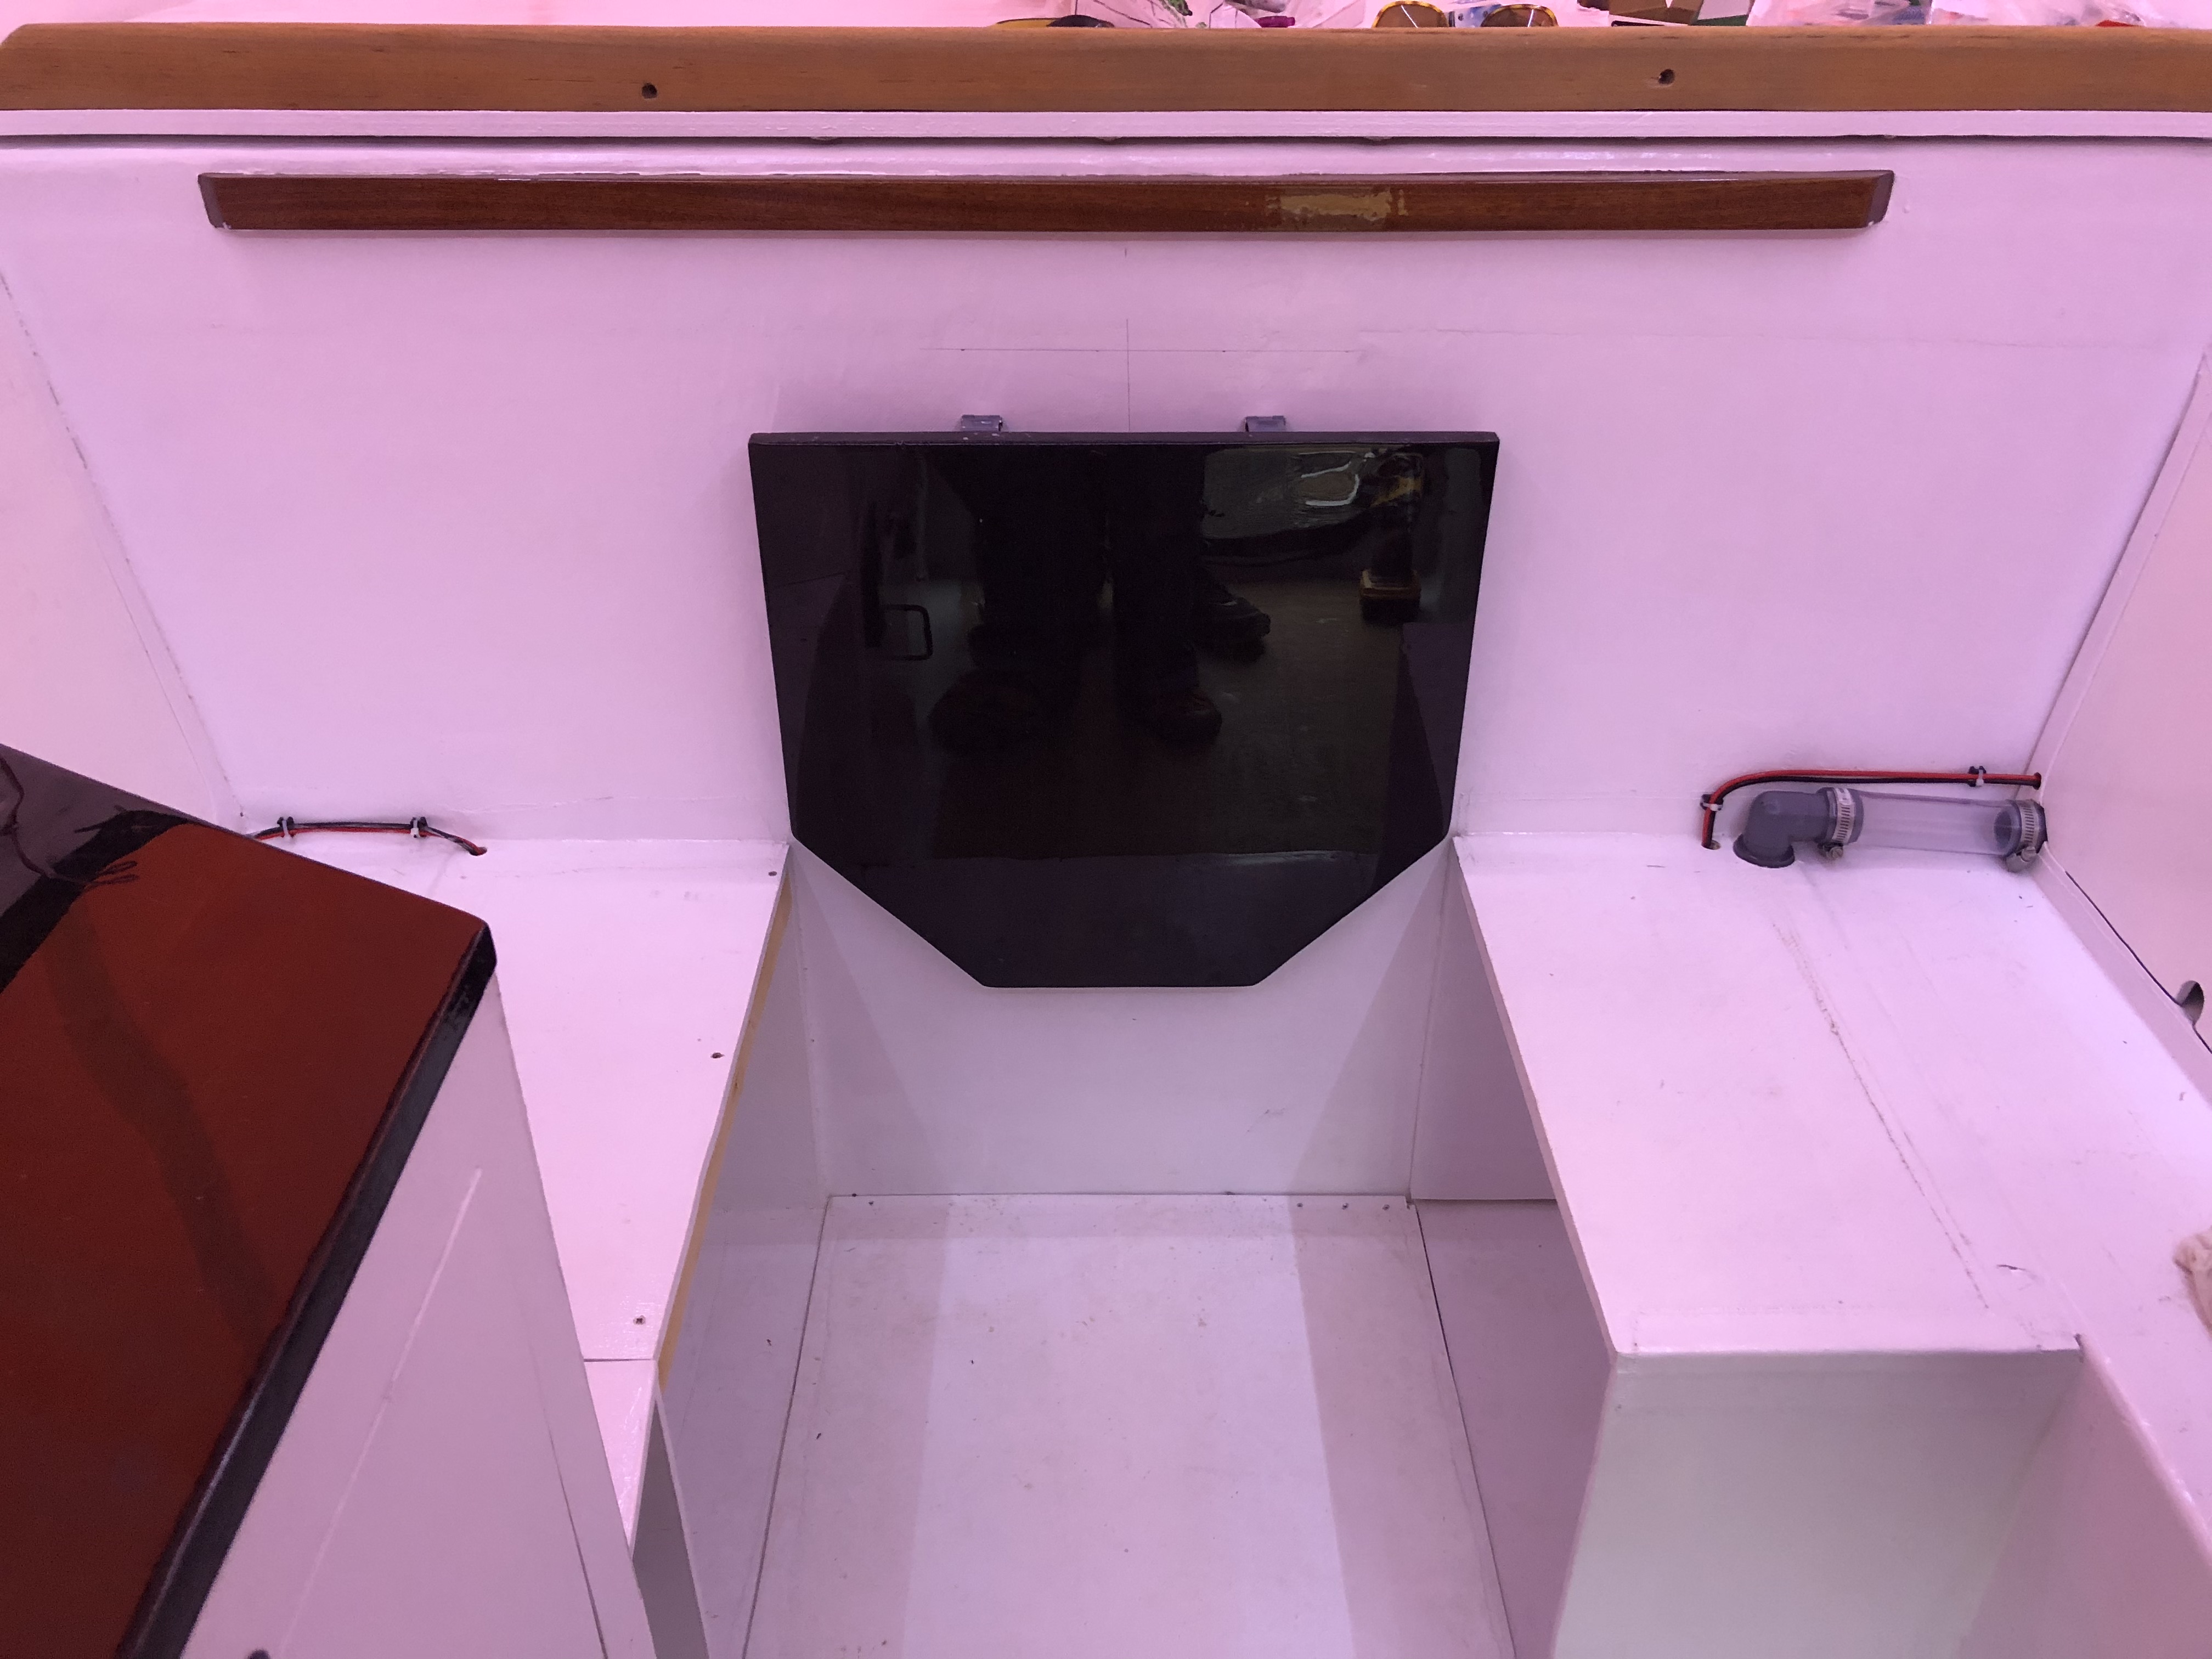
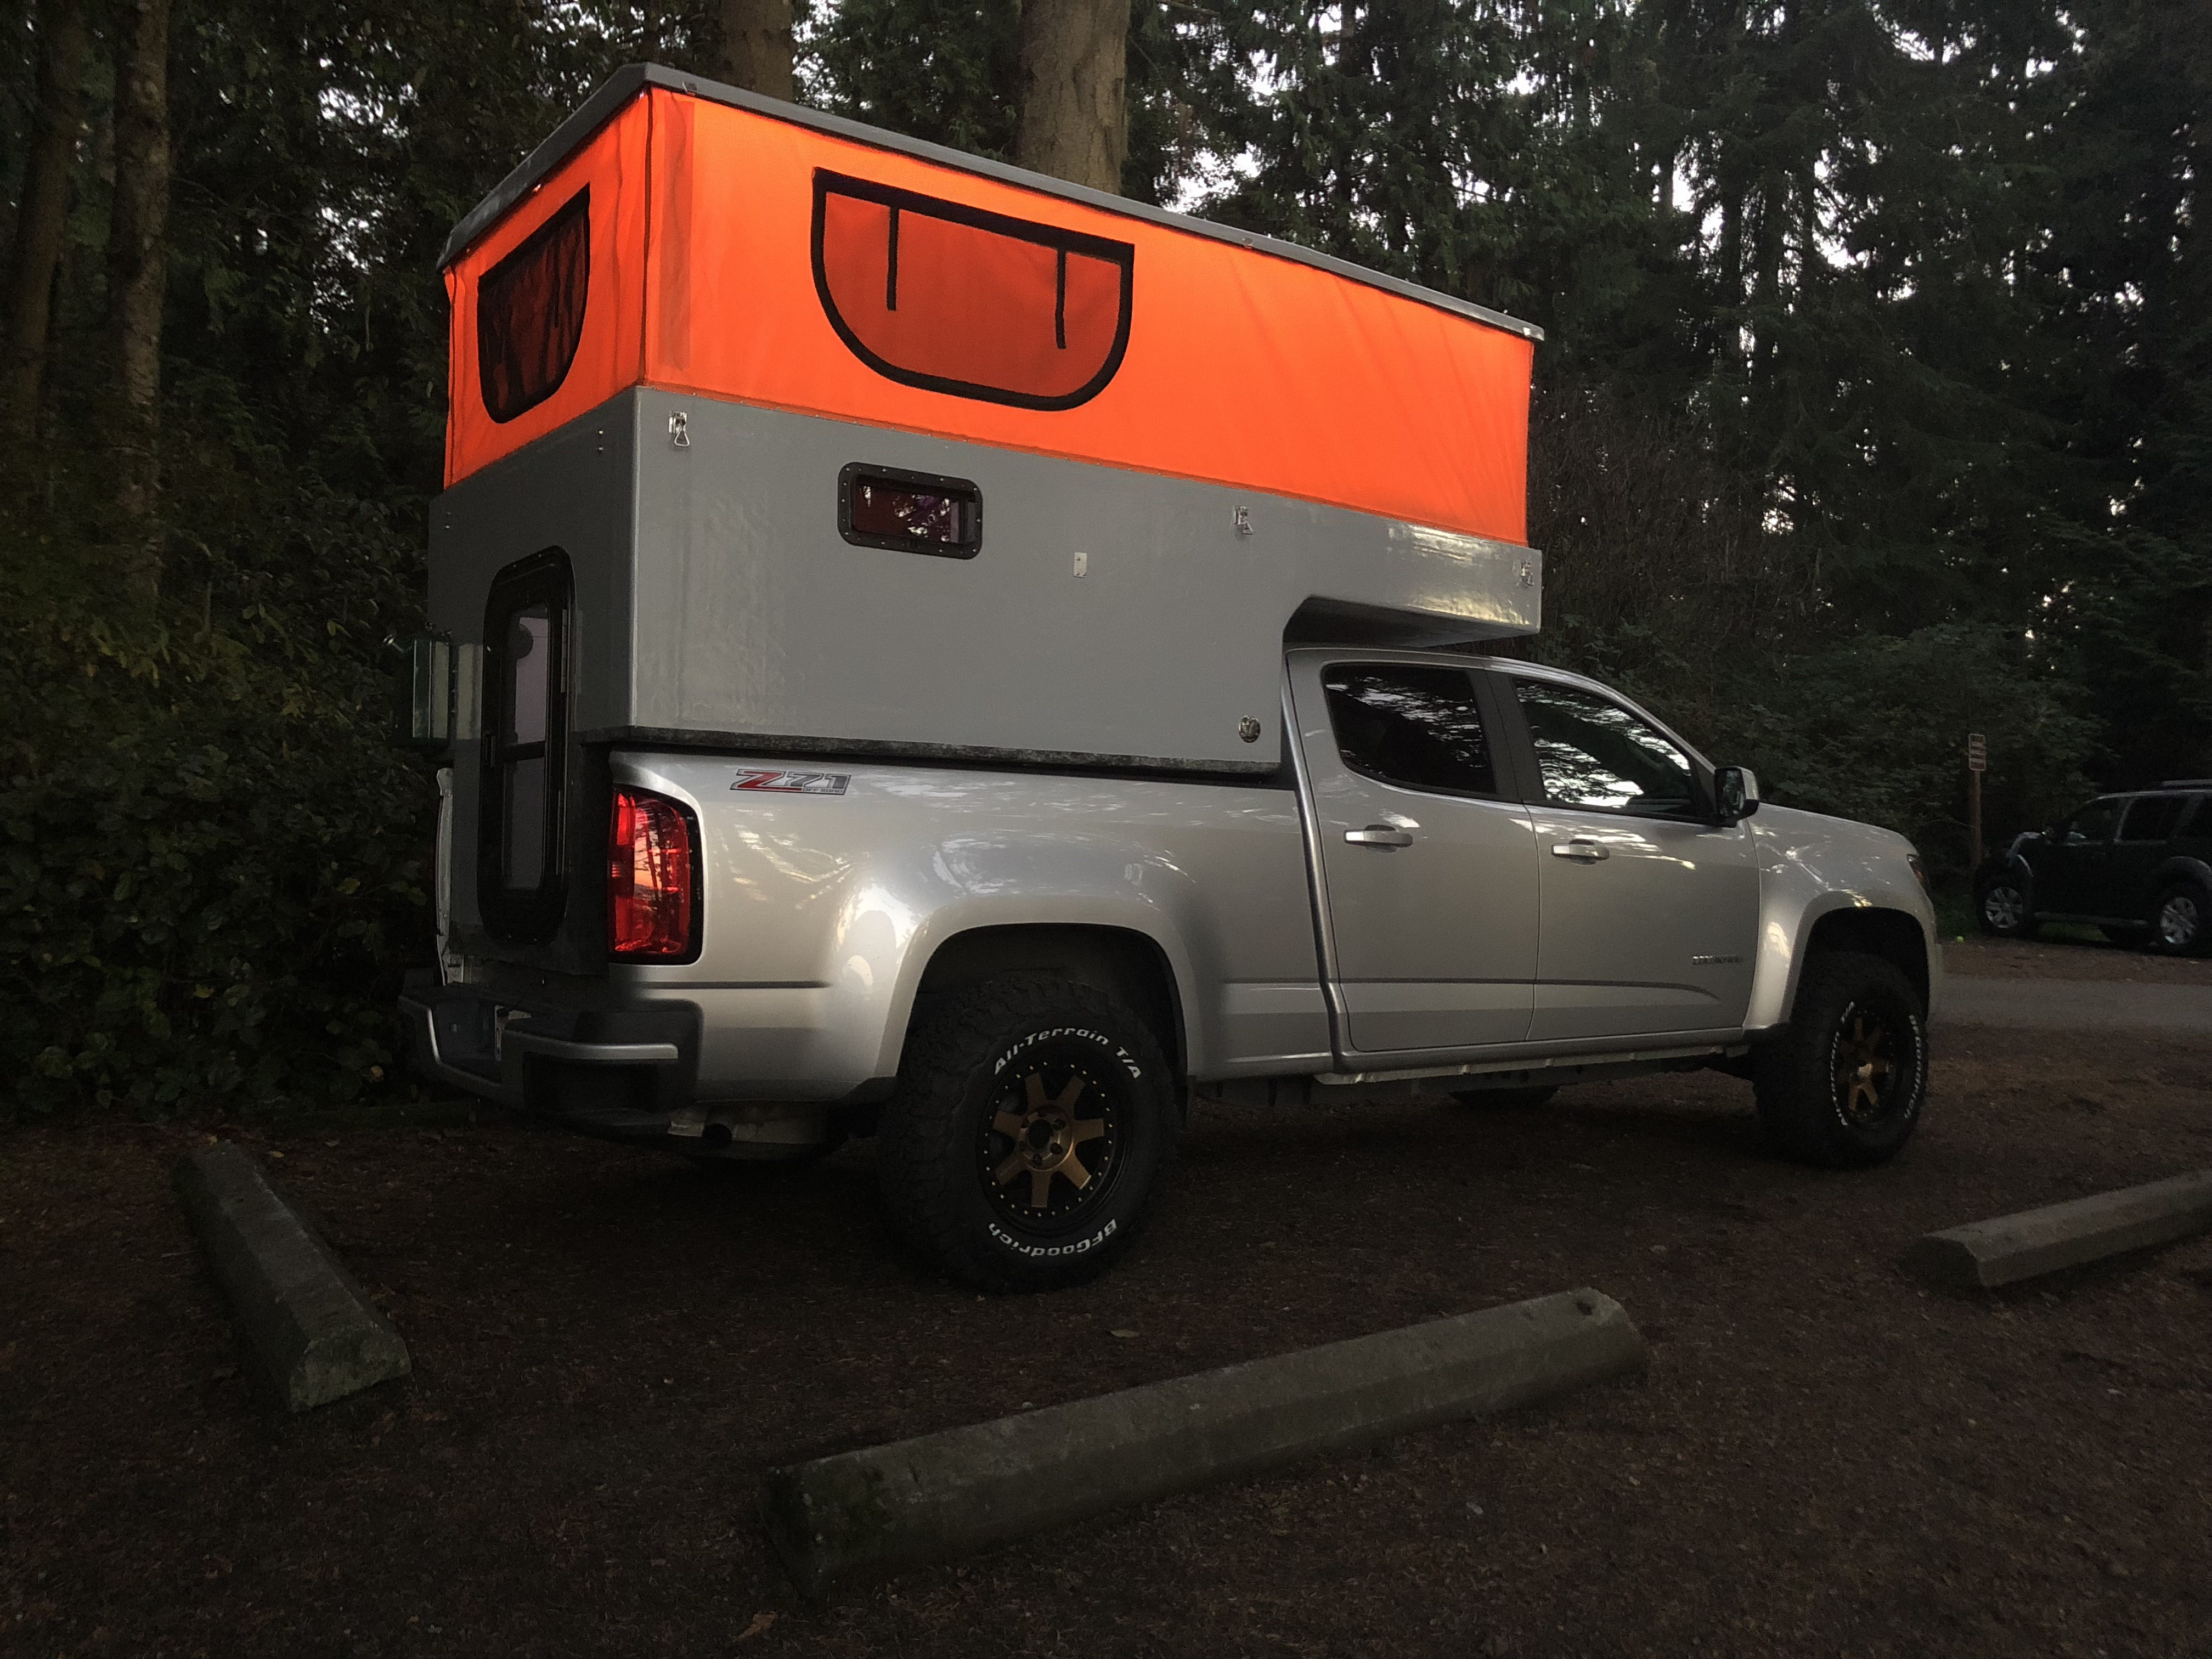
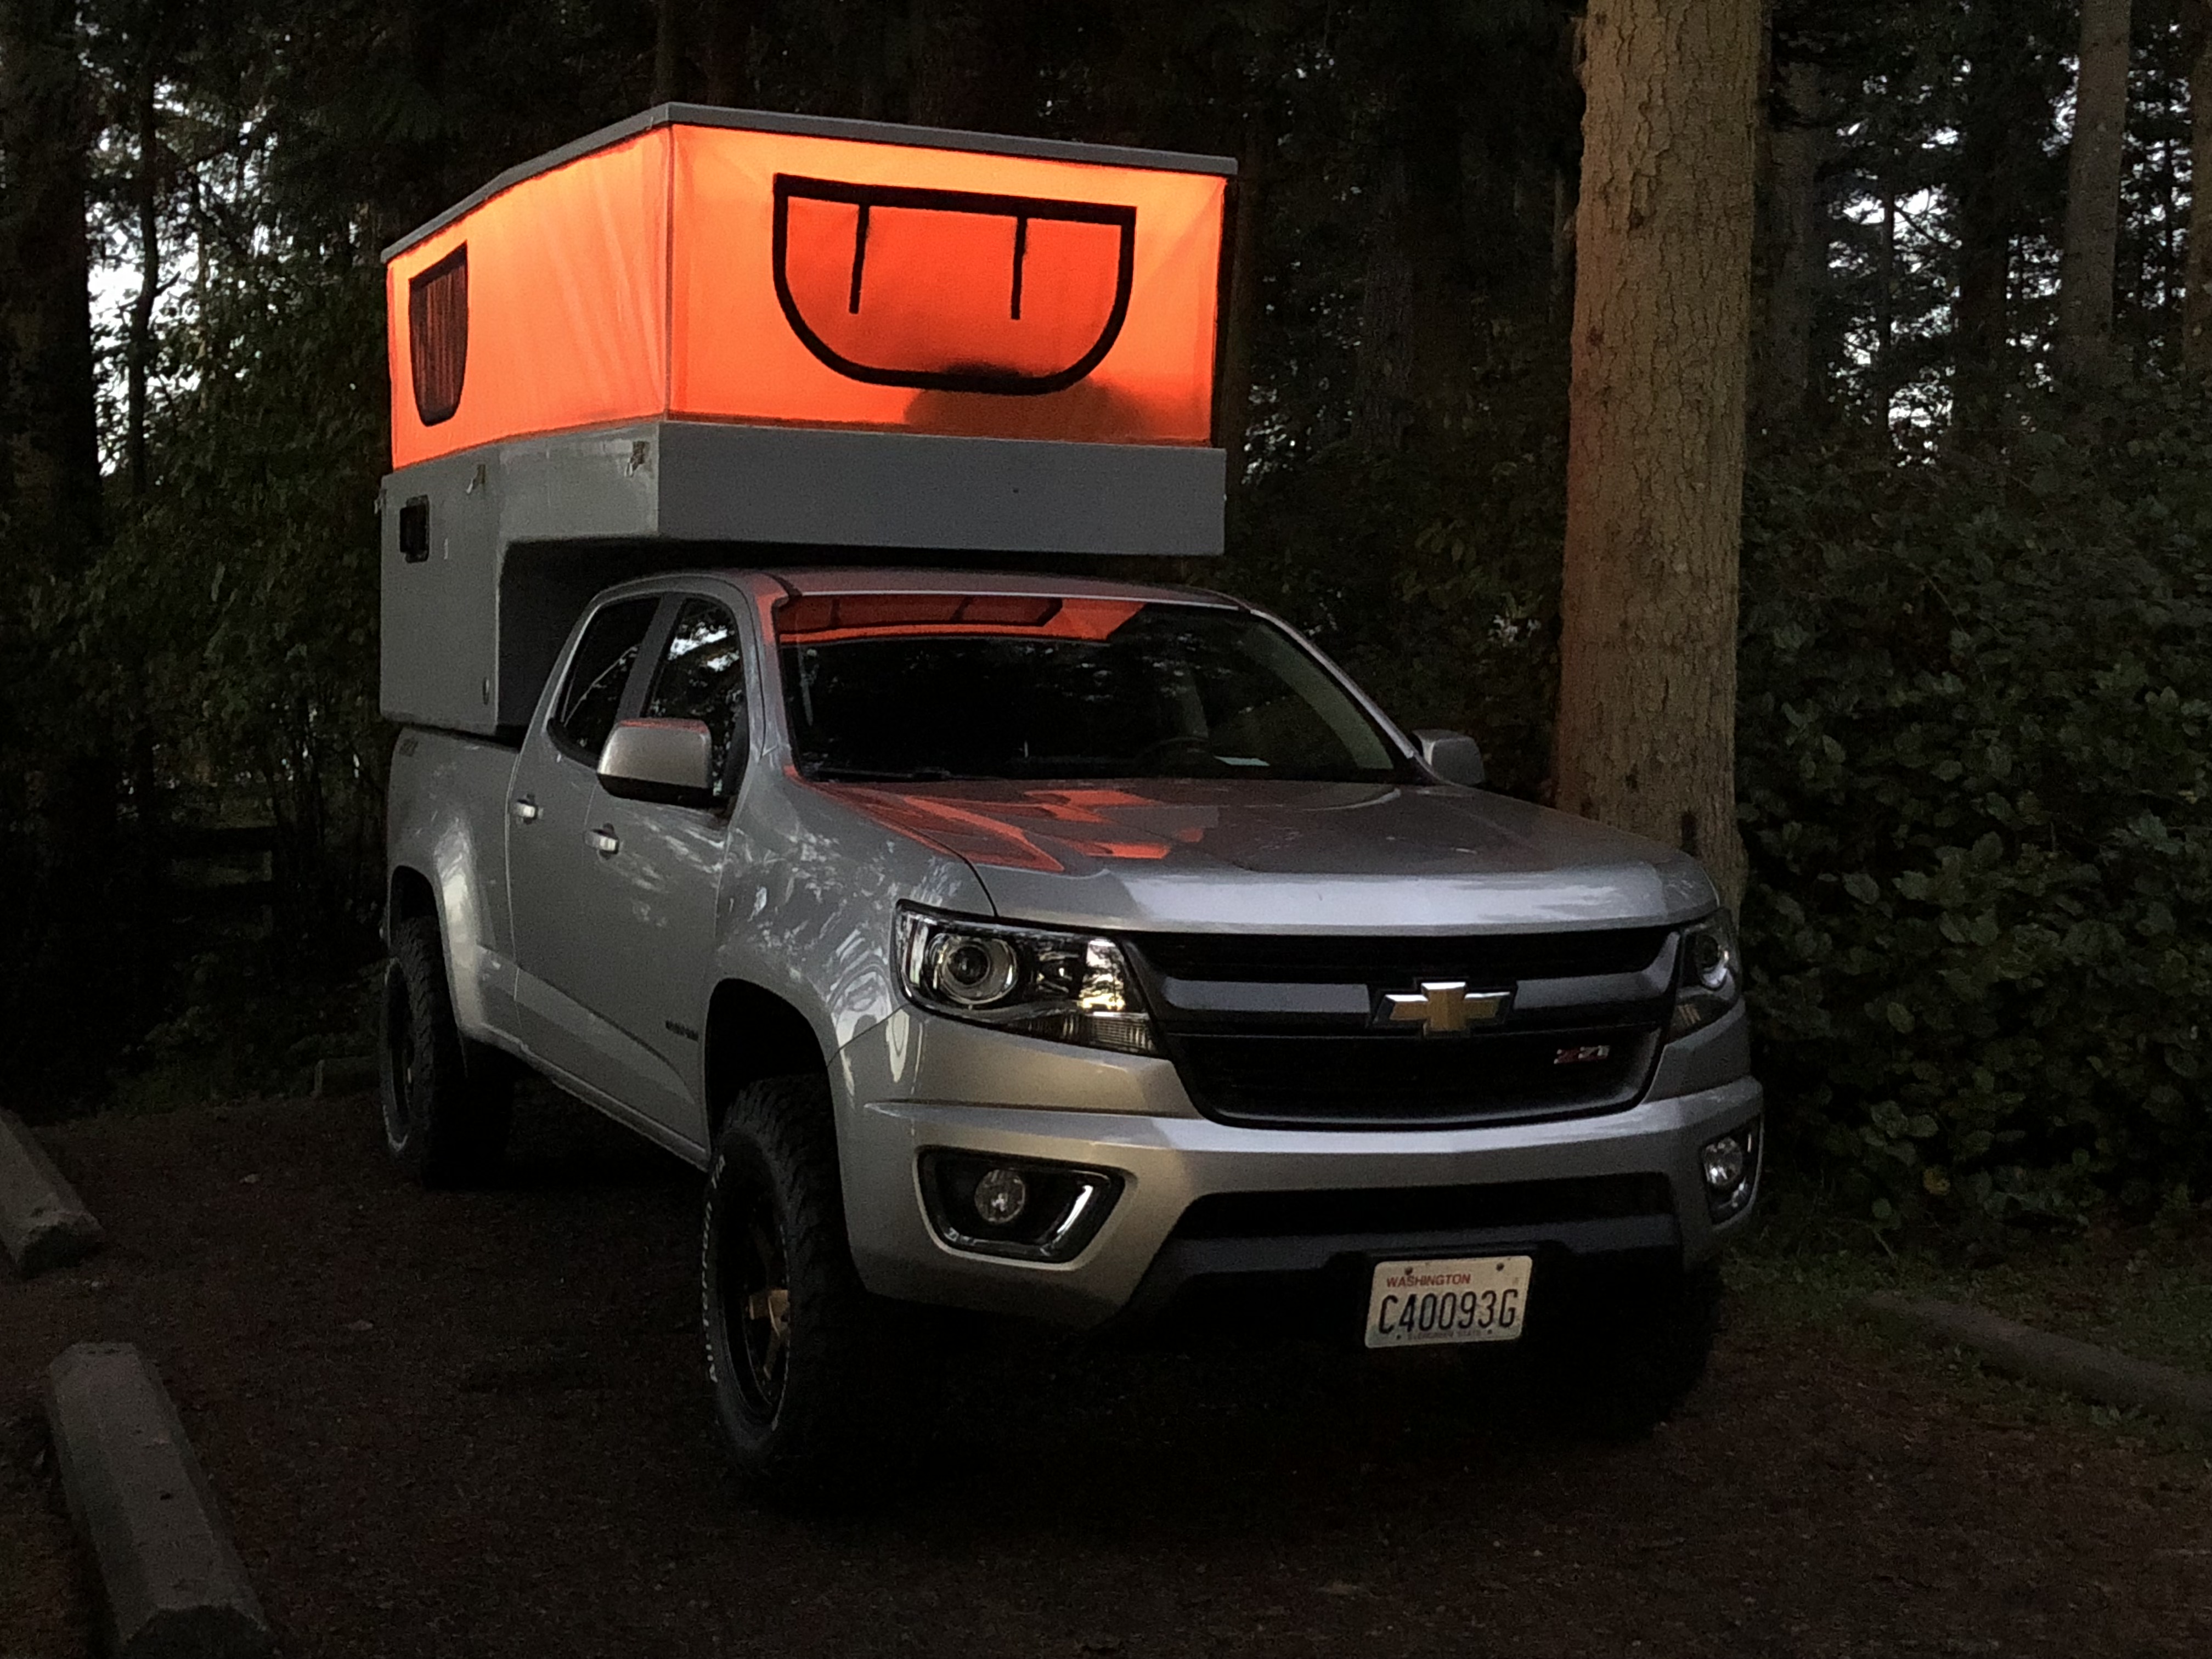
Drilled another hole in the camper
IMG_0681.jpg

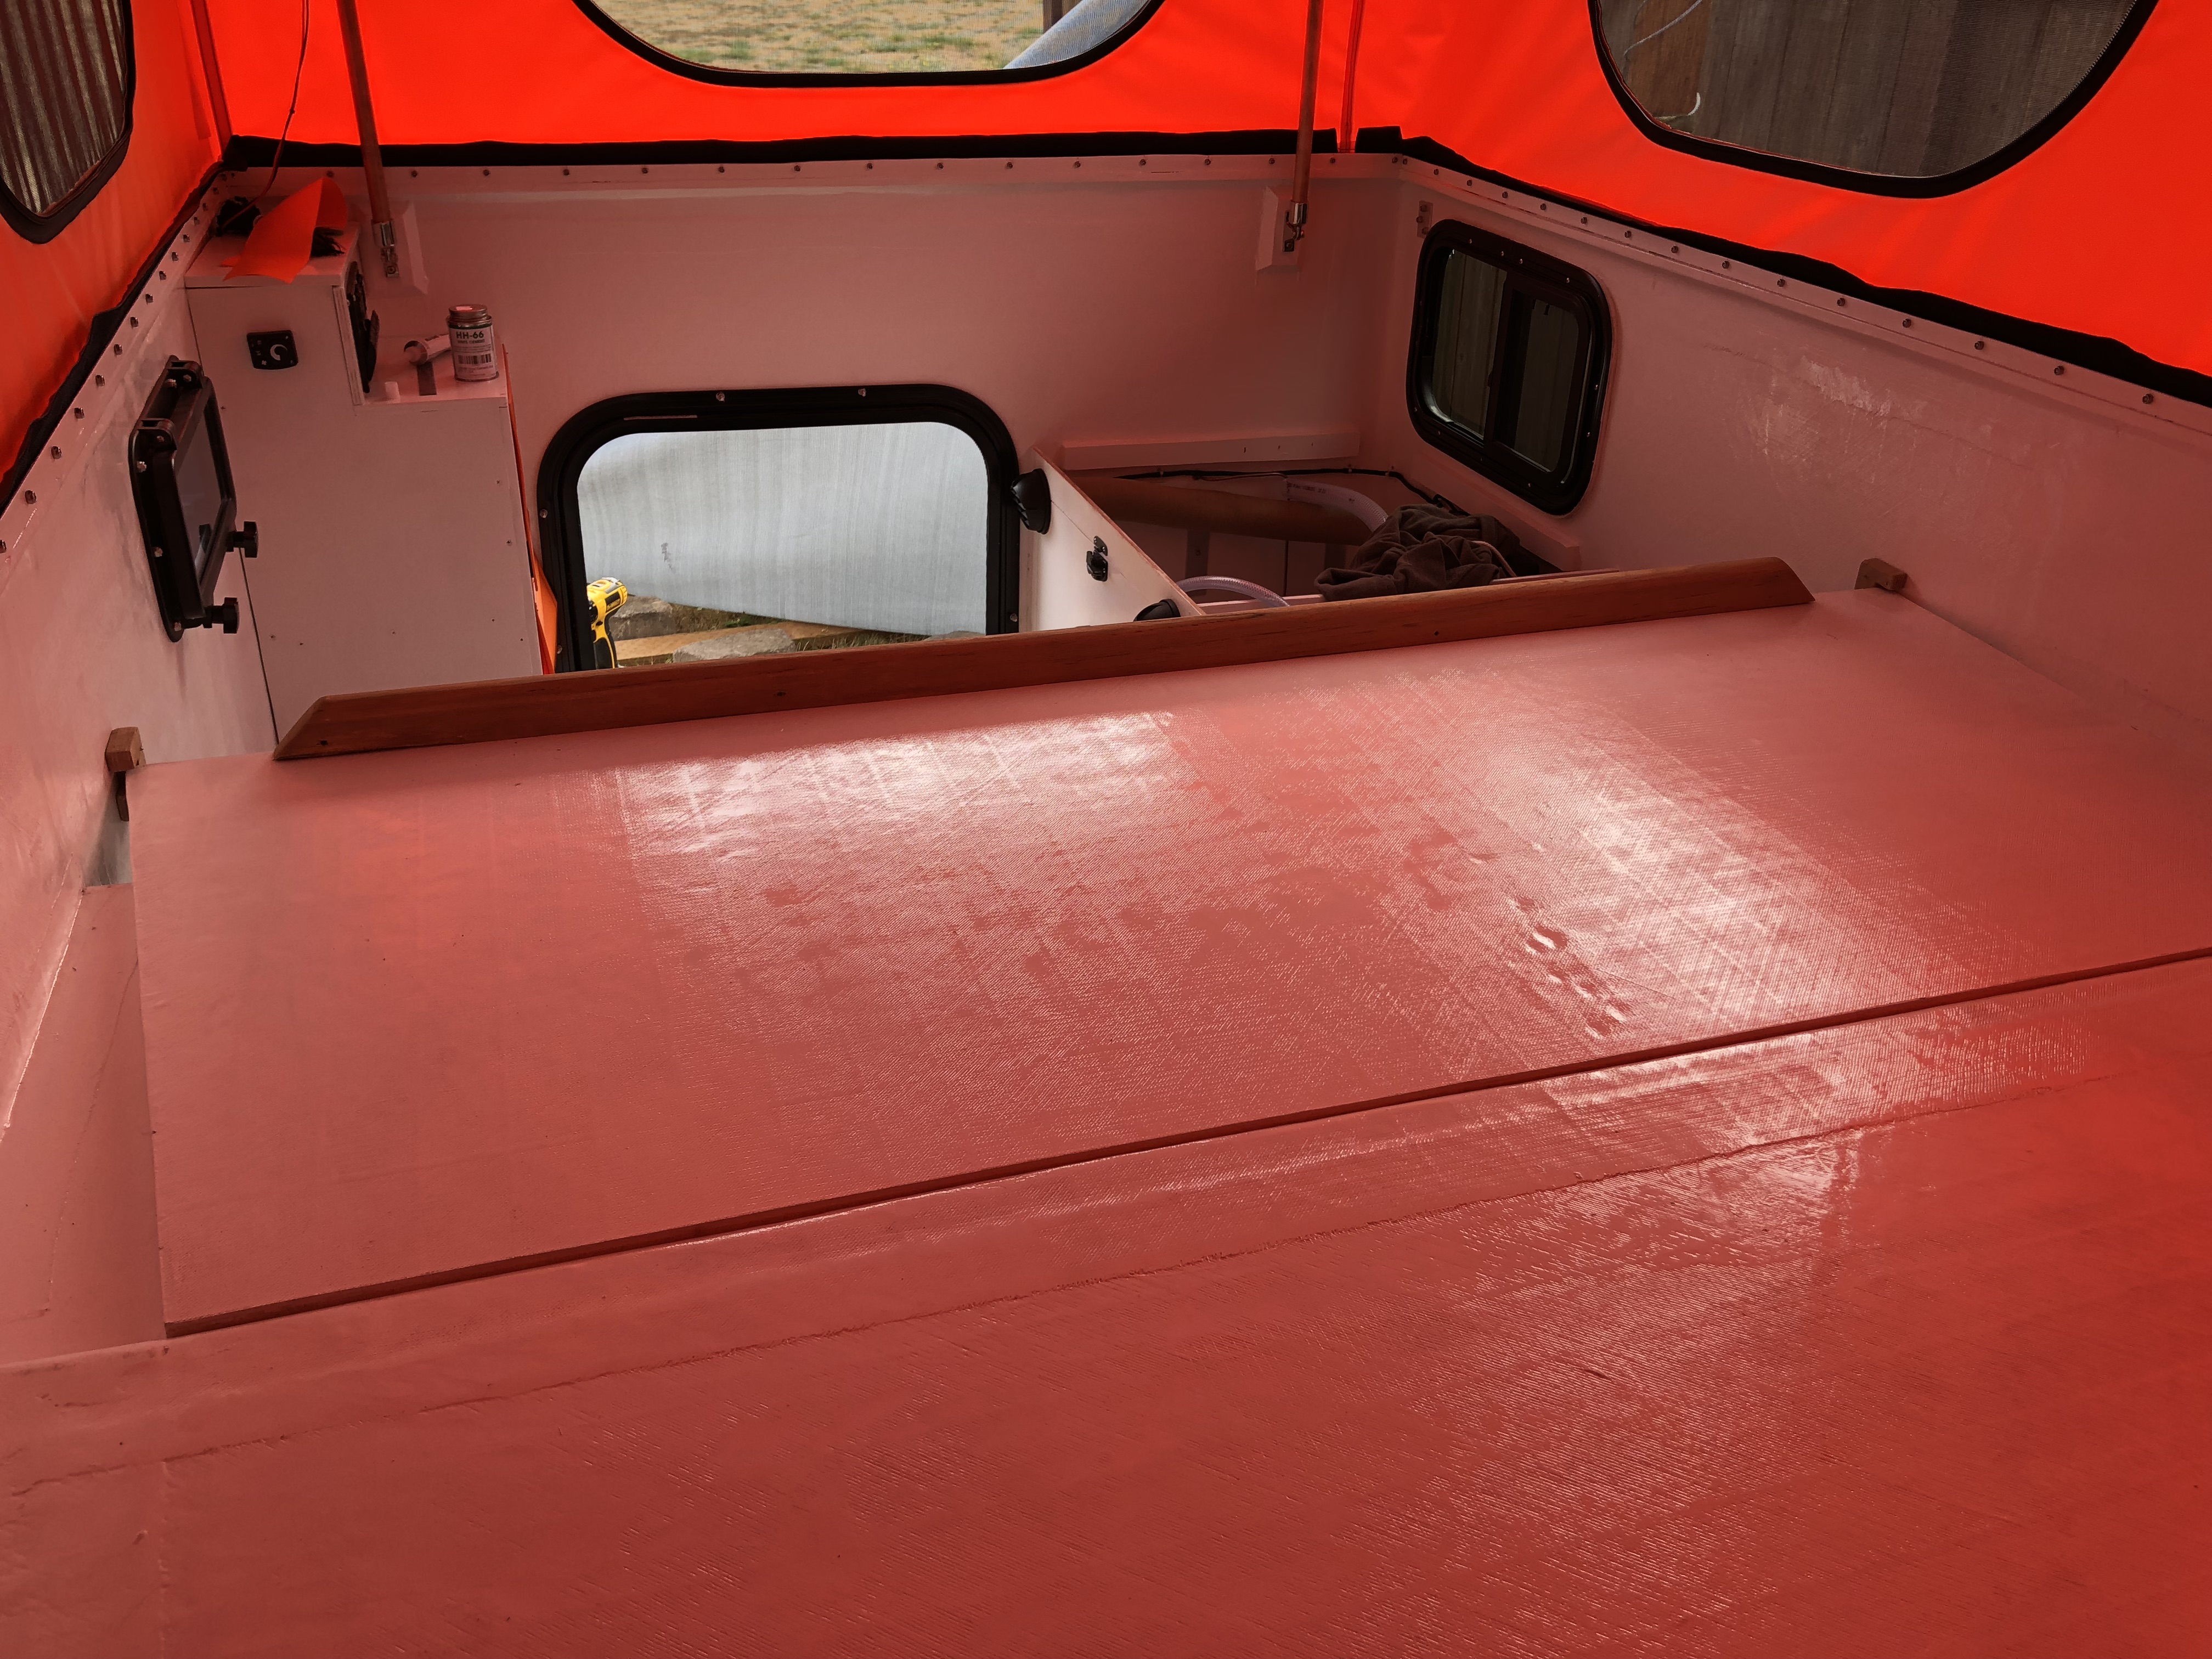
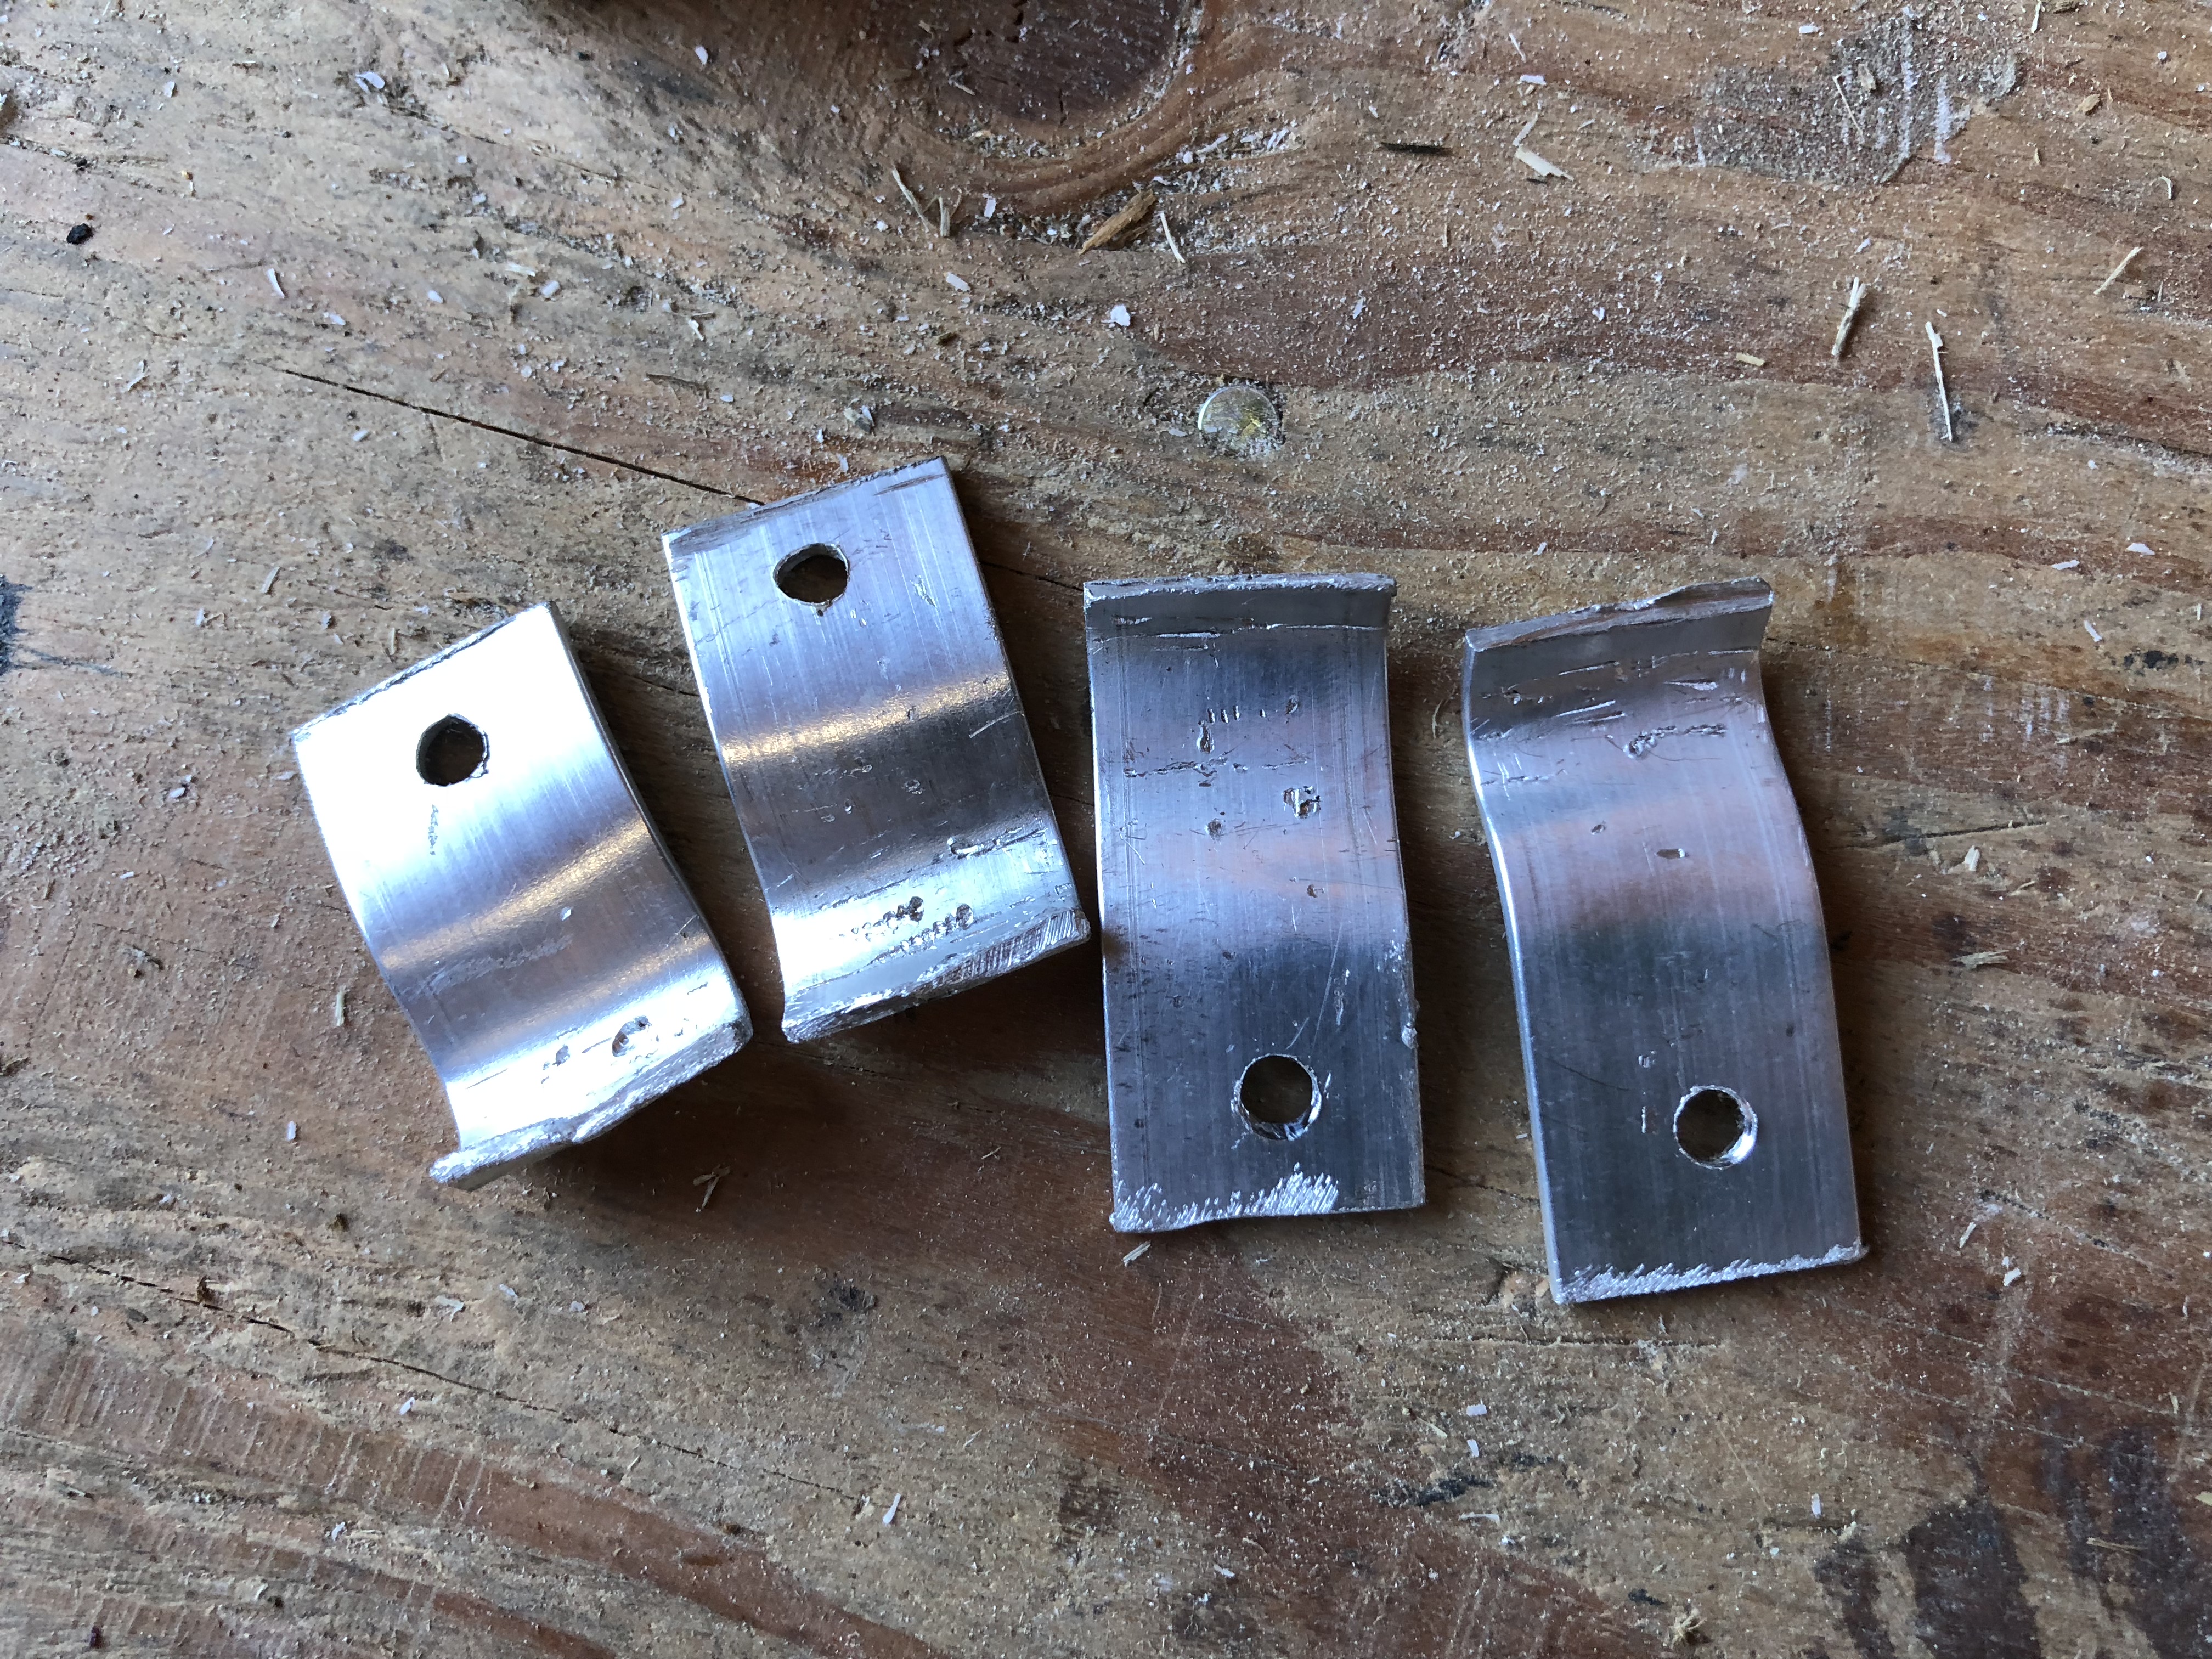
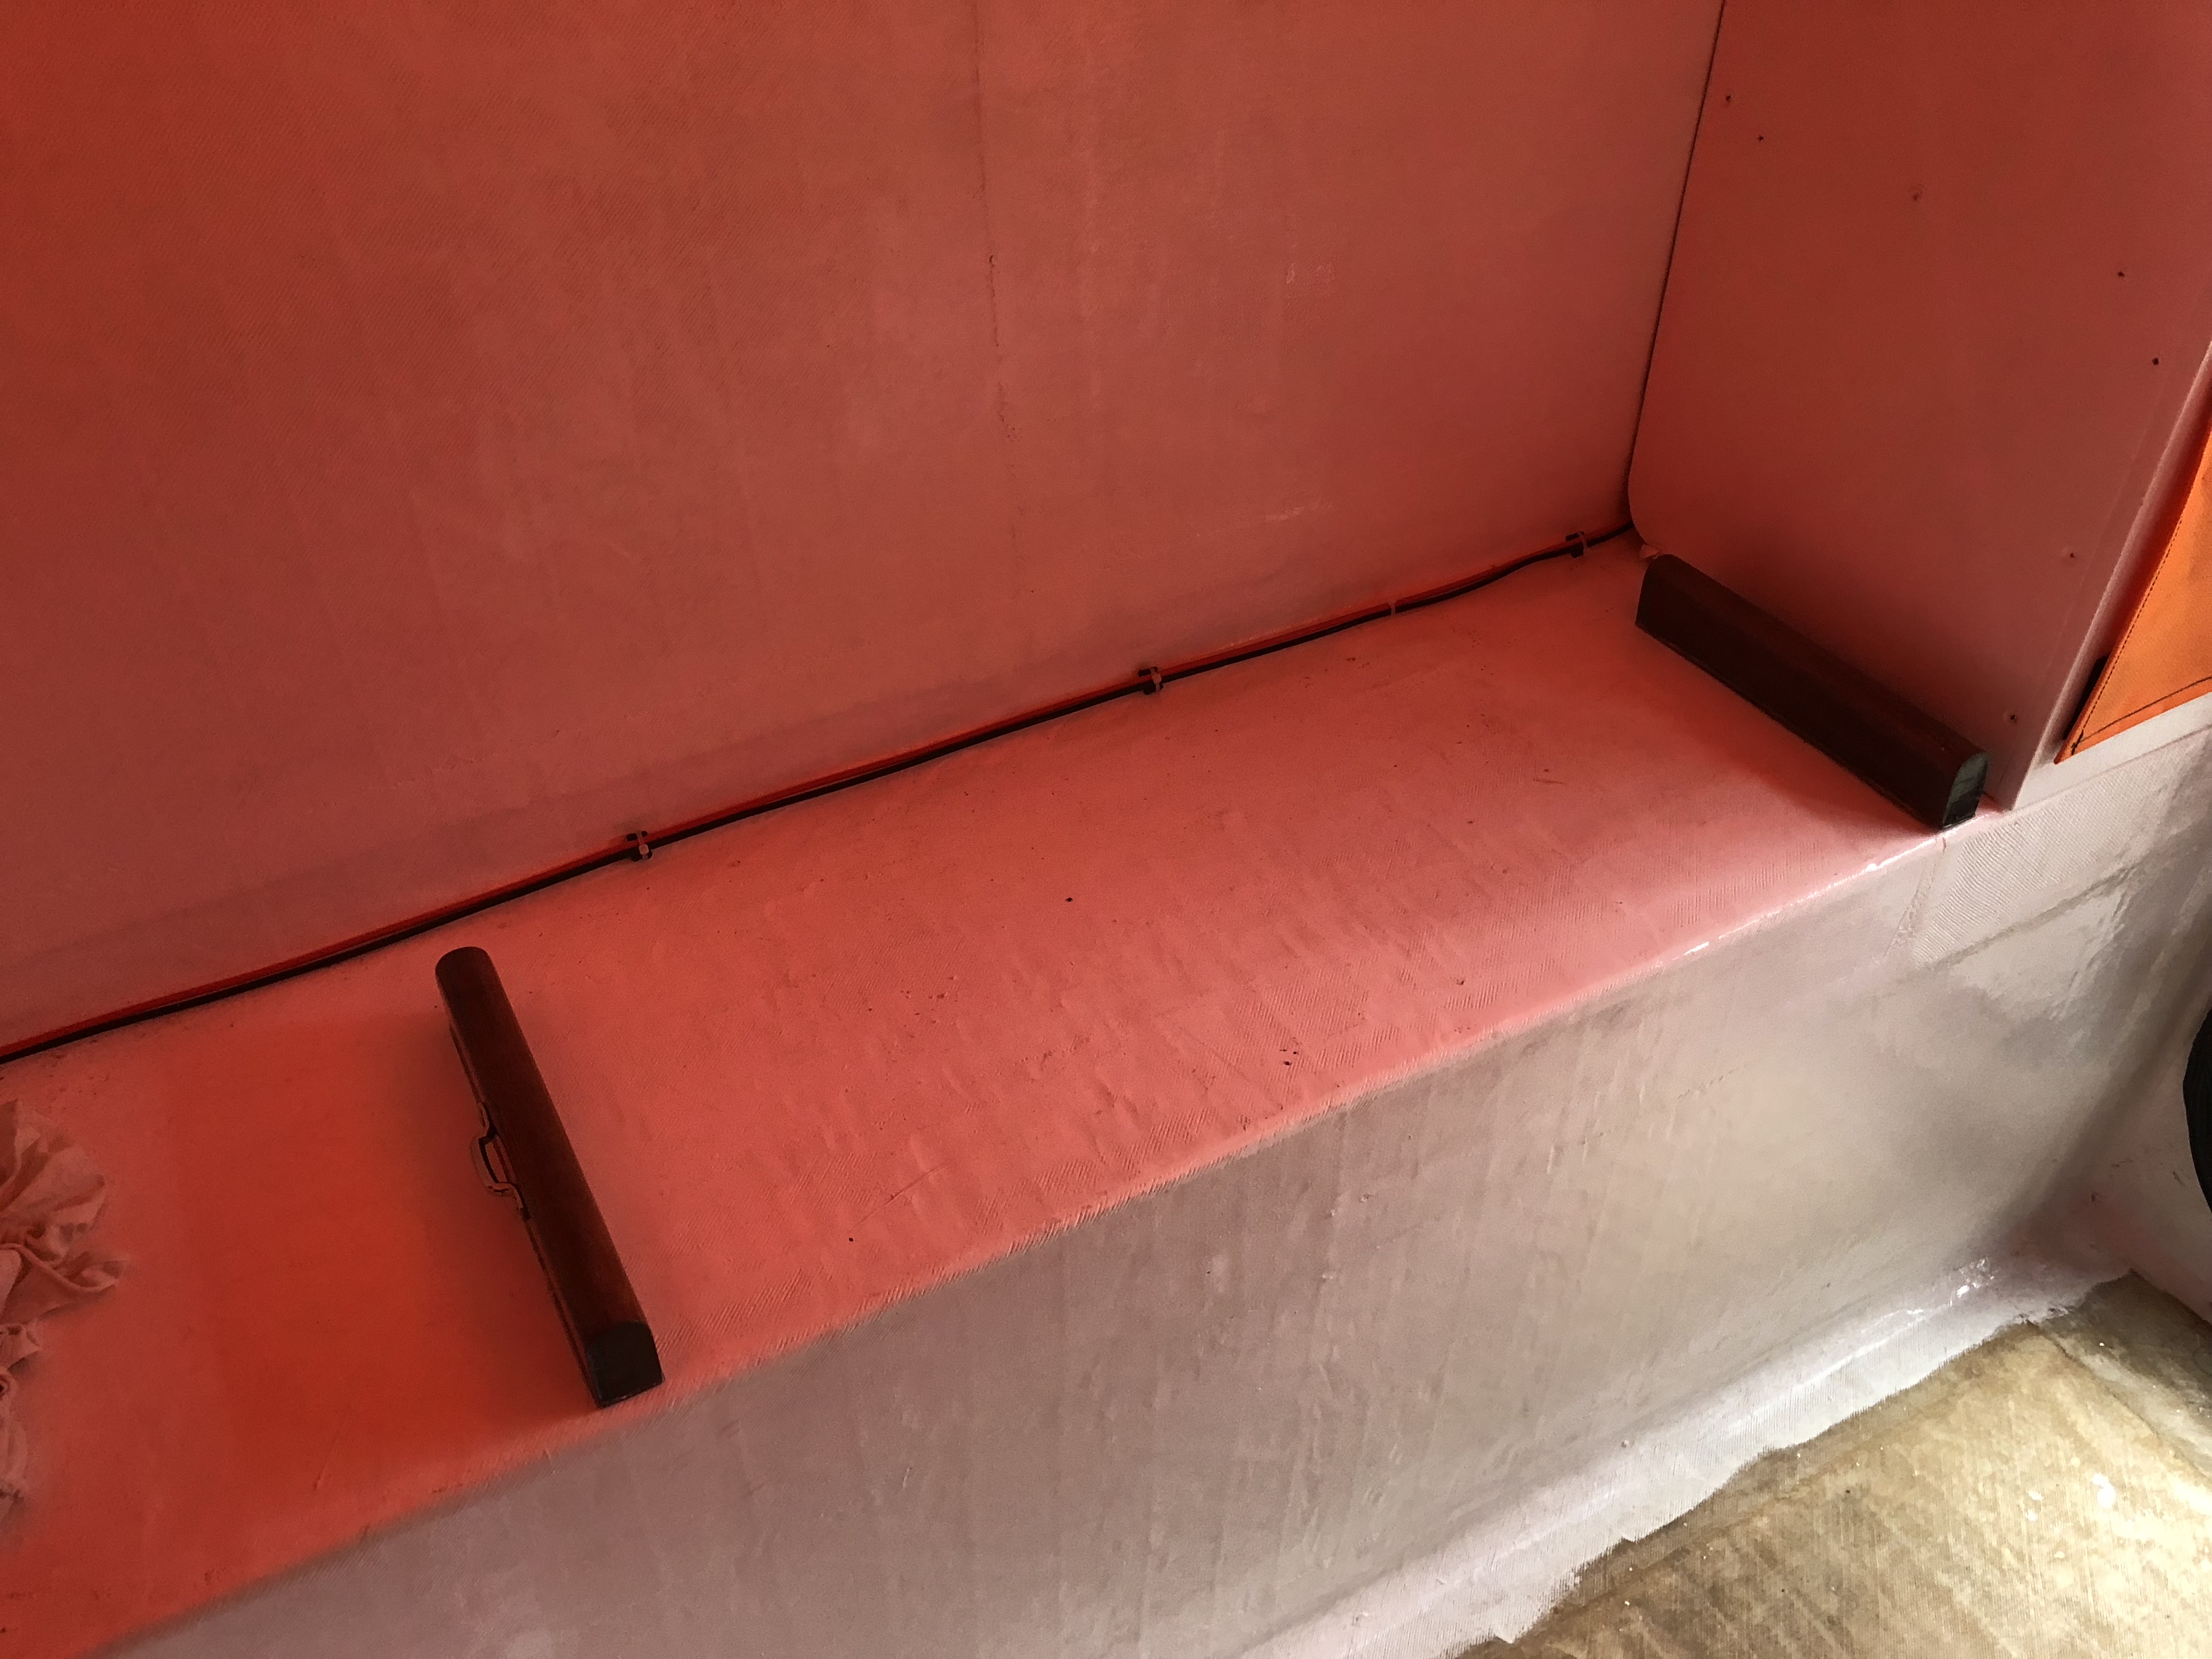
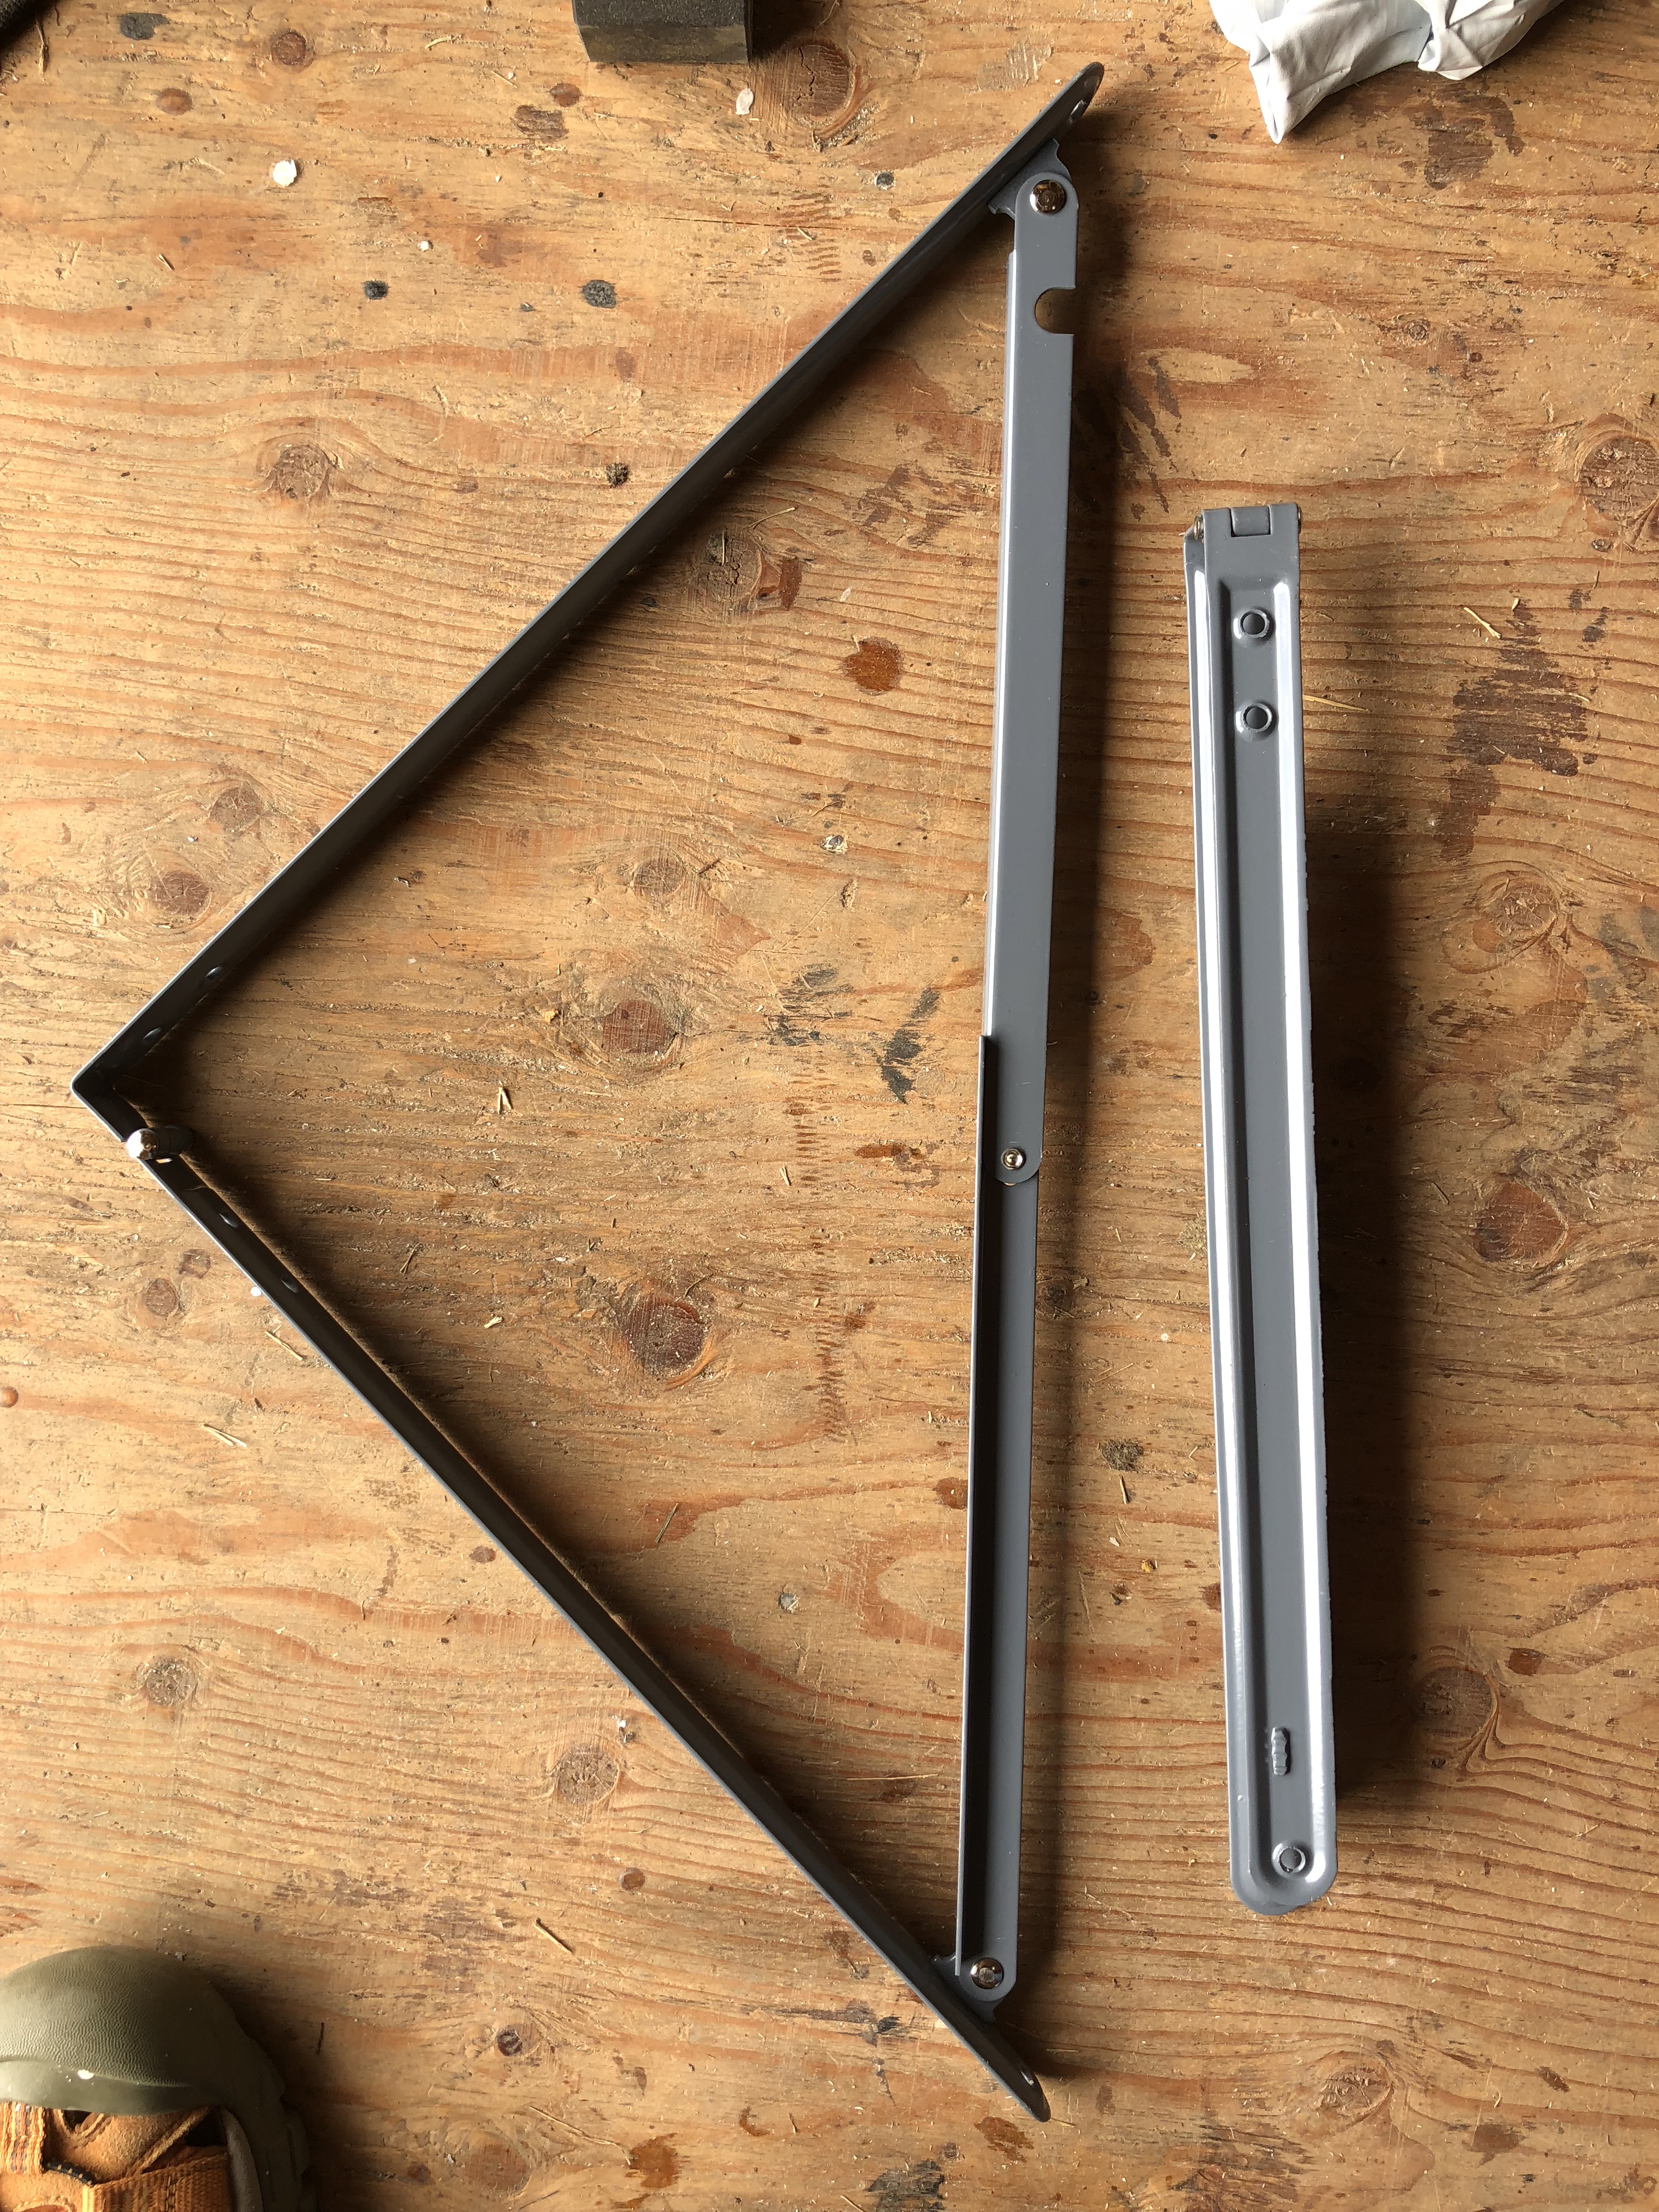
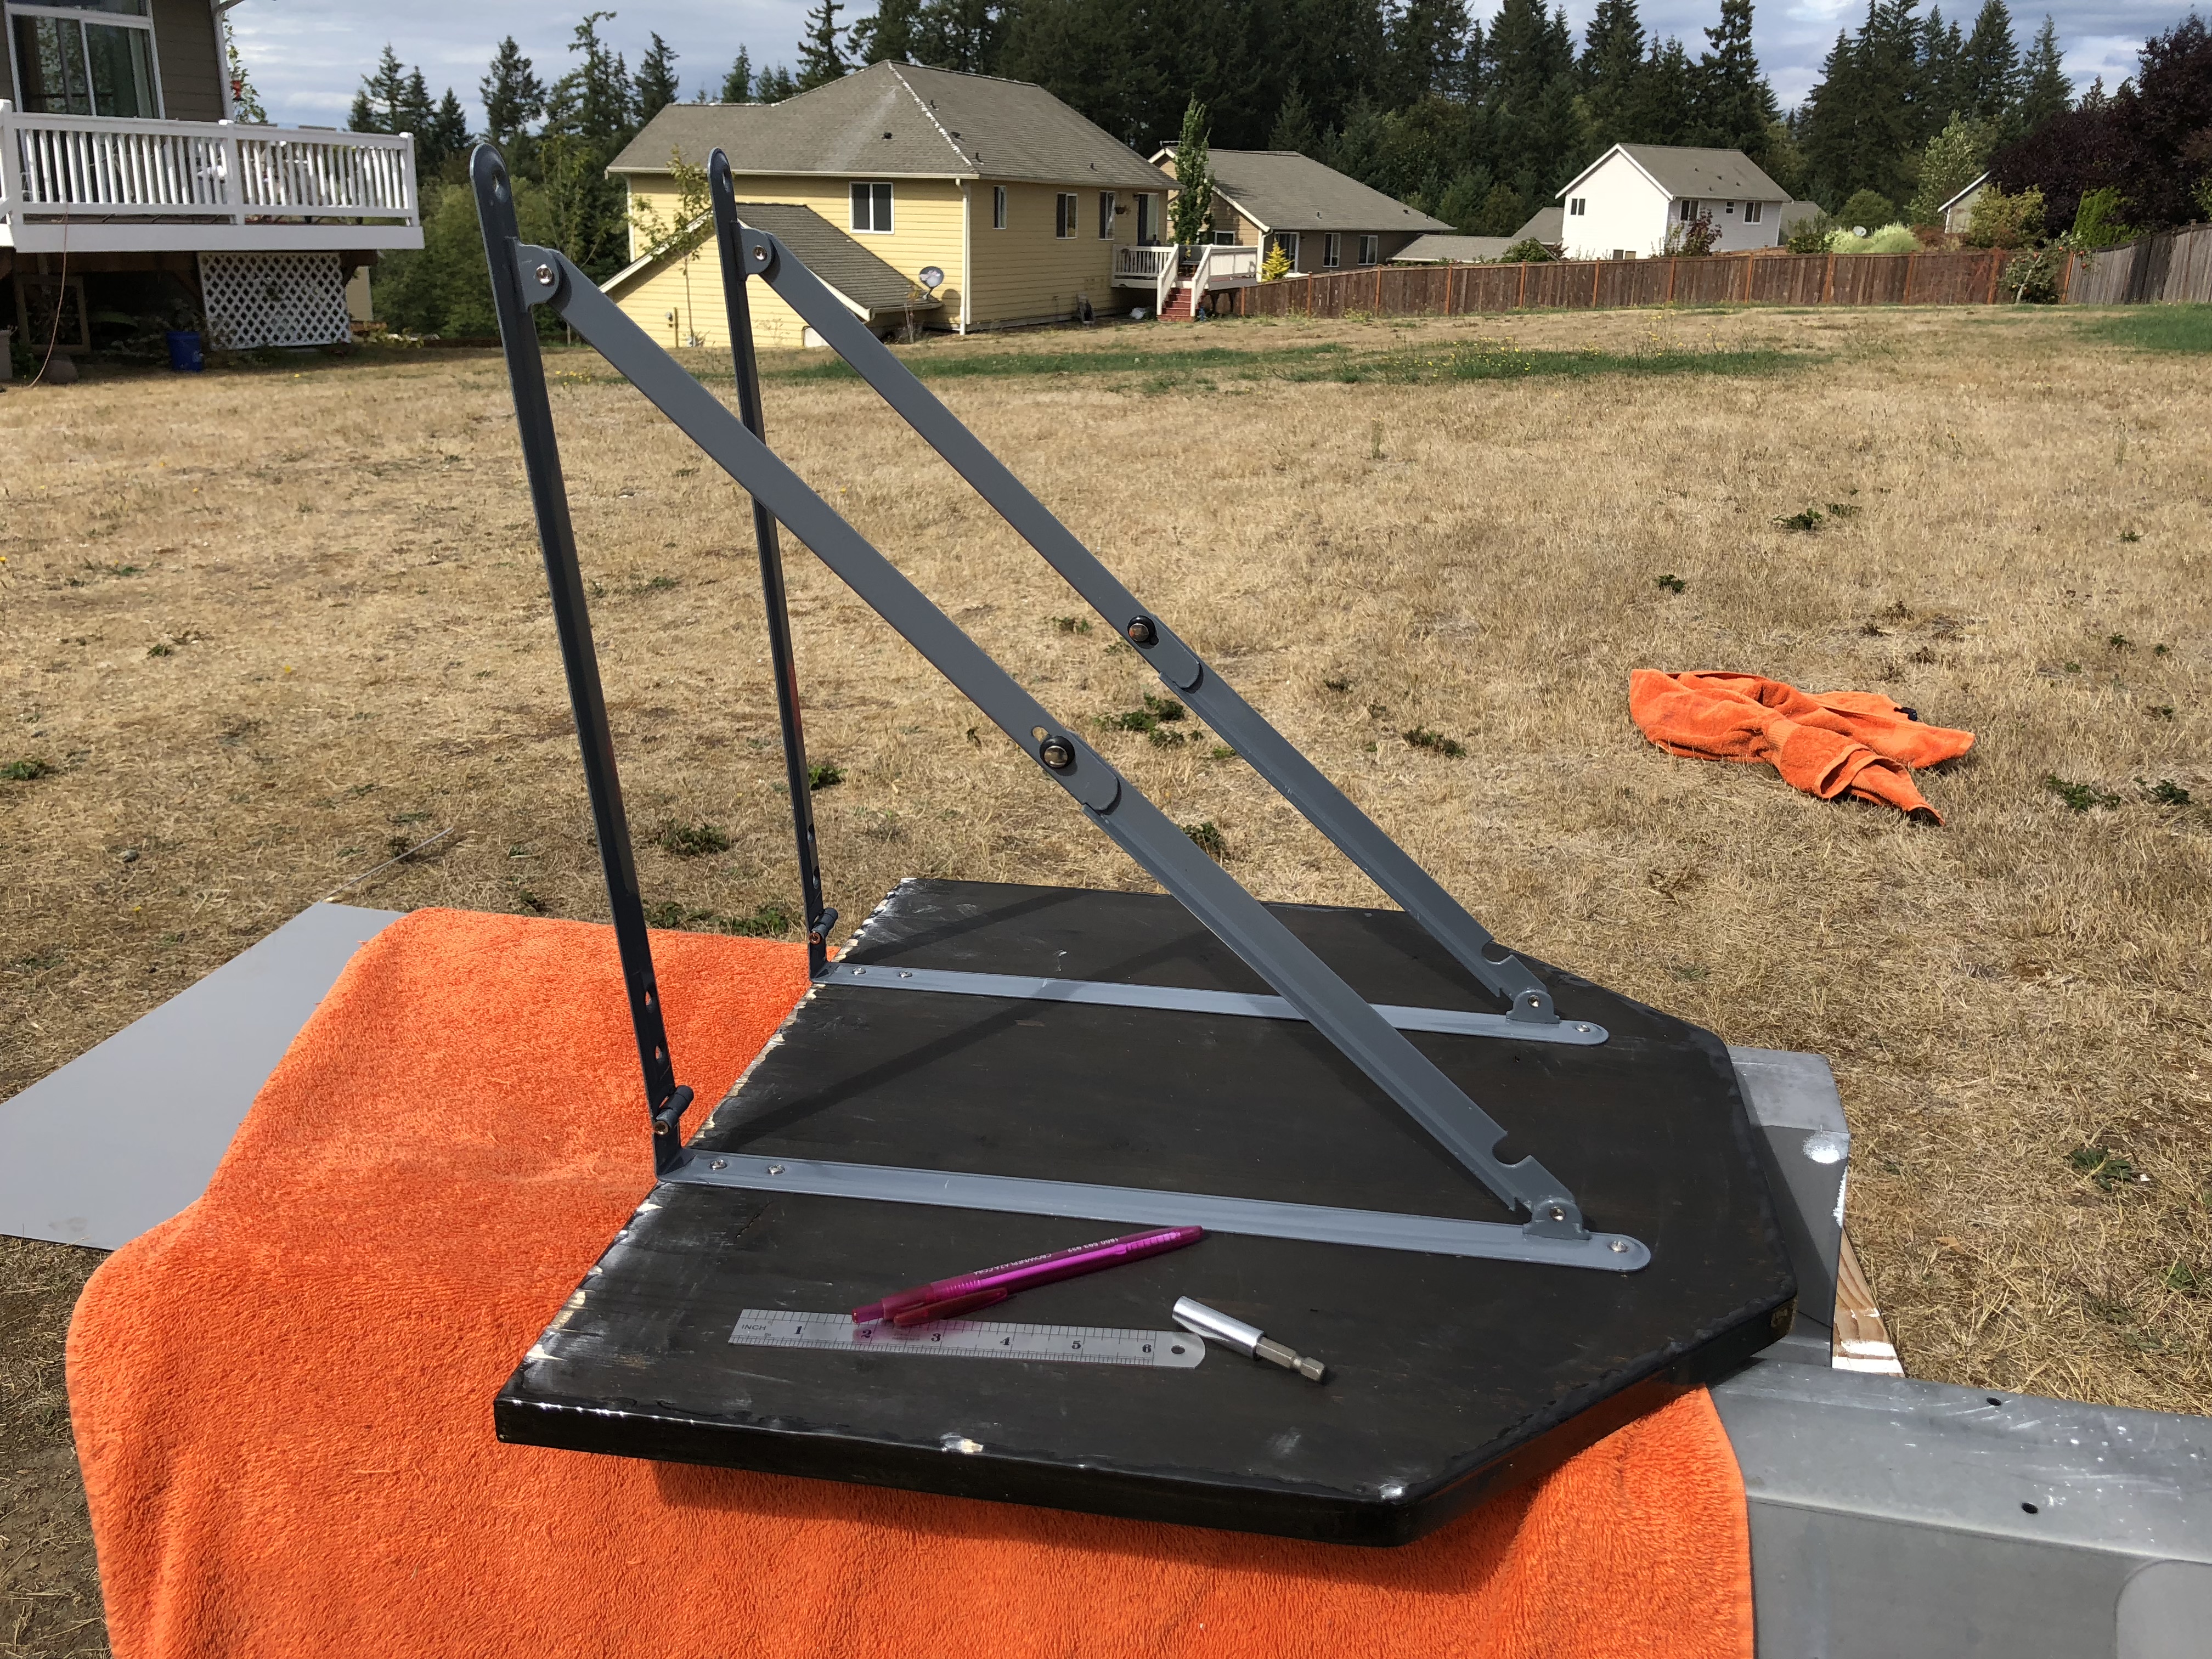
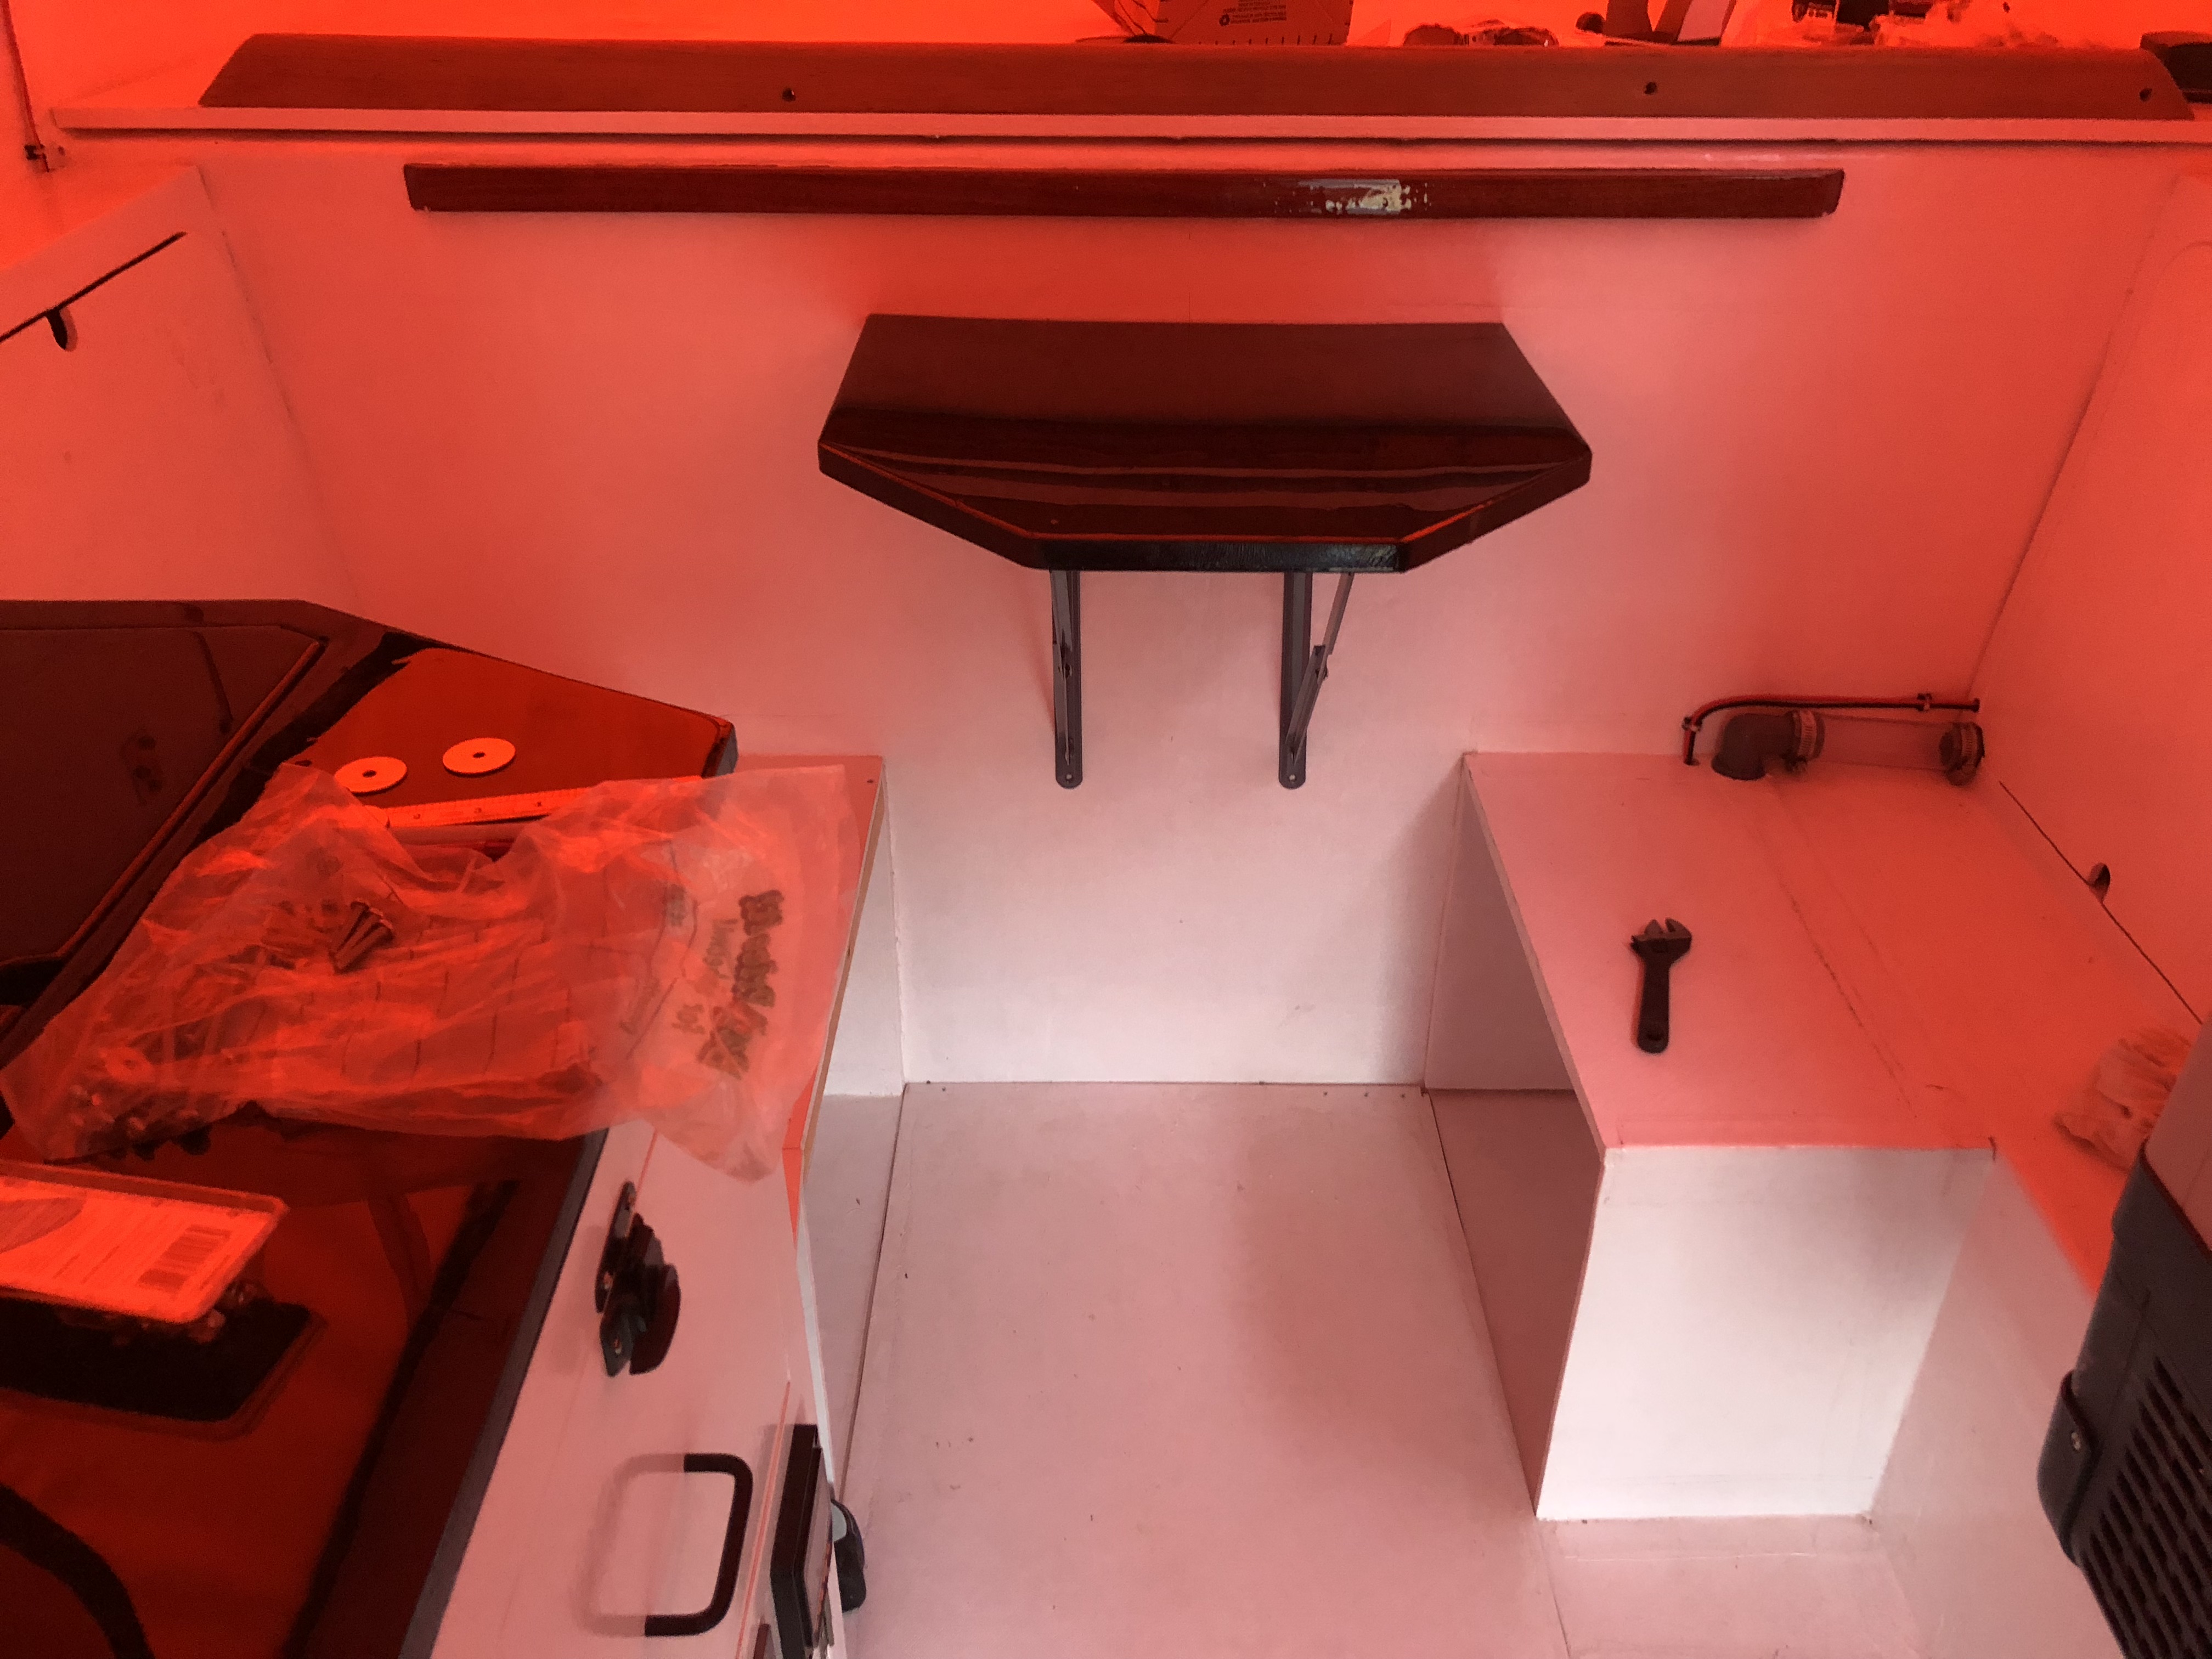
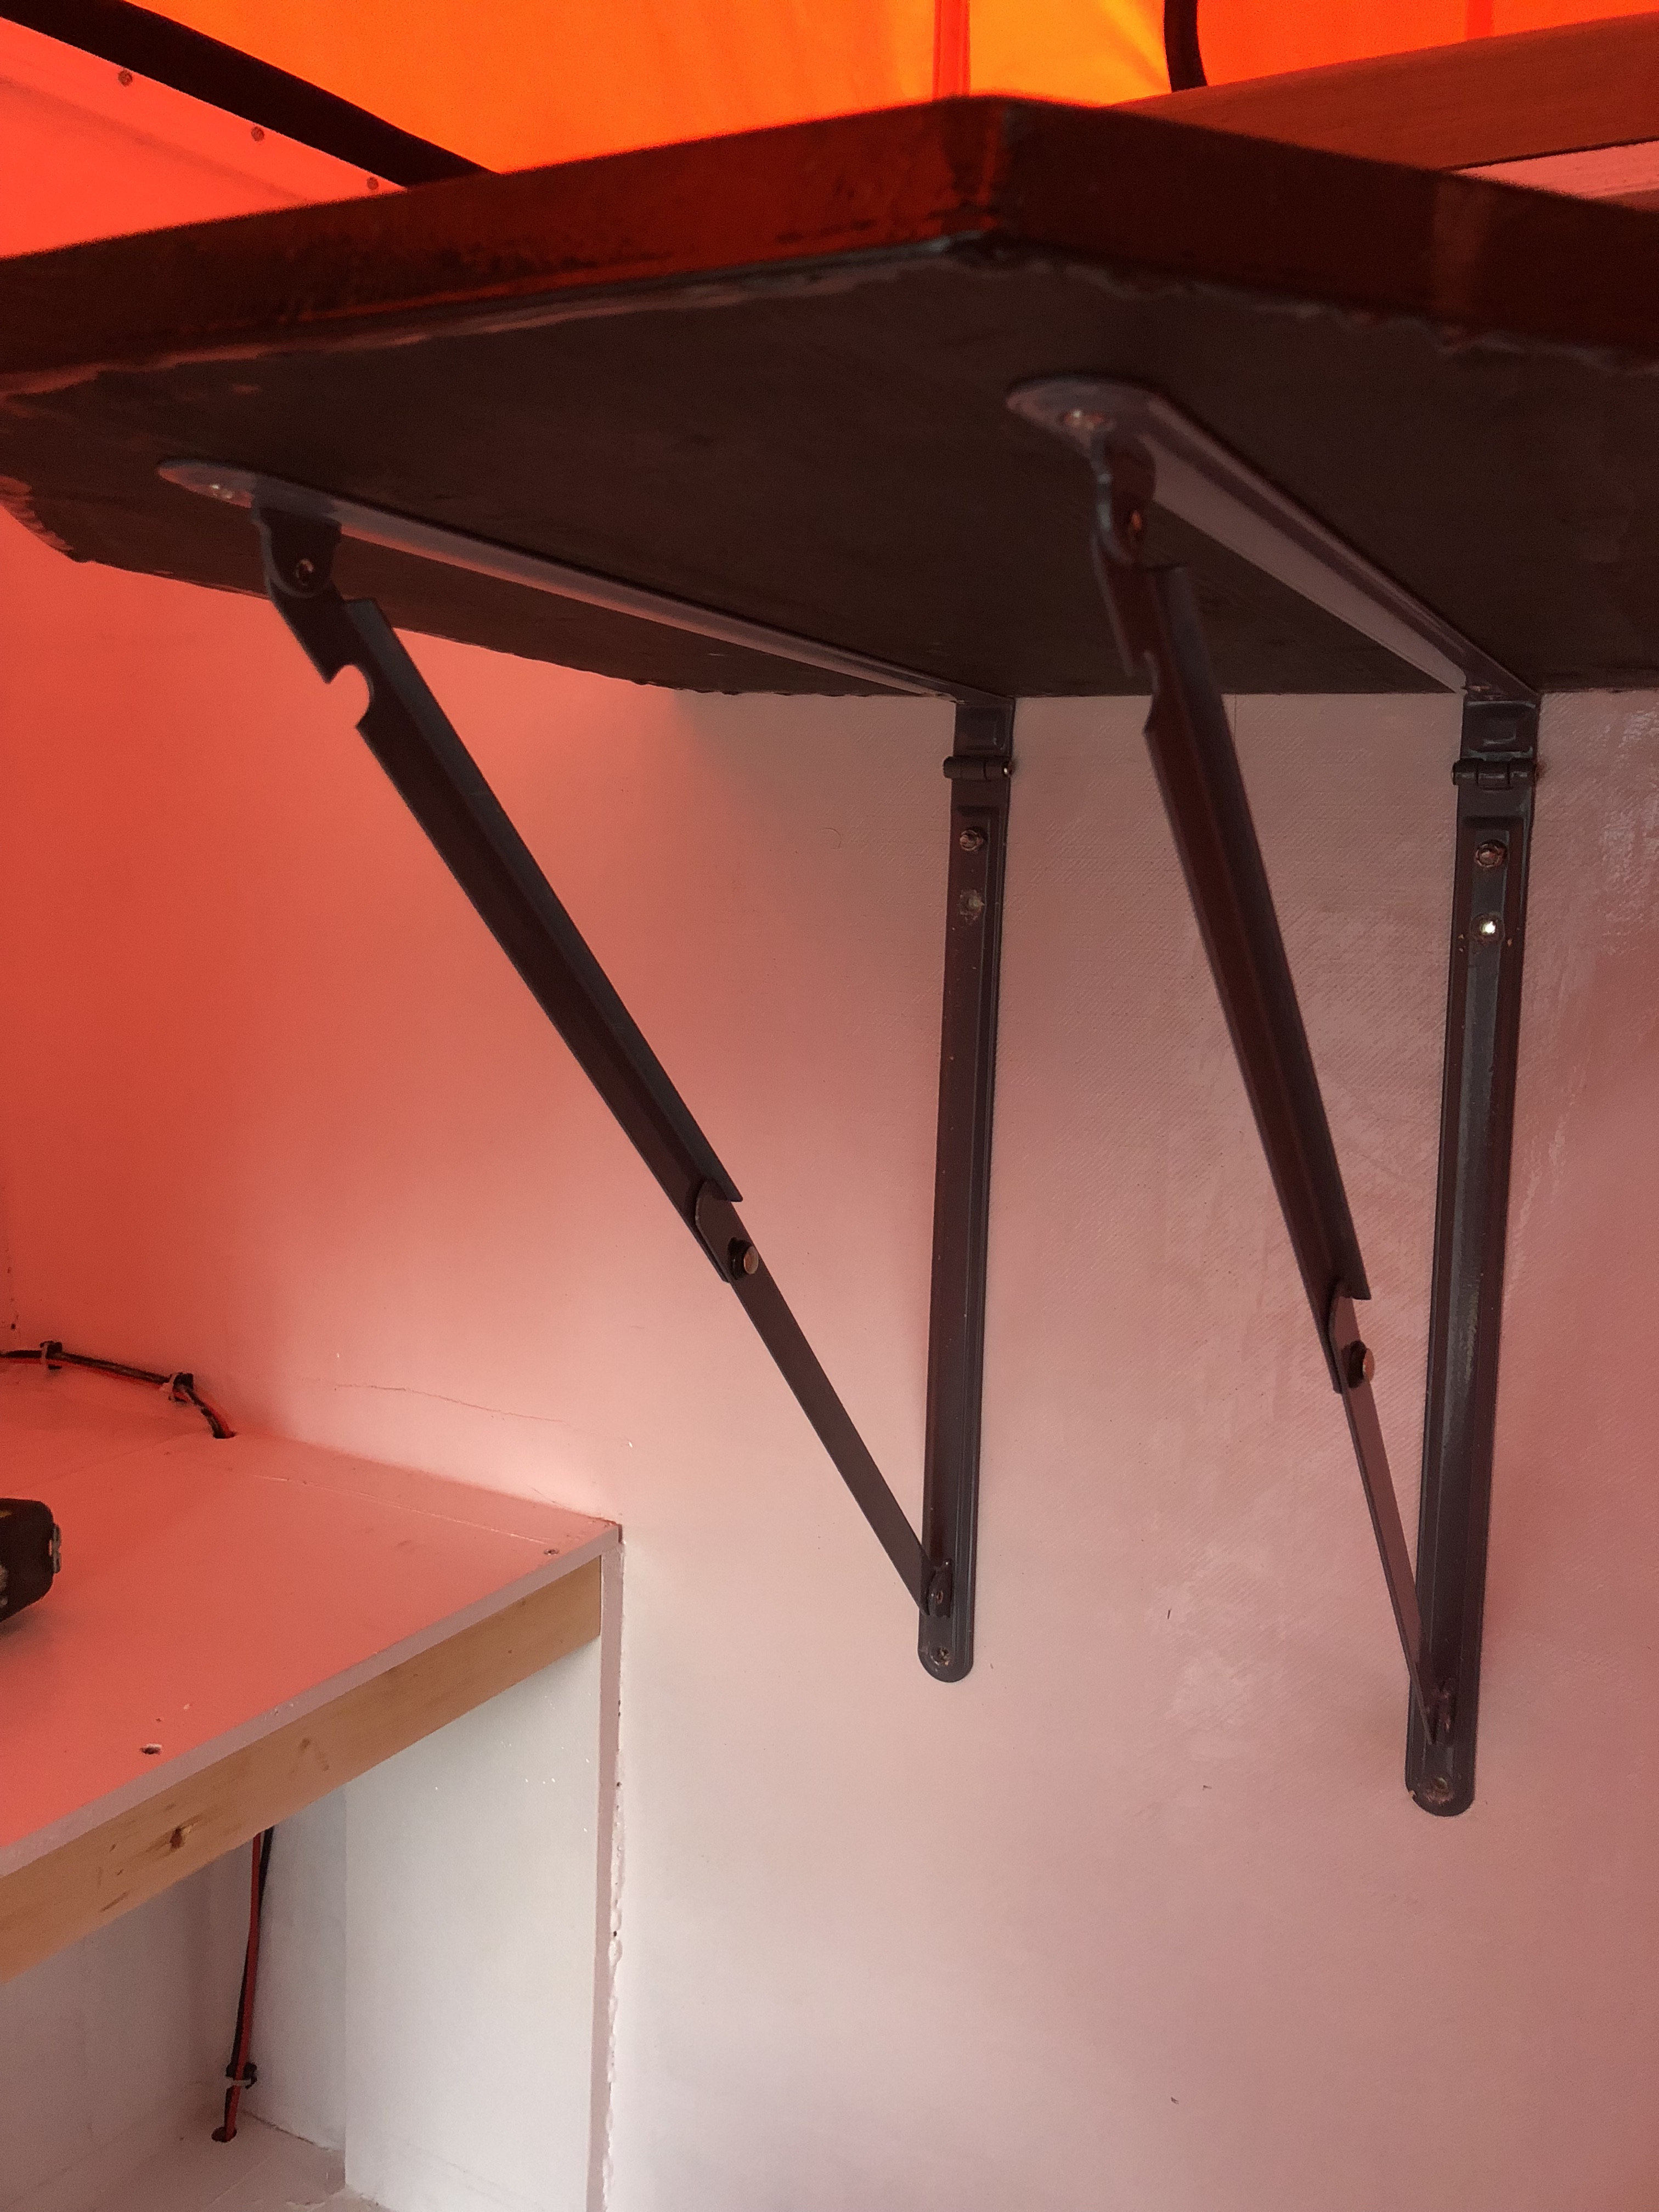
We're waiting for the piece to cover that hole to come in still. We also needed to work on the slide out for the bed some more. It rests on the seatbacks for the most part, but it needed a little more support further aft.
IMG_0684.jpg

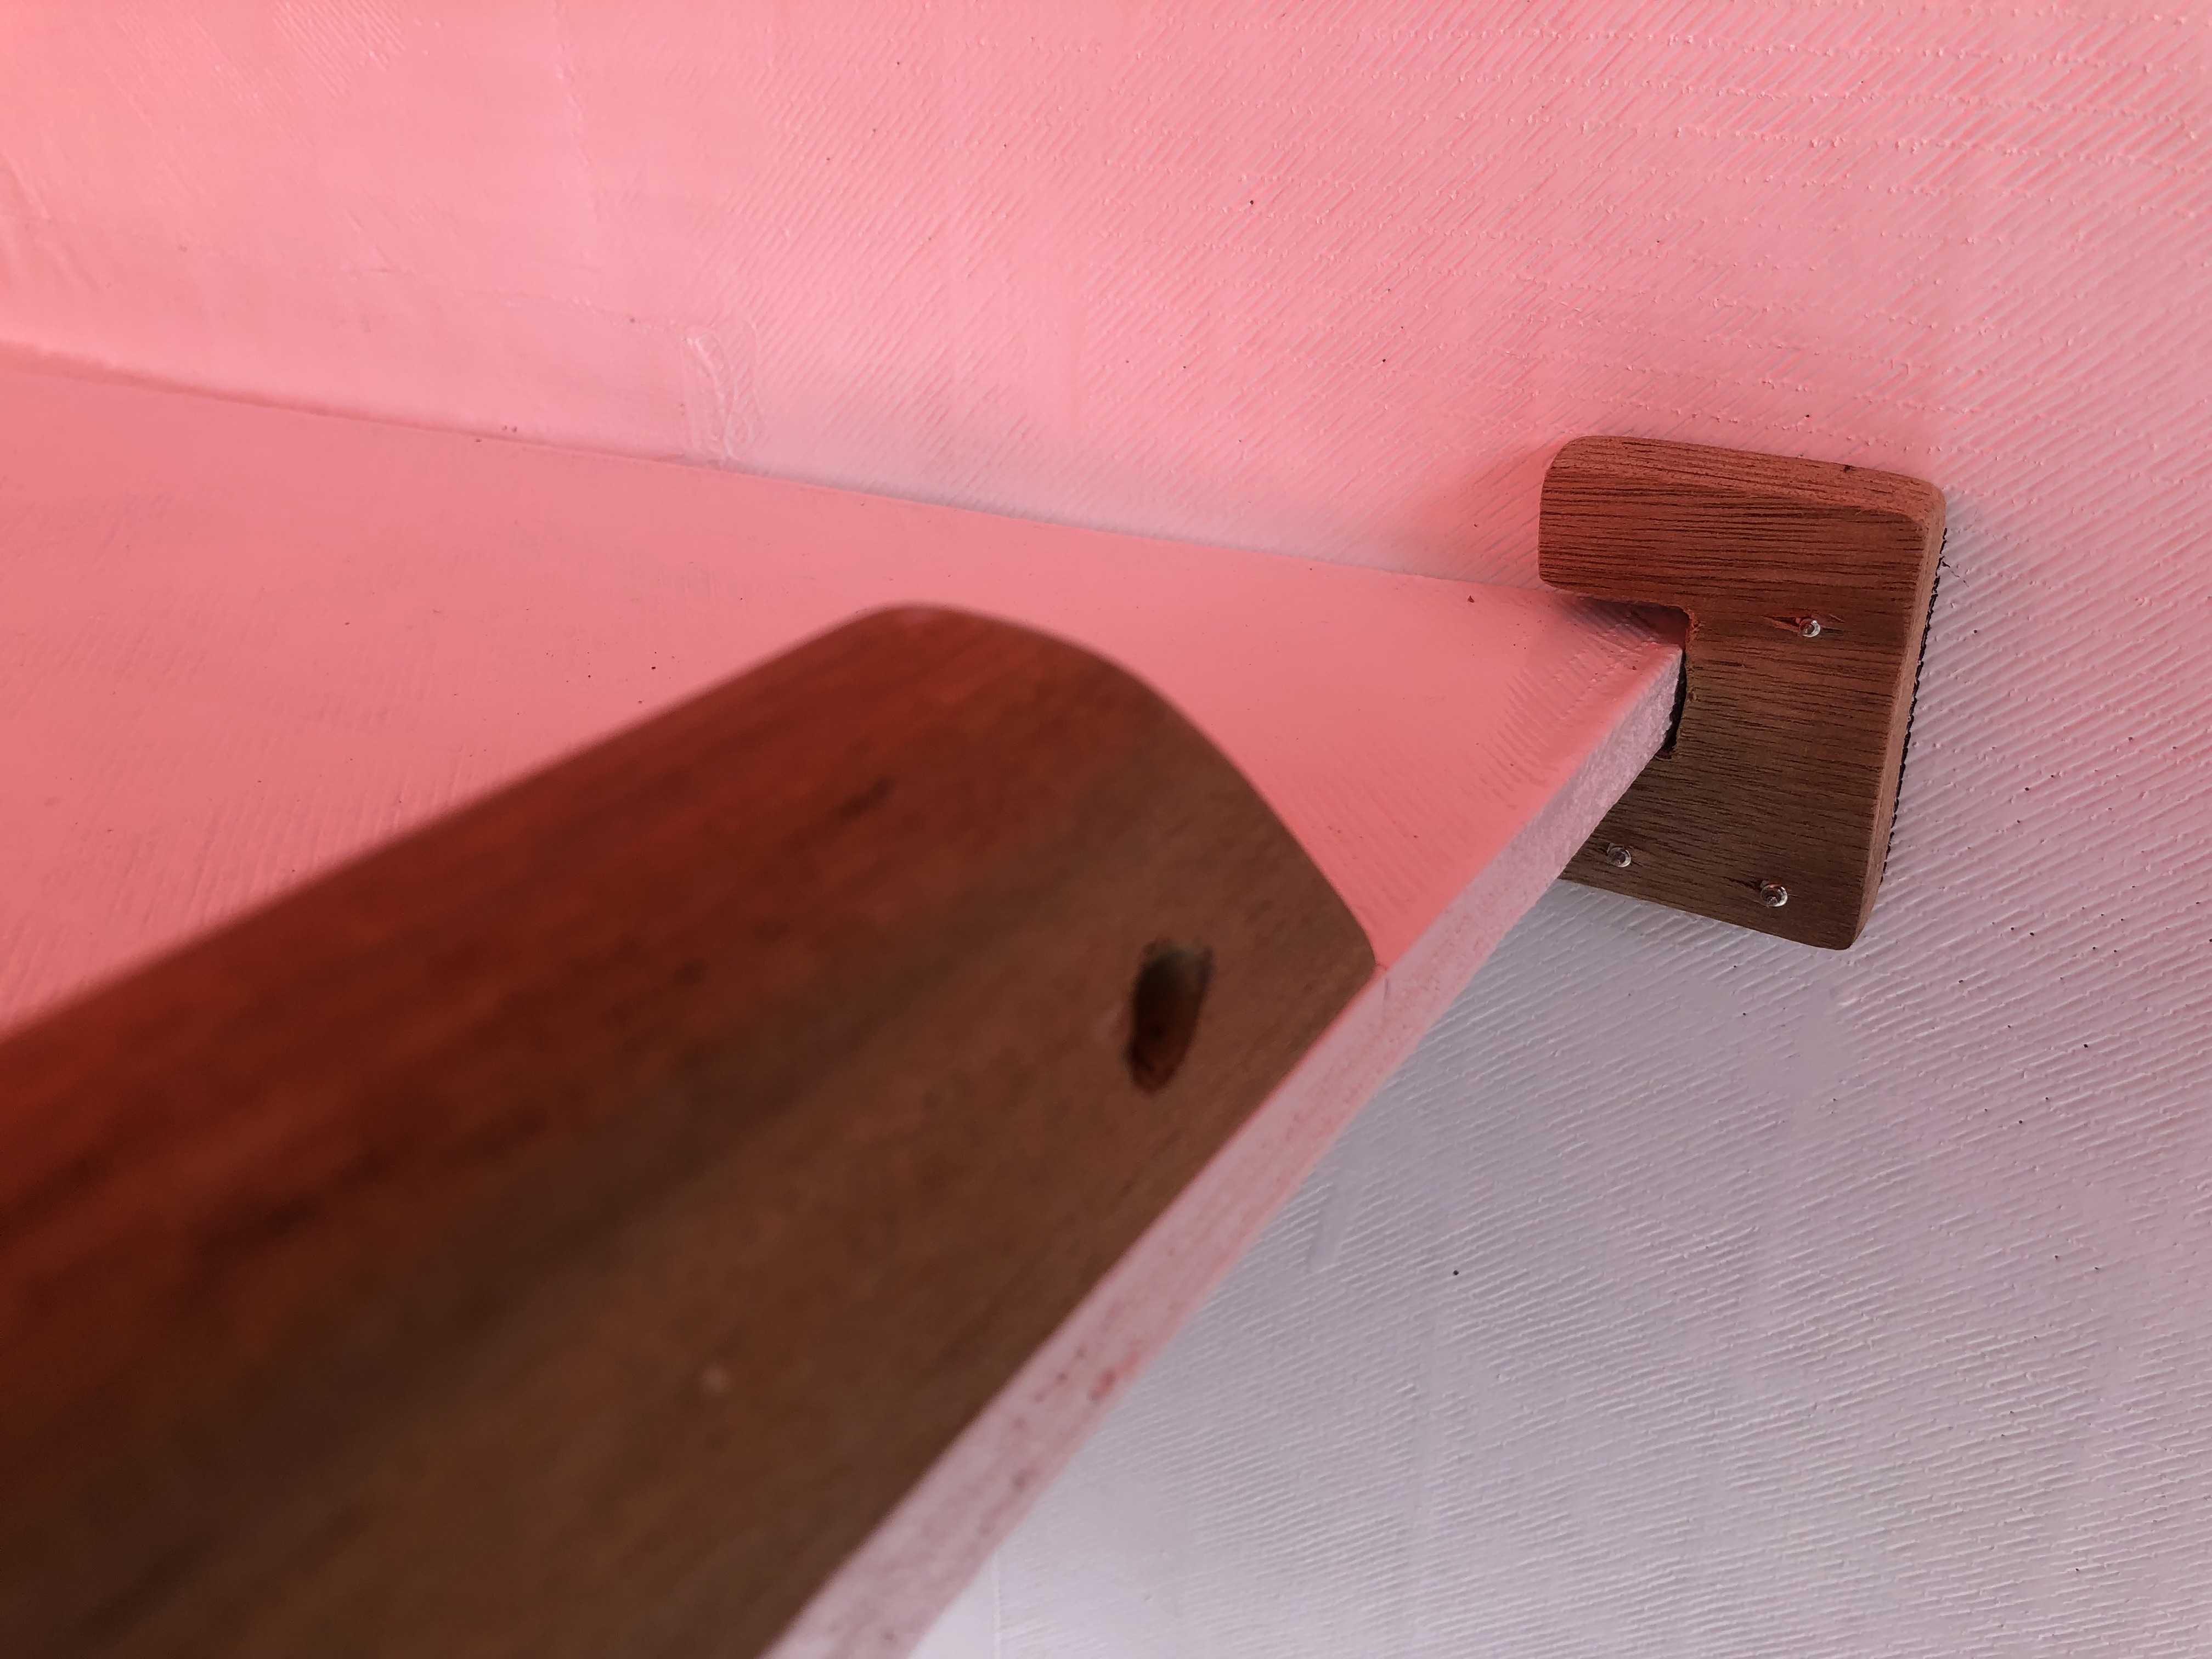
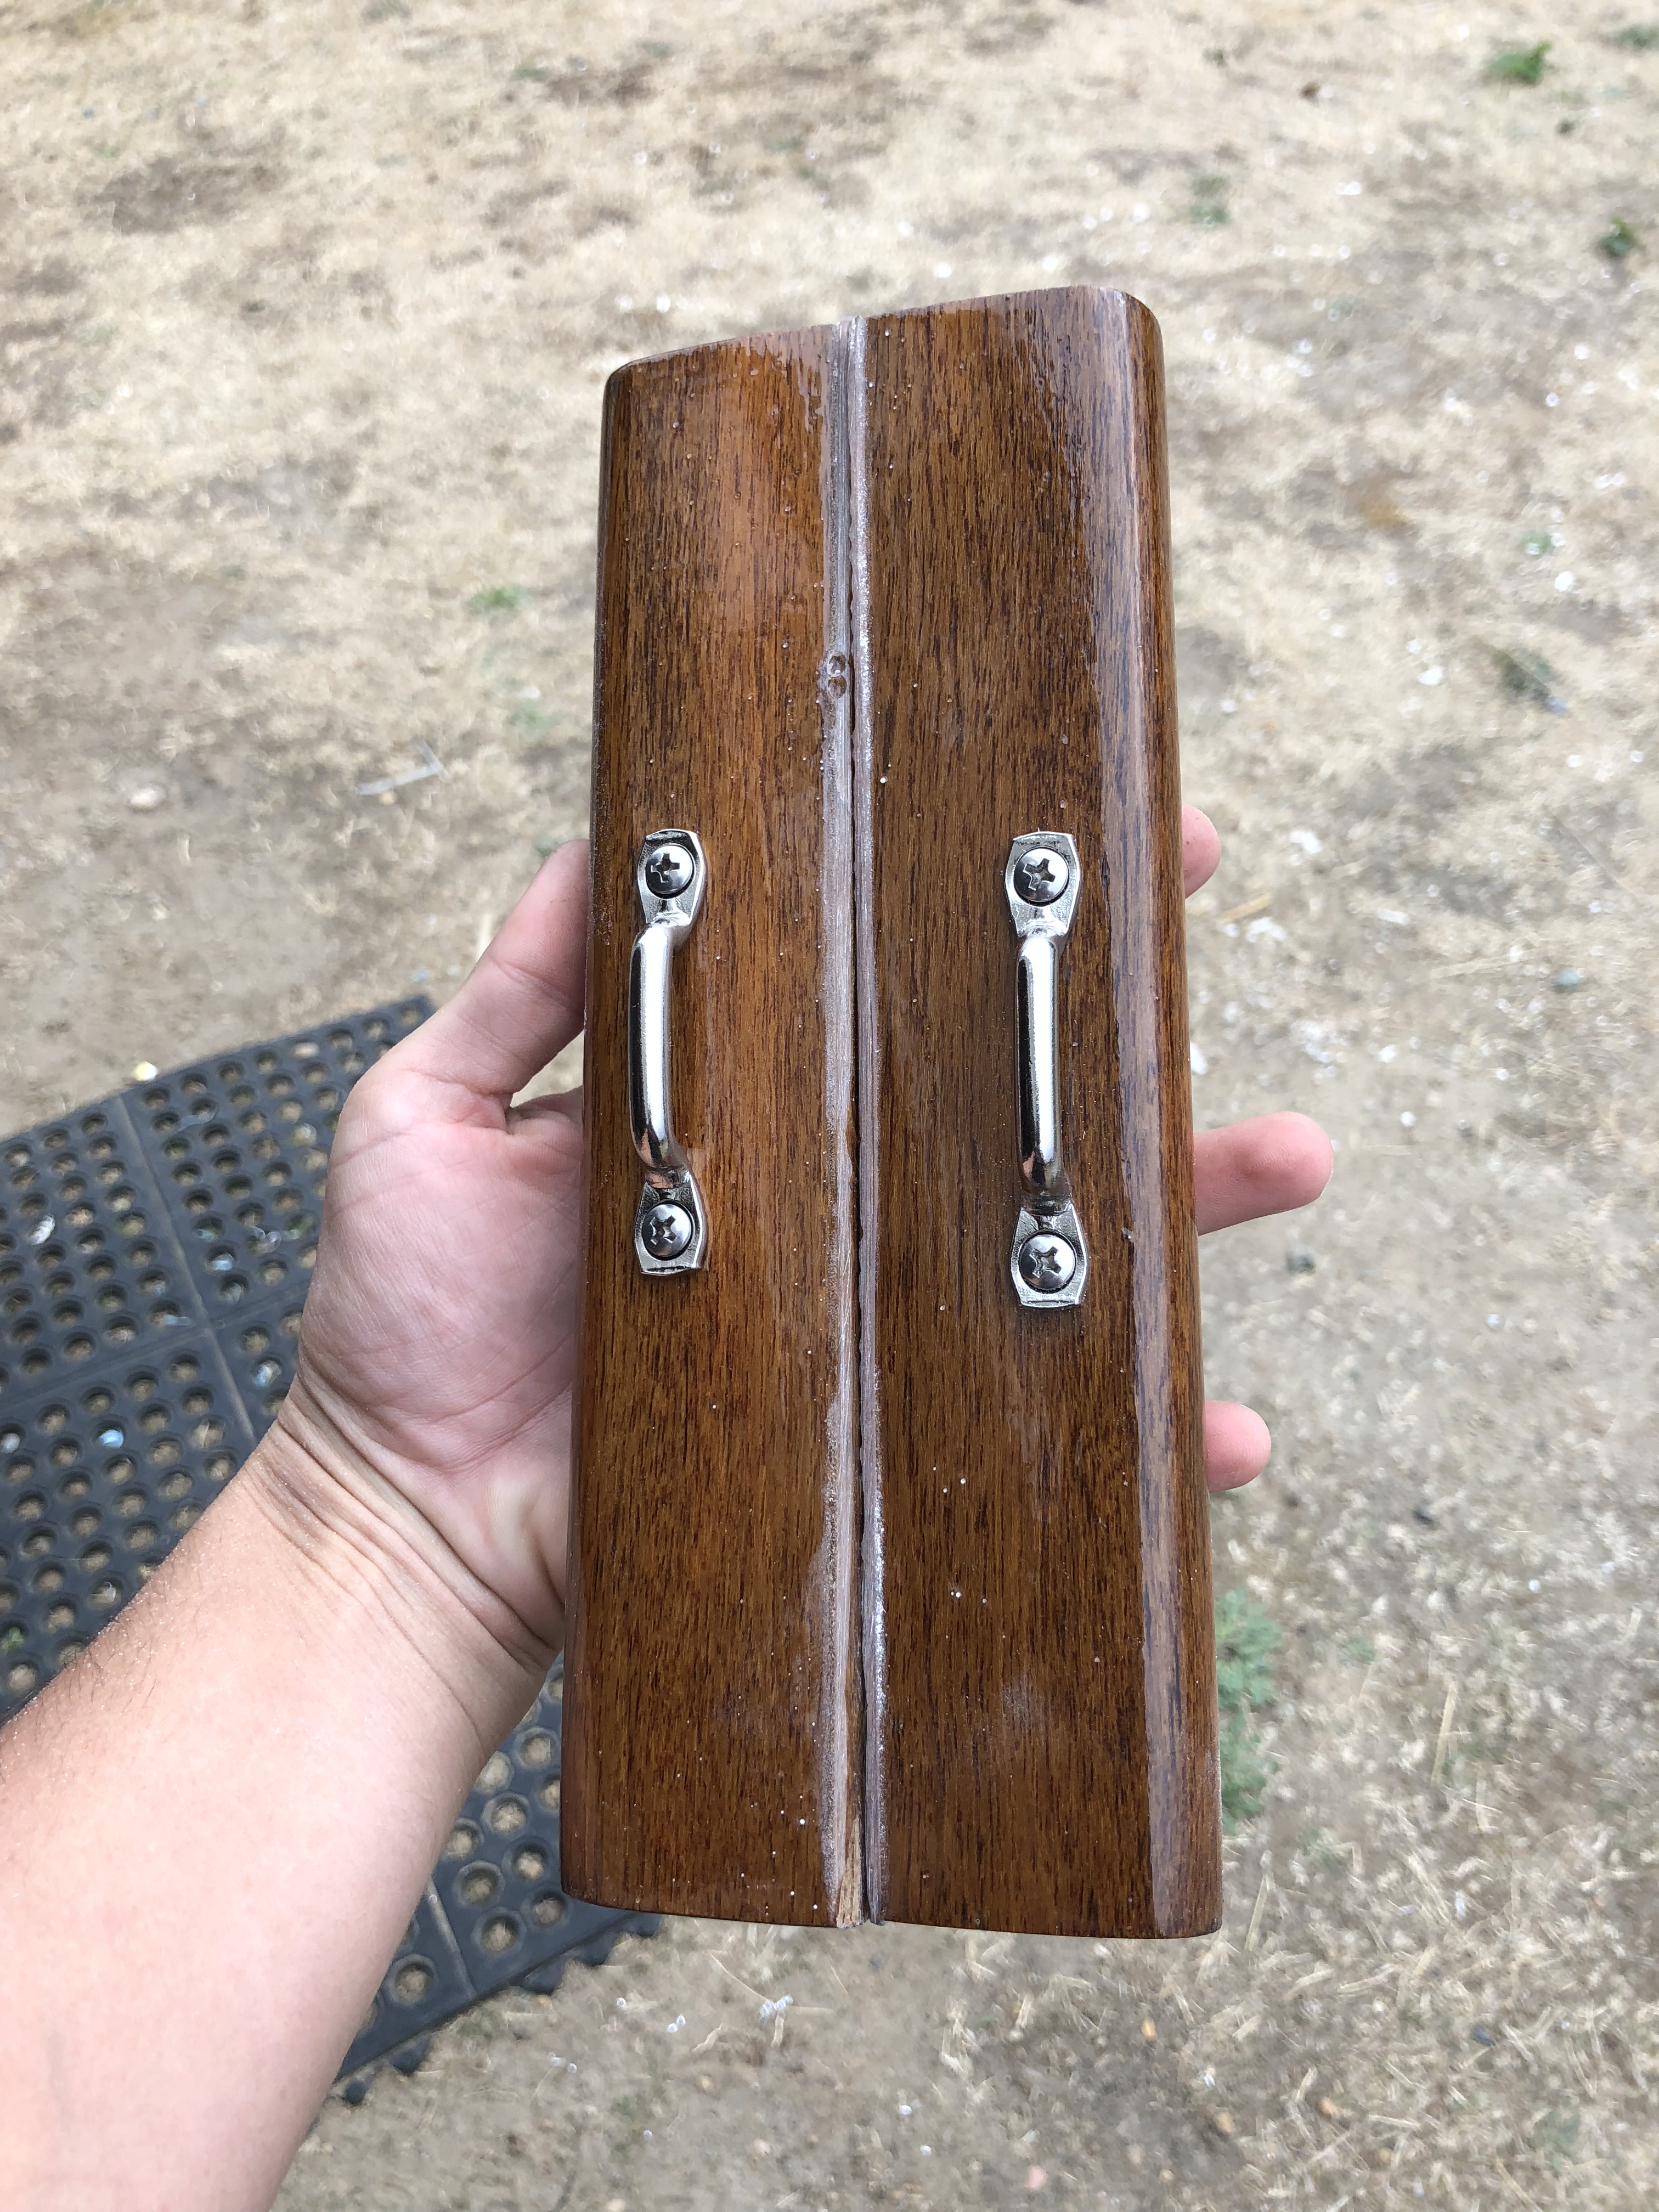
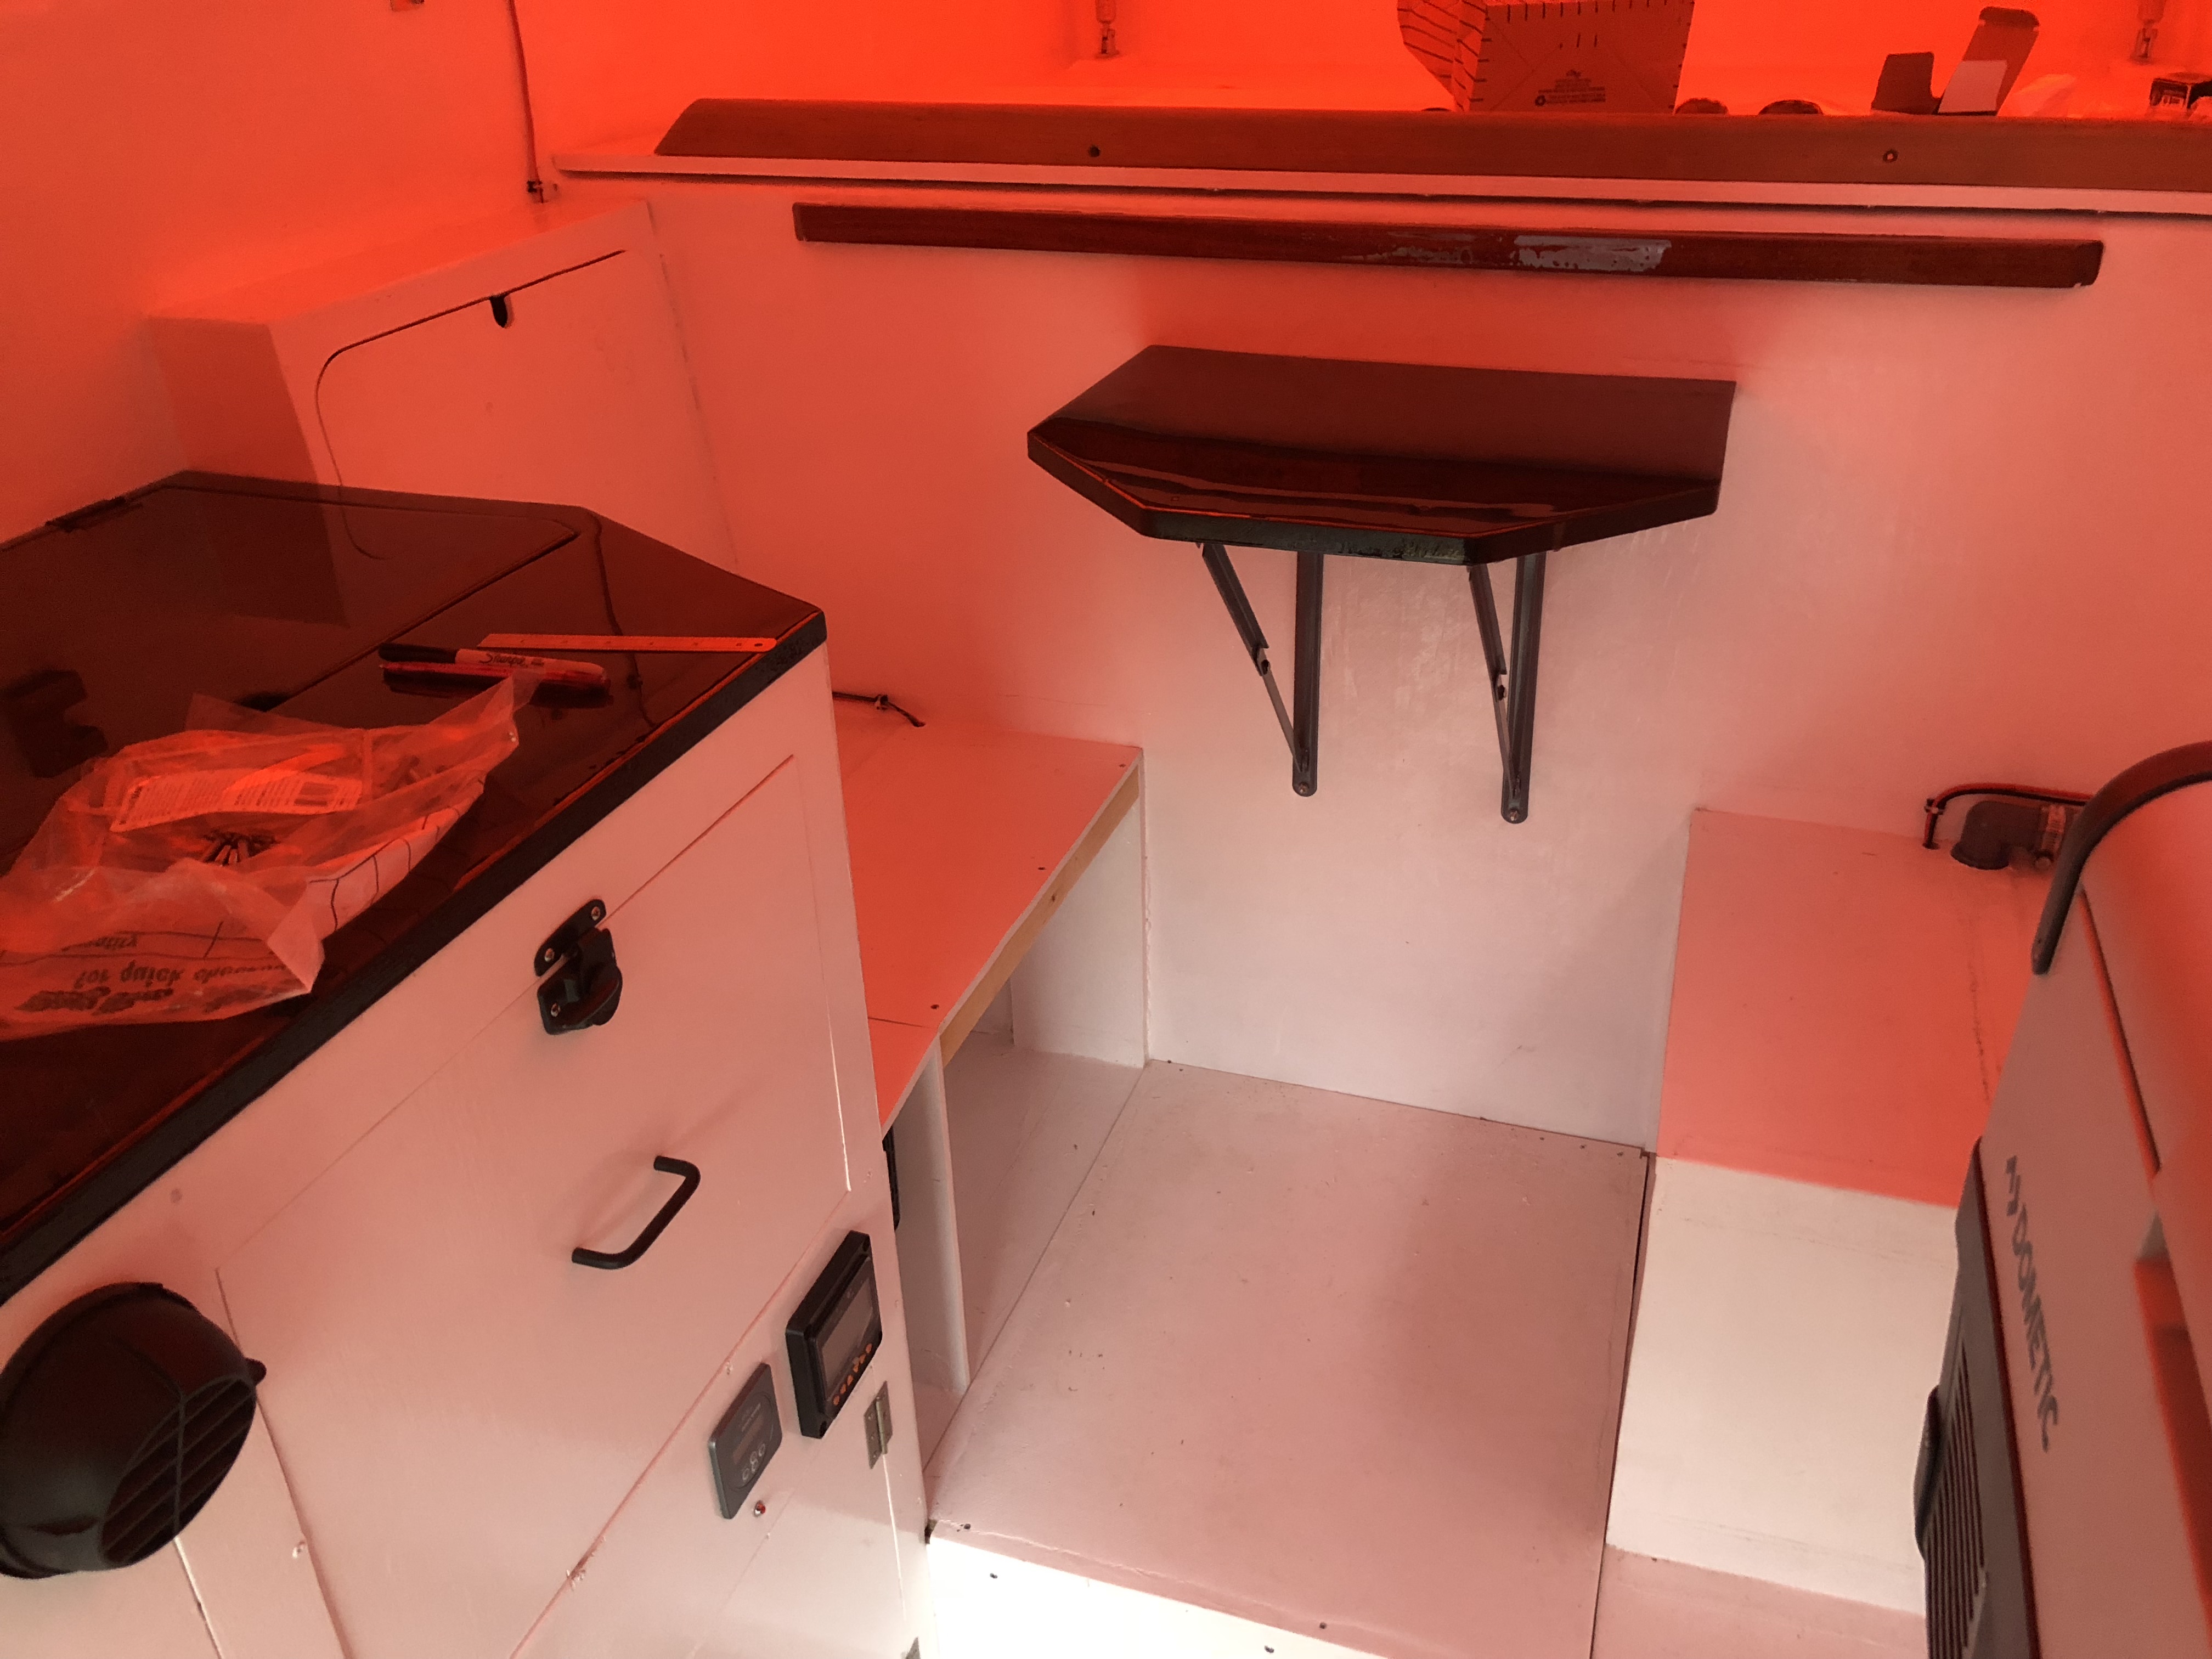
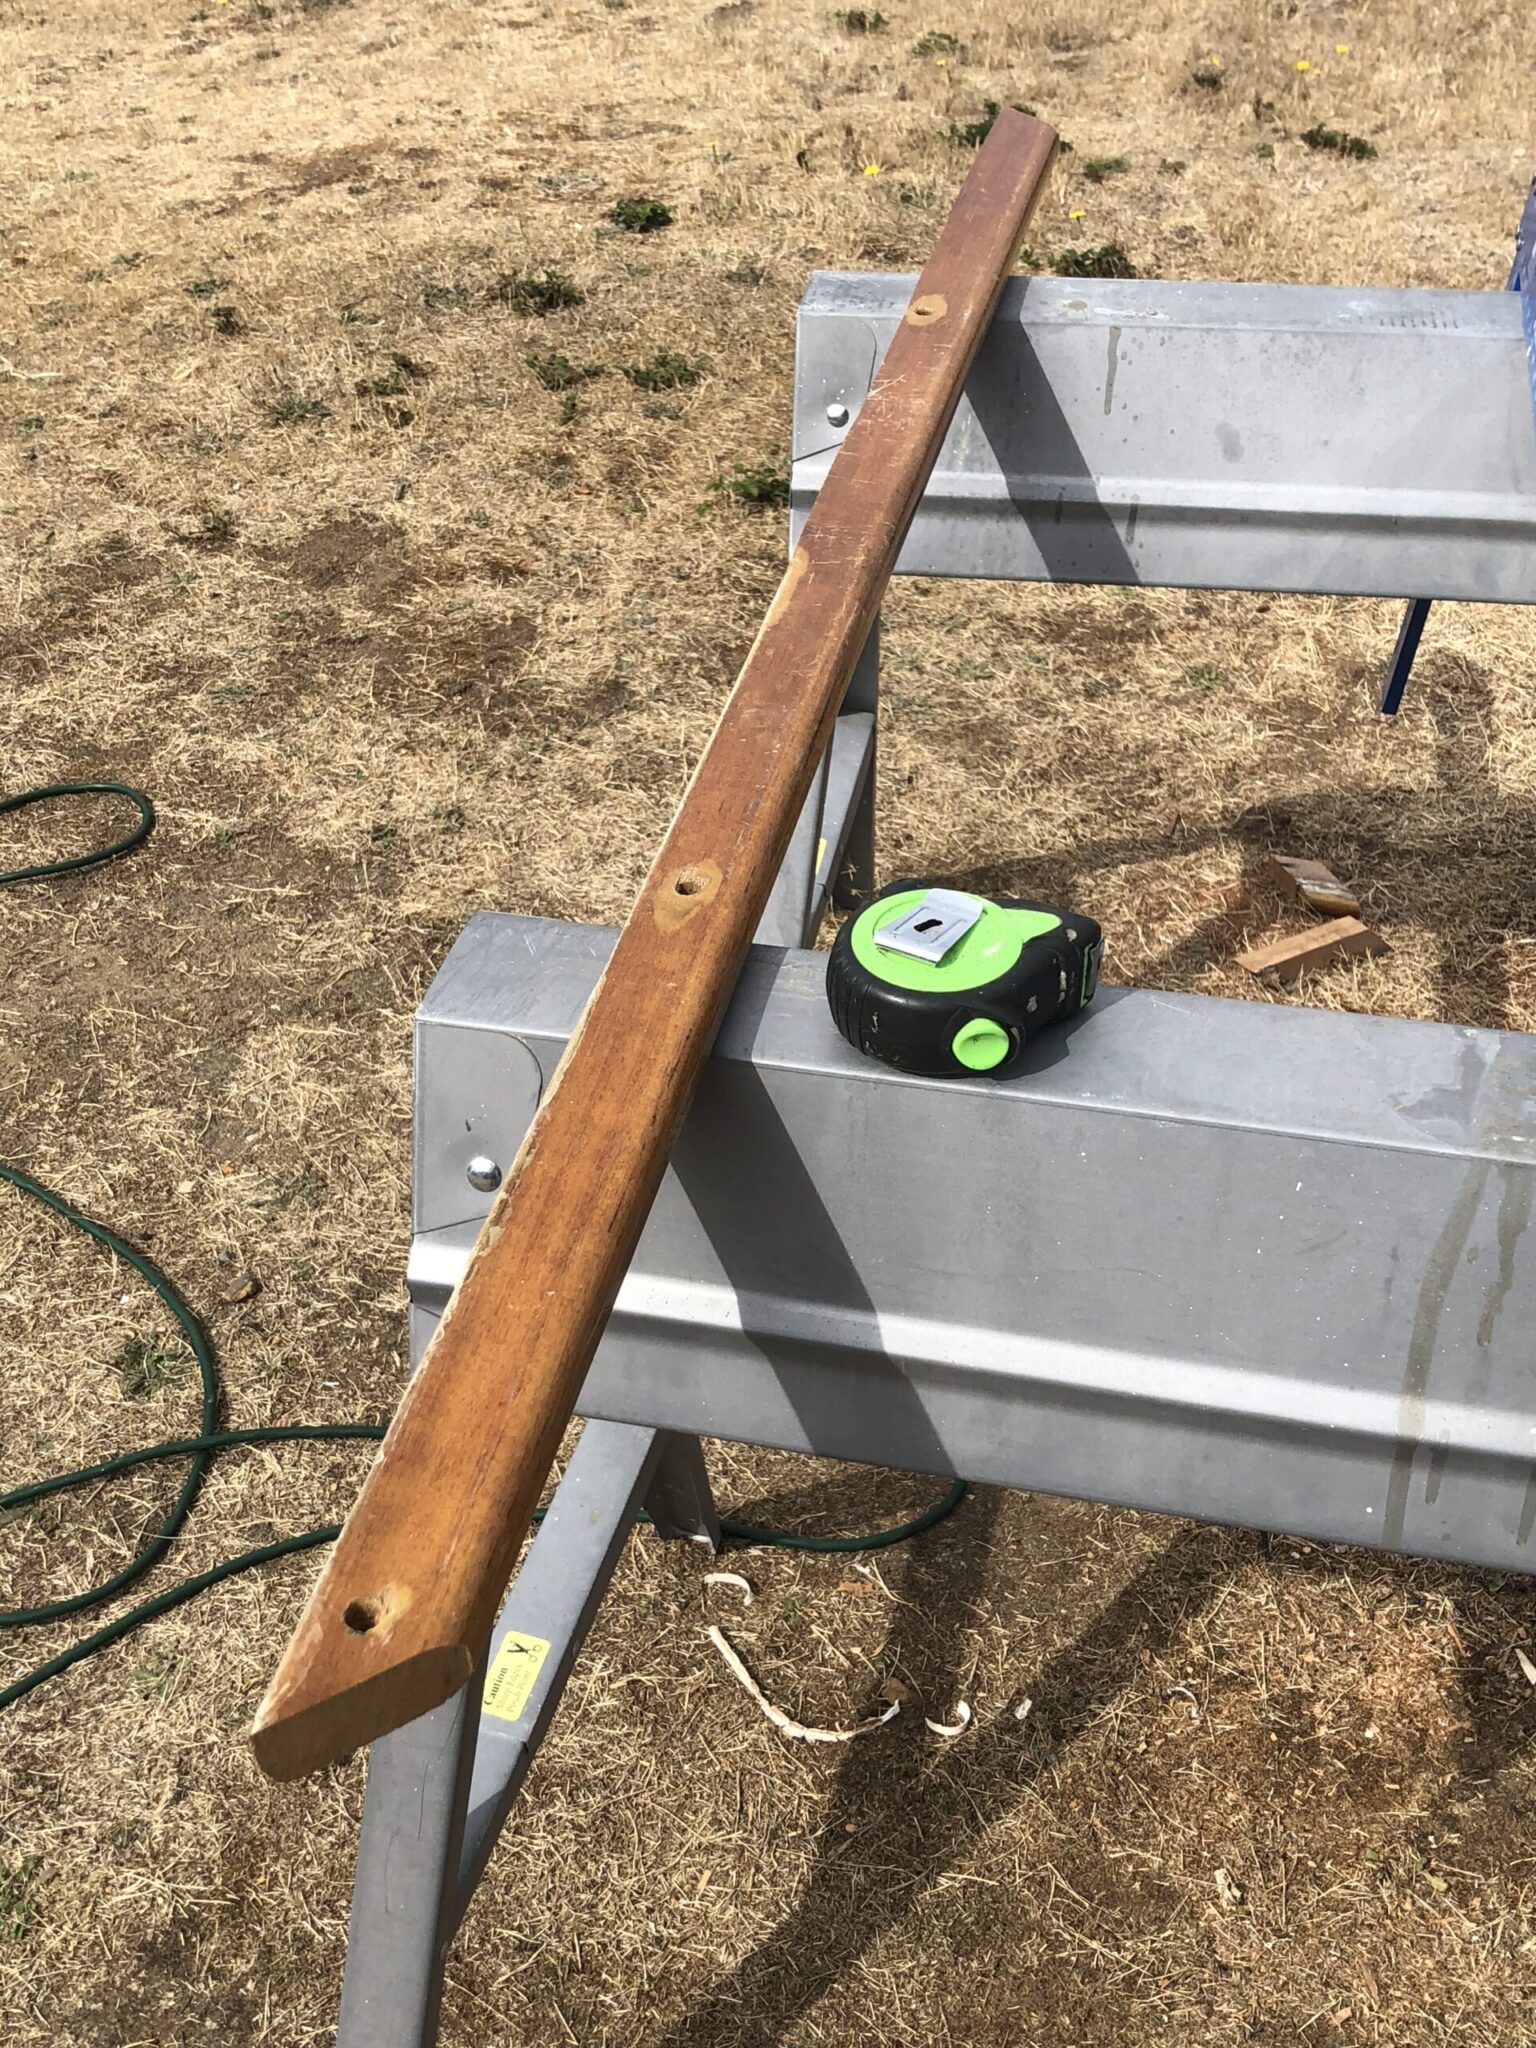
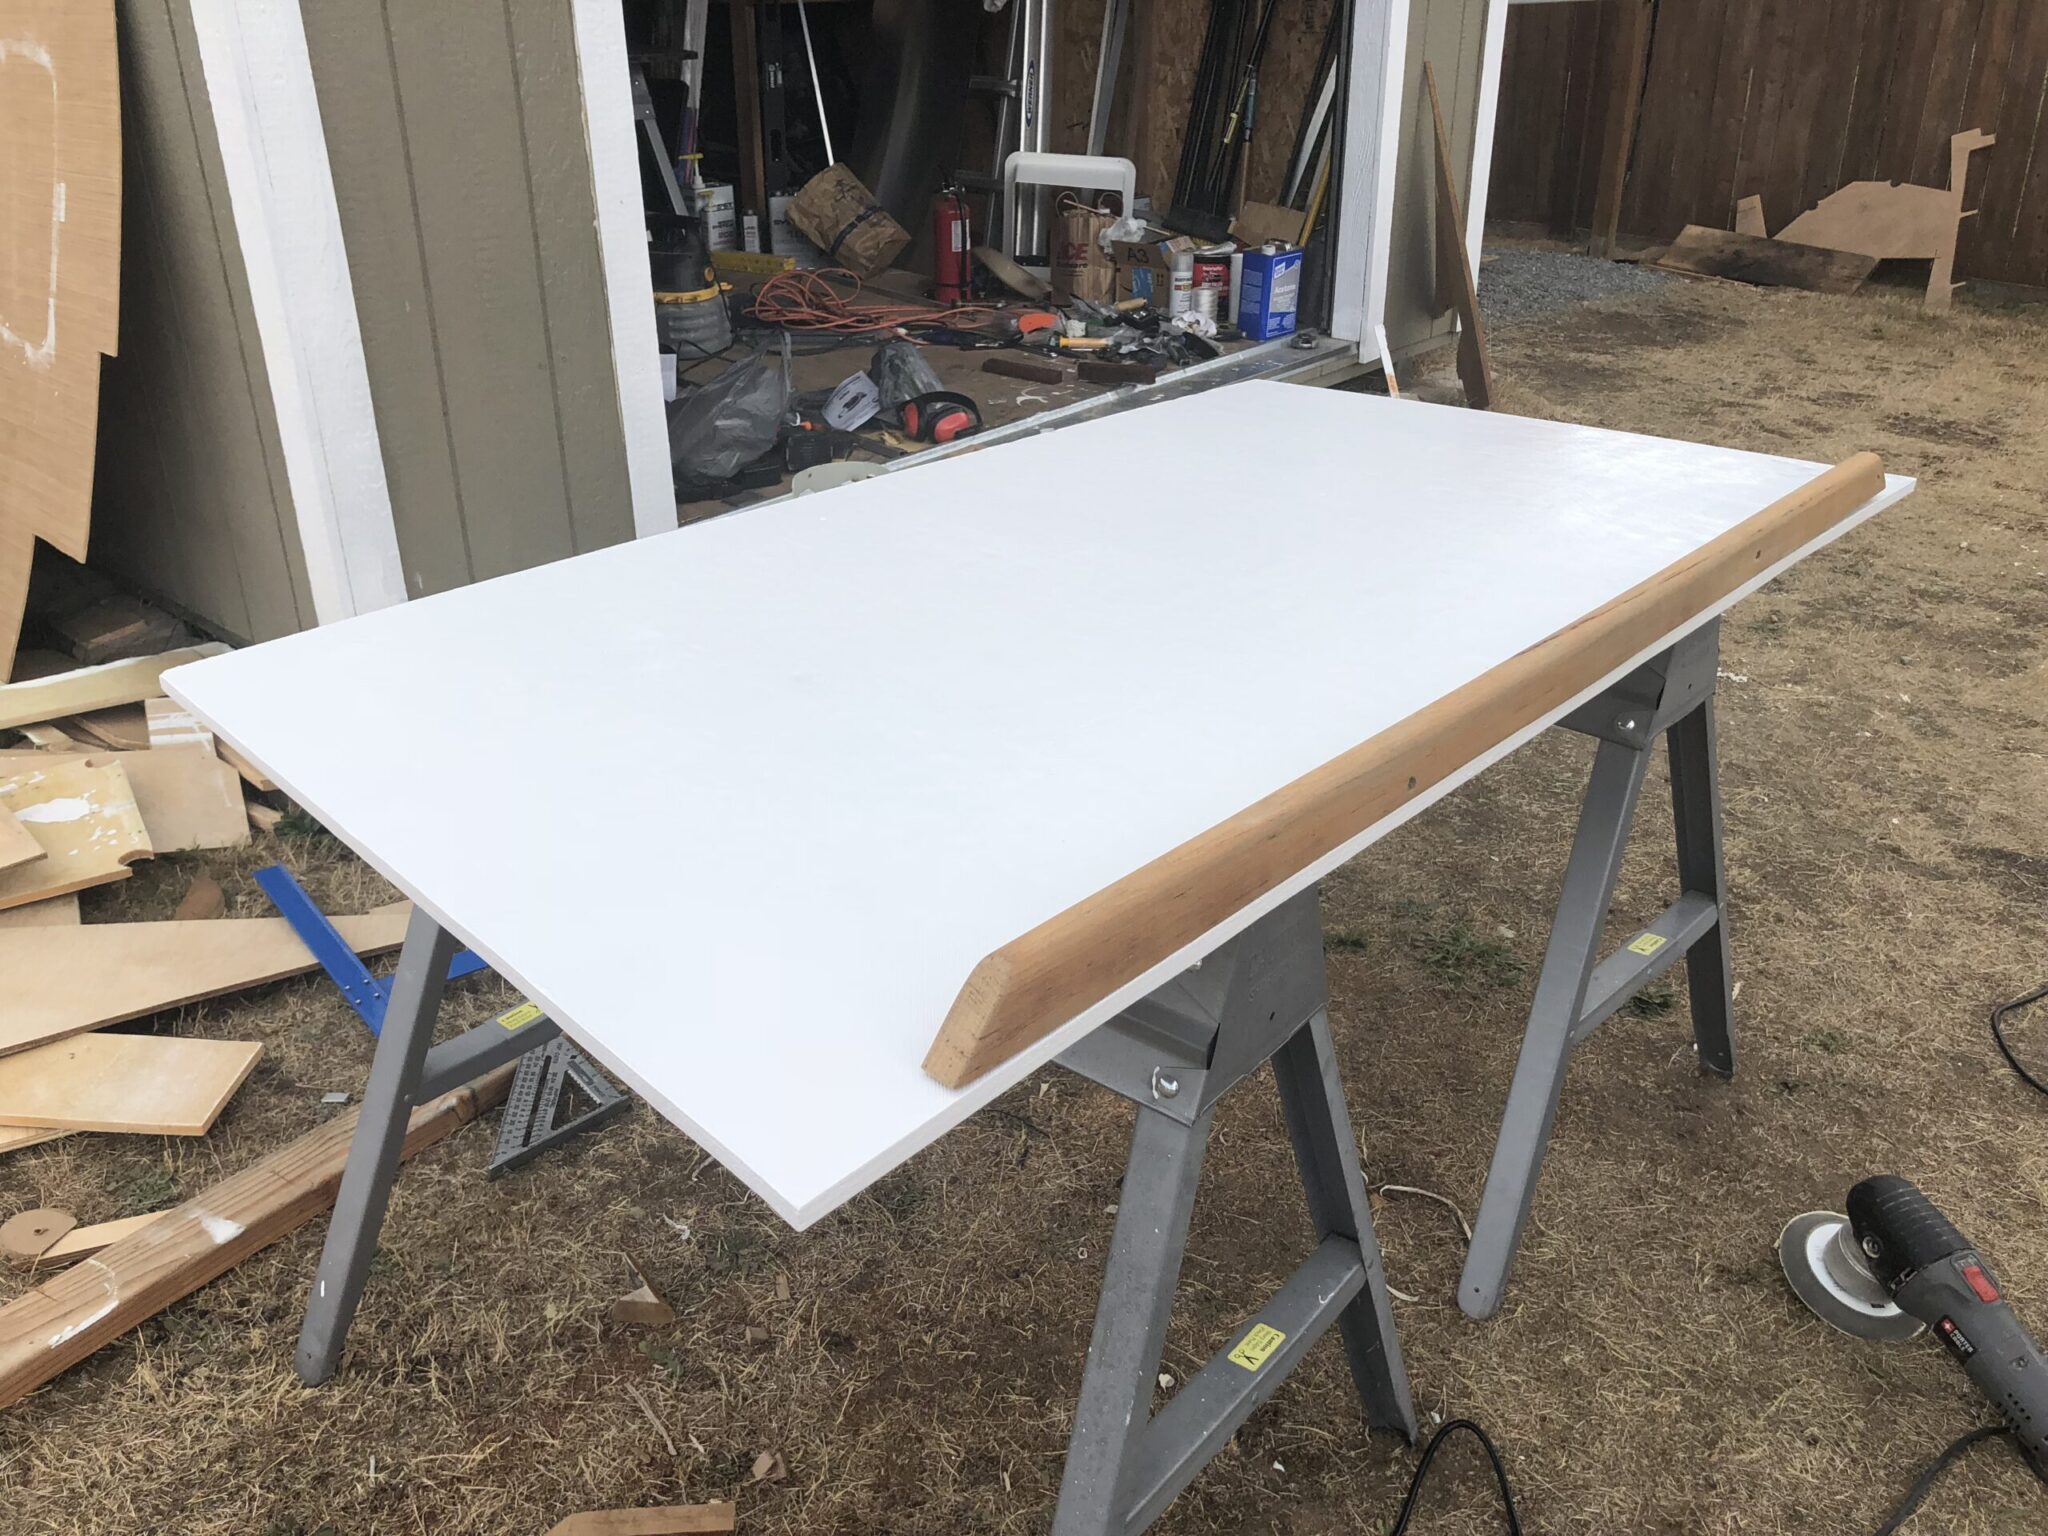
Those little brackets should hold it in place just fine. We are also going to use a leftover piece of teak hand rail from our boat as a support for the front edge of the bed slide out.
IMG_0685.jpg

This will also keep the mattress from shifting around
IMG_0709.jpg

I swear our camper has more teak wood in it than most new production yachts. It’s a bit ridiculous. We’ve just had this stuff left over for so long in the shed that we might as well use it for something and enjoy it than just let it sit there.

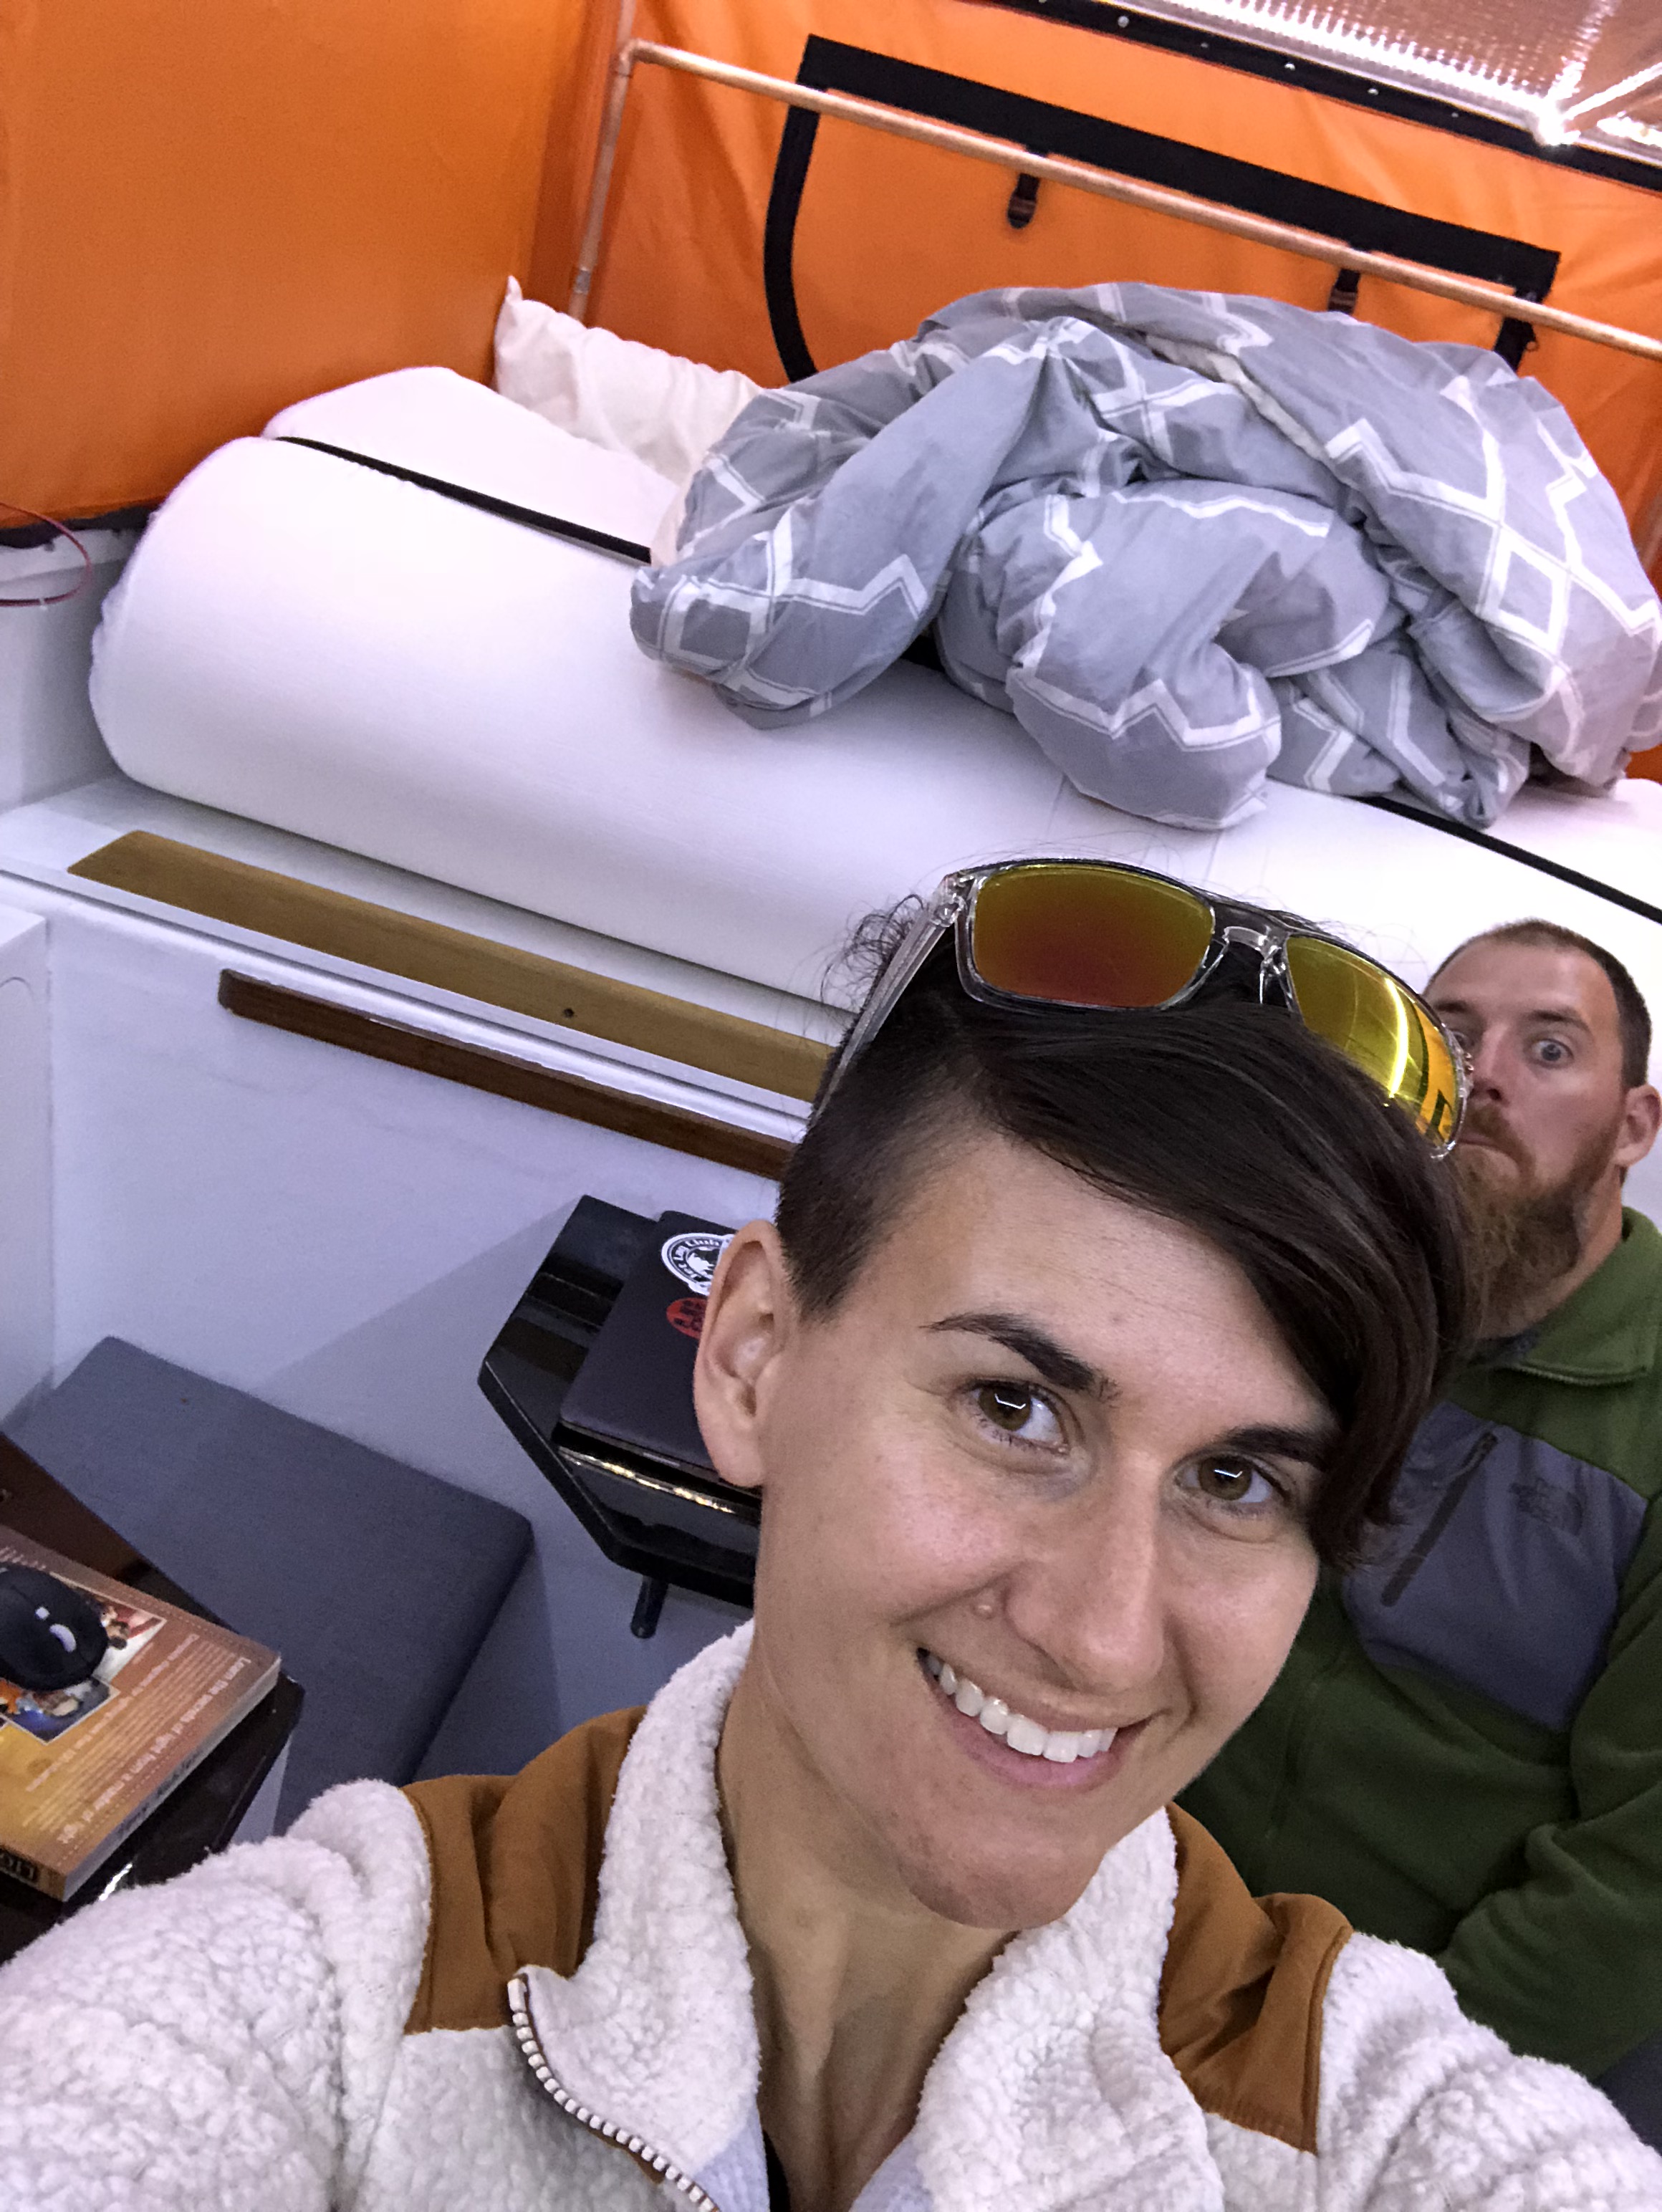
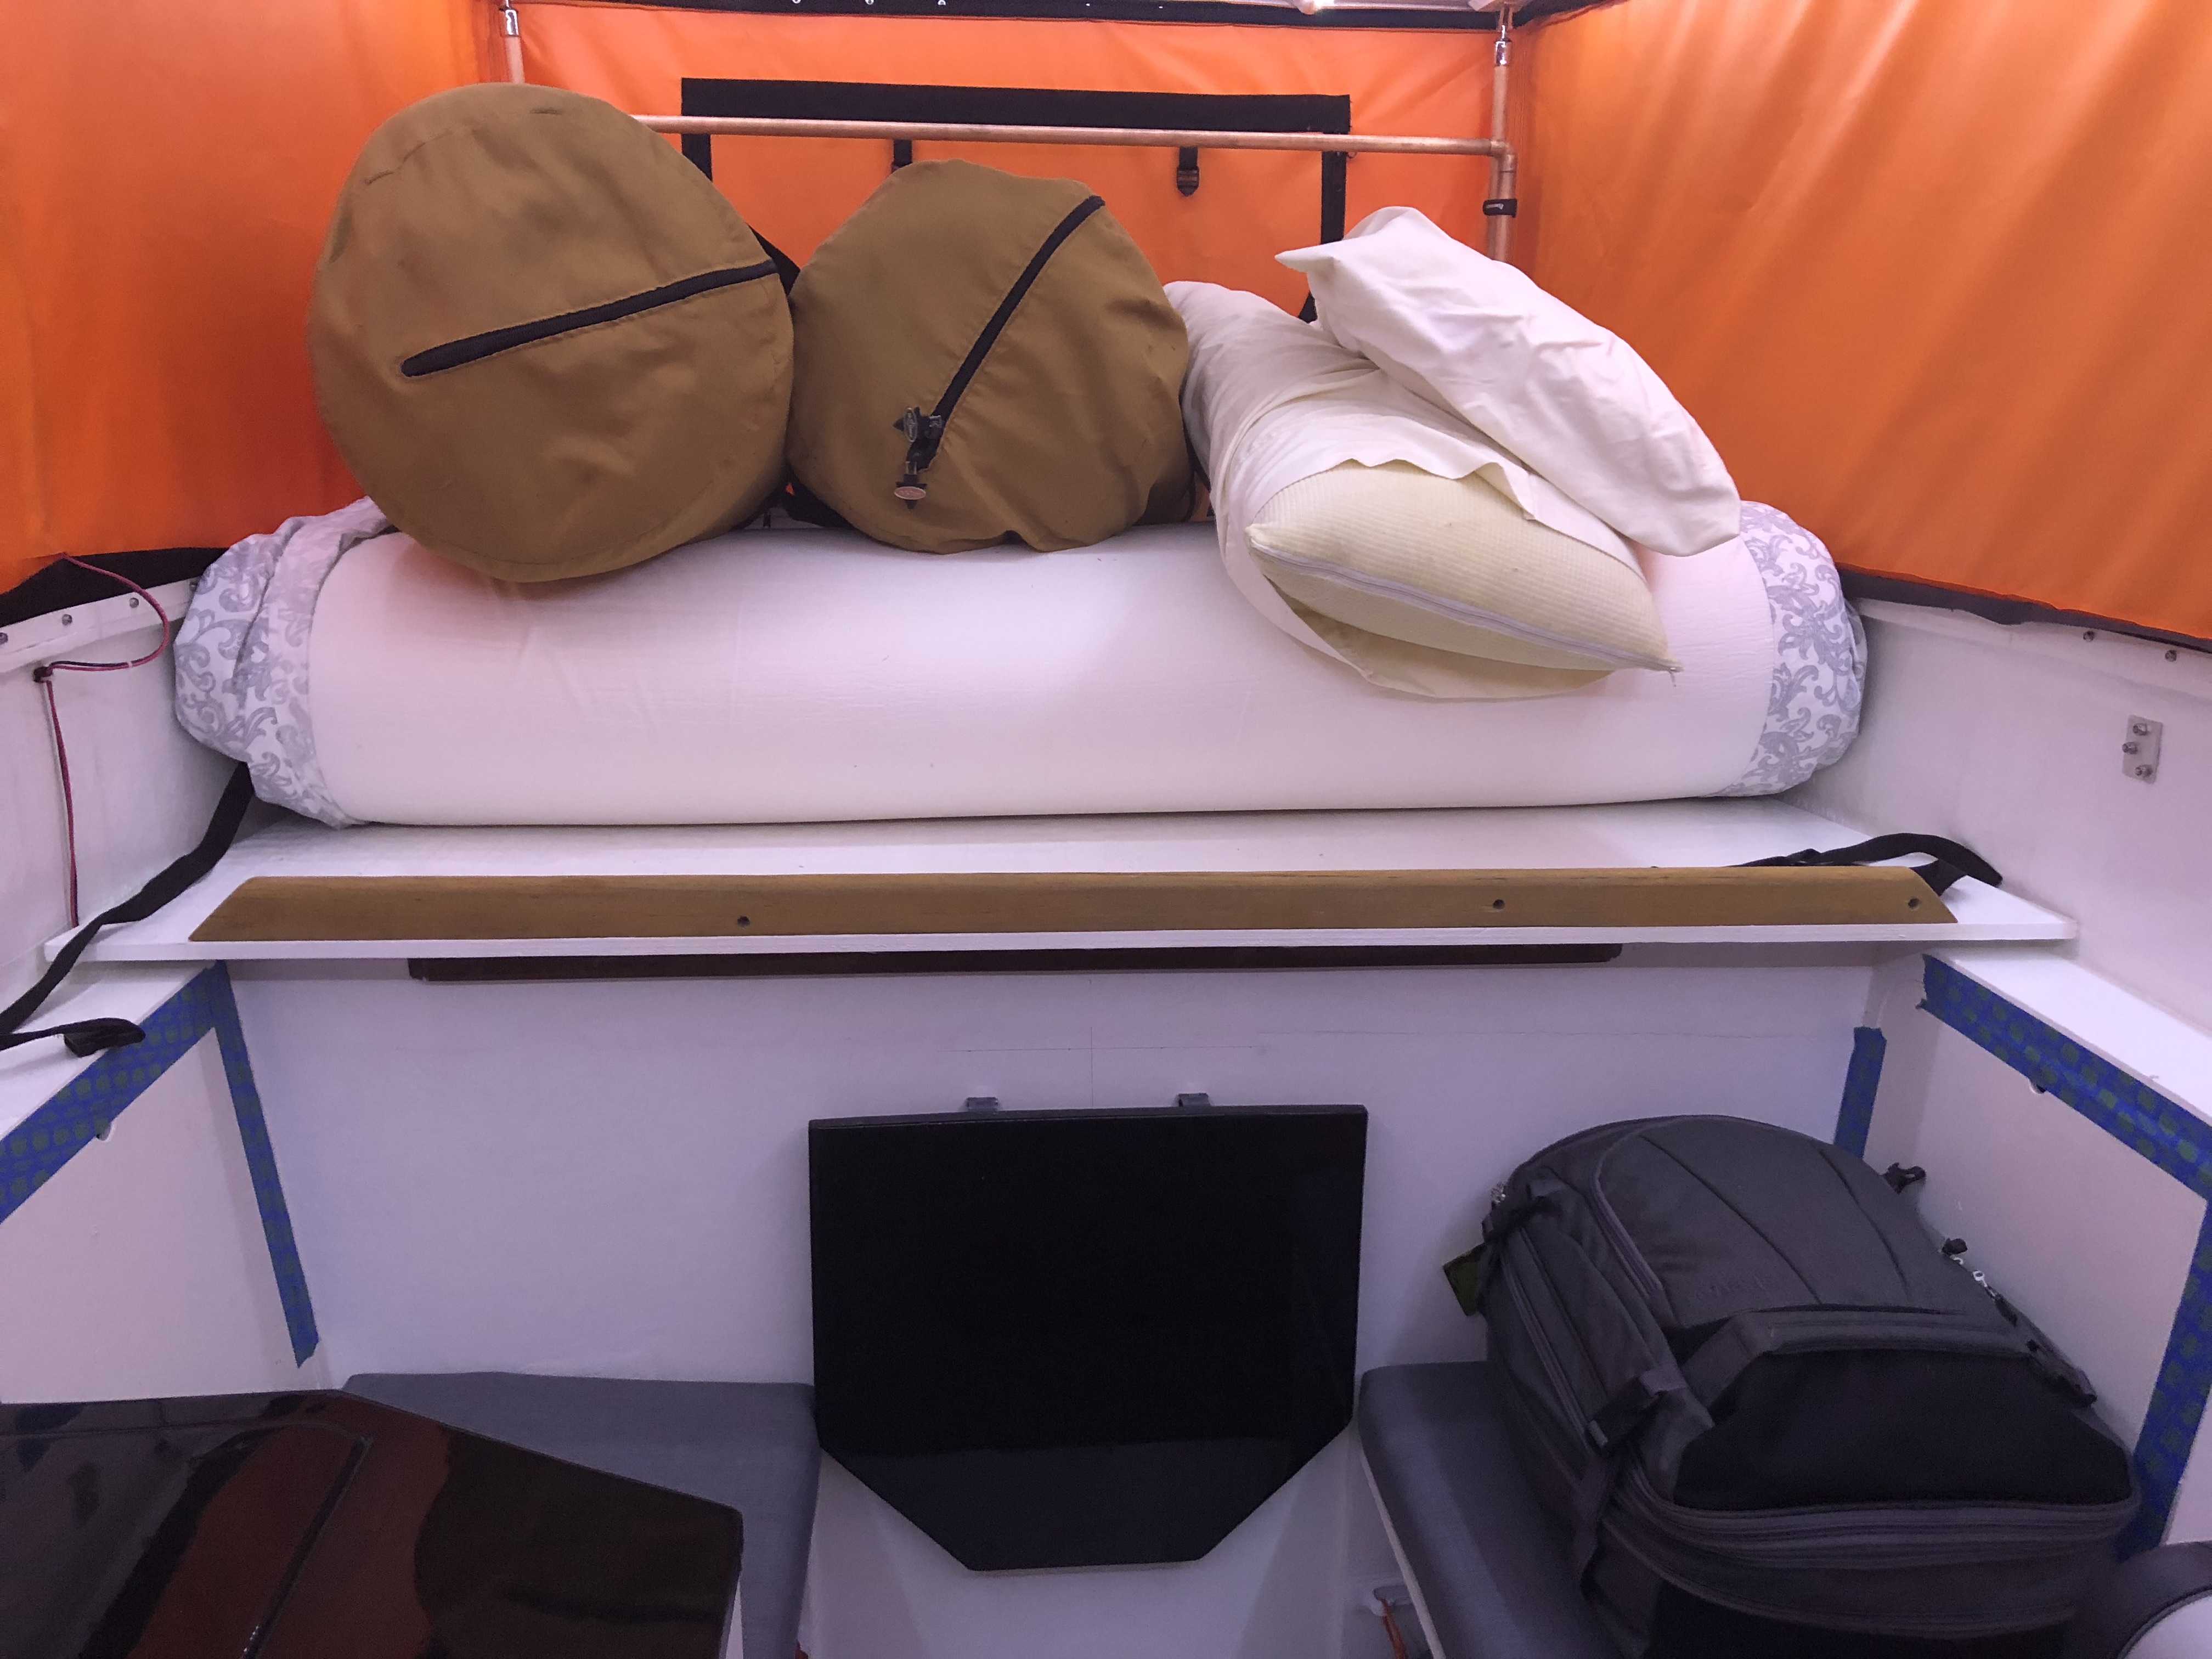
We also finally unboxed our mattress! It’s 5″ thick memory foam straight from Amazon.
IMG_0710.jpg

The directions say to let it lay on the ground and fluff back up for a few days before sleeping in it, so it’s currently taking up all of the living room floor. So far it’s firm, but not unreasonable. I think it’s going to be super comfortable once it breaks in a bit. It’s thick enough that we can sleep on our sides and not feel the floor on the other side.

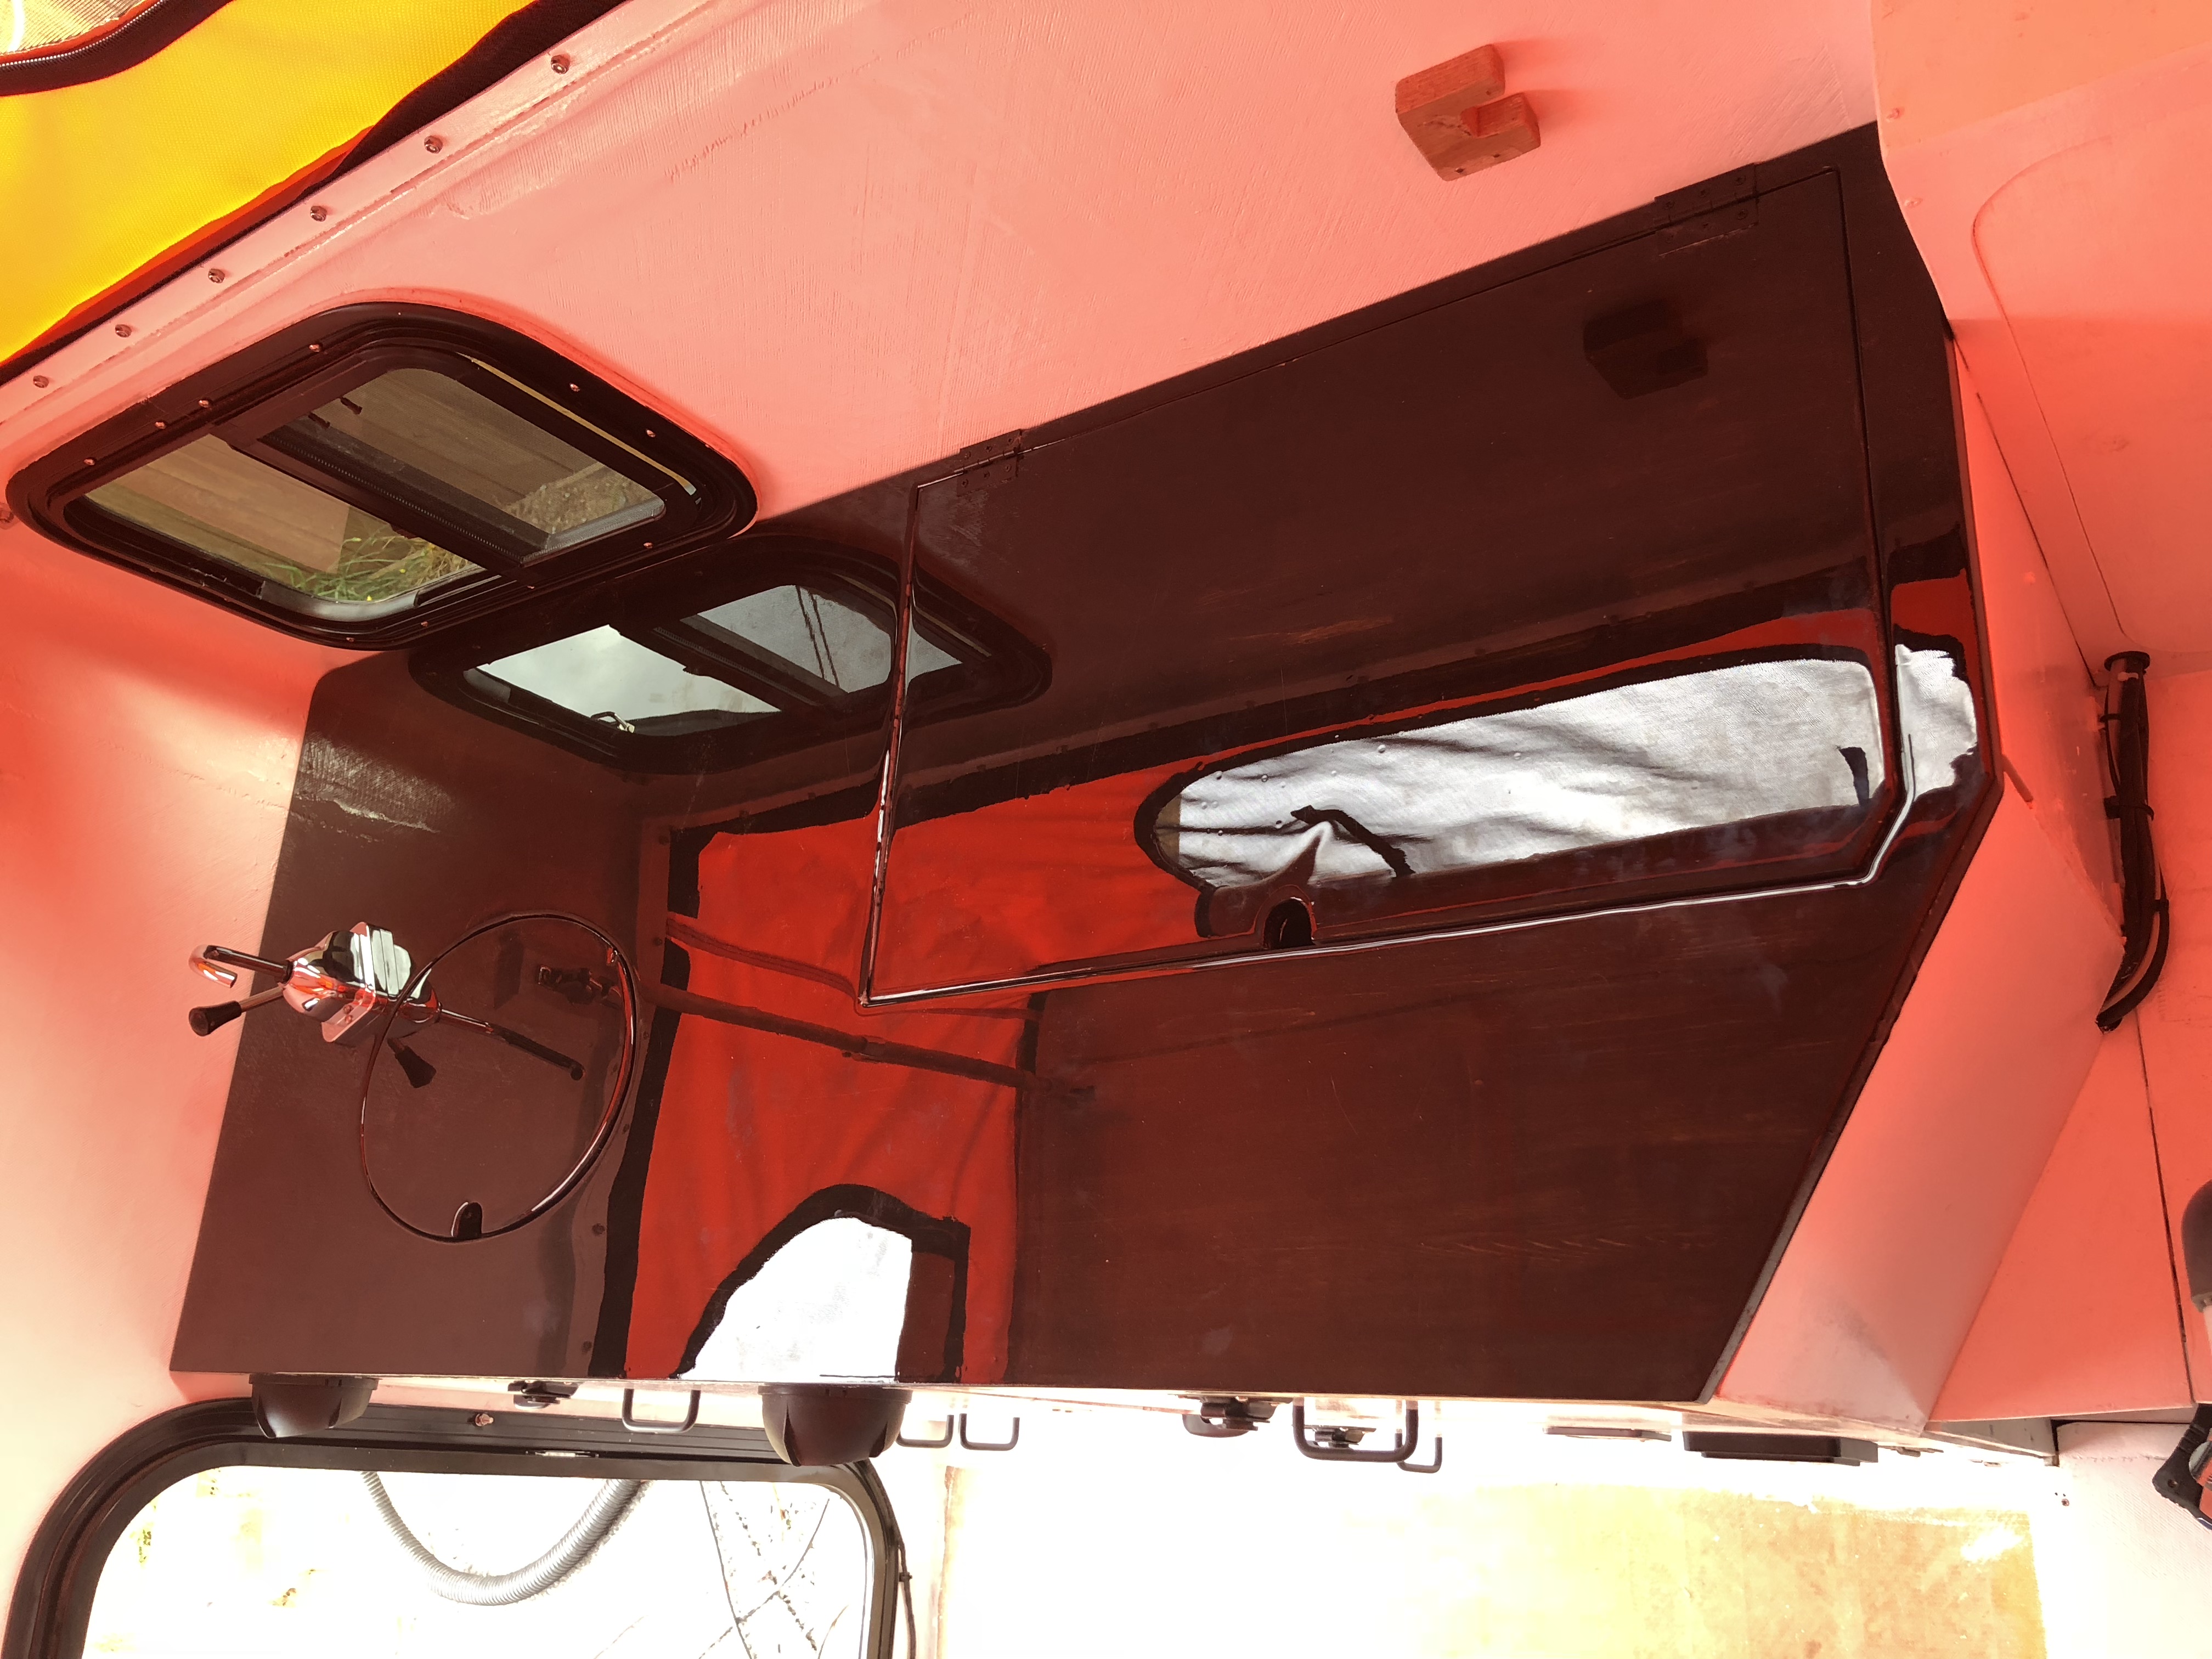
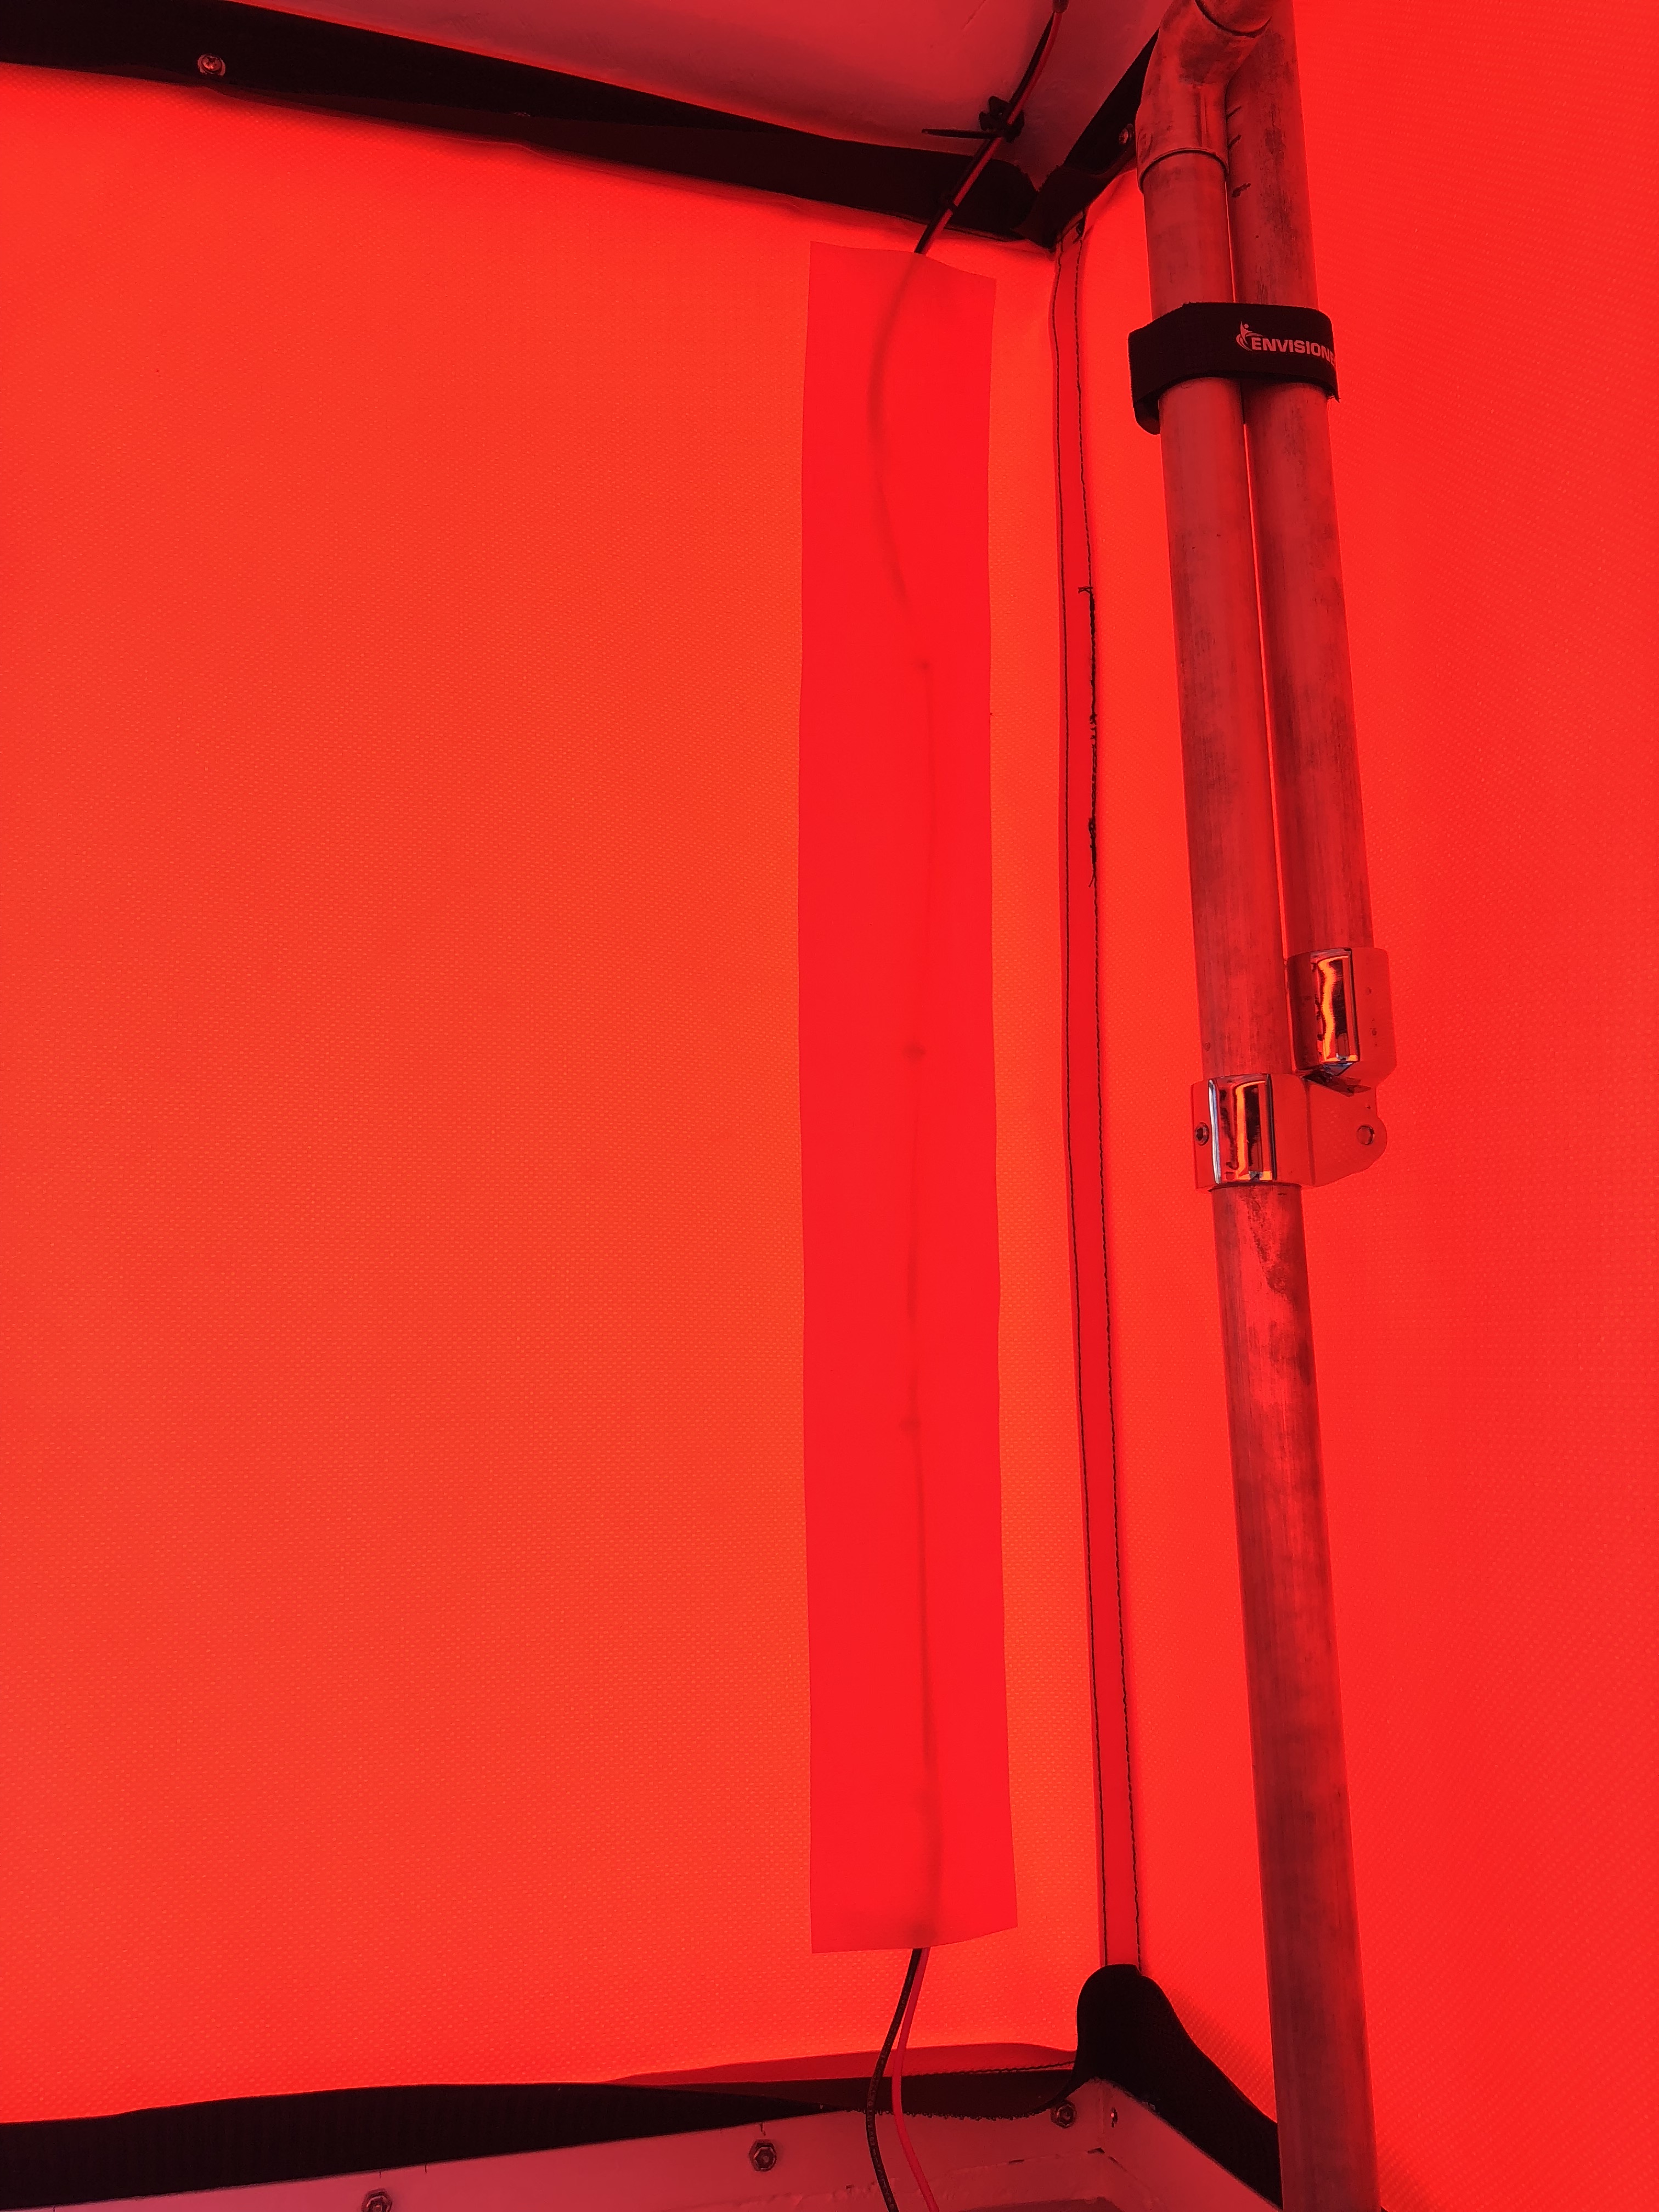
The last thing that I did today was run a bead of clear sealant around the bottom perimeter of the canvas and the aluminum rail. When we opened the camper this morning we realized we had a bunch of water in the corner of the galley. Troubleshooting ensued. Luckily it wasn’t the window like we thought! The leak was from water that pooled up along the seam of the canvas and then right up and over the aluminum through the velcro that I sewed on. Mystery solved, I suppose! I ran a bead of sealant on both edges of the canvas. Problem solved!
 

underkill

Active member
The bed slide out is finished!
IMG_0724.jpg

IMG_0722.jpg

There's enough room for a normal sized person to actually sit up in bed, which is nice!
IMG_0717.jpg

I thought the bed would end up feeling cramped since it’s a lot smaller than the roof top tent that we usually camp in. I was wrong! It’s long enough that Jason doesn’t feel like his feet are dangling off of the end and it’s more than wide enough for everyone to have enough space. As shown in the picture, he can even sit up in it nicely. The windows actually flow a ton of air and it was really comfortable to lay in! I can’t wait to get the mattress in there! (it’s still inflating in the living room floor)

Next up on the list was to actually finish installing the countertops. The first order of business was mounting the sink. We chose undermount so we could use the piece we cut out as a little cover because that’s just classy. Screwing the little brackets on underneath was a pain, but I managed.
IMG_0716.jpg

Had to make my own brackets. Also note the right angle drain fitting to keep the drain piping in the cabinet out of the way as much as possible.
IMG_0725.jpg

IMG_0726.jpg

The faucet is in as well!
IMG_0728.jpg

Plumbing is completely done now!
IMG_0729.jpg

So now the counters are completely installed! I love the gloss, but it gets REFLECTIVE! It could be a hazard when cooking! There is one piece left to actually being truly done with the galley, and that is the stove cover. When we go camping we don’t eat healthy things like salads and kale, we usually end up frying at least something. Bacon is usually involved… So, we installed an aluminum plate on the underside of the panel that covers the stove. It should work great and be easy to clean.
IMG_0740.jpg

The galley section is now complete!
IMG_0741.jpg

IMG_0742.jpg

Finished up the air intake for the heater. I put a little section of screen mesh in there to keep bugs out.
IMG_0714.jpg

IMG_0715.jpg

We had to relocate the 12v plug for the cooler to the front because it hit the lift mechanism. Now we can keep our food cold while driving!
IMG_0739.jpg
 

underkill

Active member
Here's the remote solar setup topping off the battery!
IMG_0732.jpg

Finished up and installed the mounts for the cooler
IMG_0743.jpg

IMG_0744.jpg

Here are the sleeves that hold the wires in place down the canvas.
IMG_0730.jpg
 

underkill

Active member
In our excitement about finally seeing the finished galley, we forgot that while we have an amazing place to cook, we don’t have a place to eat… The table that we made that matches our countertops was still down in the garage! I’ve had the folding brackets for weeks now, so it was finally time to install that! We did have to raise the table up a little bit higher than planned to keep the bolts from hitting the truck, but with the seat cushions it's still pretty comfortable.
IMG_0736.jpg

IMG_0737.jpg

IMG_0745.jpg

IMG_0746.jpg

IMG_0748.jpg

IMG_0747.jpg

So now the dinette is done! All it needs is the cushions installed!
 

underkill

Active member
The camper is pretty much finished, but the truck itself was filthy... so she got a bath!
IMG_1037.jpg

All that was left to do was a shakedown run on the camper! Jason and I loaded it up and headed to the coast for the weekend!
IMG_1074.jpg

Room for two people inside pretty comfortably!
IMG_1080.jpg


So I picked the orange canvas because i like orange mostly.. what I didn't plan on was how much this thing GLOWS at night!
IMG_1081.jpg

IMG_1082.jpg

The electrical system ended up working perfectly and we’ve already tested the solar panels, so I’m not concerned about any of that at all anymore. We tested the heater all evening and it works very well also! We weren’t confident enough to leave it running all night long though. Maybe next time. We do have a carbon monoxide monitor just in case. The bed itself is super comfortable. Way better than the roof top tent that the camper replaced and overall everything is fairly easy to use and convenient!
IMG_1083.jpg

Overall, our first night in the camper was a success! Nothing terrible happened and we were warm, dry, and comfortable! Obviously, I have a list of things to finish and things that we realized that we needed, but the camper is now officially open for business!
 

underkill

Active member
Remember 15 pages ago when I wanted to put a cool molded fiberglass nose cone on the front with a light bar? That's never going to happen... so we bought a pair of curved LED light bars for the front instead!
image5-1.jpeg

That'll do! :eek:
image6.jpeg

Welcome to the Pacific Northwest!
ecola-03319.jpg
 

underkill

Active member
We took the camper on a big 2 week road trip through eastern oregon and nevada. We have some lessons learned! :eek:

1. we forgot to bring pillows. we bought new pillows!
IMG_1136.jpg


2. The kitchen works really well! But there's really only room for one person to be cooking. The other person needs to be sitting at the table waiting for their food. (this is me!)
IMG_1140.jpg


3. I had to buy a 4' extension cord so I could put the coffee pot on the table safely.
IMG_1139-e1540614004668.jpg


4. I made a nice little "trash bag" to fit the empty space underneath the cooler. We use it all the time! I also bought some hooks to hang jackets up above the door, and a thing to hold paper towels in the galley. Wall space is more efficient than floor space!

IMG_1137-e1540614036656.jpg


5. The cooler generally stays in place pretty solidly, except when Jason hit a really rough pothole that tossed the truck to the side really hard. It ripped the screws out of the wood hold downs and dumped all of our stuff onto the floor, including all of the milk. Which was gross. We now have thru bolts holding the cooler to the mounts. One thing I do want to do is to have an auxiliary tie down that just goes around the entire camper for when we know we're going to be doing serious offroading.

6. We did put a wood floor in the camper at first. It looks awesome, but the main thing that failed on the camper was the water bladder that we bought. The fill fitting on the top can't handle any side loading at all (like the floor sat on top of it..) and leaked. So.. we battled that the entire time. That top fitting let go at one point and dumped most of the 20 gallon capacity onto the camper floor. We had to take the floor out to let it dry out and mop up everything else. It's fiberglass construction, so it didn't hurt anything but it was really annoying. Eventually between the spilled milk and the water we threw the wood floor away and just bought a floor mat. We never did put another floor in it. I think I would do something with outdoor carpet so you can just take it outside to wash or something.

6a. Since the water bladder was a complete waste of time, we took it out and we're now using that space to store pans and supplies since it's actually a pretty large spot. To fix the water supply problem I bought another one of the blue water cans that I was using for the sink drain tank and mounted it the same way right next to it. so its like 2.5 gallons of water for immediate use and as a bonus you can look at the drain tank and see when it's time to refill the water. Overall I think I should have done this the first time because it's so simply, reliable, and easy to use.

7. The propane locker is a good place to put wet towels and my collapsible bucket. More storage is always good!
 

underkill

Active member
It's been mentioned a few times in the thread, but the camper is officially for sale... We built it and then decided we'd like to explore by boat instead of on land, so the camper has to go to fund our sailboat.
BUY MY CAMPER!
 

Tuloko77

New member
It's been mentioned a few times in the thread, but the camper is officially for sale... We built it and then decided we'd like to explore by boat instead of on land, so the camper has to go to fund our sailboat.
BUY MY CAMPER!
Hey, Is this still for sale? I've got the exact same truck and might be interested... Thanks!
 

bawoodworks

New member
Interesting. When I did delam testing there were larger pieces of XPS that came away, in keeping with the perforations. I wouldn't say it took a ton of force to pull the skin off, but considering the concentrated load I was putting on it I thought it was sufficient, since high forces pulling the skin off wouldn't happen in practice. Plus I have wood every 4ft or less and the FG is stuck very well to that.

The strength sample I made was 36" long, 6" wide and 2" thick. I could support that on the ends and jump up and down on it and it was fine (170lb) . I had to really land with a stomp it to get it to fail.

There are expedition camper panel makers who use XPS cores. Not real high density foam either.

What was the epoxy you used and the temperature? Just wondering if that would make a difference.
What did you use to glue the wood to the foam? 2x2's?
 

Piston broke

New member
Just read (over a few days) your entire build thread because I’m contemplating something similar, and this was one of the best, detailed, informative threads on it. Thanks for all the effort in documenting your build!

Something felt familiar when I started reading this…then I remembered something from a long time ago…about a lowered 640 adventure.
Is that you guys??

If so, it’s a surprisingly small world sometimes on the big wide open web.
Good luck either way with your next adventures!
 

Forum statistics

Threads
185,535
Messages
2,875,628
Members
224,922
Latest member
Randy Towles
Top