You are using an out of date browser. It may not display this or other websites correctly.
You should upgrade or use an alternative browser.
You should upgrade or use an alternative browser.
Another DIY truck camper
- Thread starter Ducstrom
- Start date
dreadlocks
Well-known member
Photobucket's a ******** like that, the photos show up for me because I have this chrome plugin installed, its pretty much required to look at any old threads from before photobucket decided sharing photos was not its thing.

 chrome.google.com
Awesome build BTW, following.
Chrome Web Store
Discover great apps, games, extensions and themes for Google Chrome.
Awesome build BTW, following.
Got a bit more accomplished (there is so much sanding).
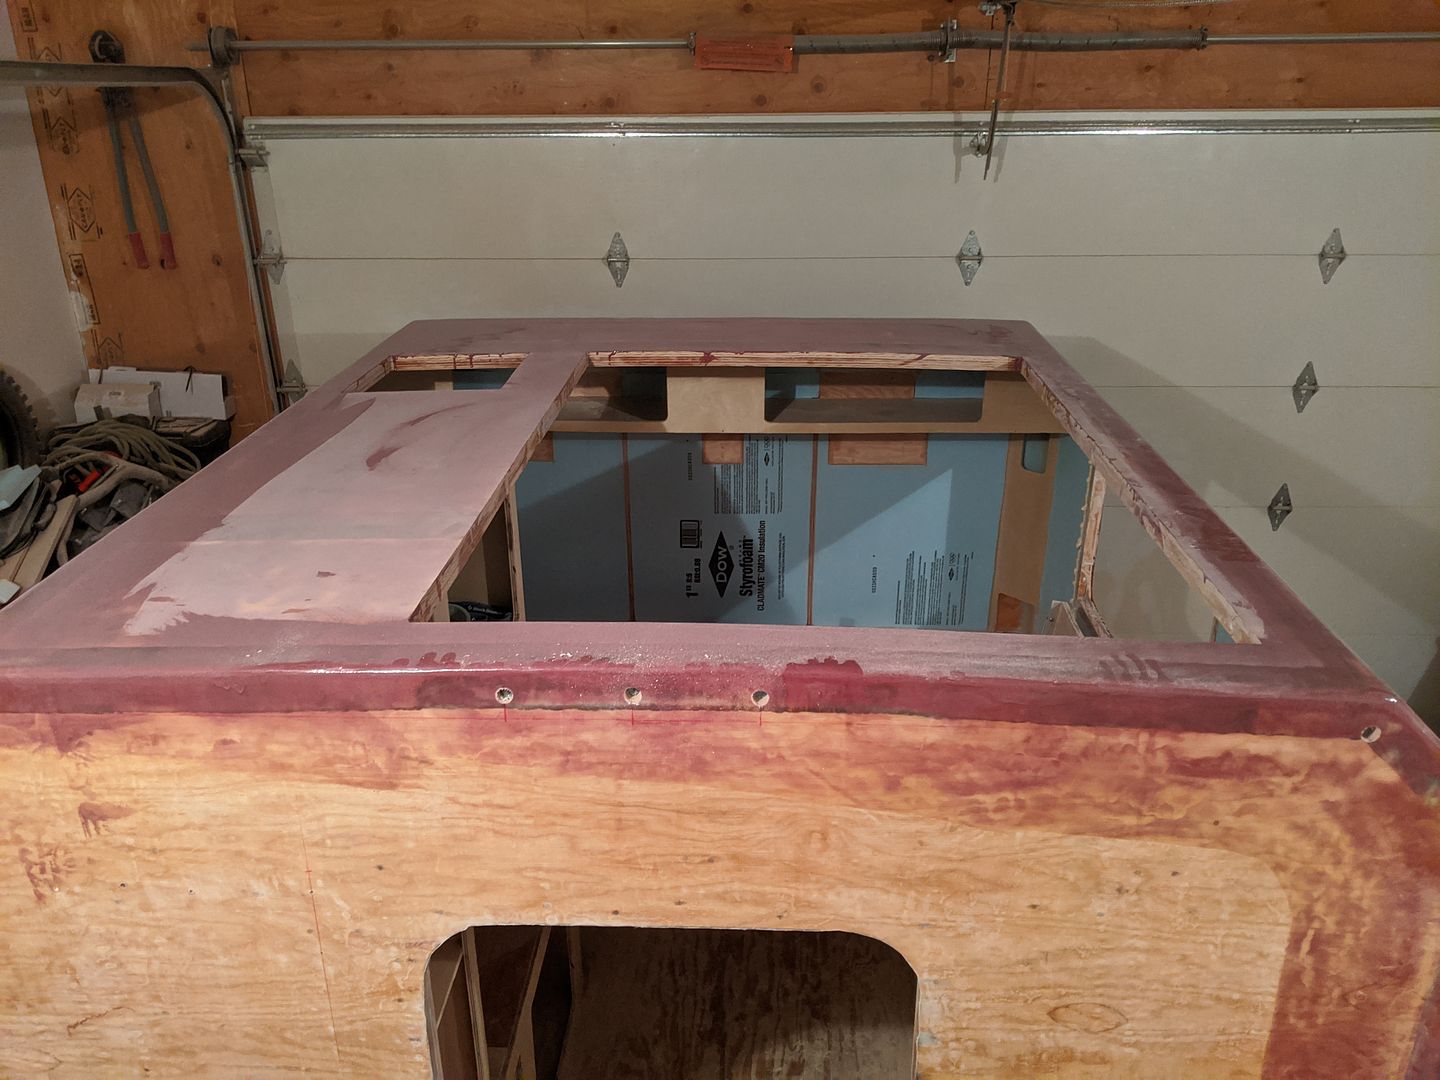
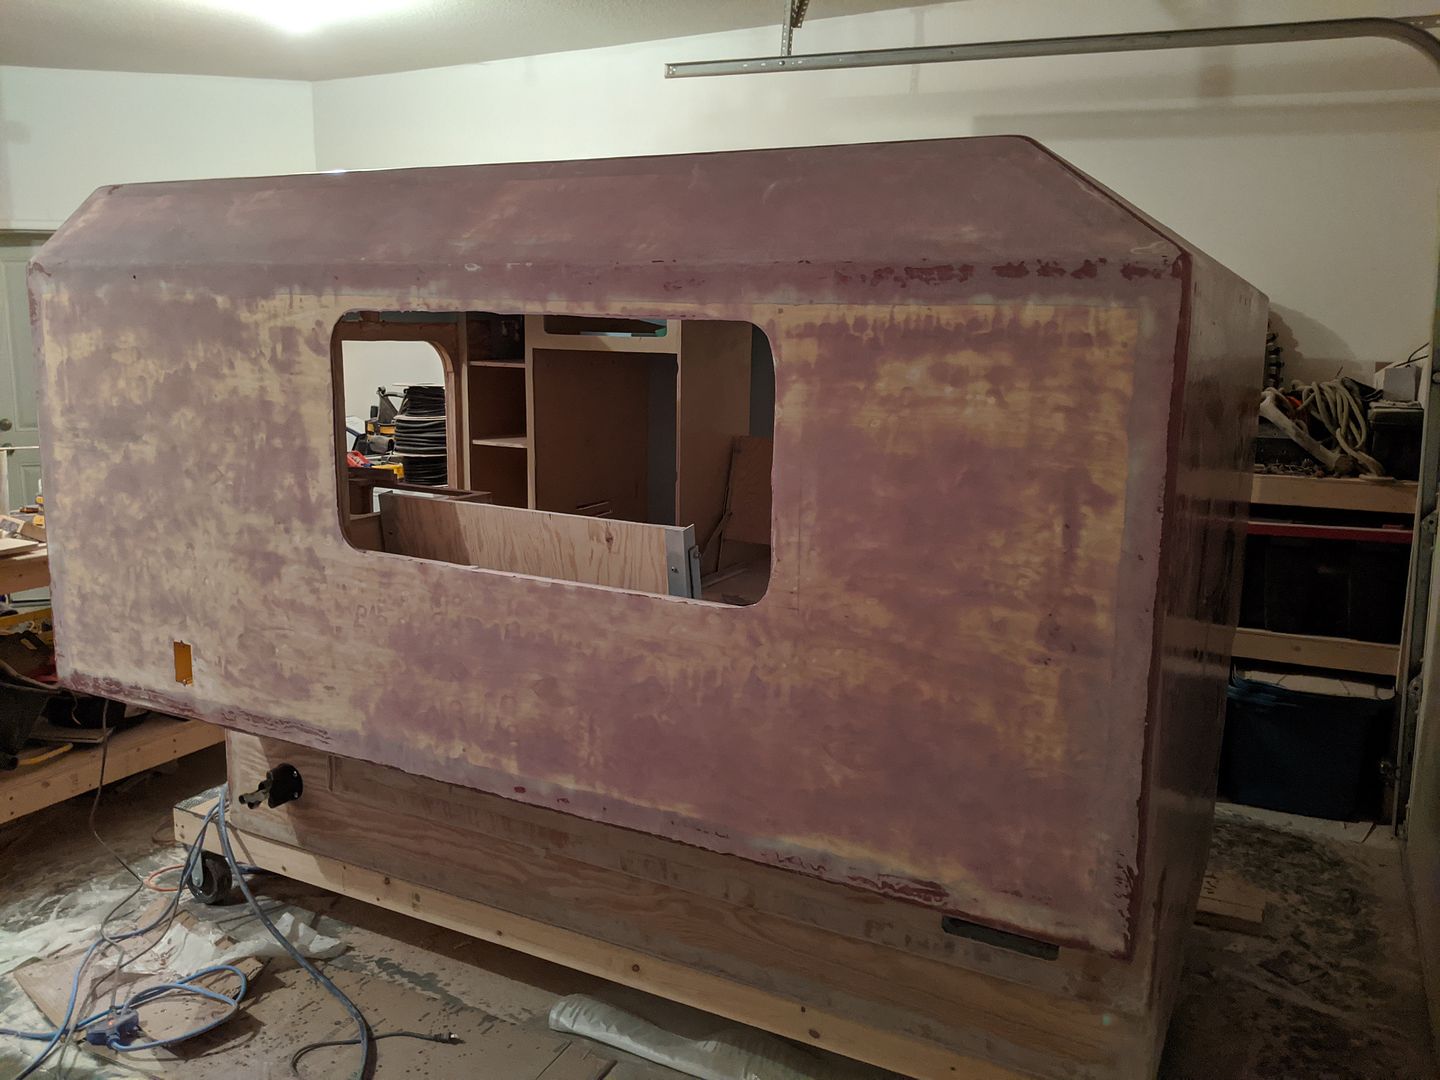
Here you can see the pop up section of the roof cut out and the window holes cut out. The fiberglass has been completed over the top half of the camper and I am now using fairing compounds and epoxy to smooth it all out flat.
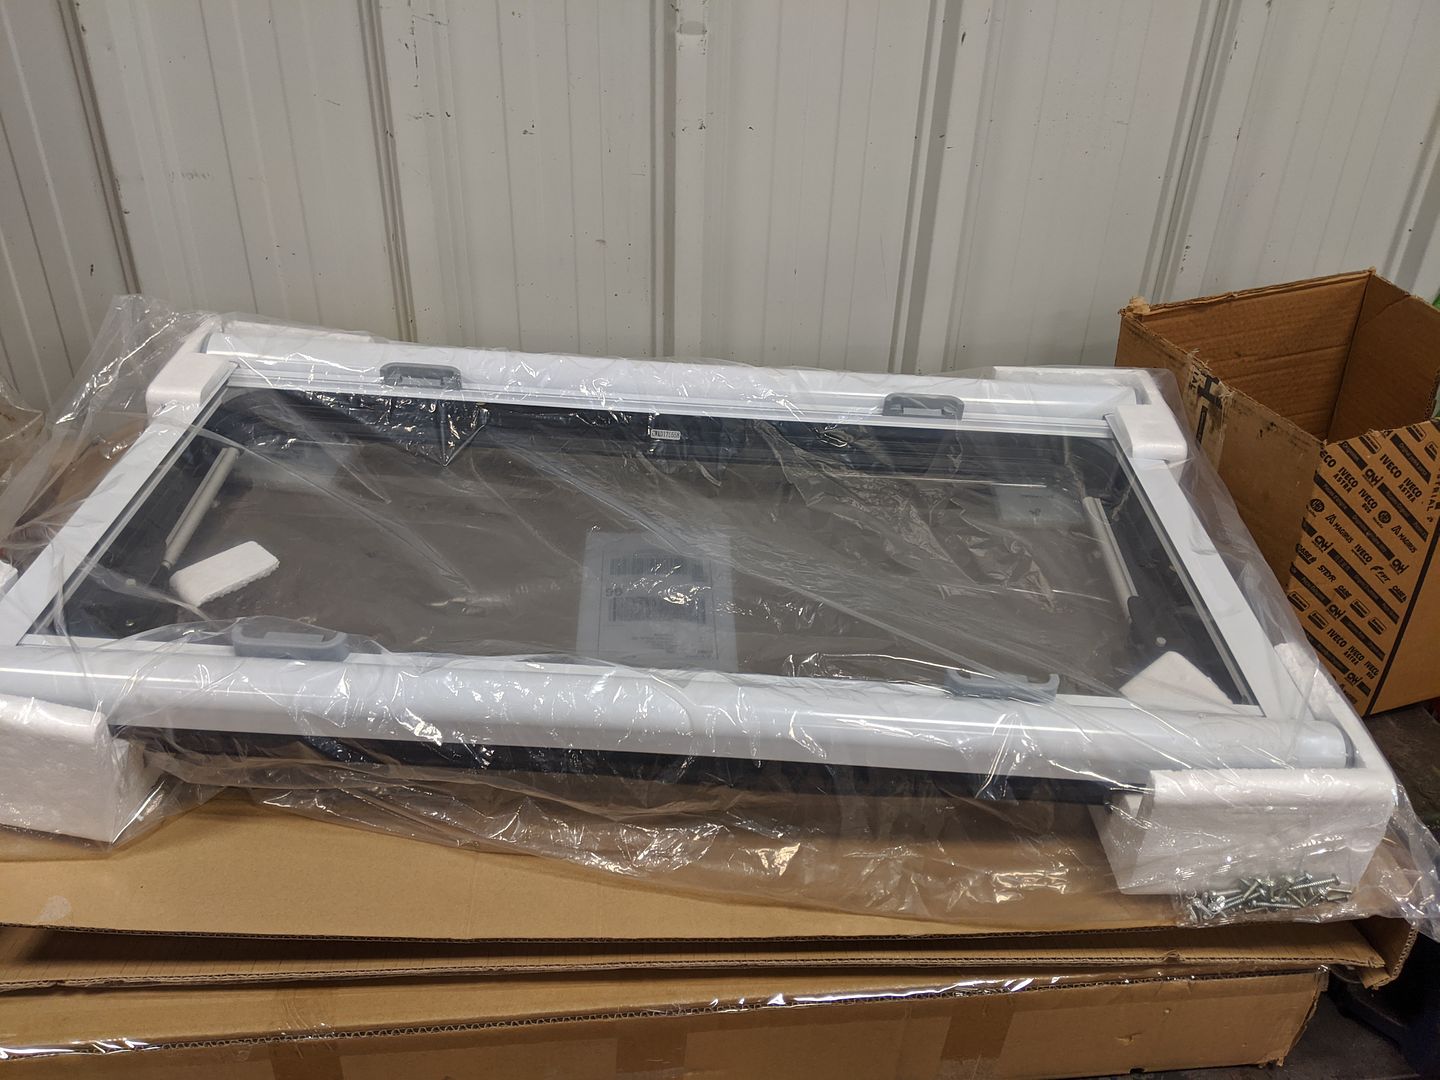
Ended up going with the Arctic tern windows. Pretty happy with the quality just looking them over when they arrived. Can't wait to get them in but it's still a long way off. Need to finish fairing the exterior, epoxy prime and paint the exterior, then ad the interior wall finish first.
Here you can see the pop up section of the roof cut out and the window holes cut out. The fiberglass has been completed over the top half of the camper and I am now using fairing compounds and epoxy to smooth it all out flat.


Ended up going with the Arctic tern windows. Pretty happy with the quality just looking them over when they arrived. Can't wait to get them in but it's still a long way off. Need to finish fairing the exterior, epoxy prime and paint the exterior, then ad the interior wall finish first.


dreadlocks
Well-known member
https://imgur.com/ > Photobucket
but for longevity purposes, it'd be best for you to mass re-size your images down to ~1080p resolution and attach em to your posts.. who knows if/when your image links will break if you put em on a 3rd party site.
but for longevity purposes, it'd be best for you to mass re-size your images down to ~1080p resolution and attach em to your posts.. who knows if/when your image links will break if you put em on a 3rd party site.
That's the plan hopefully. I wasn't happy with the mass produced stuff and couldn't afford the custom stuff. I am hoping itll last us until we're too old to comfortably climb into it.Ducstrom,
Thanks for sharing this project. It looks to me to be extremely strong, way stronger than anything you will find commercially.


Also been working on installing backer board in all the cabinets and building out the pop top. Ordered the paint for the top as well. Used epoxy primekote by interlux for the primer and will be going with interlux brightside in a Kingston grey for the paint. Bottom half of the camper will be getting sprayed with raptor liner over the fiberglass. I can't wait for all this 'body work' to be done. The garage needs a serious deep clean...
Thanks man! If I were to start again I'd be tempted to splurge and get the honeycomb panels already completed. My issues with that route was concerns about mounting things to the honeycomb panels and space. Wood is available at my local stores and I can just buy sheets as I need them instead of doing a bulk order and having nowhere to put them.kudos! incredible build for your first attempt. i'm in the planning stages for my own dyi build.
Are you planning a slide out camper as well, or something permenantly mounted?
planning a slide out. i have a mega cab thats been stretched to a long box with an 8' flat deck. I'm planning a cabover camper with a very simple interior. the plan is sleeping for a family of 4. i've thought about the panels as well, just cant justify the cost for the occasional use.
keep posting pics please!
keep posting pics please!
Well, after 2 coats of primer and a ton of sanding, the first of three layers of paint went on today. Almost done building out the pop up as well. And I ordered the dibond material to finish off the interior walls.
Pretty happy with the grey color sitting in the garage. Once some snow melts I'll get it outside to see all the blemishes..
Pretty happy with the grey color sitting in the garage. Once some snow melts I'll get it outside to see all the blemishes..
Attachments


Been working on it quite a bit over the last couple months.
Got the pop up mostly finished, insulated and painted. Finished the third and final paint coat on the camper. It far from nice, but nice from far. Each time I painted I either ended up with a couple runs or sags, or a bug would land in it, or I'd get a paint line if it dried too quick. I decided to call it good after the third coat. I figure if it's perfect I won't want to scratch it, as it is now I can scratch it and not care too much. If it bugs me enough I may repaint in the future or just wrap it in vinyl.
Also got all the interior wall material in, it'll be a gloss white when the plastic is removed. Made most of my wiring harnesses as well and installed them. Installed my led light track with the LED strips and tested them out.
I'll be mounting the pop up roof soon and am in the process of cleaning up the cabinet cuts so I can mount cabinet doors soon.
Anyway, here's the pics....
Attachments


Forum statistics
Members online
- RyanFell
- highwest
- Jakeryder
- timohardin
- rruff
- ///KM
- LikeABoss
- Kingsize24
- screwball48
- Tharnacle
- rpgrif50@gmail.com
- Darkone
- Blowby
- mmbirtcher
- corsair
- stickboy27
- RVflyfish
- Randall Dee
- midwayliberator
- mark5280
- Doug Larson
- crystalclear
- admpilot
- LostWoods
- Slappy
- Jpherbalist
- mporter84
- czechmate83
- tkiesling
- rover26c
- al415
- Hamstorm
- terrymo
- JackW
- deanerbeano
- FJFJFJFJFJFJFJFJ
- SkiFreak
- Sabey
- lithium1330
- HuskyRider
- 4loco
- webfoots
- gkerbow
- MoreGooder
- jetbuilt
- slick621
- jaywo
- Roambler
- Walter Wheeler
- rickgibbs
Total: 675 (members: 61, guests: 614)