"The Punisher" - 2016 Hilux 2.8D - Overland Build

Hilux_Max

Adventurer
Another small update I forgot to mention from a couple weeks back, I sold the Axis sliders to a work mate that liked em, and I bought my self a set of Phat Bars rocksliders.

These are an angled up design with a black checkerplate ontop.

15078929_10154085208304067_3969002289035537682_n.jpg


15107299_10154085209164067_7508811528407131177_n.jpg


15095593_10154085209324067_5356468276359186000_n.jpg


Also, the front Axis bar is for sale.....my hilux is being used by another local 4x4 company to help develop a new range of accessories for them. They 3D laser scanned it last week for their CAD development.

When complete, I will be fitting their bar to my hilux and am currently selling the existing bar I have,

14718662_1231649703562842_6553911547644802673_n.jpg
 

Hilux_Max

Adventurer
So I've finally found some time to install the suspension.

15032851_10154097179879067_6582732887362527694_n.jpg


Started last night with the extended shackles and rear shocks -

15078607_10154097263589067_151579935729153990_n.jpg


15094930_10154097263854067_3916898235535289596_n.jpg


The shackles extended up giving me a good 20mm lift over standard. I'm happy with that. I didn't really want to go higher than that in the rear. Will be keeping her on the low side anyway.

The rear leaves have heaps more open travel/droop than the previous model hilux rear leaves, I found out while installing these and jacking the vehicle up.

Installed the Matrix rears. Even thou these are installed the right way, It makes adjusting the dampner adjustor a little harder with it being ontop of the shock. I did try flipping them but there is a bracket surrounding the passenger side upper mount which doesnt provide clearance for the remote res to mount up. Will have a look again over the weekend and see if I can either remove or mod the bracket to flip em so adjusting the dampening will be easier with the adjustorbeng on the bottom side as opposed to how it sits now, if not they'll stay the way they are -

15094954_10154097328589067_625330904429117252_n.jpg


In the pic below you can see the bracket that surrounds the top mount. While under there I also spaced down the teat brake line bracket a good 20mm with longer bolts and washers to reprieve some tension in the rear brake lines on full droop until I get round to installing longer braided brake lines in the future -

15055596_10154097329339067_7503838795148400354_n.jpg


15032770_10154097329579067_511218490316444478_n.jpg


And I got the front end setup to continue working on it today -

15085689_10154097371564067_8183391039672857880_n.jpg
 

Sea.Jay

Observer
I want to see the heim steering installed and more info please!! Looks great, much jealousy from those in the states
 

Hilux_Max

Adventurer
Suspension Completed

So this is today effort.

Firstly I installed the Phat Bars braced diff drop - I can tell you that rear mount never gets any easier to replace, especially on the floor on jack stands....what an effort. But the rest of the kit fitted up nicely and easily.

15036672_10154098852739067_3616746433364277121_n.jpg


I measured before I fitted it, with a ruler going across the lower control arm mounts up to the cv cup as a reference point. Before the diff drop, the measurement was 68mm.

15109487_10154098854209067_3978050049180385334_n.jpg


After the diff drop was installed, I remeasured the same reference point and the measurement was 36mm.....equating to a total drop of 32mm.

15036737_10154098855629067_408182681493412065_n.jpg


After it was all installed, PSR upper control arms, Matrix coilovers with progressive coils -

15036454_10154099200524067_662690093949413747_n.jpg


I then proceeded to install the Phat Bars bashpplates and underbody protection. These are all 5mm thick and damn heavy I can tell you -

15135741_10154099395164067_2999706961517430451_n.jpg


Not the best pic, but goes all the way back, nice and flat to cover upto the transfercase -

15171019_10154099395349067_4718916328682252216_n.jpg


15032184_10154099396074067_2965333964250479554_n.jpg


I also removed the upper bracket at the top of the rear passenger shock absorber mount, and cable tied the wiring loom up and out of the way and flipped the rear shock. This will allow me to get to the dampening adjustor much easier and will also protect the remote reservoir better.

15094991_10154099555469067_899445976921960325_n.jpg


After all this I was absolutely nackered....nothing like doing this job to remind you that your getting older :lol:

If I have the energy, I will adjust the front coilovers in the next day or two and am aiming for 575mm (standard is 520mm) and with the addition of the front bar in the near future and putting the rocksliders back on am hoping for it to settle around the 2" lift mark or just over. Alignment will get done early next week and will be keen to see how far forward the castor is able to get pulled.

These are the flares that arrived about 2 weeks ago in body colour which will go on once the wheels/tyres have been fitted and clearancing mods completed to make em work.

http://www.ebay.com.au/itm/162239737511?_trksid=p2057872.m2749.l2649&ssPageName=STRK:MEBIDX:IT
 

Hilux_Max

Adventurer
So todays efforts was a little bit of a learning curve for me too.....as always, jobs you think will be quick and easy always tend to take alot longer than expected.

I adjusted the front height of my Matrix coilovers.....settled the suspension a little by steering left to right a couple times, then drove out of my driveway to bounce the front end over the gutter a little more to see if it'd settle further. As I dropped off the gutter.....BANG! :shock: :eek: :shock: :eek: :shock: :eek:

Here we go, I thought, ****** now?

Had a look underneath and found as I dropped off the gutter, the PSR arms hit the outer top edges of the front coilover towers....hence the bang. Also, on the passenger side the PSR arms ball joint rubber got torn clipping the coils.

Backed it into the garage and removed the wheels. It was reccomended to me prior to installation that the PSR arms needed to have their adjustment wound in all the way. I now know, and for others future reference that you shold space em out a good 10mm prior to installation.

No, it wasnt the open travel of the Matrix coilovers, as on full droop the cv boot ribs clear the lower shock mount "just", and there is no CV bind whatsoever. I put it down to the arms being too close to everything withoout any spacing adjustment dialled in first.

So I pulled torn boot off, and pulled the boot off the standard arms and replaced it.

I got the grinder out and ground back both front and rear outer edges/corners of the coilover towers on both sides of the vehicle to alleviate this potentially happening again in the future.

I then had fun dialling in the suspension, wheels off, adjust, wheels on, other side, settled suspension measure, start again.....LOL, several times. :roll:

I adjusted the front height setting based upon the CV inner joint boot ribs. As always Ive mentioned, Im not out for big height, never was, more after a reliable lift.

Therefore, what I ended up with is the following:

Passenger Side - 560mm hub to guard

15171231_10154101806934067_841054629044490760_n.jpg


Drivers Side - 562mm hub to guard

15134551_10154101807579067_113417904728410846_n.jpg


Tomorrow I will adjust the upper arms out 10mm for the meantime.
 

Hilux_Max

Adventurer
Everything is done and fully adjusted, only alignment left for tomorrow.

This mornings effort -

These are the PSR arms looking from underneath. To adjust these PSR arms, looking from the inner side of the arm outwards, you need to first:

1. Loosen the side pinch bolt.
2. Loosen the silver locknut. This nut turns clockwise to loosen.
3. Then start turning the black nut anti clockwise. Its about a 33/34mm size. So im using a shifter which helps with leverage as its damn tight.

Im spacing em out 10mm. Passenger side needed a little bit more.

Then you lock up the silver nut and then the pinch bolt beside it.
15055863_10154103793739067_1561734547637199884_n.jpg


Front suspension height has been readjusted, 580 on both sides...should stay just over 2" with a bar and i dont want any more cv angles or less cv boot rib clearance than what is there now. It clears and they dont touch.

Passenger side -

15094379_10154103923659067_925997920839619184_n.jpg


Drivers side -

15107403_10154103923834067_3616018420192126414_n.jpg


Alot of work has gone into this install....alot of it was in the adjustments of front vehicle height, open travel/length, and Upper control arm clearance. Im happy with how it all is and sits now, will play with the dampening adjustment during the week to get a nice setting for daily driving and taking the swaybar removal into consideration.

I do still have progressive bump stops to fit on the front end and the heavy duty rack ends.
 

Hilux_Max

Adventurer
This morning i fitted a set of Superbump progressive bumpstops. These are a 70 grade as opposed to the previous 60 grade, meaning they are firmer than before. On my n70 I ran the 60 grade ones with a 6mm spacer without issue. But testing in a press has shown that because these compress progressively a little more than stock bumpstops, a 16mm spacer fitted underneath them ensures overall they compress the same amount. These help take the sharp jolts encountered on the road like pot holes and the like, helping smooth out the ride onroad too.

15178154_10154106520324067_1652554912320123372_n.jpg


In testing:

Stock Bumps
Free Height @ 45mm
Compression @ 3T 35mm
Compression @ 5T 33mm

StockBumpstopStatic_zpscc290cf5.jpg


StockBumpstop3TCompression_zpscef4c20d.jpg


StockBumpstop5TCompression_zps1a719f2b.jpg


70 Sure Hardness SuperBumps
Free Height @ 68mm
Compression @ 3T 24mm
Compression @ 5T 20mm

SuperBump703TCmpression_zpsb58e3f4e.jpg


SuperBump705TonneCmpression_zps5d6b1d0b.jpg


And these are the spacers fitted inbetween the bumps and the chassis mount - a 10mm and a 6mm spacer.

DSC_0410_zpsb6460081.jpg


Also took the hilux for its first test drive. Driving slowly was fine. When i went abit quicker over a speed hump i heard a clunk again. Went back into the garage, checked over all the bolts to ensure everything was tight. It was, so i suspected the upper arm just touching the tower. Got underneath and readjusted the arms to space em further out a couple extra mm.

Went for another drive and success....was able to bunny hop roundabouts with ease and no issues. The amount of time ive spent fine tuning this setup is crazy. Hopefully i get the results im after offroad too.

Alignment has been completed as well by Rob at The Suspension Centre.....a custom alignment that had made her drive beautifully and should provide additional clearance for the larger tyres to be fitted in the near future.
 

Hilux_Max

Adventurer
Had a busy day yesterday....aim was to make those tyres fit and work.

So i fitted em first thing in the morning to gauge what sort of clearance issues I may end up with. First check was inner clearance to the UCA's....all good.

15220110_10154115825844067_5970202194362608052_n.jpg


Drove out of the garage to gauge the stance with the 295's -

15178071_10154115835449067_8853763105998381649_n.jpg


And thats where the hard work began.

Time to start clearancing!

I measured with tape the portion of the lower rear fender that will need to be chopped and marked it.

15253602_10154115885349067_898882063987062875_n.jpg


I then cut it off with a thin blade grinder. Turned the steering wheel to see how close the pinchweld will be, and realised quickly that that bugger will need to have the **** beat out of him too, as well as the bodymount.

15202733_10154115997519067_7500015906581605698_n.jpg


I cut slices into the pinchweld and beat it back....sealed it with silicon and sprayed over it......bodymount had a wedge taken out, bashed back and welded up again and sprayed.

I wanted to keep the next up innner fender liner clip holes as I was planning on re-using the fender liner and making it work pinned further back.

15230737_10154116057589067_6727594359641625944_n.jpg


I utlised a piece of the fender that I had just cut off and shortened it down and made a small bracket to help me hold the inner liner pinned back. I push the clip through the liner into the bracket and then drilled a hole through the fender and rear of bracket and pop riveted it back to hold the liner in place -

15171313_10154116265339067_3263413501958431753_n.jpg


15220130_10154116265459067_1369840151906310401_n.jpg


I have flares to go on so I wasnt overly concerned about the exposed pop rivet.

Time for a clearance check!

Clearance with tyres straight ahead -
15192687_10154116265584067_6408565047131039342_n.jpg


Clearance on full lock - Im still contemplating on making some 10mm or so steering limiters in the near future. These hilux's have a lot of steering lock as it is.
15192624_10154116265814067_3780119418922607130_n.jpg


Half steering lock from underneath -
15134589_10154116266019067_64721219933154539_n.jpg


Time to hit the back paddocks for a Flex Test!


I drove to my old testing spot and back up the hilux up a mound to put pressure on the opposing front end.

15171139_10154116303569067_3818800732267143740_n.jpg

Yes, my boys wondering ****** are you doing?

15230631_10154116303474067_2684528921929066022_n.jpg


In the rear end.....there was still 1.5" of uptravel until the bumpstop bottoms out. But the tyre was damn close to the front end of that rear finder...just missing those liner clips. If only I could space the rear diff back slightly. This "may" be an issue if a situation arises where I fully stuff that rear end hard offroad....will see. something to think about in the meantime.

15192578_10154116304474067_6379740408883534452_n.jpg


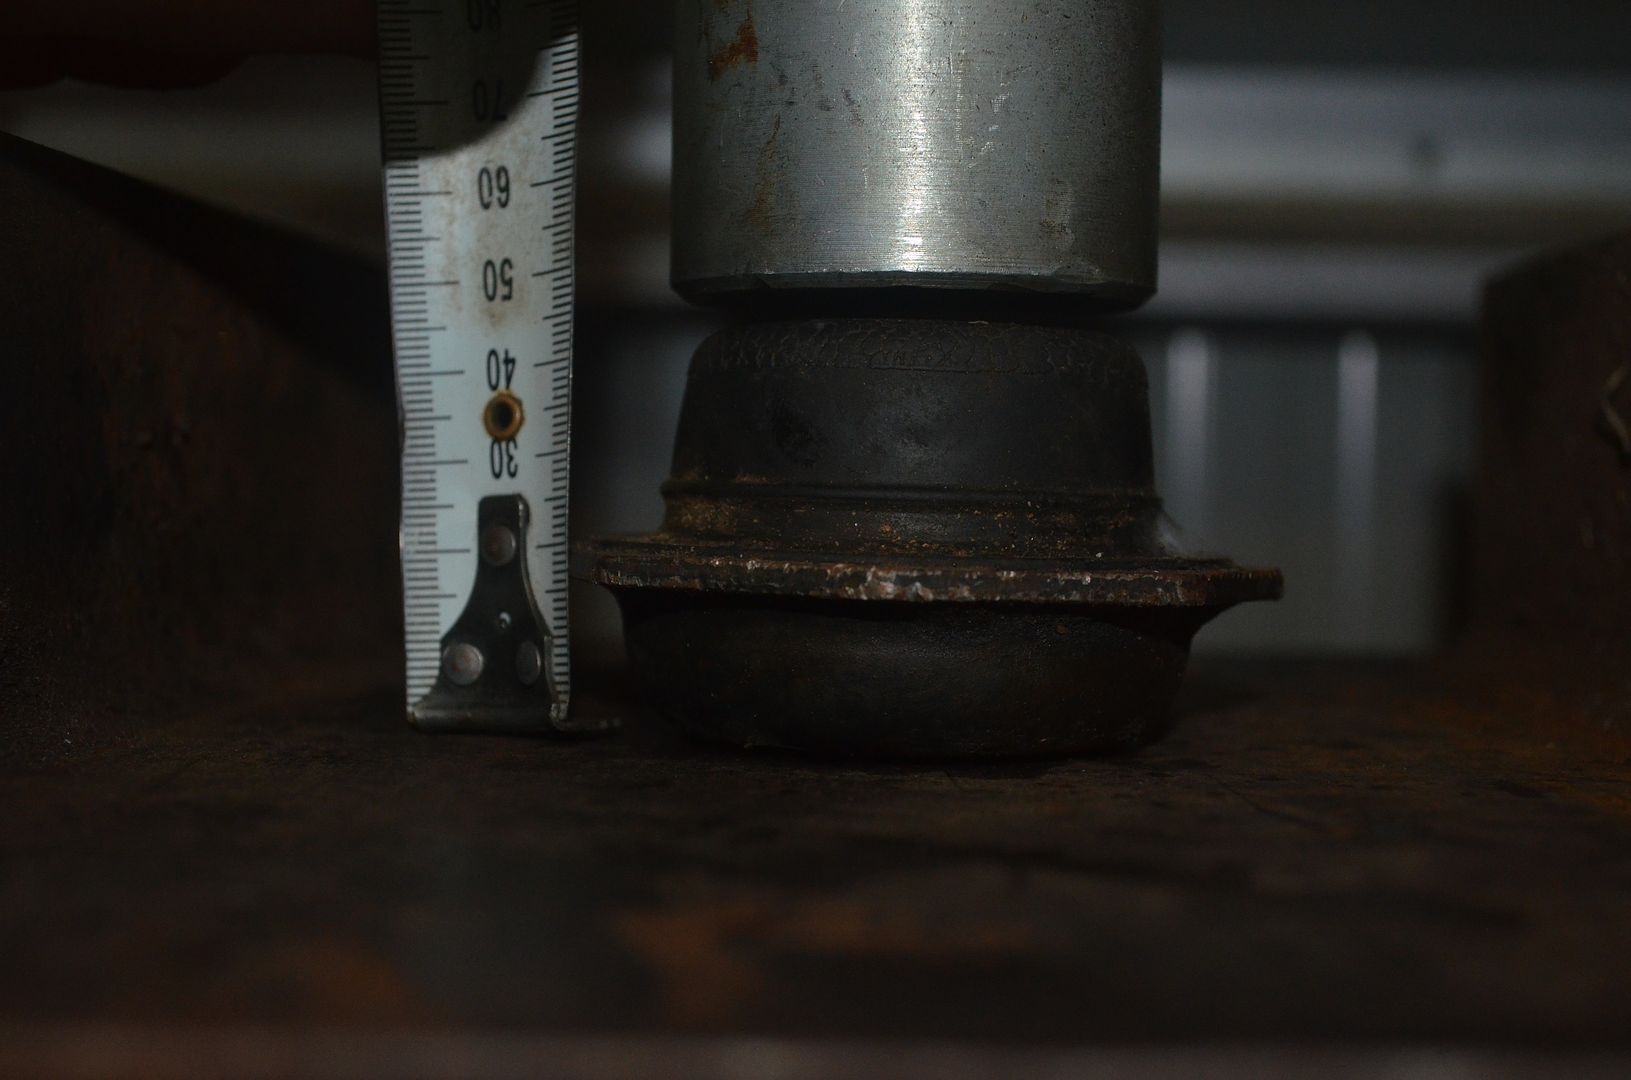
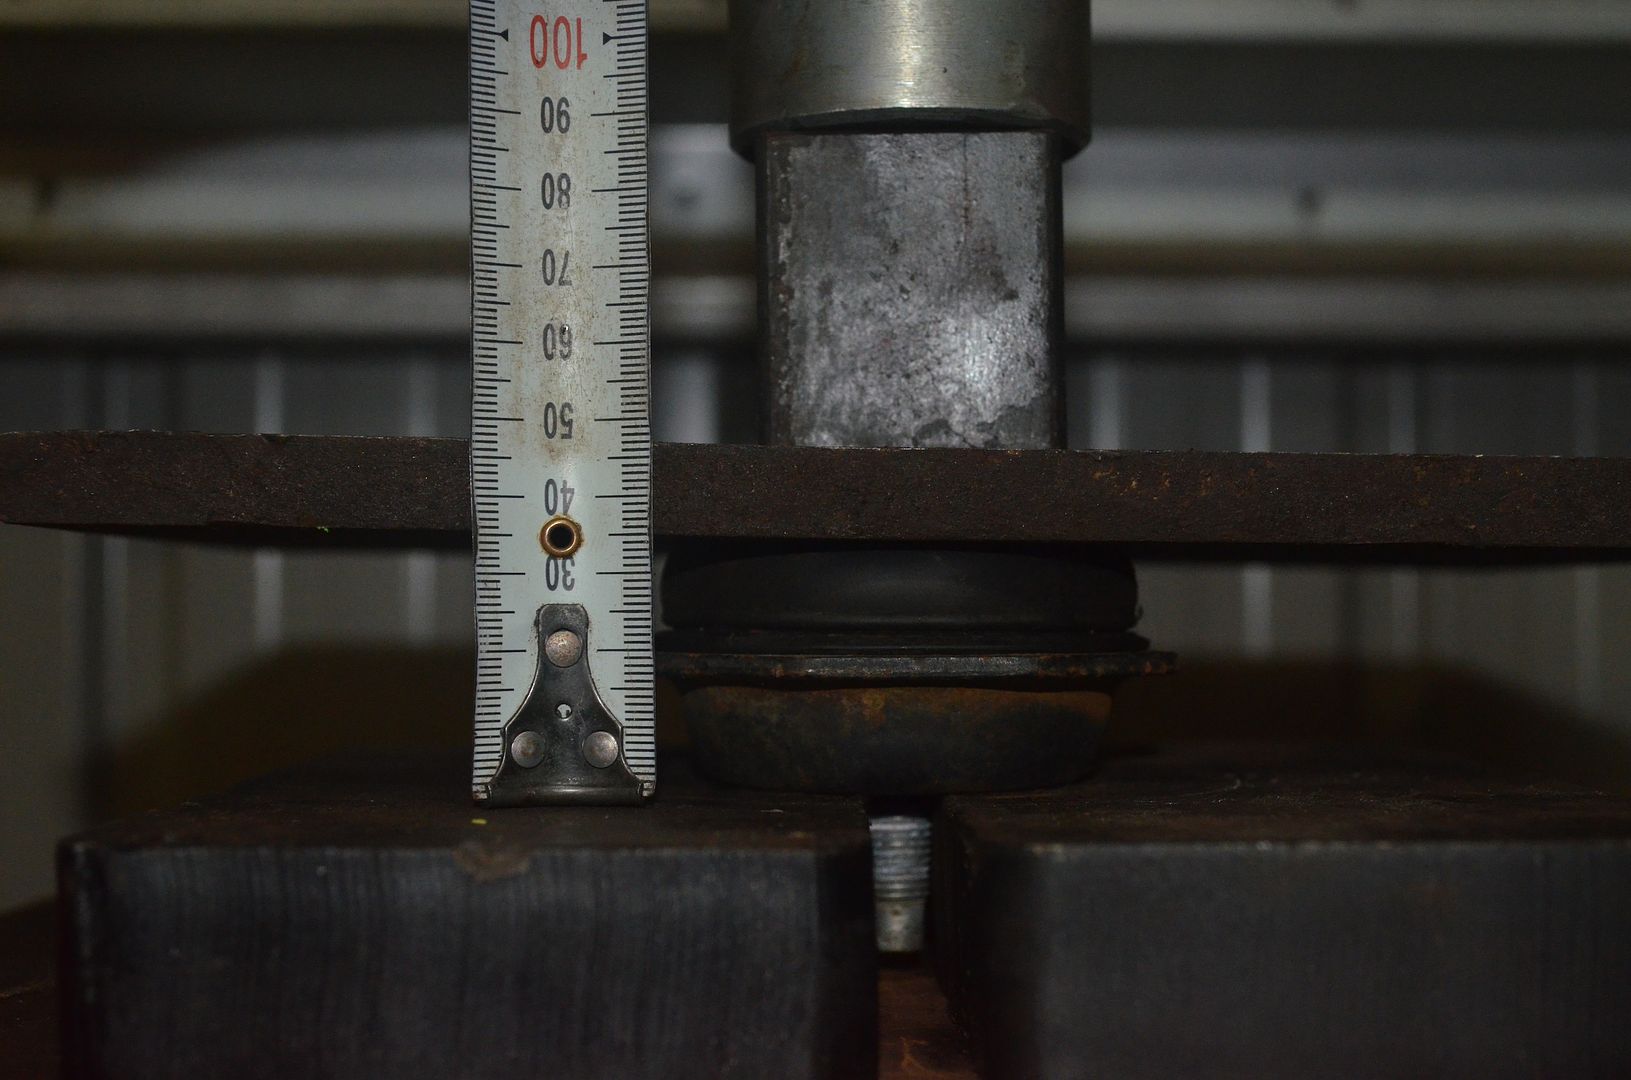
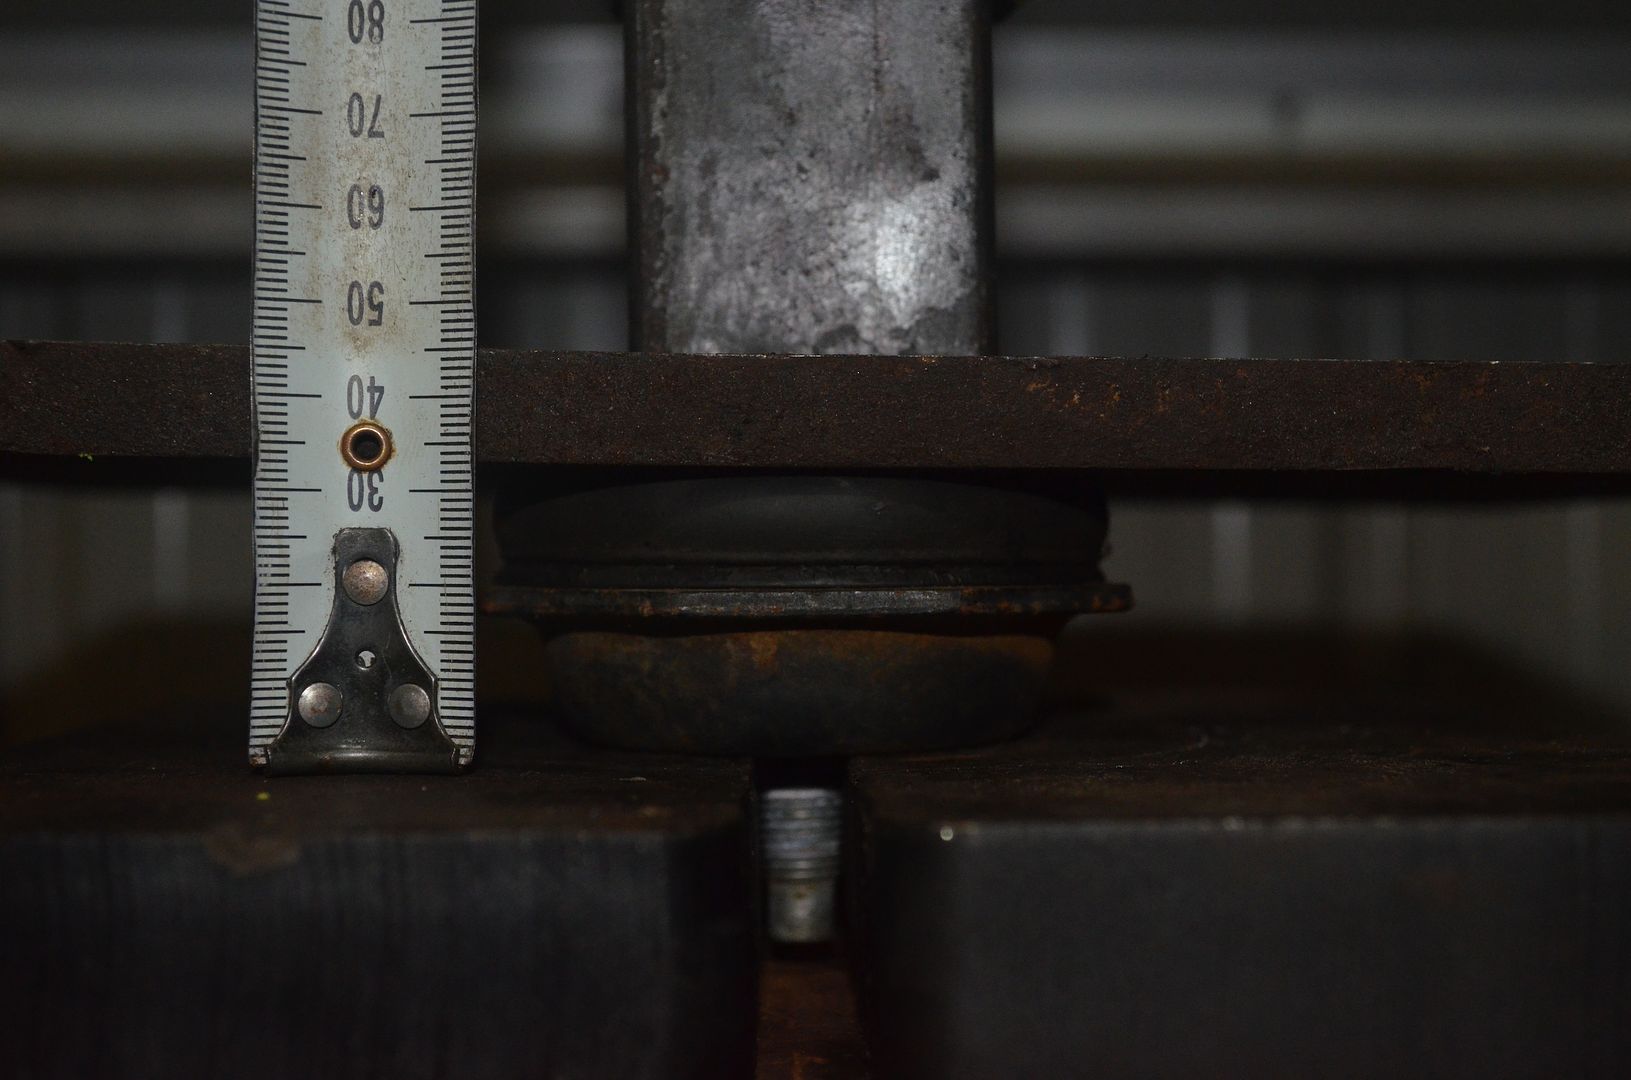
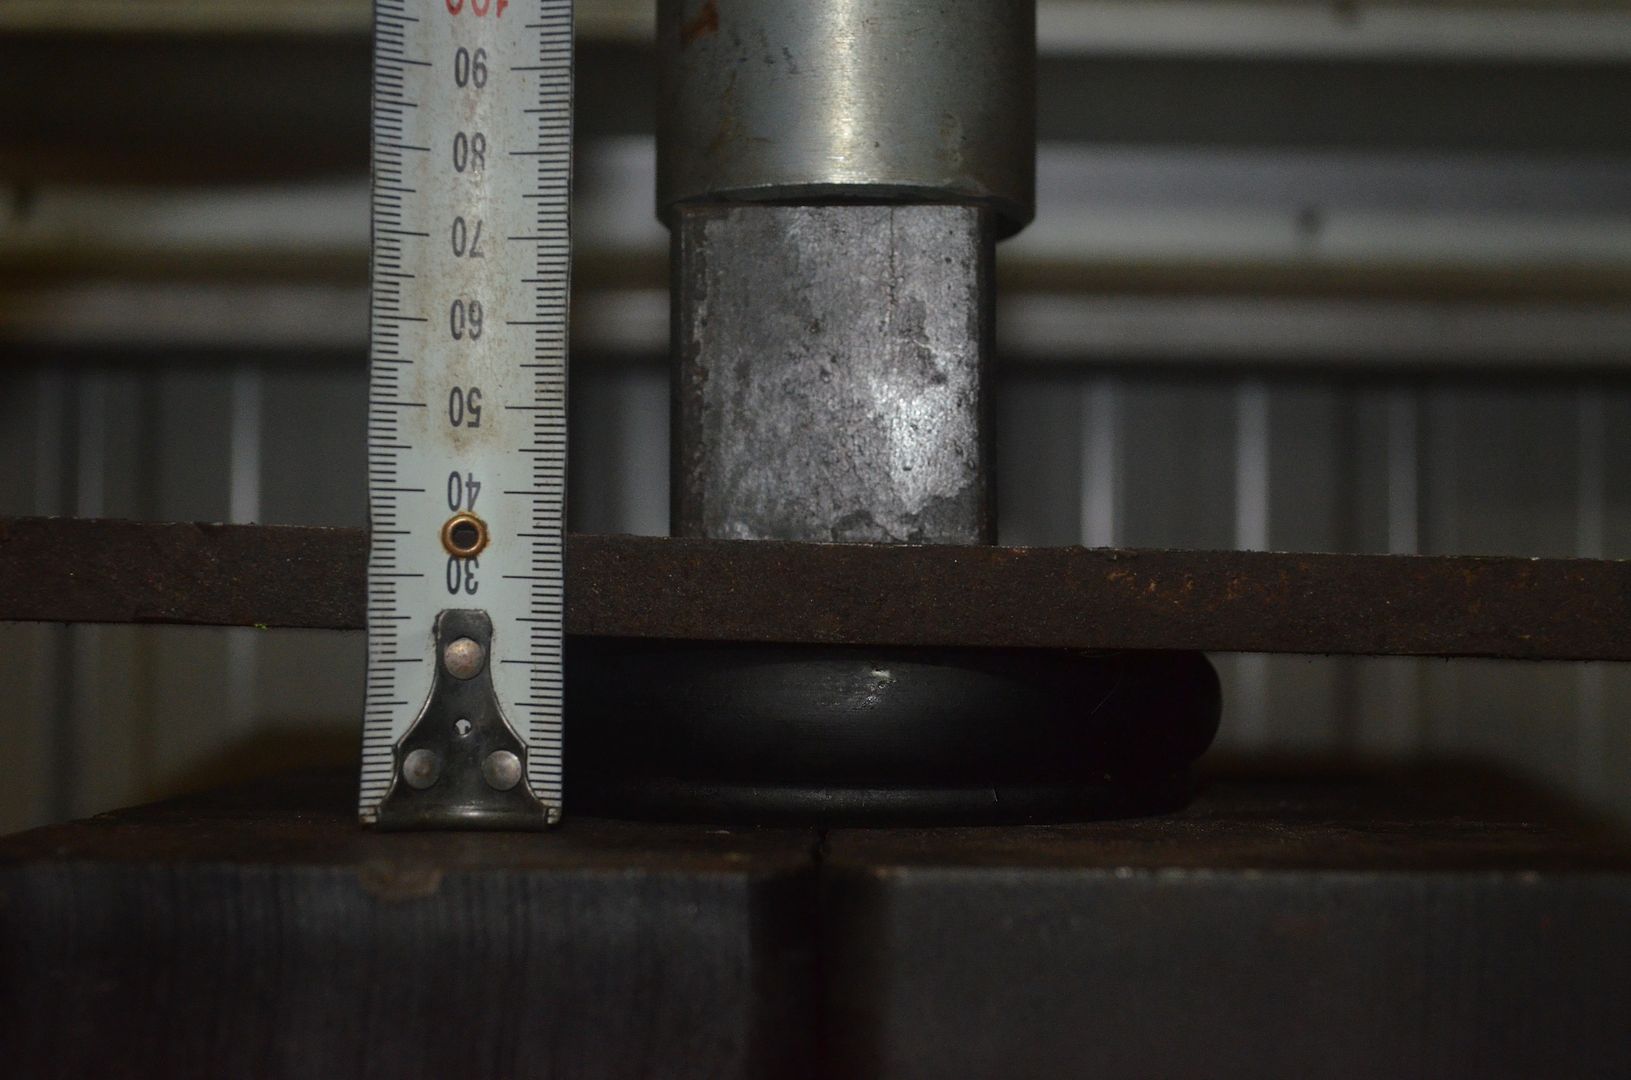
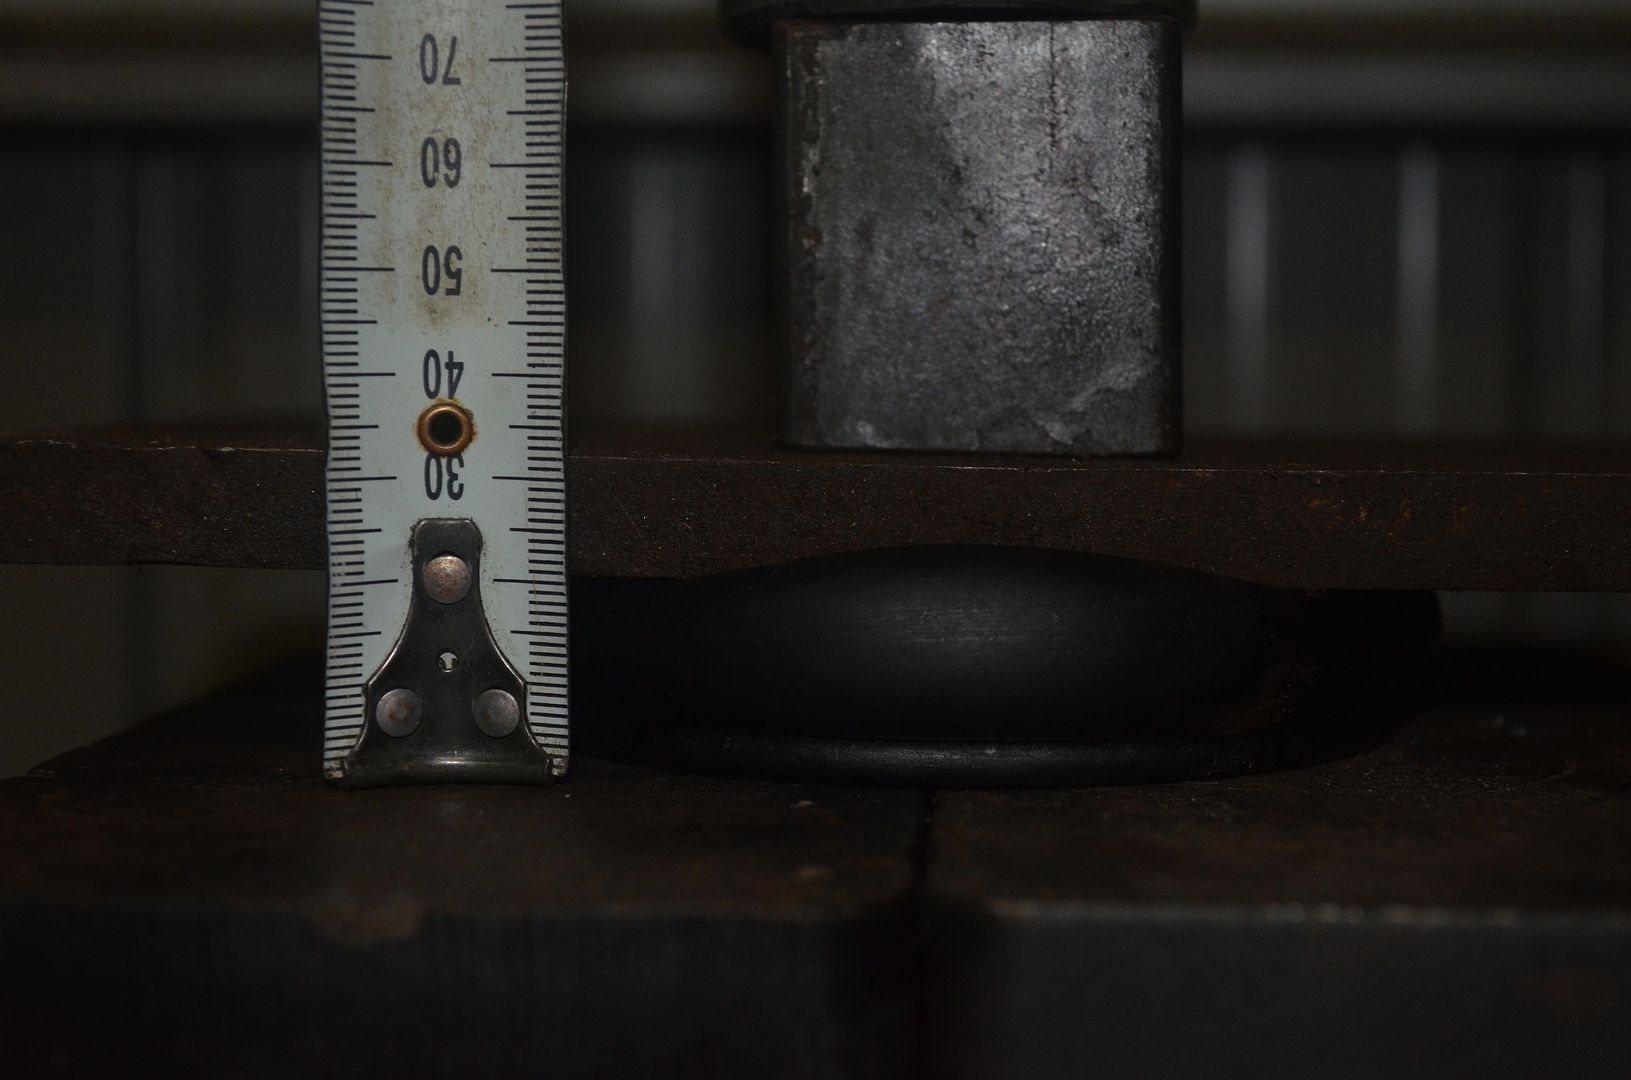
On the front end, the suspension compressed hard and the Superbumps were doing their job -

15178319_10154116306124067_7559349388443191325_n.jpg


15135898_10154116306009067_1823277645166485599_n.jpg


Whilst the front end was stuffed, U slowly began turning the steering wheel to gauge potential clearance issues with the tyres against all the clearancing I've just completed.

The tyres "just" literally only "brushed" against the lower pinchweld with the outer edge of those lugz as you can see in pic below theres a 2 inch second below that rivet.....might give it a couple more taps with the hammer to be sure.

15230818_10154116305589067_728051349671958161_n.jpg


I am not overly concerned with this thou. Rarely will you be using full steering lock when the suspension is compressed whilst offroading. Its more a measure of a potential worse case scenario which everyone should ensure works before hitting the tracks anyway and going offroad.

On the way back, I did a speed check against the GPS on my phone, and at 100kph on the speedo the GPS said I was going 104/5 kph. Just shows how far out the speedo is with factory tyres on it.

Got back home and decided to hit the next part of my build.....fitting the body colour flares I bought.

15203285_10154116716354067_4131581313066495688_n.jpg

Yes she needs a wash.

Photo's dont do it justice...she actually looks like a truck now and I love the stance she's got.

15219489_10154116716619067_7566353259654363676_n.jpg


295's on these trucks are pretty big tyres and I wouldnt reccomend going bigger if you plan on making them work offroad.
 

Plainsmuse

Adventurer
It's funny that you're using a Tacoma as the inspiration for your build because here in America, many of us 4x4 diehards would do anything to have a legit, Aussie-style of LC70 or Hilux in our garage.

You've got an awesome truck!

You Got That Right! C'mon EPA, give us a Toyo Diesel, and one with umph!
 

Hilux_Max

Adventurer
I reffited the rocksliders last week, and the Rhino platform rack the week before again.

I fitted my 42" LED Lightbar yesterday, yet to wire it up. was a bit of stuffing around as I tried to utilise the Rhino LED Lightbar brackets I had, the center roof mounted antenna also got in the way too.

I found out after I was done, that I had accidently flipped the rhino racks backbone mounts asrse about a couple weeks ago when i refitted the rack. too late now. it actually helped as this way there is 5cm more distance from the front rack mount to the front of rack....if fitted the normal way the Lightbar would not have beem able to be mounted as flush as I did due to antenna interference.

15578425_10154186528579067_6648841192463756036_n.jpg


15542082_10154186528724067_8773876413538899065_n.jpg


15622531_10154186537324067_7814245555519557284_n.jpg


Front bar is going back on this week and a 32" LED Lightbar will be mounted to the front of that too. I am planning on taking her on her first offroad trip end of January....I have a couple things still to sort out with tyres and clearance first still.
 

Hilux_Max

Adventurer
Todays effort was to refit the Axis bar back on, I then readjusted the height of the coilovers again to where I wanted it taking into account the weight of the bar. I then fitted the 32" light bar to the front bar and wired it all up.

Am yet to get round to wiring up the roof mounted light bar.

Im happy with how she is progressing, something a little different but the look and stance is spot on.

Still needs a little bit of work regarding clearance for tyres...a little more trimming in the rear end, and another alignment needed to push the front tyres a little more forward, but she is getting there.

15590436_10154189236374067_557090326925760152_n.jpg


15622195_10154189236479067_1183195107640905439_n.jpg


15622419_10154189236639067_8109853738589149821_n.jpg


To do list:

1. wire up the roof mounted light bar
2. tint the windows.
3. Fit tinted wind deflectors to windows
4. Dashmat
5. Design and get someone to make a rear bedrack for a RTT with supports to mount a full length
(front to rear of vehicle) enclosed awning, and maxtracks mounted on the sides above the top of the tub.
6. Regear to 4.8's
7. dual batteries and winch.

Im sure other stuff will pop up but thats the aims for 2017.
 

Forum statistics

Threads
185,911
Messages
2,879,536
Members
225,497
Latest member
WonaWarrior
Top