First, a little behind the intent of this build. I'm a mountain biker, dirt biker, camper etc. I need a comfortable, secure way to transport myself, a few passengers and our gear to and from destinations while also offering somewhere to sleep and shelter from the elements. This will be less of a dedicated camper and more of a flexible, configurable gear and people transport.
I've been drooling over SMB/4x4 style Ford vans for some time now, I've always wanted to build one of my own. A little over two years ago I was ready to pull the trigger on a used cargo van to start converting, then I got cold feet. I ended up buying a brand new Tundra TRD 4x4 with plans to build it into an expo/overland style vehicle. I was really enjoying the truck and getting some modifications done to it. As time went on and I used the truck, I was quickly getting over beating up a brand new vehicle that I was still making payments on. The idea of a van was still burning in the back of my brain.
I put the Tundra up for sale this May, sold it private party a few weeks later and then began my hunt for a used van. The requirements for the van were: rust free, cargo van, EB, V8, sub-150k miles, sub-$10k, PW/PL and cruise control. After some searching, I came across a van that checked all the boxes minus CC. A 2006 E350 EB cargo. One owner with 125k miles on the clock. After some research I determined it would be an easy enough to add cruise later. I began the negotiation process with the seller and soon after was on a plane from Phoenix to San Jose to pick up my new-to-me van.
Van wishlist
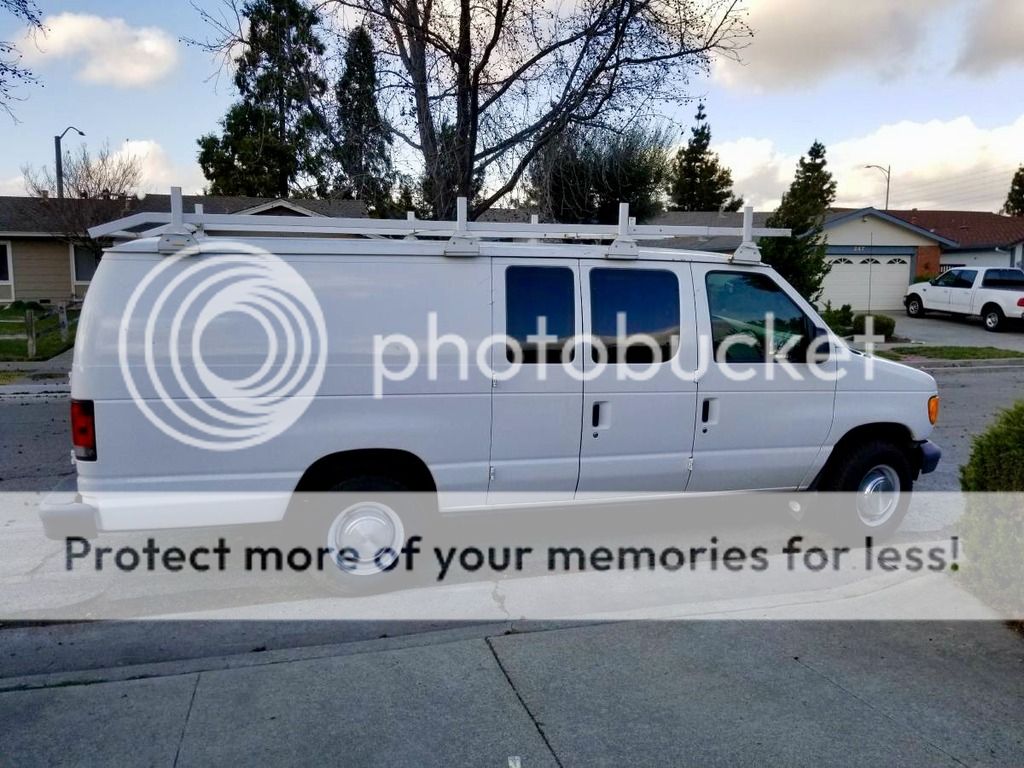
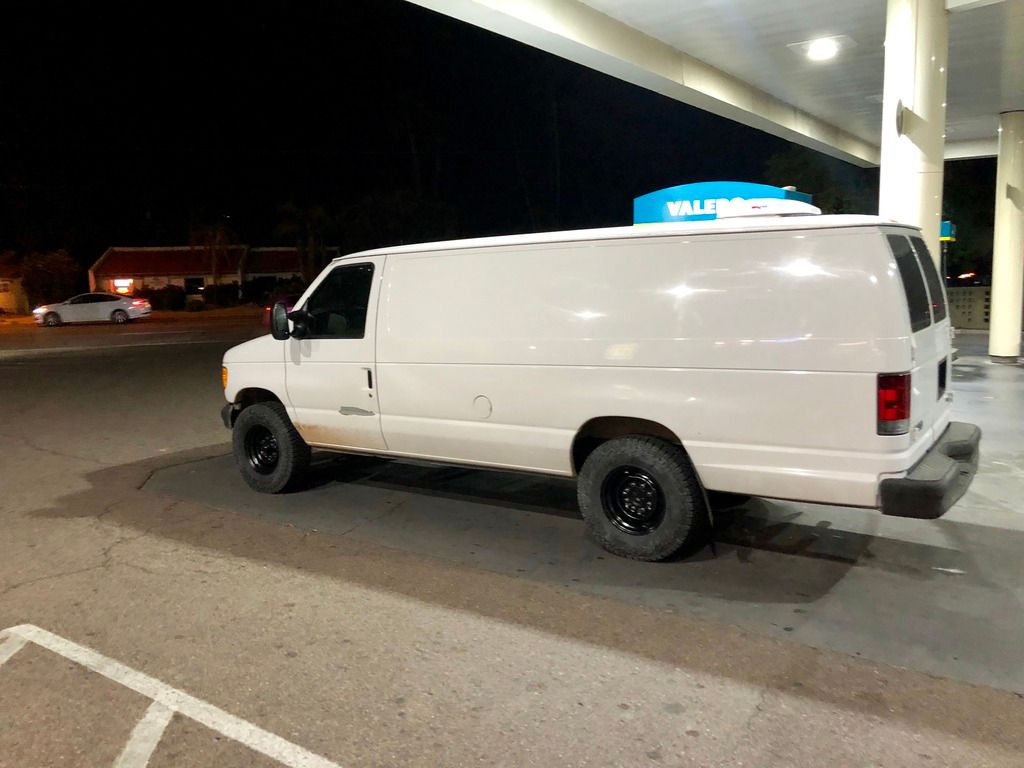
Picture of the van from the CL add.
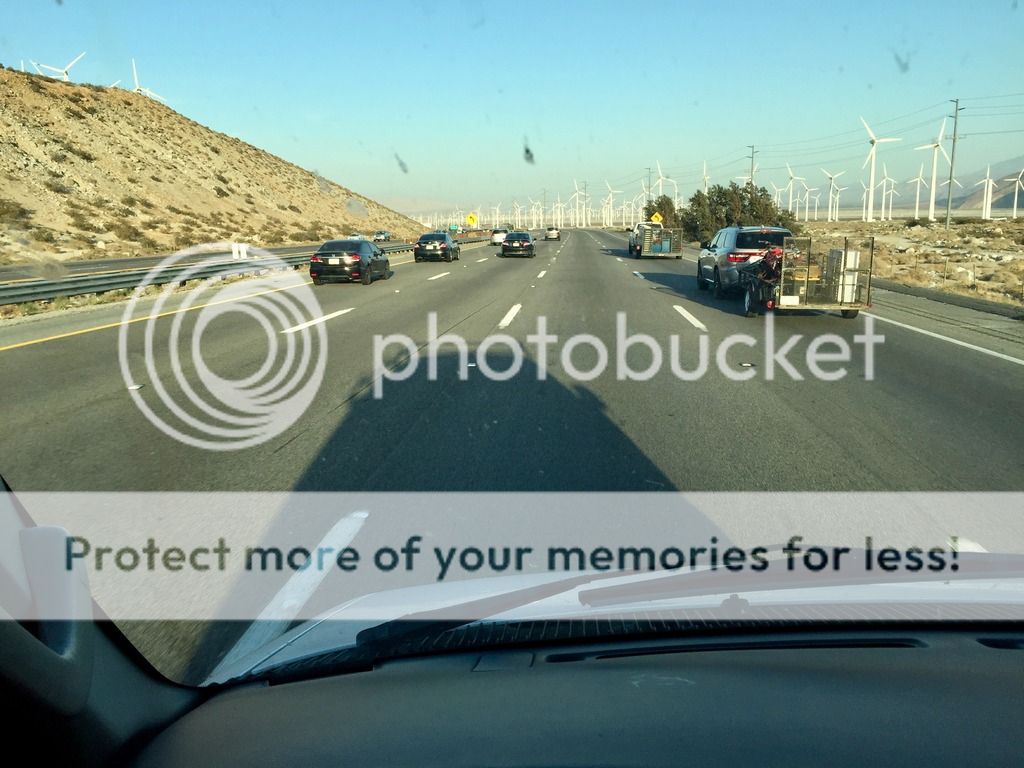
After a test drive and through inspection I was on my way back to Phoenix. I made to over 700 miles home in one shot, van did great. A little front end wobble around 65, I assumed due to worn out front end components, cruise control sure would have been nice.....
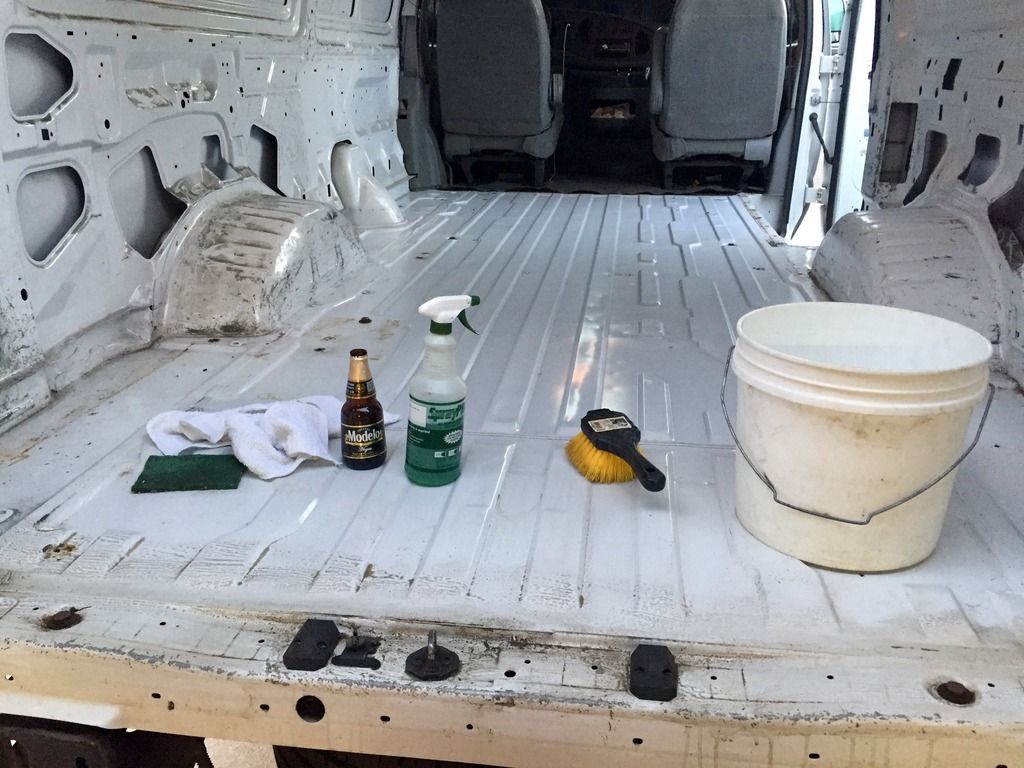
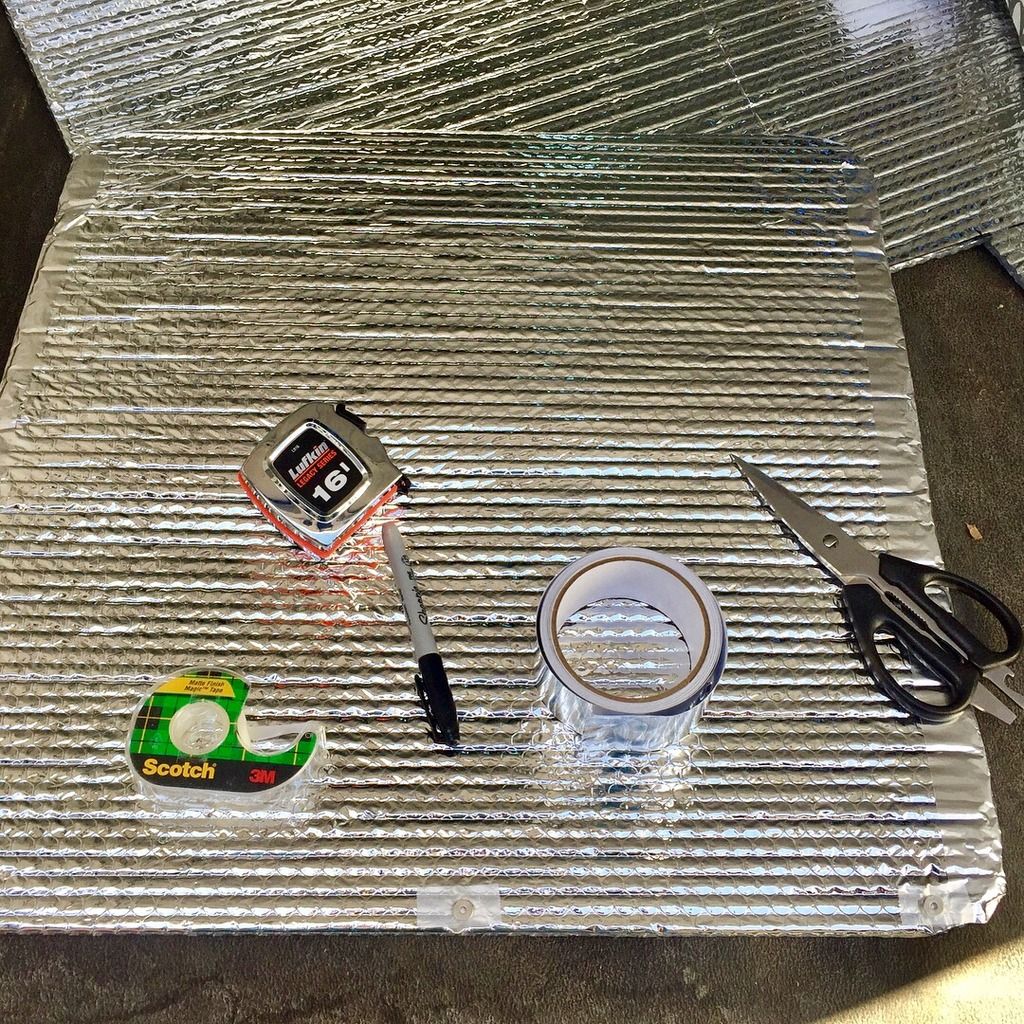
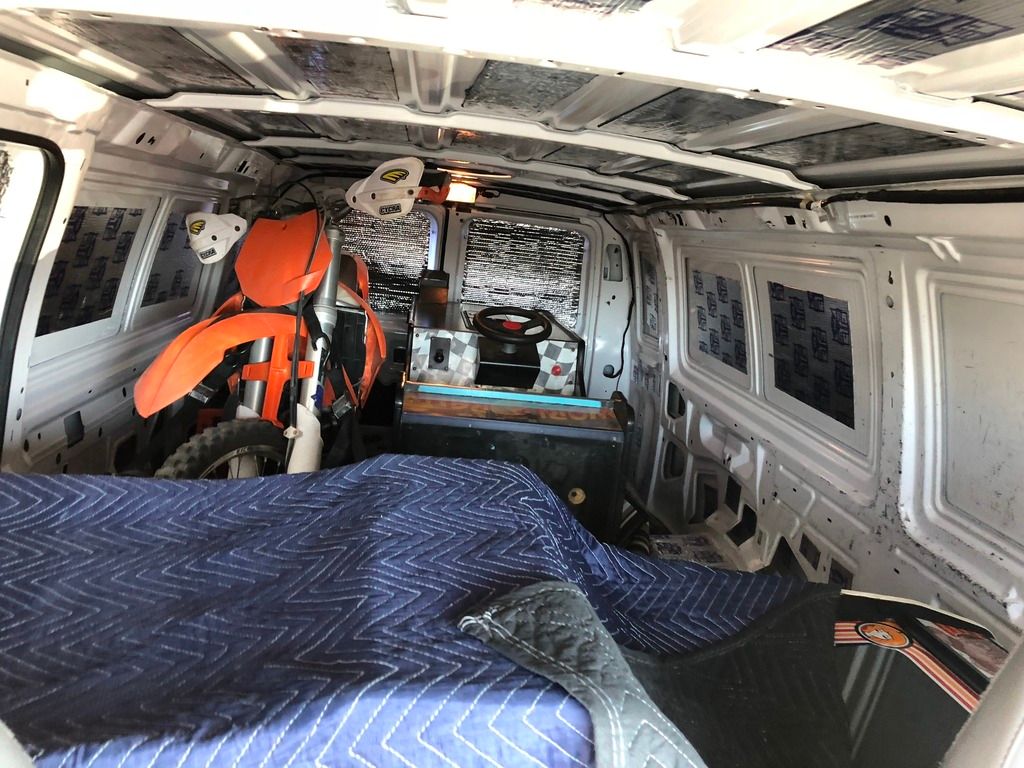
Got the van home and did some interior cleanup in preparation for starting on CLD (constraint layer damper, AKA Dynamat) treatment of metal surfaces.
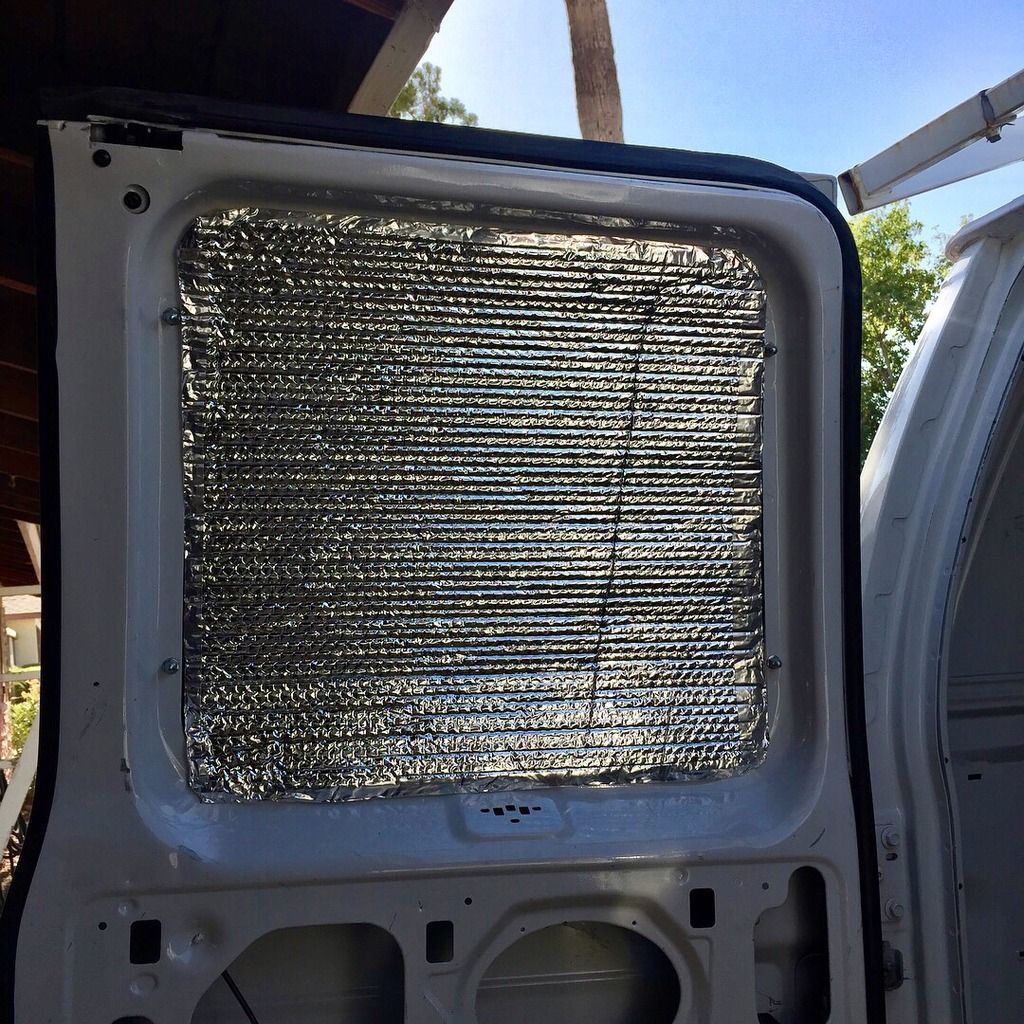
Also made up a quick set of Reflectix window shades to protect the interior from the harsh AZ sun. I used metal tape to attach some small magnets around the perimeter to hold the shades to the metal window frames.
Took care of some necessary maintenance along the way. New Moog tie rod/dragling assembly, replaced a balljoint, oil change, coolant flush, AC recharge, new fluid and dif cover seal and an alignment.
Of course, the mandatory van right of passage. Step one, put a hole in the van.
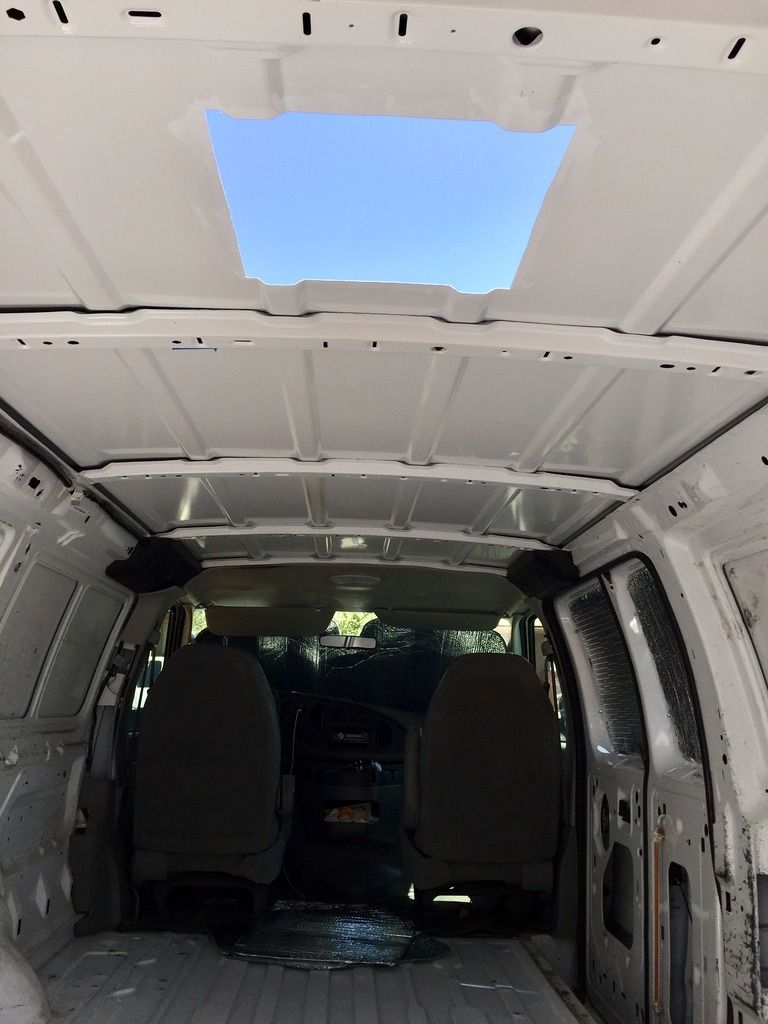
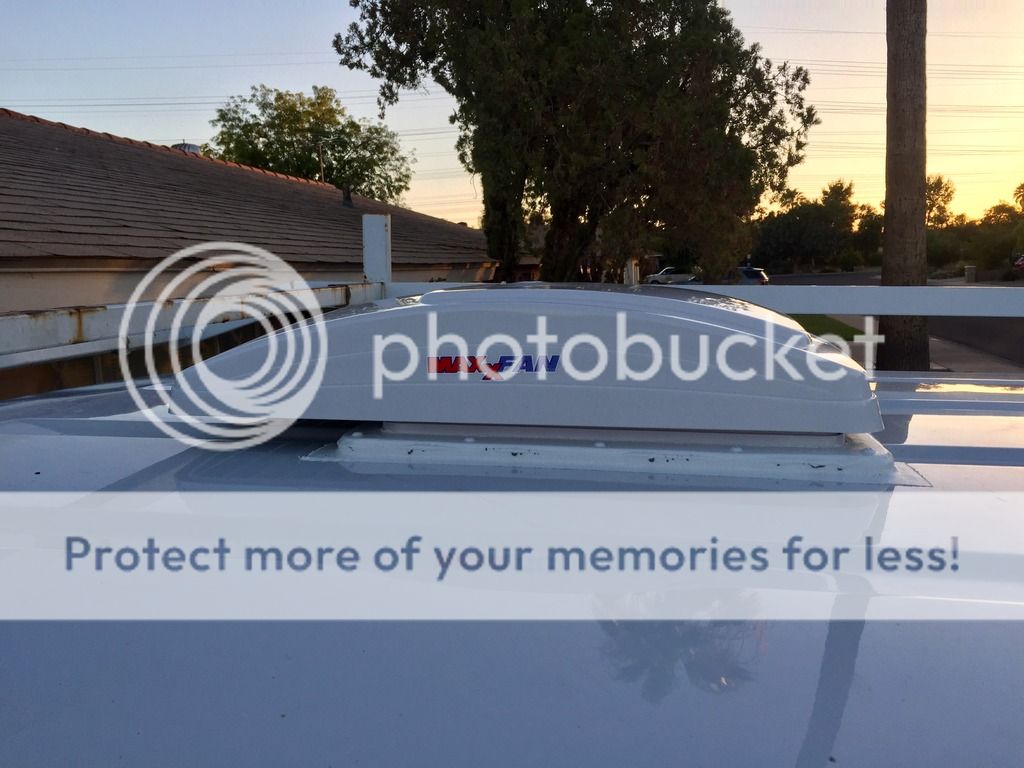
Step two, put a fan in the hole. I used the Hein adapter off Ebay, if anyone is wondering.
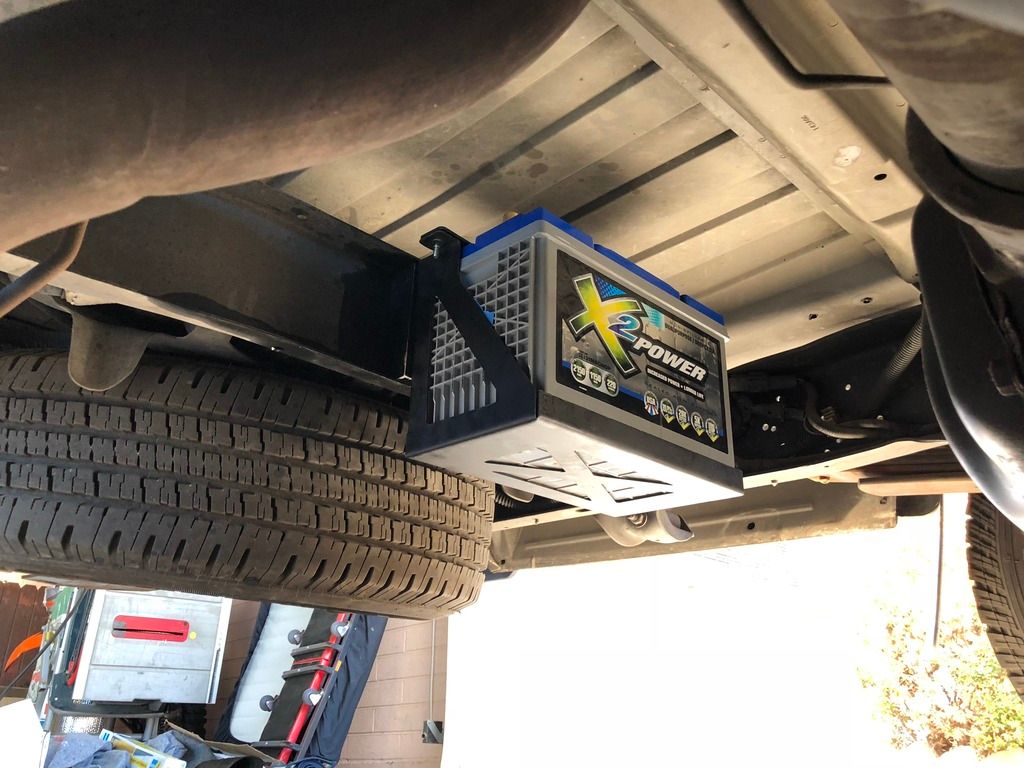
Picked up a group 31 100ah deep cycle AGM battery to power said fan and other accessories. Found a nice steel battery cage online and used some 3/8" grade hardware to hang it off the crossmember. I went with the X2 (Batteries Plus house brand) because of the 4 year warranty. Phoenix heat is not kind to batteries, and if I do need to replace it in 18 months, it'll be nice to not have to pay for it.
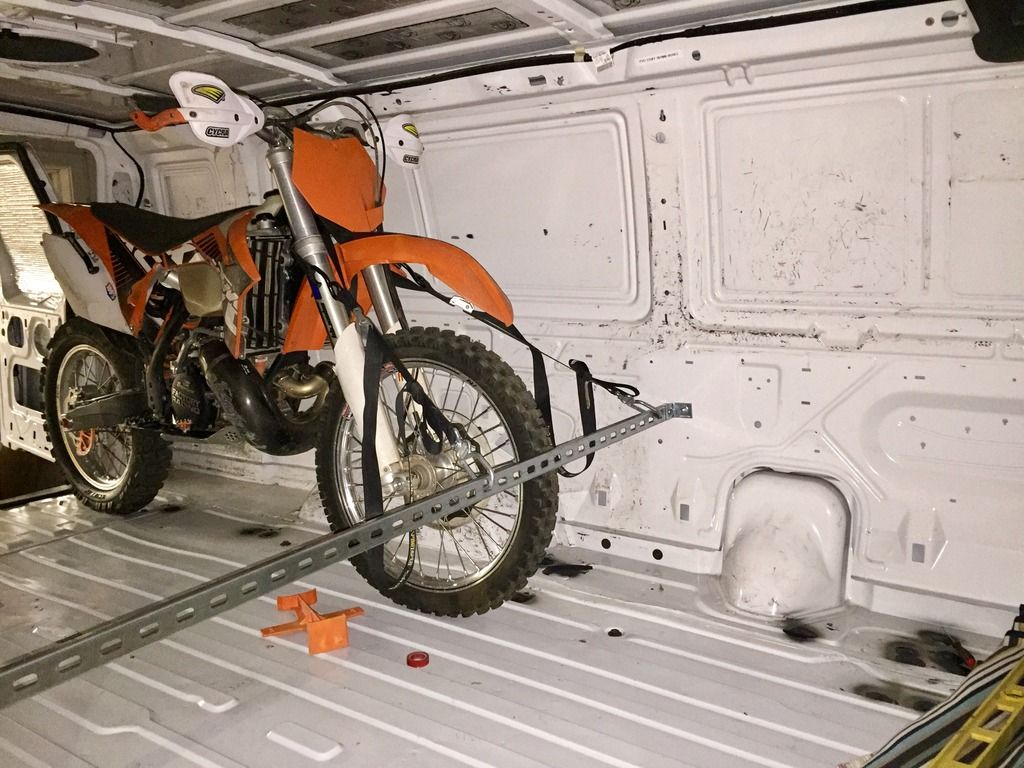
Until I got a floor in, this was my makeshift method for hauling my 250 XC-W around.
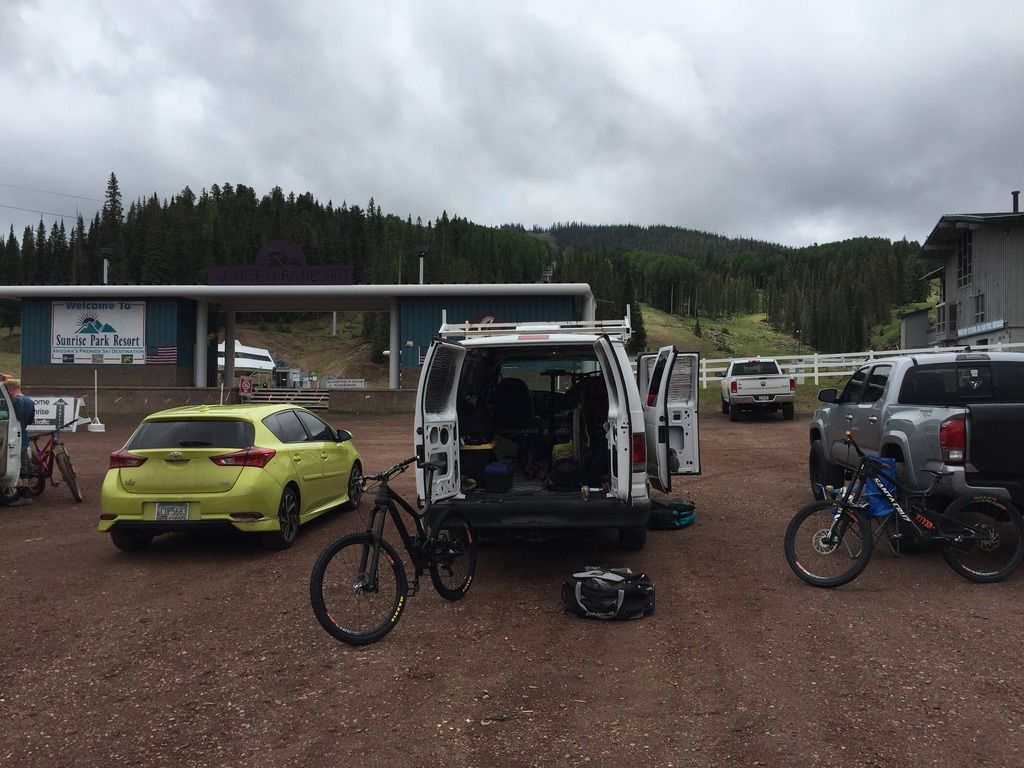
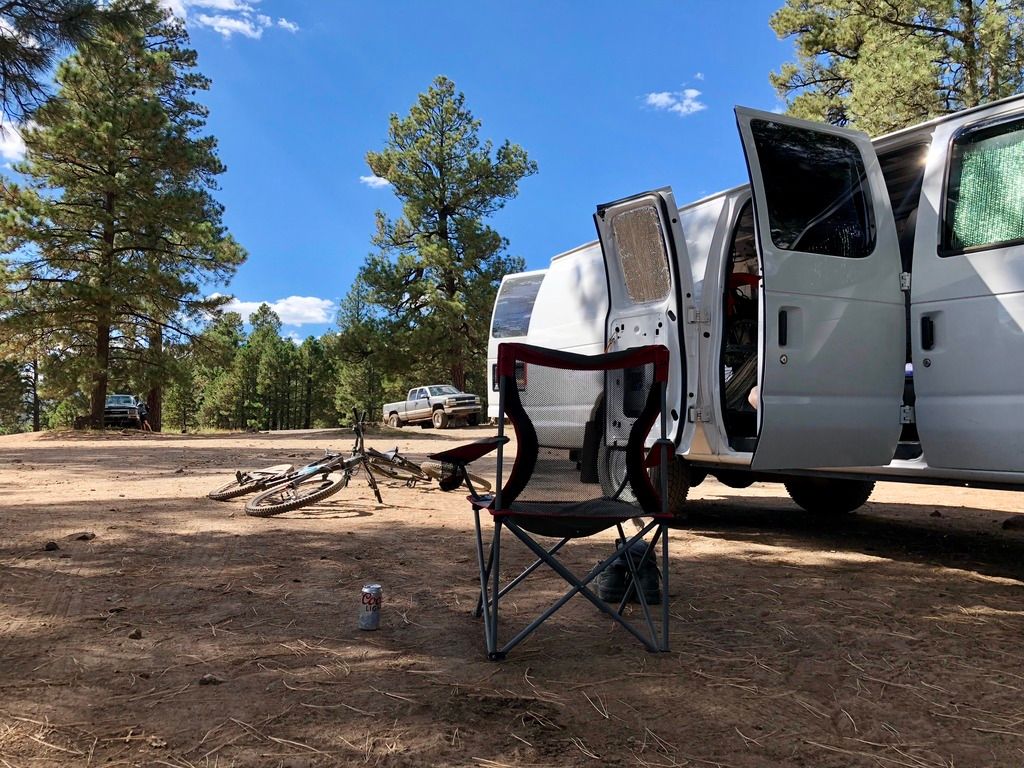
Van out in the wild doing van stuff. First shakedown to the White Mountains and Sunrise Ski Resort, the only lift-acess mountain biking in AZ. The bike is an Evil Insurgent for those who may be wondering. That was the first time I'd ridden it since I built it up, absolute ripper with a 170mm Lyrik on the front.
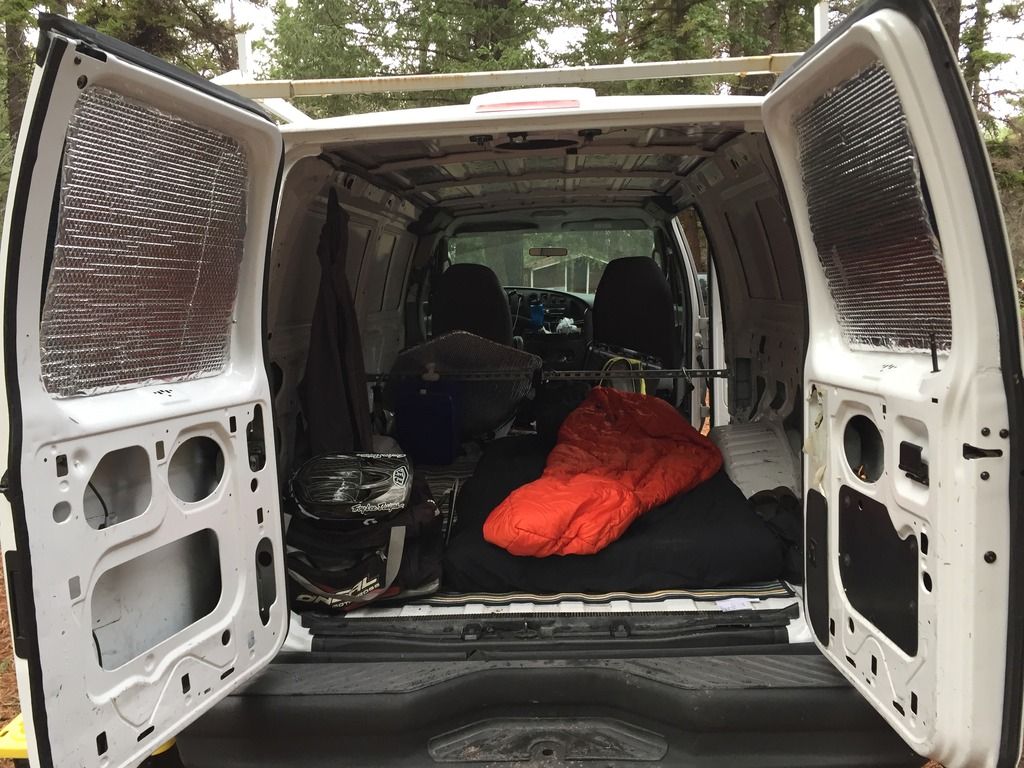
Slept in the van for the first time that weekend, simple Ikea twin mattress on the floor. Works for now till I figure out a bed platform.
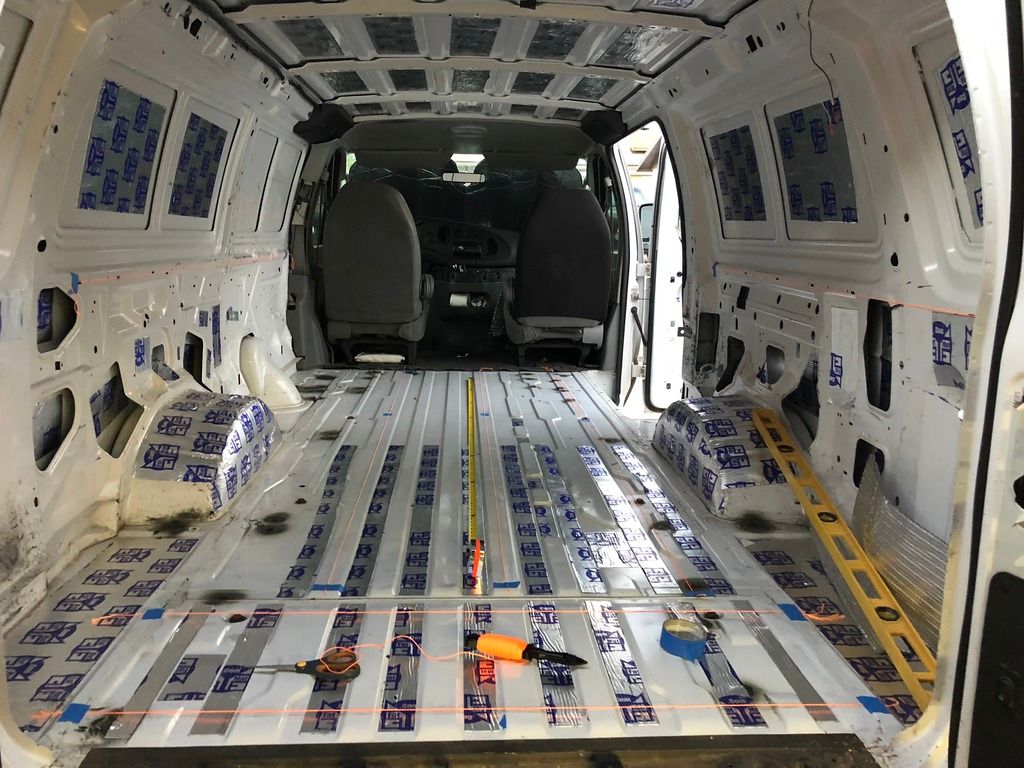
Back to work, began adding FatMat CLD all over large, resonant metal surfaces. The plan is to install L-Track in the rear for seat tracks and cargo tie down points. Using masons string to mock up potential locations.
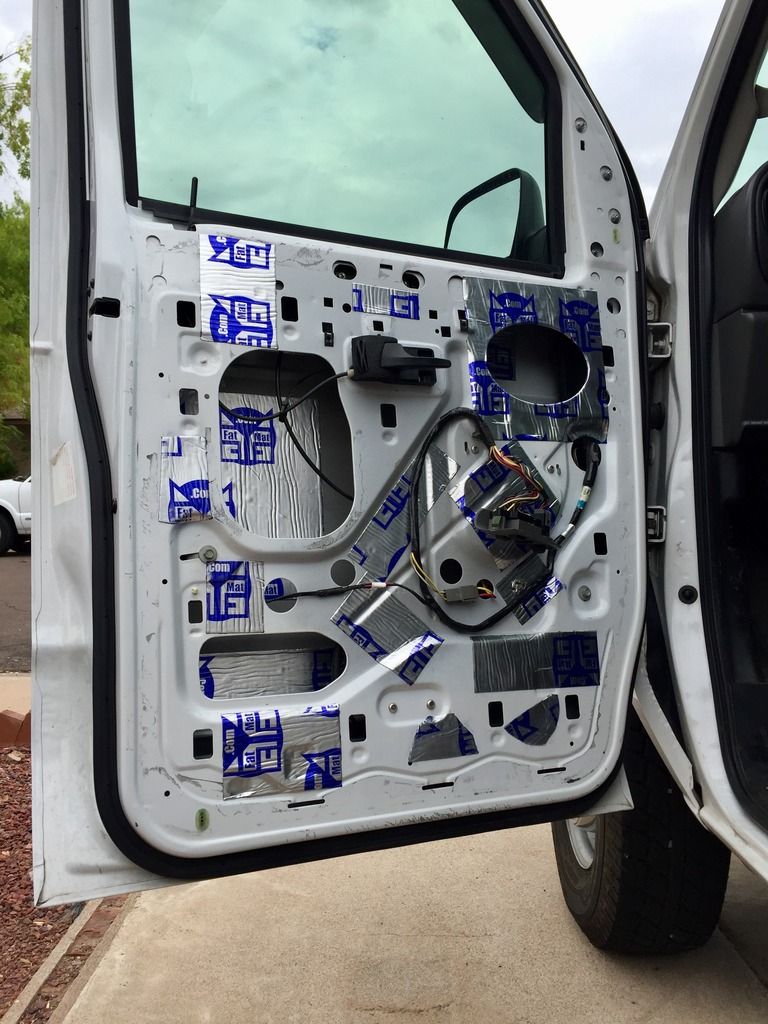
Treated the front doors as well, they got the full sound treatment including a sheet of mass load vinyl backed with closed cell foam. I swapped the factory paper cone speakers for a set of JL Audio 6.5 components while I was in there. Tweeters got installed in the black sail panels on the backside of the rearview mirrors.
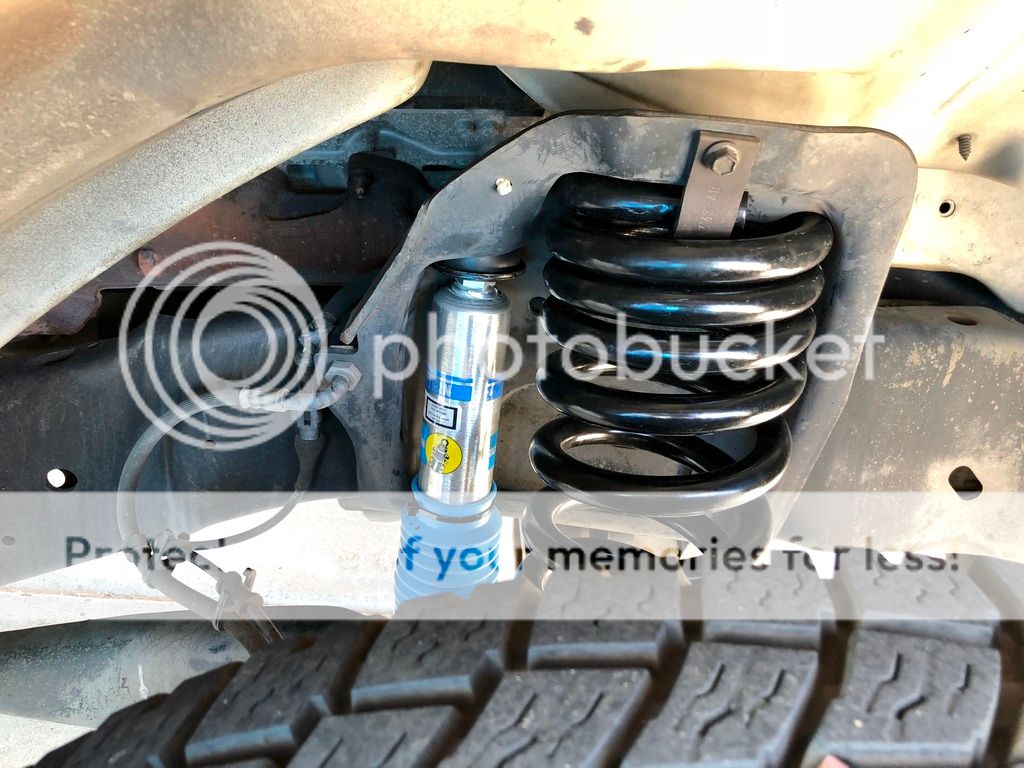
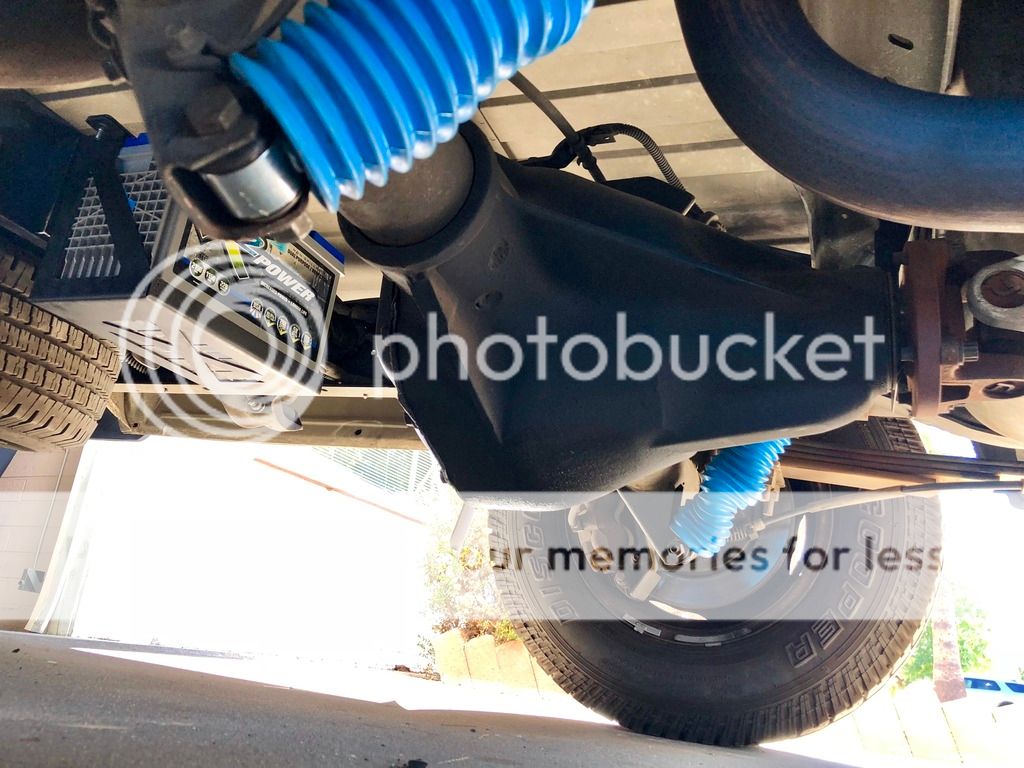
Picked up some Moog 880 coils for the front and Bilstein RV comfort series shocks for all four corners.
The tires that were on the van had lots of life left, but were pushing five years old. Swapped them out for a set of Falken Wildpeak AT3W in a 265/75R16, including a full size spare. (Which does fit in the factory location, BTW)
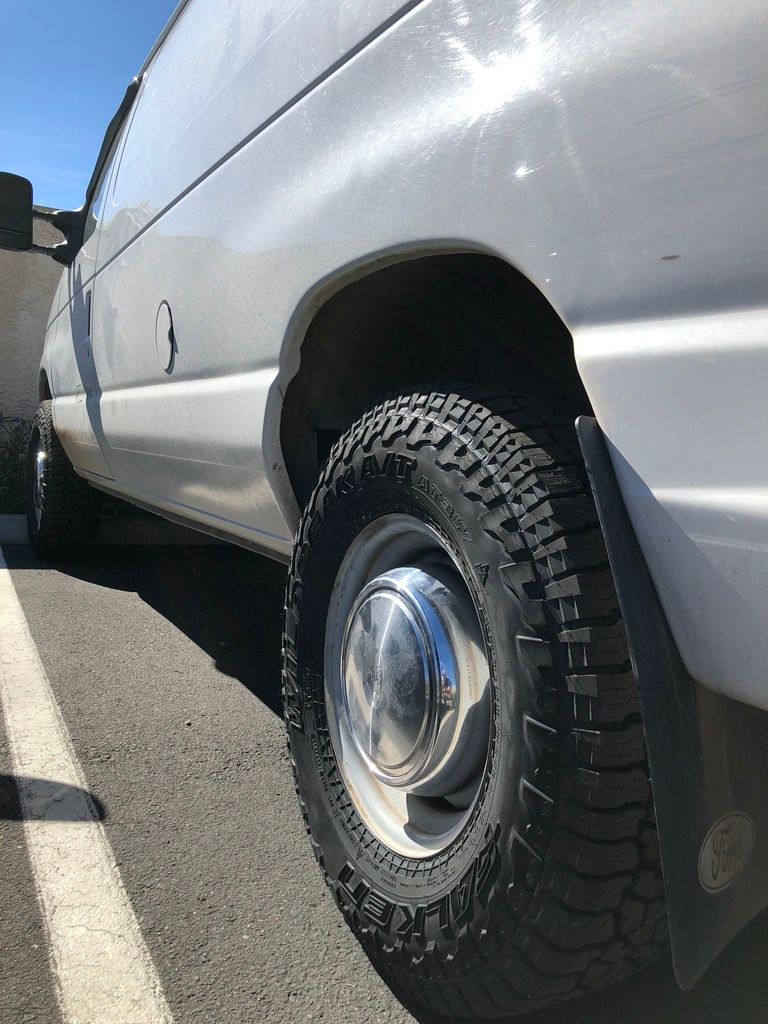
Not a big fan of the dog dish hub caps, so I ditched them and rattle canned the wheels satin black. Much better.
The van is still doing van stuff with all the projects underway. One dirtbike and two full size arcades, very happy with my decision to go with an EB.
Post-pedal in Flagstaff.
I've been drooling over SMB/4x4 style Ford vans for some time now, I've always wanted to build one of my own. A little over two years ago I was ready to pull the trigger on a used cargo van to start converting, then I got cold feet. I ended up buying a brand new Tundra TRD 4x4 with plans to build it into an expo/overland style vehicle. I was really enjoying the truck and getting some modifications done to it. As time went on and I used the truck, I was quickly getting over beating up a brand new vehicle that I was still making payments on. The idea of a van was still burning in the back of my brain.
I put the Tundra up for sale this May, sold it private party a few weeks later and then began my hunt for a used van. The requirements for the van were: rust free, cargo van, EB, V8, sub-150k miles, sub-$10k, PW/PL and cruise control. After some searching, I came across a van that checked all the boxes minus CC. A 2006 E350 EB cargo. One owner with 125k miles on the clock. After some research I determined it would be an easy enough to add cruise later. I began the negotiation process with the seller and soon after was on a plane from Phoenix to San Jose to pick up my new-to-me van.
Van wishlist
- AT tires-Complete
- Small lift/suspension-Complete, for now.....
- Floor with cargo tie down and seat attachment points-Complete
- Passenger bench-Complete (may add third row if needed)
- Roof fan-Complete
- Aux battery-Complete
- Cruise Control-Complete
- Roof rack-Complete
- Insulation
- Interior paneling
- Power distribution
- Interior storage
- Stowable bed platform
- Stereo-in progress
- Solar panel
- 09+ front seats w/swivels-Complete
- Awning-Complete
- Solar shower
- Cargo box-Complete
Picture of the van from the CL add.

After a test drive and through inspection I was on my way back to Phoenix. I made to over 700 miles home in one shot, van did great. A little front end wobble around 65, I assumed due to worn out front end components, cruise control sure would have been nice.....

Got the van home and did some interior cleanup in preparation for starting on CLD (constraint layer damper, AKA Dynamat) treatment of metal surfaces.

Also made up a quick set of Reflectix window shades to protect the interior from the harsh AZ sun. I used metal tape to attach some small magnets around the perimeter to hold the shades to the metal window frames.


Took care of some necessary maintenance along the way. New Moog tie rod/dragling assembly, replaced a balljoint, oil change, coolant flush, AC recharge, new fluid and dif cover seal and an alignment.
Of course, the mandatory van right of passage. Step one, put a hole in the van.

Step two, put a fan in the hole. I used the Hein adapter off Ebay, if anyone is wondering.

Picked up a group 31 100ah deep cycle AGM battery to power said fan and other accessories. Found a nice steel battery cage online and used some 3/8" grade hardware to hang it off the crossmember. I went with the X2 (Batteries Plus house brand) because of the 4 year warranty. Phoenix heat is not kind to batteries, and if I do need to replace it in 18 months, it'll be nice to not have to pay for it.

Until I got a floor in, this was my makeshift method for hauling my 250 XC-W around.

Van out in the wild doing van stuff. First shakedown to the White Mountains and Sunrise Ski Resort, the only lift-acess mountain biking in AZ. The bike is an Evil Insurgent for those who may be wondering. That was the first time I'd ridden it since I built it up, absolute ripper with a 170mm Lyrik on the front.

Slept in the van for the first time that weekend, simple Ikea twin mattress on the floor. Works for now till I figure out a bed platform.

Back to work, began adding FatMat CLD all over large, resonant metal surfaces. The plan is to install L-Track in the rear for seat tracks and cargo tie down points. Using masons string to mock up potential locations.

Treated the front doors as well, they got the full sound treatment including a sheet of mass load vinyl backed with closed cell foam. I swapped the factory paper cone speakers for a set of JL Audio 6.5 components while I was in there. Tweeters got installed in the black sail panels on the backside of the rearview mirrors.

Picked up some Moog 880 coils for the front and Bilstein RV comfort series shocks for all four corners.


The tires that were on the van had lots of life left, but were pushing five years old. Swapped them out for a set of Falken Wildpeak AT3W in a 265/75R16, including a full size spare. (Which does fit in the factory location, BTW)

Not a big fan of the dog dish hub caps, so I ditched them and rattle canned the wheels satin black. Much better.

The van is still doing van stuff with all the projects underway. One dirtbike and two full size arcades, very happy with my decision to go with an EB.

Post-pedal in Flagstaff.

Last edited:


")


