Slo going M416 build

slosurfer

Adventurer
After a summer camping road trip to Vancouver Island and Montana, I decided I needed to look into a little trailer. I like to have everything packed so that I can still see out all the windows, therefor we were pretty full and it was just me, my wife, and our 10 month old son. We knew we wanted to add a dog to our family and possibly another child, so I knew I needed to come up with something that did not include getting rid of the 4runner.

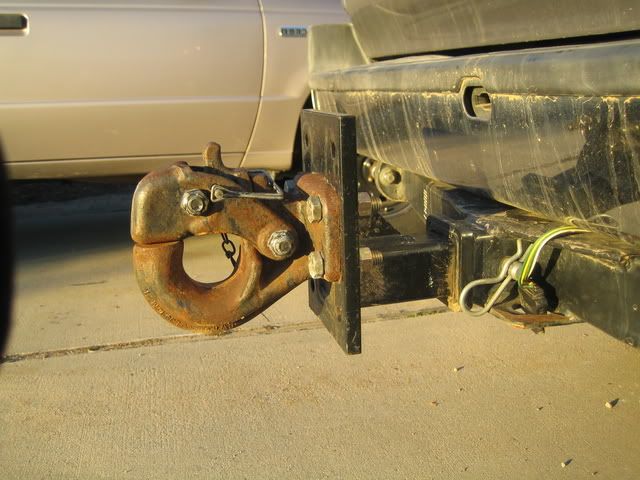
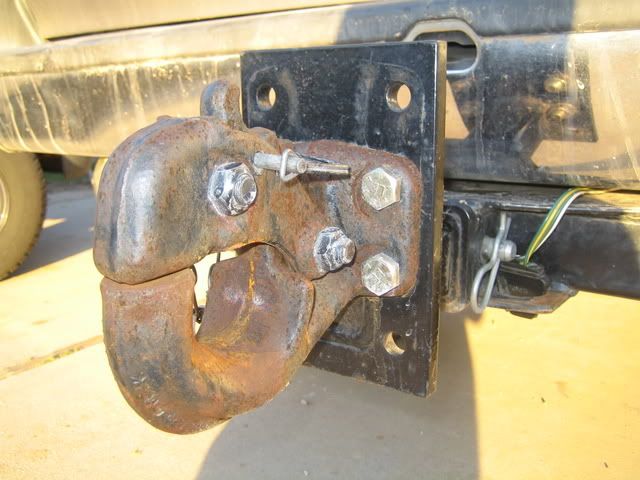
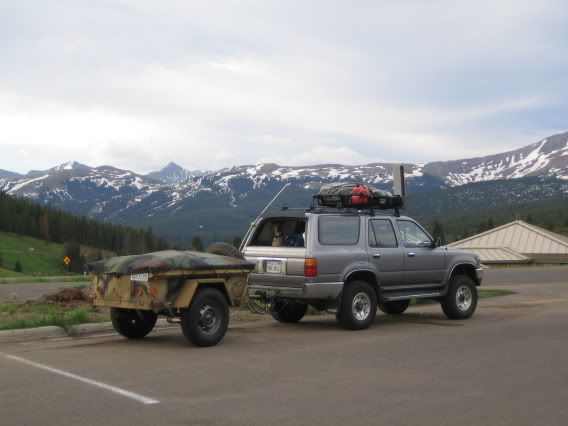
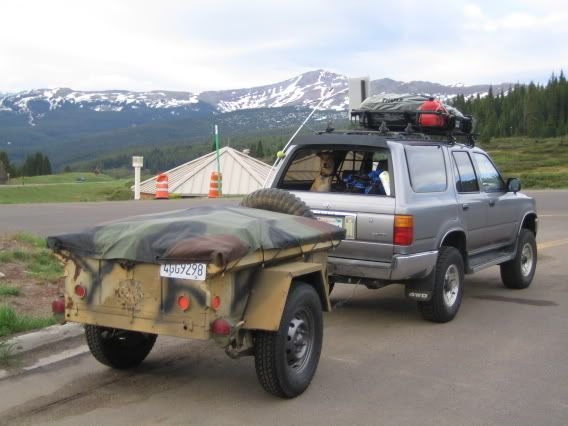
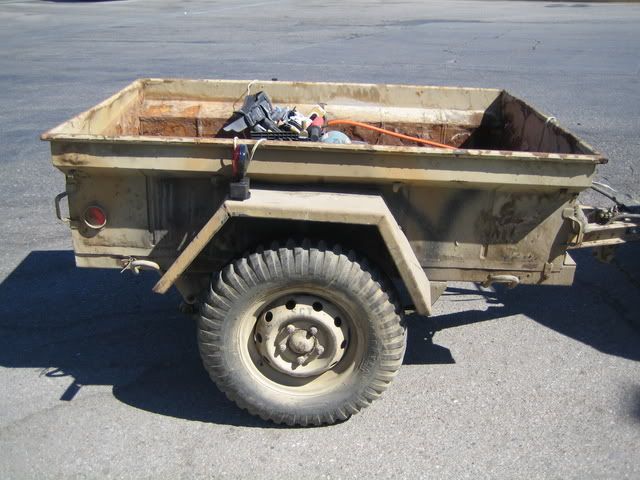
When we got home, I started researching offroad utility trailers and really liked the old military jeep trailers. I liked the pintle setup and was familiar with them from my time in the marines. I knew if they could handle towing tanks and AAV's, then a little 1/4 ton trailer would be a piece of cake. I started the hunt for one, ebay, adds, whatever. I didn't have a lot of money so I knew I would have to find a fixer upper. I finally found one on ebay that was the right price and close enough to go get. I snagged it for 300 bucks :thumbup:

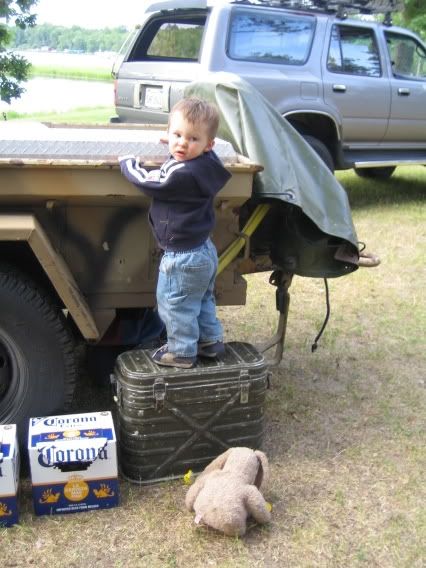
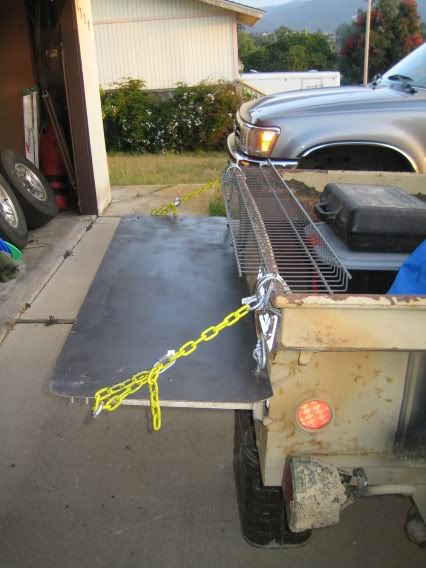
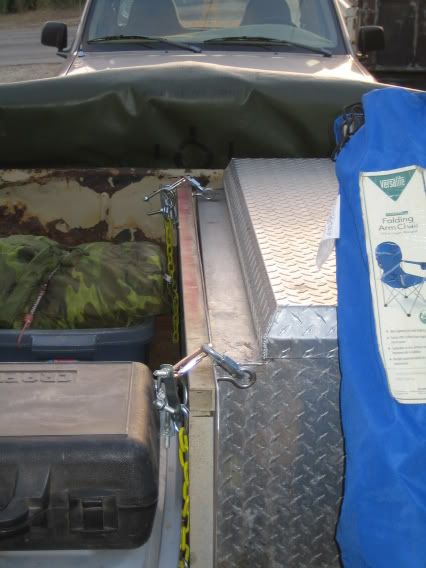
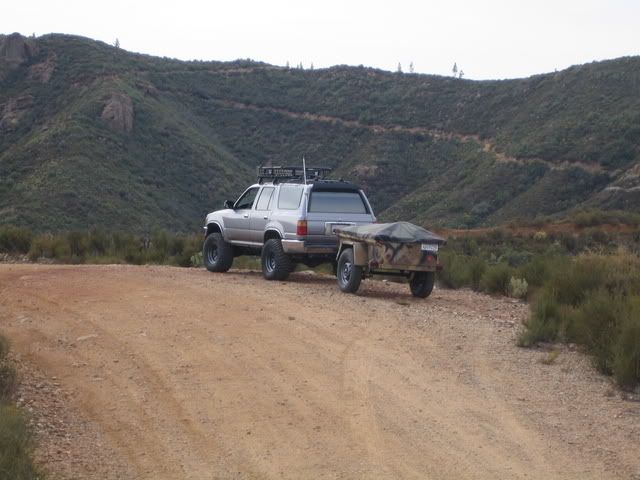
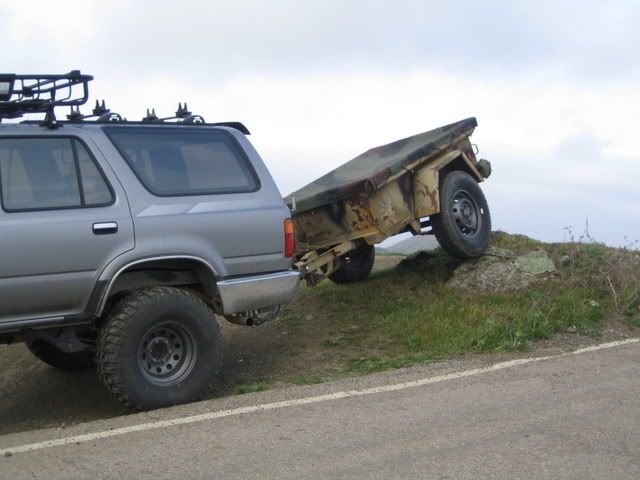
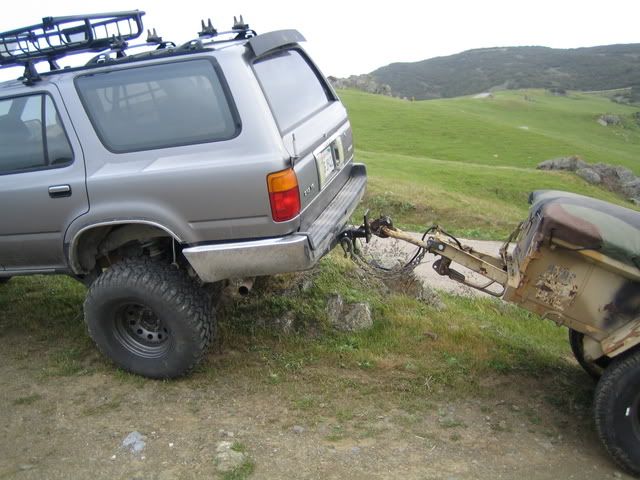
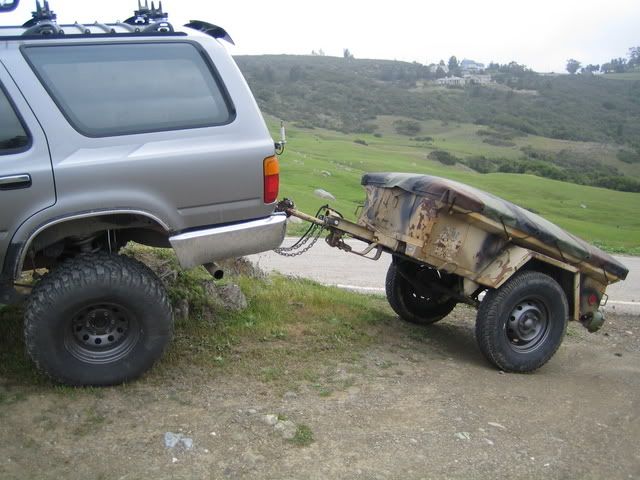
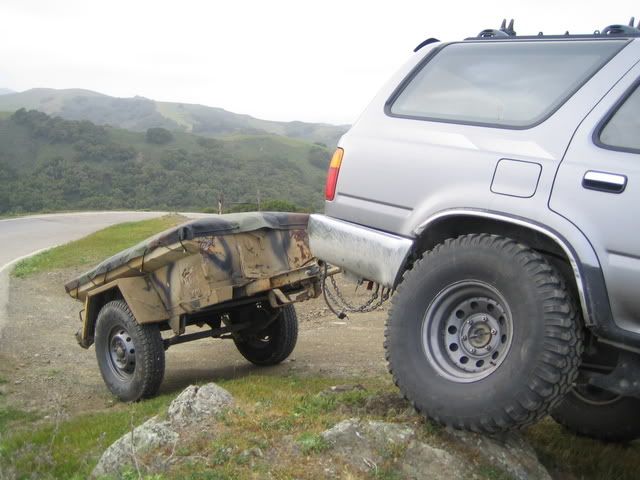
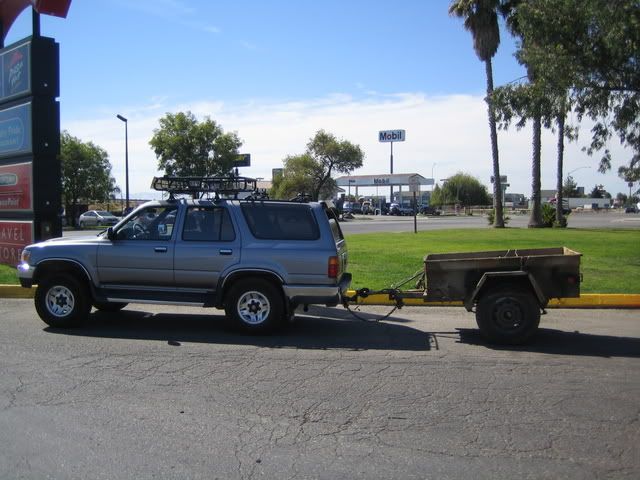
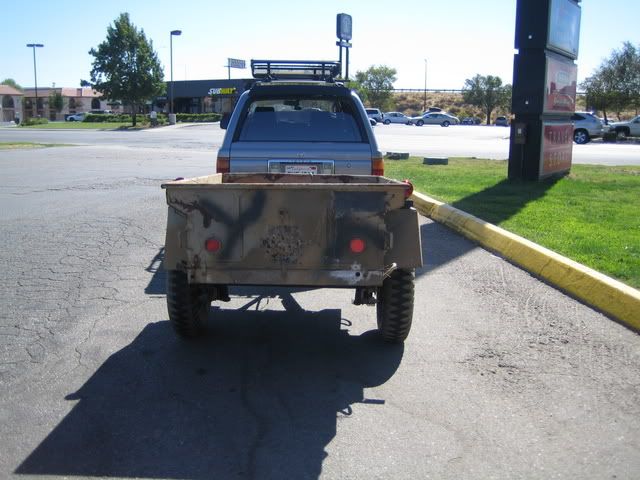
Here it is on the way home, notice the terrible butt sag my 4runner had at the time.
IMG_2193.jpg


IMG_2194.jpg


IMG_2195.jpg


IMG_2196.jpg


IMG_2192.jpg


To be able to differentiate the build portion and general chatter, I will post all build related posts in this color. It will make it easier for those who just want to read about the trailer. I copied and pasted this from another forum, I added a bunch of basic info for those there that didn't know much about these trailers.

Stats at the time I picked it up:
Bad:
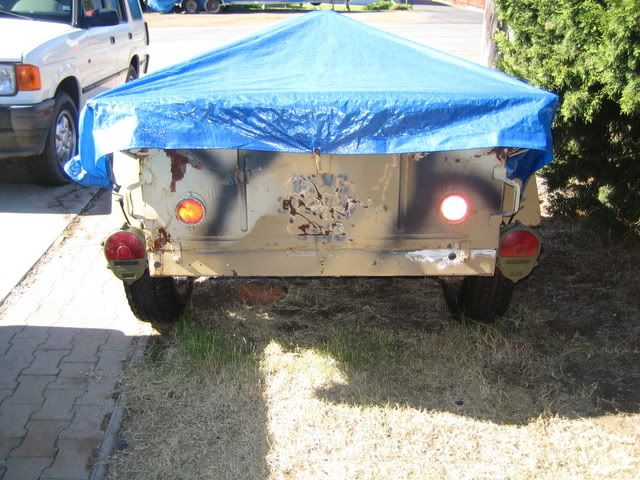
Surface rust and flaking of 100 coats of paint
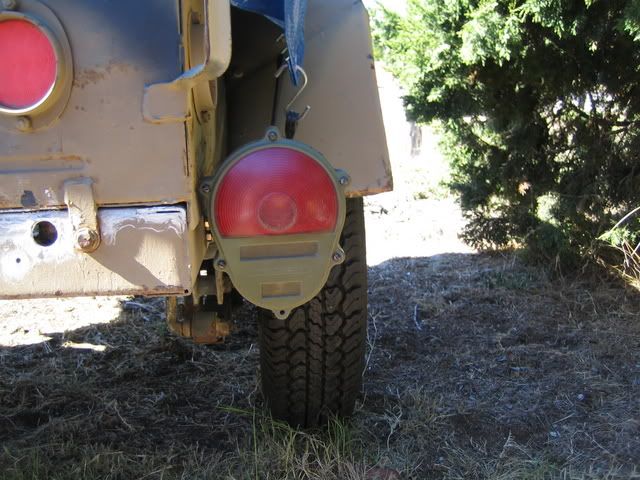
Missing tail lights but wire harness still intact
Missing one tail light bracket
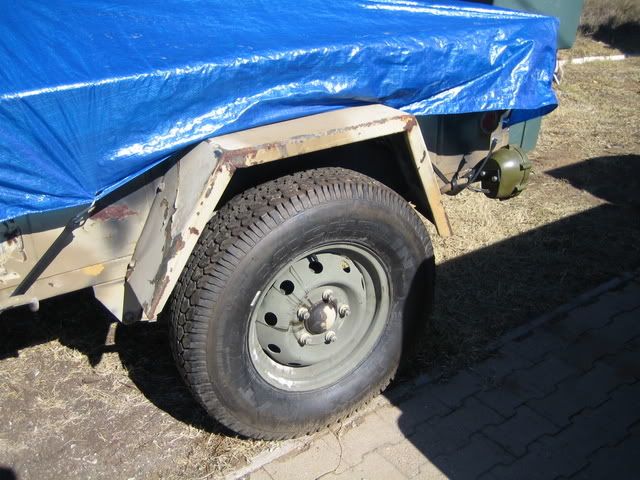
Bent fenders
A couple of fender mounting points had broken their welds, brackets and bolts still there just not welded anymore.
Tires sketchy to say the least, one tube leaked, and both tires had dryrot.
Landing leg bracket broken.
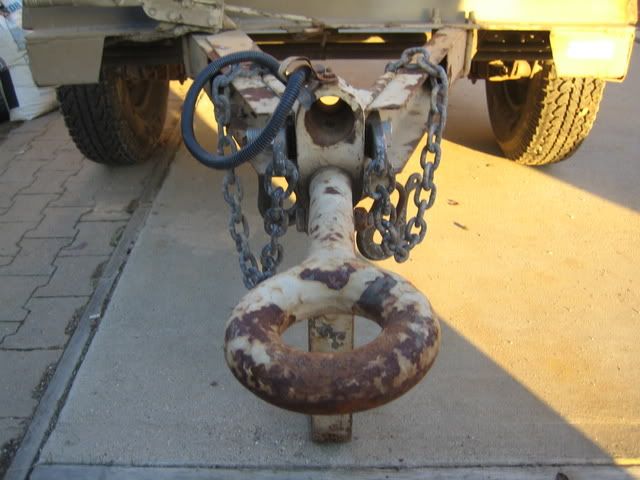
Missing original safety chain.
More surface rust and flaking paint
Dents and a couple of tiny holes in body.
Bent shock
Driverside hub leaking grease

Good:
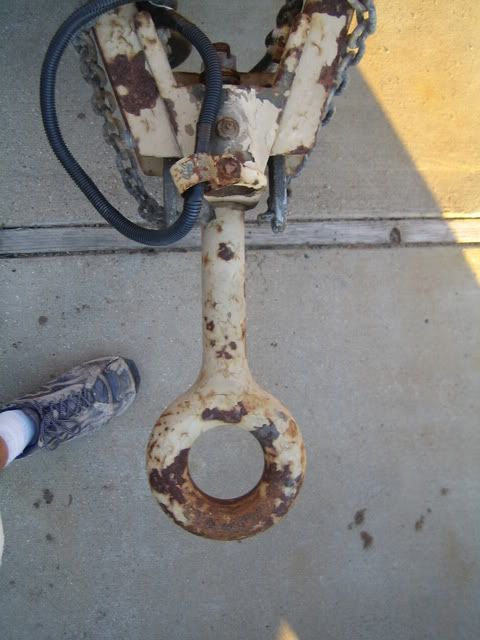
Nothing more than surface rust
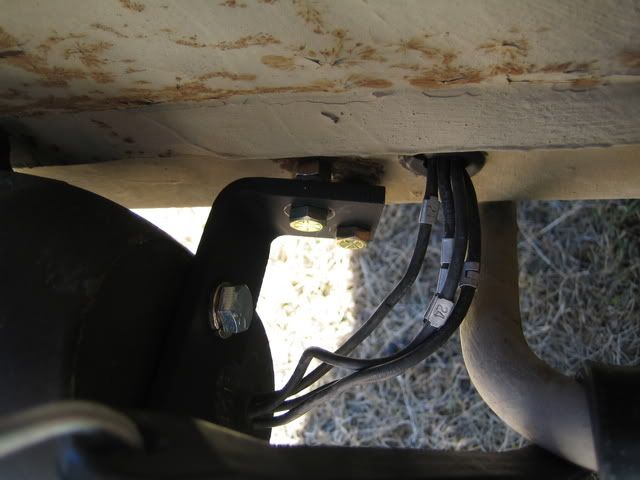
Wire harness looked very good
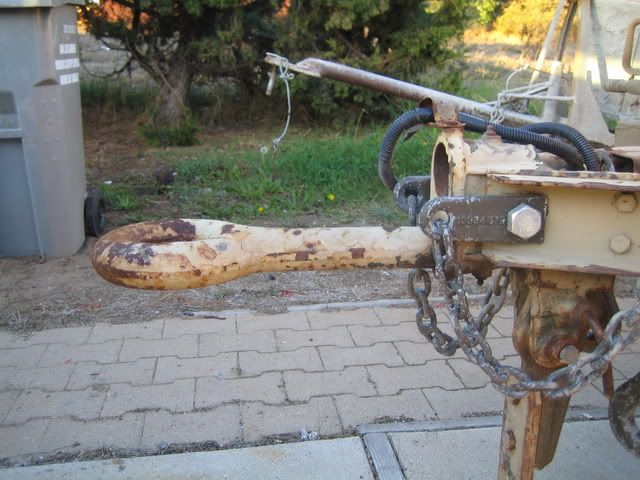
Frame, body, lunnete ring, etc... all structurally sound
Both drain plugs present and accounted for
Working parking brake
only 300 bucks!


LINKS
M416 manual Courtesy of Joe Melhorn @ ih8mud

PARTS
Midwest Military
Army Supply Warehouse

OTHER M416 PROJECTS
Scott Blackburn's M416
Pete Elton's M416
Project One Raptor
 
Last edited:

slosurfer

Adventurer
(I will start a post with just links in them once I get them organized. The links aren't working for the manual right now. Also I will add links and info for parts throughout the build). Through my research, I had found that I could download for free the complete 280 some page long Army manual for the trailer. This manual has proved invaluable to help me get this trailer at least into a reliable utility trailer. Update:Manual can be found here courtesy of Joe Melhorn @ ih8mud.

First was to get all the trash out and see what I really bought. To this day, I am still chipping paint off, it has surface rust all over because someone let the bed fill up with water. These trailers are watertight and are made to float when loaded with up to 500lbs. Some idiot poked two holes in the body to let the water out, when all he had to do was pull the drain plugs from under the trailer. I removed the drain plugs all together and cleaned the drain. I need to clean the drain plugs and get all the rust off the springs and brackets that hold them on. I don't plan on taking the trailer through any rivers right now so it has been fine with the drain plugs out.

Next was tires. I went to the local tire store hopeing to find a set of decent used tires that would fit. They didn't have any used, but he had a set of new Michelin ATX truck tires that someone had ordered months before and never picked up. He let me have them for 150 out the door, more than I wanted to pay but these tires will last forever. I also save the one good tube and the decent tire to use as a spare once I found another rim. With these tires I can cruise at 80mph, I probably wouldn't do that with military tires.
New tires:
IMG_2515.jpg


Next on the list to make it a working trailer was lights. I went with the bigger humvee lights because they have a bigger lense area and they are easier to get ahold of. I got the set on ebay. I took them apart and took the 24volt lights down and found a set of 12volt lights that matched. I needed one mounting bracket and was haveing a hard time finding one. I finally ordered a set of brackets that are made for the older M100 trailers. I ordered them from Midwest Military They worked but were a little short since I was using the bigger lights. I was able to space the brackets out using some nuts as spacers and they worked fine. Next was mounting the lights and connecting the correct wires. The wire harness was still good and had all the tags on the wires, so I just had to match the correct wire and connect the bullet connectors. No splicing!
IMG_2510.jpg


bracket wire, spacers, and wire tags
IMG_2511.jpg


IMG_2513.jpg


They hang a little low, but the extra light thrown out by them is worth it. Also, if I were to do a serious trail with these, I would remove the lights at the trail head. It is real easy, just two bolts, and the bullet connectors are just on the inside of the frame.
 

slosurfer

Adventurer
The original intervehicular cable (cable that goes from vehicle to trailer) has a massive plug on it. The thing has about 12 pins in it, so I obviously had to do something since the 4runner just has a regular 4flat connector. The cool thing about this is that the original cable is attached to the wire harness by bullett connectors. So, all I had to do was unscrew a panel and disconnect them. Before I did this, I made sure all the wires still had their number tags on them so I could look in the manual and know where they went. Next, I made my IV cable by adding the correct size bullet connectors to a 4flat connector and wires. I studied the electrical diagrams and hooked up my IV cable to the correct wires and done! Lights now work, tires are good; time to take it to the DMV and get this thing legal! I will take pics of this soon as it seems I didn't take any at the time. In the above pic of the safety chains, you can partially see the IV cable I made.

4flat connector and new IV cable:
IMG_5429.jpg


Panel that is held on by four bolts where the IV cable attaches to the wire harness:
IMG_5430.jpg
 

slosurfer

Adventurer
I realized (thanks to Ric) that I forgot to talk about the hitch that is needed for these trailers. They have what is called a lunette ring.

IMG_4774.jpg


IMG_4776.jpg


This picture shows the upper hole where the ring can also be mounted.

IMG_4775.jpg


Each hole where the ring can be mounted has its own grease sert because the ring is able to swivel. Thus allowing the trailer "flex" independently of the towing vehicle. You could even roll the trailer without rolling the vehicle. There is also a spring that goes on the back that is supposed to help ease the hard stops and starts. But just a warning, this setup clangs around quite a bit. You get used to it and it is not going to come apart on you. The trailer will go anywhere you can go and you don't have to worry about it coming off.

You will need a pintle hook and either a receiver for your hitch or a bumper with holes for the pintle to bolt to. As I still have the stock bumper I needed to get a receiver that has a plate with holes for mounting the pintle hook. They have different ones with different amount of holes so that you have some adjustment on where you mount the pintle hook. I went for a medium one that had 8 holes so I can have a little bit of adjustment. The M416 lunette ring is really thick, so you will have to get a decent sized pintle hook. I originaly got a 5ton pintle hook, it barely worked but bound up going around corners. I was able to get the trailer home at least but then I took it back and had to get a 15 ton pintle hook. It's all good now. I think a 10ton one would work but the place either had 5 or 15 ton. YOu will have to excuse the rust in the pics, as these were taken a few days after towing the trailer out to Pismo.

IMG_4777.jpg


IMG_4778.jpg


These can be found at any good trailer shop and can also be found online. I suggest a local place that way you can take it back if it doesn't work, also they are very heavy so I would imagine shipping could be a bummer.
 

slosurfer

Adventurer
My next step in getting this beast ready for the summer trip was to remedy this leaking hub.

IMG_2515.jpg


I wasn't sure if the bearings were bad or what. All I knew is that when driving, it would heat up and the grease would start to come out. It didn't get super hot though, so I wasn't sure what kind of grease was in there because it liquefied so easy.

I got out my trailer manual and started dinking around with it. It didn't take me long to figure out that the brake needed to be adjusted. It only has a parking brake, but it wasn't adjusted right, so when the brake would touch a little once it was let off. Through a combo of adjusting the actual drums and the linkage of the parking brake handle, I was able to remedy the problem. Now, it free spins like it supposed to, no more heat or leaking grease. :D

The next step was to tear the hubs apart and see how my bearings and races were. ONce again the free manual has a step by step instructions on how to do this. :thumbup: To my surprise, all of my bearings and races looked in tip top shape. All I needed to get were new grease seals, new holding washer, and new cotter pins. There is a place in Las Vegas that has the NOS grease seals but I needed them now as we were pretty close to our trip. I went to a local place, Central Coast Bearing, and they were able to find me a grease seal (TCM part # 22294TA it says it replaces 22340/410441). They could not find me a holding washer, they had a couple that were close that I bought to try but they didn't work. ONce again, I think the LV place also has these washers. I got cotter pins at the local hardware store. I know you are not supposed to reuse the holding washers that you bend over the castle nut but I was stuck and needed to get this trailer road worthy. I noticed that the new washers I bought and tried to use had tabs, you would bend a few tabs and then the next time broke those tabs off and use some of the other tabs the next time. This gave me and idea, I took my old washers, and cut the bent portions off. This way I can bend another portion of the washer to work and I don't have to worry about the old bent weak portion breaking off inside the hub. I repacked the bearings and put everything back together using the detailed instructions. I now had a road worthy trailer!

I forgot to add that you will need a Willy's CJ2A spindle nut socket. I think it is either 2 1/16" or 2 1/8". I will try to find out.
 

slosurfer

Adventurer
I will try to find the info on the Las Vegas store with the bearings, races, seals, and washers later tonight.

My next step was to get some kind of cover. I knew that the m416 is very close to the canadian m101. I saw old used canvas tarps for the m416 on ebay and then I saw that you could buy NOS vinyl tarps for the m101. The new vinyl tarps were only a few bucks more and since I wasn't doing a historical resto, I sprung for the vinyl tarps and hoped that the loops would match up to the loops on the trailer. I thing I paid about 80 bucks for the tarp on ebay. Last time I looked they were still selling them but I am nut sure if it was the same seller I used or not.

I received the tarp and it was NOS just like stated, it was still sealed in the original bag. It is a super thick vinyl with reinforcement for the corners, it also has a really nice rubber bungy like cord that is used to hold it on the loops on the trailer. I fits perfectly and works wonderfully. I looked through my pics and I don't have any good detailed pics of the tarp and how it attaches. I will go take some now.

Pics:
Sorry, it is kind of dirty right now

IMG_5778.jpg


closeup of how it hooks on the trailer
IMG_5779.jpg


closeup of how it attaches at the back and how you can adjust them tighter by pulling them through the end hooks farther
IMG_5780.jpg


And one cool function of the tiedowns on the trailer
IMG_5431.jpg

perfect bottle opener no matter what side of the trailer you are on.
 

slosurfer

Adventurer
NOw I had a road worthy trailer that could keep my stuff dry. One of the things I didn't like was that there was nothing to keep thiefs from taking what they want. I had at the time a Mazda B2300 truck that had a weatherguard truck box in it. After measureing, it was too long to fit width wise in the trailer but it fit lengthwise and after playing around with it and with my ice chest, I determined that it could work going lengthwise. Also, it was just barely taller than the sides of the trailer, pretty much just the lid was above the height of the trailer sides just like how it sat in my truck. That way I could lock some of the more valuable camping gear and not worry as much.

After searching, this is pretty much the only pic that somewhat shows the box. I recently sold the truck and the box. :(

IMG_3509.jpg


The box worked out great I was able to lock some of the more valuable stuff in it plus it acted as an insulator to some of the food and kept it from getting too hot (i.e. fruit and bread).
 

slosurfer

Adventurer
As was stated earlier, these trailers dont' have a tailgate. Not a big deal, but I really missed a tailgate to use as a table. I set out to make something to use as a "kitchen" to hold a stove, lantern, and some real estate for prepping meals. I had in mind that I could make something that would hang off the sides and or back of the trailer. I had little $$$ at this time so it was going to get interesting. The criteria was that it's width was no greater than the height of the trailer sides, that way it could be stored on its side for ease of removeing and not takeing up much room. The other criteria were weight and the ability for adjustment as if it was used on the sides it would need to hang higher and sit on the fender, but on the rear it needed to hang lower for stability and the perfect height.

As I always do when I want to try to make something from scratch, I headed over to my grandfather's storage shed. He has collected all sorts of stuff over the years and with some imagination you can build some cool stuff, plus he likes seeing it used. I knew I could build the table out of wood but that would be pretty heavy, I was thinking I might be able to find some sheet metal or something and just build the frame out of wood. I ended up finding an old highway sign (grandpa used to work for Caltrans and was part of building PCH from here up to Big Sur), it was very close to the right length and the aluminum would be easy to cut down to width. To top it off, the frame was u channel aluminum. I removed the frame, and cut the actual sign down to the dimensions I needed. Next I chopped up the frame and was able to reuse it. Now I had a super light sturdy table! I painted it with my left over wheel paint. :D

I put some eyebolts through the table and frame and ran some chain through them and attached back to the chain with some clips. The other side of the chain is attached to some ubolts I had that I bent into a hook like shape that hooks onto the rail of the trailer. By moving the clips I can control the length of the chain and this gave me my ability to adjust it for the rear of side of the trailer. After useing it, I really don't see why I will use it on the sides, it sits perfect off the back and leaves the sides free to reach everything.

IMG_4321.jpg


it is a little crooked in this pic
IMG_4322.jpg


IMG_4323.jpg


here is how it is stored, stood on its side right next to the truck box that I no longer have.
IMG_4324.jpg


I also found a wire shelf that I cut down to the width of the trailer. You can barely see it in the pics, but the hooks actually loop through it and pin it to the rail of the trailer. It works perfect. The lantern, utensils, towels, etc.. can sit up on the shelf while the stove and cutting board, etc.. are on the main table. It looks kind of hokey, but it has worked out very well and I have used it many times. There have even been times where I was wrenching on the 4runner and set this table up to set stuff on and work on. Next time I am camping, I will take pics with the "kitchen" all set up.
 

slosurfer

Adventurer
Maiden voyage: Los Osos, CA to Cass Lake, MN on return trip spent a week in the Silverton/Ouray, CO area and then back to CA through Flagstaff, AZ. Over 6,000 miles (changed oil before I left, changed oil in MN, and changed oil when I got home), trailer did great! :thumbup: Only problem was that the dark vinyl cover soaked up the sun and if it was sitting on the ice chest it melted the ice quicker. I solved it for the most part by putting our rolled up beach towels on top of the ice chest to give it a barrier from the hot cover.

Just a recap:
first pic
IMG_2193.jpg


At the top of one of the passes near Vail
IMG_3494.jpg


Closer pic
IMG_3495.jpg


Still rough looking but perfectly functional. There is a little bit of welding that needs to be done still on the body so that is why I haven't worried too much about paint.
 

slosurfer

Adventurer
1st offroad test now I'm on 33's

IMG_4750.jpg


Unfortunately it started raining right after this pic so there aren't any pics of the tough 4wheeling parts that really showed how the trailer worked. Once it started raining the club was worried about all the vehicles that didn't have lockers. LOL, no lockers plus I pulled a trailer.

IMG_4770.jpg


IMG_4773.jpg
 

slosurfer

Adventurer
Recently, while hauling stuff home from a job site, I found a rock to try to show some of the articulation of the trailer, but the rock was kind of lame, but you can tell that it isn't even phasing the trailer.

IMG_5439.jpg


IMG_5440.jpg


IMG_5445.jpg


IMG_5446.jpg


IMG_5447.jpg
 

slosurfer

Adventurer
atavuss said:
nice writeup! do you actually use the Mermite can? if so, what do you think of it?

I never knew what they were called. I did know what they were used for though.

I actually use it all the time as an ice chest. It works fairly well as long as you keep it out of the sun (green just soaks up the sun). I mainly use it as the chest that holds drinks and day trip stuff that needs to stay cold. That way the real icechest holds its ice longer. ON a recent Death Valley trip, I didn't have to buy any ice for my big chest because I would only open it for meals and used the small one for snacks and drinks. Also, if I have the trailer, the big chest is in the trailer and the mermite is in with us, makeing it easy to grab snacks and leave the trailer at a base camp.

It works great for beer :sombrero: it will still keep drinks cold even if the ice has almost fully melted and the seal is great to keep water from leaking out. I almost always take it when I go offroading, the handles are perfect for strapping it down in the back of the
4runner and tacoma.

I have thought about painting it in something that will reflect the sun better but I don't know if I can make myself do that. I like the beat up look it has now.:archaeolo plus it gets just as many comments as the trailer when I go camping.
 

slosurfer

Adventurer
I haven't found a new 10# or 11# propane tank, but my dad gave me an older one awhile back that doesn't have the new nozzle so it can't be refilled. It is over halfway full, so I am going to use it till it's gone and then see either about getting the new nozzle or getting a new tank. So, be forewarned about the ugly rust colored propane tank in the following pics, but hey it matches the trailer great!

I used a set of XL Quick Fists and mounted it to the front of the trailer. I even found a good use for my rifle cable lock from bootcamp. I do plan on running a bungee cord from one grab handle, through the holes on top of the tank, and to the other grab handle.

IMG_5847.jpg


IMG_5848.jpg


I was worried about what to do with those long straps when I don't have the tank on there, but I just weaved them together so they wouldn't be swinging all around.

IMG_5850.jpg
 
Last edited:

Forum statistics

Threads
185,912
Messages
2,879,542
Members
225,497
Latest member
WonaWarrior
Top