Side-mount Jerry can holders

Omar Brannstrom

Adventurer
Yes.. I was too impatient. :(

Jscherb... if you ever can incorporate it into the design.. it would be nice if the base plate lifted up(hinged) when not in use.
Maybe when overlanding or offroading.. these could be folded up during certain moves. For now, I'm very happy with it.

Will the base plate, the hole holder be outside the front fender, I mean will it stick out past the front fender. I hope You understand my english
 

jscherb

Expedition Leader
Will the base plate, the hole holder be outside the front fender, I mean will it stick out past the front fender. I hope You understand my english

The outside of the jerry can tray is about even with the fender.

JKSideMountTest3_zpstctbyczd.jpg
 

jscherb

Expedition Leader
Yes.. I was too impatient. :(

Jscherb... if you ever can incorporate it into the design.. it would be nice if the base plate lifted up(hinged) when not in use.
Maybe when overlanding or offroading.. these could be folded up during certain moves. For now, I'm very happy with it.

That's an interesting idea. I've done one folding cargo carrier for the Jeep that's now in production, if it seems like there would be enough interest in a folding tray for the side mount it wouldn't be too hard to make one up.

JKExcursion_zpslkxcule2.jpg


The "Excursion Rack" hangs off the spare and folds up when not needed. It's very handy...

BullCanyon1_zps8emoxnye.jpg
 

jscherb

Expedition Leader
Great product! Does anyone have a photo of the drivers side mount? Does the radio antenna need to be relocated? TIA.
A photo of the driver's side mount:

1438777762-DStray.jpg


The factory radio antenna on the passenger side of the Jeep does not need to be relocated in order to install the passenger side mount, the mount has a hole that the antenna passes through. Here's a photo of the passenger side, the antenna is still in place:

JKSideMountRotopax3_zpsgesaomrf.jpg
 

mikeJKUR

Adventurer
Very cool product. Any plans to build a mount for a shovel and axle in the same location? I have seen a product where a hi-lift was mount there and thought it would make sense if an axle and shovel was mounted on the opposite side.
 

jscherb

Expedition Leader
Very cool product. Any plans to build a mount for a shovel and axle in the same location? I have seen a product where a hi-lift was mount there and thought it would make sense if an axle and shovel was mounted on the opposite side.

I am thinking about a HiLift side mount, although I was thinking of doing the TJ/LJ first. I mocked it up the other day to do the design work and get some measurements.

SideMountHiLift_zpsjgcxqrfv.jpg


BTW I have done a HiLift mount for the tailgate hinges (and as you can see that's where I put a shovel too ;)):

Hilift6_zpsd0zrum0b.jpg
 

Zeiderman

Adventurer
Well, I just read the entire thread and I don't own any of those Jeeps, inspiring none the less, congrats on all you have done. Now I think you should buy an XJ and go to town with your mad scientist self, next to these style Jeeps, the XJ line up has to be the next most heavily modified lineup. I really enjoy all of your threads and builds, you sir are a genius, thank you for your contributions.
 

jscherb

Expedition Leader
Well, I just read the entire thread and I don't own any of those Jeeps, inspiring none the less, congrats on all you have done. Now I think you should buy an XJ and go to town with your mad scientist self, next to these style Jeeps, the XJ line up has to be the next most heavily modified lineup. I really enjoy all of your threads and builds, you sir are a genius, thank you for your contributions.
Thank you very much.
 

Omar Brannstrom

Adventurer
I got my jerrycan holder today here in Sweden :wings:

I glued some rubber cut from bike inner tire for the 3 places where the bolts are to eventually protect the paint.

We hade some problems first that the door would not get closed so we moved it a little bit and then it worked, its a tight fit.

I mounted the tray at the lowest point to the right and then I could not really open the door because the mirror hitted the LCI water can. I moved the tray up to the left and then I could open the door and the mirror dont hit the watercan, maybe 1cm left.

It looks awesome :victory:

Some direct photos from the garage

161164849.jpg


161164834.jpg


Hmm, dont know what the swedish cops will say about this

161164915.jpg
 

jscherb

Expedition Leader
I got my jerrycan holder today here in Sweden :wings:

I glued some rubber cut from bike inner tire for the 3 places where the bolts are to eventually protect the paint.

We hade some problems first that the door would not get closed so we moved it a little bit and then it worked, its a tight fit.

I mounted the tray at the lowest point to the right and then I could not really open the door because the mirror hitted the LCI water can. I moved the tray up to the left and then I could open the door and the mirror dont hit the watercan, maybe 1cm left.

It looks awesome :victory:


Looks great! Glad it finally reached you over there.

For jerry cans and most NATO cans, the mounting position you chose first is the right one, but for Sceptre/LCI-style cans like the one you've got, that's what the second second set of holes is designed for. As for the tight fit with the door, any thickness you add to the mounting bracket, like the rubber pad you put on to protect the paint can possibly interfere with the fit, glad it all worked out for you.
 

jscherb

Expedition Leader
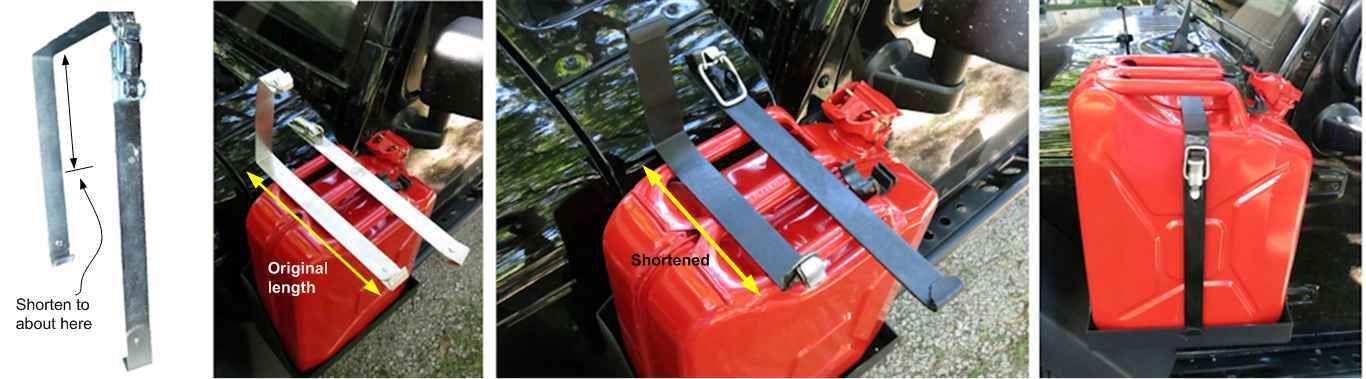
One comment/request I've gotten about the side-mount jerry can carrier is for a way to lock the cans in place to prevent theft. The side-mount comes with an excellent ratchet strap that does a great job of securing the can so that it doesn't move around or rattle, but it doesn't have a provision for locking. Here's a locking solution that can be implemented for about $7 including the lock. It's an easy DIY project, just requires a drill and a 1/4" drill bit.

Supplies needed:

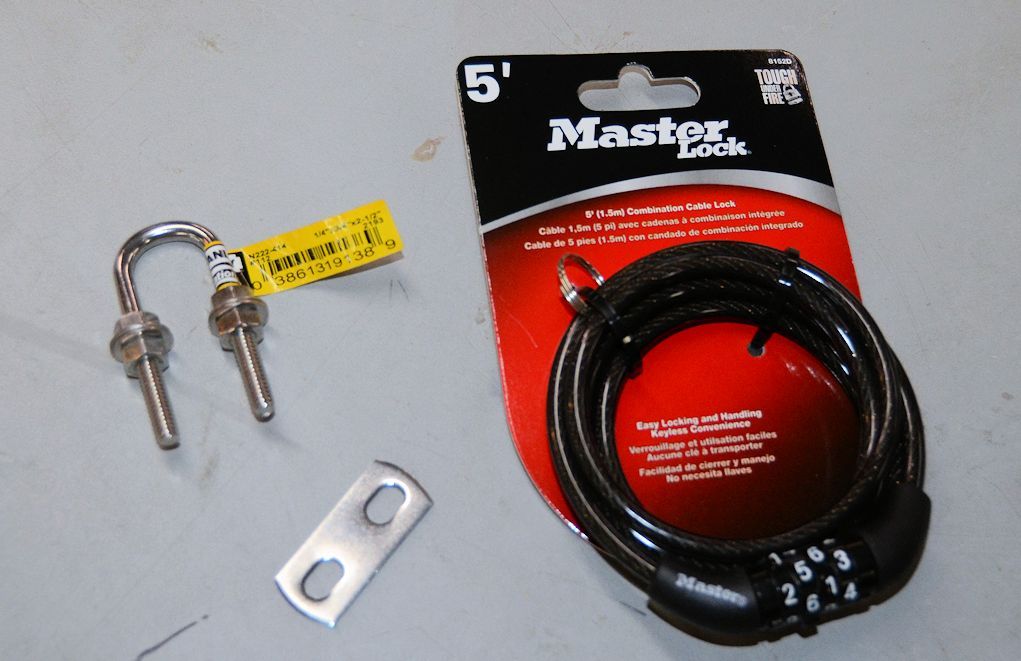
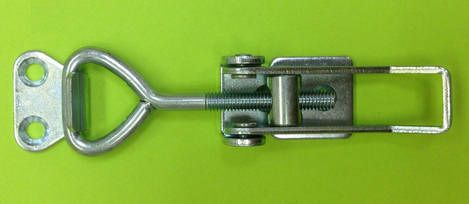
* Small u-bolt. I used a Stanley/National #112, which should be available in most hardware stores for maybe $2.00 with a zinc-plated finish. It's also available in stainless for about $2 more. This comes with 2 nuts; for this application 4 nuts are required; they're very common 1/4-20 nuts so most DIY's would likely have two on hand. I also used 4 washers, one under each nut.

* Bike lock or chain lock. I used a Master 8152D combination lock that I picked up at Walmart for $4.77. It's a bit long for this application, but a Master 99DSPT Gun Lock with a 14" cable would probably work well too, it's about $7.50 (Walmart didn't stock this one).

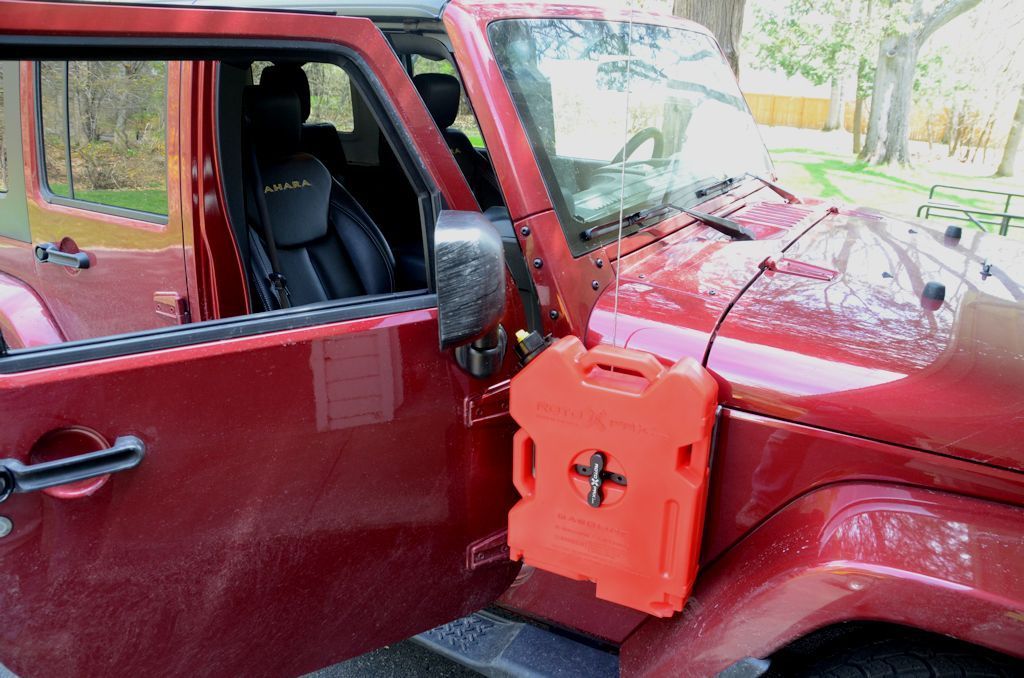
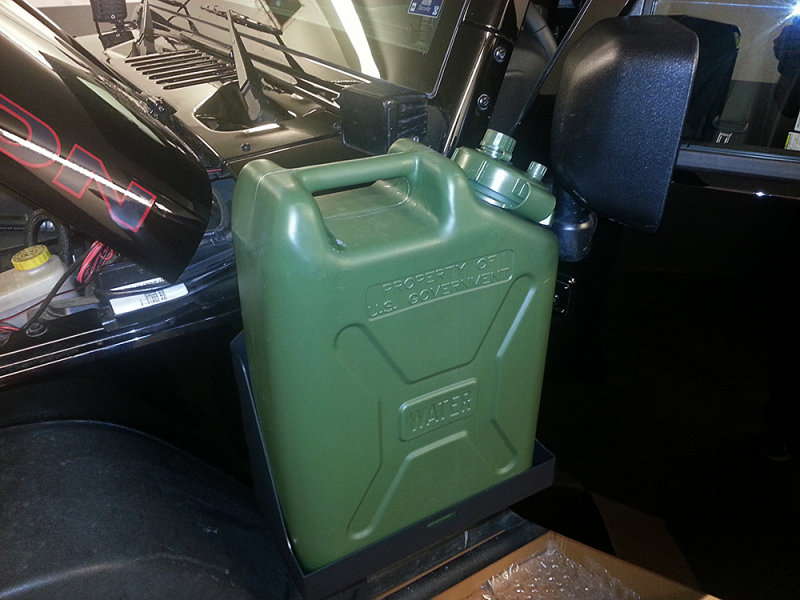
The photo below shows the u-bolt as used, with the extra nuts and washers. The strap that comes with the u-bolt can be used if you like, but is not necessary in this application.

BikeLock1_zpsffd3ystq.jpg


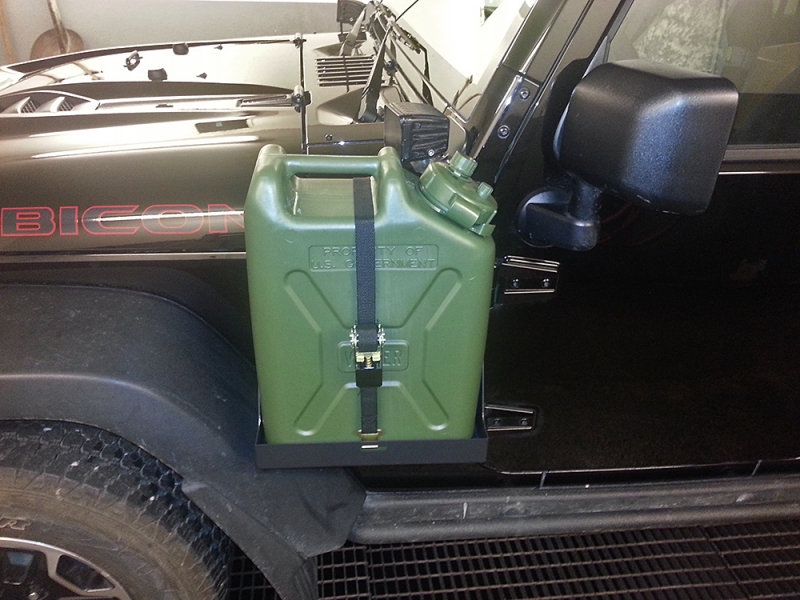
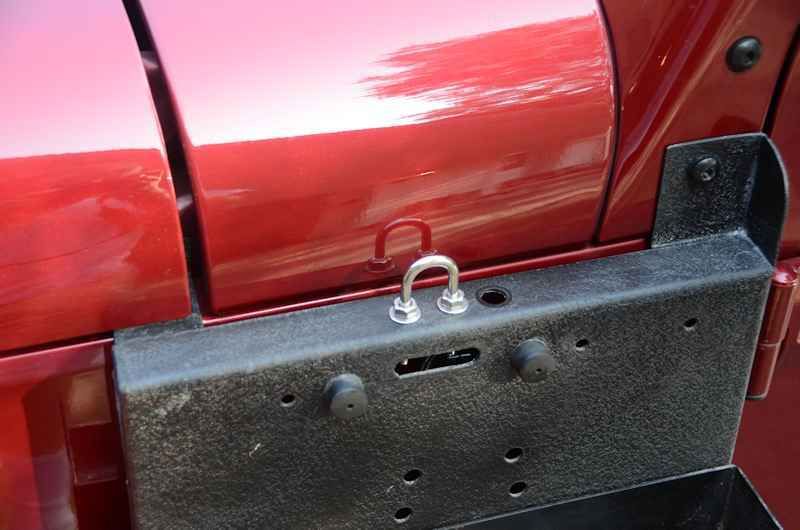
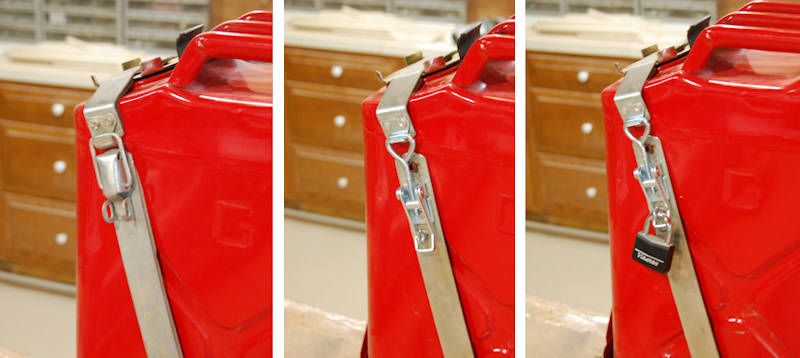
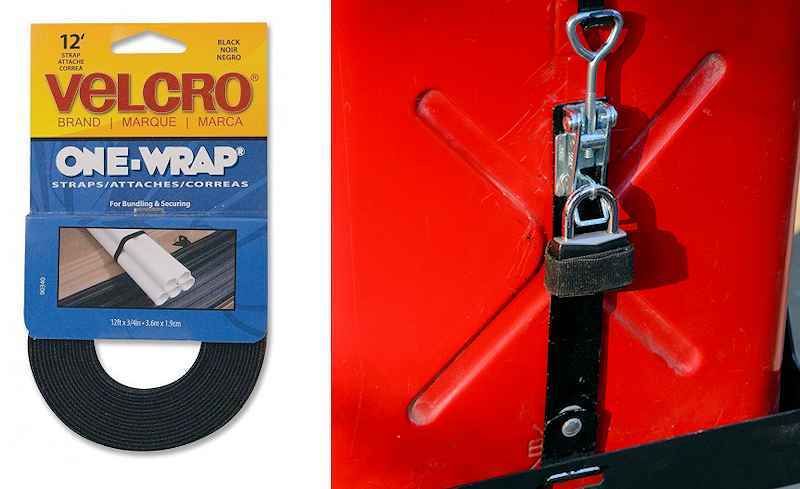
The u-bolt gets installed in the top of the side-mount main frame as shown below. Two holes are drilled, and nuts are placed on both the outside and the inside of the frame and tightened down.

BikeLock2_zpsowsldguq.jpg


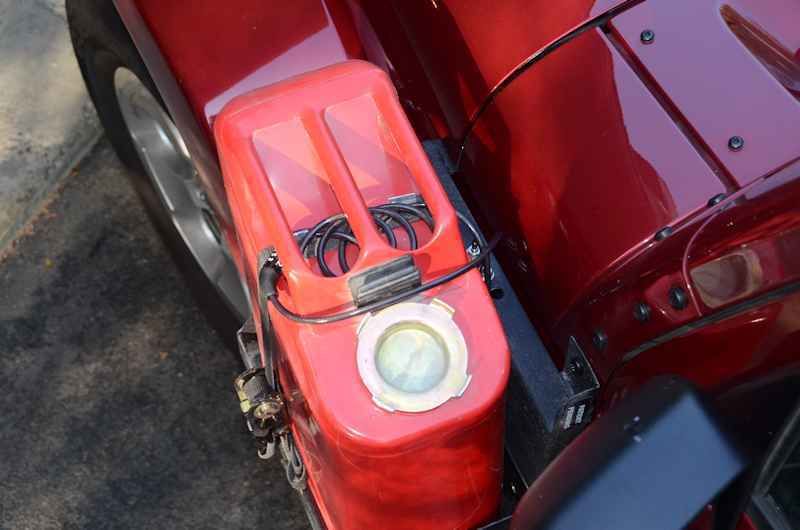
BTW the hole to the right of the u-bolt is the CB antenna mount hole, which is provided in the mount from the factory.

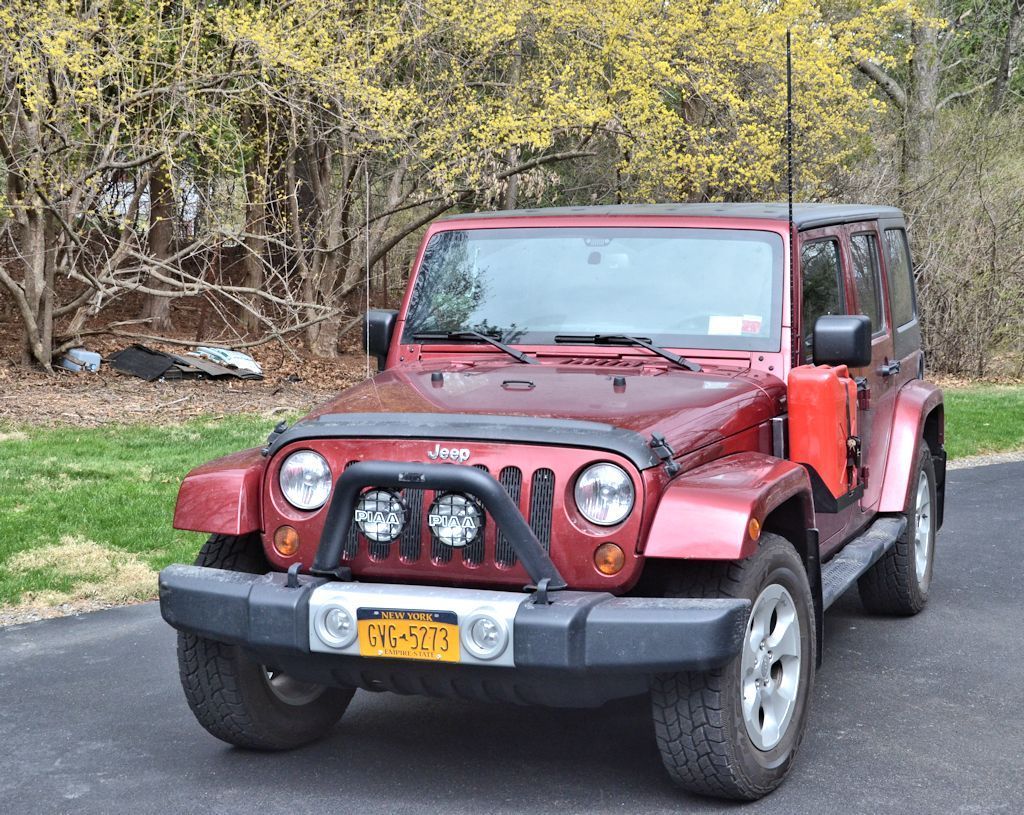
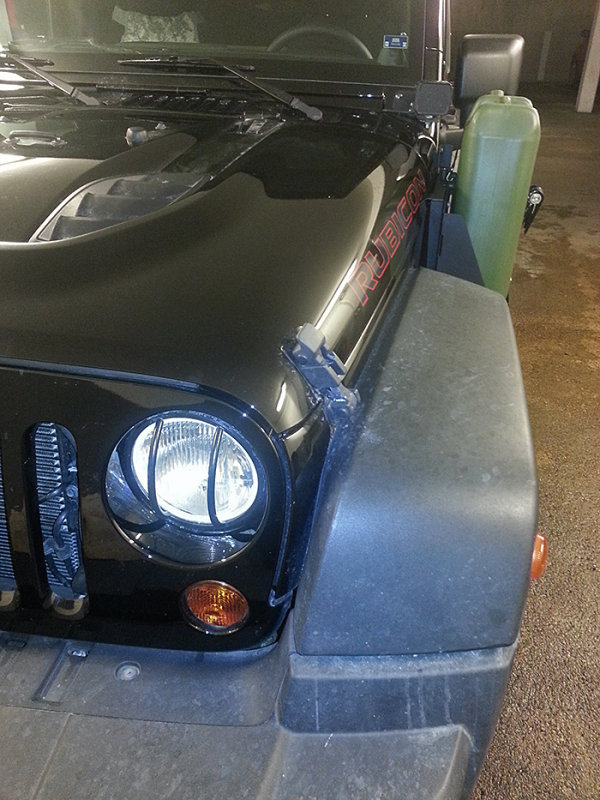
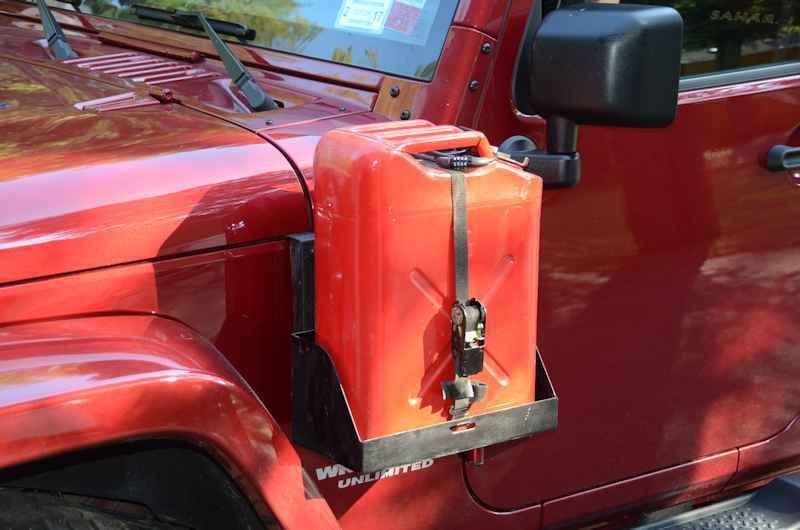
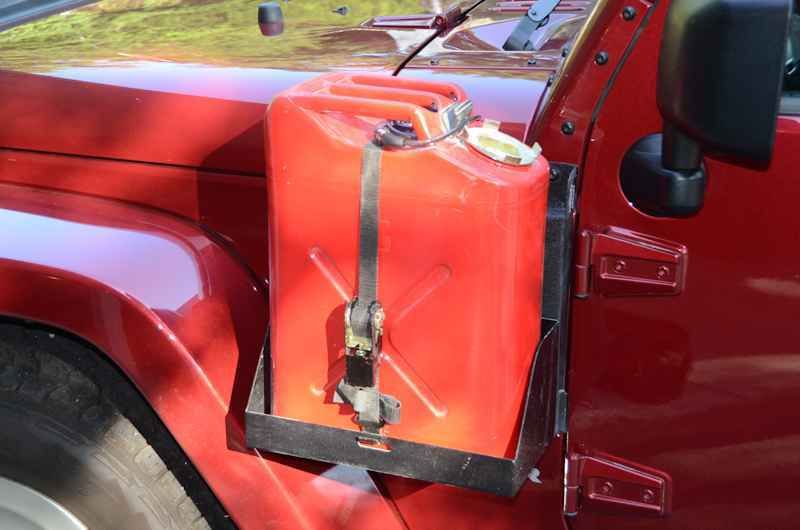
The lock cable is then threaded through the handle of the jerry can and the u-bolt.

BikeLock4_zps0xrw8twf.jpg


BikeLock3_zps74rcaaih.jpg


BikeLock5_zpsldywgewg.jpg


That's all there is to it, a $7.00 solution. The u-bolt is secure because the nuts are inside the main panel of the side-mount and can't be accessed when the side-mount is installed. The side-mount itself is secure because one of the nuts attaching it to the Jeep is inside the door opening and inaccessible with the door is closed and locked; one of the other bolts is under the hood so if you've got a good lock that one's inaccessible too.
 
Last edited:

jscherb

Expedition Leader
There is another solution using straps that are commercially available, although they have to be modified slightly. The straps are available at amazon (http://www.amazon.com/Jerry-Mounting-Straps-Steel-Strap/dp/B00BF0AS60) and also Twin City Surplus (http://www.twincitysurplus.com/catalog.fx?view=1&pid=1037&cart_id=95627.370) and may be available from other sources as well.

The series of photos below shows the original straps (left two photos), and the shortened straps (right two photos). The back side of the strap needs to be shortened to be the proper length to hook into the slot in the side mount holder. Length will vary depending on exactly what can style you have, but the final length is going to be roughly 5". The original strap has a swivel hook on the end that's attached with a rivet; you can either drill out the rivet, shorten the strap, drill a hole at the end for a new rivet, and then use a pop rivet to reattach the hook, or you could just eliminate the swivel hook altogether and bend the shortened end of the strap into the proper hook shape and length.

ShorteningStraps1_zpshkkm02it.jpg


One thing you may find with this style strap is that the can may move or rattle a bit in the holder - the strap isn't adjustable so other than latching it you can't tighten it down any further. I modified a set of these straps a few years ago to eliminate rattle - I installed adjustable locking latches. At the time I picked up my latches on eBay, but McMaster-Carr has similar latches that include the padlock loop, their #13435a31 or #13435a32 should work well in this application: http://www.mcmaster.com/#catalog/119/2927/=ofisp4

JerryCanLatch2_zpsd93f51e3.jpg


This series of photos shows the strap with the original latch (left), and the adjustable latch (right two photos). The original latch is riveted to the strap, so I drilled out the rivets to remove it. Then I drilled new holes in the strap for the mounting holes in the new latch, and used pop rivets to attach it.

JerryCanLatch_zps5df007c3.jpg


One other thing... I found that the lock would sometimes rattle against the strap and I hate rattles so I solved that problem with a short length of Velcro One-Wrap around the strap and the lock:

One-Wrap_zpsmakusc7l.jpg
 
Last edited:

Forum statistics

Threads
185,911
Messages
2,879,535
Members
225,497
Latest member
WonaWarrior

Members online

Top