theksmith
Explorer
so yesterday i spent the day at Number7's house with him helping me weld up my rack..
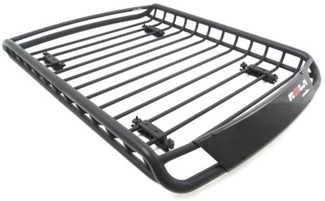
i started with a Rola rack and extension. it's a very inexpensive rack, yet pretty tough. I already had someone weld the extension in permanently quite a while ago (with them just screwed in, it flexed too much for my liking). once welded solid though, it made a extremely stout and great looking rack.
the only problem at that point was that the factory crossbars and rail system has tons of movement in it and never felt very secure to me. also, the Rola attachments to the factory crossbars were kind of wimpy and would allow the rack to slide from side to side sometimes when off-camber and fully loaded with tire/fuel cans/etc.
the first step was to remove all the factory stuff. next i laid down some 1/8 thick by about 1" wide steel in place of the factory rails, drilled it for the factory attachment holes, rounded off the end corners and got some new stainless steel screws and washers to fasten it to the factory thread-serts. i used only 1/8 thick so it would lay down nice and match the curve of the roof without putting lots of stress on the thread-serts. these pieces really will just need to spread the load of the rack more than any other structural purpose.
then i put the rack up there, got it all lined up and started cutting the "feet" for it - 0.25" thick by about 1.5" wide steel. i then tried to get it all tack-welded into place before taking it to george for the real welding. i got some of it tacked, but i've never welded before and even my tack welds weren't holding worth a crap. later george told me that the harbor freight welder i had came with crap wire and he let me play with his welder and indeed i was able to make some decent welds in no time (now i can't wait to go buy some better wire and start practicing welding!)
here's the first front "foot" tacked into place:

and george tacking the other feet into place (we used a wet blanket to keep the spatters off the paint, mostly):

taken off the jeep in order to finish welding:

the tubing on the rack itself was kinda thin, so george talked me into adding some gussets that tied the feet to more surface area of the rack. i'm glad he did, they came out nice and i'm sure added tons more strength... now i'll never worry about the feet tearing off the thin tube:

view from the front looks great:

and here's some other shots of the nearly finished product:


i still need to fab up a hi-lift carrier on one side and a shovel & axe carrier on the other side, and maybe add some light tabs, etc. and then prep and paint.
thanks tons to George for all the help constructing this!
my full build thread is here if interested in any other mods... http://www.offroadpassport.com/forum/showthread.php?t=5
i started with a Rola rack and extension. it's a very inexpensive rack, yet pretty tough. I already had someone weld the extension in permanently quite a while ago (with them just screwed in, it flexed too much for my liking). once welded solid though, it made a extremely stout and great looking rack.
the only problem at that point was that the factory crossbars and rail system has tons of movement in it and never felt very secure to me. also, the Rola attachments to the factory crossbars were kind of wimpy and would allow the rack to slide from side to side sometimes when off-camber and fully loaded with tire/fuel cans/etc.
the first step was to remove all the factory stuff. next i laid down some 1/8 thick by about 1" wide steel in place of the factory rails, drilled it for the factory attachment holes, rounded off the end corners and got some new stainless steel screws and washers to fasten it to the factory thread-serts. i used only 1/8 thick so it would lay down nice and match the curve of the roof without putting lots of stress on the thread-serts. these pieces really will just need to spread the load of the rack more than any other structural purpose.
then i put the rack up there, got it all lined up and started cutting the "feet" for it - 0.25" thick by about 1.5" wide steel. i then tried to get it all tack-welded into place before taking it to george for the real welding. i got some of it tacked, but i've never welded before and even my tack welds weren't holding worth a crap. later george told me that the harbor freight welder i had came with crap wire and he let me play with his welder and indeed i was able to make some decent welds in no time (now i can't wait to go buy some better wire and start practicing welding!)
here's the first front "foot" tacked into place:
and george tacking the other feet into place (we used a wet blanket to keep the spatters off the paint, mostly):
taken off the jeep in order to finish welding:
the tubing on the rack itself was kinda thin, so george talked me into adding some gussets that tied the feet to more surface area of the rack. i'm glad he did, they came out nice and i'm sure added tons more strength... now i'll never worry about the feet tearing off the thin tube:
view from the front looks great:
and here's some other shots of the nearly finished product:
i still need to fab up a hi-lift carrier on one side and a shovel & axe carrier on the other side, and maybe add some light tabs, etc. and then prep and paint.
thanks tons to George for all the help constructing this!
my full build thread is here if interested in any other mods... http://www.offroadpassport.com/forum/showthread.php?t=5


