Rolling Studio - FG Camper Conversion

john lovett

Observer
Hi pods8,
Most of the strength comes from the ply laminate - the glass is to seal the structure and strengthen the joints hence the stitched reinforcement. On the original caravan I used west system epoxy - good but expensive and smells like hell. The Vinyl esther is cheaper and not as strong smelling as the epoxy. I believe the epoxy penetrates better, so the ply was first soaked in vinyl esther, then as soon as it went off, re soaked, cloth applied then wet out. The stitched stuff took a lot of wetting out and would only curve around fairly large radius. Awkward to use, but once in place seems very strong.
Another reason FGI, the fiberglass supplier, recommended vinyl esther was because it is much more tolerant to heat than epoxy, and the subframe sits above a large muffler!
 

pods8

Explorer
I haven't personally used west system but I'm not really heard it smelling much. I'm using a US composites epoxy resin right now and I don't find it to have much smell unless in a confined space. I would have figured vinyl ester would be worse, doesn't it have styrene? Good to hear its not bad. I don't think it penetrates wood as well but in terms of strength its up there with epoxy from my reading anyways. Definately better for heat as you mentioned. If I wasn't playing around with polystrene foam I would have considered trying it out (it'll dissolve polystyrene foam, I see you're right on track with polyurathane foam :coffeedrink:).

If you have to do more reinforced corners maybe multiple layers of thinner stuff, easier to work a tighter radius and to wet out.
 

john lovett

Observer
Hi pods8,
Had I known the difficulty of using the stitched cloth, I would have definitely gone with multiple layers of lighter fabric. Unfortunately, I purchased a big roll of the stitched and woven stuff, so had to persevere with it.
Perhaps I'm numb to the smell of this stuff. Friends drop into the shed and complain about the smell - I can happily work with it all day!
 

john lovett

Observer
Seats and Table

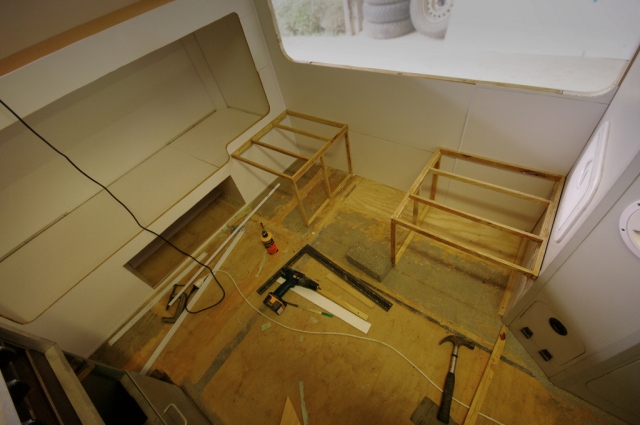
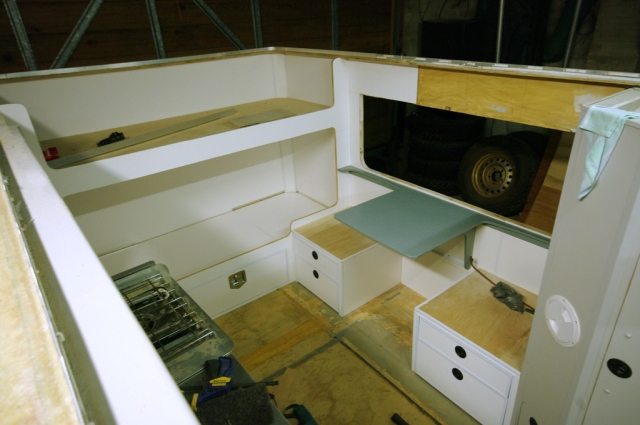
Two seats and a small fixed table fill the space created by removing the RHS wheel arch. The seat frames were made of 25mm wide strips of 12mm ply. These were covered in a light weight 4mm ply. Simple timber drawer slides locate two drawers under each seat.

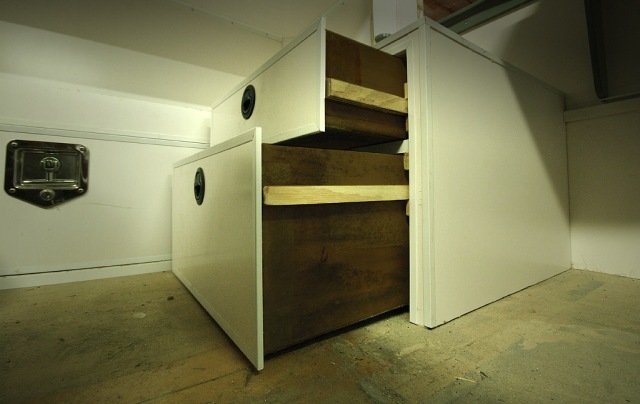
The drawers in the existing kitchen were changed from bearing type runners in metal frames to timber runners. The metal framed runners allowed the drawers to move around too much on corrugations – puncturing beer cans and wearing the labels off most of the contents. More expensive metal runners may have solved the problem, but the timber runners are cheap and simple, allowing little movement. The drawer is kept in place by a length of shock chord passing through a runner on the wall behind it. This system works well – the only disadvantage being, the drawer needs to be held open with one hand while extracting goods with the other. The upside is they can never be left accidently open.

bunks-and-seats.jpg


Seat frames seem frail and lightweight, but soon stiffen up once a ply skin is glued in place. Another cross piece was added behind the front one just to be safe.

imgp4291.jpg


The table is made from 12mm ply, laminated with fiberglass, filled sanded and sprayed with enamel. The table structure braces the large window opening, as will the overhead lockers, once installed.

drawer-runners.jpg


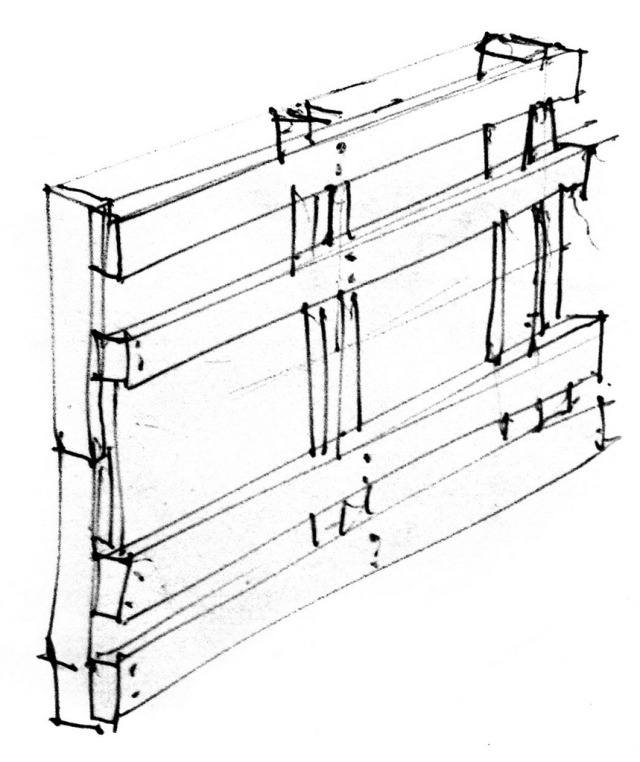
Simple 12mm x 25mm ply drawer runners

drawers.jpg


The drawers are made from 4mm ply, glued and carefully tacked together, coated with vinyl ester resin then fiberglassed over all joins – very strong and light, without the need for an internal frame.
 

john lovett

Observer
End Storage Cupboards

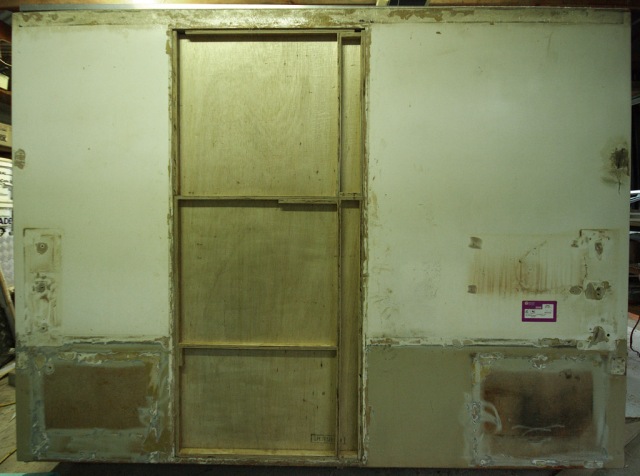
Before work could begin on the back section of the van the old back door had to be filled in. It was a weird feeling blocking off the back door we'd stepped through thousands of times all over the country. All of a sudden it felt like a different place.
back-door.jpg


Patched cavity before urethane foam insulation and ply and fiberglass skin were applied. It all looks a bit rough, but the whole structure will be covered in a thin aluminium composite panel.

endcupboards.jpg


endcupboards2.jpg


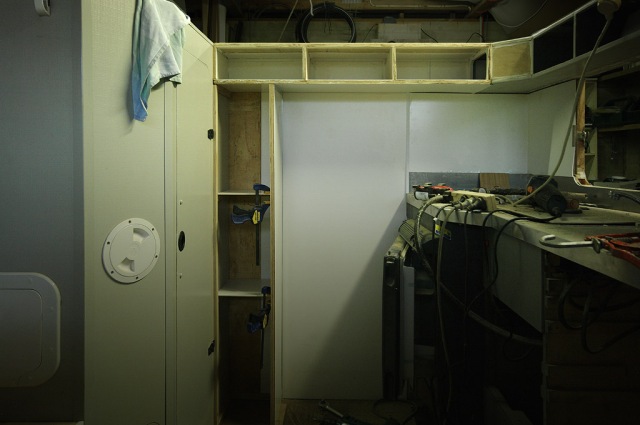
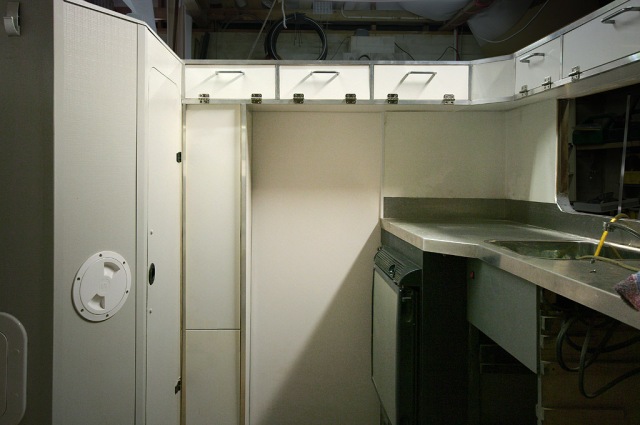
The overhead cupboards act as bracing and provide heaps of storage for plates cups tea coffee and all those small, lightweight things you use all the time.The cupboard doors are mad from a product called Komacel. It is some kind of compressed foam with a tough plastic outer skin. It can be cut, routered, drilled, screwed - anything that can be done to MDF or ply can be done to this stuff. The only thing it doesn't like is glues other than Cyanoacrylates (Super Glue). I used 10mm for the doors and 3mm for other bits of trim. It can be easily bent with a heat gun (see splash back above)
 
Last edited:

john lovett

Observer
Hi Mr Beast,
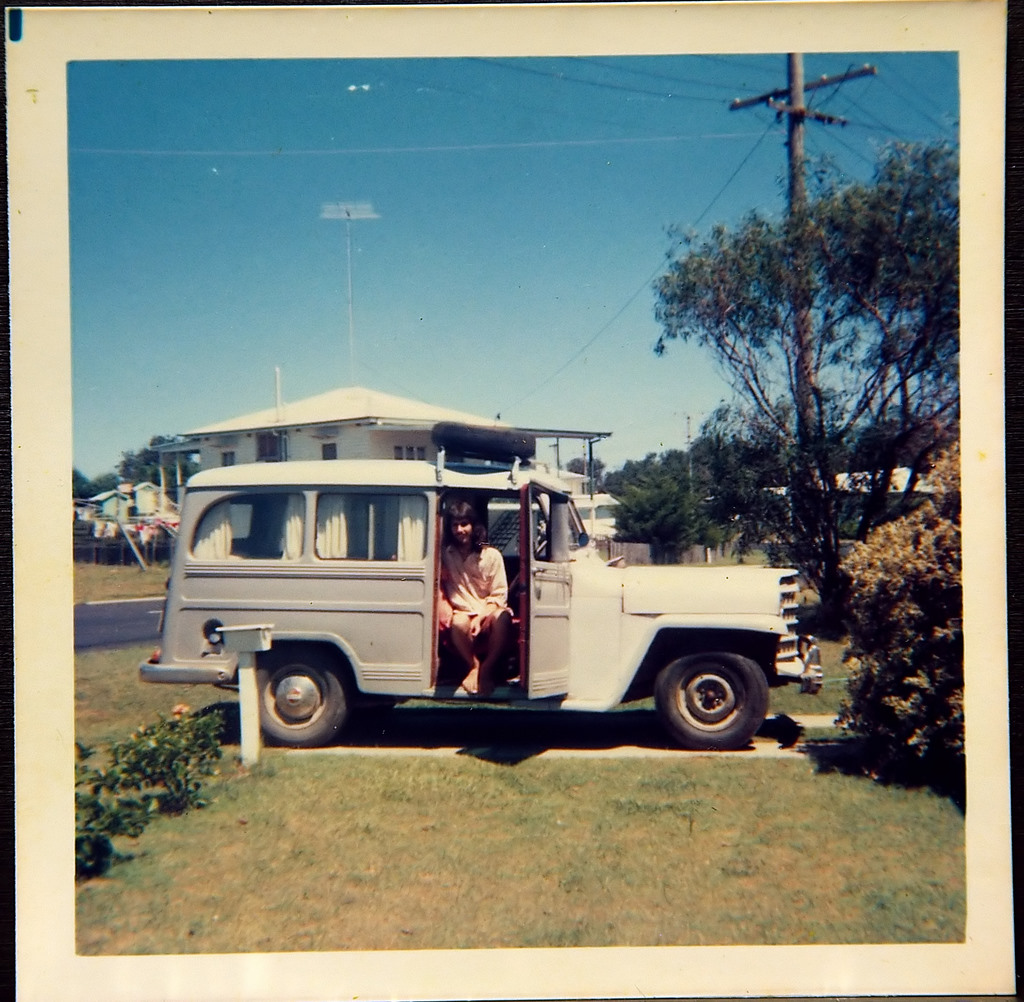
Glad you liked the post. I enjoyed reading about your Jeep. The first car I owned was an old Willys from the 40's. I loved it and kick myself for ever getting rid of it. This photo was taken in 1971. I got my drivers license in this old wagon. The cop that took me for the test said, after he filled out all the papers, "You be careful in this thing, it's not very fast."


jeep_filtered.jpg
 

john lovett

Observer
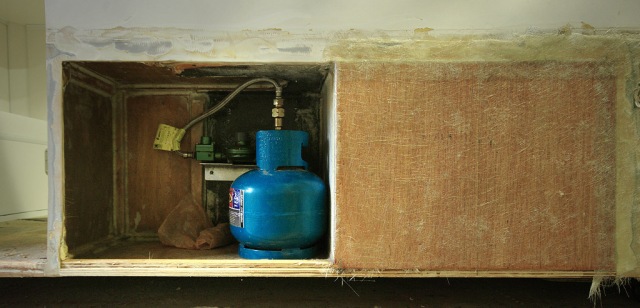
Gas Storage

wheel-arch-lhs.jpg

The passenger side wheel arch was cut out, the floor filled in and an external gas cylinder compartment created. the other half of the wheel arch provides more under bench kitchen storage. Two 2kg gas cylinders carry enough gas for around 4 -5 weeks since they only run a small gas stove. Unfortunately, filling a 2kg cylinder in Australia is around 80% of the cost of filling a 4kg cylinder - labour I guess?

Australian Gas Fitting Regulations
 

john lovett

Observer
12 Volt Wiring

img_3107.jpg


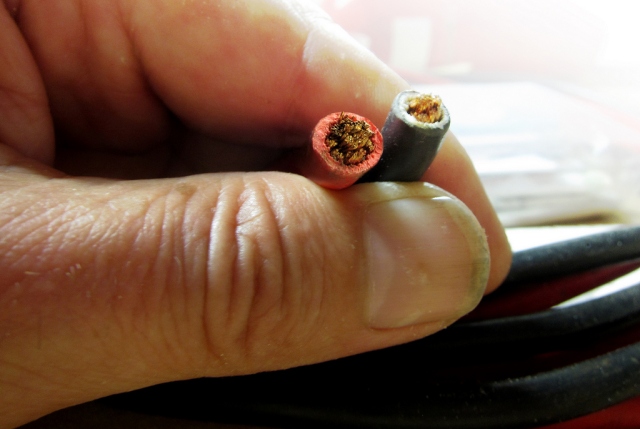
I’m no expert when it comes to 12 volt wiring, but I have learned the hard way that, more than anything, size matters. Cable size is pretty confusing – the easiest figure to understand is the diameter of the copper core. I have run 6.5mm diameter cable (2AWG) From my fuse box to the fridge and a couple of distribution boxes. From these boxes I run 5.1mm (4AWG) and 3.2mm (8AWG) to lights pumps, CD player etc. Depending on current draw. (Heavy for pumps or motors, light for led lights.) The main lines are fused at the main box and inline fuses are near all appliances.

AWG American Wire Guage) to mm2 cross section converter

img_3086.jpg


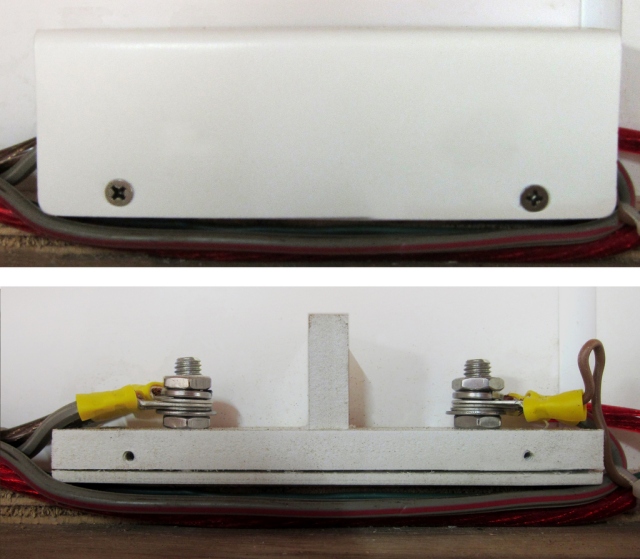
These distribution boxes are made from 10mm Komacell plastic sheet and stainless steel bolts. The cover (top Picture) is 3mm Komacell bent with a heat gun. These boxes allow heavy 6.5mm cable to be used for long runs then lighter cable to run out to appliances.

wiring.jpg


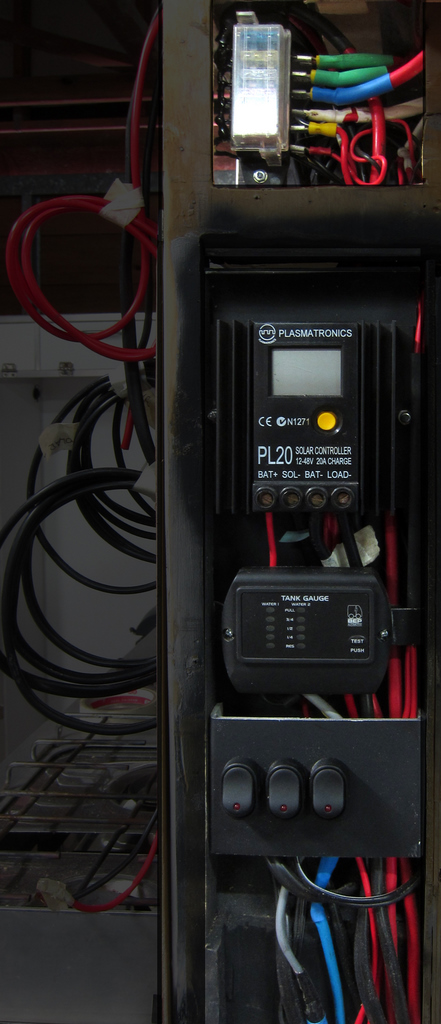
The Main fuse box, solar regulator, water tank gauges and main switches are all located on the right hand side of the doorway, directly above the house batteries.

Two 64 watt amorphous solar panels and one 120watt polycrystalline panel feed into a Plasmatronics solar regulator. Power is stored in two Fullriver 120AH AGM batteries.

When all this was fitted to the original caravan, this setup kept beer cold and lights and computers running in +45 degree temperatures in Northern Australia. It also coped well with periods of cloud and overcast skies. We carried a second 40litre fridge in the back of the car. It was powered by a second battery in the engine bay.

We are fitting a 30 litre fridge under one of the bunks and I plan to run it from a separate battery charged by the engine. I would be interested to hear if anyone has split the two cranking batteries on a canter with a smart solenoid, Using one battery for cranking, one for other appliances?

I have had problems with an inefficient 12 volt fridge in the past and found the solution (heavier wire) in Collyn Rivers Motorhome Electrics book. He has lots of good info on 12 volt installation on his website.
 

pods8

Explorer
12 Volt Wiring
Cable size is pretty confusing – the easiest figure to understand is the diameter of the copper core.

Is it the conversion to metric that you find confusion or knowing which cable size to pick? If its the cable size part its just based off the length of the cable and how many amps you think you'll need it to carry. There are charts out there to help.
 

john lovett

Observer
In Australia there are a number of different standards.
Auto cable is sold by cross sectional width, so buying 5mm cable does not mean 5sq mm of copper, it only has 2sq mm of copper
ISO 5 (also sold as 5mm cable) has a copper core area of 5sq mm.
AWG 10 (sometimes called Gauge 10) also has a copper cross section of just over 5mm

Unless you know the standard the cable is being sold under, you can be easily caught.

This article describes the confusion in detail.
 

john lovett

Observer
Water Supply

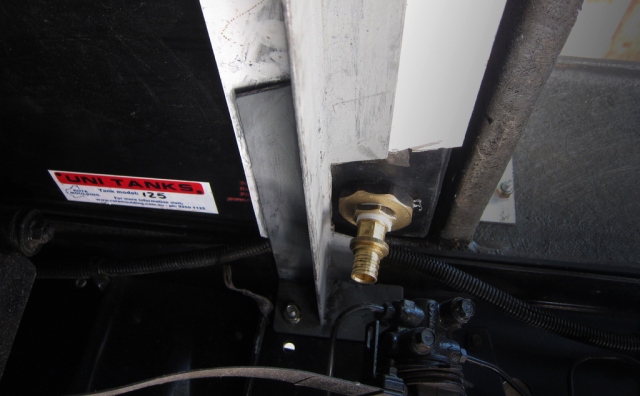
The main water tank is roto molded polyethylene, 125 litre and fits snugly between the subframe rails.
It sits on a plastic plate attached to the chassis cross member and a steel bracket fabricated from 50x50mm steel angle.

tank1.jpg


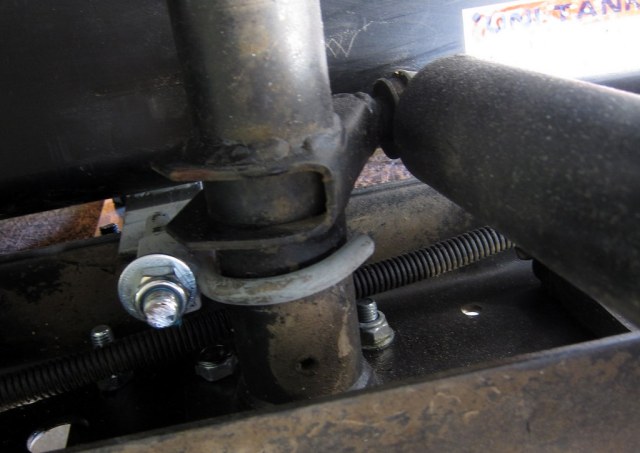
The main tank is held down by a 40mm steel strap

tank-support.jpg


The fabricated bracket bolts through existing holes in each side of the chassis rails.
The cut out in the bracket allows water to exit from the bottom front corner of the tank and pass through the chassis, into the wheel arch and up into the kitchen pump.

img_3123.jpg


Threaded rod welded to the tank hold down strap, locates two hooks that tension against the rear shock mount cross tube.

tank-2.jpg


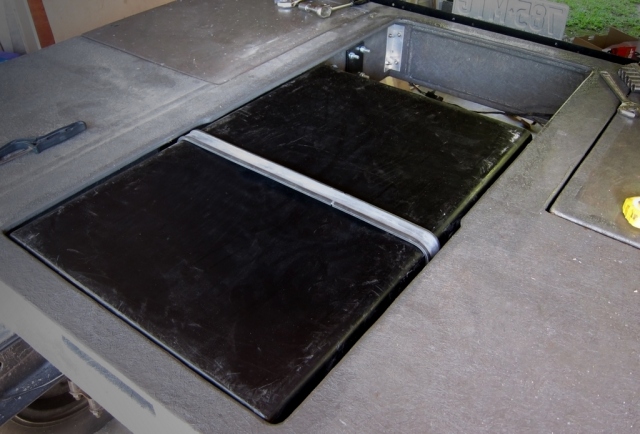
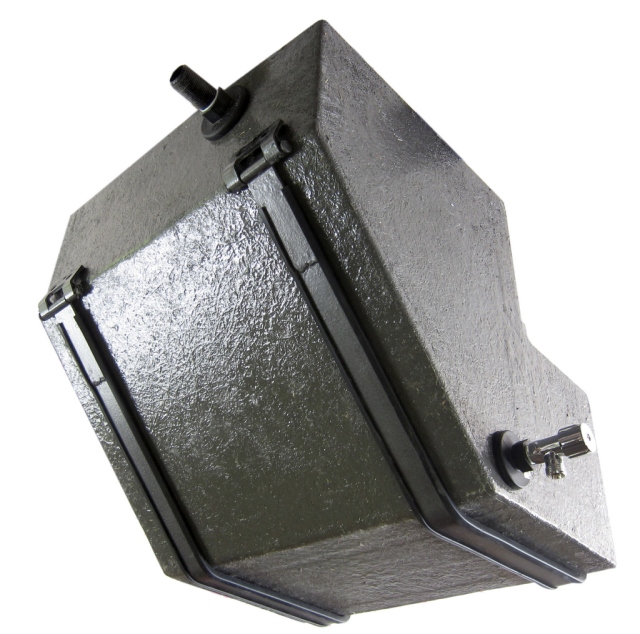
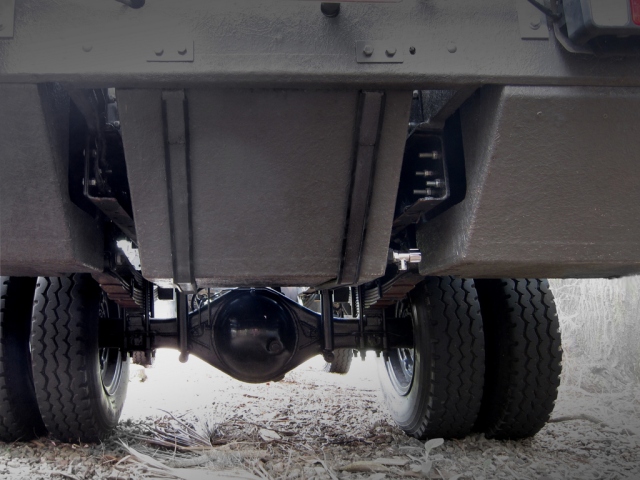
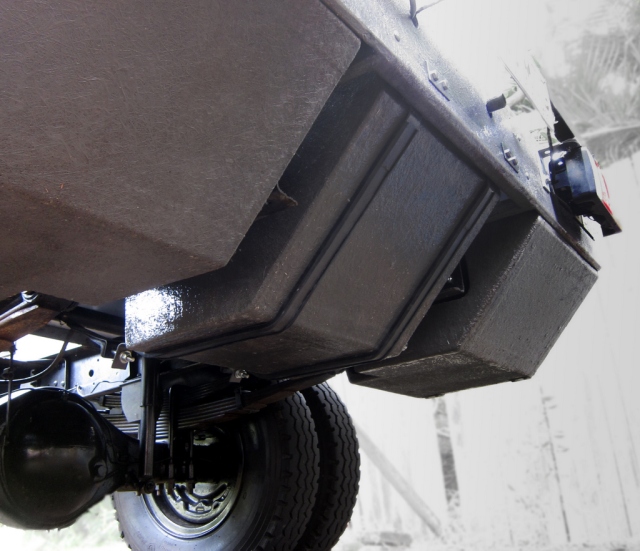
The second tank is made from ply and fiberglass and holds just over 100 litres.
This tank sits behind the main tank and doubles back underneath it. It gravity feeds to a tap that sits inside the chassis rail behind aluminium guards.

These two tanks plus two jerry cans give us around 270 litres of water.

tank2.jpg


tank2-2.jpg


tank-gauge.jpg


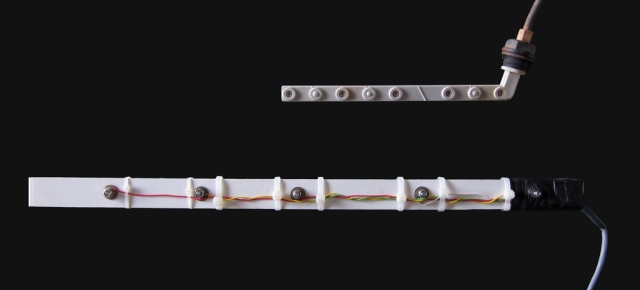
The standard tank level gauge (top) was too short for the second tank so a larger version was made from a length of plastic and some stainless steel hardware.


Black food grade plastic pipe would be ideal to hook up the tanks, but it doesn’t seem to exist.
The clear pipes let in light causing algae to grow, so I am going to try spraying the clear pipes black.

The main tank was made by Uni Tanks in Western Australia. They have a great selection of sizes and can deliver to the Eastern States for just $80. Really good, solid tanks too.
 

pods8

Explorer
Water Supply
The second tank is made from ply and fiberglass and holds just over 100 litres.

<snip>

Black food grade plastic pipe would be ideal to hook up the tanks, but it doesn't seem to exist.
The clear pipes let in light causing algae to grow, so I am going to try spraying the clear pipes black.

You planning to use that fiberglass tank for drinking too or just showers, etc? Although fully reacted resins are supposed to be safe I've got mild hesitation (probably unfounded) about the off chance of unreacted stuff leaching over time. Nice job on the tank though!

You could just wrap the tubes in electrical tap and/or that black wiring loom stuff.

Edit: Can you guys get PEX tubing in your neck of the woods? Our hardware/plumbing stores carry it fairly commonly over here. I think that stuff is opaque, you might want to check that out.
 
Last edited:

Forum statistics

Threads
185,795
Messages
2,878,264
Members
225,352
Latest member
ritabooke
Top