You are using an out of date browser. It may not display this or other websites correctly.
You should upgrade or use an alternative browser.
You should upgrade or use an alternative browser.
Rocksea - EarthCruiser CORE Total Composites Build
- Thread starter awheeler
- Start date
awheeler
Member
Alright finally getting our ducks in a row to get some build progress going for you all. Still trying to figure out the best flow for getting updates posted here as I also am posting to our blog.
Day 1
We are doing the build in the dead of winter here in McCall Idaho. We had a heck of a time finding a shop to do the build in since we no longer have our own place. We were able to find someone who ‘s building a large shop that was willing to let us do some work there. It’s not heated or finished but at least it does provide some cover.

When we sold our house one of the things we couldn’t justify keeping was my large cabinet table say. To replace it I am trying this Kreg track saw system and so far it looks great. I think it will even replace our chop saw as that feature works really well.
Checking The 3D Model
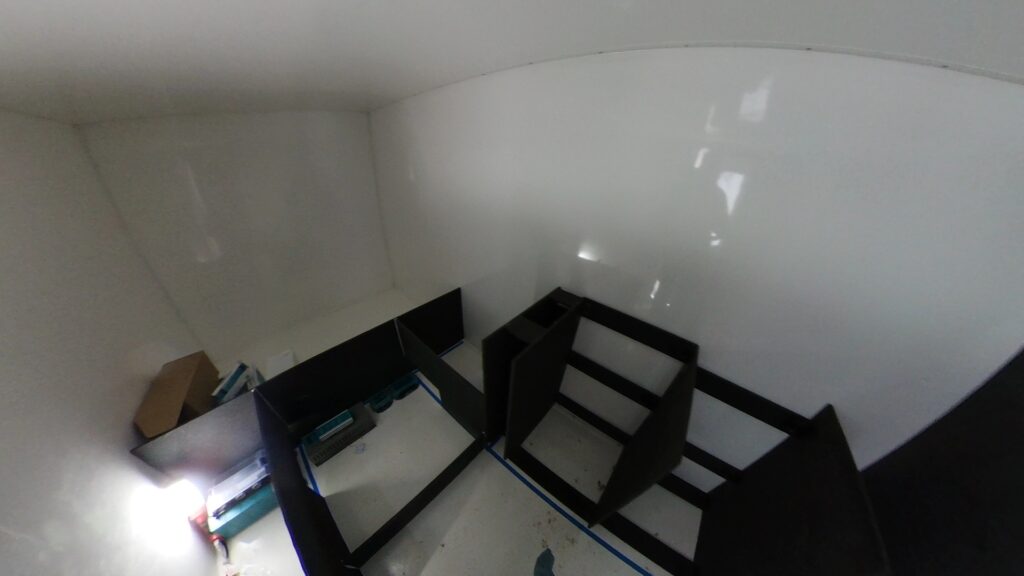
We spent some time going over our 3D build plan with the actual box. Up until now or plan was based off of tape and cardboard from our mock build. It’s nice to finally have the actual box.
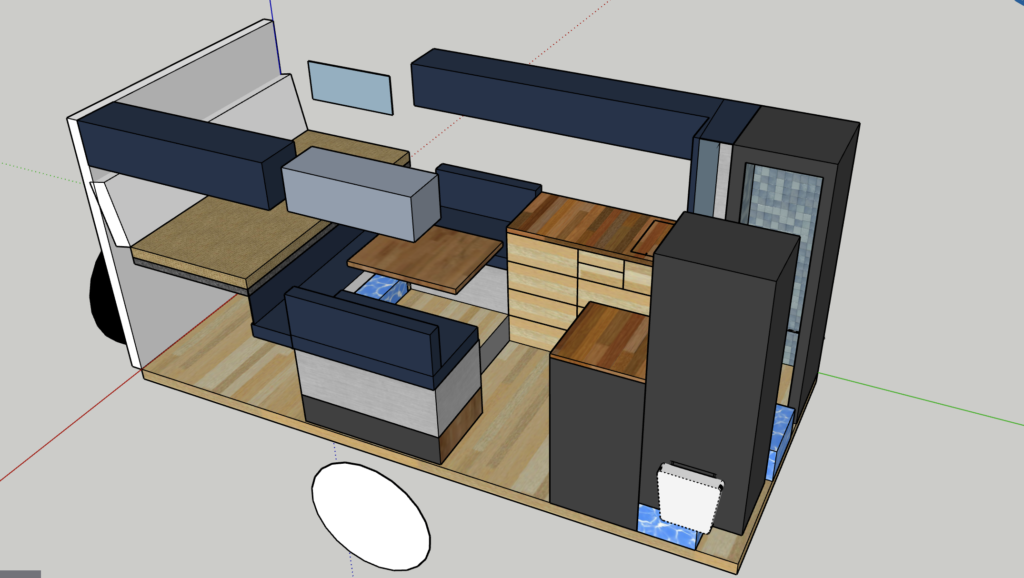
Everything was looking good and the measurements from the box blueprint and box itself were spot on. Next we started taping things out in the Total Composites camper box. I’ve a got a video coming out later today showing the 3D build using Google Sketchup. I'll post that up on our Youtube channel.
Coosa Composite Panels
We are building the interior using 1/2” Coosa composite panels. Coosa is a foam board with fiberglass stranding. It’s incredibly light and easy to work with.
The board can be shaped and cut using normal wood working tools. They have a rough finish to them and also have some air bubble imperfections so don’t expect a perfectly smooth surface.
My plan is to use a skim coat of Bondo for any areas that I want a perfectly smooth surface but I think a few layers of paint should do the trick. Coosa recommends starting with Kilz 3 primer and then using any standard interior paint.

Here I was doing some glue strength tests using the glue that Total Composites recommends for their boxes. Coosa is used a lot in the marine industry and works well with Epoxy and glassing techniques. While I am familiar with that process it adds a lot of complexity and mess so I was excited to see how well this other glue worked.
The Total Composites recommended glue is dispensed using a caulking gun making for fast and easy application. I may still use some epoxy for the kitchen cabinet but everything else I will likely use the Total Composite caulking glue.
The big drawback with Coosa is screw retention. While it works well with glues it does not hold screws very well. You can use screws to help hold things together while the glue dries but that’s about it. I’ll be using some pocket hole screws to help glue pieces were clamps won’t work.
I’m also testing this glue using a metal activator on the drawer slides as I don’t trust using only screws to secure the drawer hardware. I also want to use some aluminum angle iron to secure cabinets to the camper box walls. That reminds me, it’s important to know you can’t screw anything into the walls or ceilings of the total composite boxes. Everything must be glued. You can screw into the floor of the box since there is a layer of marine ply directly beneath the fiberglass skin.
I purchased the Coosa panels from Fisheries Supply In Seattle, they only charged $100 in freight to ship 8 sheets! They accidentally sent me one sheet of 5/8 and if I did this again I would probably just go with 5/8” throughout. I think the 5/8” is the best bang in terms of strength and weight and will require less bracing to make things rigid.
Dinette Seating Area
We got a few parts of the dinette seating area put in. The short side is 32″ and the longer seat is 42″, I may shorten the 42″ side a bit. Between the seats is going to be a raised 7″ platform to accommodate electrical and some storage. Behind the dinette is our 54″ wide Full size bed area. Bed will sit about 36″ high to allow for storage under the bed.

Better get back to work....
Day 1
We are doing the build in the dead of winter here in McCall Idaho. We had a heck of a time finding a shop to do the build in since we no longer have our own place. We were able to find someone who ‘s building a large shop that was willing to let us do some work there. It’s not heated or finished but at least it does provide some cover.
When we sold our house one of the things we couldn’t justify keeping was my large cabinet table say. To replace it I am trying this Kreg track saw system and so far it looks great. I think it will even replace our chop saw as that feature works really well.
Checking The 3D Model
We spent some time going over our 3D build plan with the actual box. Up until now or plan was based off of tape and cardboard from our mock build. It’s nice to finally have the actual box.
Everything was looking good and the measurements from the box blueprint and box itself were spot on. Next we started taping things out in the Total Composites camper box. I’ve a got a video coming out later today showing the 3D build using Google Sketchup. I'll post that up on our Youtube channel.
Coosa Composite Panels
We are building the interior using 1/2” Coosa composite panels. Coosa is a foam board with fiberglass stranding. It’s incredibly light and easy to work with.
The board can be shaped and cut using normal wood working tools. They have a rough finish to them and also have some air bubble imperfections so don’t expect a perfectly smooth surface.
My plan is to use a skim coat of Bondo for any areas that I want a perfectly smooth surface but I think a few layers of paint should do the trick. Coosa recommends starting with Kilz 3 primer and then using any standard interior paint.
Here I was doing some glue strength tests using the glue that Total Composites recommends for their boxes. Coosa is used a lot in the marine industry and works well with Epoxy and glassing techniques. While I am familiar with that process it adds a lot of complexity and mess so I was excited to see how well this other glue worked.
The Total Composites recommended glue is dispensed using a caulking gun making for fast and easy application. I may still use some epoxy for the kitchen cabinet but everything else I will likely use the Total Composite caulking glue.
The big drawback with Coosa is screw retention. While it works well with glues it does not hold screws very well. You can use screws to help hold things together while the glue dries but that’s about it. I’ll be using some pocket hole screws to help glue pieces were clamps won’t work.
I’m also testing this glue using a metal activator on the drawer slides as I don’t trust using only screws to secure the drawer hardware. I also want to use some aluminum angle iron to secure cabinets to the camper box walls. That reminds me, it’s important to know you can’t screw anything into the walls or ceilings of the total composite boxes. Everything must be glued. You can screw into the floor of the box since there is a layer of marine ply directly beneath the fiberglass skin.
I purchased the Coosa panels from Fisheries Supply In Seattle, they only charged $100 in freight to ship 8 sheets! They accidentally sent me one sheet of 5/8 and if I did this again I would probably just go with 5/8” throughout. I think the 5/8” is the best bang in terms of strength and weight and will require less bracing to make things rigid.
Dinette Seating Area
We got a few parts of the dinette seating area put in. The short side is 32″ and the longer seat is 42″, I may shorten the 42″ side a bit. Between the seats is going to be a raised 7″ platform to accommodate electrical and some storage. Behind the dinette is our 54″ wide Full size bed area. Bed will sit about 36″ high to allow for storage under the bed.
Better get back to work....
Thanks for taking the time to share your build. It's hard enough to get a project completed let alone document it.
You mentioned screw retention. Do you think threaded inserts would hold when bonded into the coosa composites?

 www.mcmaster.com
www.mcmaster.com
www.mcmaster.com
You mentioned screw retention. Do you think threaded inserts would hold when bonded into the coosa composites?
McMaster-Carr
McMaster-Carr is the complete source for your plant with over 595,000 products. 98% of products ordered ship from stock and deliver same or next day.
McMaster-Carr
McMaster-Carr is the complete source for your plant with over 595,000 products. 98% of products ordered ship from stock and deliver same or next day.
In lieu of Coosa (#70 in 48" x 96" x 1"), consider using Plascore Polypropylene sheeting skinned with fiberglass or a PVC foam-based sandwich panel product called Celtec. A 48" x 96" x 1" sheet of Celtec weighs 118 pounds, so it's heavier than Coosa, but you can use less of it in a given application, and nail and screw holding are both excellent, at 35 pounds and 300 pounds, respectively.
A Polypropylene cored sandwich panel weighs 24 pounds if constructed using a 48" x 96" x 1" sheet of 5 PPCF core (#13.333) and fiberglass skins that weigh #10.67. The skins consist of two layers of 6 ounce/200 GSM cloth per side and an equal amount, by weight, of epoxy resin, as an estimate. This is massive overkill for cabinets and furniture, but in a weight-conscious application such as a camper or a small boat, this product is fantastic. The sandwich panel is stronger than either of the other two products, at 34% and 20% of their weight, respectively.
8 sheets at #70 = 560 pounds. . . . . . . . . . . . . .8 sheets at #118 = 944 pounds. . . . . . . . . . . . . . . . . . . . . . . .8 sheets at #24 = 192 pounds
Edit: It is common in the composites world to bond in blocks of aluminum, titanium and even solid carbon blocks, that later, can be drilled and tapped for fasteners. The idea is to spread the load or to eliminate point loading in a sandwich panel or foam-cored product.
Last edited:
awheeler
Member
Yes threaded inserts work great when glued in. I have a bunch of rivnuts left over from our van build that we will be using.Thanks for taking the time to share your build. It's hard enough to get a project completed let alone document it.
You mentioned screw retention. Do you think threaded inserts would hold when bonded into the coosa composites?
McMaster-Carr
McMaster-Carr is the complete source for your plant with over 595,000 products. 98% of products ordered ship from stock and deliver same or next day.McMaster-Carr
McMaster-Carr is the complete source for your plant with over 595,000 products. 98% of products ordered ship from stock and deliver same or next day.
awheeler
Member
These look like some nice panels. It's amazing how many choices there are these days. There are also some really nice honey comb panels which are what Earthcruiser uses for their camper builds(no screw retention with those either). I am using aluminum angle iron as a means to secure and screw things in to reduce point loading on the camper box. I'm waiting for the special aluminum primer to use with this glue, should be arriving this week.In lieu of Coosa (#70 in 48" x 96" x 1"), consider using Plascore Polypropylene sheeting skinned with fiberglass or a PVC foam-based sandwich panel product called Celtec. A 48" x 96" x 1" sheet of Celtec weighs 118 pounds, so it's heavier than Coosa, but you can use less of it in a given application, and nail and screw holding are both excellent, at 35 pounds and 300 pounds, respectively.
A Polypropylene cored sandwich panel weighs 24 pounds if constructed using a 48" x 96" x 1" sheet of 5 PPCF core (#13.333) and fiberglass skins that weigh #10.67. The skins consist of two layers of 6 ounce/200 GSM cloth per side and an equal amount, by weight, of epoxy resin, as an estimate. This is massive overkill for cabinets and furniture, but in a weight-conscious application such as a camper or a small boat, this product is fantastic. The sandwich panel is stronger than either of the other two products, at 34% and 20% of their weight, respectively.
8 sheets at #70 = 560 pounds. . . . . . . . . . . . . .8 sheets at #118 = 944 pounds. . . . . . . . . . . . . . . . . . . . . . . .8 sheets at #24 = 192 pounds
Edit: It is common in the composites world to bond in blocks of aluminum, titanium and even solid carbon blocks, that later, can be drilled and tapped for fasteners. The idea is to spread the load or to eliminate point loading in a sandwich panel or foam-cored product.
awheeler
Member
Day 2 Build
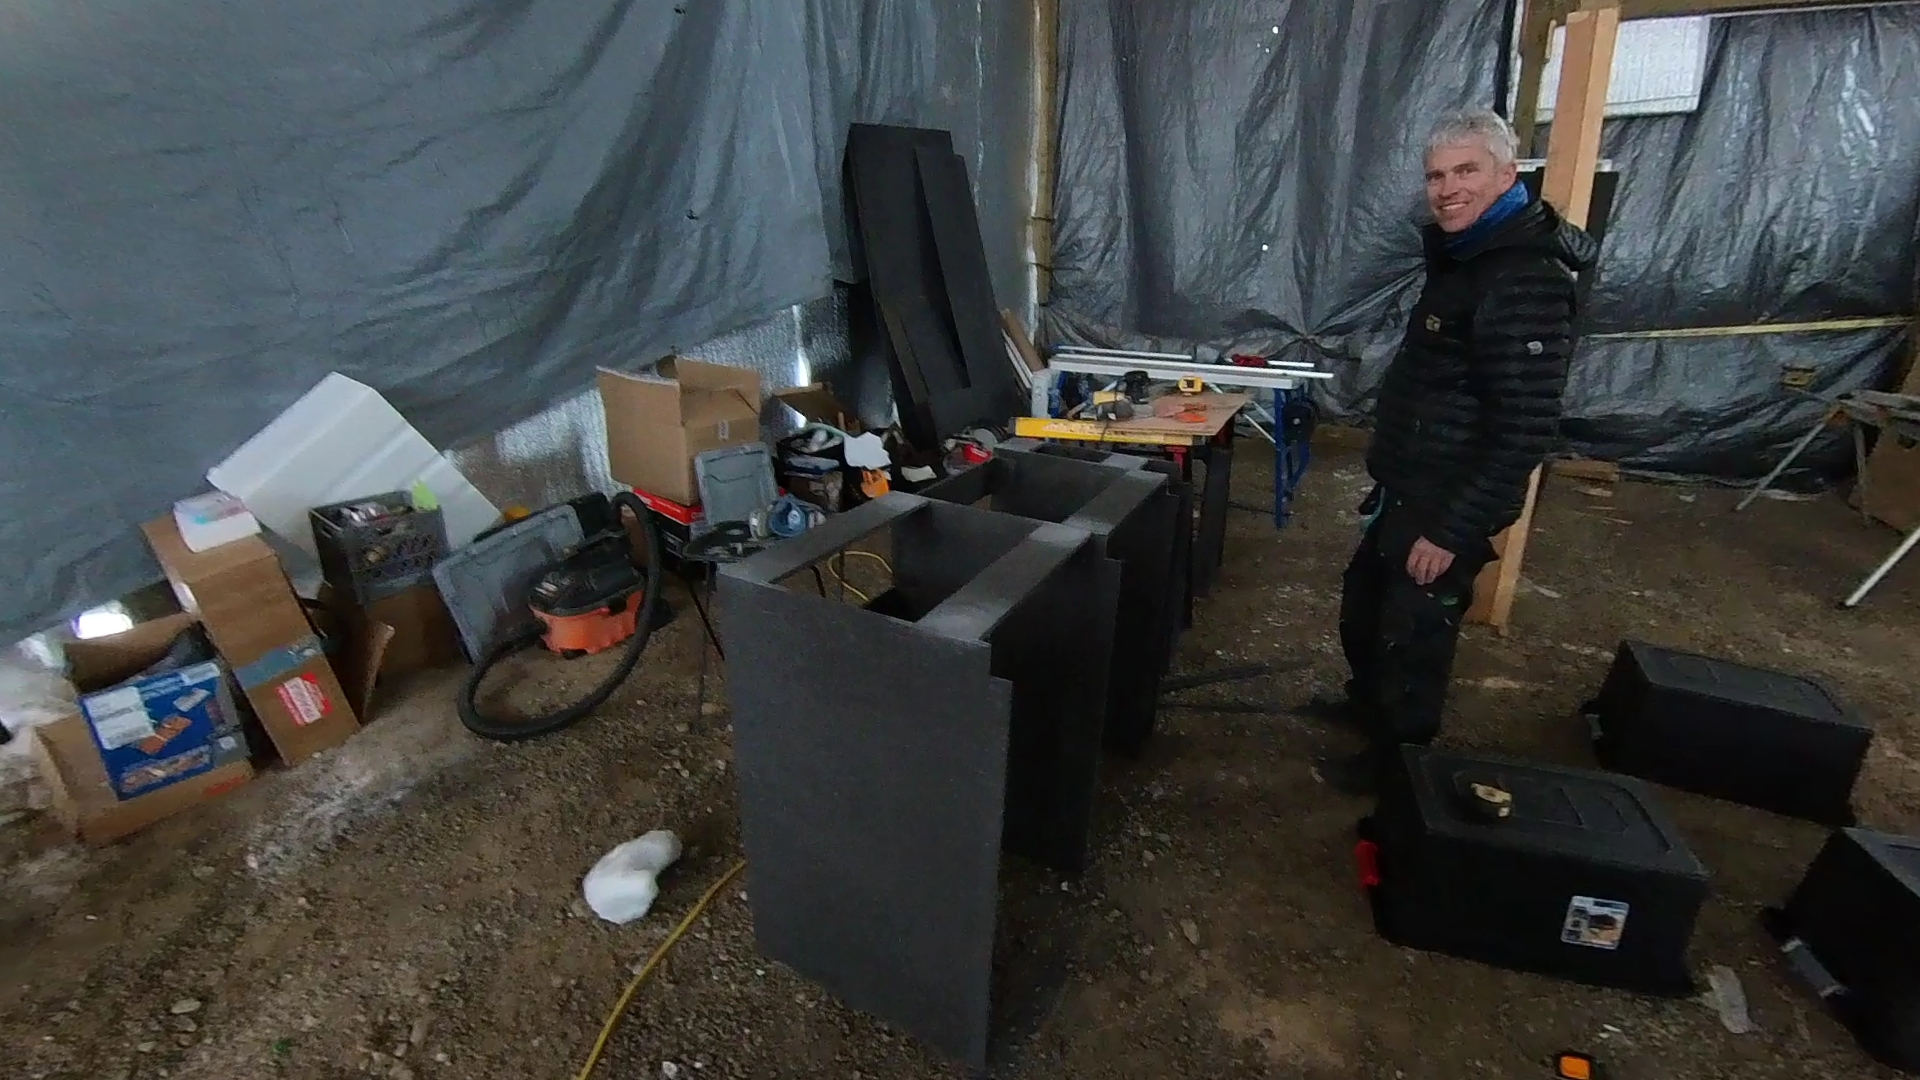
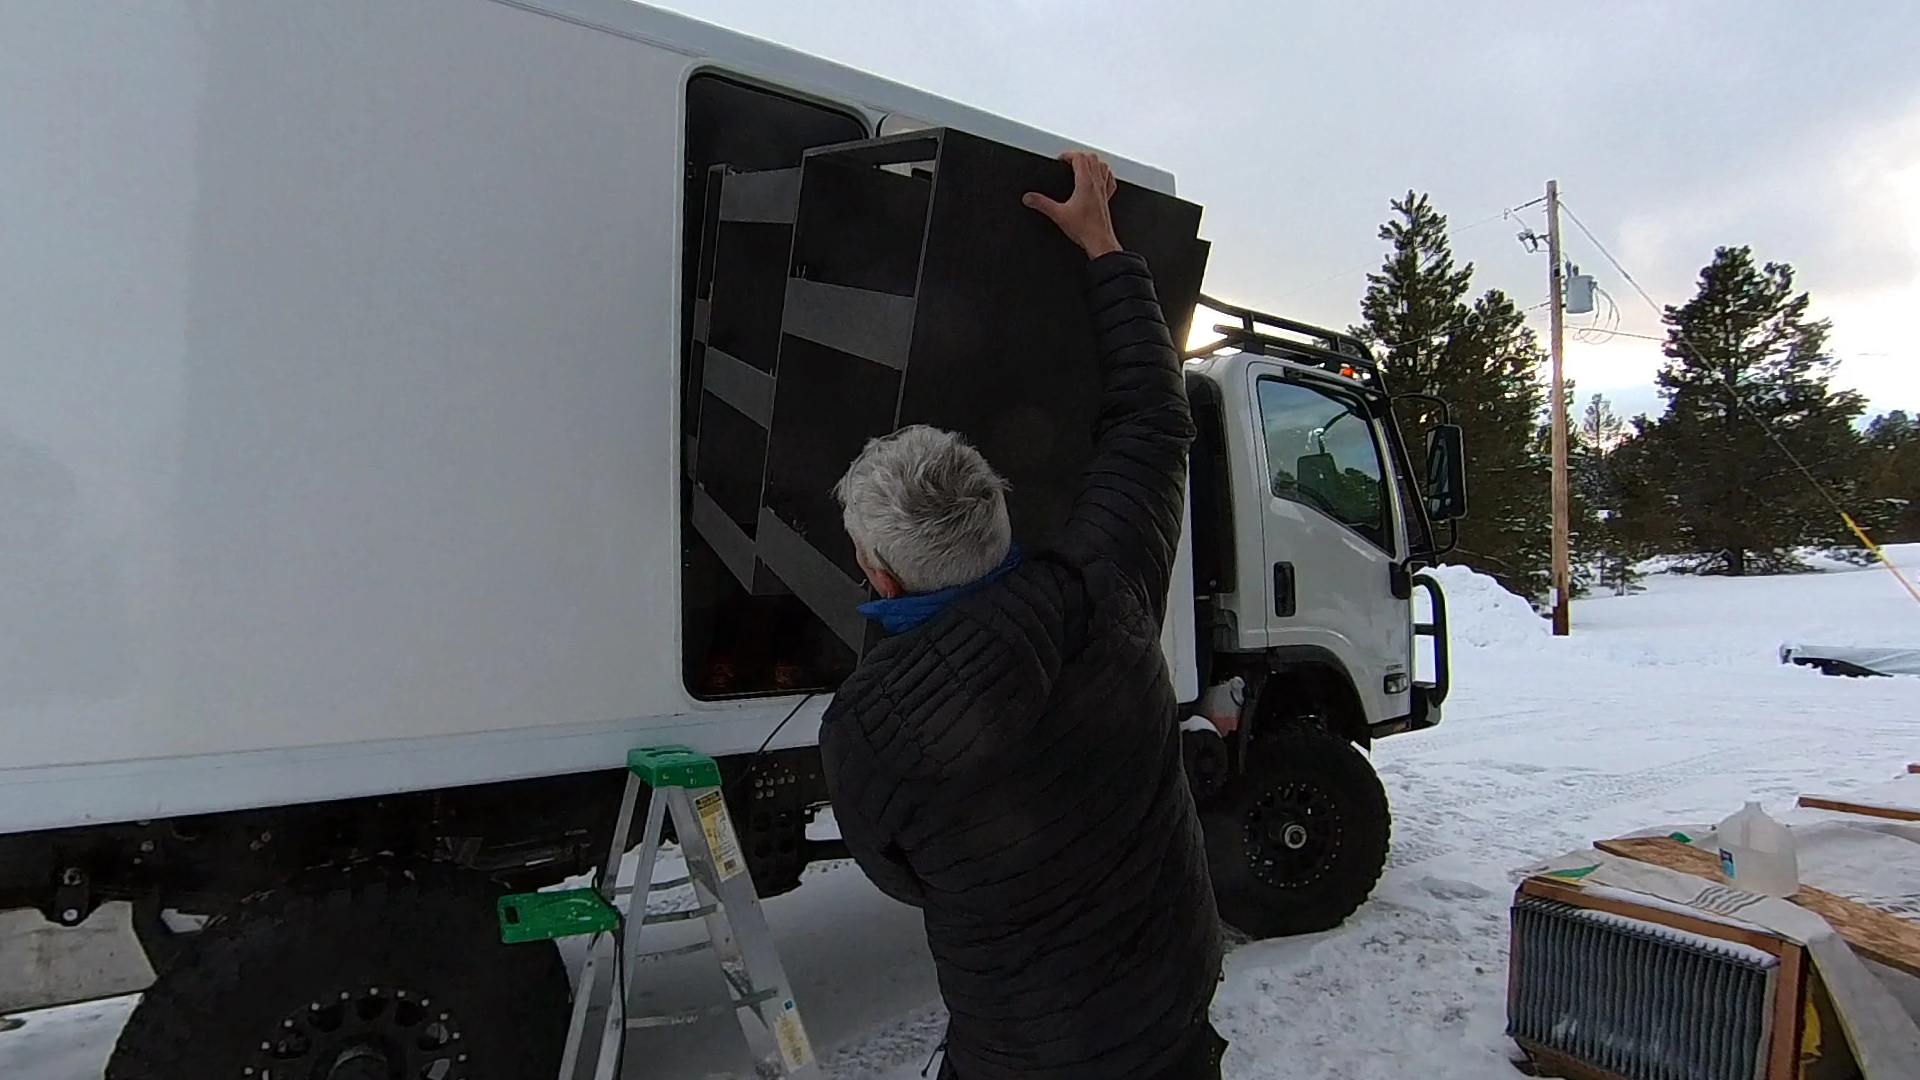
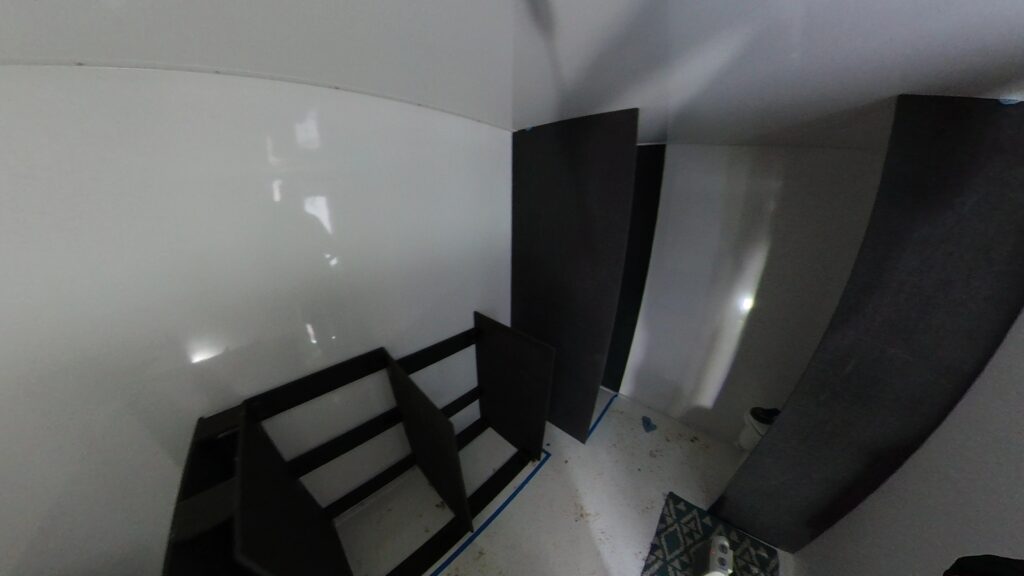
We are continuing to battle single digit temperatures but we did manage to make a bit more progress. We got the majority of the interior walls and kitchen area put together. I built the kitchen cabinet a while back to make sure this Coosa board was going to work for us. All was good except the cabinet was 1/4 too big to fit through the door. Measure once cut twice!!!
I built the kitchen cabinet using epoxy, fiberglass and pocket screws because I knew that would be plenty strong. The glue for the Total Composites box works really well on this Coosa board and I probably could have just used that to make things a bit easier.
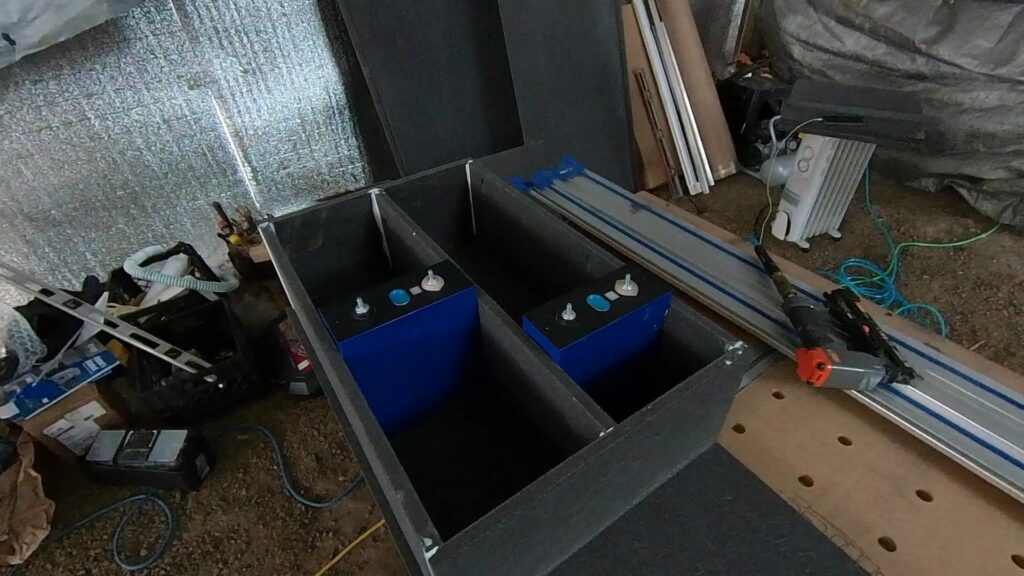
Next we started working on the battery box for the 16 Lithium cells. Still working out how to secure them but I have a few ideas I’ll try tomorrow. Because Lithium batteries like to be packed in snug I built the box out of 5/8 Coosa board to provide a little more rigidity over the 1/2″. I then plan to slide in thin 1/16” cutting board pieces to adjust how snug the batteries are.
Also got the video up showing our interior design on Google Sketchup, you can watch that HERE. Should help give a better idea of the layout for our build.
We are continuing to battle single digit temperatures but we did manage to make a bit more progress. We got the majority of the interior walls and kitchen area put together. I built the kitchen cabinet a while back to make sure this Coosa board was going to work for us. All was good except the cabinet was 1/4 too big to fit through the door. Measure once cut twice!!!
I built the kitchen cabinet using epoxy, fiberglass and pocket screws because I knew that would be plenty strong. The glue for the Total Composites box works really well on this Coosa board and I probably could have just used that to make things a bit easier.
Next we started working on the battery box for the 16 Lithium cells. Still working out how to secure them but I have a few ideas I’ll try tomorrow. Because Lithium batteries like to be packed in snug I built the box out of 5/8 Coosa board to provide a little more rigidity over the 1/2″. I then plan to slide in thin 1/16” cutting board pieces to adjust how snug the batteries are.
Also got the video up showing our interior design on Google Sketchup, you can watch that HERE. Should help give a better idea of the layout for our build.
CORE_vehicles
Member
So awesome!!!!!!! You both are killin it!!!!!!
Let me know if you don't want this in here and I will gladly remove it.
1. Potted Inserts
The diagram below outlines the basic steps for a blind insert installation. Thru inserts are done is a very similar process but have a second installation tab that is applied to the back side of the panel to keep it flush with the back skin and prevent the potting compound from escaping during the injection process.
Also worth noting is that step 3 is considered optional by most people as the surrounding cells will already be opened up during the drilling operation. Reaming out additional area for added adhesive volume is typically only going to benefit you when using a small cell size (ie 1/8” cell) where there might be minimal voids evident with the surrounding core after drilling.

Potted inserts come in an endless variety of options to match your fastener preference. Blind/thru/threaded/clearance/floating… the list goes on and on.
Here are just a couple of the sources we use on a regular basis for fastener hardware (rivnuts/potted inserts/bond plates/t-nuts):
McMaster-Carr
Clipnuts
Shur-Lok
Young Engineers
2. Treveria fabric (screw retention by way of laminated filament binding, aka a “bulking material”)
When laminated into your composite part at fastener locations, Treveria acts like a steel wool layer and binds/grips to self-tapping screws during fastening. As it grips and binds it essentially forms a plugged mass behind the laminate surface to enhance pull-out strength. I’m having a bit of an issue finding all my resource material on it at the moment but I can tell you it is available through most marine supply and composite distributors. Composites One is a good place to start.
Something to keep in mind, however, is that this option does require a pretty decent amount of resin to fully wet out and will most likely show through on the finished surface unless the core is recessed in a similar amount to account for the fabric thickness.
3. Fastening methods – an overview.
There are tons of other ways to fasten to honeycomb composites. The illustration below goes over some of the most common methods and of course there are a million variations for how to achieve each.

1. Potted Inserts
The diagram below outlines the basic steps for a blind insert installation. Thru inserts are done is a very similar process but have a second installation tab that is applied to the back side of the panel to keep it flush with the back skin and prevent the potting compound from escaping during the injection process.
Also worth noting is that step 3 is considered optional by most people as the surrounding cells will already be opened up during the drilling operation. Reaming out additional area for added adhesive volume is typically only going to benefit you when using a small cell size (ie 1/8” cell) where there might be minimal voids evident with the surrounding core after drilling.
Potted inserts come in an endless variety of options to match your fastener preference. Blind/thru/threaded/clearance/floating… the list goes on and on.
Here are just a couple of the sources we use on a regular basis for fastener hardware (rivnuts/potted inserts/bond plates/t-nuts):
McMaster-Carr
Clipnuts
Shur-Lok
Young Engineers
2. Treveria fabric (screw retention by way of laminated filament binding, aka a “bulking material”)
When laminated into your composite part at fastener locations, Treveria acts like a steel wool layer and binds/grips to self-tapping screws during fastening. As it grips and binds it essentially forms a plugged mass behind the laminate surface to enhance pull-out strength. I’m having a bit of an issue finding all my resource material on it at the moment but I can tell you it is available through most marine supply and composite distributors. Composites One is a good place to start.
Something to keep in mind, however, is that this option does require a pretty decent amount of resin to fully wet out and will most likely show through on the finished surface unless the core is recessed in a similar amount to account for the fabric thickness.
3. Fastening methods – an overview.
There are tons of other ways to fasten to honeycomb composites. The illustration below goes over some of the most common methods and of course there are a million variations for how to achieve each.

pinion-gear
New member
Because Lithium batteries like to be packed in snug I built the box out of 5/8 Coosa board to provide a little more rigidity over the 1/2″. I then plan to slide in thin 1/16” cutting board pieces to adjust how snug the batteries are.
These same LFP cells have been working great for me. But as the cells expand and contract based on their state of charge I ended up using springs inside my case to set the required pressure on the cells. Found the idea over on the diysolorforum.
View attachment 709077
Attachments

awheeler
Member
Finally getting our build videos up.
Week 1 of the build progress is posted,
Expedition Camper DIY Build Week 1 - EarthCruiser CORE with Total Composites Box
We did have a bearing blow on us that was due to an improperly seated bearing race. The bearings were put in by the axle manufacturer, Fusion.

EarthCruiser promptly had us return to them and pulled all bearings apart to make sure all was good.
awheeler
Member
Excellent new way of building cabinetry. Way better than aluminum. Can’t wait to see it in person.
See ya in Flagstaff!
Sent from my iPhone using Tapatalk