You are using an out of date browser. It may not display this or other websites correctly.
You should upgrade or use an alternative browser.
You should upgrade or use an alternative browser.
Rango.....1942 Willys MB
- Thread starter Metcalf
- Start date
Metcalf
Expedition Leader
another few hours in the shop.....
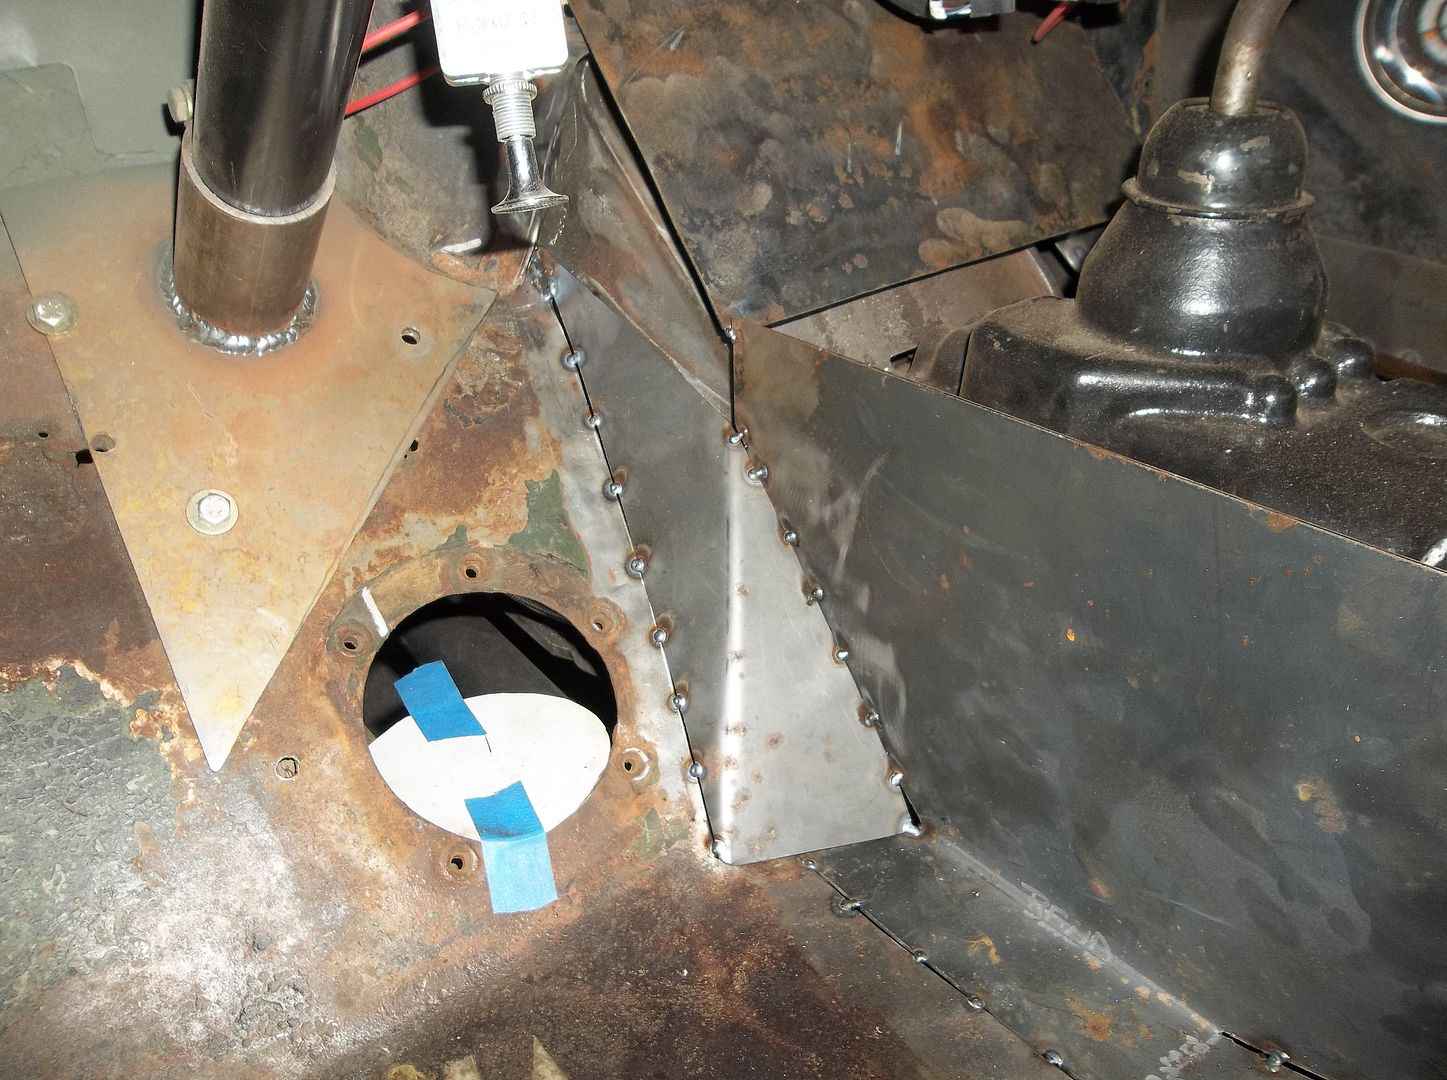
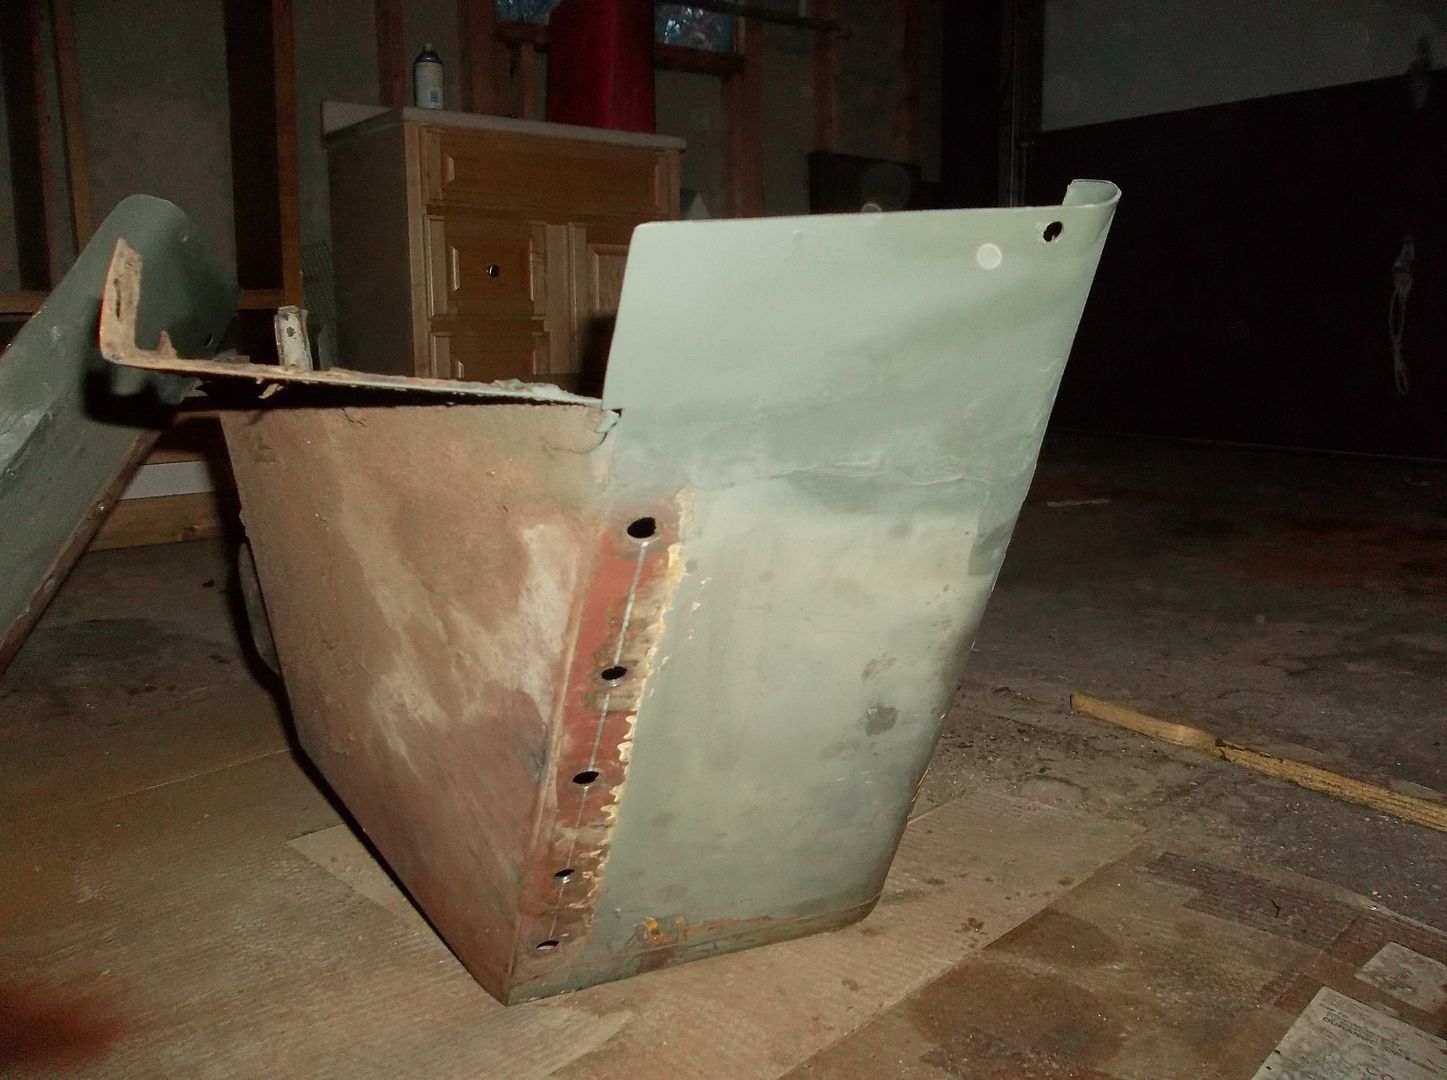
This panel was a pain in the rear. It is a fairly simple panel but was a total pain to bend a fit in such a small space. I couldn't really tweak the panel as much as the larger panels. Make a new cardboard template since everything wasn't in the exact same spot, cut a blank out, bend, hammer, grind, grind, grind to fit, grind again, hammer, bend, grind, sand, grind, tweak, then weld.
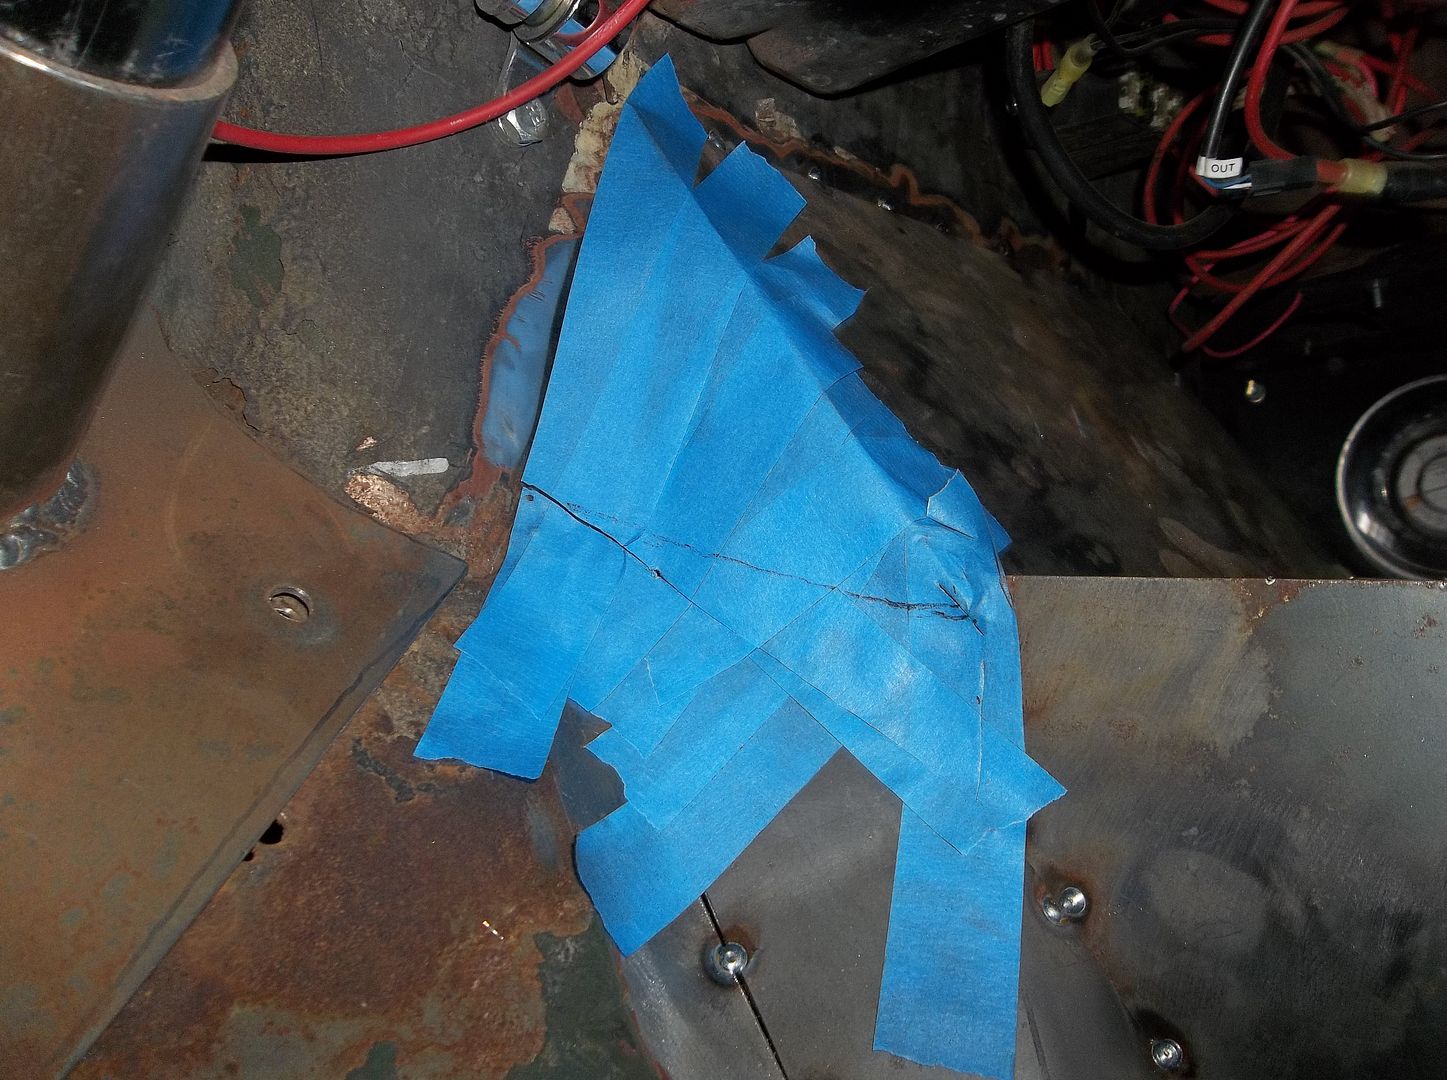
Return of the blue tape! This technique works really well for making template for odd shaped panels when you can't trace a poster board pattern at all. Tape the area you want to pattern in a few layers and then trim it out with a razor blade.
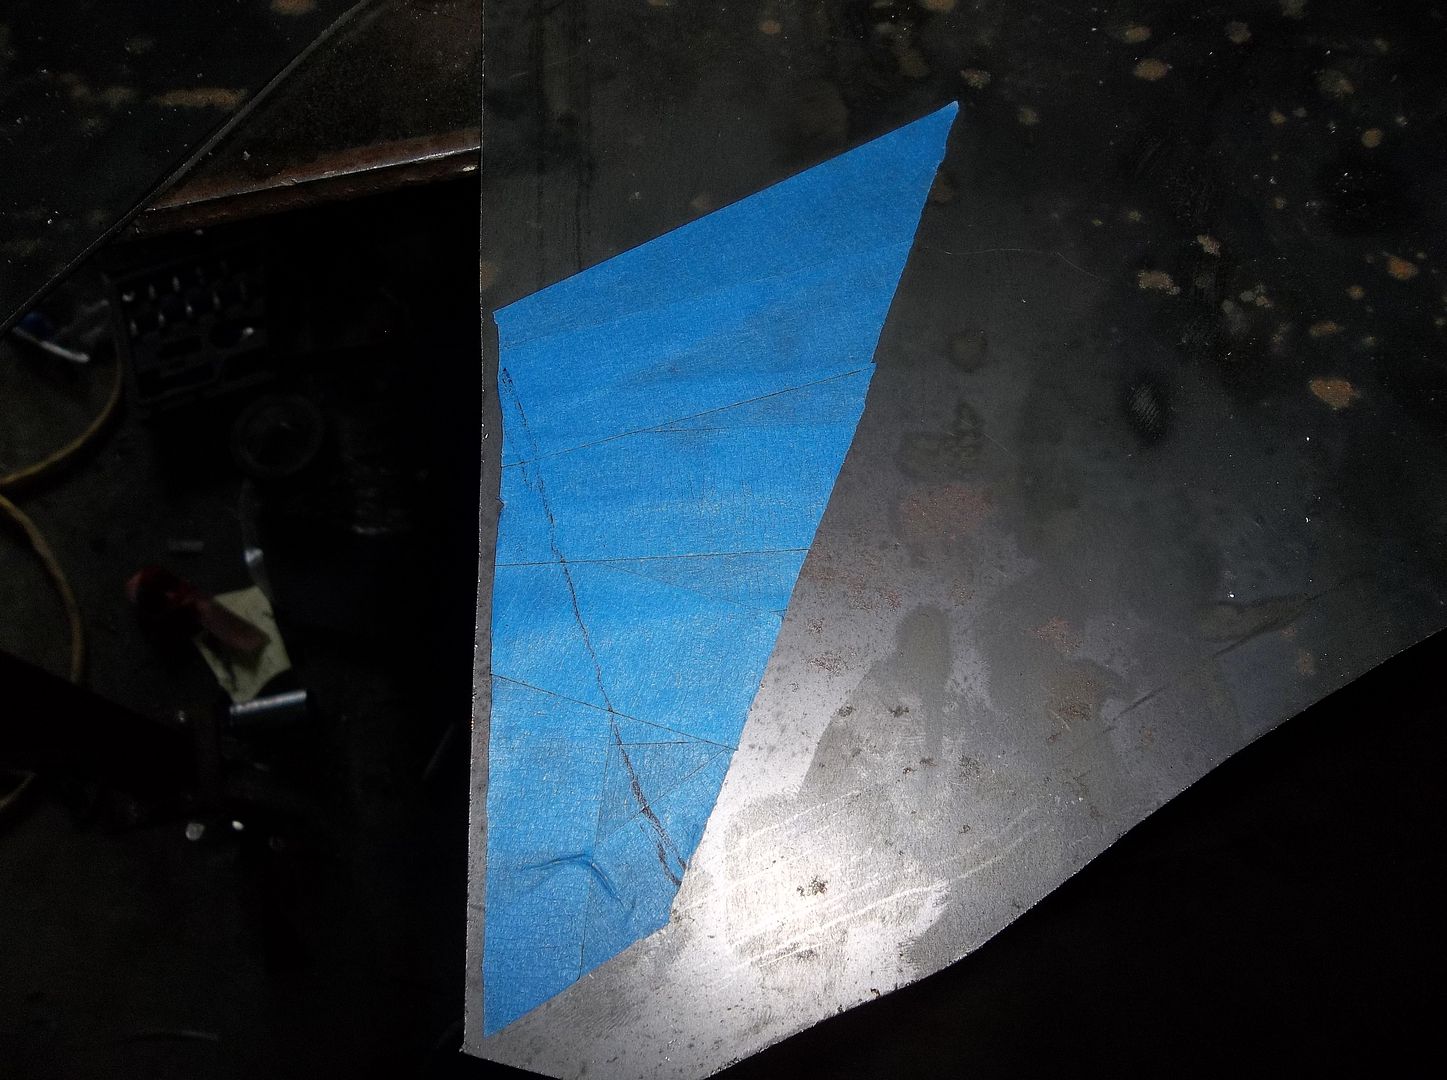
Once the pattern is free you can stick it directly on the metal to make a pattern. Make sure to leave your self a little extra on the edges. I usually use about 1/8" on the edges of the panel to allow a little bit extra to sand down for a proper fit.
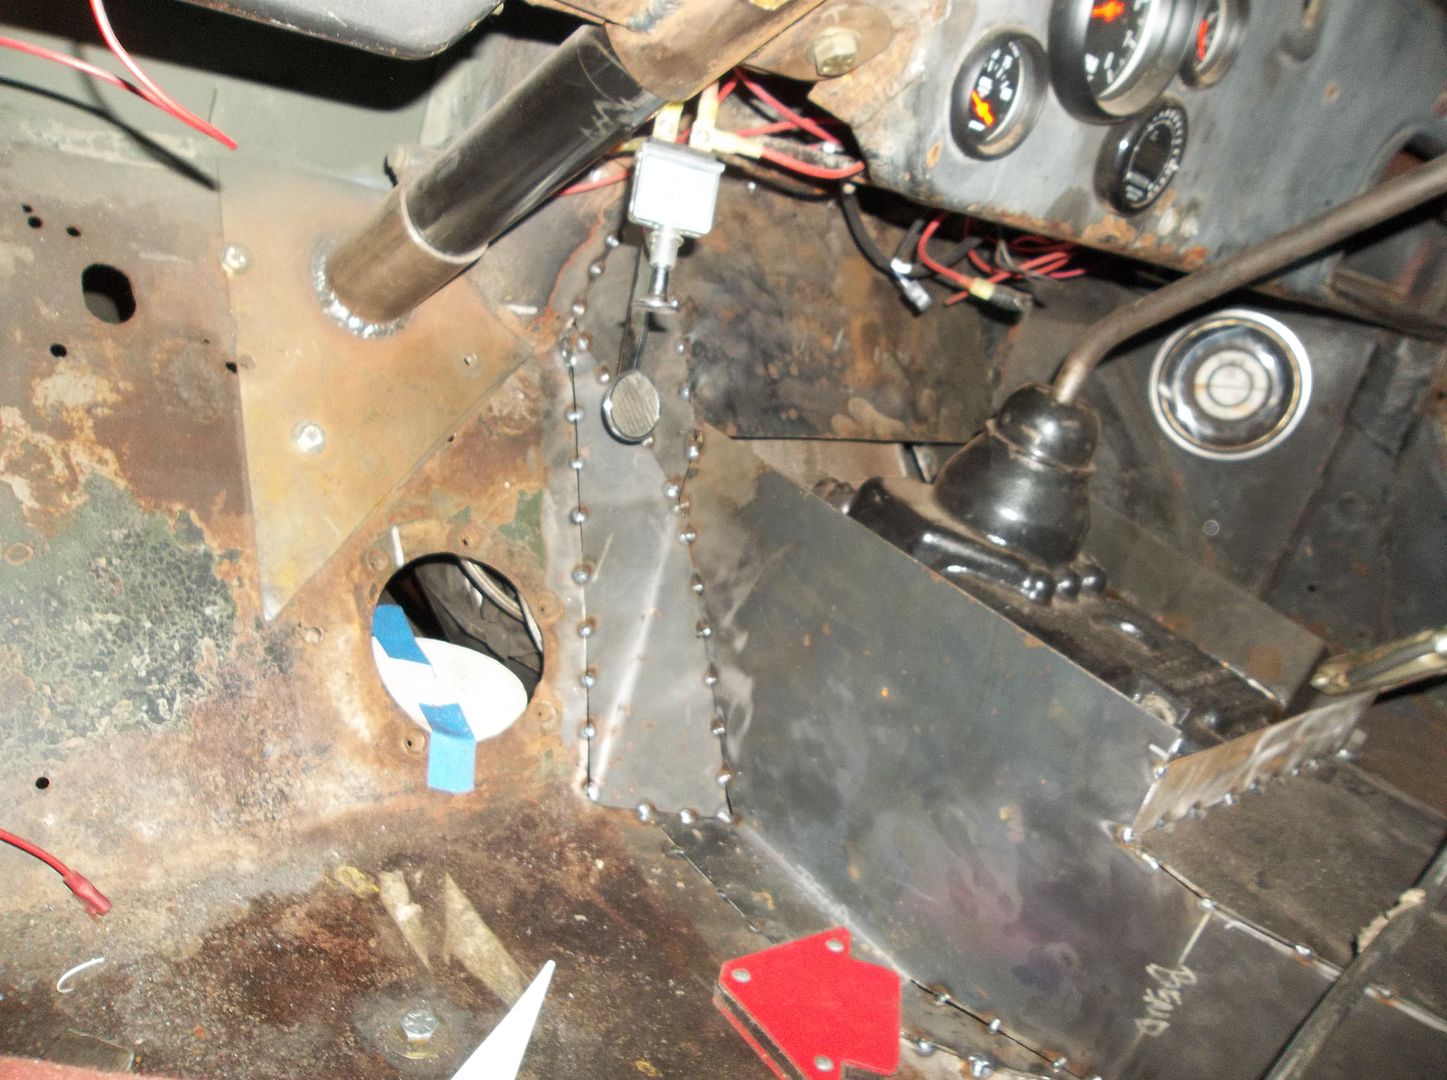
After a lot of fitting I was able to tack in the last small panel.....a lot of fitting....
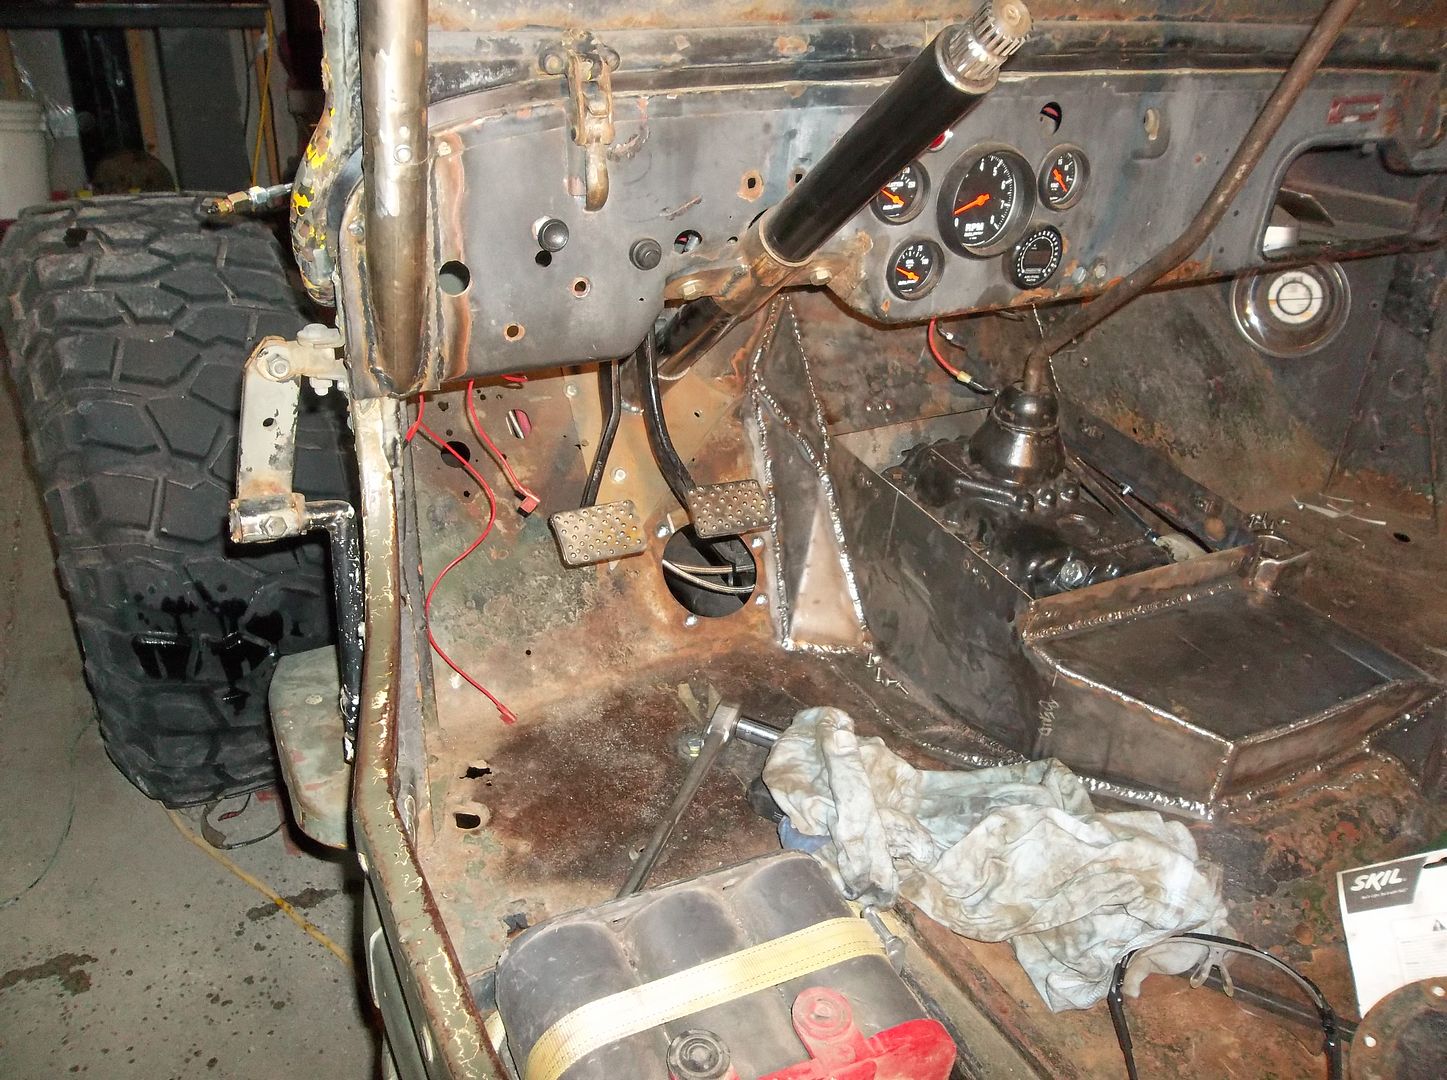
The area around the gas pedal is much better than the last version. After some playing around with the pedal I was able to flip the arm back around to the normal position AND lower the pedal a notch or two. I think the pedal is overall about 1-2" lower than it was before with much better room around the right foot...
A quick test fit on the top panel is showing a pretty decent fit from the cardboard templates to the steel weld in unit. I am pretty happy with that. Next I will make all the covers....fun. At least those parts can be wasted if I mess up since they just bolt in.
Fun Stuff
This panel was a pain in the rear. It is a fairly simple panel but was a total pain to bend a fit in such a small space. I couldn't really tweak the panel as much as the larger panels. Make a new cardboard template since everything wasn't in the exact same spot, cut a blank out, bend, hammer, grind, grind, grind to fit, grind again, hammer, bend, grind, sand, grind, tweak, then weld.
Return of the blue tape! This technique works really well for making template for odd shaped panels when you can't trace a poster board pattern at all. Tape the area you want to pattern in a few layers and then trim it out with a razor blade.
Once the pattern is free you can stick it directly on the metal to make a pattern. Make sure to leave your self a little extra on the edges. I usually use about 1/8" on the edges of the panel to allow a little bit extra to sand down for a proper fit.
After a lot of fitting I was able to tack in the last small panel.....a lot of fitting....
The area around the gas pedal is much better than the last version. After some playing around with the pedal I was able to flip the arm back around to the normal position AND lower the pedal a notch or two. I think the pedal is overall about 1-2" lower than it was before with much better room around the right foot...
A quick test fit on the top panel is showing a pretty decent fit from the cardboard templates to the steel weld in unit. I am pretty happy with that. Next I will make all the covers....fun. At least those parts can be wasted if I mess up since they just bolt in.
Fun Stuff
Metcalf
Expedition Leader
Cover looks great man! I'll be raising my drivetrain for sure now that I've seen you do it, doesn't seem too bad. We were on CO few months back would have loved to see it live. Keep the flatties goin!
Not too bad, but a decent amount of work for sure.
With the stupid low stance of my little creation the extra belly clearance really helps out. Even aired down I have about 15-16" of clearance and everything is up out of the way enough that things don't get snagged too often. Even with the low pinion diffs the drivelines are up out of the way. Fun stuff.
Metcalf
Expedition Leader
A productive morning shift....
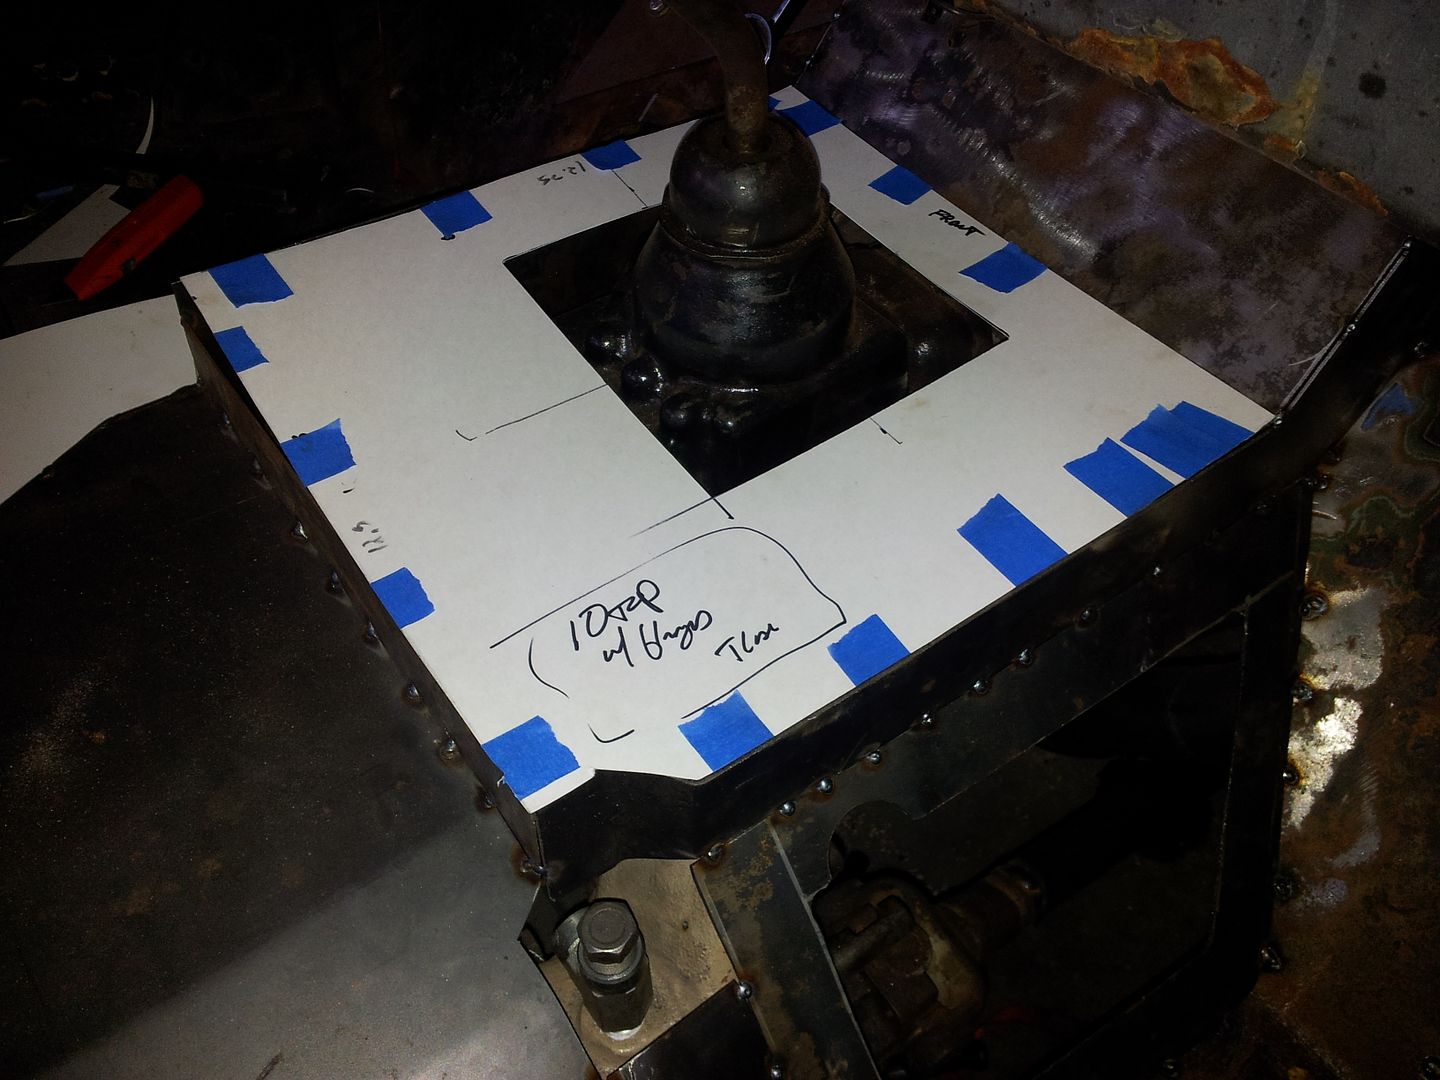
Test fitting the template for the top cover. All in all it was pretty close. I ended up trimming it a little bit but was able to use it. By the time you get to the last few panels on an assembly like this all bets are off on if the original template will fit. Test fit the template and make a few one if needed.
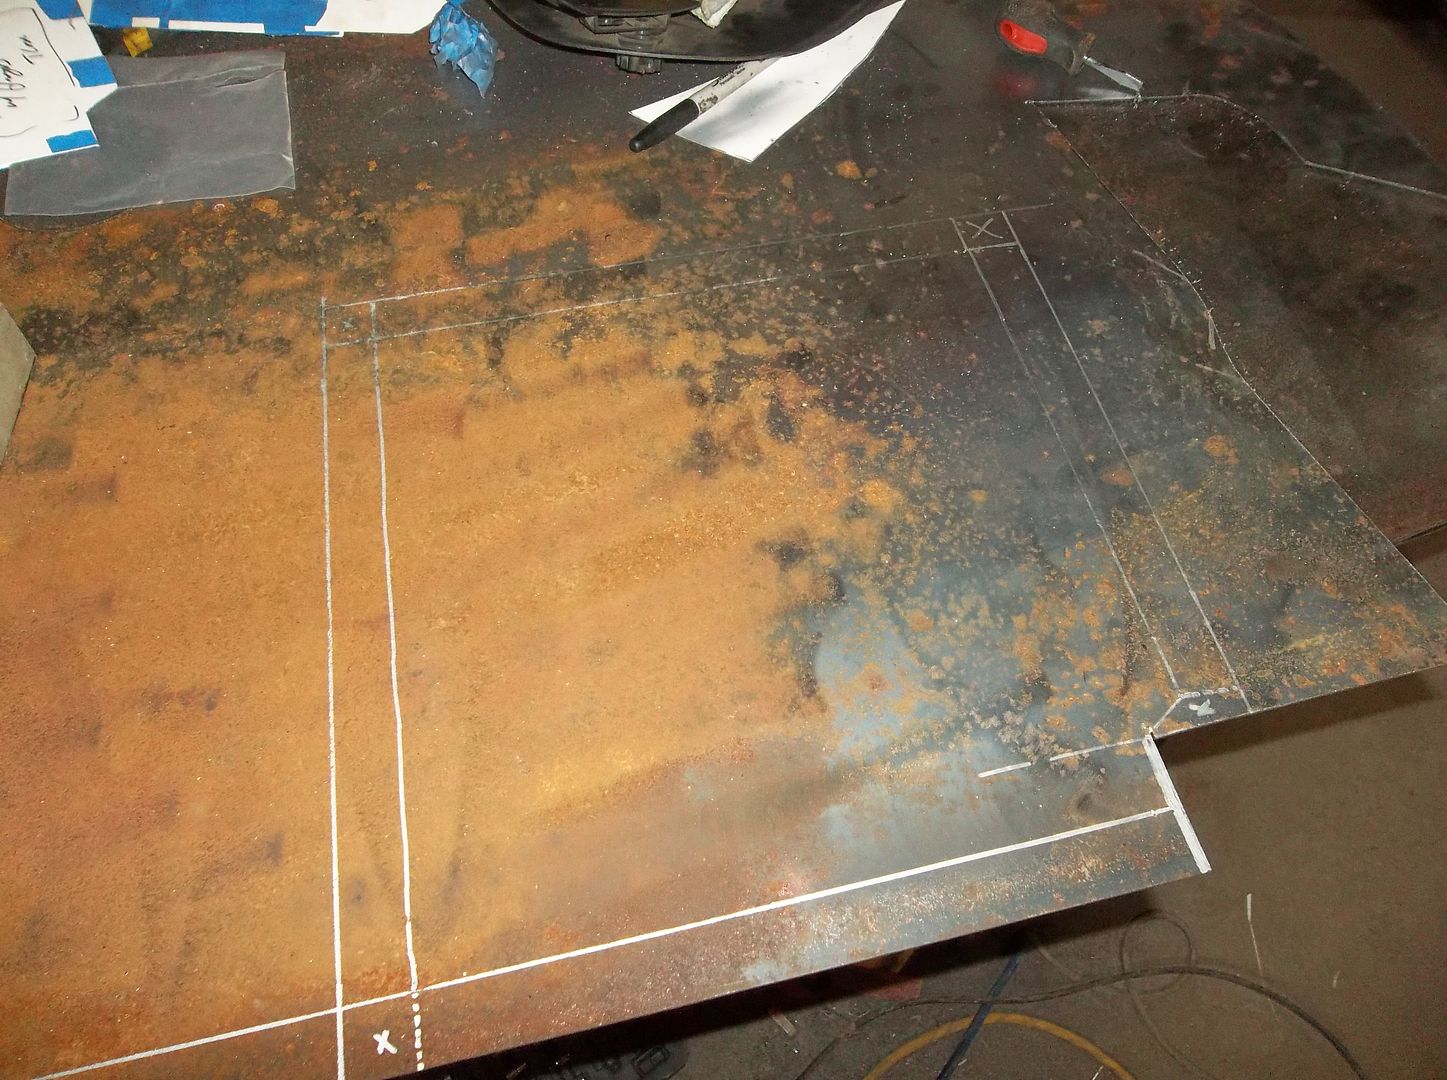
Layout of the top panel. Don't forget to add the flanges around the top! I am running a little short on clean sheetmetal. The chunk was sitting on the floor getting run over by the misses car this winter for a little too long. It ended up cleaning up with a prep disc pretty well.
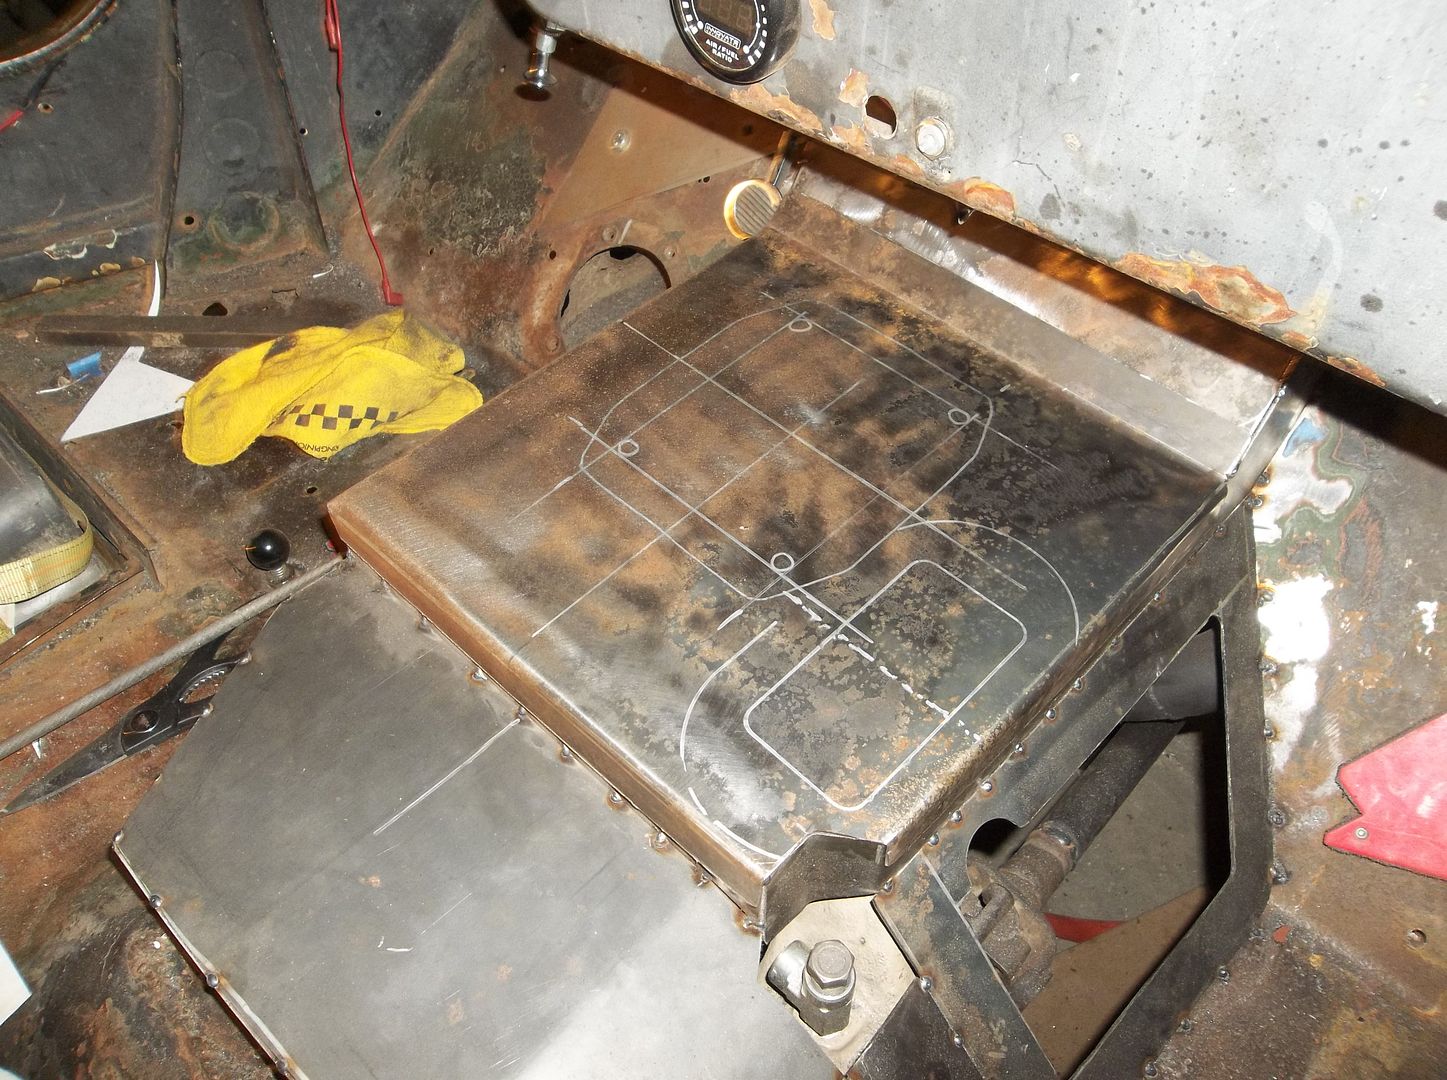
Here is the top panel after cutting it out and bending it. I just used the edge of the welding table to make the flanges. I clamped the edge to the table with a piece of heavy stock to help stabilize things. Then I just worked the flanges over with the deadblow. Make sure to check the position of all the flanges one after another as you fit the panel. Make some adjustments of the bend lines as needed.
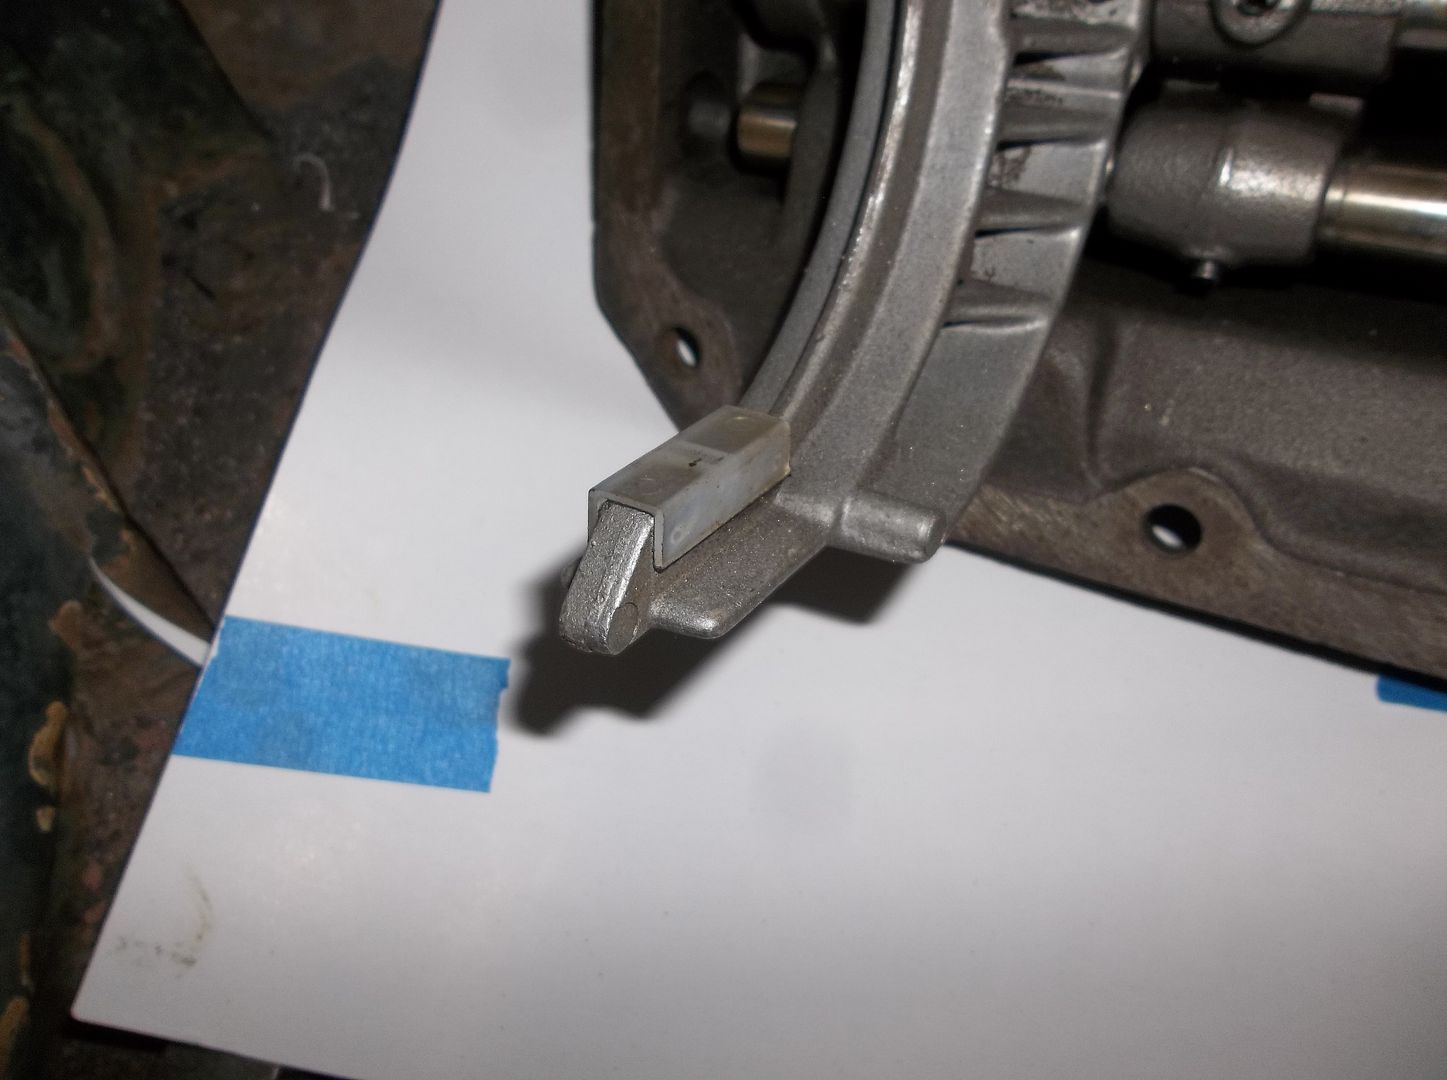
Don't forget the shift fork pads on your T18 if you have aluminum forks. I was able to find all 5 pads I needed from partsmike.com
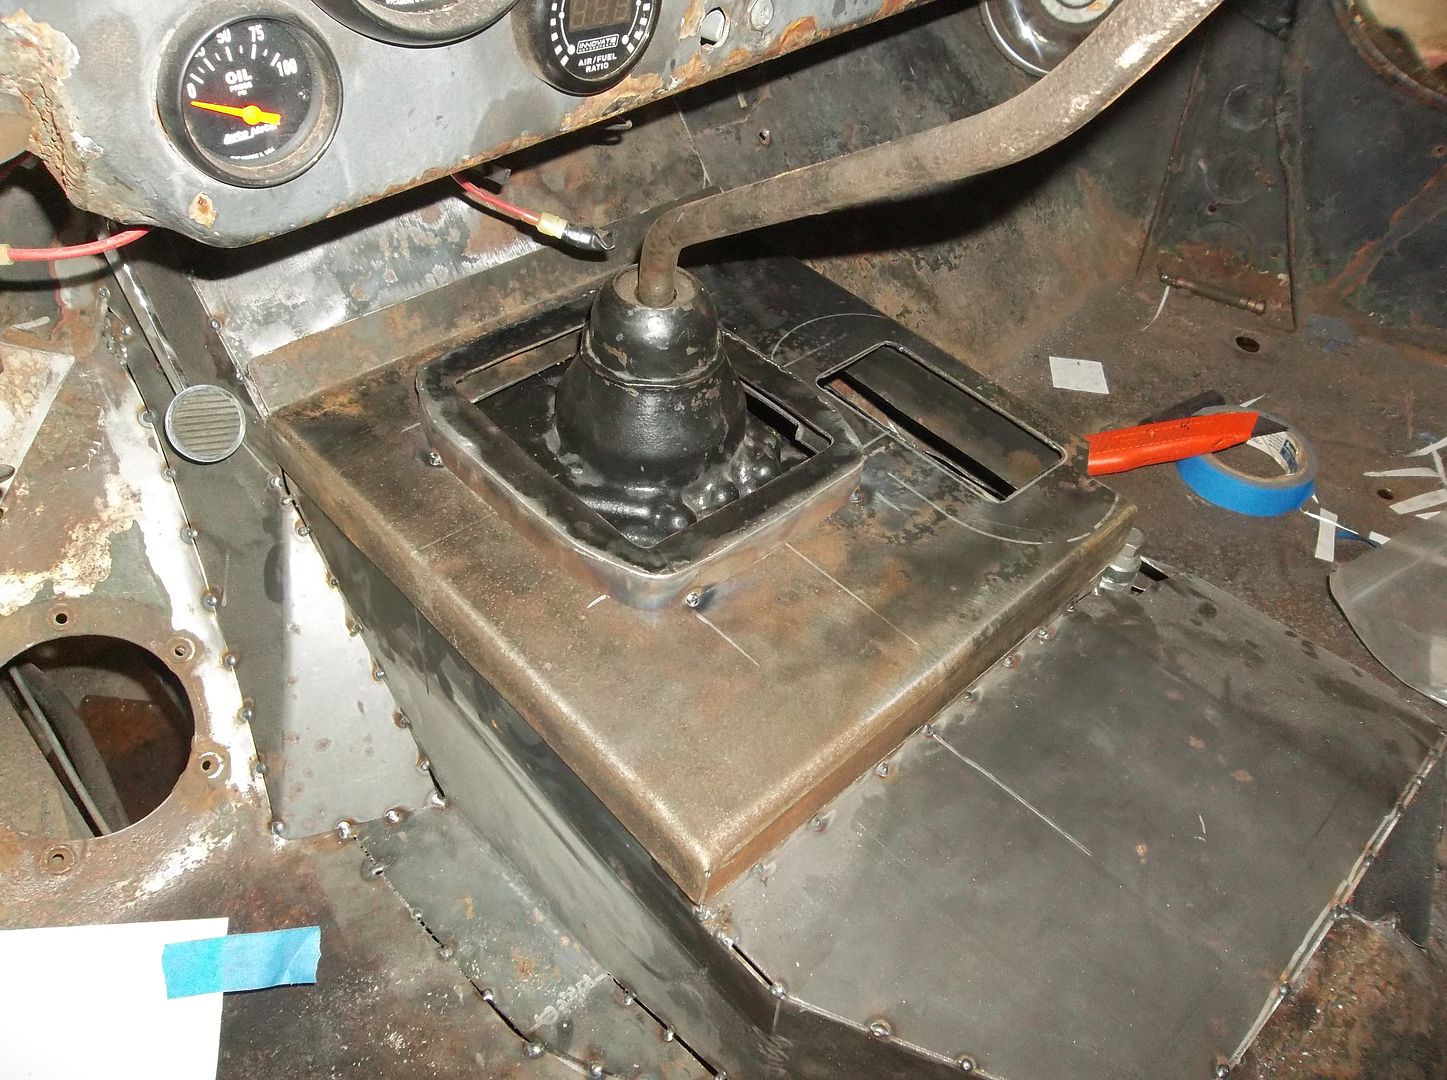
I ended up having to make this little hat feature for the transmission shift boot to sit on. There just wasn't enough clearance without it for the T18 shift housing.
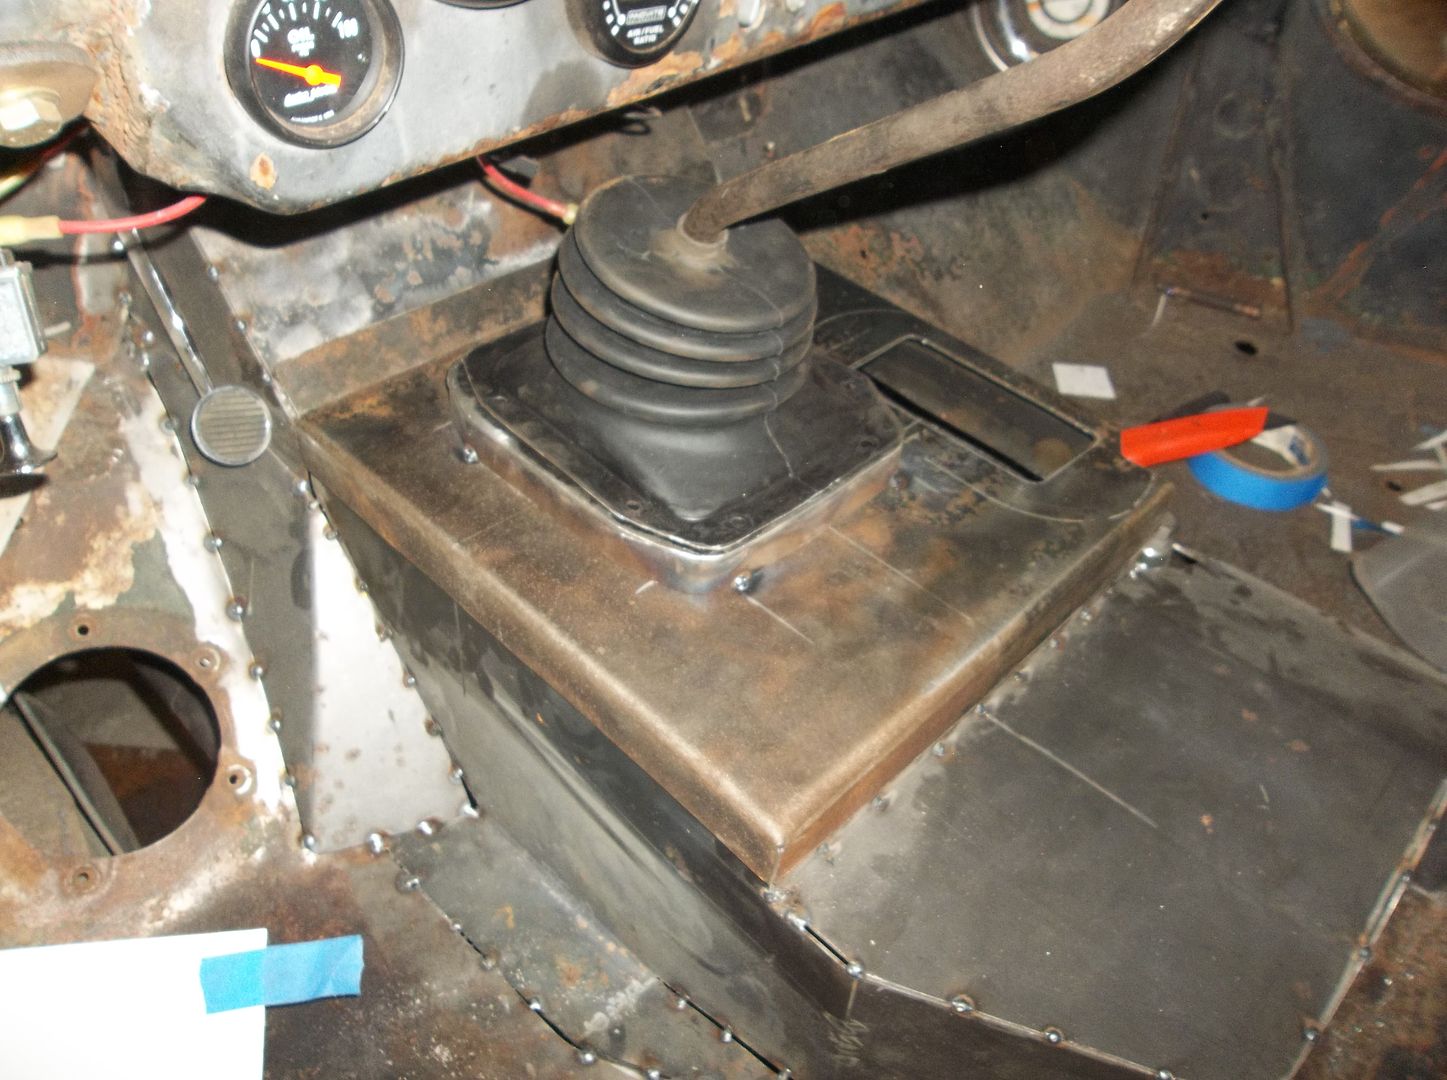
The boot is a 73-76 ford F100-150 version. It is pretty big and fits over the transmission shift tower pretty well. I think it will give a much better finished look when it is finally attached.
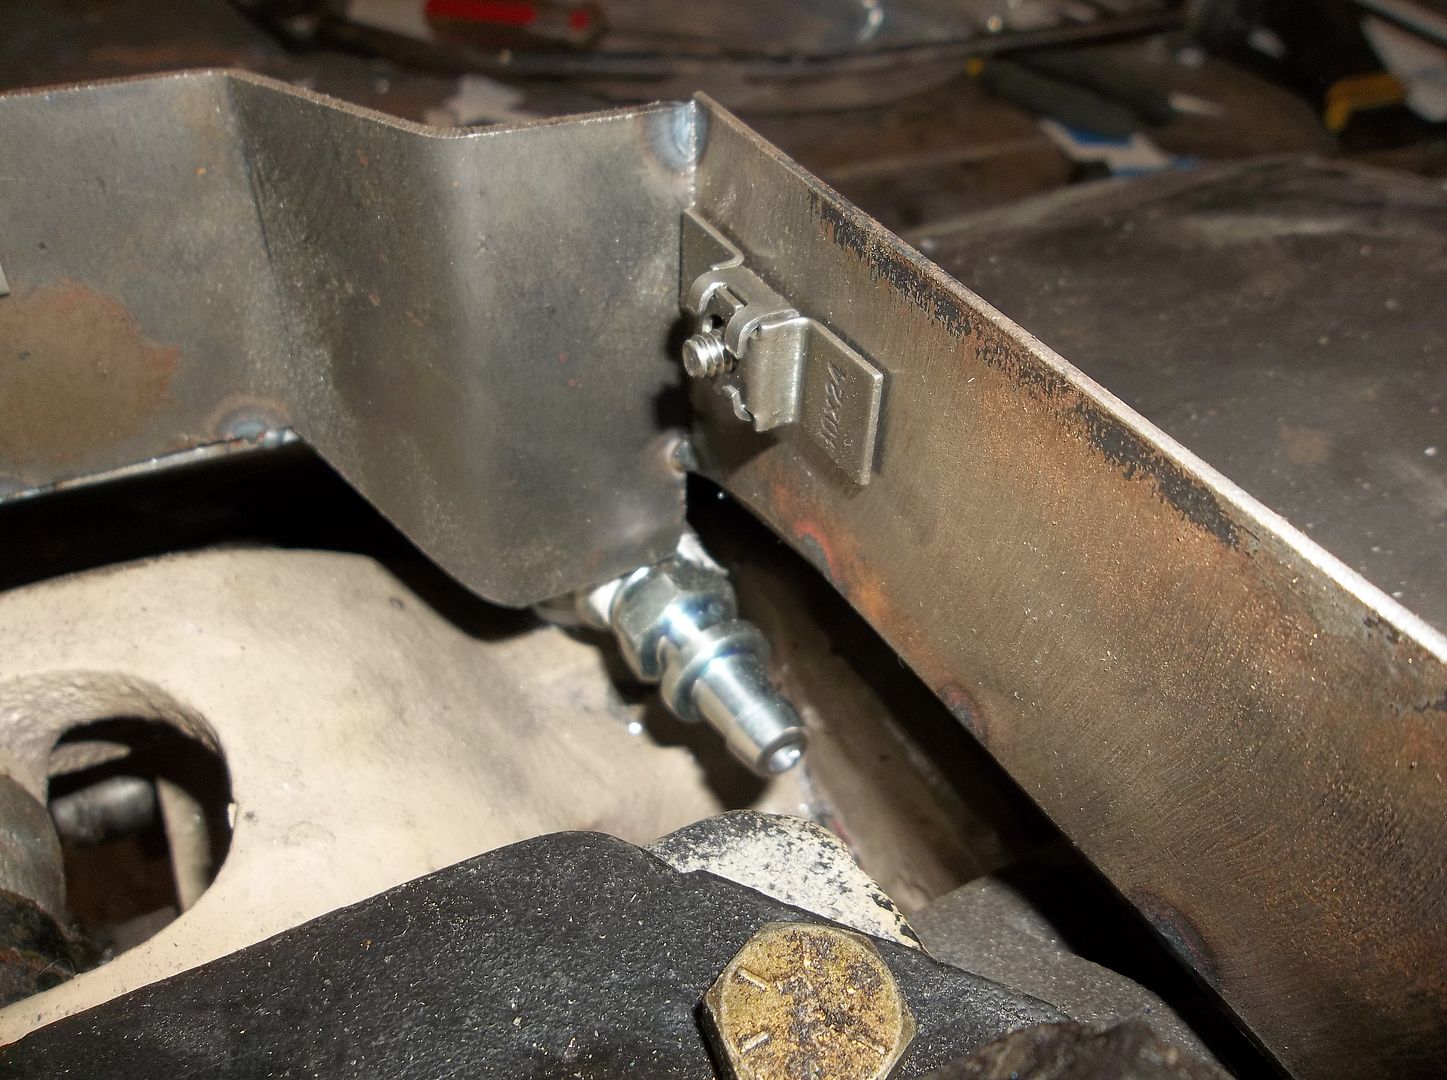
I used these little weld in 10-24 captured nuts to hold the top cover onto the main transmission tunnel. You can also see the vent fitting for the Dana 18 that I added with a fill port. I need to trim the tunnel a little more around it. I need a little cutoff wheel for the dremel....

You drill three holes for the captured nuts. Two get tack welded.
I needed a break and a trip to the hardware store for a few misc things. I still have one more panel to make for the front yoke access cover. I also need to clean up a few things and make a cover over the new D18 fill port.
Hopefully I will be able to wrap up the tunnel tonight and tomorrow!
Test fitting the template for the top cover. All in all it was pretty close. I ended up trimming it a little bit but was able to use it. By the time you get to the last few panels on an assembly like this all bets are off on if the original template will fit. Test fit the template and make a few one if needed.
Layout of the top panel. Don't forget to add the flanges around the top! I am running a little short on clean sheetmetal. The chunk was sitting on the floor getting run over by the misses car this winter for a little too long. It ended up cleaning up with a prep disc pretty well.
Here is the top panel after cutting it out and bending it. I just used the edge of the welding table to make the flanges. I clamped the edge to the table with a piece of heavy stock to help stabilize things. Then I just worked the flanges over with the deadblow. Make sure to check the position of all the flanges one after another as you fit the panel. Make some adjustments of the bend lines as needed.
Don't forget the shift fork pads on your T18 if you have aluminum forks. I was able to find all 5 pads I needed from partsmike.com
I ended up having to make this little hat feature for the transmission shift boot to sit on. There just wasn't enough clearance without it for the T18 shift housing.
The boot is a 73-76 ford F100-150 version. It is pretty big and fits over the transmission shift tower pretty well. I think it will give a much better finished look when it is finally attached.
I used these little weld in 10-24 captured nuts to hold the top cover onto the main transmission tunnel. You can also see the vent fitting for the Dana 18 that I added with a fill port. I need to trim the tunnel a little more around it. I need a little cutoff wheel for the dremel....
You drill three holes for the captured nuts. Two get tack welded.
I needed a break and a trip to the hardware store for a few misc things. I still have one more panel to make for the front yoke access cover. I also need to clean up a few things and make a cover over the new D18 fill port.
Hopefully I will be able to wrap up the tunnel tonight and tomorrow!
Metcalf
Expedition Leader
I ended up going back out to the shop again for another round...
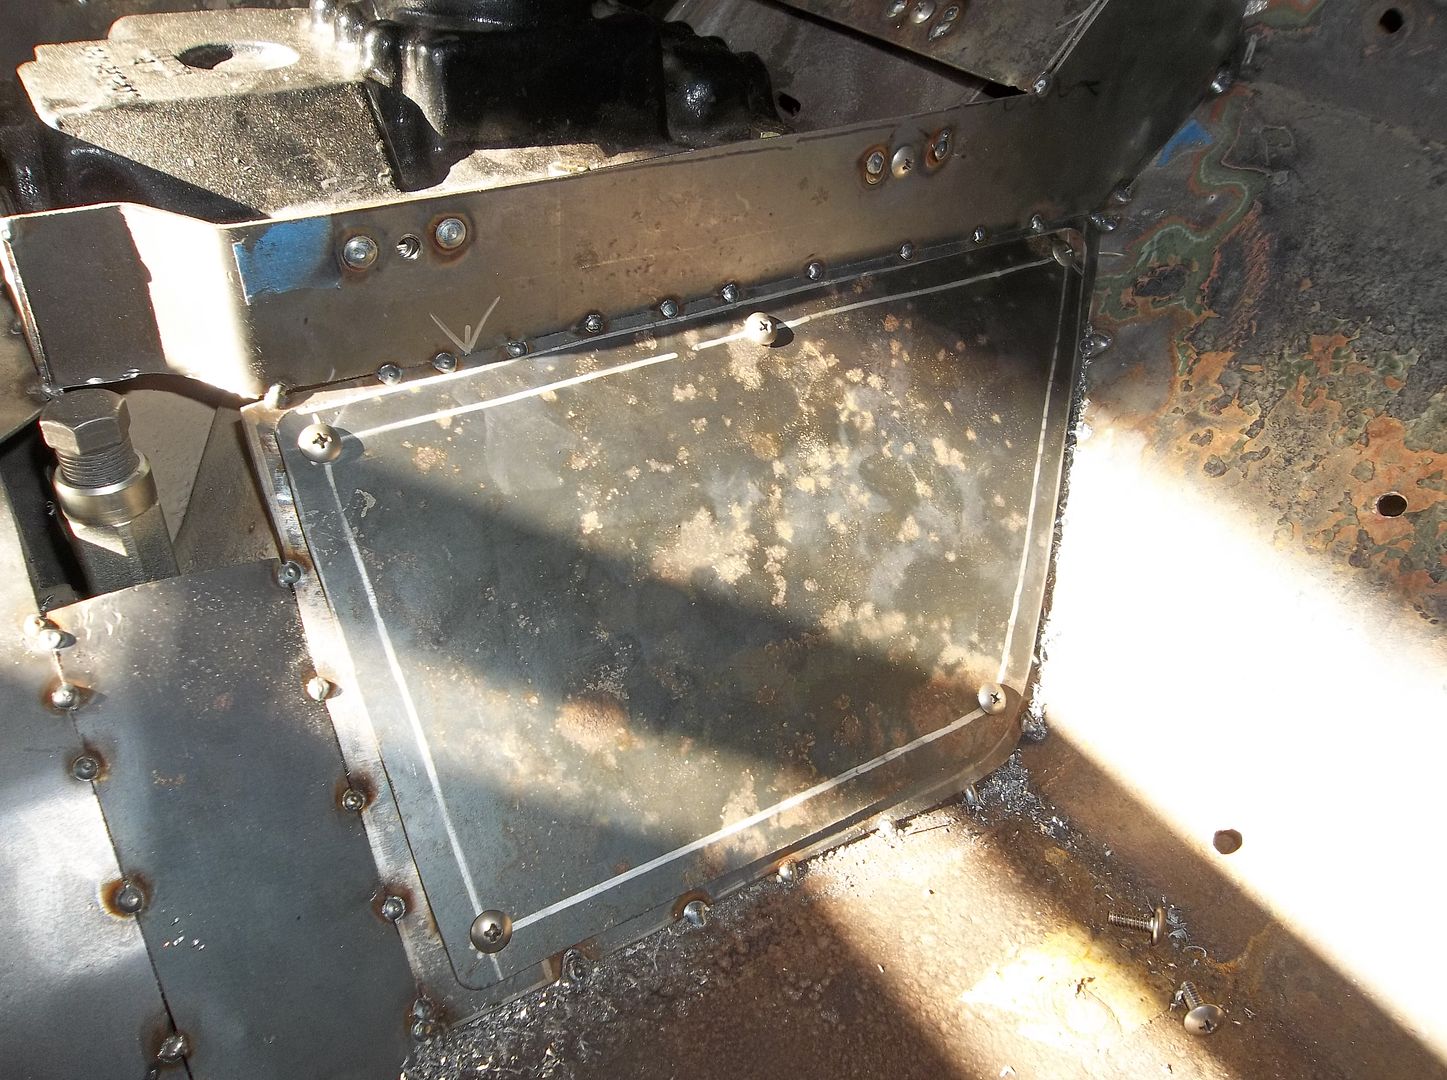
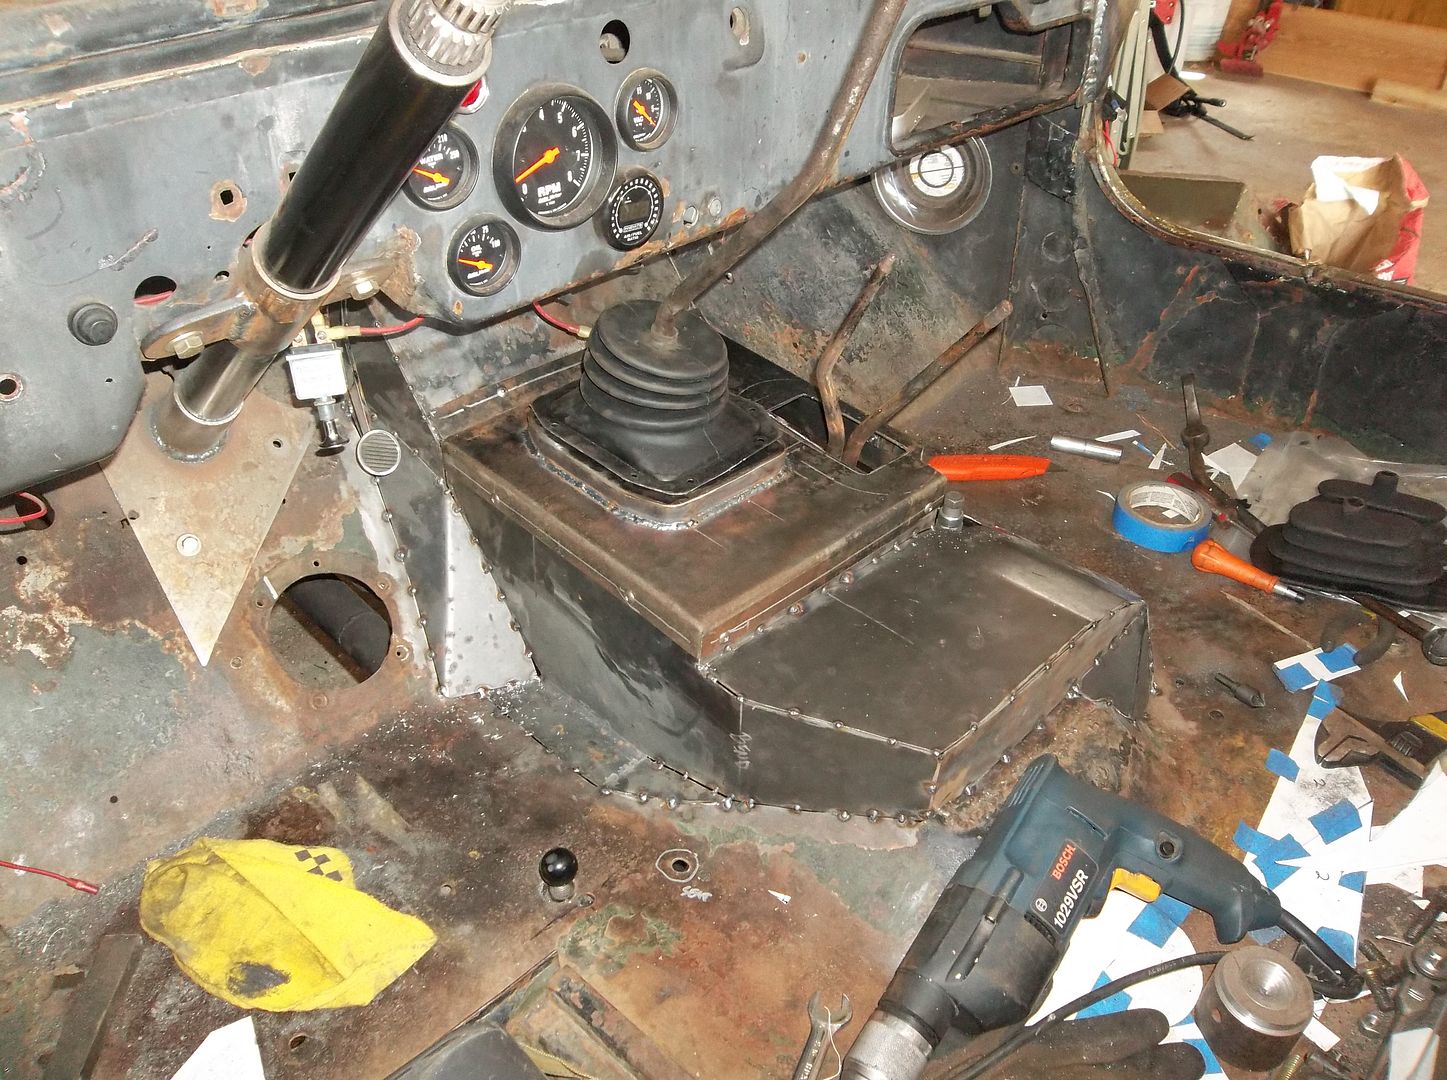
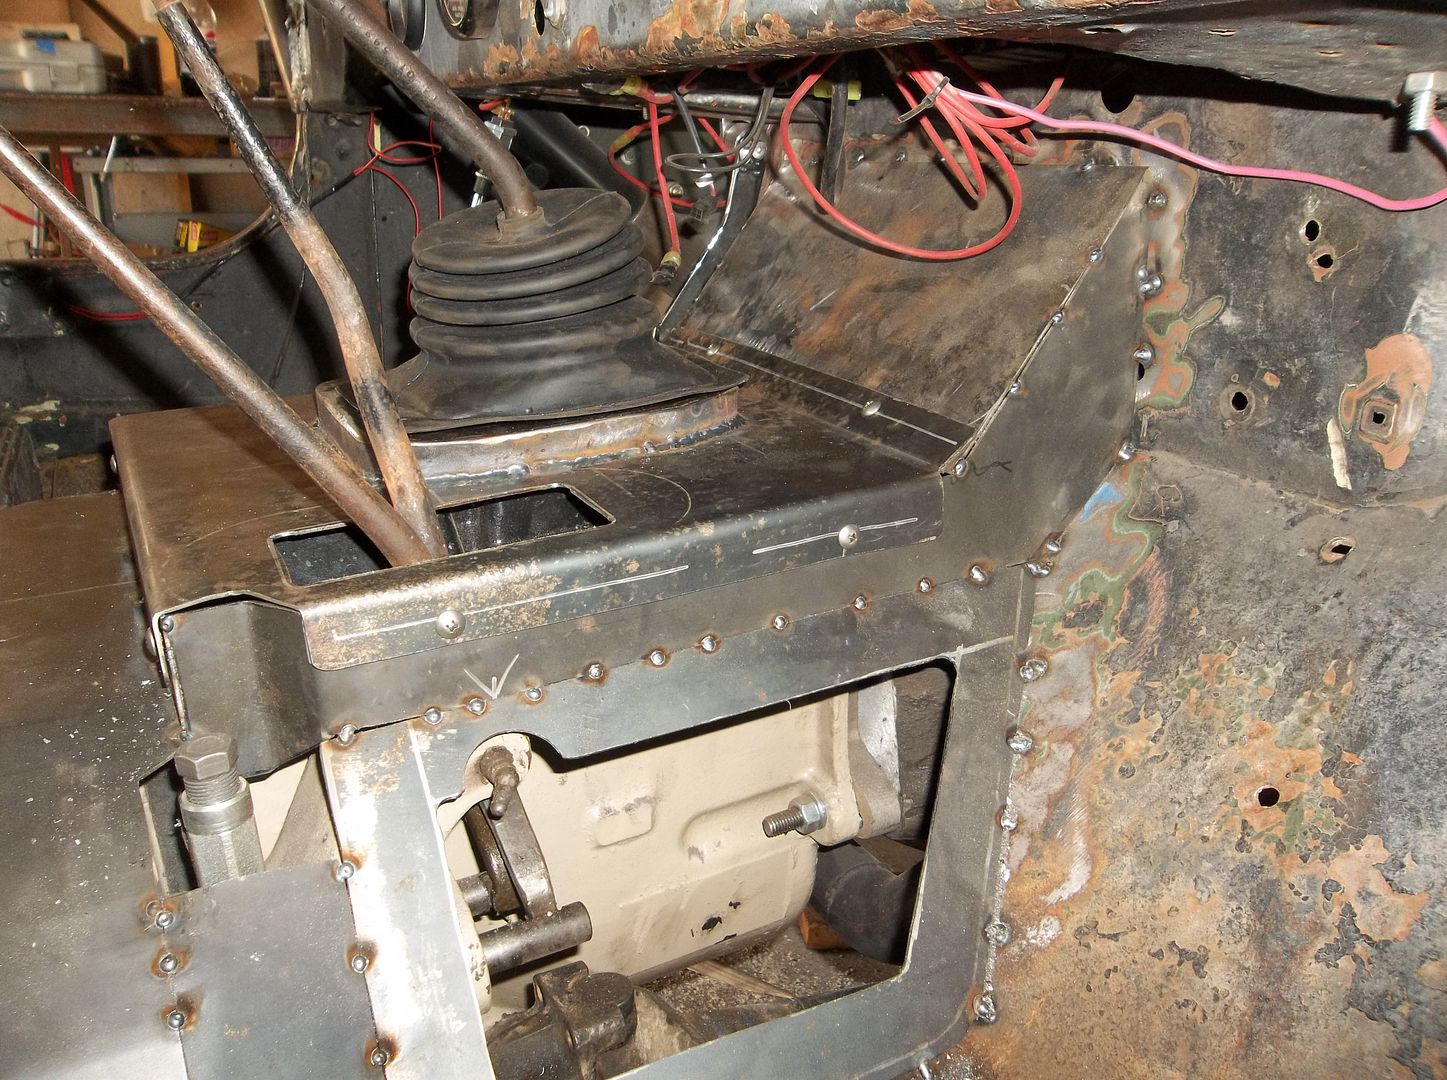
Here is the access panel for the front output and Dana 18 shift pin. It has the same 10-24 stainless screws as the top cover.
Then I started welding and didn't really stop till I was done. I need a few Advil for my back but I am SOOOOOO happy that is done! Welding the tunnel was a pain in the butt. Welding to the original floor was a REALLY big pain. All said an done it took me about 4 hours to weld in the tunnel. As always, some of th welds could be prettier but they are not going to come apart.
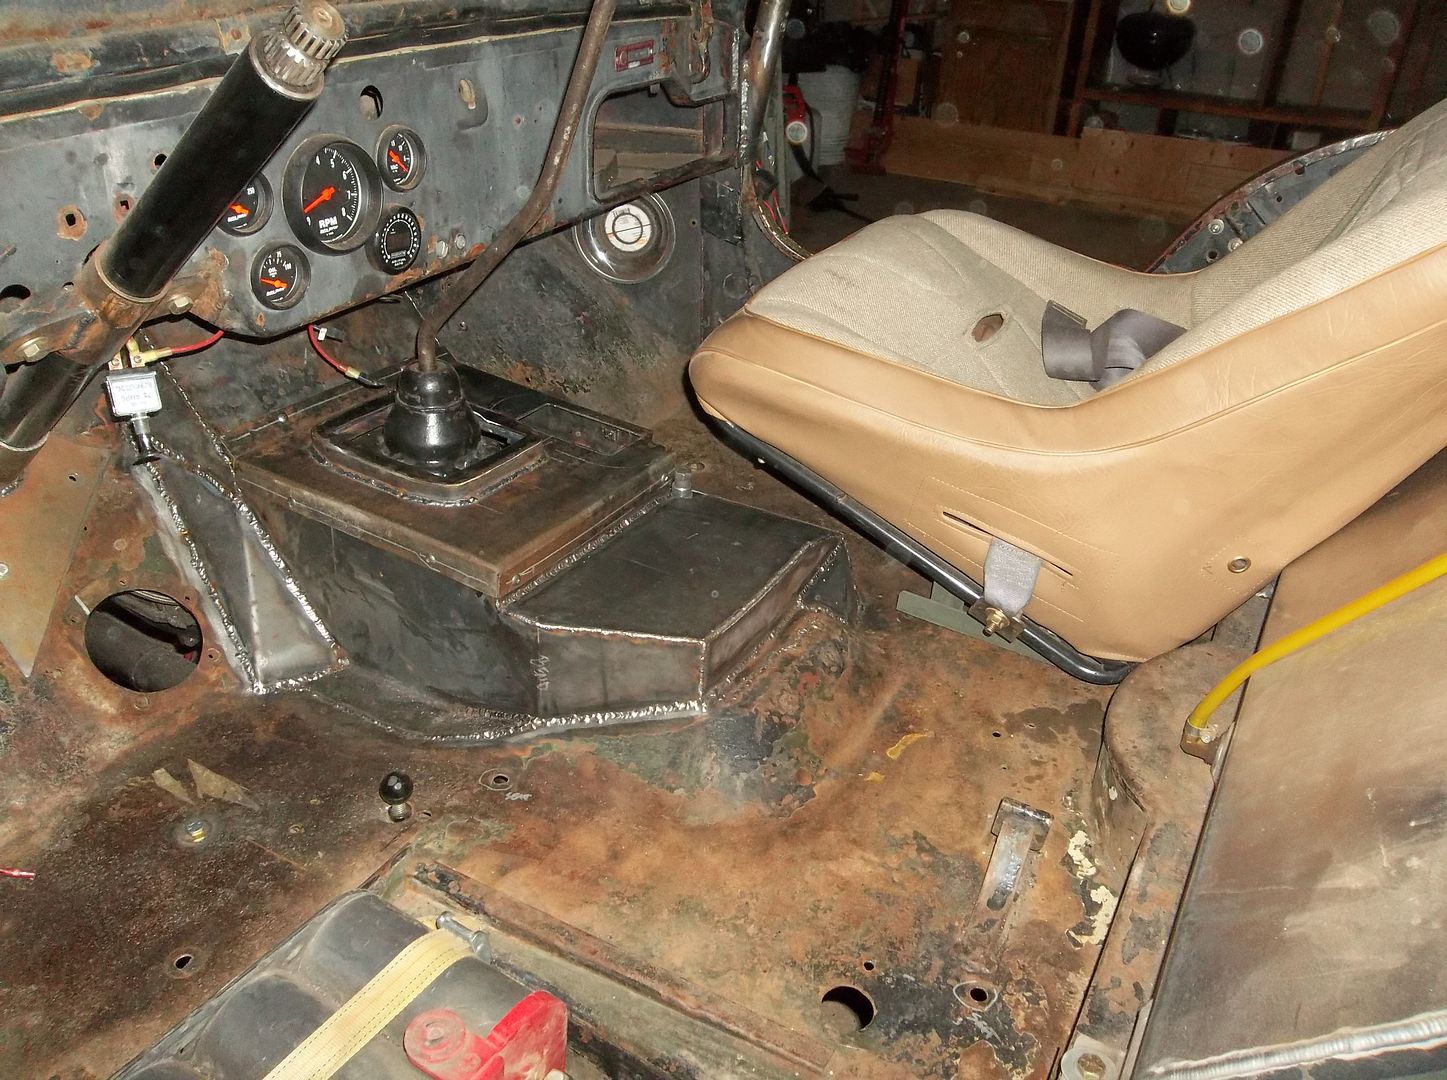
Here is the clearance on the passenger seat. It is much better than before, but still tight.
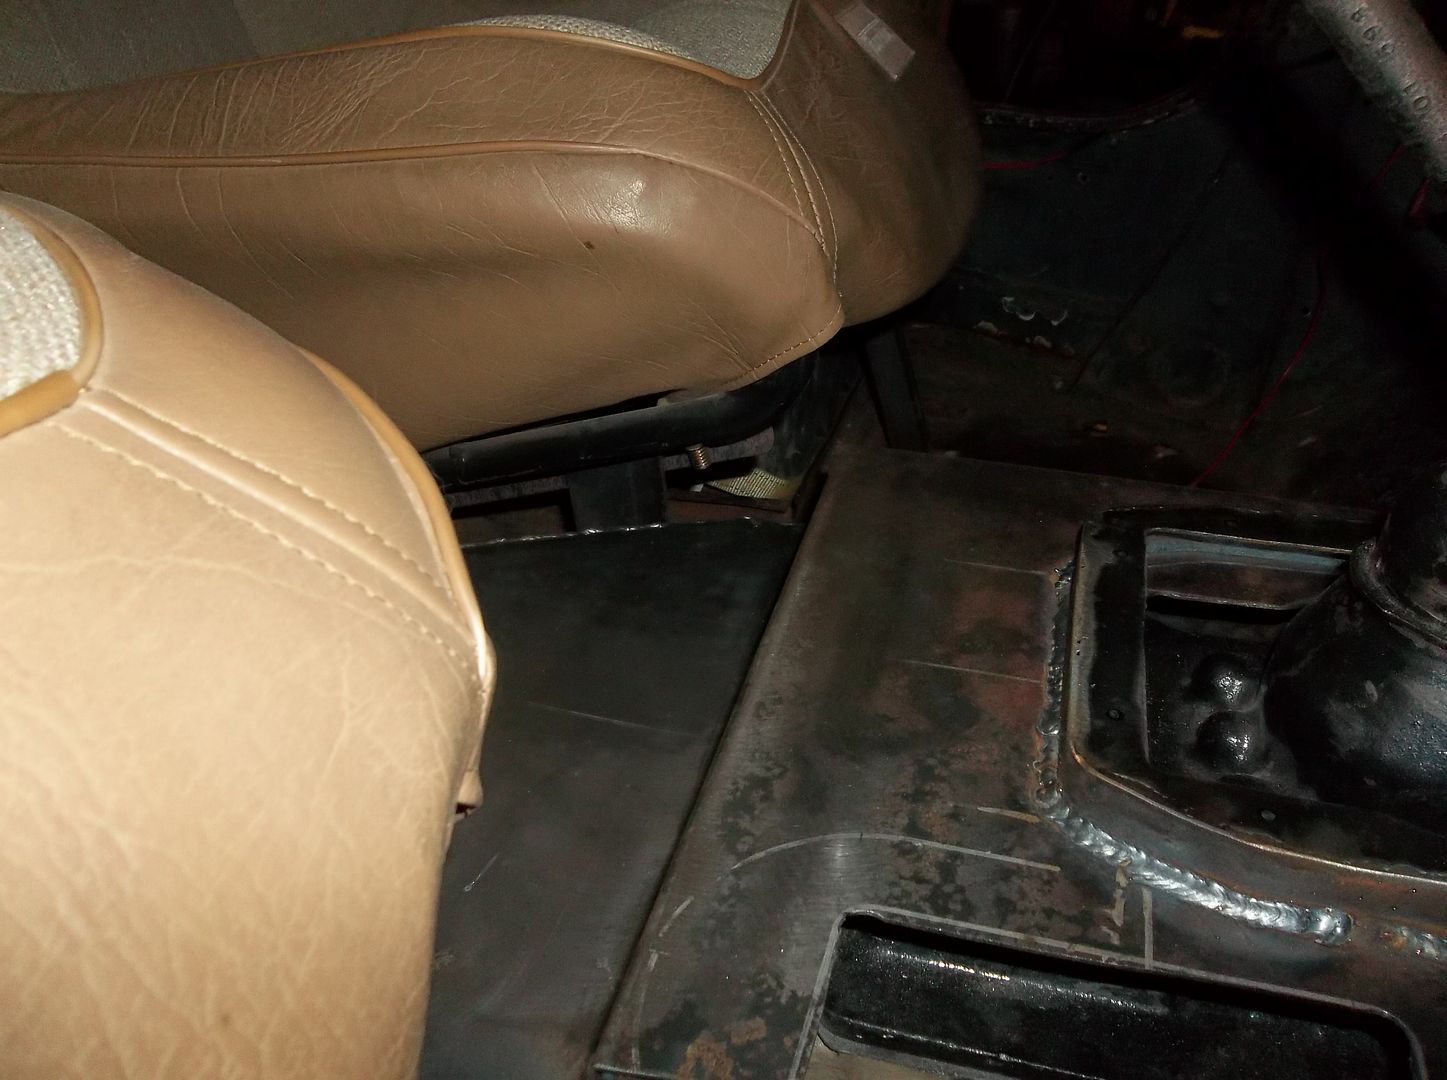
Drivers side seat clearance. Tight also.
I still have some odds and ends to wrap up but this was a big goal accomplished!
The stock T18 shifter also works pretty well. I will probably shorten it a few inches and install a new threaded end for a custom shift knob. I also need to bend it down just slightly for more clearance in 1st gear.
The D18 shifters need some slight changes for the twin stick boot. Basically I need a little more space between the shift rods.
That was a long day.....
Here is the access panel for the front output and Dana 18 shift pin. It has the same 10-24 stainless screws as the top cover.
Then I started welding and didn't really stop till I was done. I need a few Advil for my back but I am SOOOOOO happy that is done! Welding the tunnel was a pain in the butt. Welding to the original floor was a REALLY big pain. All said an done it took me about 4 hours to weld in the tunnel. As always, some of th welds could be prettier but they are not going to come apart.
Here is the clearance on the passenger seat. It is much better than before, but still tight.
Drivers side seat clearance. Tight also.
I still have some odds and ends to wrap up but this was a big goal accomplished!
The stock T18 shifter also works pretty well. I will probably shorten it a few inches and install a new threaded end for a custom shift knob. I also need to bend it down just slightly for more clearance in 1st gear.
The D18 shifters need some slight changes for the twin stick boot. Basically I need a little more space between the shift rods.
That was a long day.....
Metcalf
Expedition Leader
Just a few hours today....
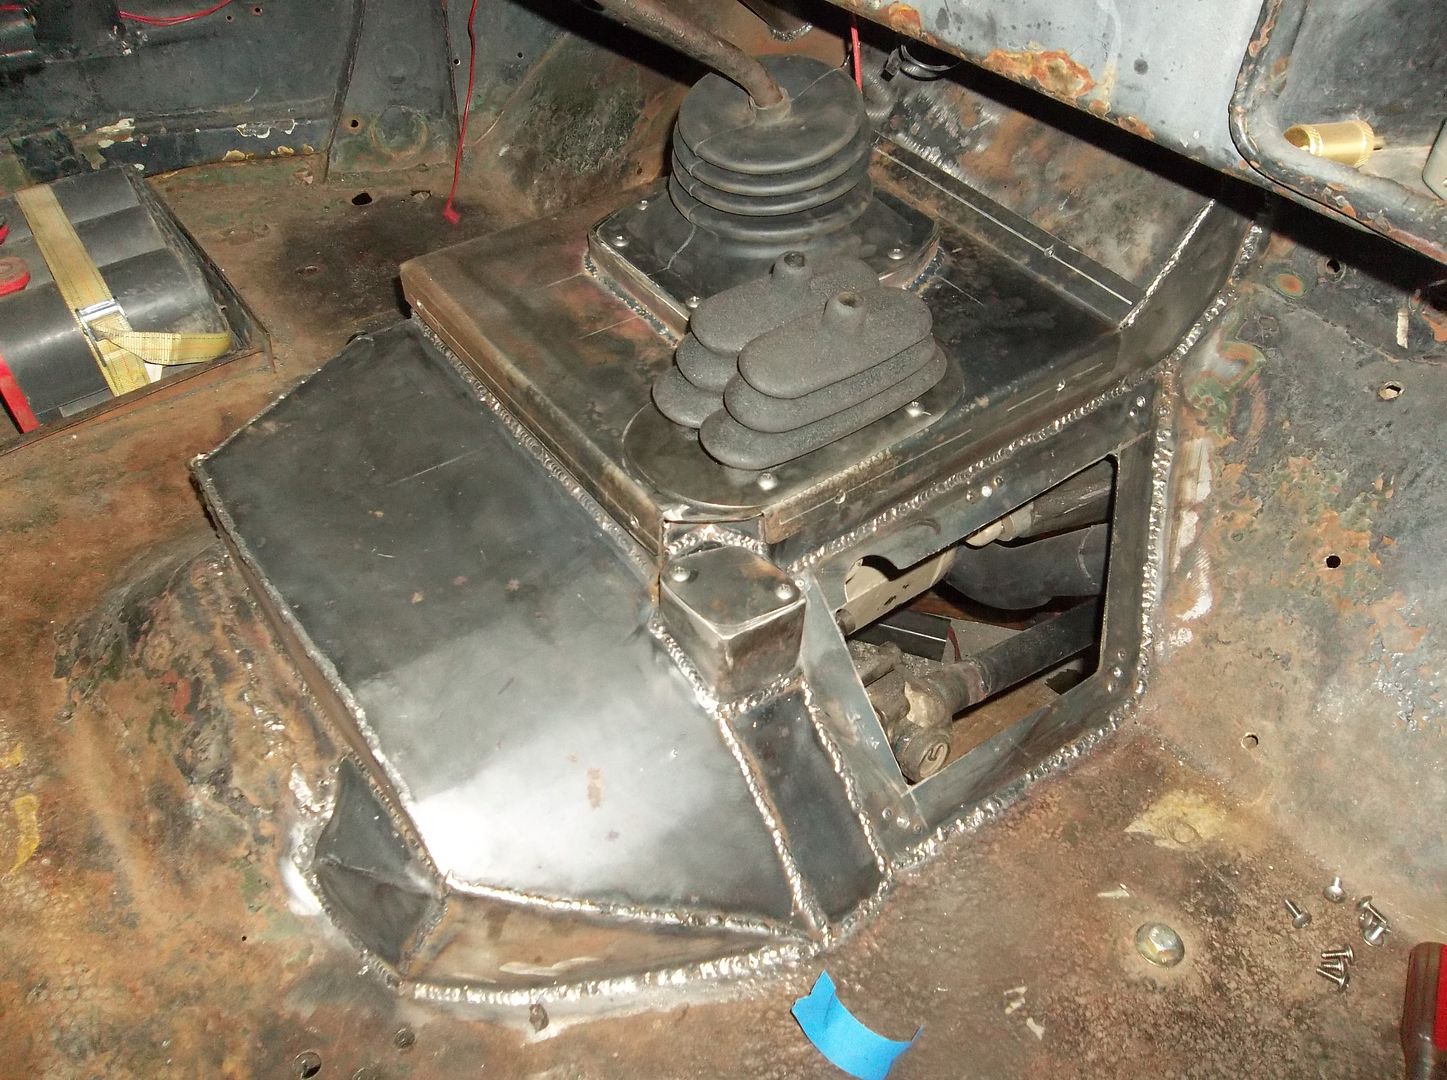
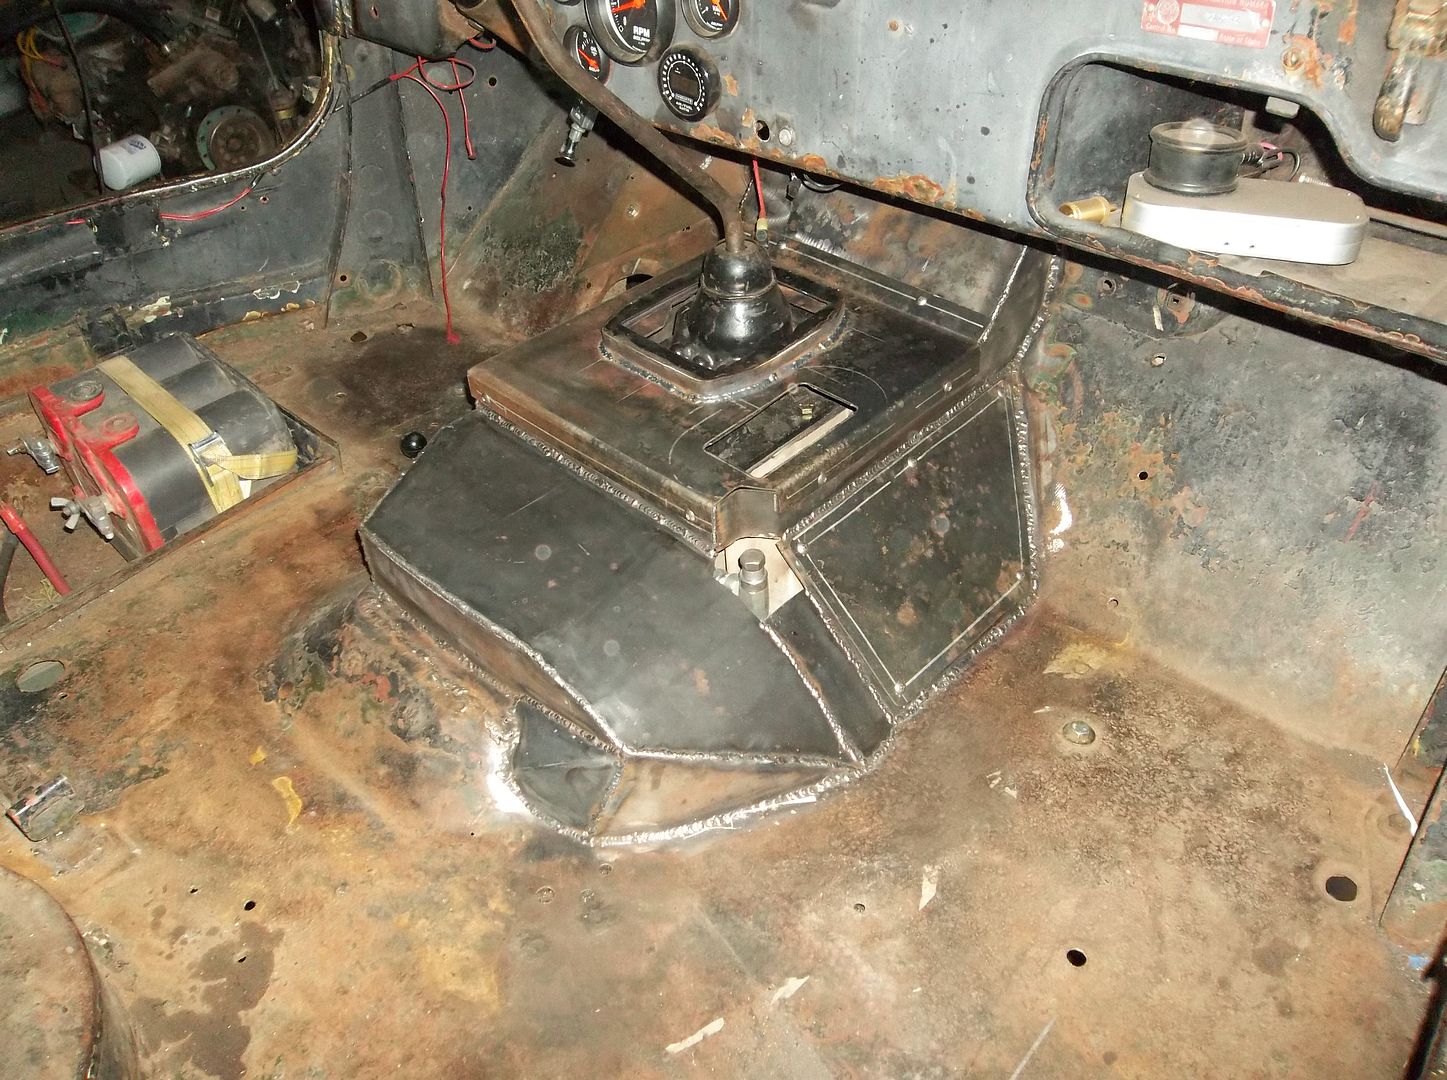
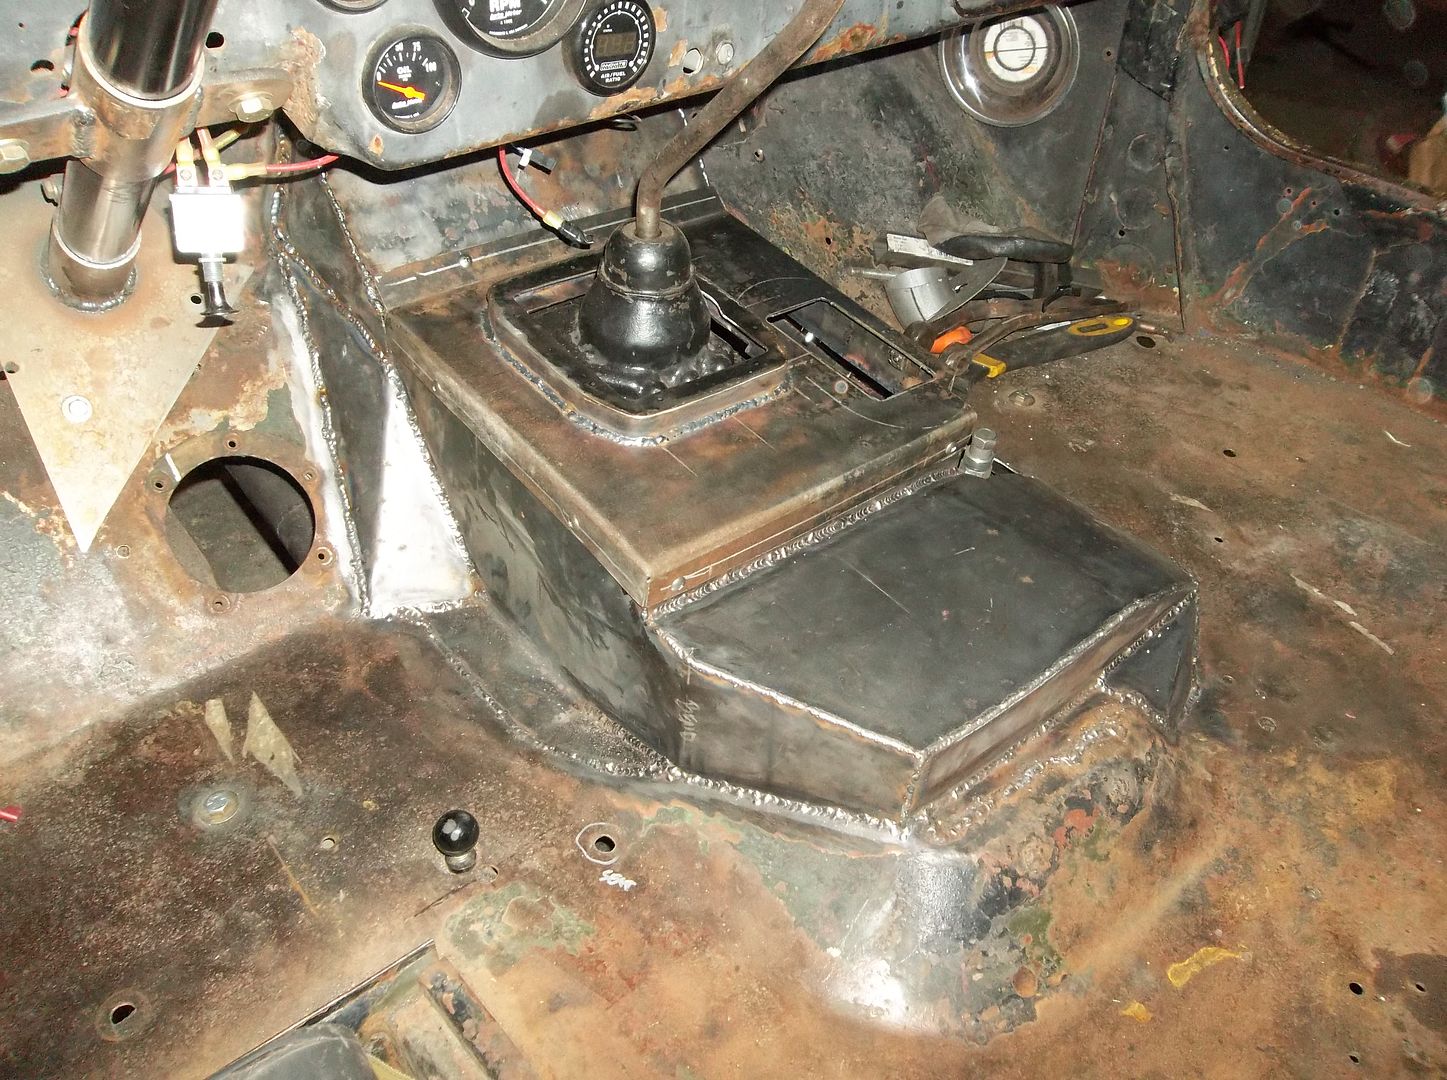
I made a little enclosed box for the T-case fill/vent thing. The little top cover comes off with two screws. All in all I think it turned out pretty well. I also worked on mounting the transfer case shifter boot. I need to bend the shift levers a bit still....
Helpful shop tips of the day....
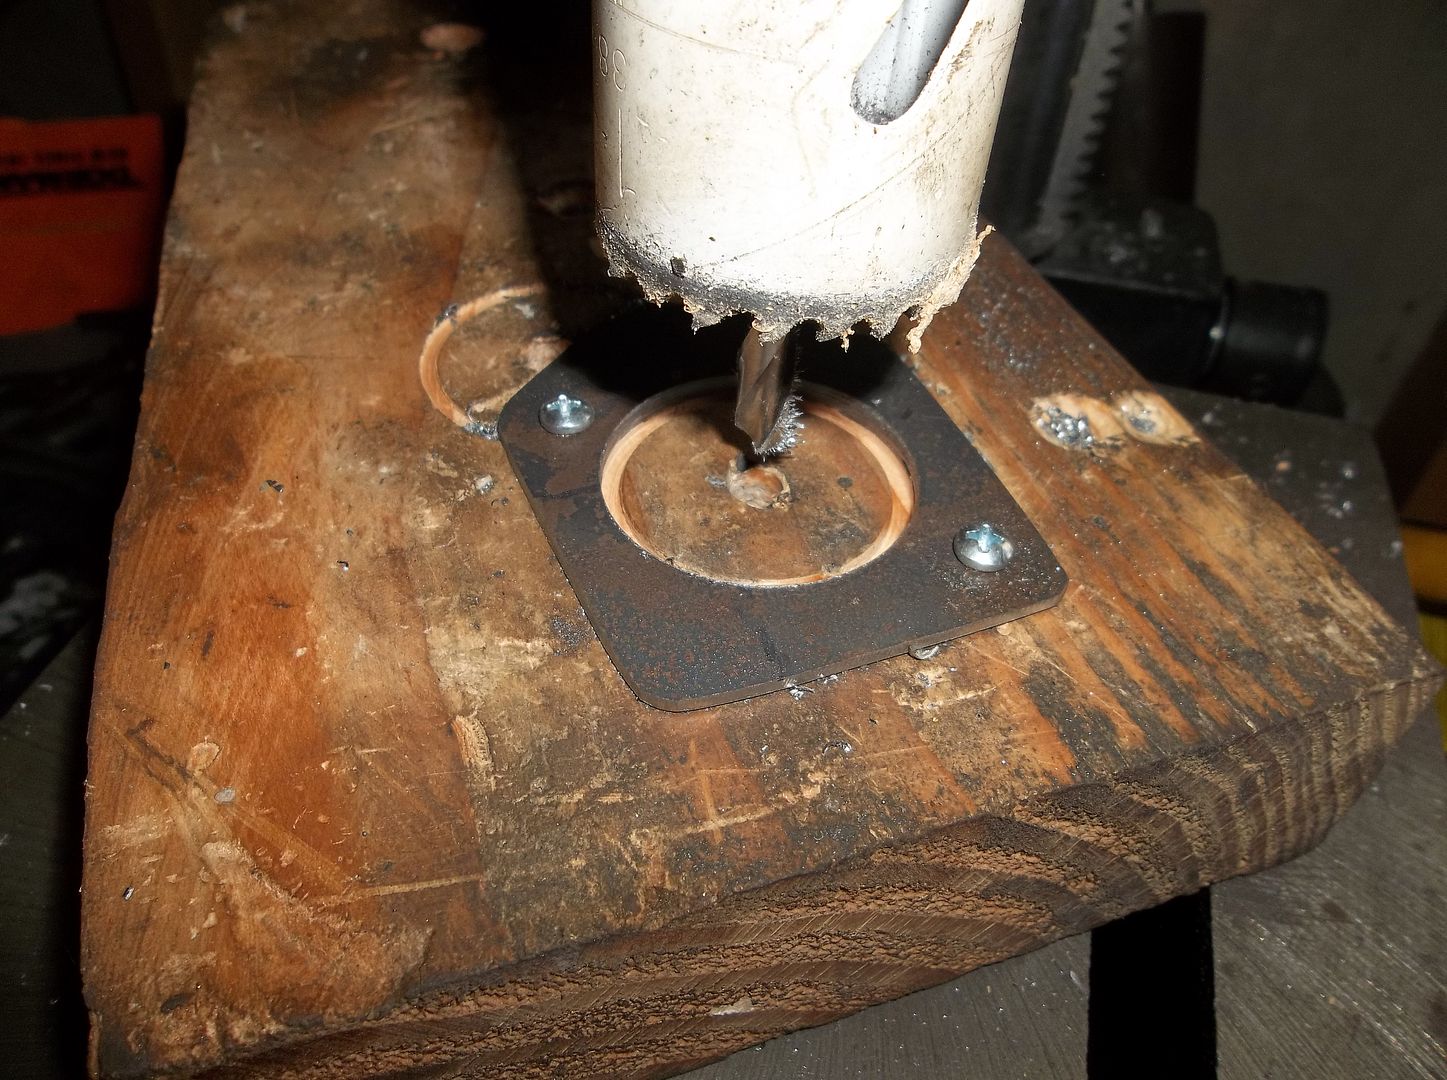
When you need to put a hole in a piece of metal that is a little too small to hold screw it down to something else like a block of wood. Also, think ahead and drill holes before you cut the part out!
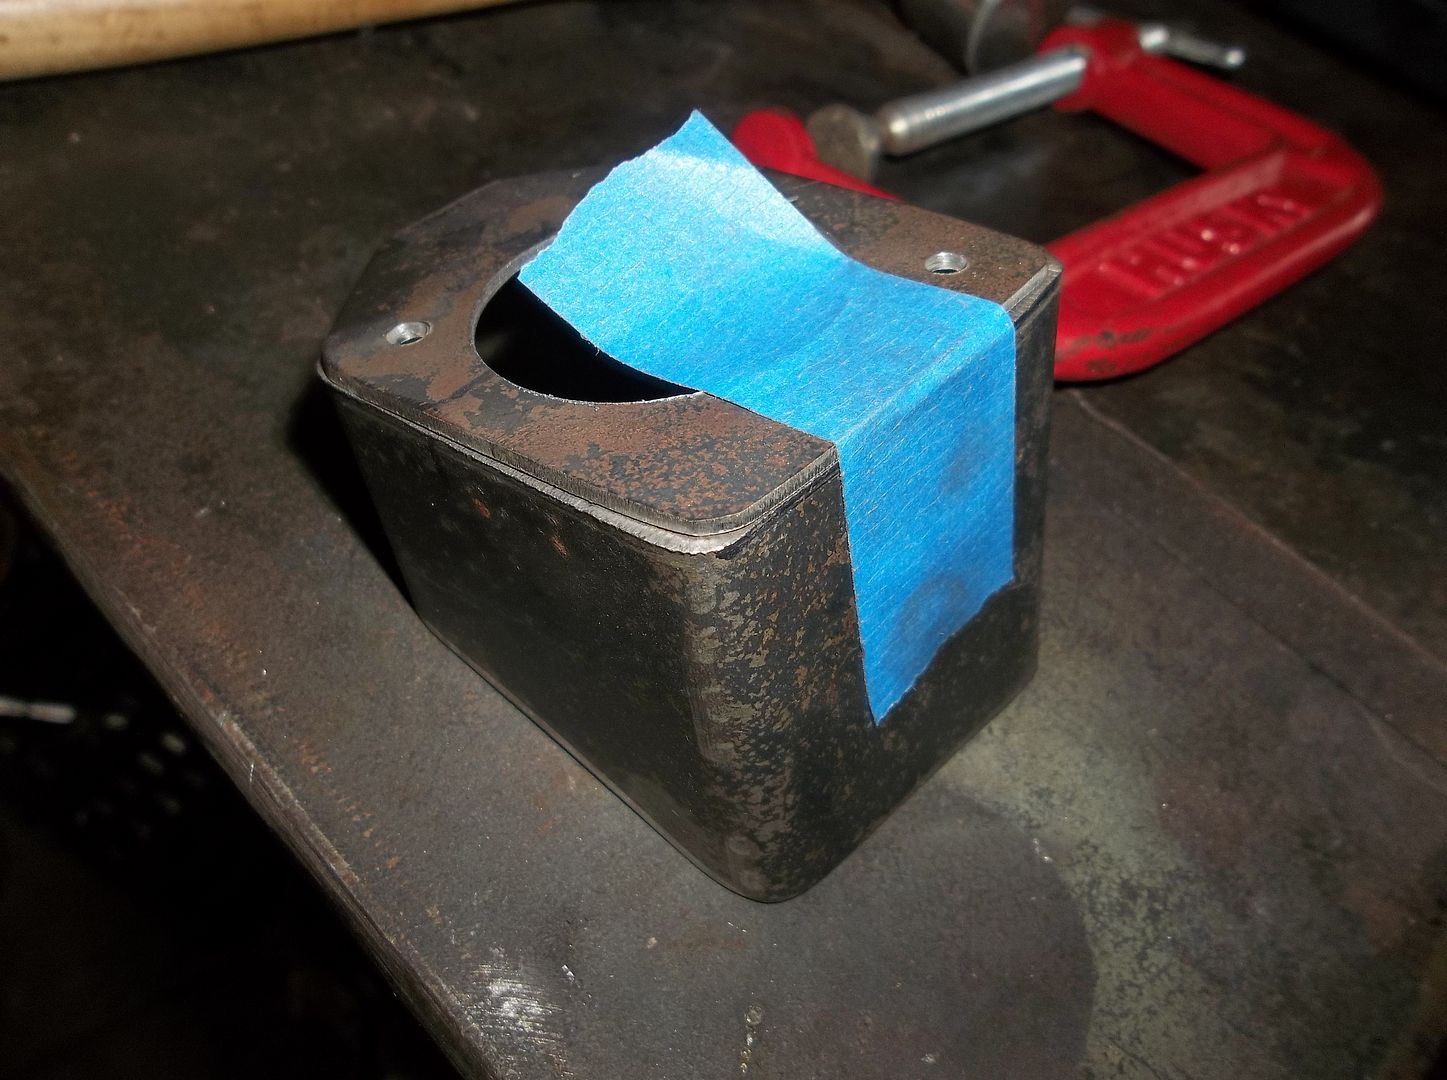
I little masking tape can make a great 3rd hand when you need to hold a part for tack welding...
I still need to bend up the t-case shift levers but the tunnel itself is finished at this point. I will probably start laying down some primer on it soon. I found a 9/16 fine thread bolt that will work to make a plug for the reverse light switch in the transmission top cover....need to get that cut down a little bit. I also need to make a plug for the old speedometer cable port. I think I can mod the old part. That is going to be my 'full' plug overflow for the transfer case now.
Next I need to reinstall the pedal assembly and make sure everything is good in that area. Need to bend up some new brake lines from the master to the front and rear circuit.
Need to make up a rear driveline....
I think I can put the front clip back together and get all the wiring hooked up.
Hopefully I will be driving it around next weekend. It would sure be nice to be able to get a few miles on it before EJS!
I made a little enclosed box for the T-case fill/vent thing. The little top cover comes off with two screws. All in all I think it turned out pretty well. I also worked on mounting the transfer case shifter boot. I need to bend the shift levers a bit still....
Helpful shop tips of the day....
When you need to put a hole in a piece of metal that is a little too small to hold screw it down to something else like a block of wood. Also, think ahead and drill holes before you cut the part out!
I little masking tape can make a great 3rd hand when you need to hold a part for tack welding...
I still need to bend up the t-case shift levers but the tunnel itself is finished at this point. I will probably start laying down some primer on it soon. I found a 9/16 fine thread bolt that will work to make a plug for the reverse light switch in the transmission top cover....need to get that cut down a little bit. I also need to make a plug for the old speedometer cable port. I think I can mod the old part. That is going to be my 'full' plug overflow for the transfer case now.
Next I need to reinstall the pedal assembly and make sure everything is good in that area. Need to bend up some new brake lines from the master to the front and rear circuit.
Need to make up a rear driveline....
I think I can put the front clip back together and get all the wiring hooked up.
Hopefully I will be driving it around next weekend. It would sure be nice to be able to get a few miles on it before EJS!
Metcalf
Expedition Leader
A productive evening on small stuff.....
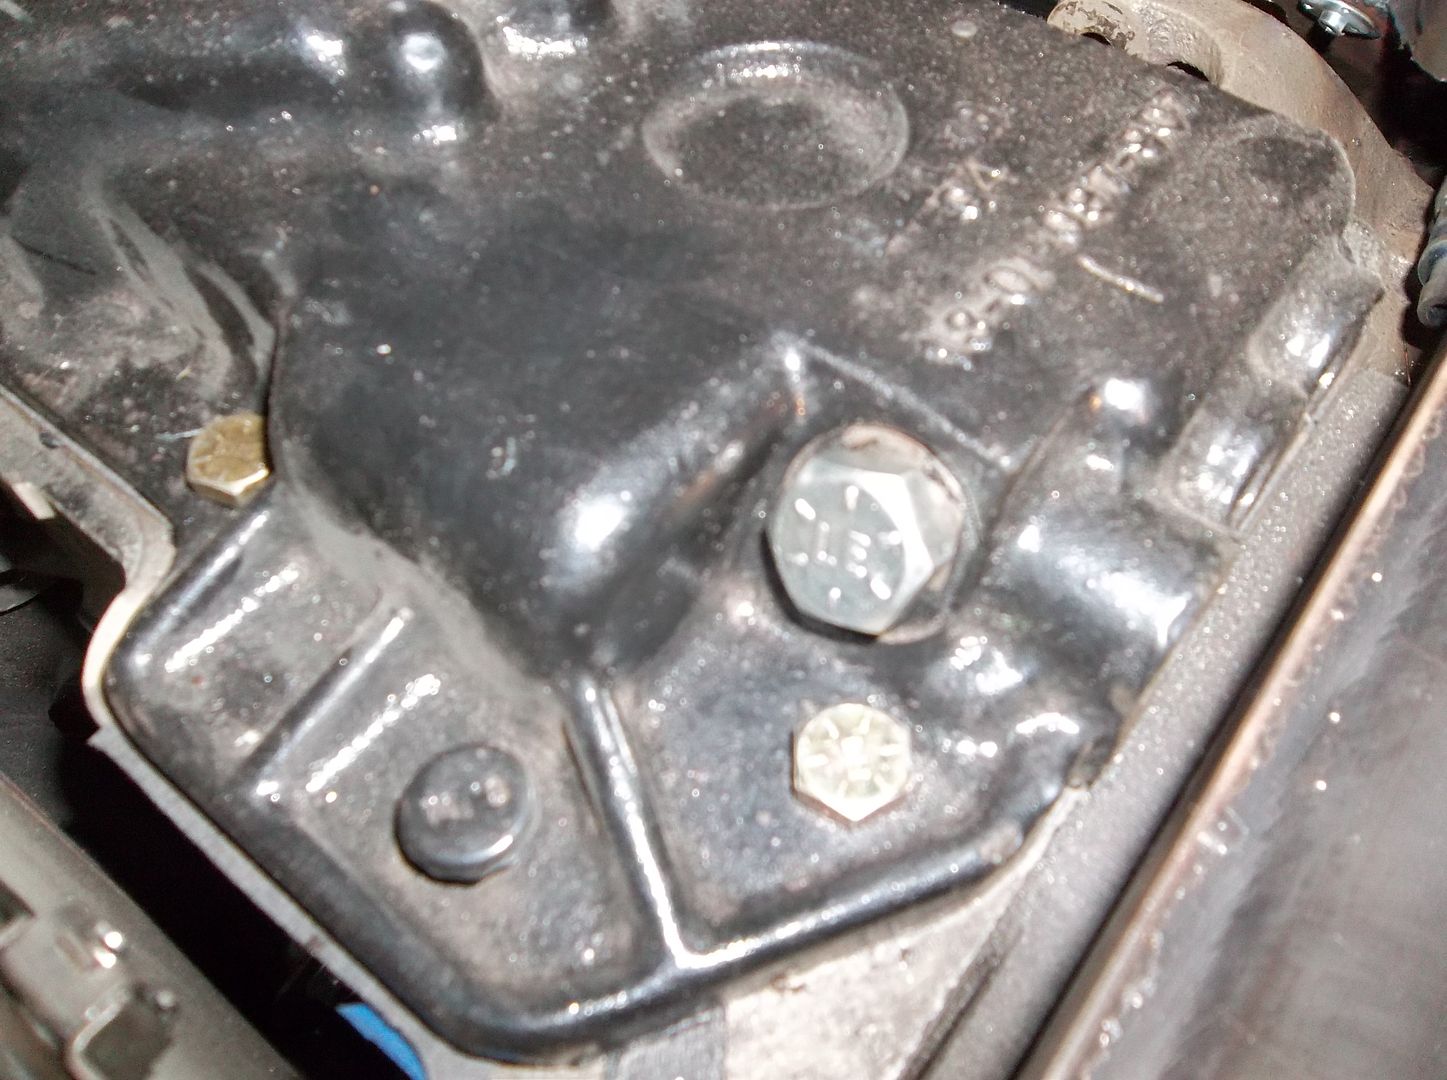
I made a plug for the reverse switch hole out of a 9/16 fine thread bolt. The threaded portion is only about 5/16" long so it doesn't bottom out.
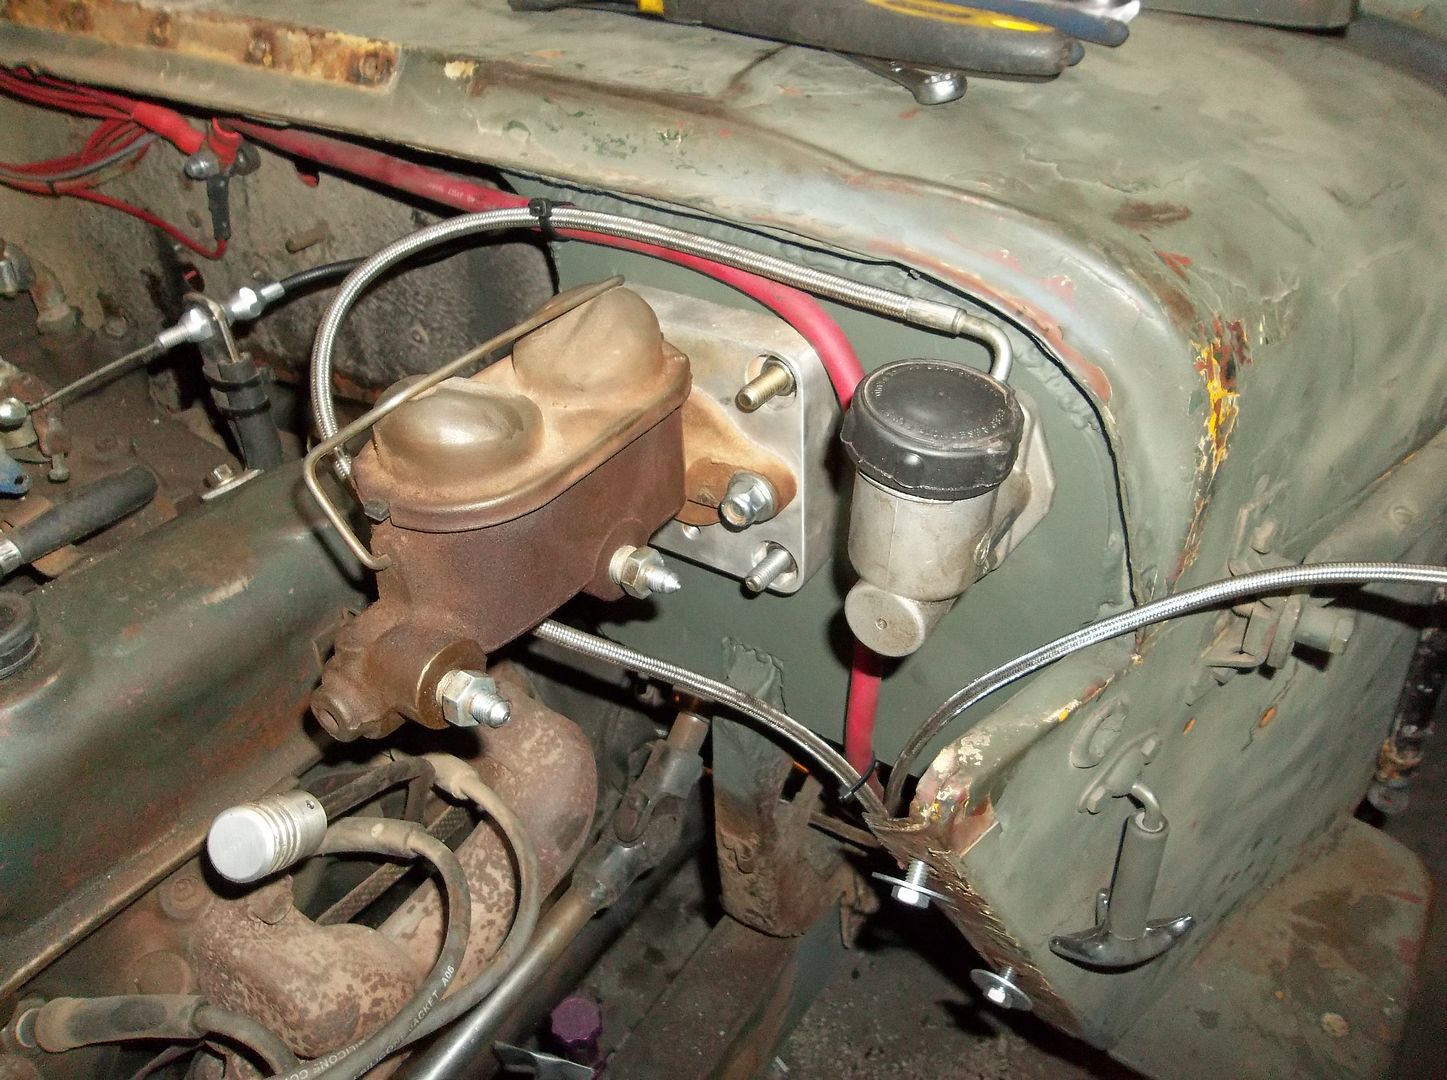
I got the pedal assembly mounted along with the master cylinders. I ran into a small problem with the alignment of the clutch master pedal pin...
I had to do this to the clutch pedal. The pin had to move to the inside about 1/4" and up 1/4". This was the simple way to do things. I had a lot of extra travel on the pedal last time so this should work out just fine...
This is where the pedals ended up. I now have about 1/4" of clearance between the brake pedal arm and the steering column. The entire assembly seems to be in a much better position and better alignment than last time. The new firewall is STIFF. It doesn't seem to move at all that I can tell. I decided to not brace to the cowl just yet. I would have to pull all the wiring out of the way to get access. I think a can retro something later if needed...maybe....
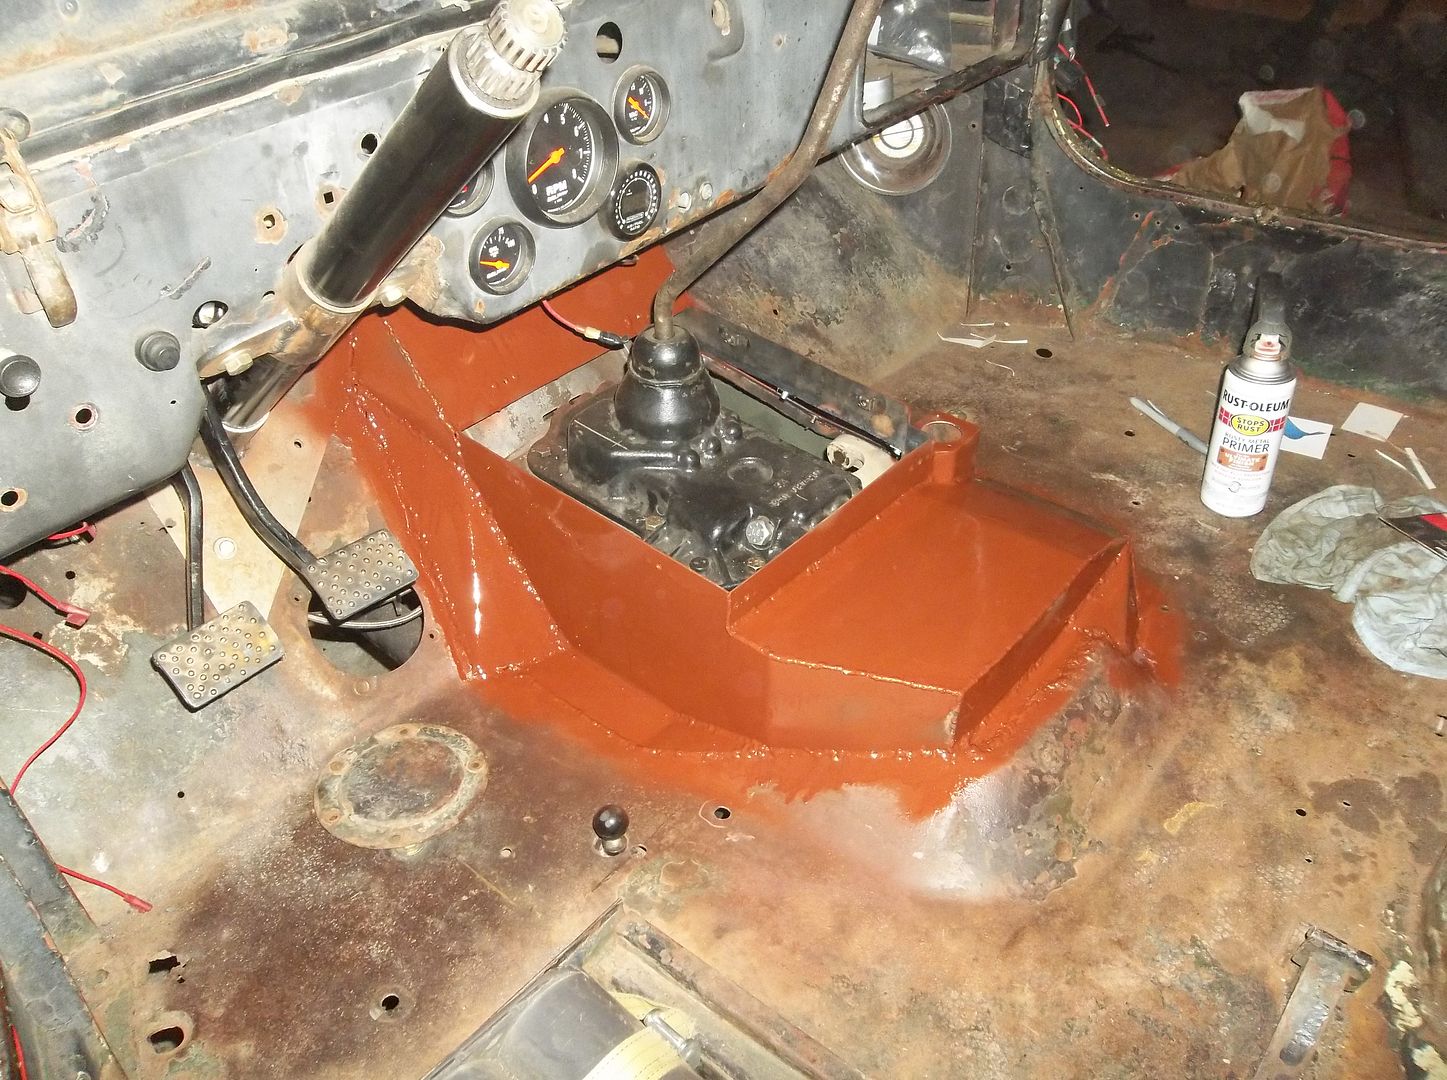
A little red oxide primer....
I decided to install the old brake lines. I am going to get a 2psi residual valve for the front circuit in the future. I am passing on new lines till then. The old ones will work for now even though they are a little funky.
I also welded up the fender extensions for the raised fenders and cleaned up the weld seam.
More tomorrow. I think I can stick the front sheetmetal back on and get ready to fire it back up.
I made a plug for the reverse switch hole out of a 9/16 fine thread bolt. The threaded portion is only about 5/16" long so it doesn't bottom out.
I got the pedal assembly mounted along with the master cylinders. I ran into a small problem with the alignment of the clutch master pedal pin...
I had to do this to the clutch pedal. The pin had to move to the inside about 1/4" and up 1/4". This was the simple way to do things. I had a lot of extra travel on the pedal last time so this should work out just fine...
This is where the pedals ended up. I now have about 1/4" of clearance between the brake pedal arm and the steering column. The entire assembly seems to be in a much better position and better alignment than last time. The new firewall is STIFF. It doesn't seem to move at all that I can tell. I decided to not brace to the cowl just yet. I would have to pull all the wiring out of the way to get access. I think a can retro something later if needed...maybe....
A little red oxide primer....
I decided to install the old brake lines. I am going to get a 2psi residual valve for the front circuit in the future. I am passing on new lines till then. The old ones will work for now even though they are a little funky.
I also welded up the fender extensions for the raised fenders and cleaned up the weld seam.
More tomorrow. I think I can stick the front sheetmetal back on and get ready to fire it back up.
Metcalf
Expedition Leader
I forgot to take pictures.....
-Fenders installed
-Grill installed with the radiator, fans, headlights, etc...
-hooked up all the wiring for the engine, winch, lights, etc.
-Cut down a driveline to make a temp/spare rear driveline
-torqued down the output yokes, still need some cotter-pins
-Painted the tunnel drab
Hopefully tomorrow I can get the seats mounted, driveshafts installed, etc.
Then I need to add fluids to everything....
I should be be able to have it running and driving ( knock on wood ) this weekend!
Metcalf
Expedition Leader
Amazing work. I'm not sure I would have the patience, much less the talent.
Jack
Thank you very much. Patience is a key factor for sure, but I think anyone can learn metal fab with enough time. Speed and efficiency comes with time. I am a self taught fabricator for the most part. While I have a decent amount of tools I do most things with very few tools and a little time.
Metcalf
Expedition Leader
A productive day....
I rebent the D18 shifters are work during lunch. A big rose bud torch makes it go pretty fast. When I got home I was able to finally test fit everything. the twin stick boot ended up working out really well. No binding at all. I then pulled the transmission cover and primed and painted it.
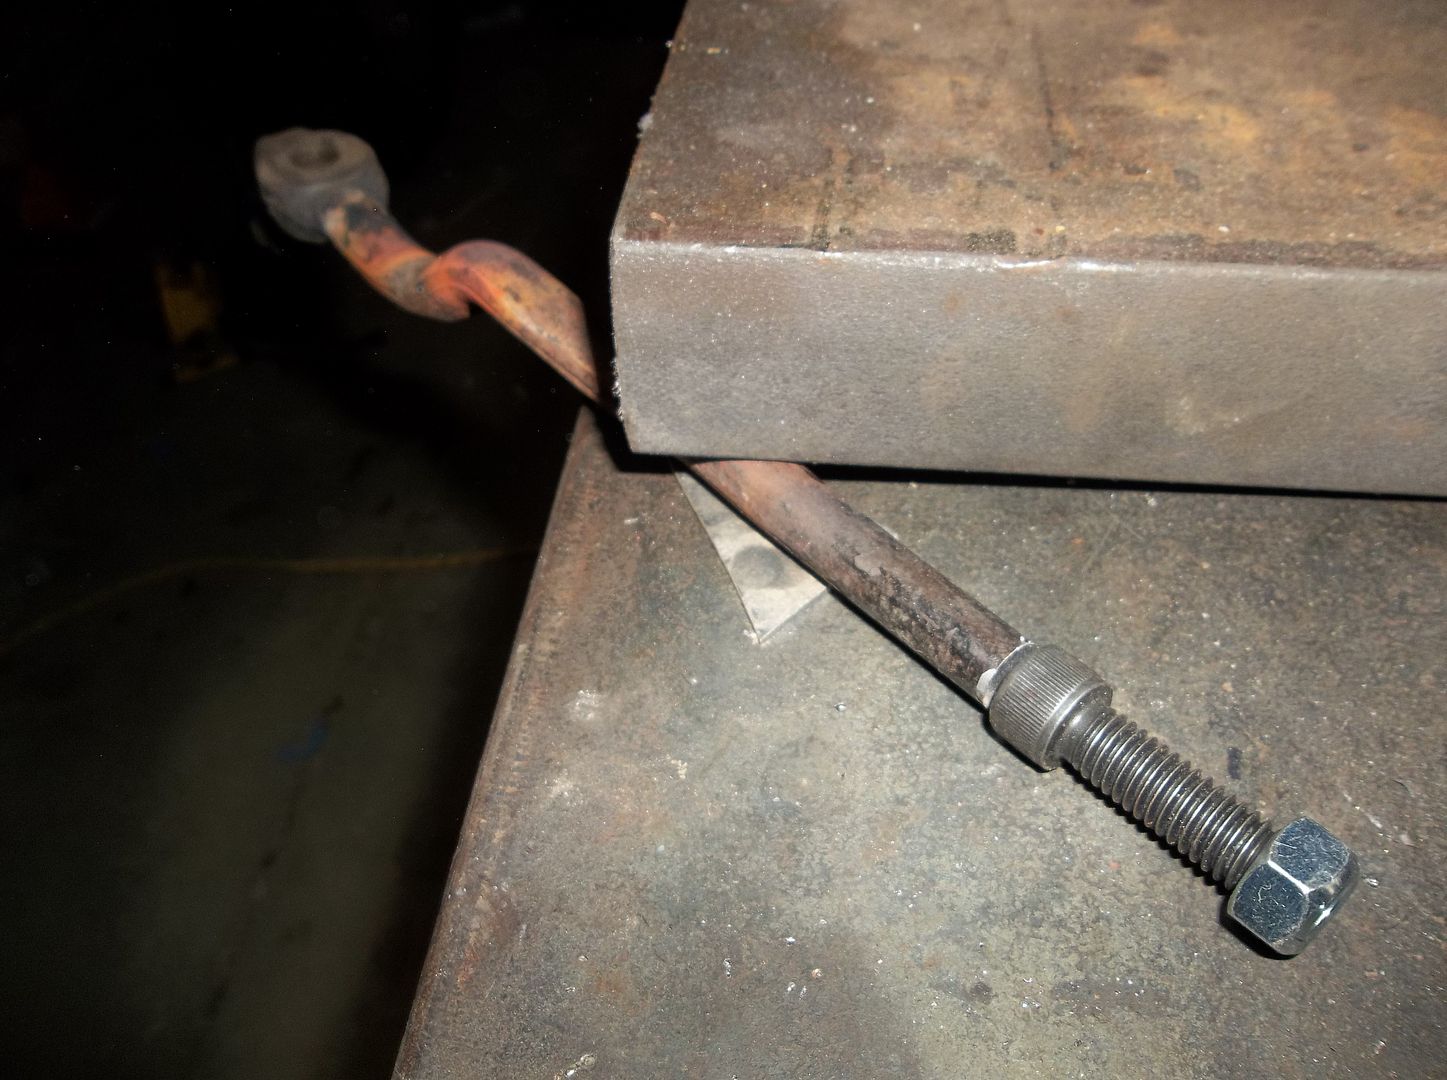
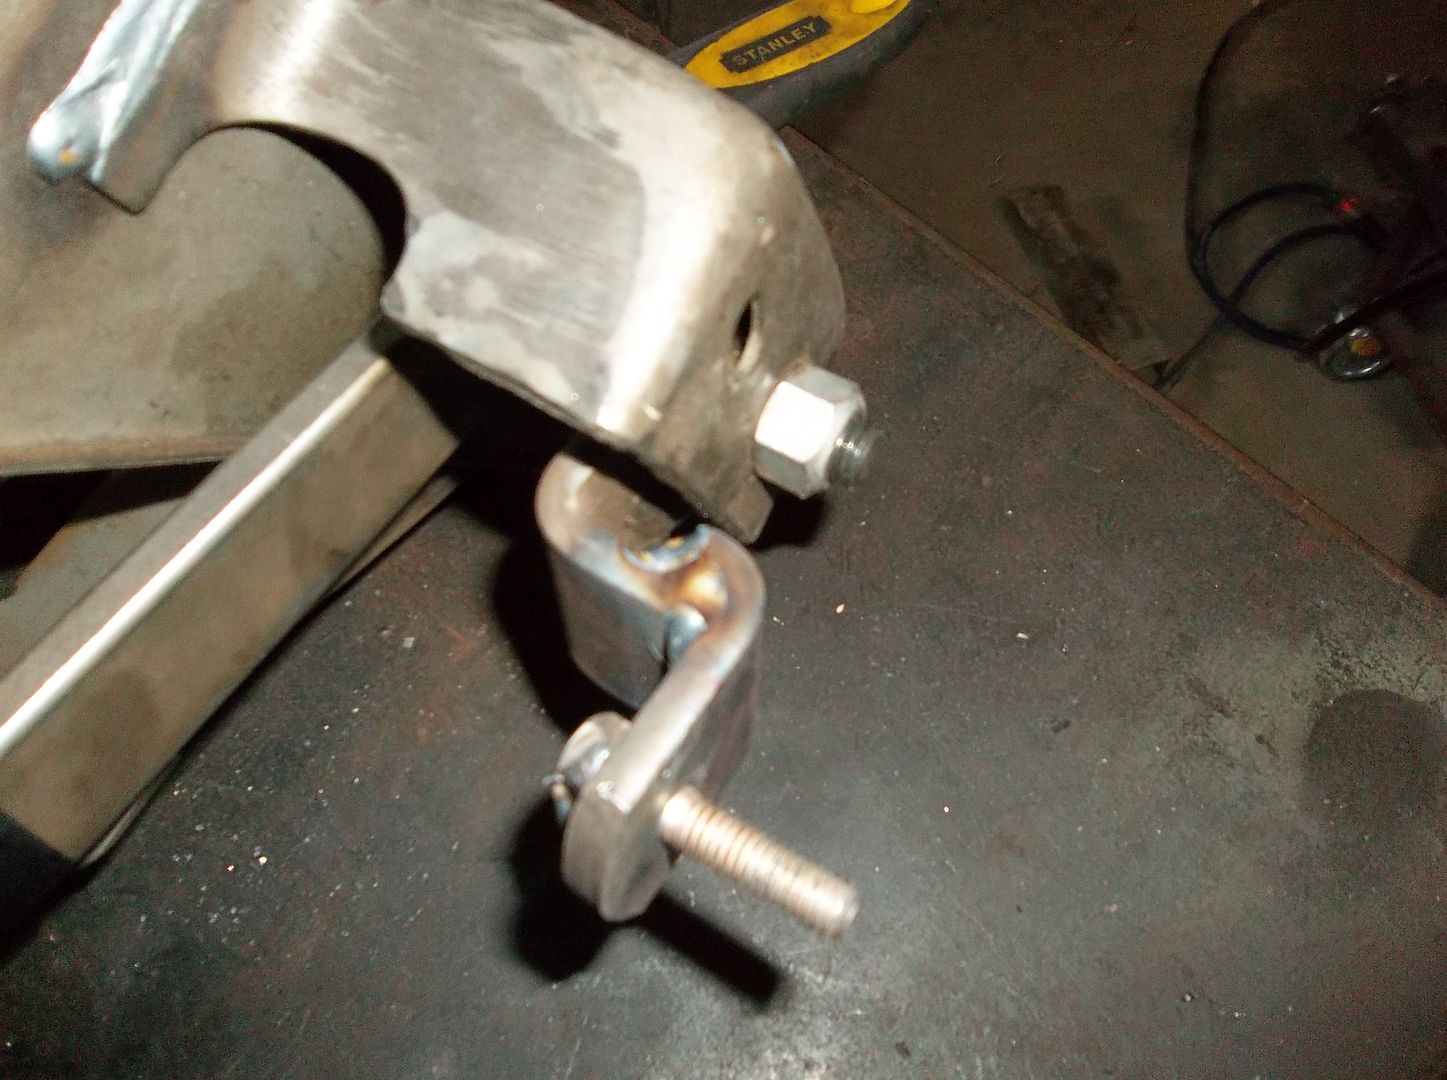
I wanted the shift levers to be the same length and have some common threads on then ends. I marked them during the mock up and cut them off in the saw. Then I welded some 3/8-16 socket head bolts on the ends. This gave me nice new threads....
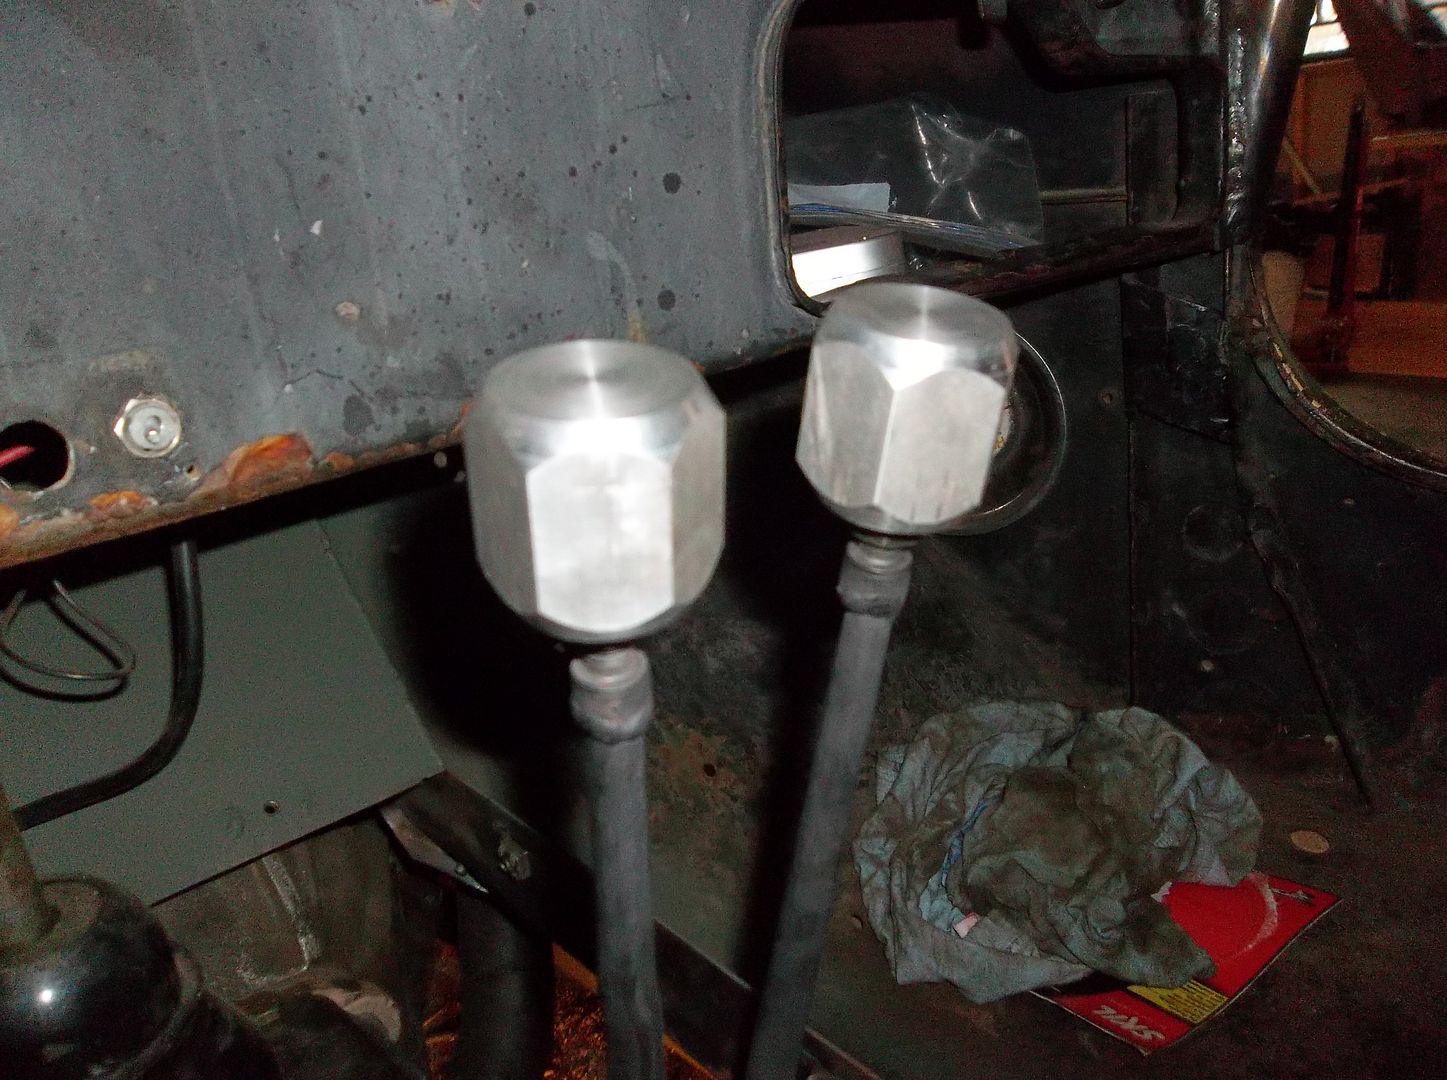
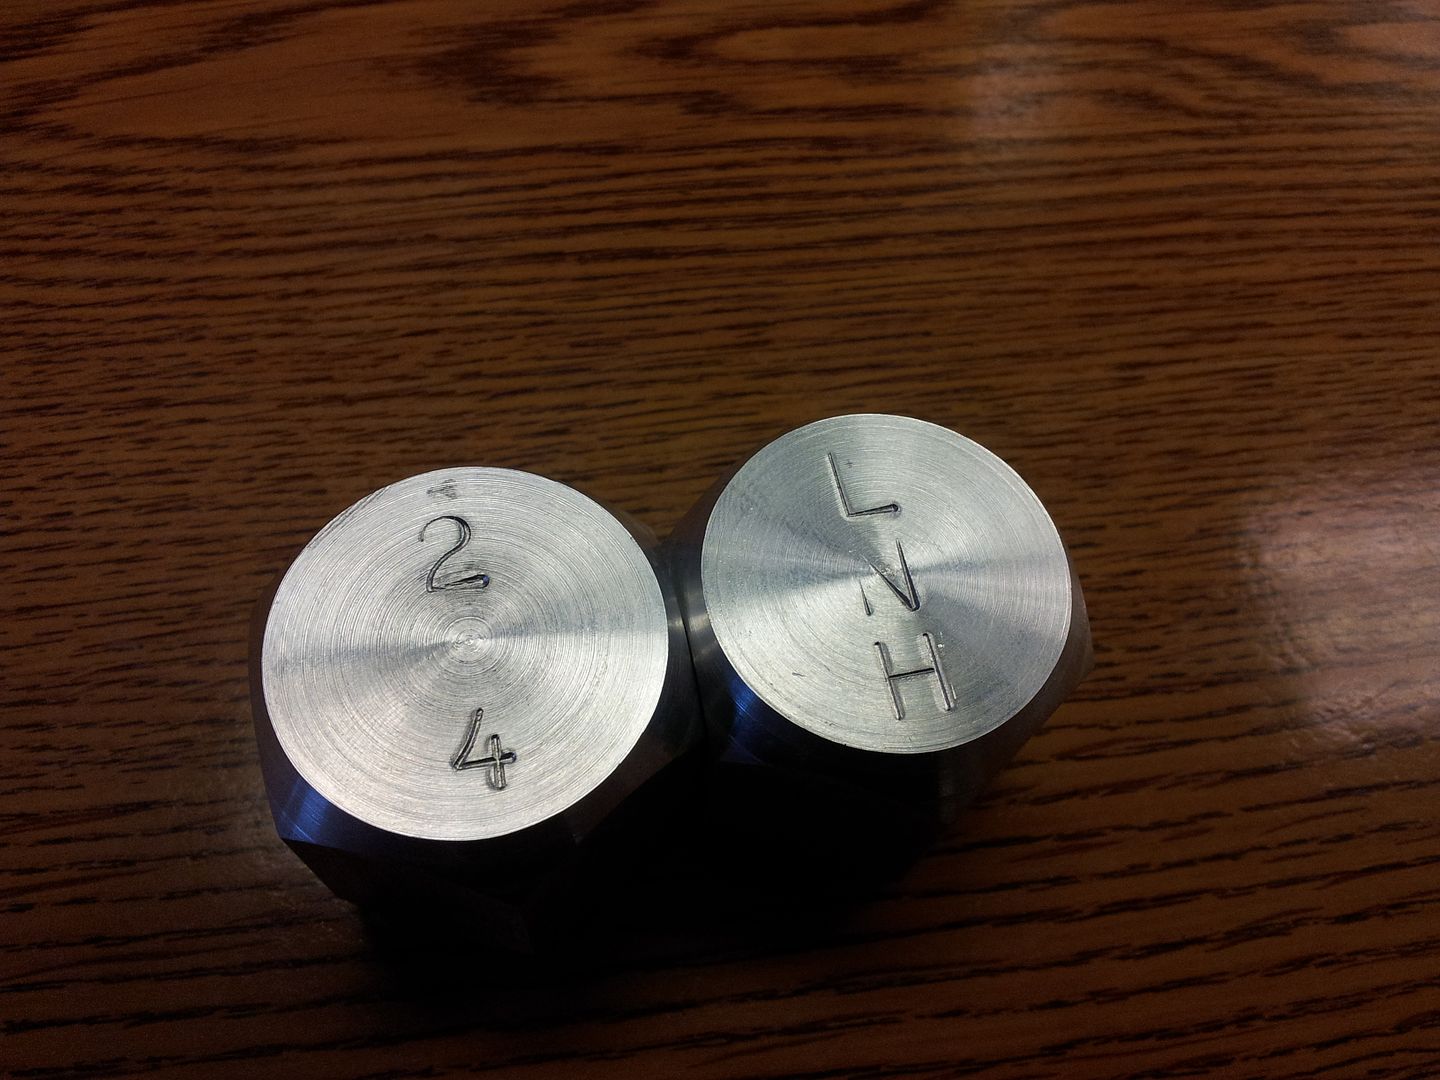
Somewhere in there I found a chunk of aluminum hex stock in the scrap pile so I made some shift knobs for the transfer case out of it. I just had enough for two knobs. Simple but a little different. The bottom was drilled and tapped in 3/8-16 to match the modified levers. I will take them to work tomorrow and stamp in the shift pattern for each lever....
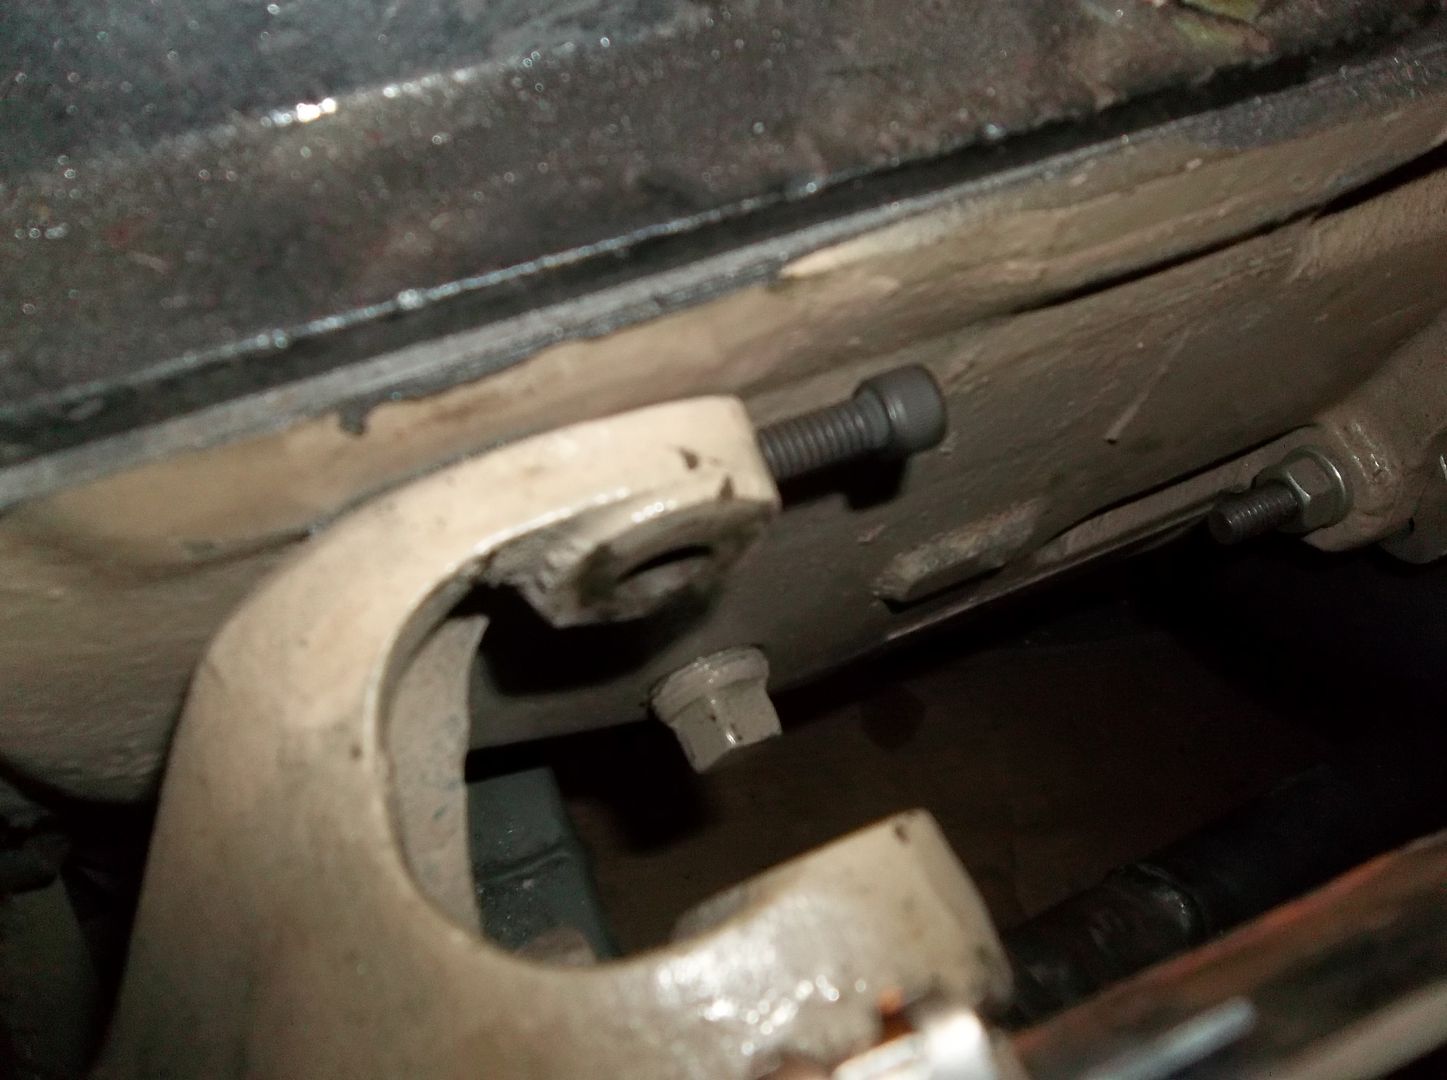
I had a real bugger of a time finding a way to retain the shifter pin on the transfer case. It is a CLOSE fit with the shift tower ground down to work with the late 70s T18 case. I ended up finding a 5/16 socket head bolt that would JUST fit next to the transmission case. Much better than a little set screw I think...
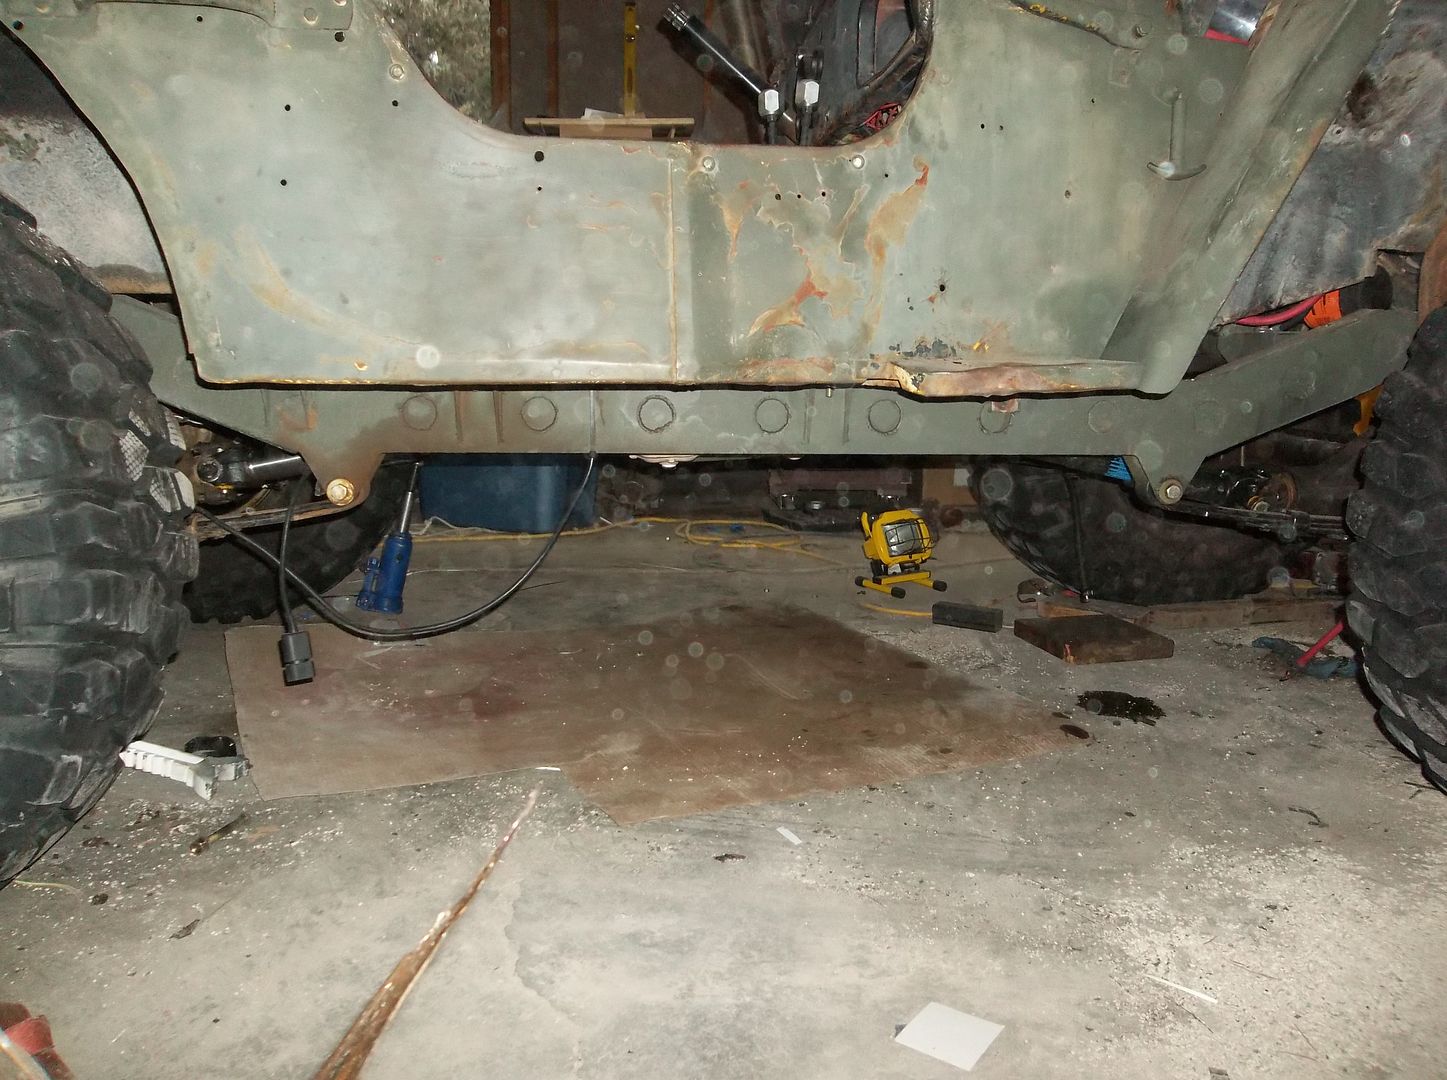
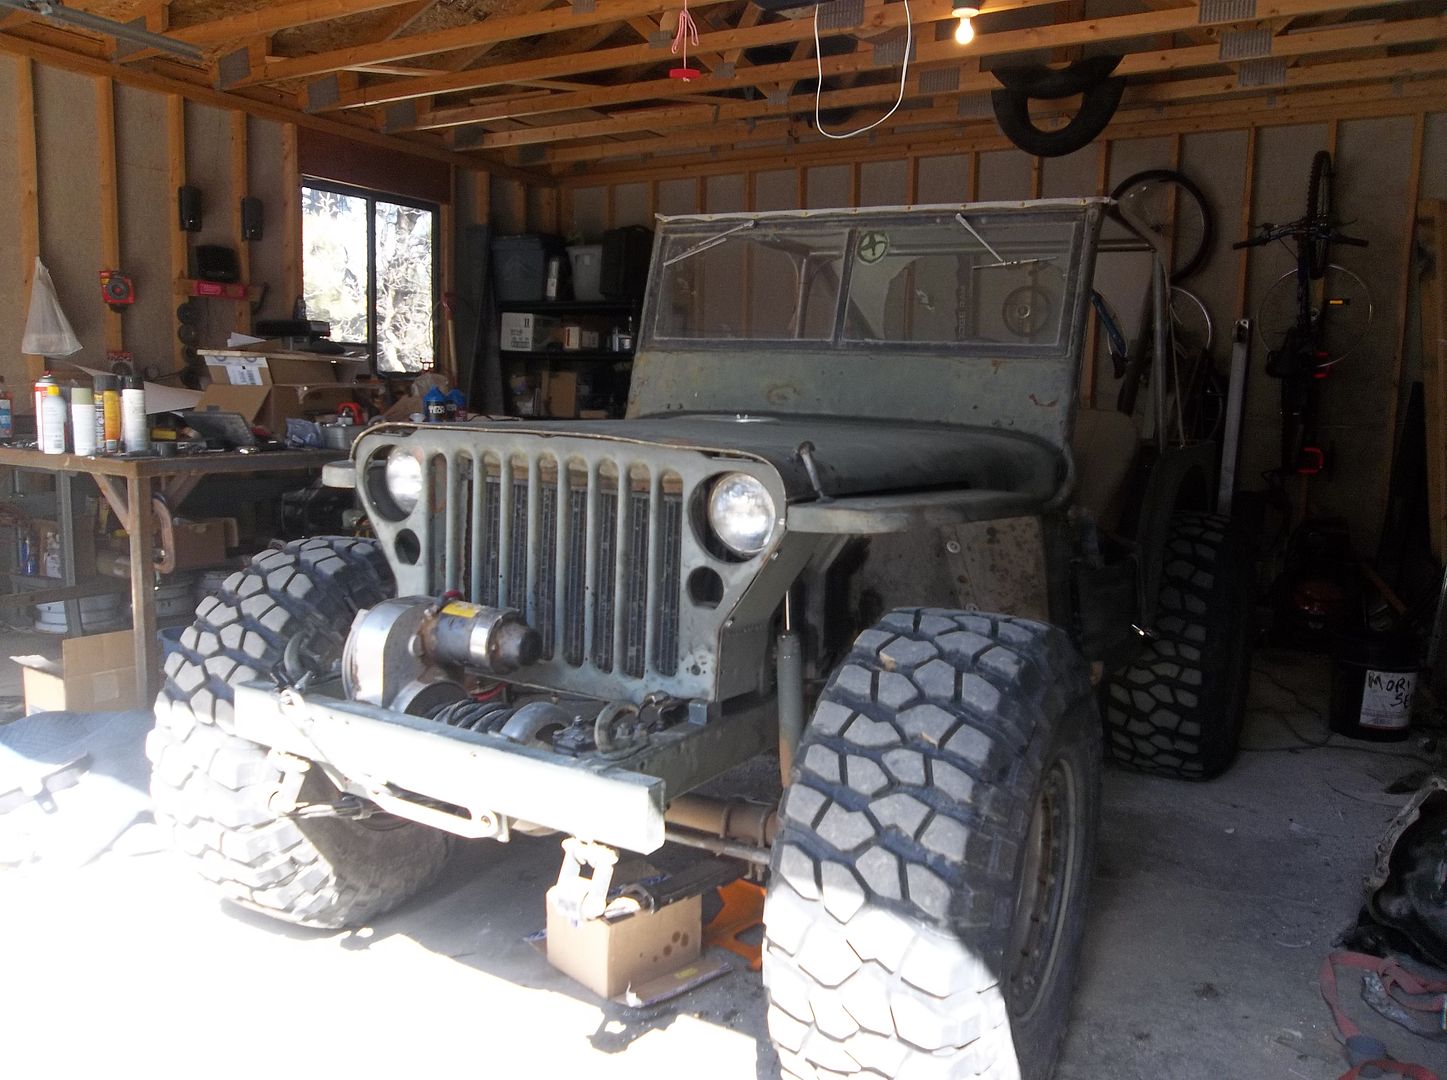
I picked up a few cotter pins and stick them in the castle nuts on the front and rear output of the transfer case. Then I could finally bolt up the driveshafts. Yes....there are driveshafts in the chassis in that picture! I think this is the real bonus of the raised transfer case and low suspension. It gets most everything pretty dang far up out of the way. Remember, this suspension is basically lowered about 1/2" compared to stock but with the 35" clown tires it has just about 16-17" of clearance.
The front driveline is a little more exposed than I would like but the rear is tucked up out of the way really nice. You can ********** the chassis on a tall ledge or step on the rear tires and not have to worry about tagging the driveshaft.
I also slipped the rear part of the exhaust system in place. I still love those little hitch pin mounts I made....
Tomorrow I think I can fill all the fluids, mod the transmission shifter a little bit, assemble the tunnel, and mount the seats. I think that just about does it for reassembly and I can fire it up this weekend. I need a helper to bleed the brakes and she is a teacher so the week is pretty thin for helper time....
I rebent the D18 shifters are work during lunch. A big rose bud torch makes it go pretty fast. When I got home I was able to finally test fit everything. the twin stick boot ended up working out really well. No binding at all. I then pulled the transmission cover and primed and painted it.
I wanted the shift levers to be the same length and have some common threads on then ends. I marked them during the mock up and cut them off in the saw. Then I welded some 3/8-16 socket head bolts on the ends. This gave me nice new threads....
Somewhere in there I found a chunk of aluminum hex stock in the scrap pile so I made some shift knobs for the transfer case out of it. I just had enough for two knobs. Simple but a little different. The bottom was drilled and tapped in 3/8-16 to match the modified levers. I will take them to work tomorrow and stamp in the shift pattern for each lever....
I had a real bugger of a time finding a way to retain the shifter pin on the transfer case. It is a CLOSE fit with the shift tower ground down to work with the late 70s T18 case. I ended up finding a 5/16 socket head bolt that would JUST fit next to the transmission case. Much better than a little set screw I think...
I picked up a few cotter pins and stick them in the castle nuts on the front and rear output of the transfer case. Then I could finally bolt up the driveshafts. Yes....there are driveshafts in the chassis in that picture! I think this is the real bonus of the raised transfer case and low suspension. It gets most everything pretty dang far up out of the way. Remember, this suspension is basically lowered about 1/2" compared to stock but with the 35" clown tires it has just about 16-17" of clearance.
The front driveline is a little more exposed than I would like but the rear is tucked up out of the way really nice. You can ********** the chassis on a tall ledge or step on the rear tires and not have to worry about tagging the driveshaft.
I also slipped the rear part of the exhaust system in place. I still love those little hitch pin mounts I made....
Tomorrow I think I can fill all the fluids, mod the transmission shifter a little bit, assemble the tunnel, and mount the seats. I think that just about does it for reassembly and I can fire it up this weekend. I need a helper to bleed the brakes and she is a teacher so the week is pretty thin for helper time....
Metcalf
Expedition Leader
Getting pretty close now...
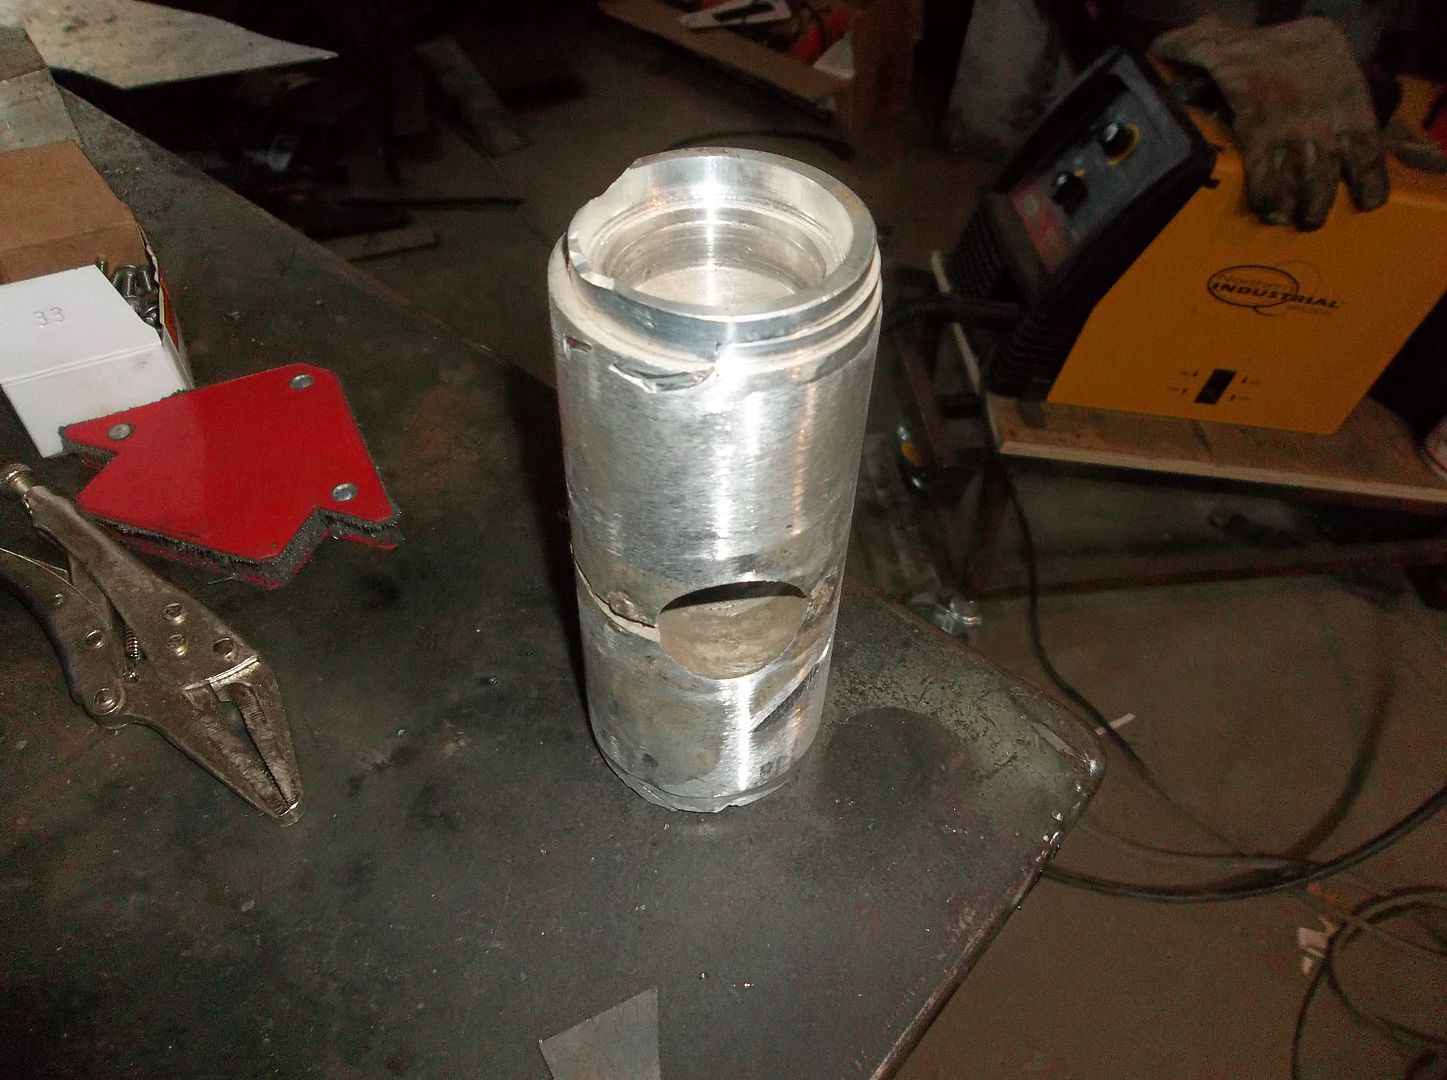
I found this big ugly chunk of aluminum that looks like someone used for a hammer or something. I chucked it up in the lathe and made one of these...

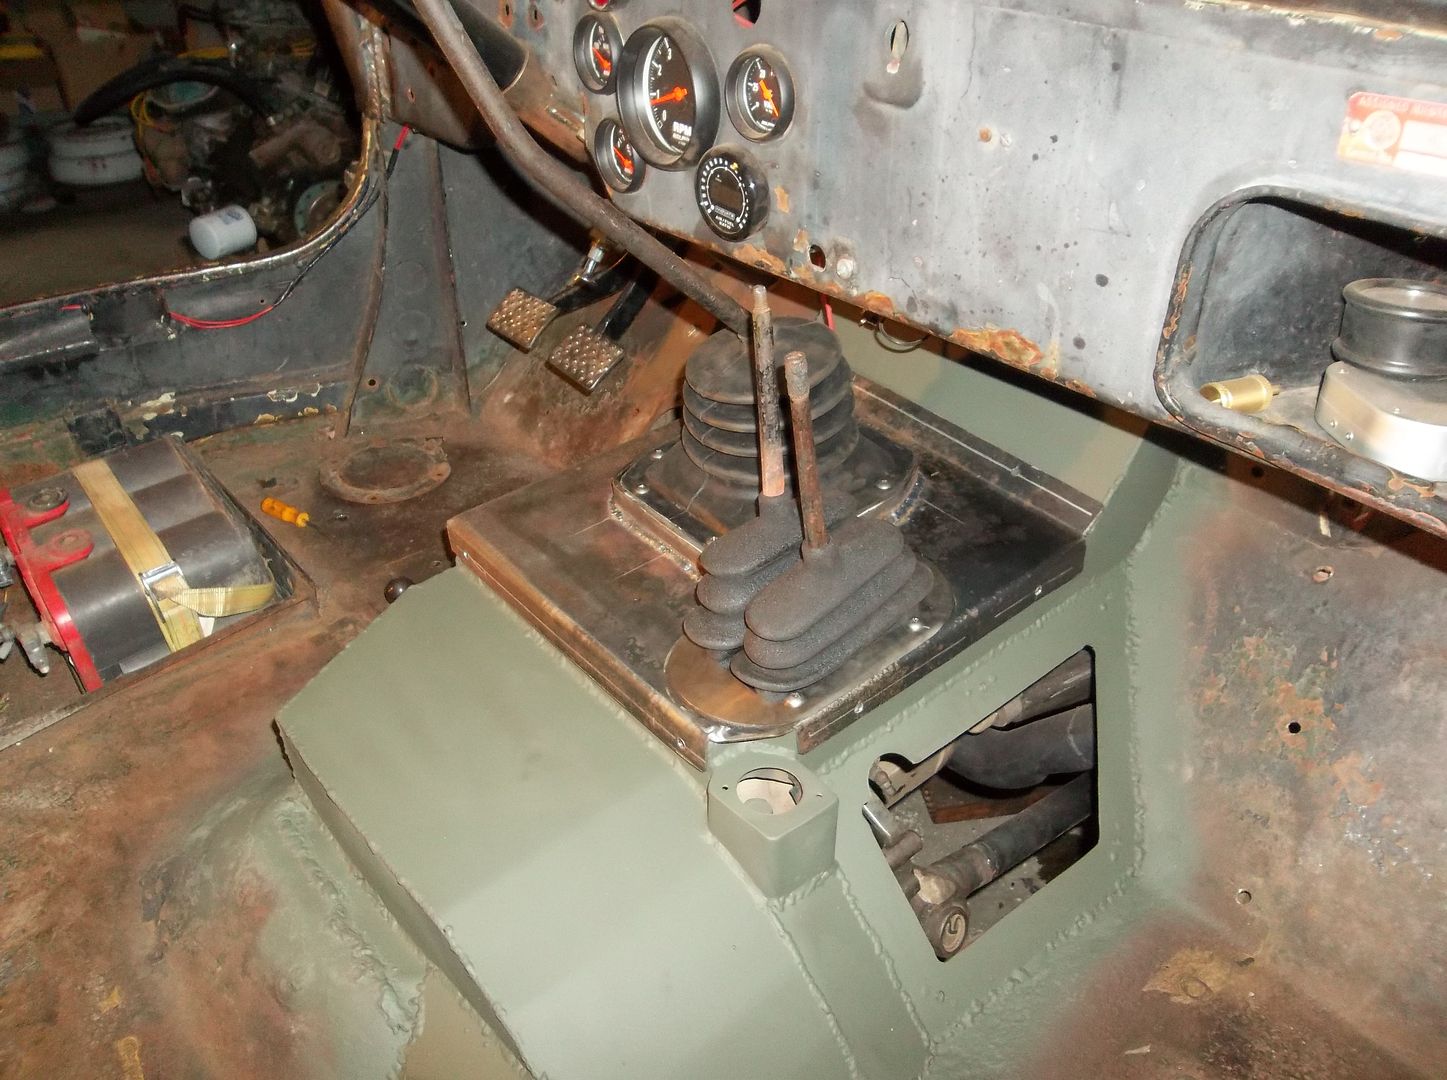
A shift knob for the transmission. I bent the shifter rod a little bit at lunch. I shortened it just a little bit. Then welded on a new threaded bolt like the transfer case shift lever. Overall it worked out pretty good. I can reach all the gears fully seated without having to reach for any. If anything the shift knob might be a little close. I can always bend the shifter away a little bit...
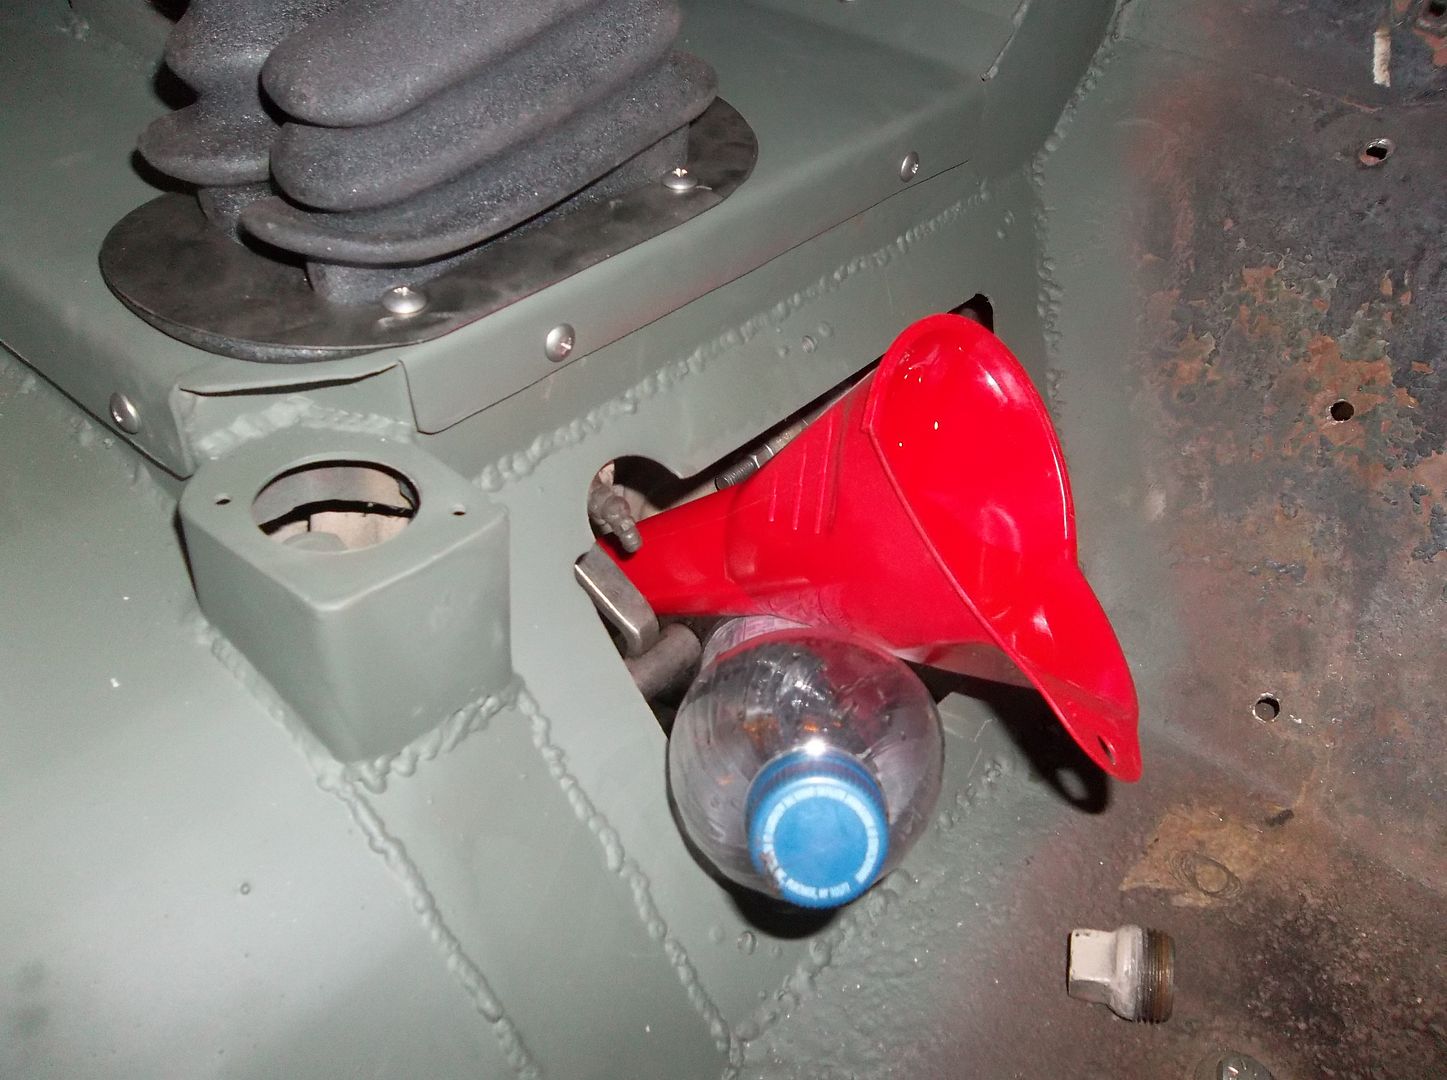
Another bonus of the removeable side panel. You can use a long funnel into the transmission fill port. This is SOOOOO much better than crawling under the vehicle...
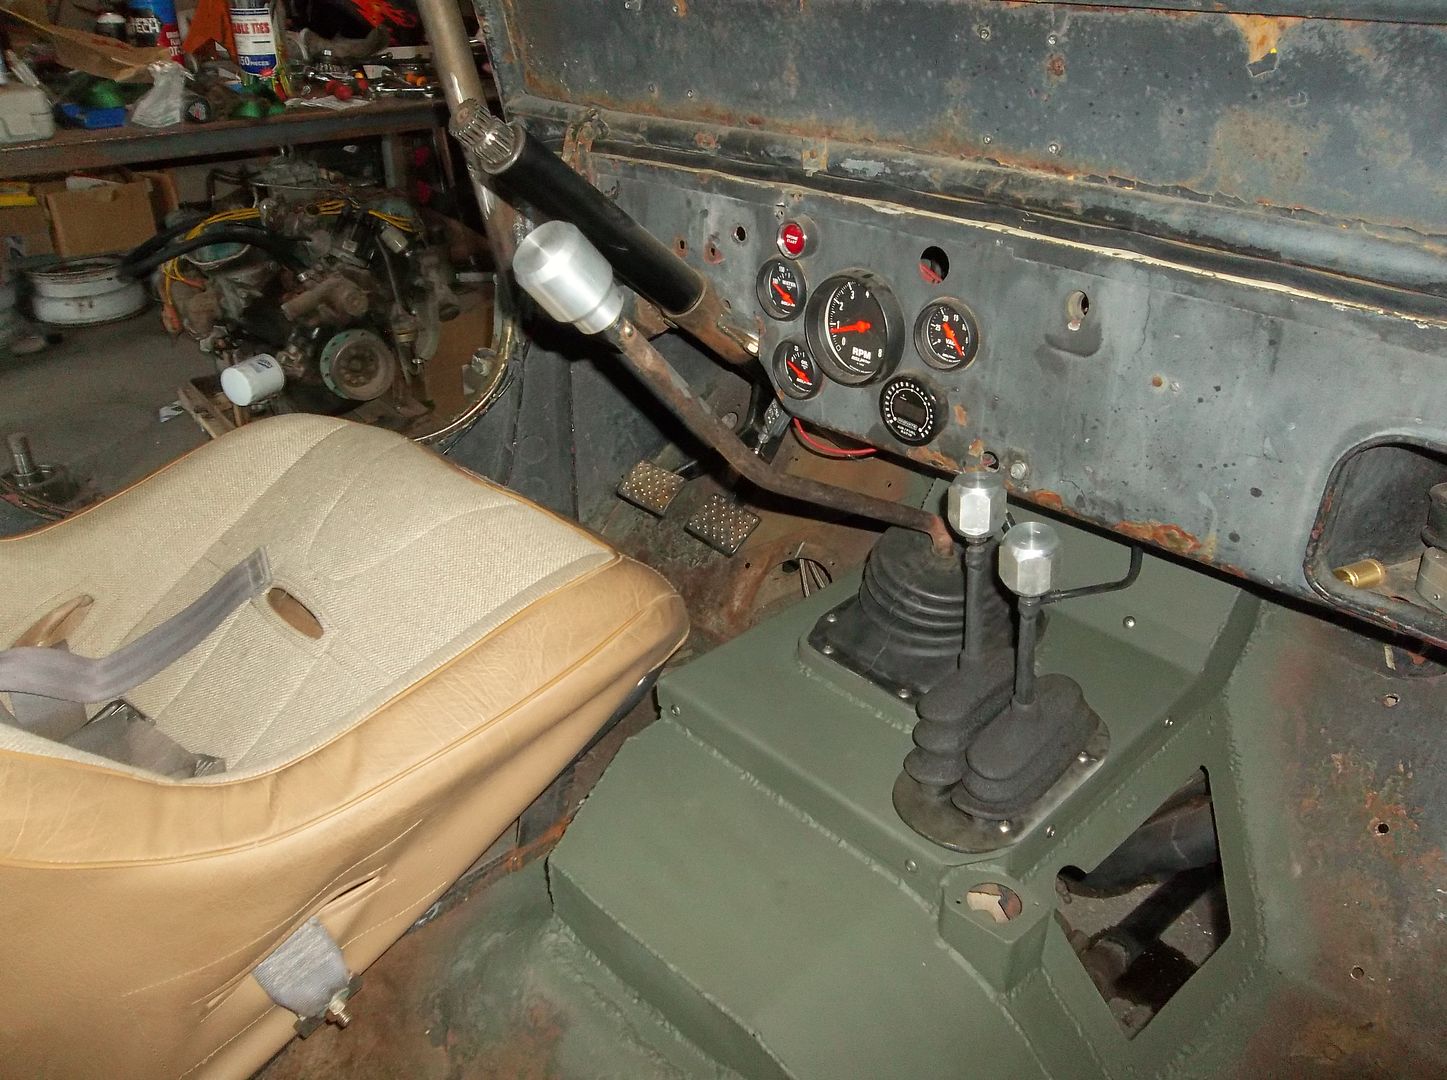
Somewhere in there I assembled the transmission top cover and shift boots. I also attached the vent line to the transfer case. The gas pedal is installed.
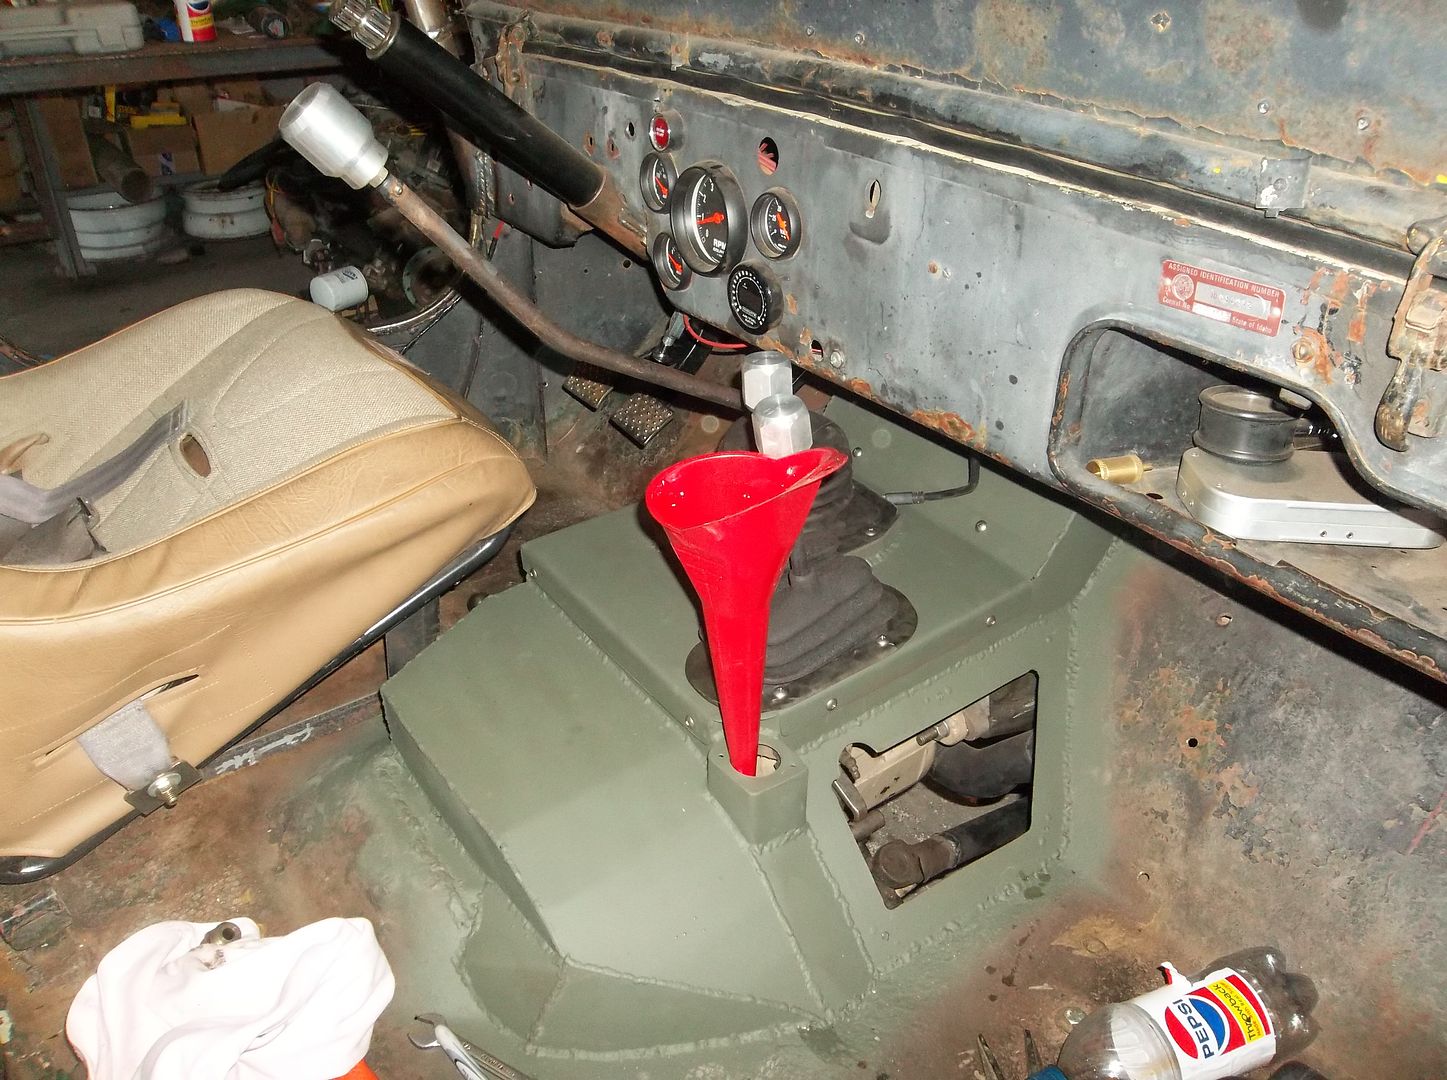
Transfer case fill hole for the win...
I also topped up the radiator with coolant. I should go throw the charger on it to make sure the battery is fresh for starting it soon!
I'm slightly nervous about getting the clutch bled out since it was such a pain in the butt last time. At this point I don't care I will drive it without a working clutch at EJS if I have to!
I found this big ugly chunk of aluminum that looks like someone used for a hammer or something. I chucked it up in the lathe and made one of these...
A shift knob for the transmission. I bent the shifter rod a little bit at lunch. I shortened it just a little bit. Then welded on a new threaded bolt like the transfer case shift lever. Overall it worked out pretty good. I can reach all the gears fully seated without having to reach for any. If anything the shift knob might be a little close. I can always bend the shifter away a little bit...
Another bonus of the removeable side panel. You can use a long funnel into the transmission fill port. This is SOOOOO much better than crawling under the vehicle...
Somewhere in there I assembled the transmission top cover and shift boots. I also attached the vent line to the transfer case. The gas pedal is installed.
Transfer case fill hole for the win...
I also topped up the radiator with coolant. I should go throw the charger on it to make sure the battery is fresh for starting it soon!
I'm slightly nervous about getting the clutch bled out since it was such a pain in the butt last time. At this point I don't care I will drive it without a working clutch at EJS if I have to!
Metcalf
Expedition Leader
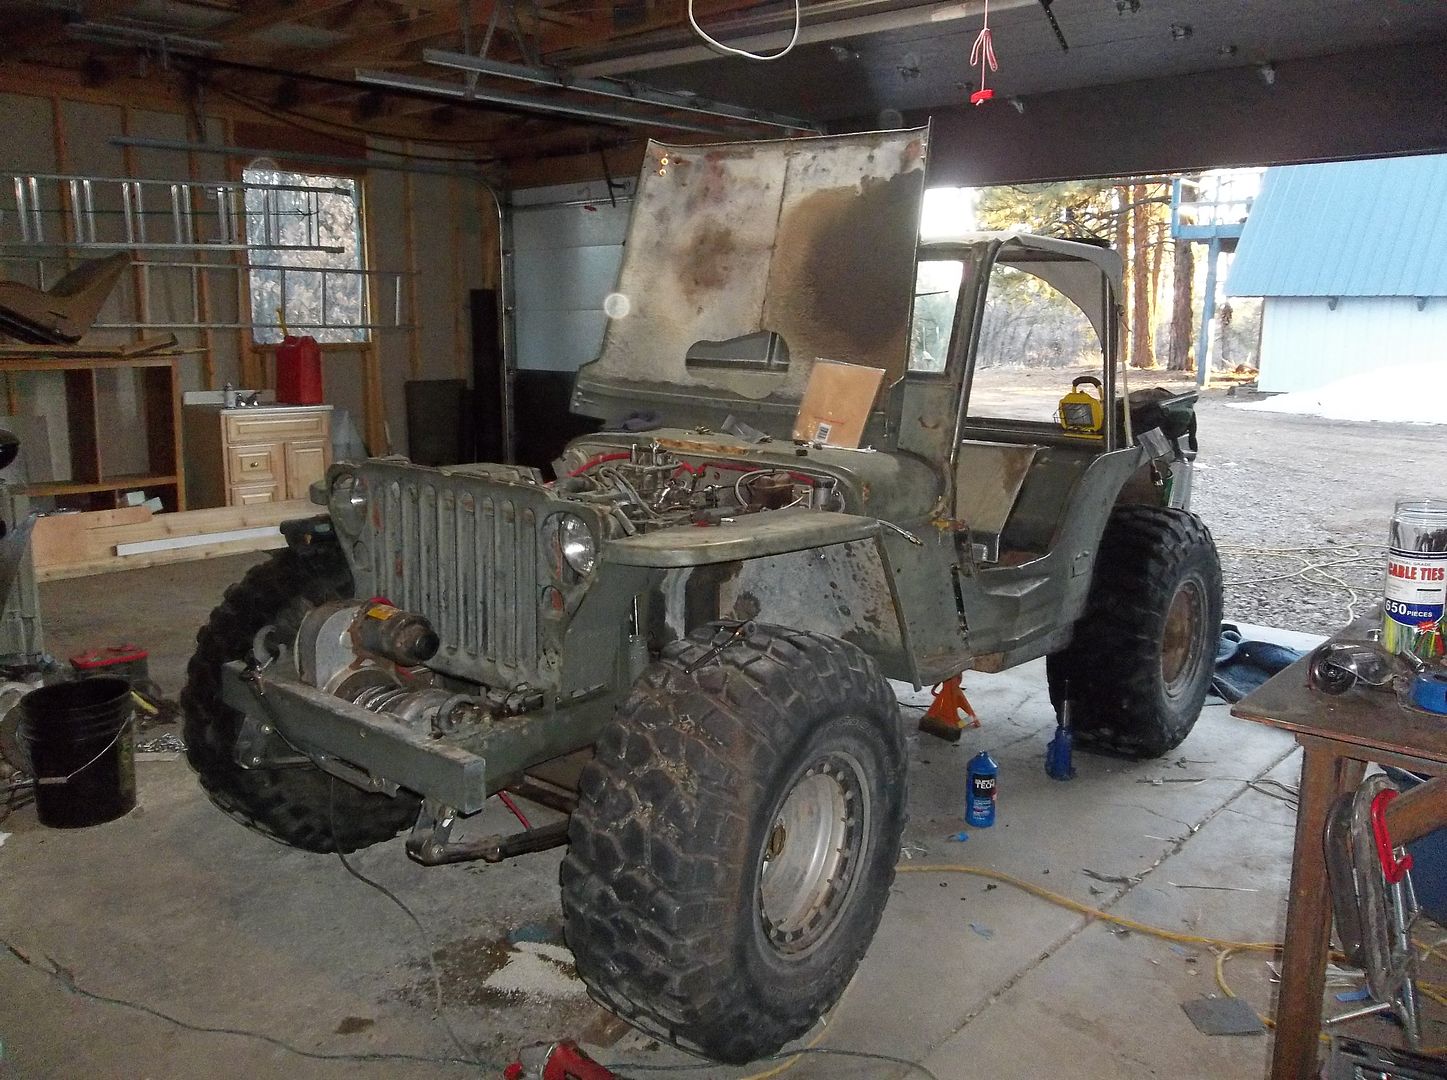
Did you ever have one of those feelings.....
Here is a totally cool converted Willys. It has about every little modification you can imagine EXCEPT a working hydraulic clutch. Now, it works just fine for the most part. You push the pedal and the hydraulic throwout bearing moves forward right up till the point it crashes in to the pressure plate! Now, I can adjust the linkage so that doesn't happen, but the problem is that the pressure place fingers have not traveled far enough to release the clutch, not even close from what I can tell....
Now, that didn't strop me from taking it for a test drive. You just have to start in gear and drive without the clutch. I hate to drive a transmission without a clutch for very long but I haven't come this far to miss Easter Jeep Safari next week! I will be taking the willys and driving around town without a clutch....maybe an easy trail.....I just want to go see all the cool stuff.
Some good....
The new transmission seems to be doing great. No leaks. Shifts pretty easy without a clutch.
The transfer case works great. No leaks. I can now use each stick independent.
I didn't notice any bad vibes from my temp trail driveshafts.
No new bad noises....well.....unless you count the hydraulic throwout bearing crashing into the pressure plate. It doesn't do that anymore but it also doesn't shift...sooooooooooo.....
The bad....
The fan relay doesn't work anymore. I could have messed up the wiring but I don't think so. I need to go to a parts house and find another one...and a spare too.
The main switch for power to the ignition doesn't work. I had to take it out and tap on it. I need to do something different with that. I have a big marine style disconnect that I think I am going to use.
And the clutch not releasing....lame.....
I had a bad feeling about the clutch since the geometry changed a little with the new clutch disc. I even shaved the pressure plate down slightly on the pressed nose fold area. Nope, not good enough.
I have had enough with this stupid internal clutch linkage. I am going to convert it to an external fork somehow. I think I have just enough clearance with the new floor design.
IT SUCKS that I will have to pull the engine again to do this. I think I can just pull the grill, drop the y-pipe, drop the starter off, and pull the motor forward enough to get it off the input shaft and stuff....suck suck suck suck suck!