You are using an out of date browser. It may not display this or other websites correctly.
You should upgrade or use an alternative browser.
You should upgrade or use an alternative browser.
Pro-Rig V2.0 - Home Built Compact Composite Pop-up
- Thread starter CoyoteThistle
- Start date
CoyoteThistle
Adventurer
Thanks Java. Like they say, imitation is the sincerest form of flattery!
Got out and today and got a layer of primer on. Went pretty well, I'm sure the fumes killed a few brain cells (respirator over beard, really not that effective).
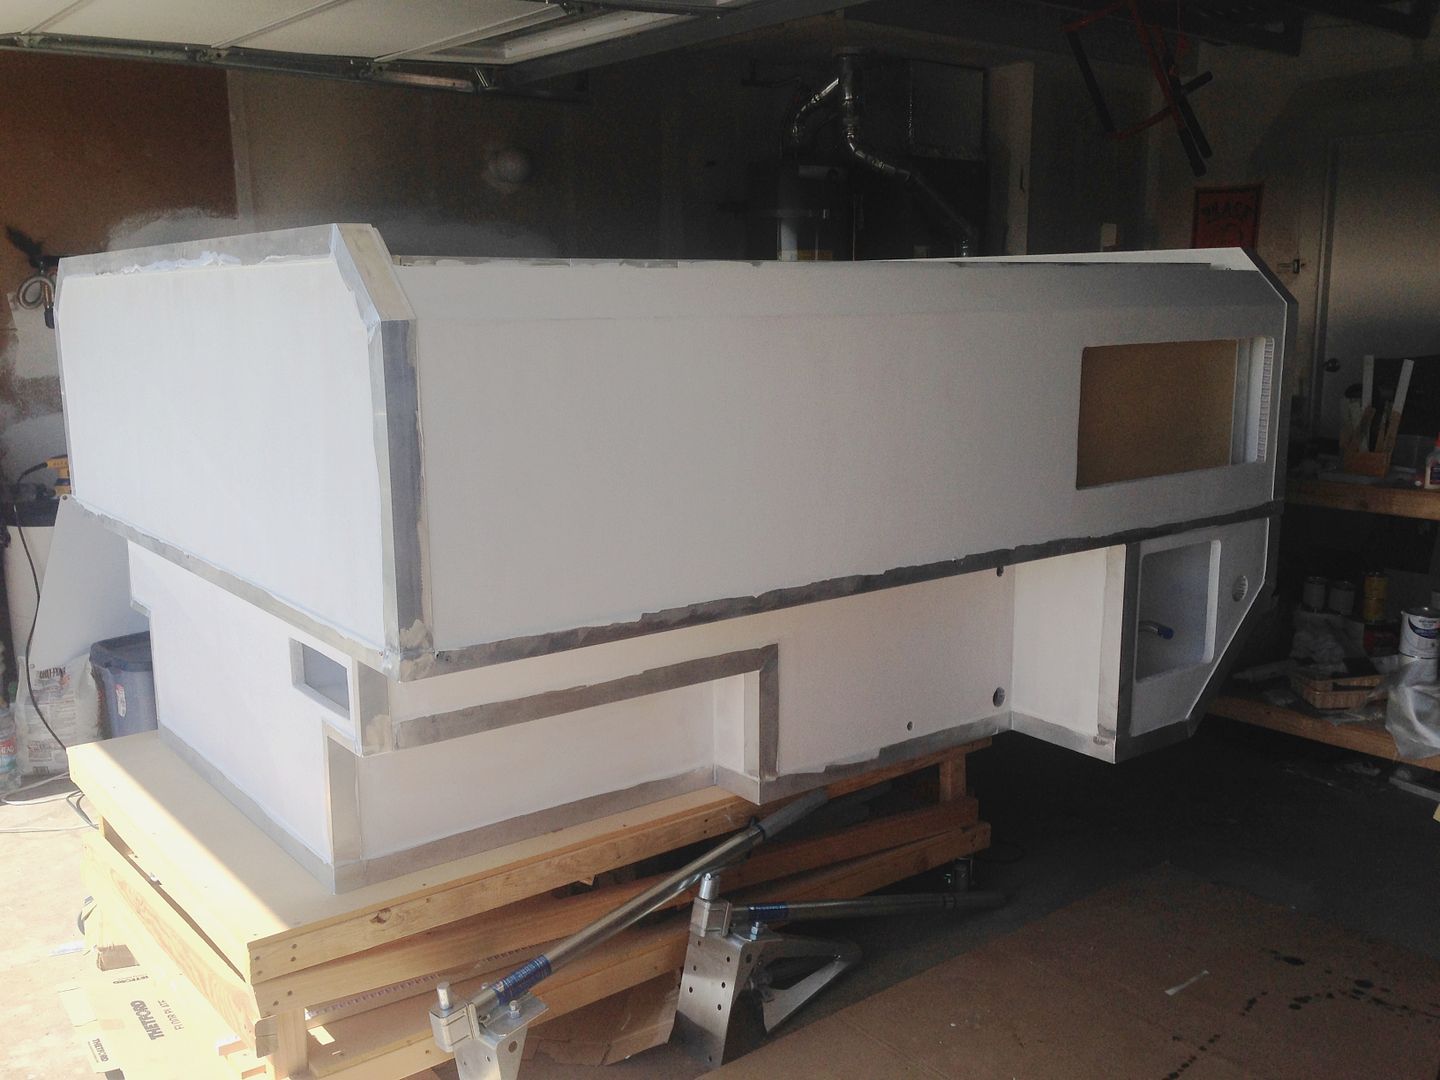
Going to use different primer on the aluminum. That's probably the next step.
Got several other minor pieces done on the interior - the little things that eat up so much time.
CoyoteThistle
Adventurer
Yep, the little stuff...
Speaking of which, got the tail light wiring about done along with some other electrical stuff. including finalizing the plan for the latches that will hold down the slide-up. Going with the same style lots of pop-ups use, one on each corner like so
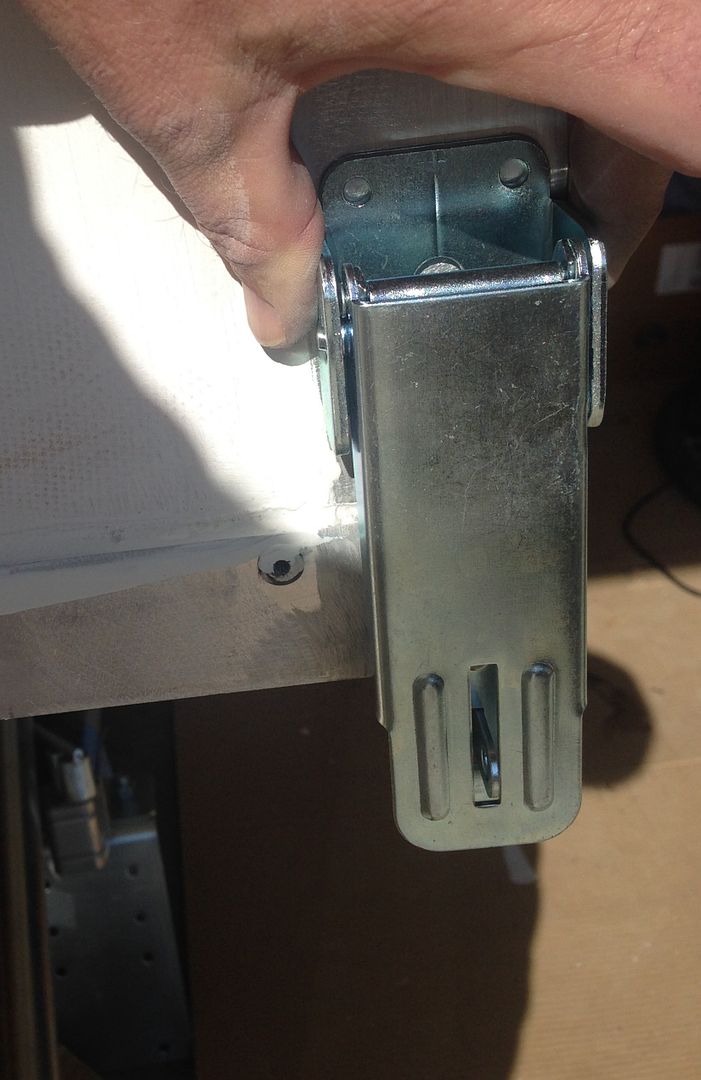
Once paint is done, I'll rivet these in.
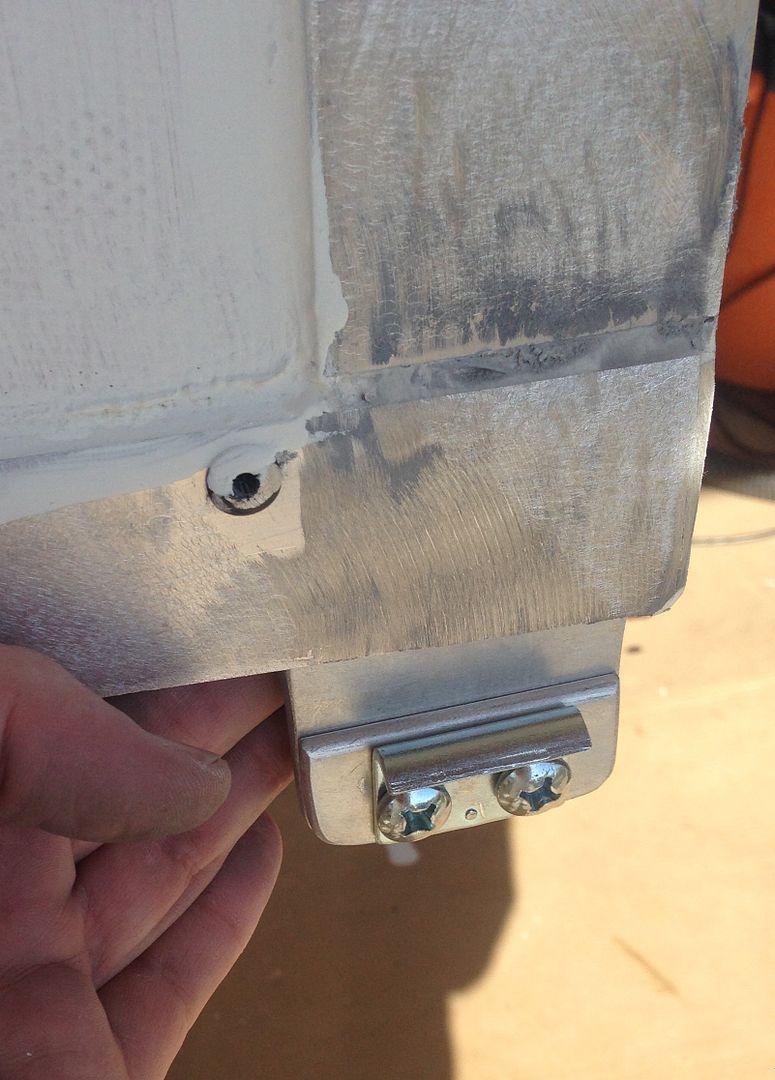
Made some little brackets to hold the catches on the front.
Took another stab at the epoxy counter - in certain lights it looked pretty bad. Sheri took over the operation this time. Heated the epoxy up a bit more, mixed up more to put on a thicker layer and tried it a third (fourth?) time. With the expert leadership and help:
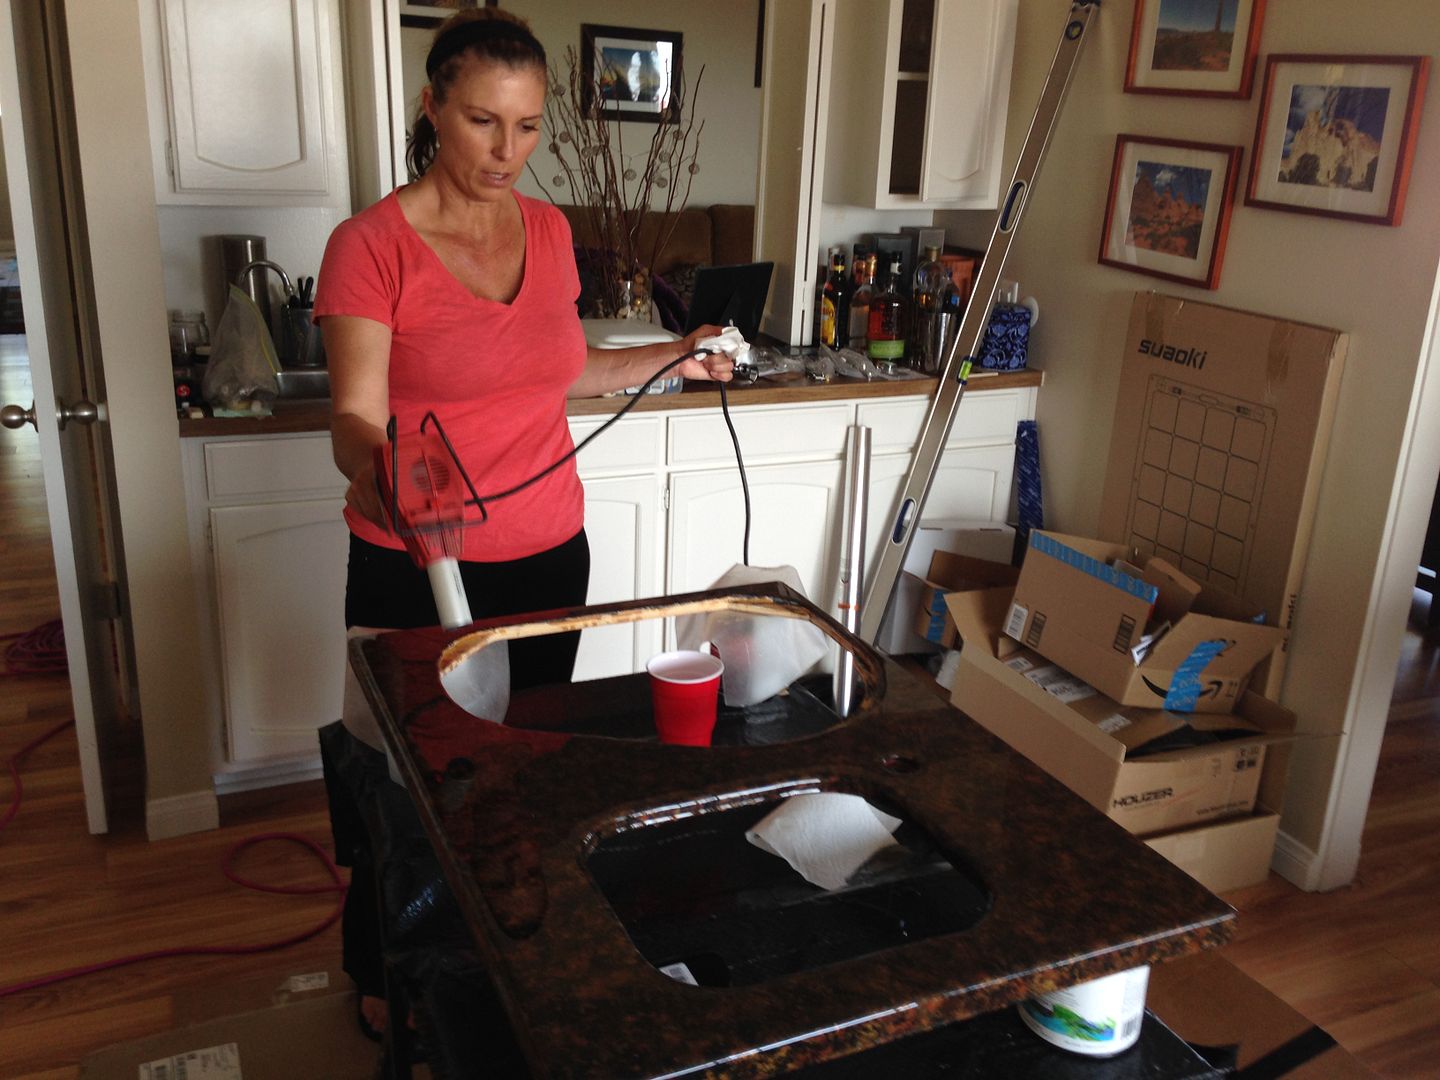
It came out almost perfect! I think you'd need a NASA clean room to keep it perfect, little particles landed on it but the flaws are very minor compared to what it was. Feeling good about this now.
Main fun for the weekend was more sanding and priming. Did a pretty aggressive round of sanding with 240 grit on the primer trying to really smooth things out (effectively using the primer as a filler for the little surface flaws and where a little fiberglass texture was still showing through. Wound up looking like this
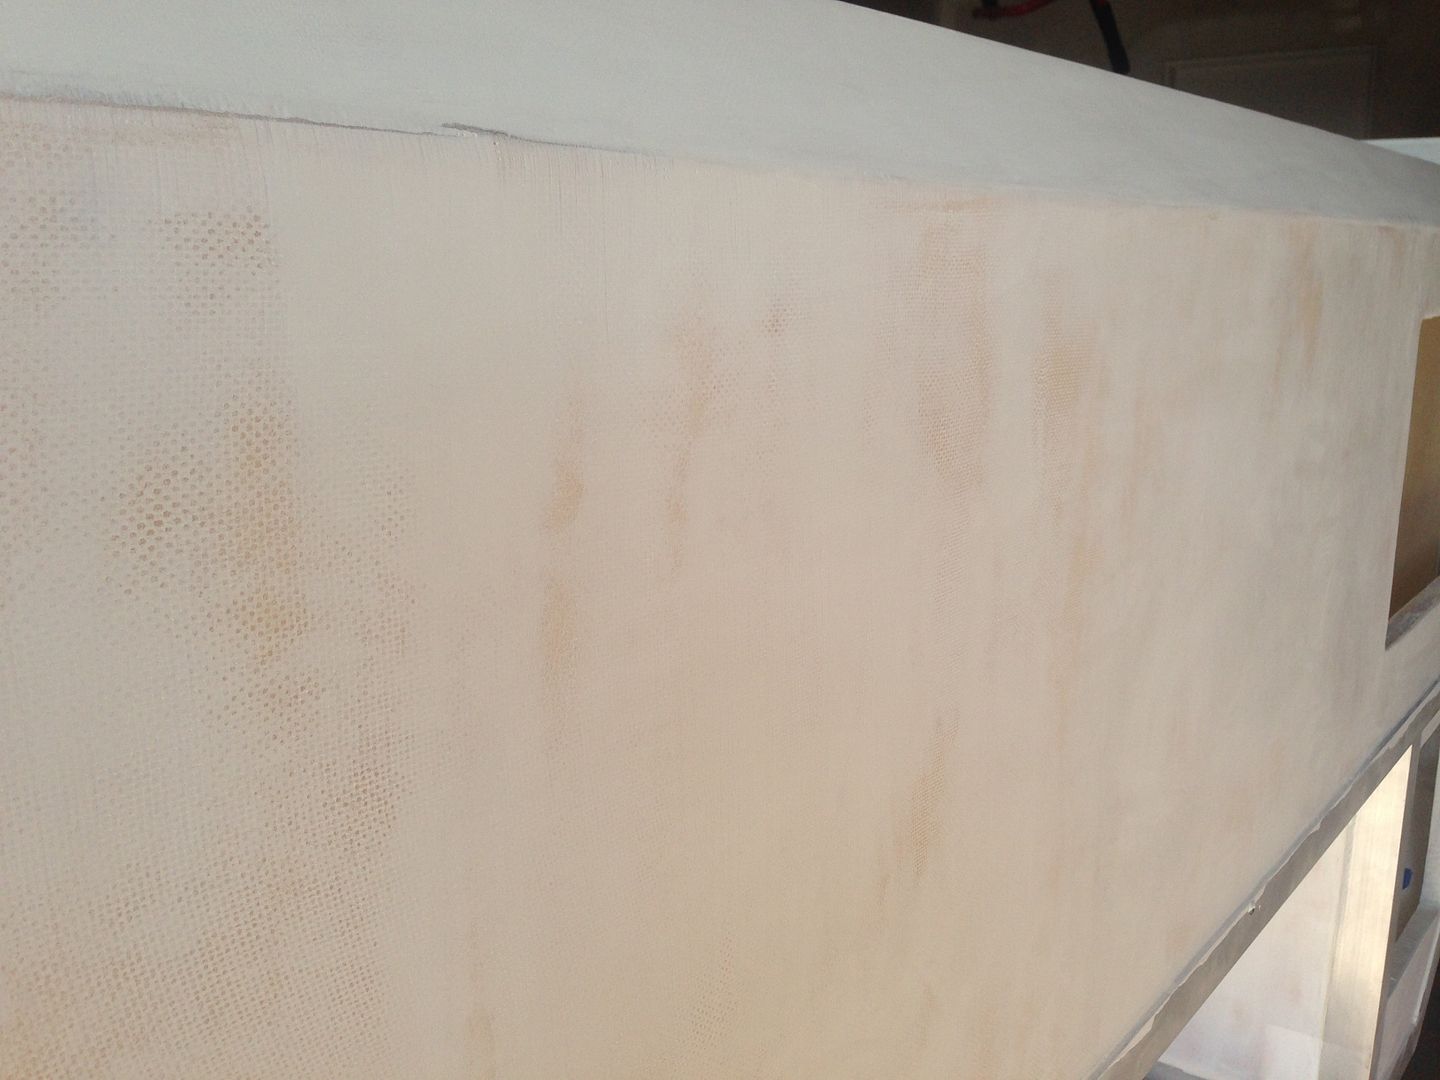
Put another layer of primer on and sanded again. Still some fabric texture in a few spots put it seems really smooth. Gonna go with it, the clock is ticking...
Speaking of which, got the tail light wiring about done along with some other electrical stuff. including finalizing the plan for the latches that will hold down the slide-up. Going with the same style lots of pop-ups use, one on each corner like so

Once paint is done, I'll rivet these in.
Made some little brackets to hold the catches on the front.

Took another stab at the epoxy counter - in certain lights it looked pretty bad. Sheri took over the operation this time. Heated the epoxy up a bit more, mixed up more to put on a thicker layer and tried it a third (fourth?) time. With the expert leadership and help:

It came out almost perfect! I think you'd need a NASA clean room to keep it perfect, little particles landed on it but the flaws are very minor compared to what it was. Feeling good about this now.
Main fun for the weekend was more sanding and priming. Did a pretty aggressive round of sanding with 240 grit on the primer trying to really smooth things out (effectively using the primer as a filler for the little surface flaws and where a little fiberglass texture was still showing through. Wound up looking like this

Put another layer of primer on and sanded again. Still some fabric texture in a few spots put it seems really smooth. Gonna go with it, the clock is ticking...
CoyoteThistle
Adventurer
Making progress on the painting, slow and steady...
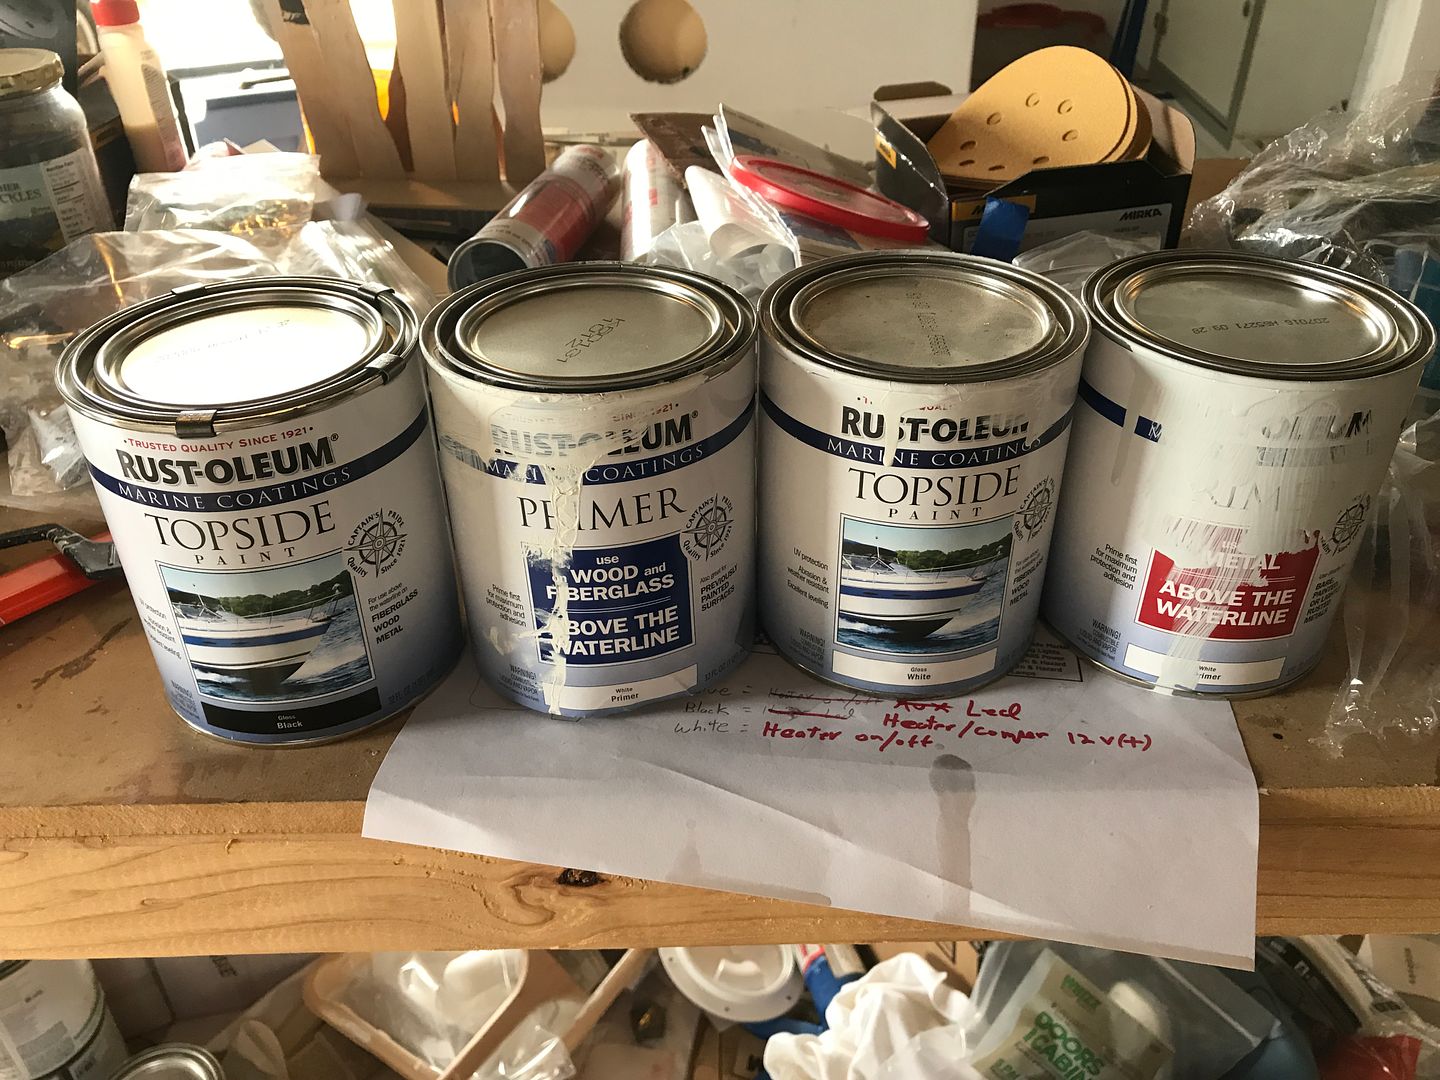
Here's what I've been using.
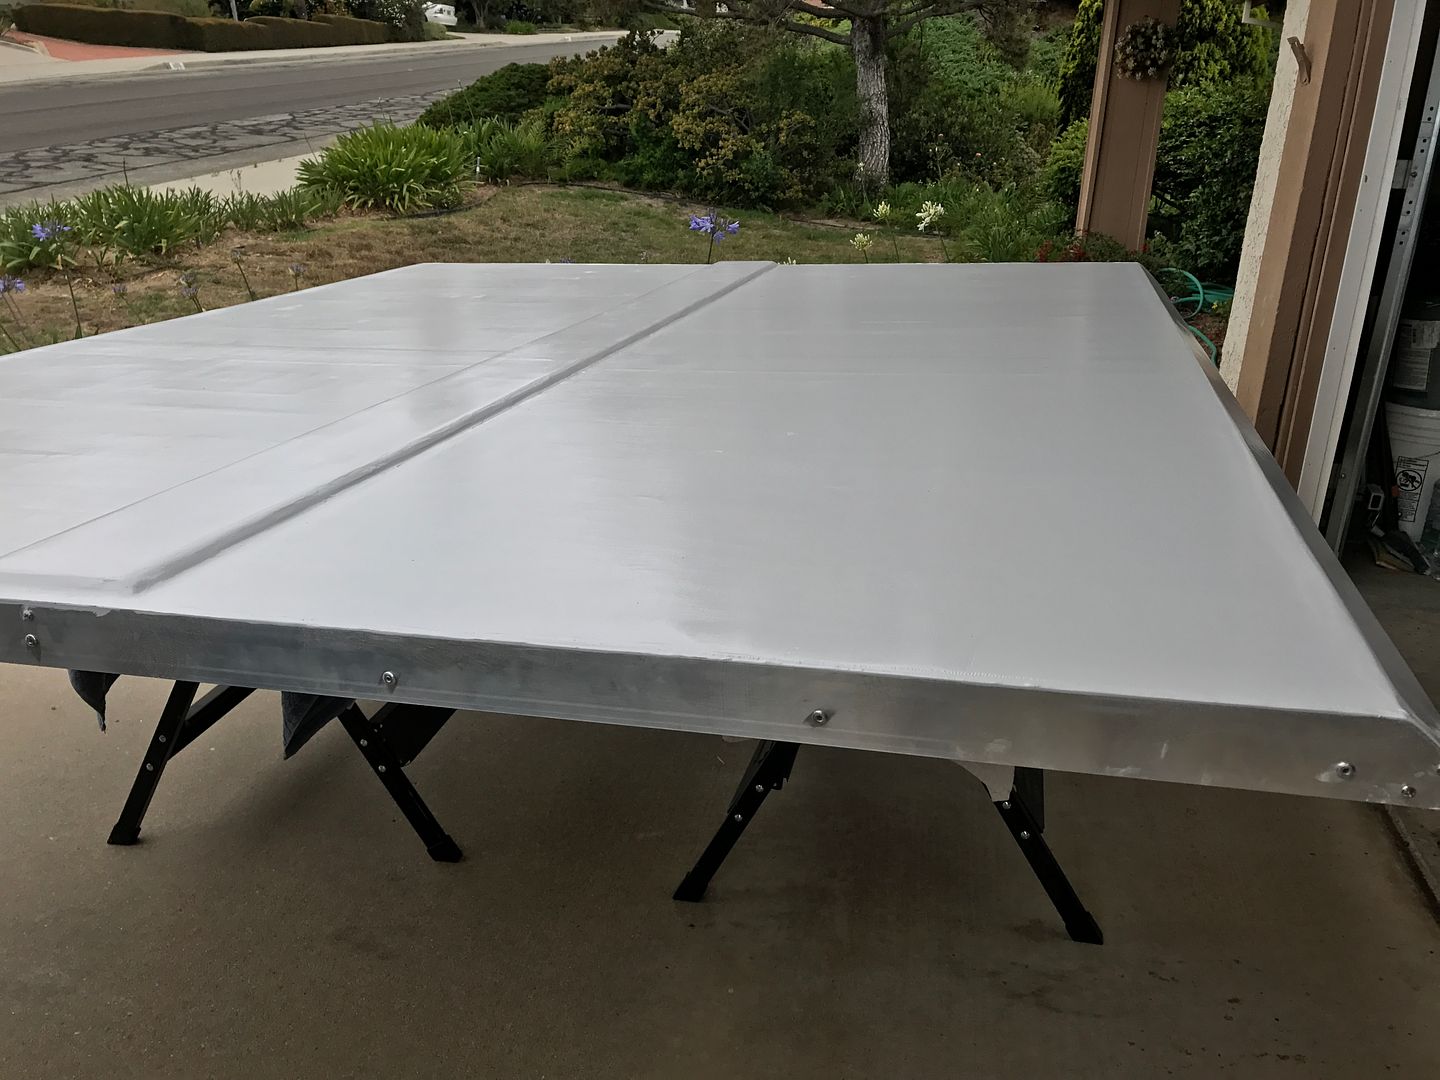
The roof now has two coats of white on it, one to go I think. Seems to have a decent gloss. Really shows the imperfections but hey, it's the roof, I was just going for good-enough here since it won't be seen.
I decided to do the shower floor in the white Topside paint too. Pretty happy with it.

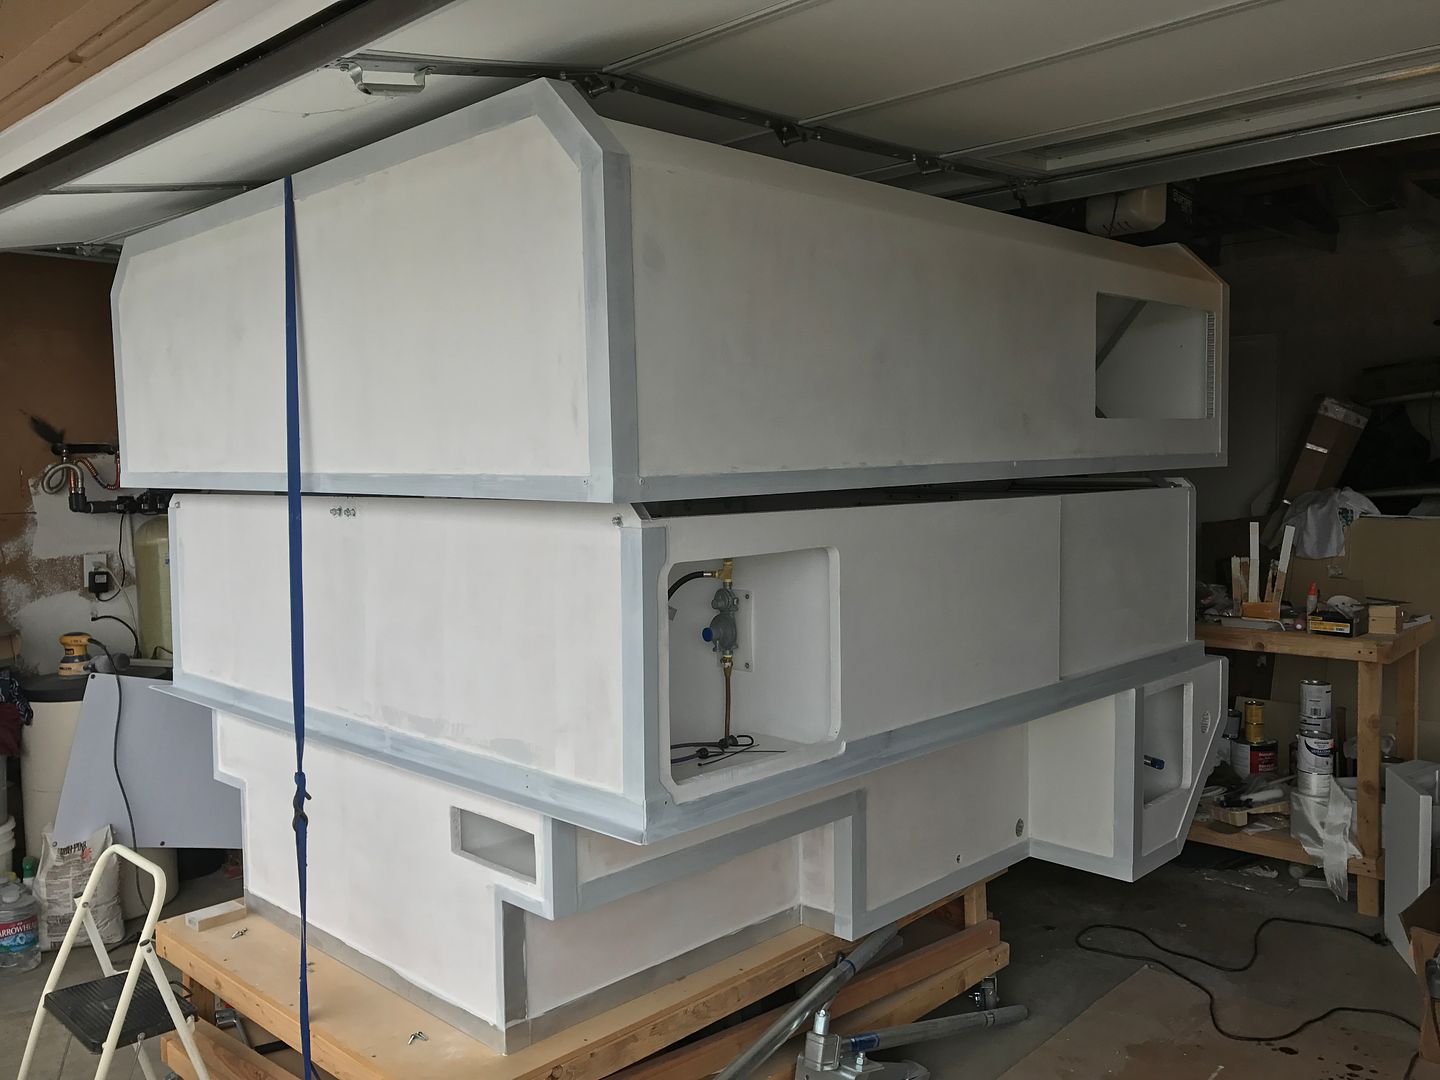
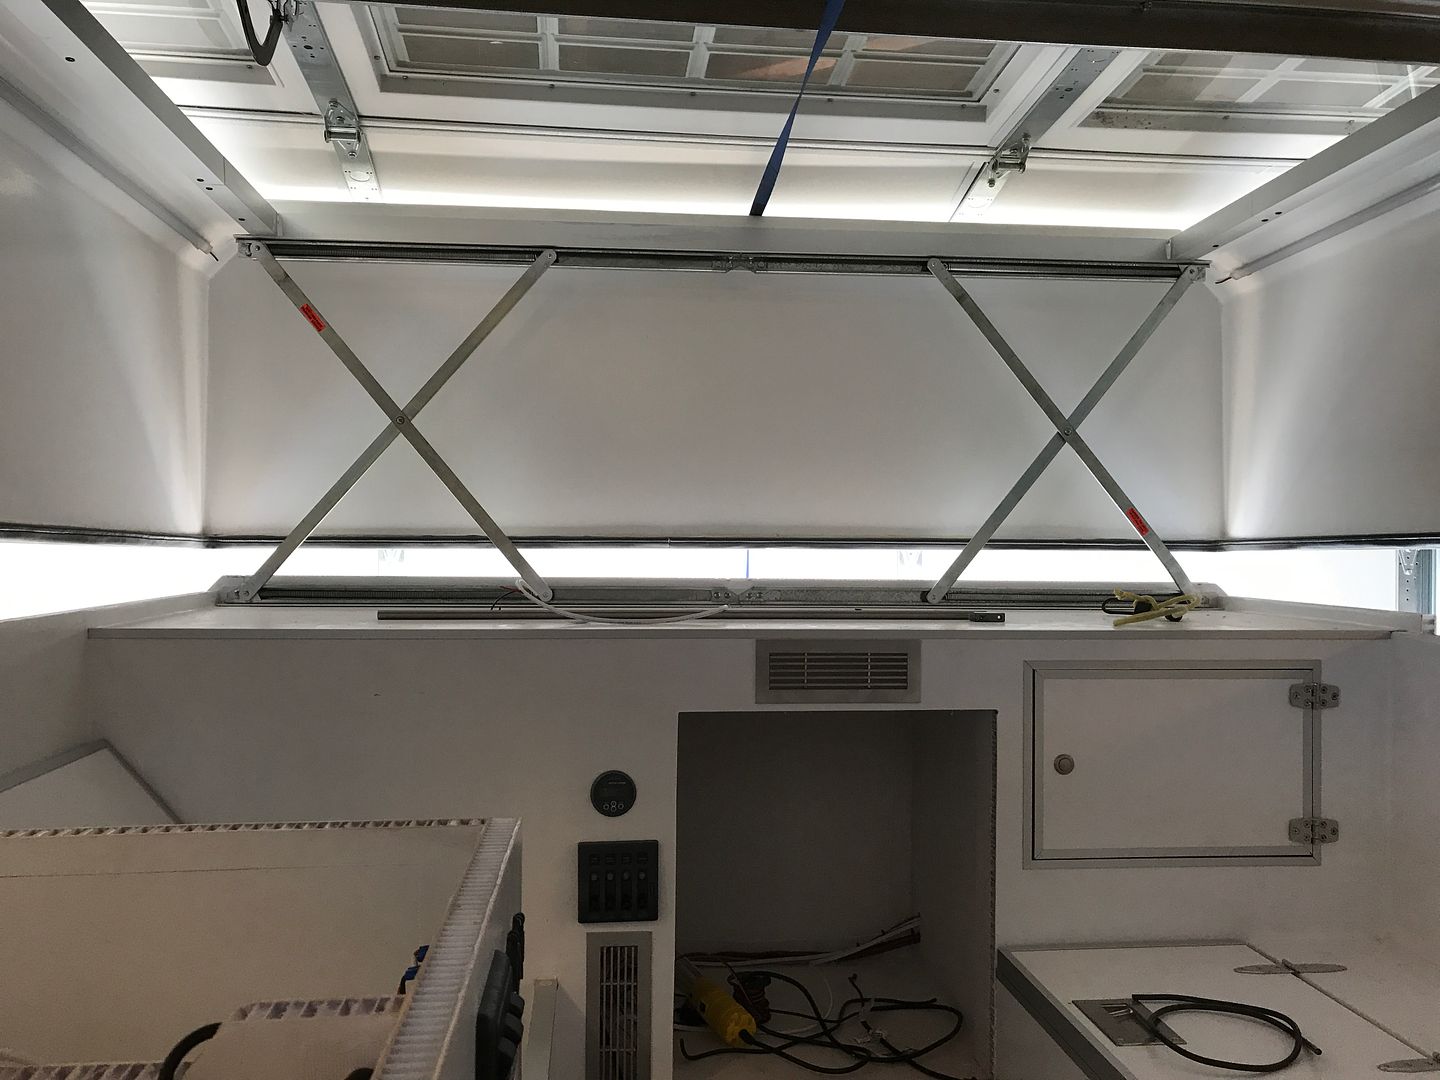
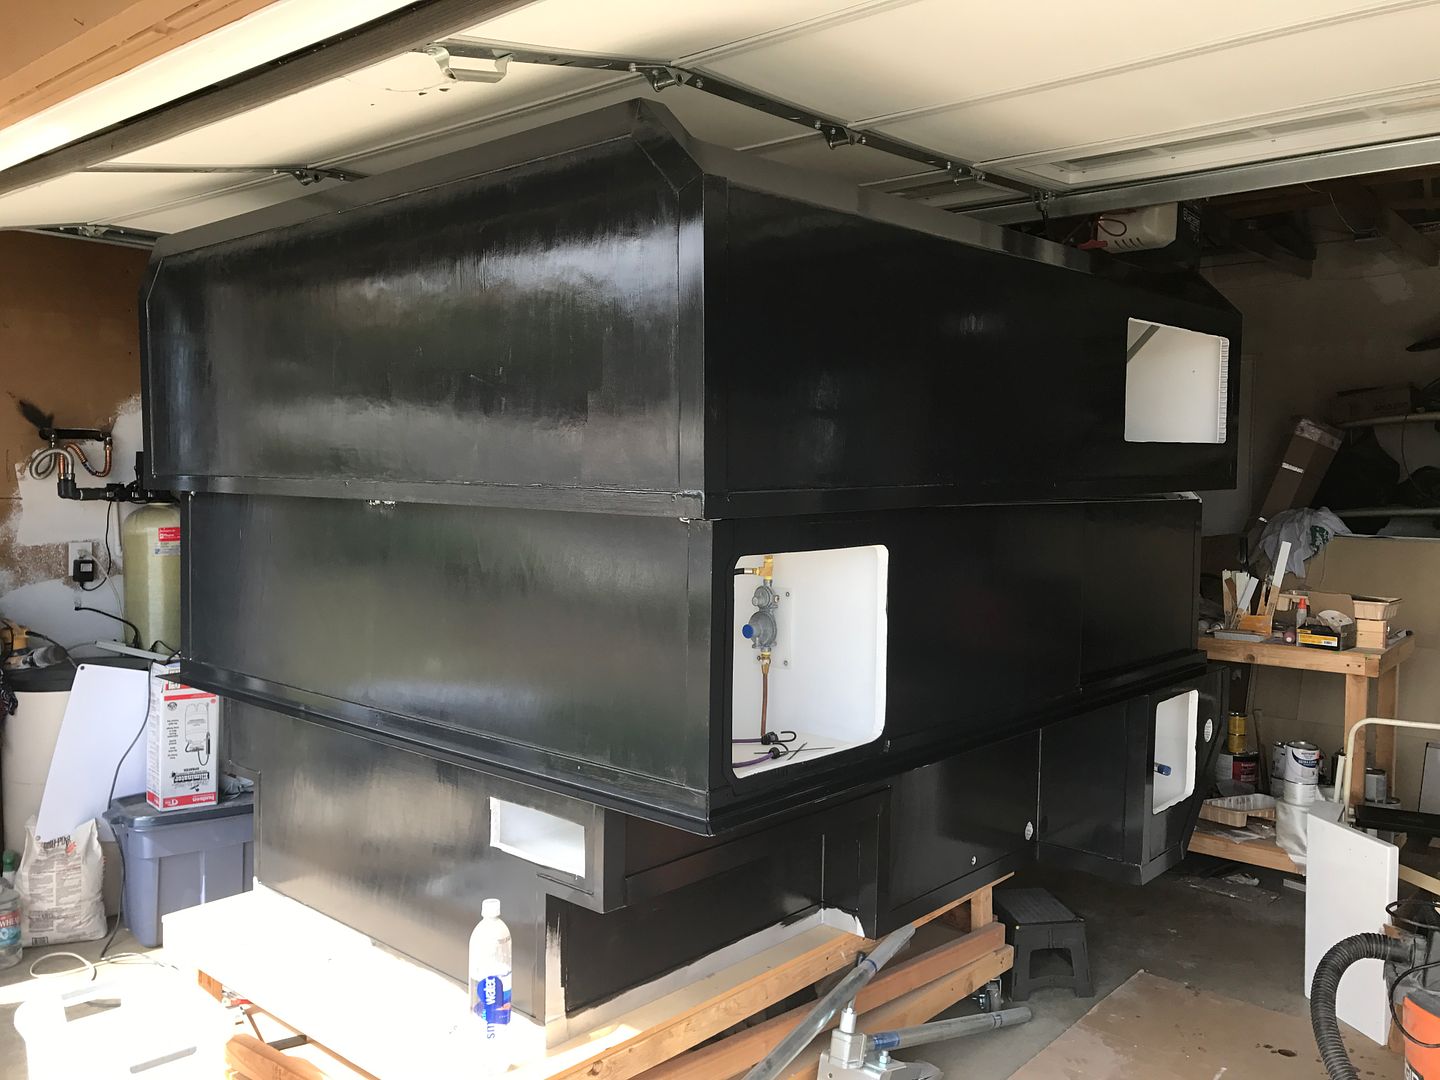
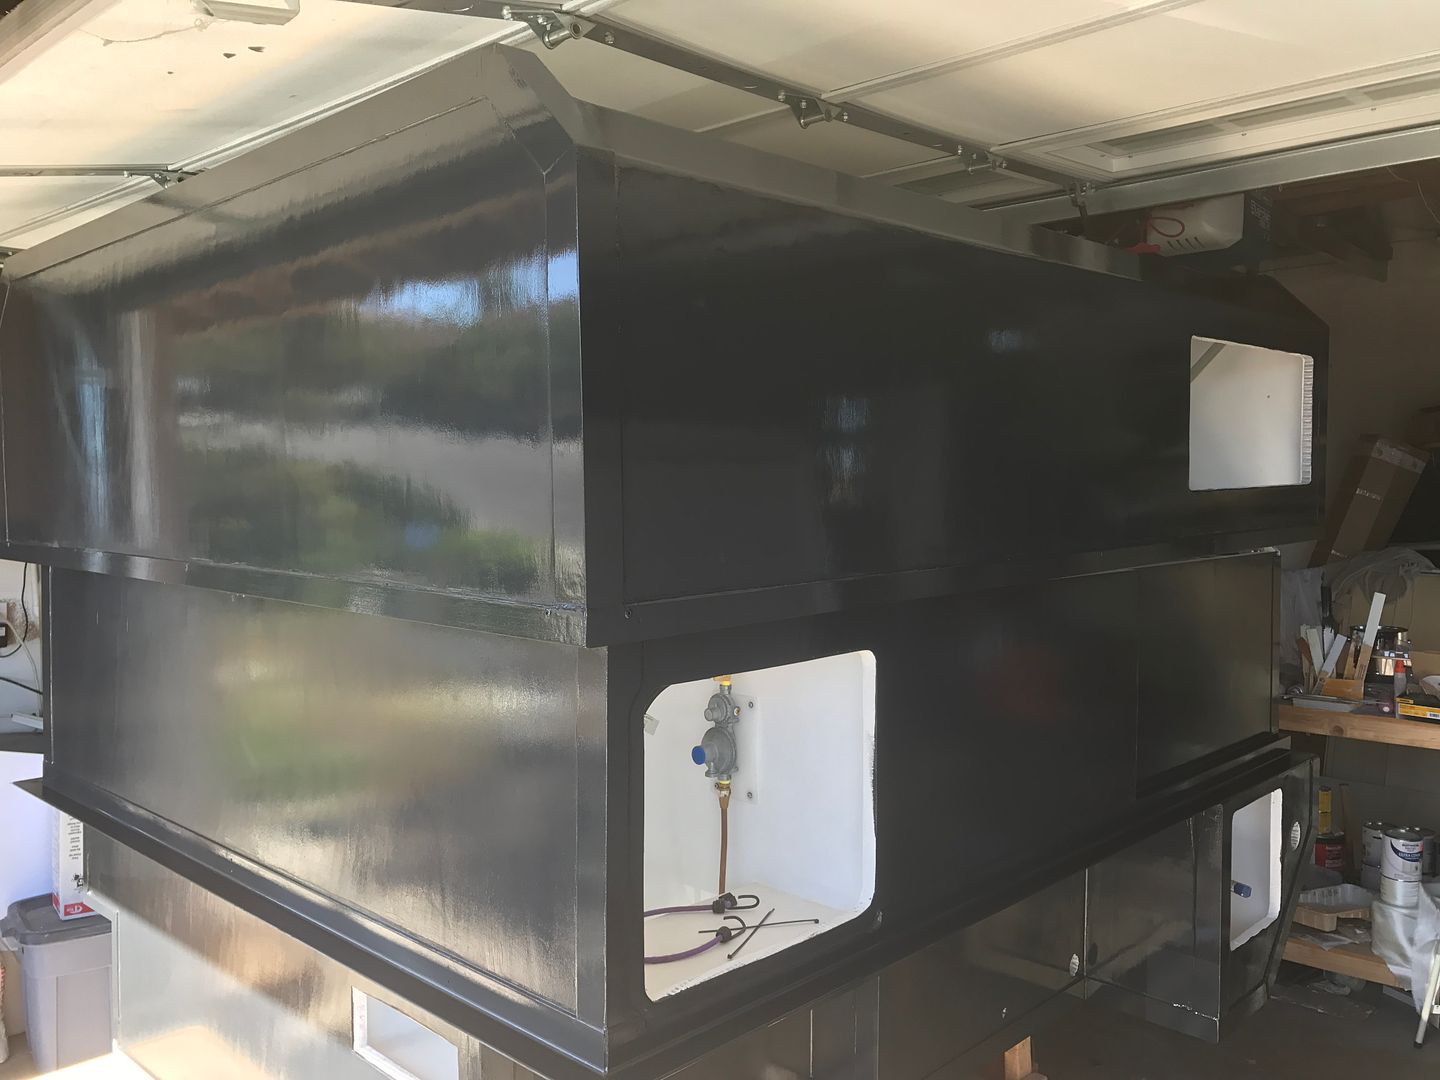
The rest of the camper is now covered in primer. I did a second coat on the slide-up, a coat under the slide-up and I did the aluminum. In order to do all that I had to slide up the slide-up for the first time. The strap is to keep it down enough to clear the garage door.
Tight fit!
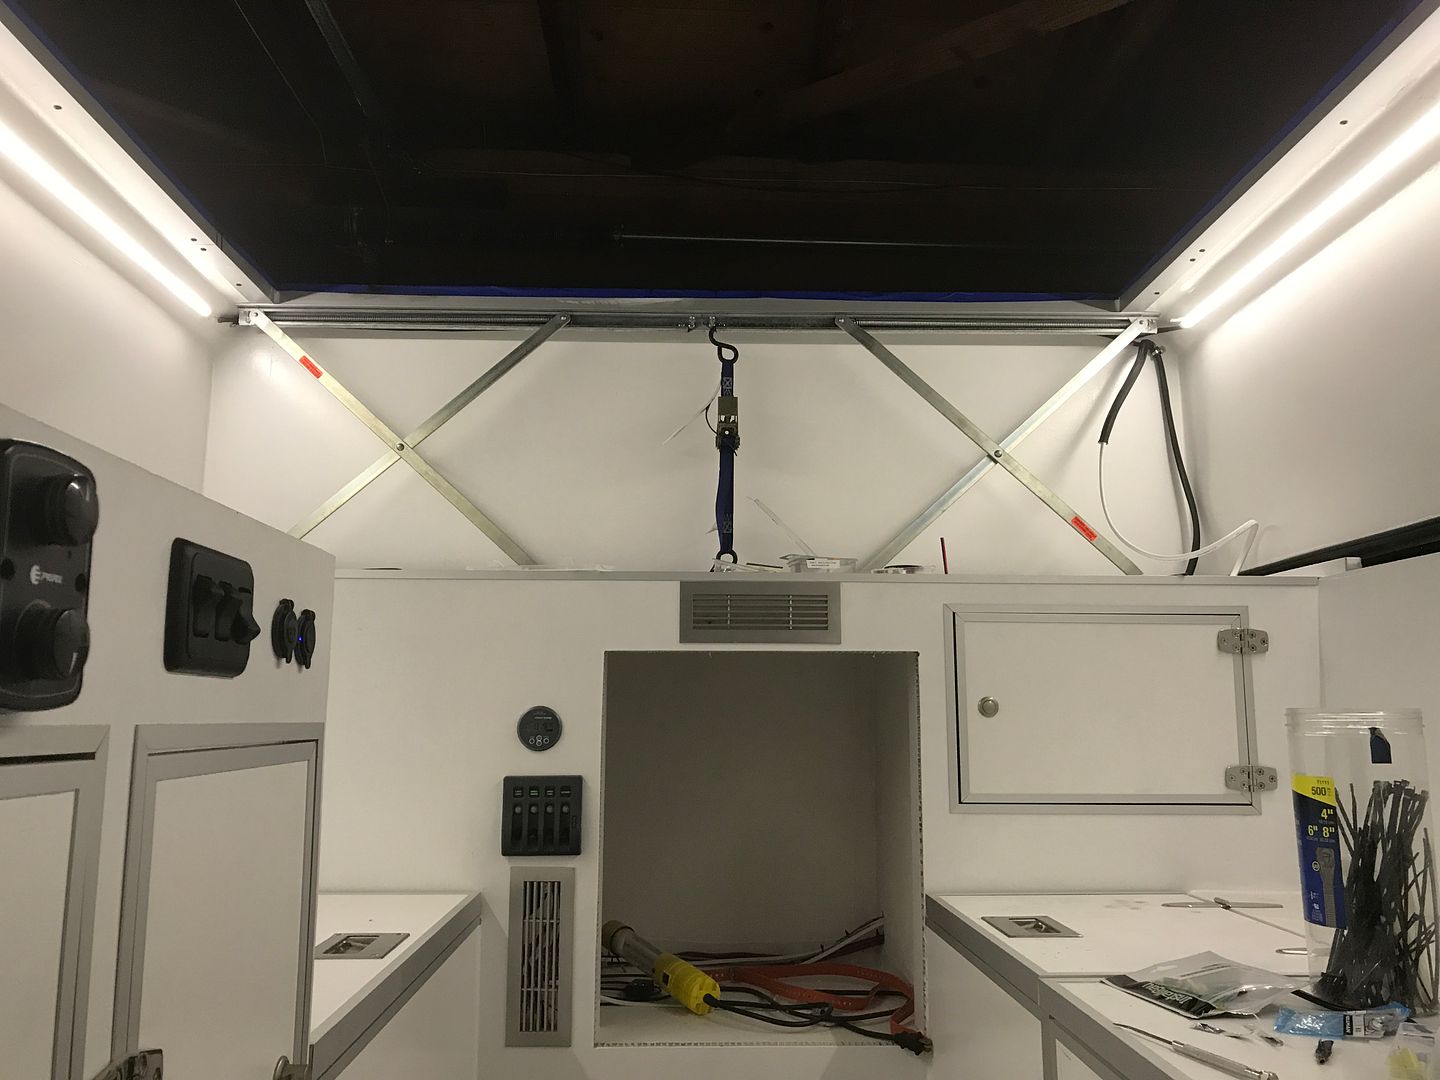
Here's a look at the lifters from the inside. This is of course over extended. There will eventually be a seal and limiter to keep it at the right height.
Paint is next...
Here's what I've been using.

The roof now has two coats of white on it, one to go I think. Seems to have a decent gloss. Really shows the imperfections but hey, it's the roof, I was just going for good-enough here since it won't be seen.

I decided to do the shower floor in the white Topside paint too. Pretty happy with it.

The rest of the camper is now covered in primer. I did a second coat on the slide-up, a coat under the slide-up and I did the aluminum. In order to do all that I had to slide up the slide-up for the first time. The strap is to keep it down enough to clear the garage door.

Tight fit!
Here's a look at the lifters from the inside. This is of course over extended. There will eventually be a seal and limiter to keep it at the right height.

Paint is next...
The Artisan
Adventurer
Looks good man, mine is so simple in comparison.
Kevin
Kevin
CoyoteThistle
Adventurer
Thanks guys!
Simple is a pretty smart way to go. I got kind of caught up in the idea of doing something different, which is interesting and challenging and all that but on the other hand, it would have been nice to be done and out camping months ago with a simpler design. So it goes, no regrets. Onward!
Simple is a pretty smart way to go. I got kind of caught up in the idea of doing something different, which is interesting and challenging and all that but on the other hand, it would have been nice to be done and out camping months ago with a simpler design. So it goes, no regrets. Onward!
CoyoteThistle
Adventurer
Pretty busy week since the last update.
Biggest news is paint. That topside paint is nice and glossy, but boy does it show the shoddy fairing work I did in some of the fiberglass areas (I swear it felt smooth!). Pays to be totally OCD in fairing and sanding I guess.
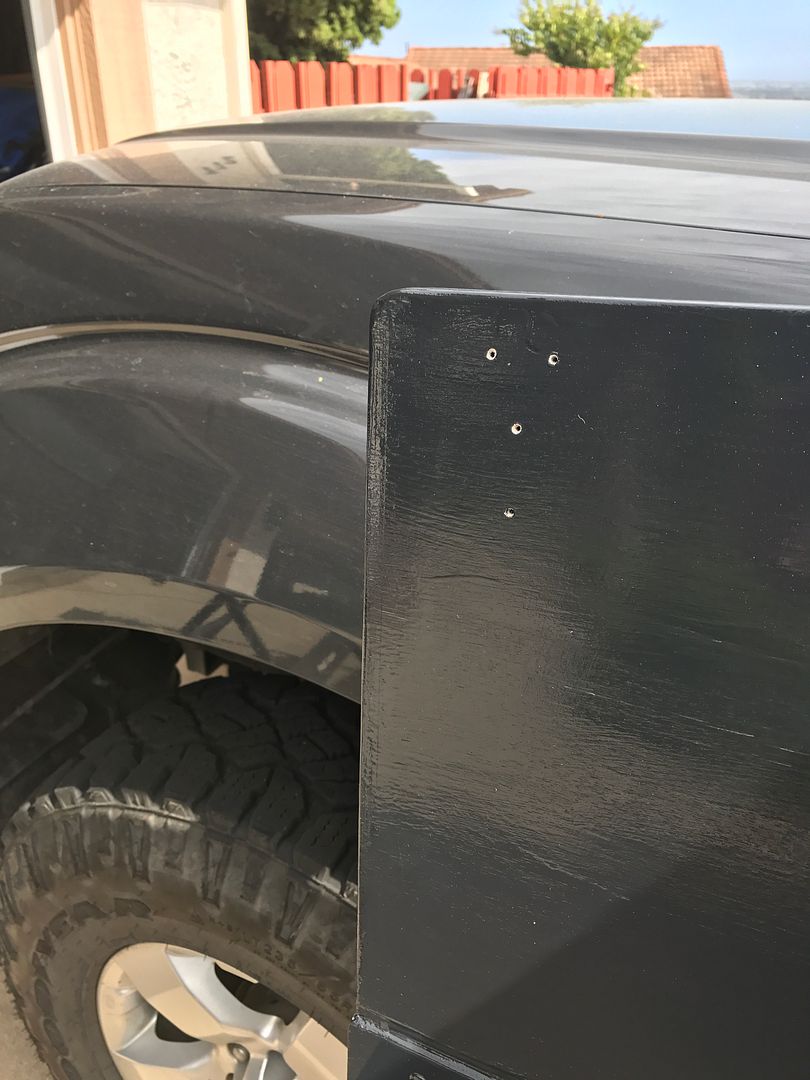
Anyway, we decided there are already enough white campers out there so we decided to more or less match the color of the truck. Here's the first mix and test on the door with the truck in the background for comparison
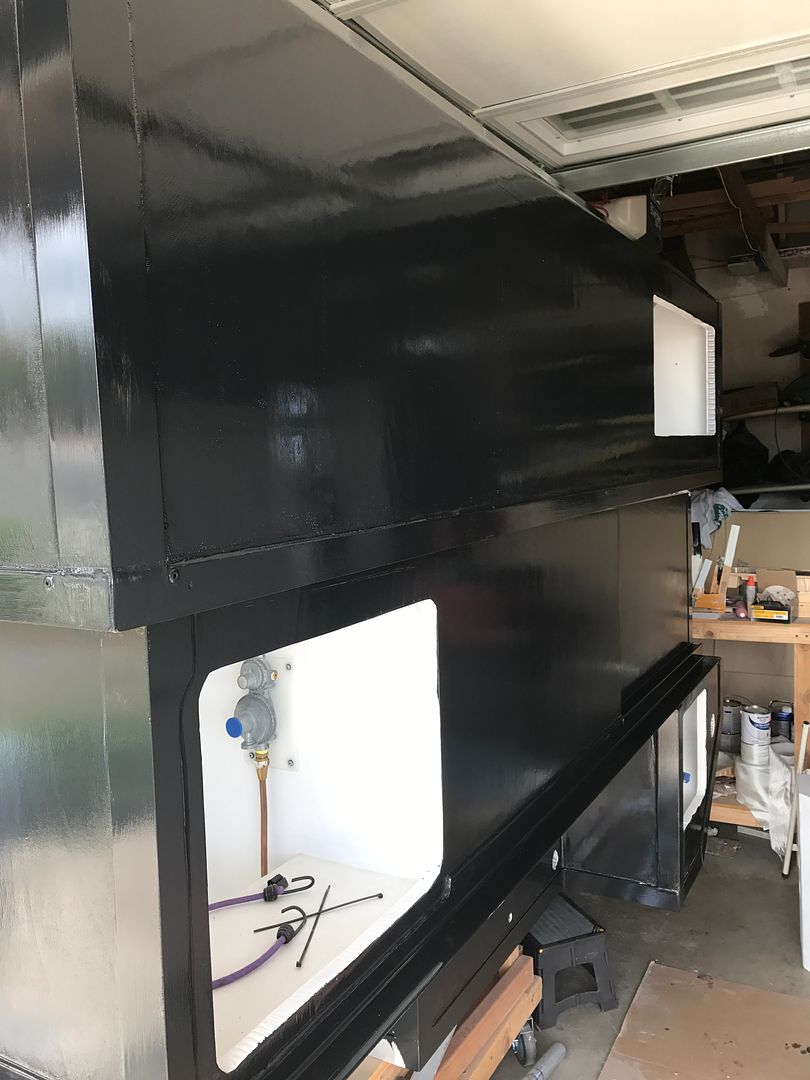
and the first coat on the beast (out of direct sunlight it looks basically black)
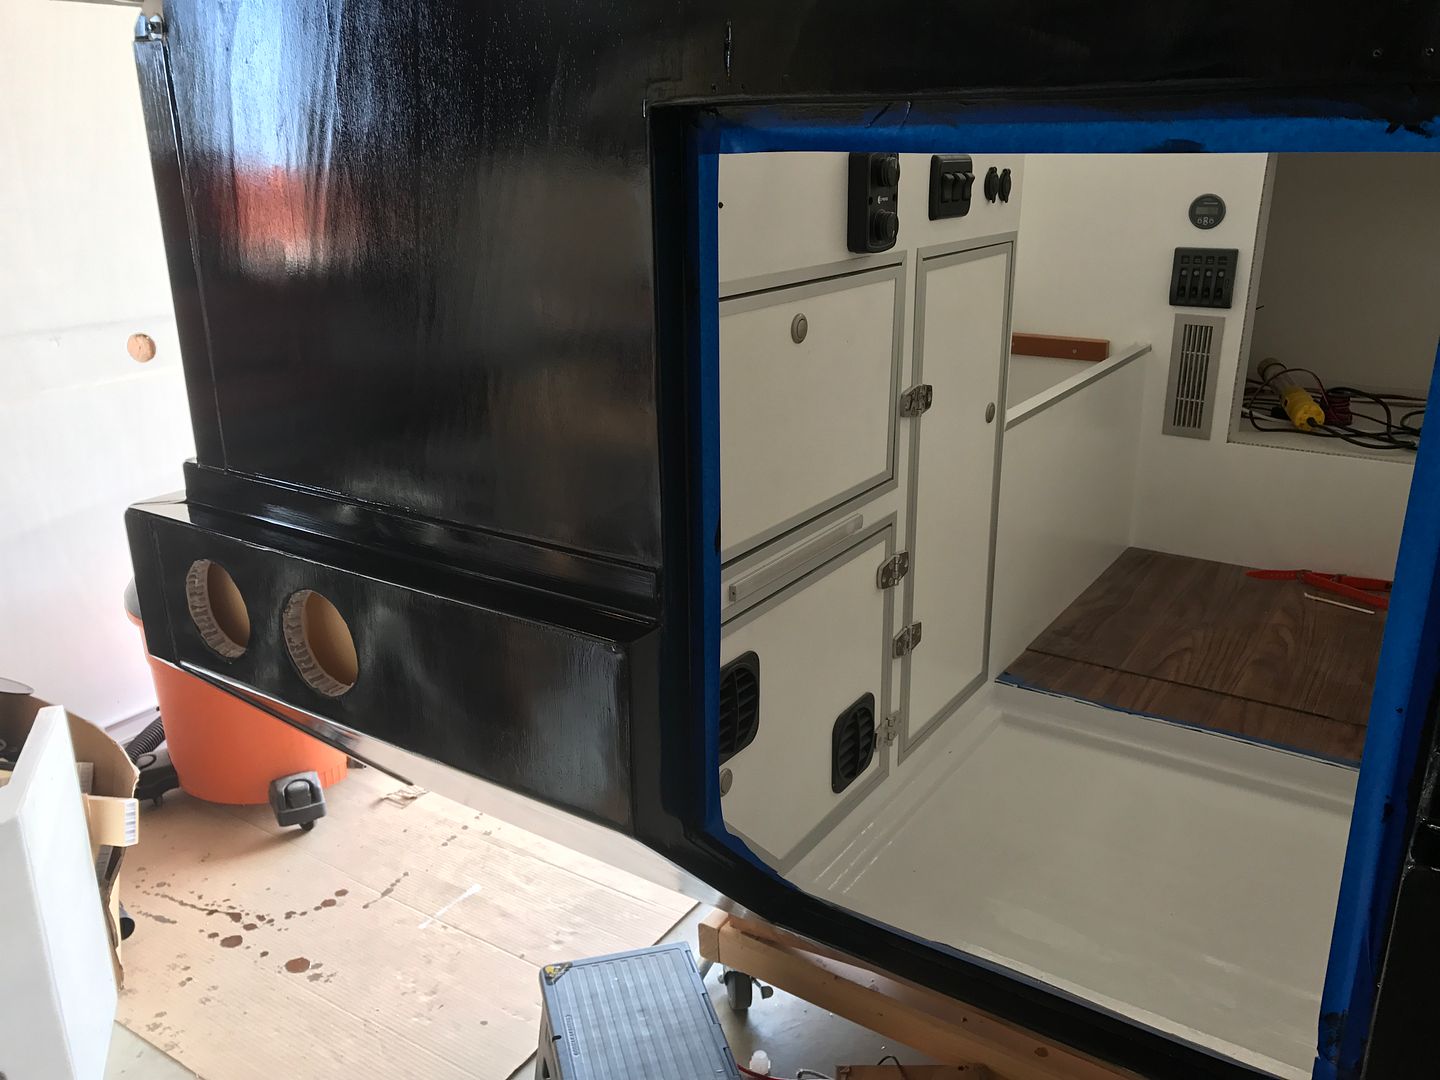
Contrasts nicely with the interior
This photo kinda shows the fiberglass pattern showing through in spots on the front of the slide-up
I sanded most of the paint off of the slide-up to get rid of some more of the fiberglass texture (let the paint act is a filler of sorts). The re-paint looks better and I'm calling it good.
After considering the color, we added a bit more white to the mix and it looks about like this now.
With the paint done, a whole new world of work on new aspects opened up. Details to follow...
Biggest news is paint. That topside paint is nice and glossy, but boy does it show the shoddy fairing work I did in some of the fiberglass areas (I swear it felt smooth!). Pays to be totally OCD in fairing and sanding I guess.
Anyway, we decided there are already enough white campers out there so we decided to more or less match the color of the truck. Here's the first mix and test on the door with the truck in the background for comparison

and the first coat on the beast (out of direct sunlight it looks basically black)

Contrasts nicely with the interior

This photo kinda shows the fiberglass pattern showing through in spots on the front of the slide-up

I sanded most of the paint off of the slide-up to get rid of some more of the fiberglass texture (let the paint act is a filler of sorts). The re-paint looks better and I'm calling it good.
After considering the color, we added a bit more white to the mix and it looks about like this now.

With the paint done, a whole new world of work on new aspects opened up. Details to follow...
CoyoteThistle
Adventurer
Electrical updates!
Yes there are some, but not the interesting kind you're thinking of anton
Finishing wiring and getting lights working has taken some time but it's mostly done now.
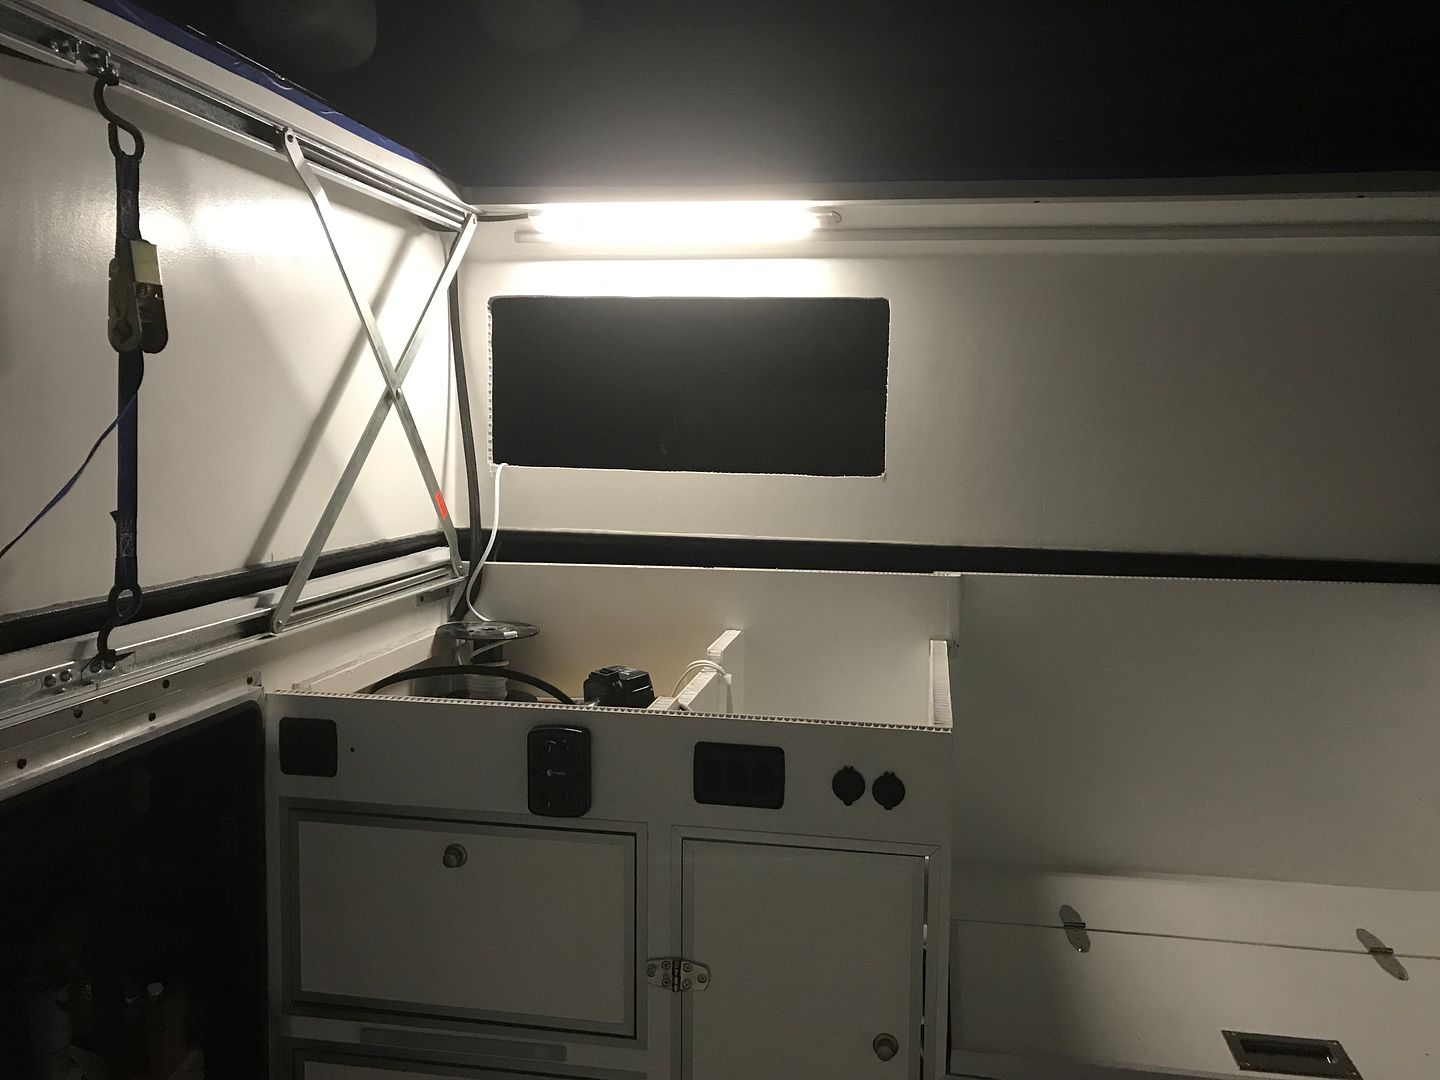
Main cabin lights are strips down the sides of the roof
Extra wire at upper right will go through the roof to the solar panels eventually.
Kitchen gets its own extra lighting
This light is for nocturnal trips to the loo and entry/exit without blinding someone else who might still be in bed.
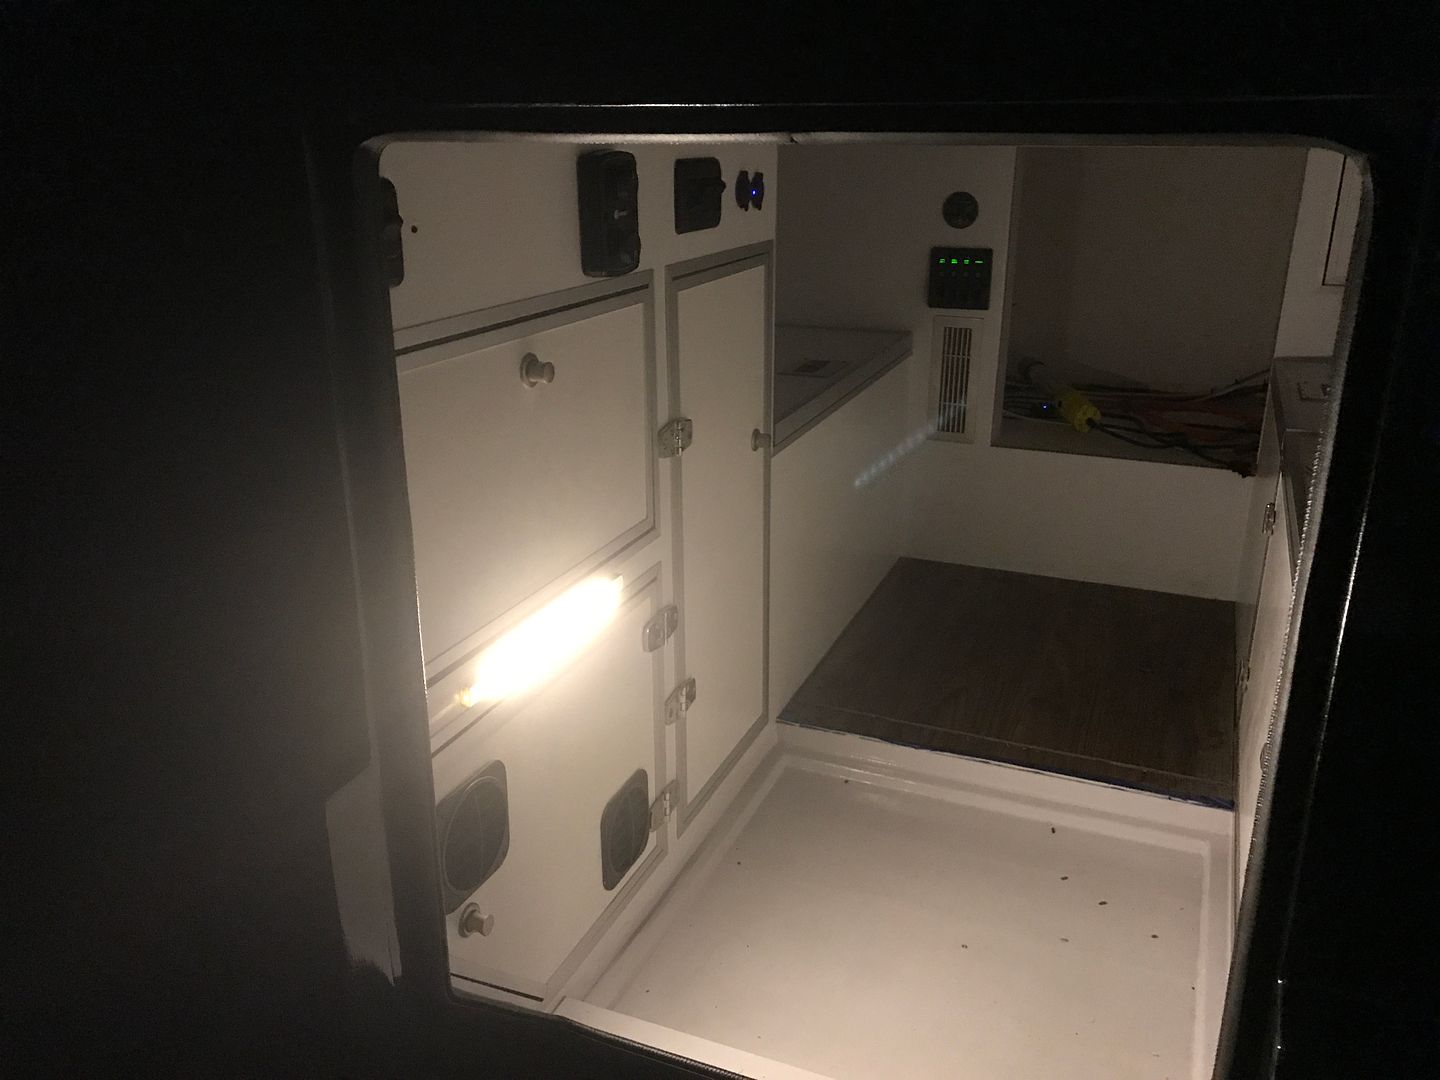
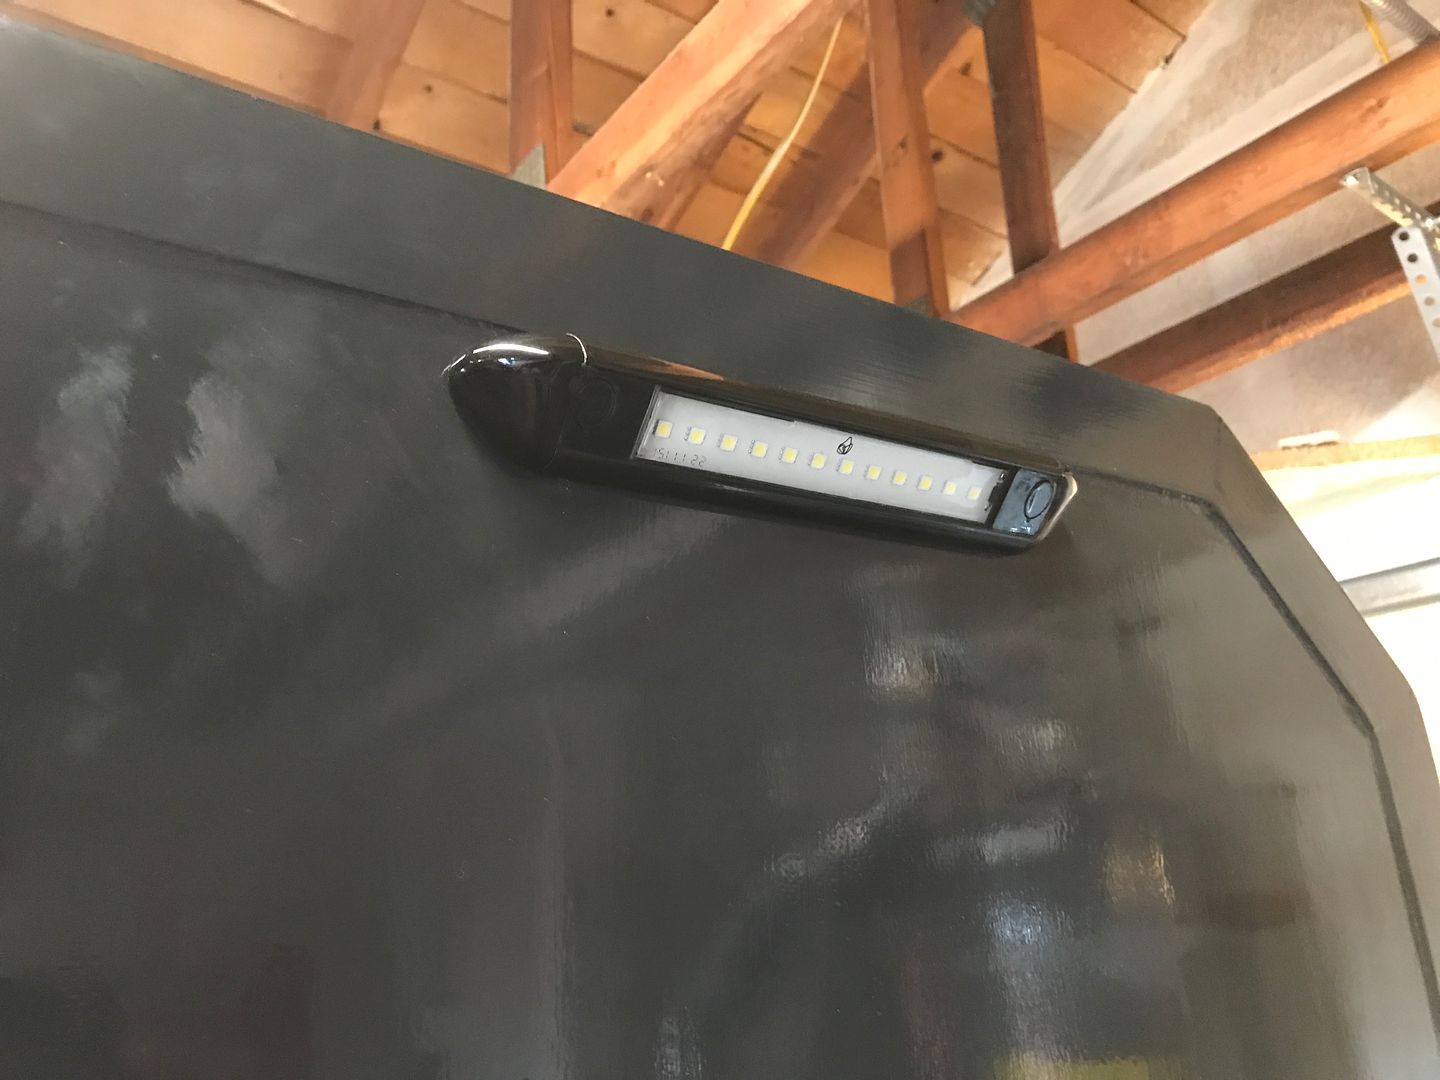
Finally, outside lighting
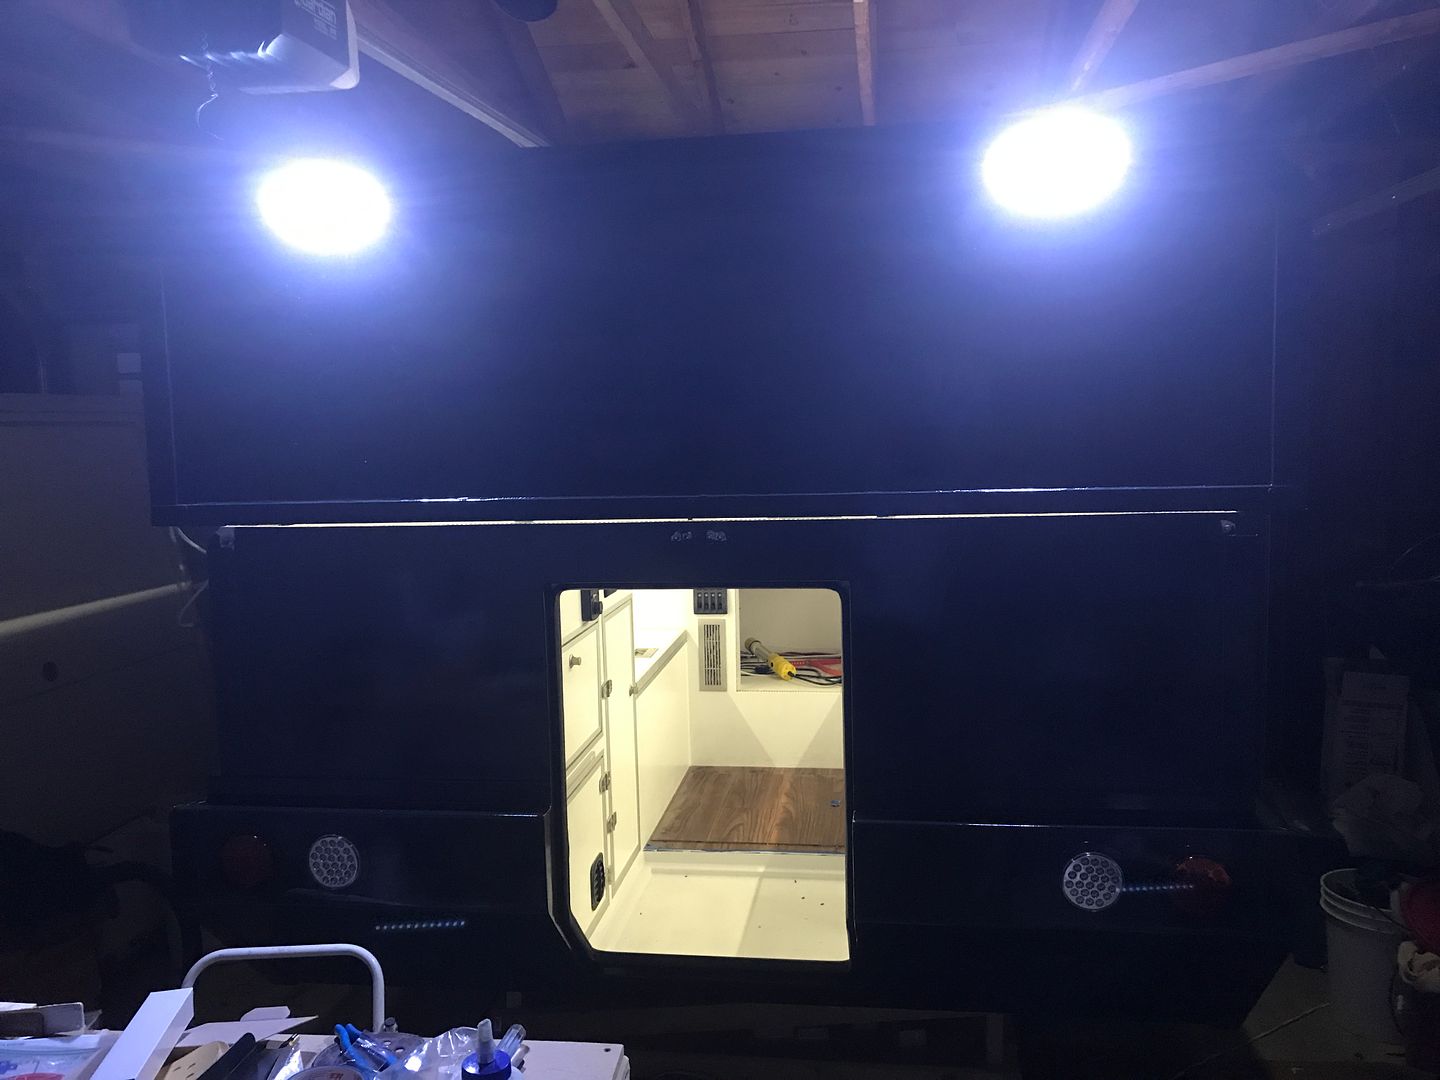
They look like this
So I guess the electrical update is that the really expensive lithium battery does indeed light up several mA of led's
Hope to have it on the truck in a couple weeks for some real battery testing. Lots of little stuff to do in the meantime...
matt
Yes there are some, but not the interesting kind you're thinking of anton
Finishing wiring and getting lights working has taken some time but it's mostly done now.
Main cabin lights are strips down the sides of the roof

Extra wire at upper right will go through the roof to the solar panels eventually.
Kitchen gets its own extra lighting

This light is for nocturnal trips to the loo and entry/exit without blinding someone else who might still be in bed.

Finally, outside lighting

They look like this

So I guess the electrical update is that the really expensive lithium battery does indeed light up several mA of led's
Hope to have it on the truck in a couple weeks for some real battery testing. Lots of little stuff to do in the meantime...
matt
The Artisan
Adventurer
Looks great. How are you sealing the gap where the 2 sliding boxes meet. I have a design that seals and keeps the dust out, if you have not figured it out yet.
Kevin
Kevin
CoyoteThistle
Adventurer
Looks great. How are you sealing the gap where the 2 sliding boxes meet. I have a design that seals and keeps the dust out, if you have not figured it out yet.
Kevin
I just have a bulb seal running around the base of the slide-up. Here's a lame picture

Aluminum is T-stock. Rubber seal on the left (Trim Lok type attachment on what would be the bottom of the "T"). I have room in there for a second bulb seal, but it would need to be attached with adhesive - not crazy about that. Seal is to aluminum angle on the main body of the camper
What's your design? I'm not at all sure this is going to be dust proof.