You are using an out of date browser. It may not display this or other websites correctly.
You should upgrade or use an alternative browser.
You should upgrade or use an alternative browser.
Post up your drawer/storage system
- Thread starter neliconcept
- Start date
washington taco
Explorer
I have:
View attachment 91434
Behind the seat: blanket, fire extinguisher, first aid kit, convertor, safety triangle, rain gear, owners manuals and jacks.
In the net in the cap: 2 Camp pillows, extra shirts, sun hats, sun shade, reusable shopping bags and clothes pins to dry cycling gear.
View attachment 91435
In the Boxes:
Box A: Kitchen - camp stove, pots, fuels bowls, plates, plastic silverware, big bowl, dish soap, paper towels, TP, energy bars, instant coffee, hot chocolate, sunscrean, bug repellant and 3 LED flashlights. (a lot of that was left over from cyclocross season for the family)
Box B: Long Stuff - Hiking pole, 2 umbrellas, PVC poles to hold open the glass when camping or the sun screen is on, a camp chair, tripod, sun screen canopy.
Box C - Often Used Tools - 2 sets of gloves, tool set, bike tools, cable and lock, Surfer Poncho (for changing in parking lots) extra ball cap
Box D - Other tools and misc. air compressor, flip flops, repair manual for truck, bike pump, jumper cables, tow strap, shackle, wood block needed for jack, rope, 2 qts of water and a mat to stand on when changing or washing off in the woods.
View attachment 91436
These are my boxes, set up for carrying a bike and for sleeping
I know this seems like a ton of stuff, but I have used every piece of the gear at least once in the last 6 months.
The reason I pulled it all out is I am thinking of cutting the boxes down an inch for a little more head room and make the end boxes into drawers so I can pull them out when camping, lay a board over them, giving me 6 feet to sleep on.
Hope you dont mind but would like to totaly rip off your truck storage design!
mtnbike28
Expedition Leader
Washington Taco, I would love to see what someone with ability could do with my idea... I am a hack with a saw ; )
Anyway, I adjusted my plans yesterday and modified my 2008-ish Box Version 1.0 with drawers.

Biggest downside is the lost ability to carry my bike upright, but I hope laying it down and the drawers will work.
PS Mowerman, that is quality work! I am impressed!
Anyway, I adjusted my plans yesterday and modified my 2008-ish Box Version 1.0 with drawers.
Biggest downside is the lost ability to carry my bike upright, but I hope laying it down and the drawers will work.
PS Mowerman, that is quality work! I am impressed!
5Runner
Adventurer
I've built a handfull of storage areas
THIS POST IS COPIED FROM TWO YEARS AGO WHEN I HAD MY 4RUNNER:
So I have been testing out and going through multiple generations of my cargo area build. It started out as a grate I bought off craigslist so that our gear wouldn’t fly forward and kill us. The dog was a little pup at the time so he sat by the kids feet:

Then I added a simple shelf on one side for the dog and gear below. When I did this I modified the wire grate so that it did not go to the floor and take up space.


Not soon after I modified my cargo mat to fit the dog area and put in a 7 gallon water jug and shelf above.

Then I added the slide-out-and-fold-down table:

Next I added a slide out drawer on the left side of the cargo area, but I don’t have a picture of that. That is the transformation of the last year and a half. Here is the thread with more details about these builds:
I just got an Engle fridge, and it did not fit well with my cargo build. So I took out the drawer and table and built a new one. I spent the ENTIRE weekend working on this, so I have to give credit to my wife, who handled the rest of the household responsibilities. But, this version is ready now for our trip to the sand dunes next week!
Here it is before you load the fridge:

Now with the fridge loaded. The design puts the heavy fridge as low as possible and all the way to the back of the cargo area (front of the vehicle). This is the best spot, “center of gravity-speaking” for it. I designed the slide so that it sits on the cargo floor. This way the weight of the fridge is right on the vehicle and not stressing the slides. I glued a sheet of metal on the bottom of the floor the fridge sits on, so it slides better on the carpet.

Once you load the fridge, you can insert the drawer and bucket, with wing nuts:


Now it’s loaded and ready for camping! I found that I always have paper towels and baby wipes “wet wipey’s” laying around the back of the rig (remember, three little kids with me almost always). So I built a hinged door with storage that has a spot for paper towels, wet wipes, dog poop bags, tissues, garbage bags and toilet paper.

I can still open the top of the upper storage area with everything closed up.

THIS POST IS COPIED FROM TWO YEARS AGO WHEN I HAD MY 4RUNNER:
So I have been testing out and going through multiple generations of my cargo area build. It started out as a grate I bought off craigslist so that our gear wouldn’t fly forward and kill us. The dog was a little pup at the time so he sat by the kids feet:
Then I added a simple shelf on one side for the dog and gear below. When I did this I modified the wire grate so that it did not go to the floor and take up space.
Not soon after I modified my cargo mat to fit the dog area and put in a 7 gallon water jug and shelf above.
Then I added the slide-out-and-fold-down table:
Next I added a slide out drawer on the left side of the cargo area, but I don’t have a picture of that. That is the transformation of the last year and a half. Here is the thread with more details about these builds:
I just got an Engle fridge, and it did not fit well with my cargo build. So I took out the drawer and table and built a new one. I spent the ENTIRE weekend working on this, so I have to give credit to my wife, who handled the rest of the household responsibilities. But, this version is ready now for our trip to the sand dunes next week!
Here it is before you load the fridge:
Now with the fridge loaded. The design puts the heavy fridge as low as possible and all the way to the back of the cargo area (front of the vehicle). This is the best spot, “center of gravity-speaking” for it. I designed the slide so that it sits on the cargo floor. This way the weight of the fridge is right on the vehicle and not stressing the slides. I glued a sheet of metal on the bottom of the floor the fridge sits on, so it slides better on the carpet.
Once you load the fridge, you can insert the drawer and bucket, with wing nuts:
Now it’s loaded and ready for camping! I found that I always have paper towels and baby wipes “wet wipey’s” laying around the back of the rig (remember, three little kids with me almost always). So I built a hinged door with storage that has a spot for paper towels, wet wipes, dog poop bags, tissues, garbage bags and toilet paper.
I can still open the top of the upper storage area with everything closed up.
5Runner
Adventurer
THEN I MOVED UP TO A 100 SERIES LAND CRUISER AND STARTED OVER AGAIN IN 2011:
I worked on it again this weekend...between drooling over the work occuring on my garage. I'd say about half the job is physical work, the other half is staring at the cargo area, sketching and planning. This was NOT an easy design to decide on. What made it easier is knowing that I am going to take it all apart at the end of the year and rebuild it again. I used only 1/2 inch plywood, 3/4 lumber and screws to build it. I don't like the plywood/plywood joints, but for a test version that work fine. Not using glue will make this easier to disassembly later. The next version will definitely incorporate metal.
Enough talk, here's the pics!
The overall look: The flat part in the upper center is for the fire extinguisher/mag light/etc.

Two 7 gallon water tanks. Designed so the extra can be swapped out with the spigoted one.

I had to customize the drawer to accomodate the spigot. The water is as far to the back as the cargo doors would allow. This recess gives room to get a cup/pot/etc under the spigot. The whole area with the tanks will be lined in waterproofing that will extend to a "sink" type of thing under the spigot. Any leaks should be directed to a tube and out of the vehicle.

Drawers open. I had 24" and 30" slides on hand, thus the difference in how far they pull out. I designed them so when pulled out, they just barely rest on the tailgate. This way the weight is not on the hinges when fully extended.

The side area over and behind the wheel well (under ruff-ruffs spot) hinges open. I will fit almost all my "dirty" stuff in there. Axe, shovel, recovery, tools, saw, etc. The two drawers should be left for just "kitchen" and "camping" stuff.

Secret little DC plug for fridge tucked away

I made use of every nook and cranny and was not afraid to cut into the plastic cargo liner. Here is an example of extra space gained that was previously empty space behind the panels.

Here is the "extended cab" behind the seats. There was some space behind the water jugs (not as deep as the fridge), so I cut an access to make use of the space. Who knows what I will put in there, but something I am sure.

Pictures don't really tell the story of this build like being in front of it. Is is WAAAAY more complicated and tricky than my 4runner cargo build. Even for version 1.0 it is not finished. I've got lots to do still! At least it is ready enough for Moab...well...close.
I worked on it again this weekend...between drooling over the work occuring on my garage. I'd say about half the job is physical work, the other half is staring at the cargo area, sketching and planning. This was NOT an easy design to decide on. What made it easier is knowing that I am going to take it all apart at the end of the year and rebuild it again. I used only 1/2 inch plywood, 3/4 lumber and screws to build it. I don't like the plywood/plywood joints, but for a test version that work fine. Not using glue will make this easier to disassembly later. The next version will definitely incorporate metal.
Enough talk, here's the pics!
The overall look: The flat part in the upper center is for the fire extinguisher/mag light/etc.
Two 7 gallon water tanks. Designed so the extra can be swapped out with the spigoted one.
I had to customize the drawer to accomodate the spigot. The water is as far to the back as the cargo doors would allow. This recess gives room to get a cup/pot/etc under the spigot. The whole area with the tanks will be lined in waterproofing that will extend to a "sink" type of thing under the spigot. Any leaks should be directed to a tube and out of the vehicle.
Drawers open. I had 24" and 30" slides on hand, thus the difference in how far they pull out. I designed them so when pulled out, they just barely rest on the tailgate. This way the weight is not on the hinges when fully extended.
The side area over and behind the wheel well (under ruff-ruffs spot) hinges open. I will fit almost all my "dirty" stuff in there. Axe, shovel, recovery, tools, saw, etc. The two drawers should be left for just "kitchen" and "camping" stuff.
Secret little DC plug for fridge tucked away
I made use of every nook and cranny and was not afraid to cut into the plastic cargo liner. Here is an example of extra space gained that was previously empty space behind the panels.
Here is the "extended cab" behind the seats. There was some space behind the water jugs (not as deep as the fridge), so I cut an access to make use of the space. Who knows what I will put in there, but something I am sure.
Pictures don't really tell the story of this build like being in front of it. Is is WAAAAY more complicated and tricky than my 4runner cargo build. Even for version 1.0 it is not finished. I've got lots to do still! At least it is ready enough for Moab...well...close.
5Runner
Adventurer
I TESTED OUT THE FIRST DESIGN FOR THE LAND CRUISER LAST SEASON AND HAVE BEEN REBUILDING IT THIS WINTER WITH ALL MY NEW IDEAS. HERE IS THE THREAD COPIED FOR MY NEW BUILD. THIS ONE IS NOT DONE YET. MY WATER TANK SHOULD ARRIVE TODAY.
Worked some more on my 3rd cargo build, second one for the LC.
I had done some work before, laying out the drawers (using the old ones), fridge and water.

I got the sides of the compartments built and a top cut. That was it for the first session.

Today I made great headway.
I got all the compartments made and cut out as much wood as I could. I am going to fill in the spots with 1/2" poly insulation.
From top left, clockwise:, Water, storage, fridge, drawer, drawer

Here is the layout of pieces for the sleeping platform. The pieces will be connected together with hinges and latches...

It will fold up and lock into this. Notice Ruff-Ruff modeling is approximate location in the truck:

Folded up in the truck for dog/gear divider

Unfolded and locked into place as a sleeping platform

Storage behind the fridge, with access by folding the rear seat down.

That's two thermarests rolled together in the storage area, with plenty more room. This will be for "permanent" storage. Gear to sleep in the rig and change the families clothes, etc...

Here's a mock up of the second module that will be able to attach and detach, the one that goes over the fridge for storage above.

Here's the whole platform together:

A lot of design issues got solved today...it was a good day. My water tank should arrive next week and I've already got the pump. I need a little more wood and aluminum and some 200lb hinges for the fridge/table slide. The dog/storage divider will also be adjustable. When we have a really big trip or other reason that we need more storage, there will be another setting where Ruff-ruff has to give up some space. The divider (while at camp) will be able to be detached, unfolded, laid down over the back seats and attached in place, voila! sleeping platform. It's totally going to work.
There's a number of combinations of my family that will fit with the fridge in place. I'm also planning on adding an outlet up front, and making it so I can put the fridge in the passenger front seat for the night, fill in the hole in the back, and have a FULL sleeping platform. Even so, without moving the fridge, it will get used.
I can really see my vision coming to life in this build. I bet this one will last a while before V4.0.
HERE IS THE PROGRESS THE NEXT WEEKEND:
I made some more progress today. My water tank didn't arrive, but the 200 lb slides did.
I use full length drawer slides at the bottom of the two drawers (24") so the drawers are fully supported down the length

However, I didn't want the drawers to open that far. I also wanted some stability at the top since they are 12" deep. So I used one pair of 18" slide on one side of each drawer at the top. This really took the wobble out of the drawers and limits their opening length.

Both drawers out.

Fridge slide pulled out.

Bar table.

The idea is that one person could be standing to the left of the "bar", with the drawers closed, and using the tailgate table to prep food. At the same time someone could come up on the right side of the "bar" and access the fridge to make a drink or get food.

I am going to use a kitchen spray nozzle that will mount here

It will extend way out to the side so you can wash your head and body.

THIS IS WHERE IT IS TODAY 4/5/12. I'M WORKING ON IT MORE THIS WEEKEND. WILL GET THE WATER TANK IN AND THE TOP SECURED DOWN. HOPE TO GET ALL THE DOORS WORKING AND THE LATCHES FOR THE DRAWERS/FRIDGE SLIDE.
Worked some more on my 3rd cargo build, second one for the LC.
I had done some work before, laying out the drawers (using the old ones), fridge and water.
I got the sides of the compartments built and a top cut. That was it for the first session.
Today I made great headway.
I got all the compartments made and cut out as much wood as I could. I am going to fill in the spots with 1/2" poly insulation.
From top left, clockwise:, Water, storage, fridge, drawer, drawer
Here is the layout of pieces for the sleeping platform. The pieces will be connected together with hinges and latches...
It will fold up and lock into this. Notice Ruff-Ruff modeling is approximate location in the truck:
Folded up in the truck for dog/gear divider
Unfolded and locked into place as a sleeping platform
Storage behind the fridge, with access by folding the rear seat down.
That's two thermarests rolled together in the storage area, with plenty more room. This will be for "permanent" storage. Gear to sleep in the rig and change the families clothes, etc...
Here's a mock up of the second module that will be able to attach and detach, the one that goes over the fridge for storage above.
Here's the whole platform together:
A lot of design issues got solved today...it was a good day. My water tank should arrive next week and I've already got the pump. I need a little more wood and aluminum and some 200lb hinges for the fridge/table slide. The dog/storage divider will also be adjustable. When we have a really big trip or other reason that we need more storage, there will be another setting where Ruff-ruff has to give up some space. The divider (while at camp) will be able to be detached, unfolded, laid down over the back seats and attached in place, voila! sleeping platform. It's totally going to work.
There's a number of combinations of my family that will fit with the fridge in place. I'm also planning on adding an outlet up front, and making it so I can put the fridge in the passenger front seat for the night, fill in the hole in the back, and have a FULL sleeping platform. Even so, without moving the fridge, it will get used.
I can really see my vision coming to life in this build. I bet this one will last a while before V4.0.
HERE IS THE PROGRESS THE NEXT WEEKEND:
I made some more progress today. My water tank didn't arrive, but the 200 lb slides did.
I use full length drawer slides at the bottom of the two drawers (24") so the drawers are fully supported down the length
However, I didn't want the drawers to open that far. I also wanted some stability at the top since they are 12" deep. So I used one pair of 18" slide on one side of each drawer at the top. This really took the wobble out of the drawers and limits their opening length.
Both drawers out.
Fridge slide pulled out.
Bar table.
The idea is that one person could be standing to the left of the "bar", with the drawers closed, and using the tailgate table to prep food. At the same time someone could come up on the right side of the "bar" and access the fridge to make a drink or get food.
I am going to use a kitchen spray nozzle that will mount here
It will extend way out to the side so you can wash your head and body.
THIS IS WHERE IT IS TODAY 4/5/12. I'M WORKING ON IT MORE THIS WEEKEND. WILL GET THE WATER TANK IN AND THE TOP SECURED DOWN. HOPE TO GET ALL THE DOORS WORKING AND THE LATCHES FOR THE DRAWERS/FRIDGE SLIDE.
Every Miles A Memory
Expedition Leader
You've Got Skills 5Runner!! :victory:
DGarman
What could go wrong?
Bronco Platform
A lot of nice set-ups here!
I've been using this platform in my '79 Bronco for about 6 months now. I built it around 2 plastic totes from Lowe's and my floor mounted spare tire. It's just me and my dog so there's plenty of storage for us.
I built the platform out of 1/2" Luaun plywood (mostly because it was light and cheap) and 1" X 2" cleats, with lots of screws and glue. The totes are 17 gallon flip lids, and are very sturdy. They contain all the cooking gear and food.


The front part of the platform is a box for fluids, spares, etc. The spare is covered with the same 1/2" luaun, with 1" X 2" strips underneath for support. There's storage in the wheel cavity for jumper cables, rope, etc. I glued floormat material on top so my dog can get some grip on it.


For a full-size truck, the Bronco doesn't have much room inside. It is only slightly more than 5 feet from the tailgate to the back of the seat. I added some extensions to the front of the platform to make it 6-1/2 feet long with the driver's seat folded forward.


Loaded up for a week in Death Valley, and then ready to sleep in.


Taggart approves of the new set-up!

My goal was to make a sleeping/storage platform that would fit me and Taggart, and that was simple and lightweight. I figure it weighs about 125 pounds, even with all the hardware and tie-downs. It's bolted to the floor with 6 carriage bolts, so it's also easy to remove.
Dennis
A lot of nice set-ups here!
I've been using this platform in my '79 Bronco for about 6 months now. I built it around 2 plastic totes from Lowe's and my floor mounted spare tire. It's just me and my dog so there's plenty of storage for us.
I built the platform out of 1/2" Luaun plywood (mostly because it was light and cheap) and 1" X 2" cleats, with lots of screws and glue. The totes are 17 gallon flip lids, and are very sturdy. They contain all the cooking gear and food.
The front part of the platform is a box for fluids, spares, etc. The spare is covered with the same 1/2" luaun, with 1" X 2" strips underneath for support. There's storage in the wheel cavity for jumper cables, rope, etc. I glued floormat material on top so my dog can get some grip on it.
For a full-size truck, the Bronco doesn't have much room inside. It is only slightly more than 5 feet from the tailgate to the back of the seat. I added some extensions to the front of the platform to make it 6-1/2 feet long with the driver's seat folded forward.
Loaded up for a week in Death Valley, and then ready to sleep in.
Taggart approves of the new set-up!
My goal was to make a sleeping/storage platform that would fit me and Taggart, and that was simple and lightweight. I figure it weighs about 125 pounds, even with all the hardware and tie-downs. It's bolted to the floor with 6 carriage bolts, so it's also easy to remove.
Dennis
Cargo Slide
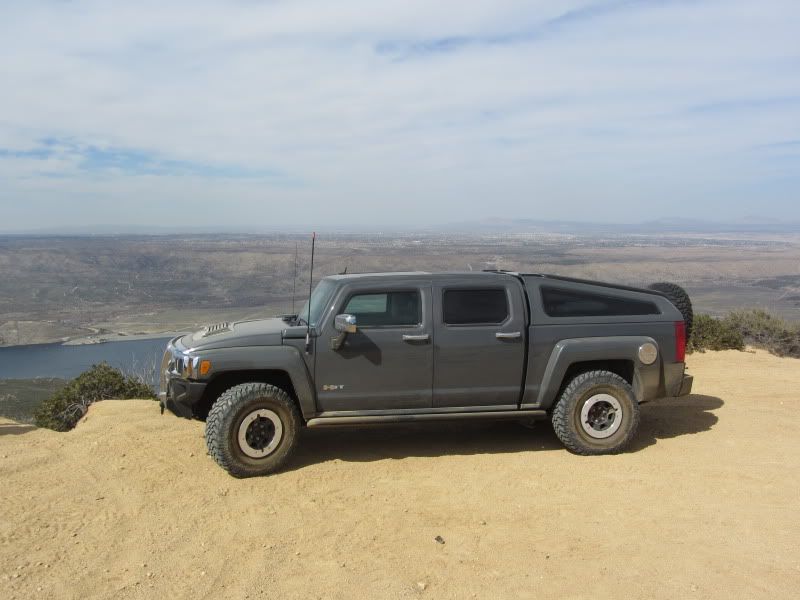
I have a Hummer H3T that my wife and I and sometimes one or two friends use for rock hunting, prospecting, meteorite hunting and/or off roading. I needed a way of securing all my equipment in the back since sometimes we are using all four seats inside the cab. I purchased a SnupTop SlantBack topper shown in the picture below, which does a good job, but it made it even more difficult to access and secure my gear.
I looked into commercial drawer systems that are made to fit my truck, such as the truck vault, but when I started planning where I would stow everything I realized I was going to be mounting a lot of stuff to the top of the drawer system, because it wouldn't fit inside. That stuff on top was going to be ever harder to access, because the top of the drawer system would be closer to the bottom side of the topper. In addition, whenever I needed to haul brush the drawer would be in the way.
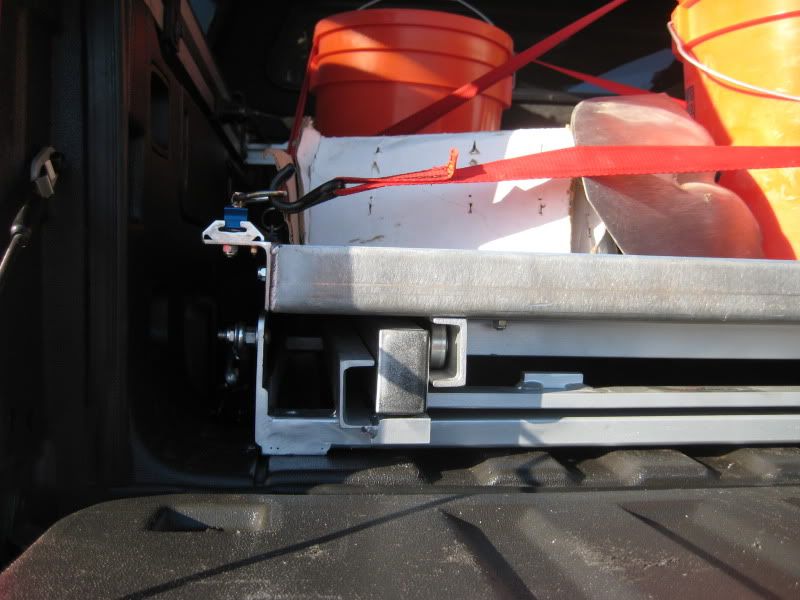
I finally decided to get a cargo slide with 100% travel. I selected a model SM3-SP from SlideMaster , which is a single direction, 1,000 lb cargo capacity cargo slide with 100% extension. I also bought their 3/16" aluminum tray and a 3/16" aluminum "head-board". I considered getting the M3 aluminum slide, to save weight, but I think the steel slide has less "sag" under load and I think it may tolerate more off road abuse. At the time I purchased my cargo slide, the M3 aluminum slide wasn't available, so that made my decision easier.
The cargo slide has 6 mounting holes, one in each corner and 2 in the middle, one on each side. The center mounting bolts are critical to supporting the cargo slide when the slide is fully extended. My problem is I didn't want to drill through my truck bed, so I welded a steel angle on each side so I could use the existing cargo tie-downs in the four corners of the bed. One nice thing about SlideMasters is you can enter the dimensions you want in 1: increments, so you can get a really good fit.
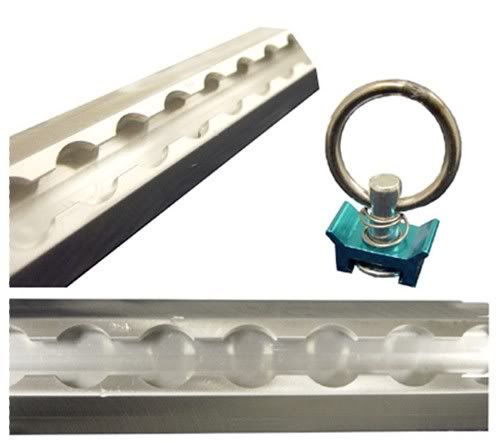
I also bolted an aluminum angle to each side of the cargo tray, which extends the width over the wheel well bumps, and I attached "Logistics Rails" (see picture below) to the top of the angles for tie-downs. These come in very handy for securing gear.

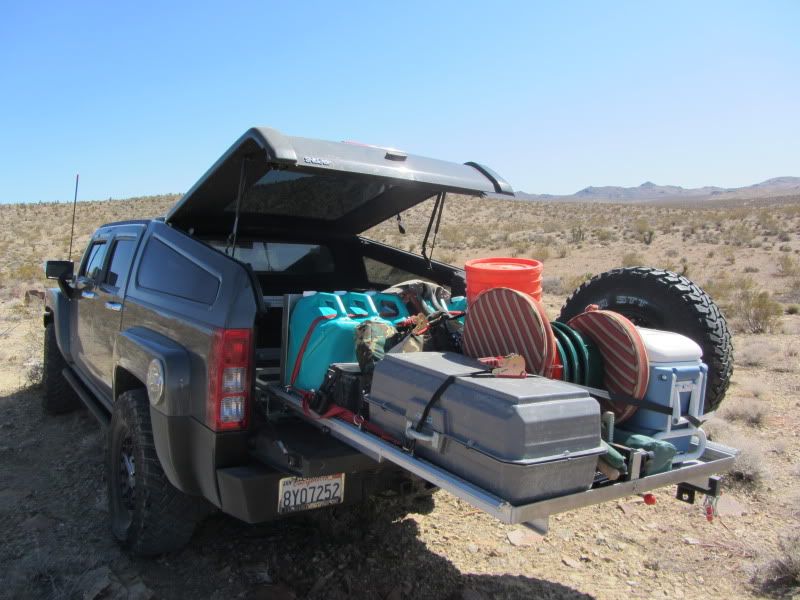
Here are some pictures of the cargo slide loaded.
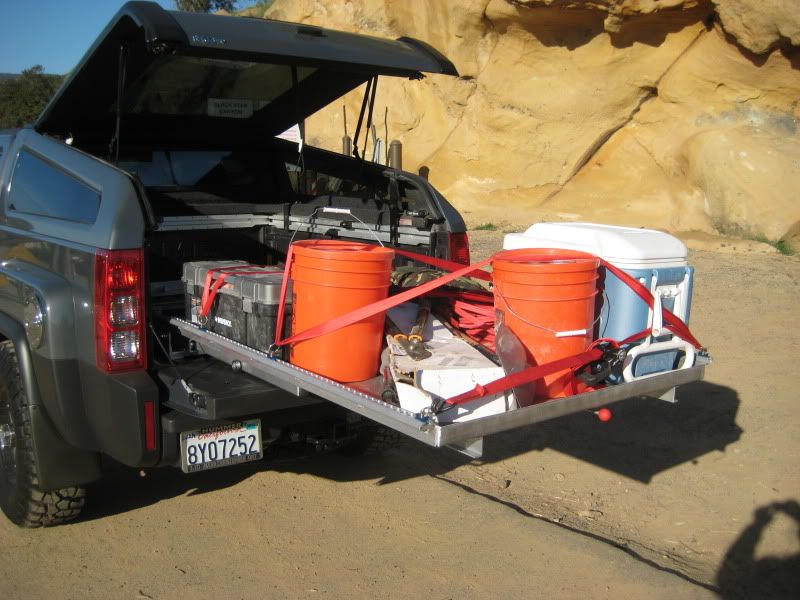
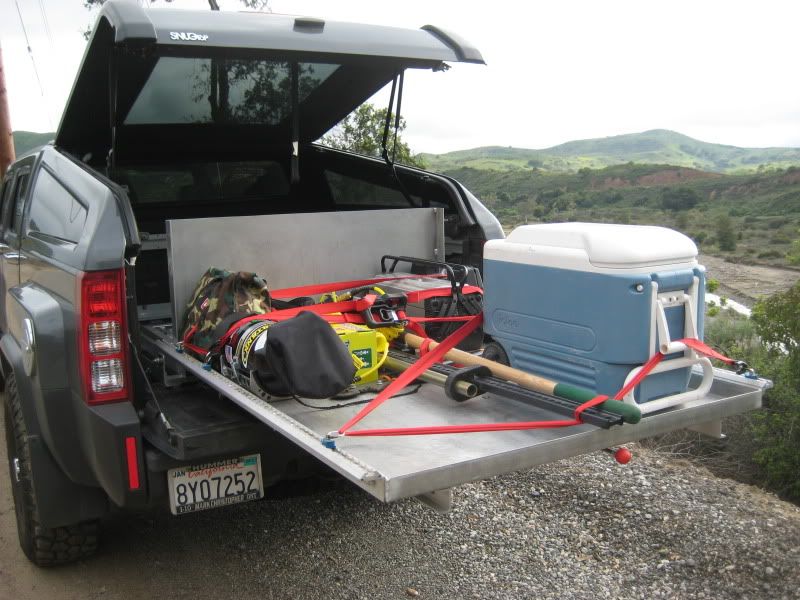
Here is a picture from a recent gold prospecting trip where I have six 6 gallon water containers in the front, my recirculating sluice in the back, along with four 5 gallon buckets, three classifiers, shovels, seat cushions, tool box, cooler and all my off road equipment. I made a bracket in the front to hold the base of my Hi-lift jack and a bracket in the back to secure it with one locking nut from a Gobi Hi-lift Jack mount kit. My CO2 PowerTank is mounted to the "head-board" in the front on the passenger’s side.
Here is an animated gif of the cargo slide in action.
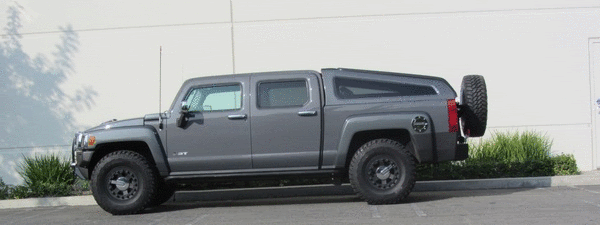
I have a Hummer H3T that my wife and I and sometimes one or two friends use for rock hunting, prospecting, meteorite hunting and/or off roading. I needed a way of securing all my equipment in the back since sometimes we are using all four seats inside the cab. I purchased a SnupTop SlantBack topper shown in the picture below, which does a good job, but it made it even more difficult to access and secure my gear.
I looked into commercial drawer systems that are made to fit my truck, such as the truck vault, but when I started planning where I would stow everything I realized I was going to be mounting a lot of stuff to the top of the drawer system, because it wouldn't fit inside. That stuff on top was going to be ever harder to access, because the top of the drawer system would be closer to the bottom side of the topper. In addition, whenever I needed to haul brush the drawer would be in the way.
I finally decided to get a cargo slide with 100% travel. I selected a model SM3-SP from SlideMaster , which is a single direction, 1,000 lb cargo capacity cargo slide with 100% extension. I also bought their 3/16" aluminum tray and a 3/16" aluminum "head-board". I considered getting the M3 aluminum slide, to save weight, but I think the steel slide has less "sag" under load and I think it may tolerate more off road abuse. At the time I purchased my cargo slide, the M3 aluminum slide wasn't available, so that made my decision easier.
The cargo slide has 6 mounting holes, one in each corner and 2 in the middle, one on each side. The center mounting bolts are critical to supporting the cargo slide when the slide is fully extended. My problem is I didn't want to drill through my truck bed, so I welded a steel angle on each side so I could use the existing cargo tie-downs in the four corners of the bed. One nice thing about SlideMasters is you can enter the dimensions you want in 1: increments, so you can get a really good fit.
I also bolted an aluminum angle to each side of the cargo tray, which extends the width over the wheel well bumps, and I attached "Logistics Rails" (see picture below) to the top of the angles for tie-downs. These come in very handy for securing gear.
Here are some pictures of the cargo slide loaded.
Here is a picture from a recent gold prospecting trip where I have six 6 gallon water containers in the front, my recirculating sluice in the back, along with four 5 gallon buckets, three classifiers, shovels, seat cushions, tool box, cooler and all my off road equipment. I made a bracket in the front to hold the base of my Hi-lift jack and a bracket in the back to secure it with one locking nut from a Gobi Hi-lift Jack mount kit. My CO2 PowerTank is mounted to the "head-board" in the front on the passenger’s side.
Here is an animated gif of the cargo slide in action.
Thanks Dennis;
Hummer got SnugTop to develop the SlantBack and have it available at the H3T introduction. It is a pretty nice unit and it works great but I suspect SnugTop lost money on it because Hummer built less than 6,000 H3T's. The only thing I mind about driving such a rare vehicle is the availability of aftermarket support.
I've never seen another SlantBack in person. I've only seen a few H3T's and all but one of them was at a Hummer get together.
jasong4110
New member
Hi guys,
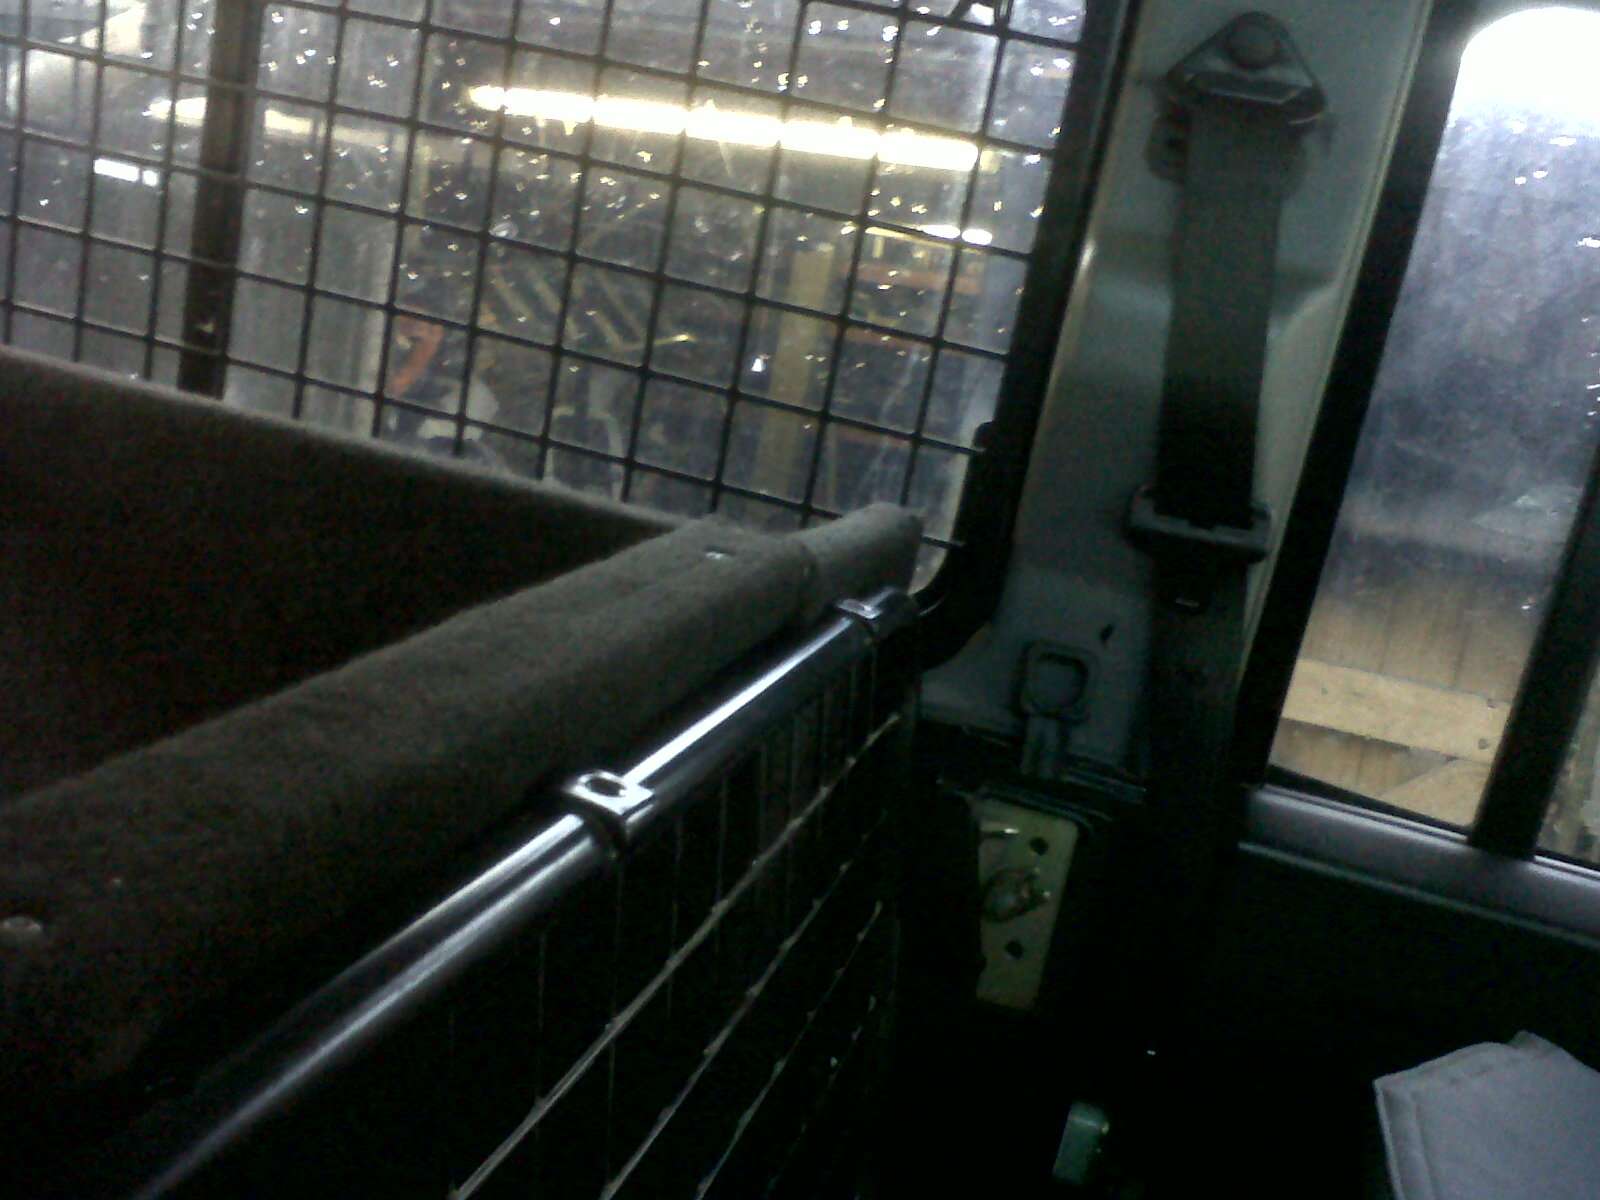
After taking a lot if inspiration from here before building my storage unit I felt it was time to post up my solution, I have a Land Rover Defender 110 CSW and need to retain the back seats I also wanted to make the unit removable if needed, I have an overland trailer and roof tents so don't need to sleep in the truck but will be going to Norway next February and at -40c will need to sleep in the truck.
I went through many designs but in the end decided to make the unit from 2mm zintec.
I don't have the equipment to cut and fold this type of material so got a local engineering company to cut and fold the zintec to my plans (attached below but can send non PDF copy if anyone wants them)
First photo is of the pieces back from the engineering company.
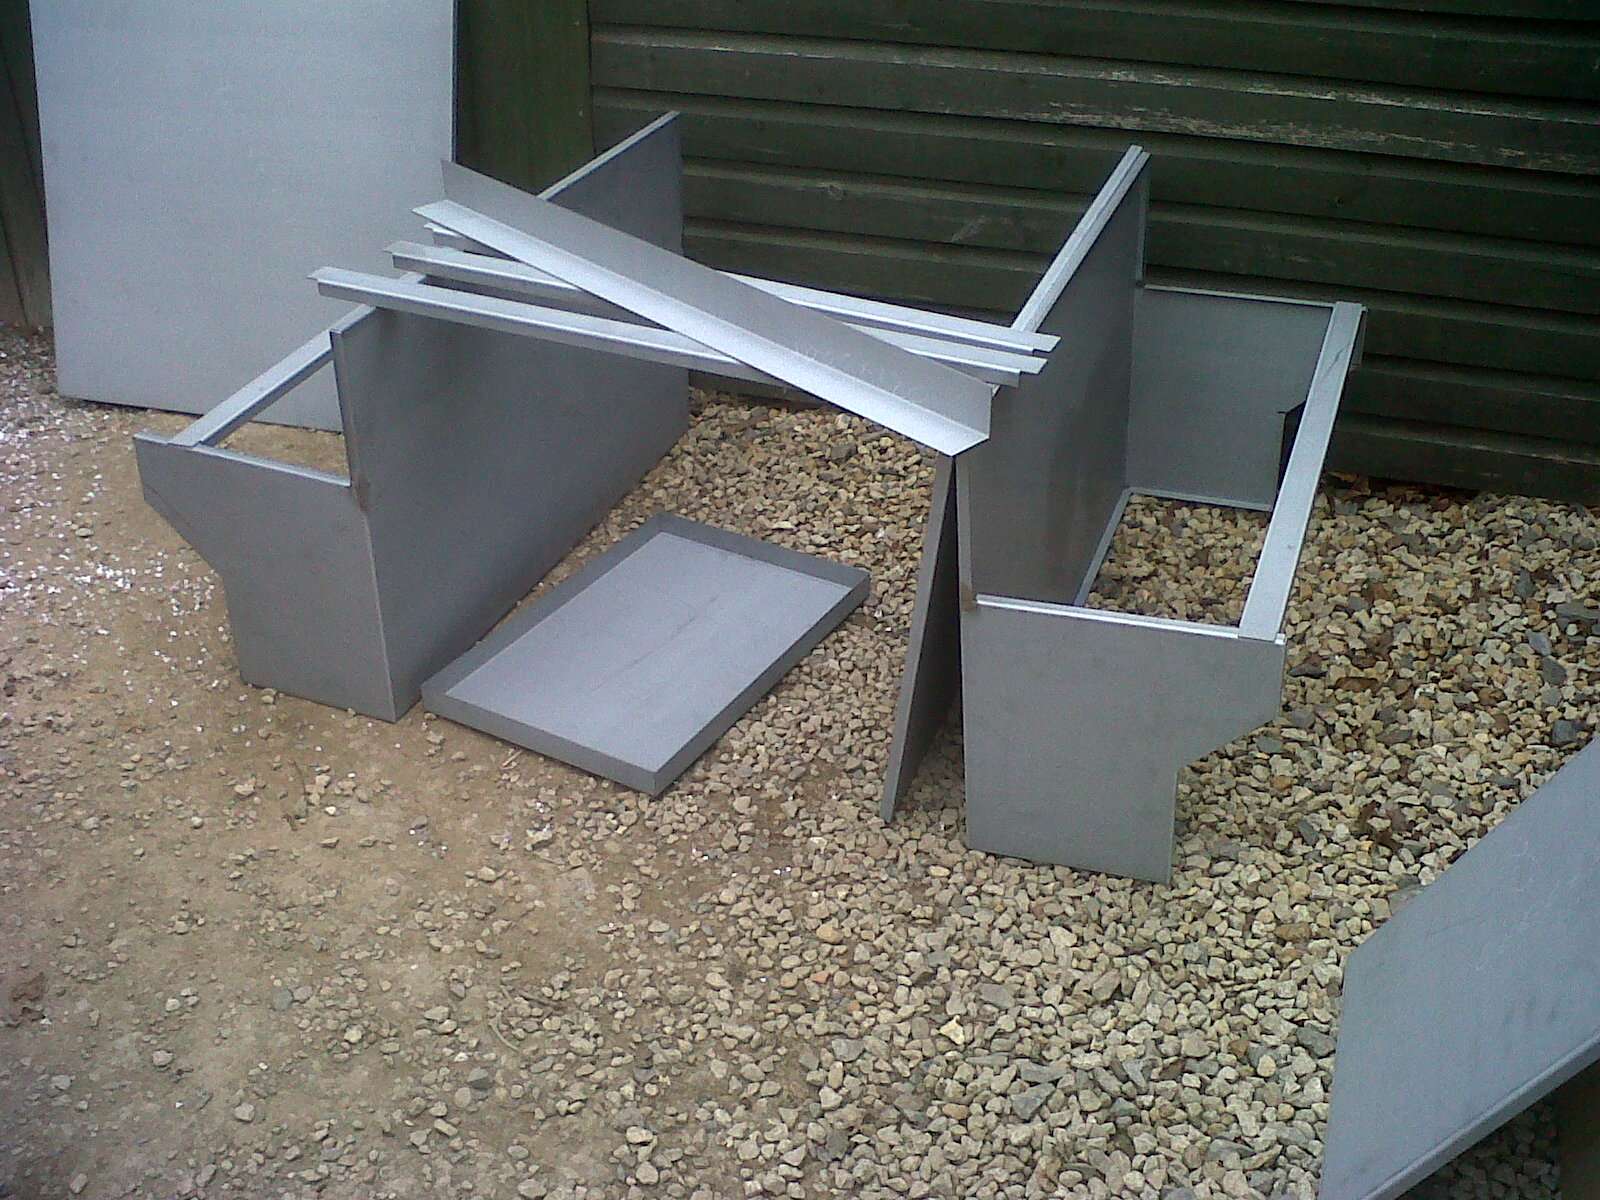
By jasong4110 at 2012-04-20
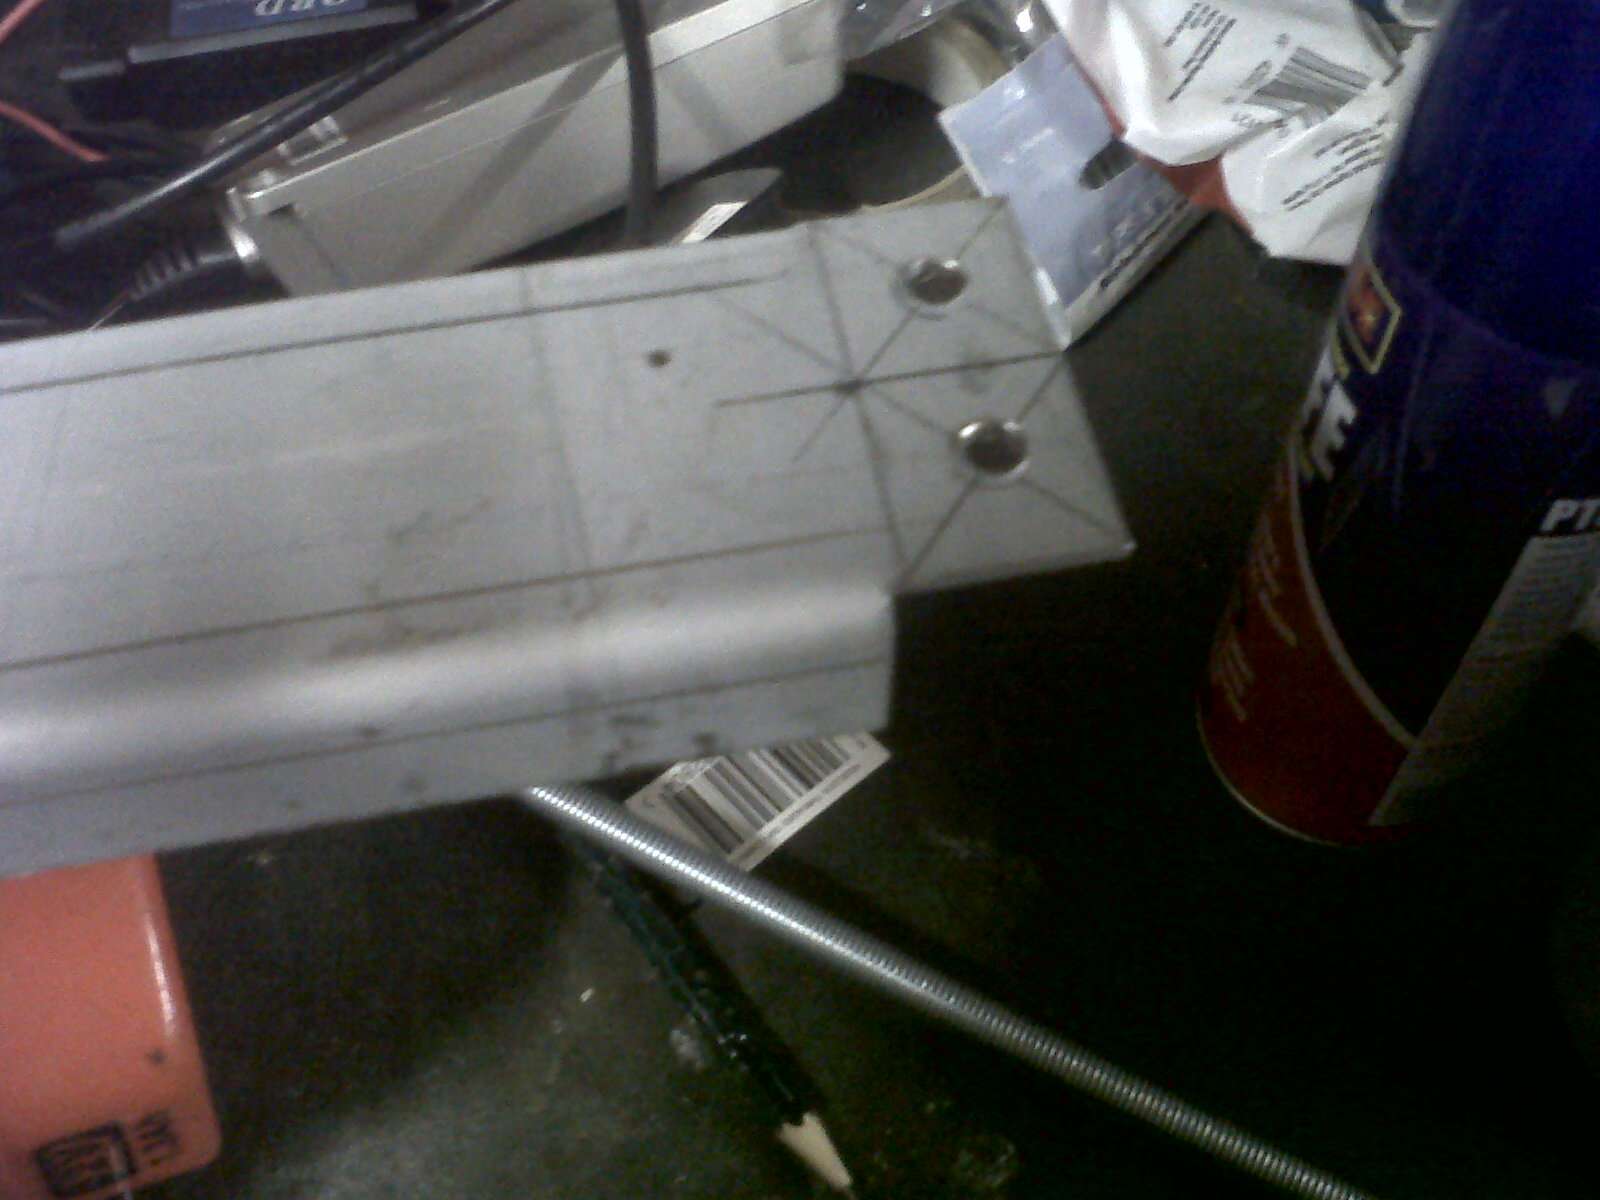
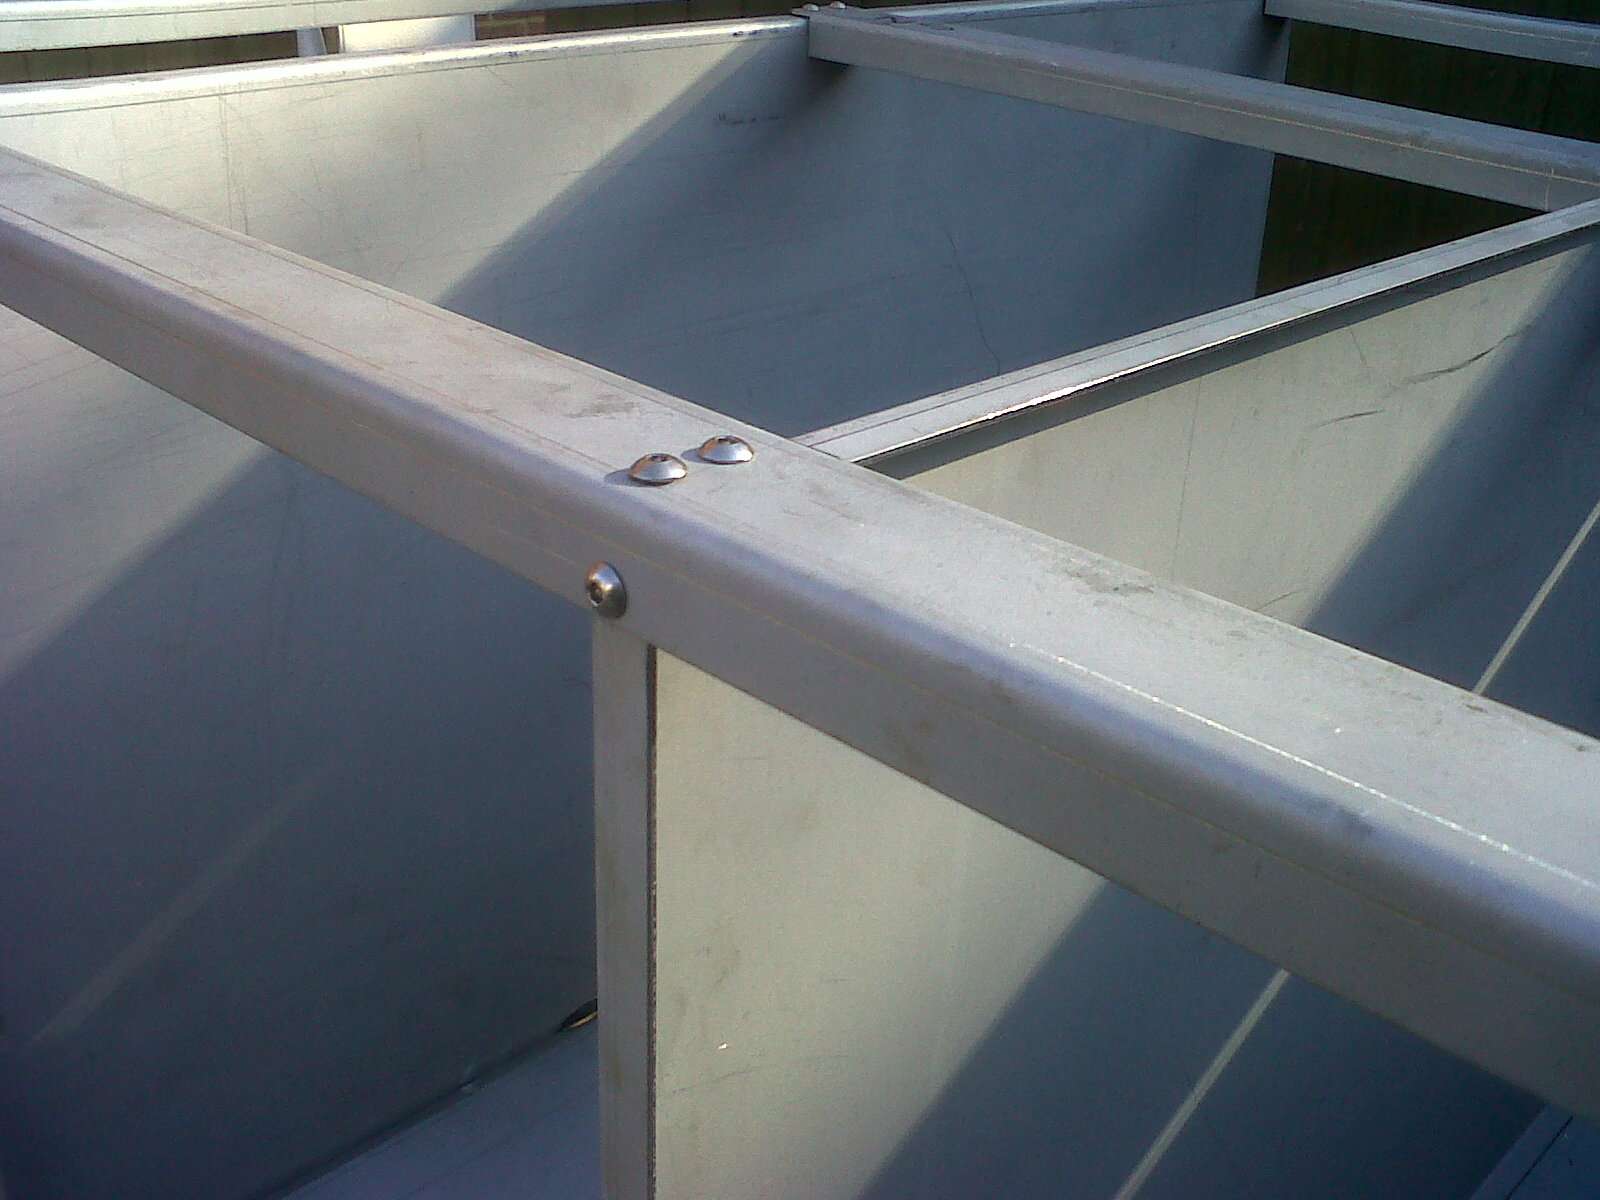
I then started to put the units together using rivnuts and studs the way the unit is fitted in the truck means that it is self bracing and does not require bolting in but lots of holes needed drilling and rivnuts needed pressing in.
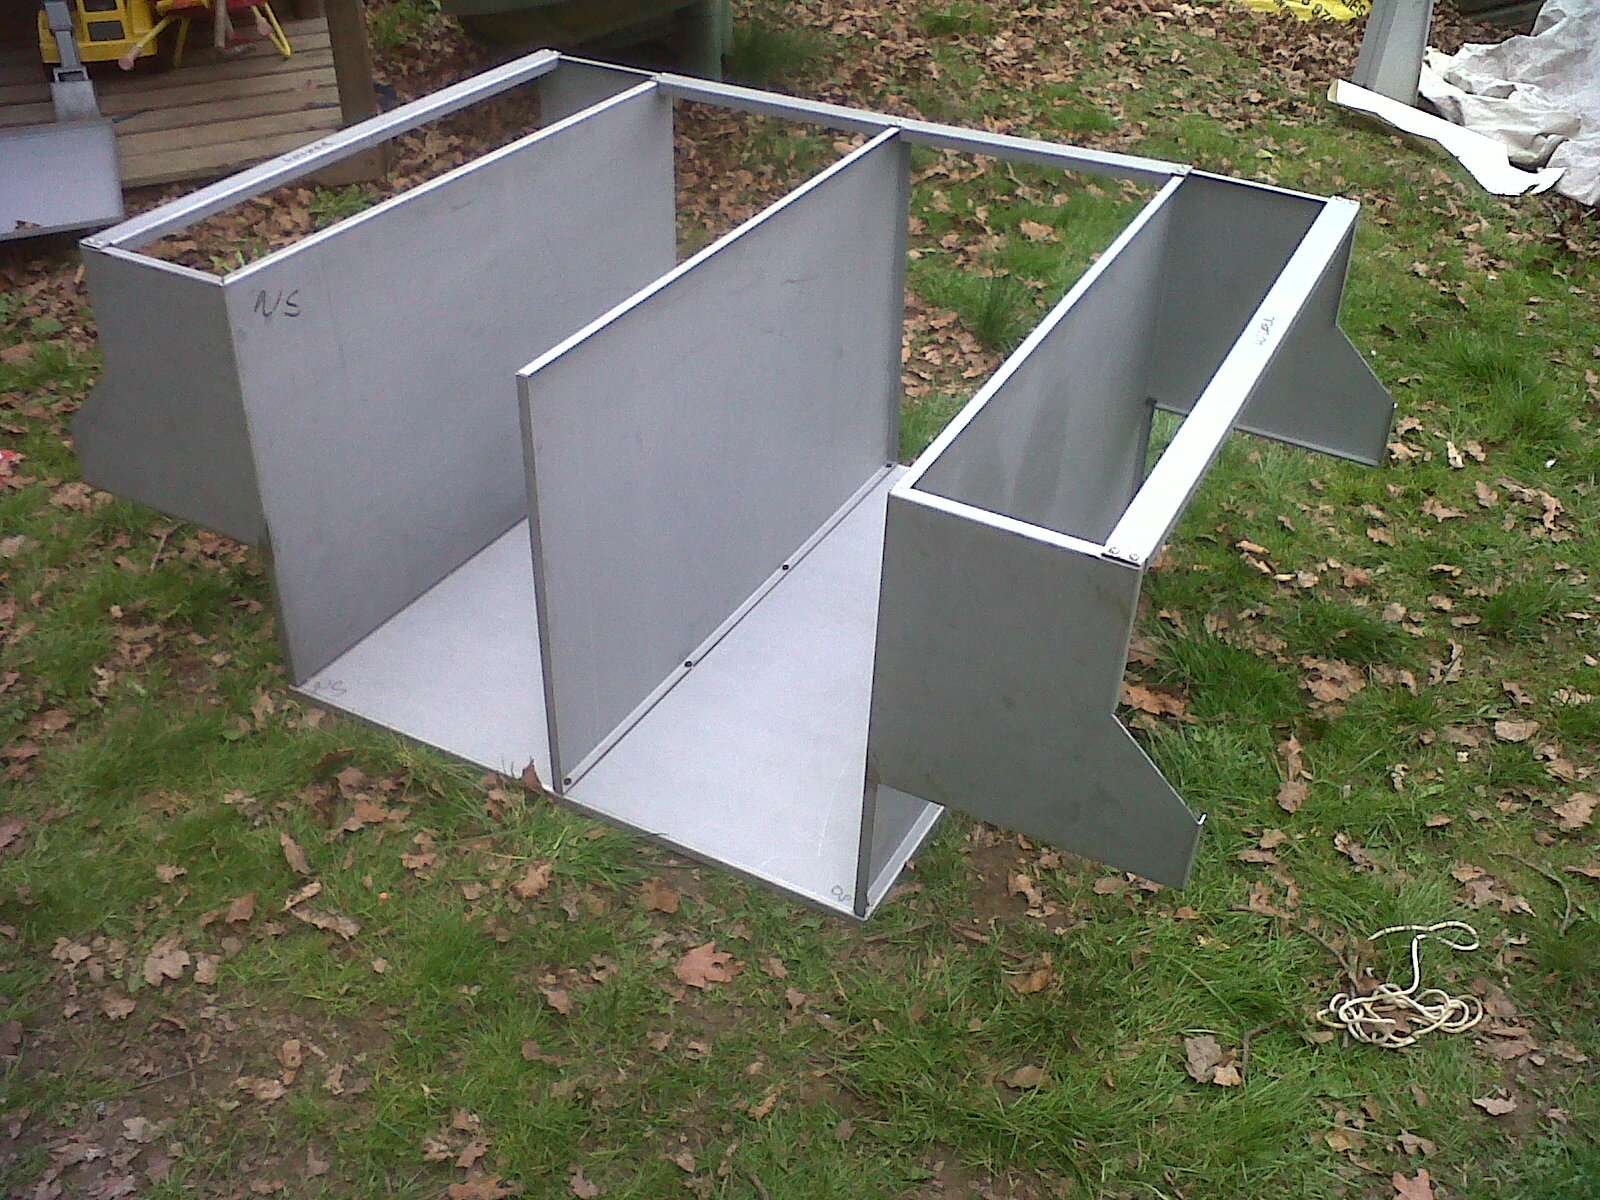
By jasong4110 at 2012-04-20

By jasong4110 at 2012-04-20
By jasong4110 at 2012-04-20
By jasong4110 at 2012-04-20
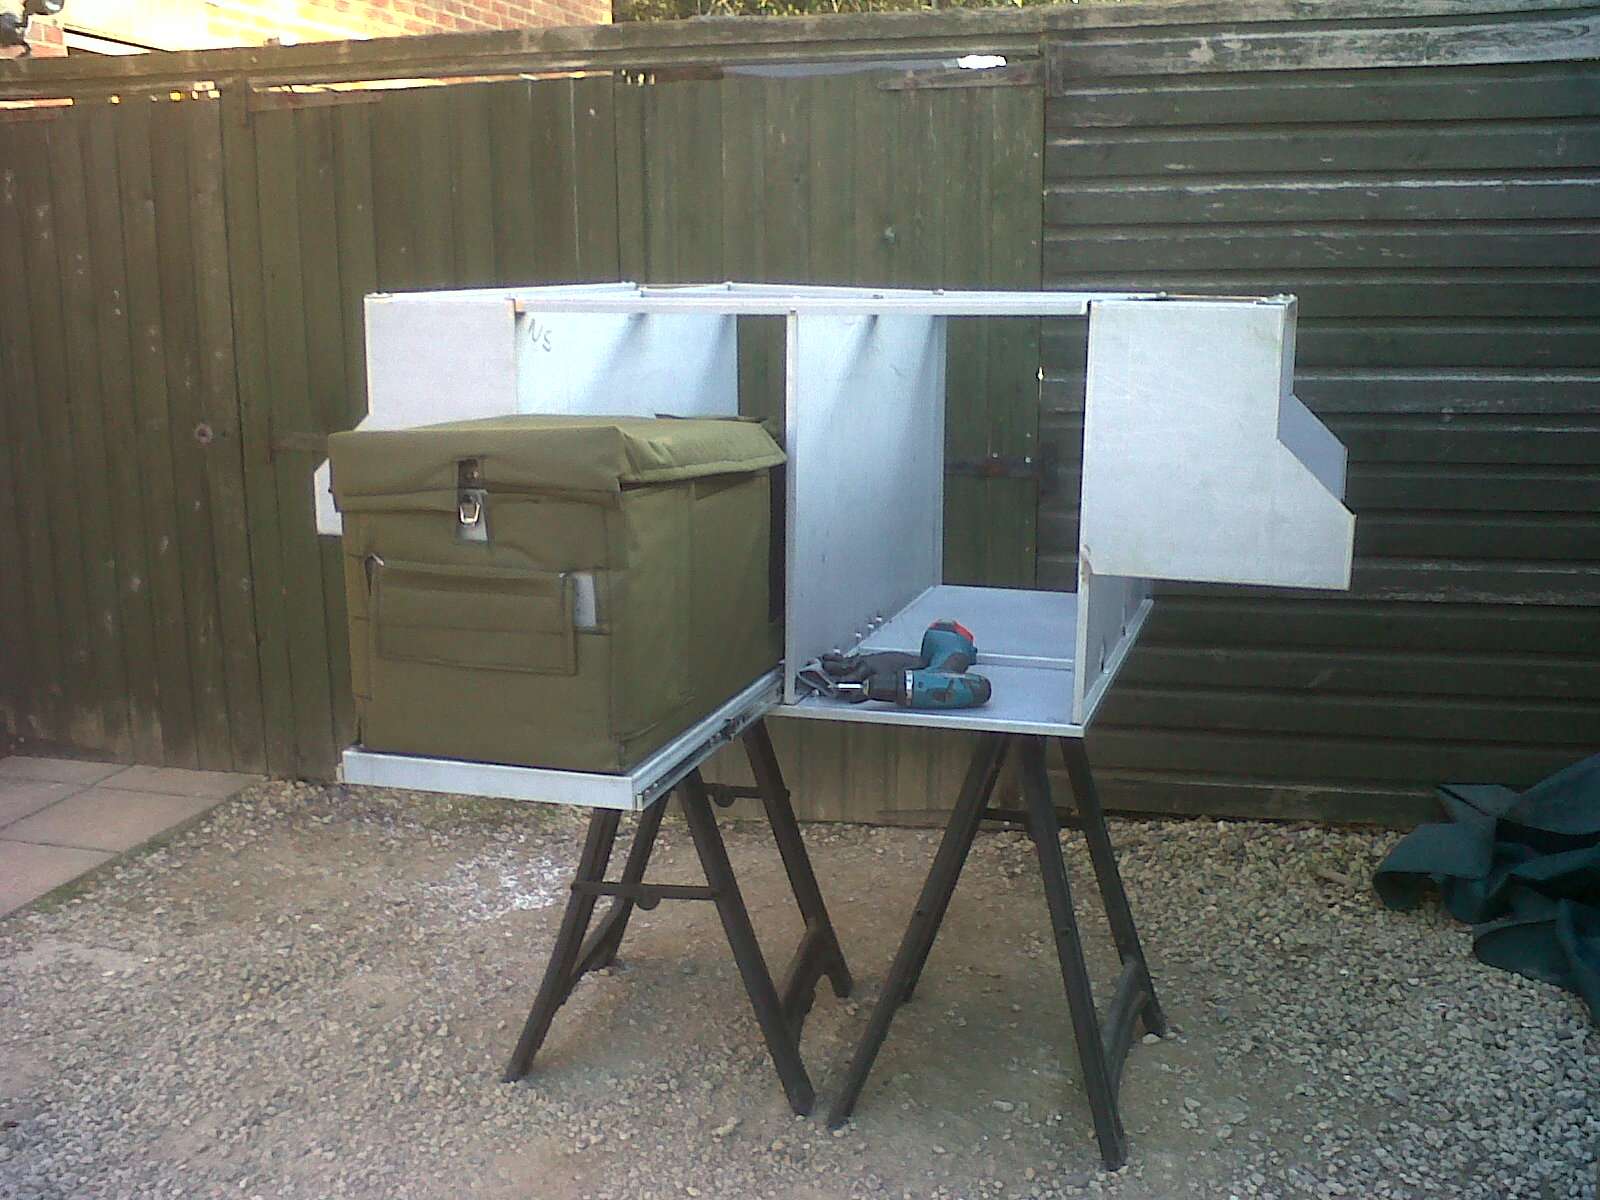
As above I never intended the unit to be self supporting but an interesting side affect was it was able to support it's self so I knew it would be strong, I wanted to add a fridge slider and again this needed to be strong to support my 40l truck fridge, I tested this with my 4 1/2 year old boy!!
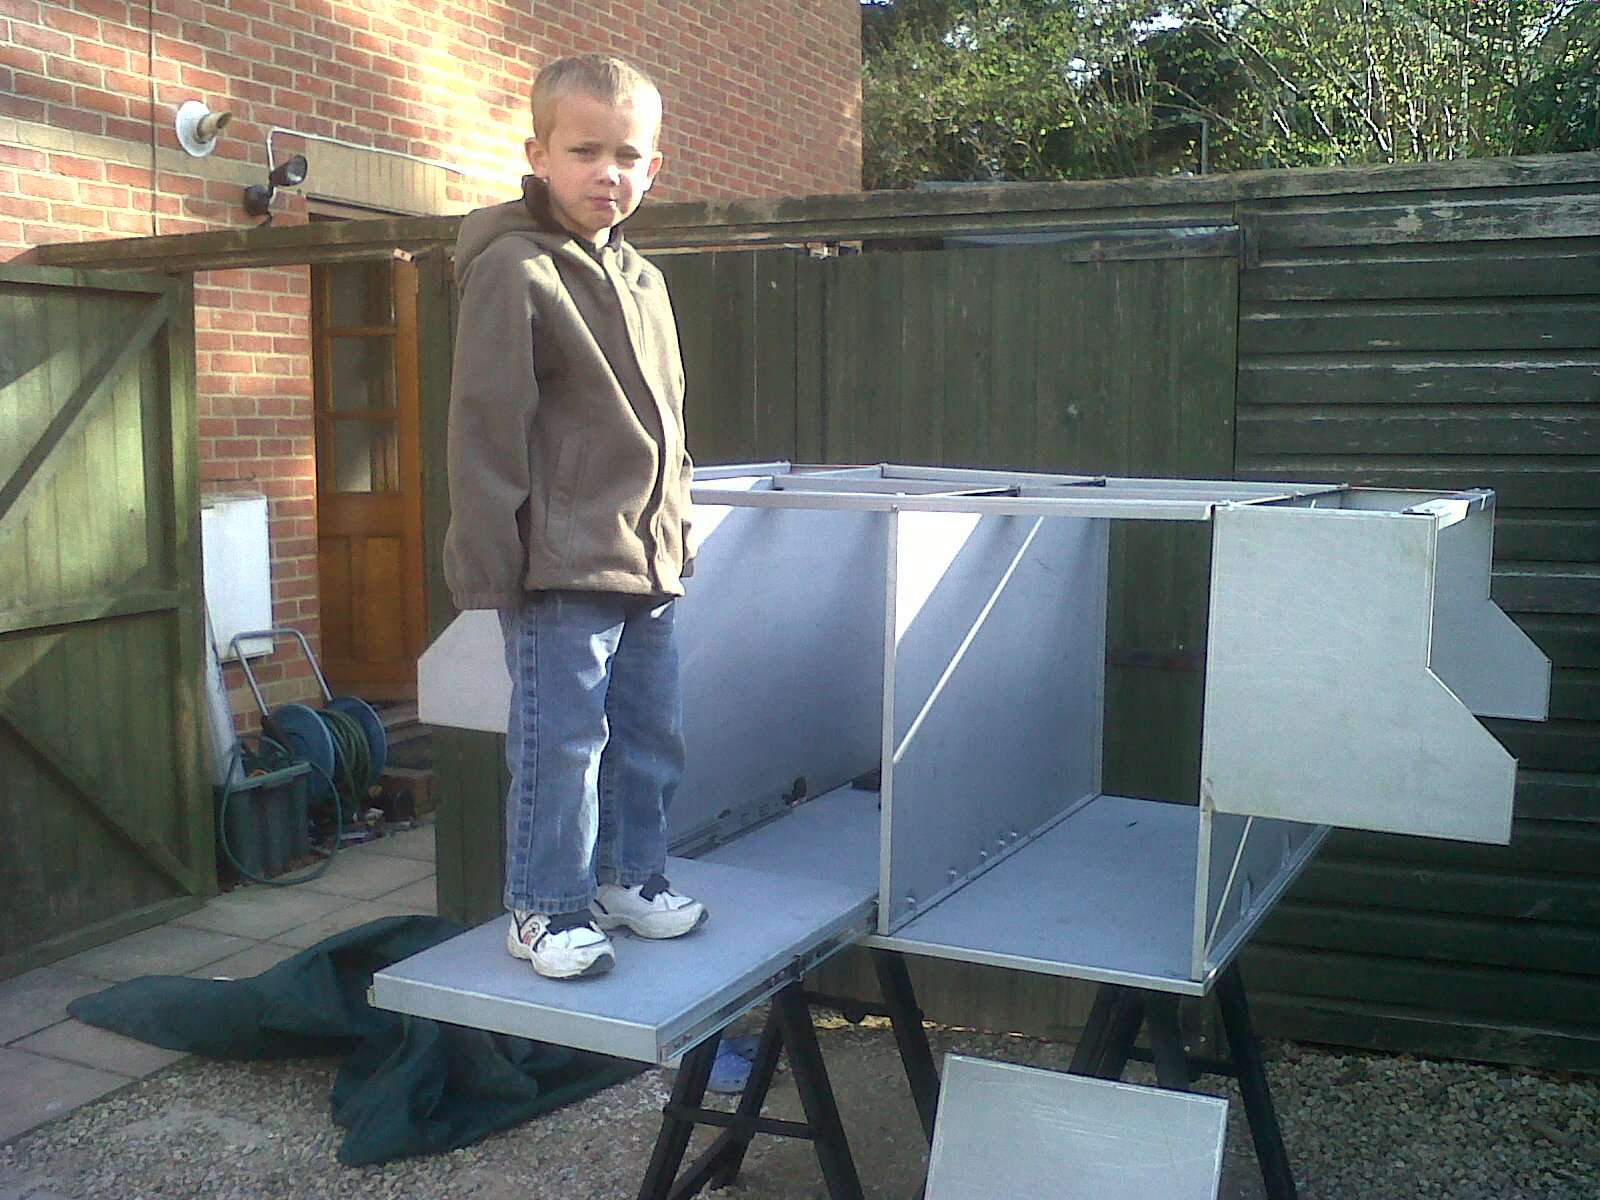
By jasong4110 at 2012-04-20
By jasong4110 at 2012-04-20

By jasong4110 at 2012-04-20
I then decided that I would line the unit with Veltrim to keep the noise down and stop the unit from drumming.
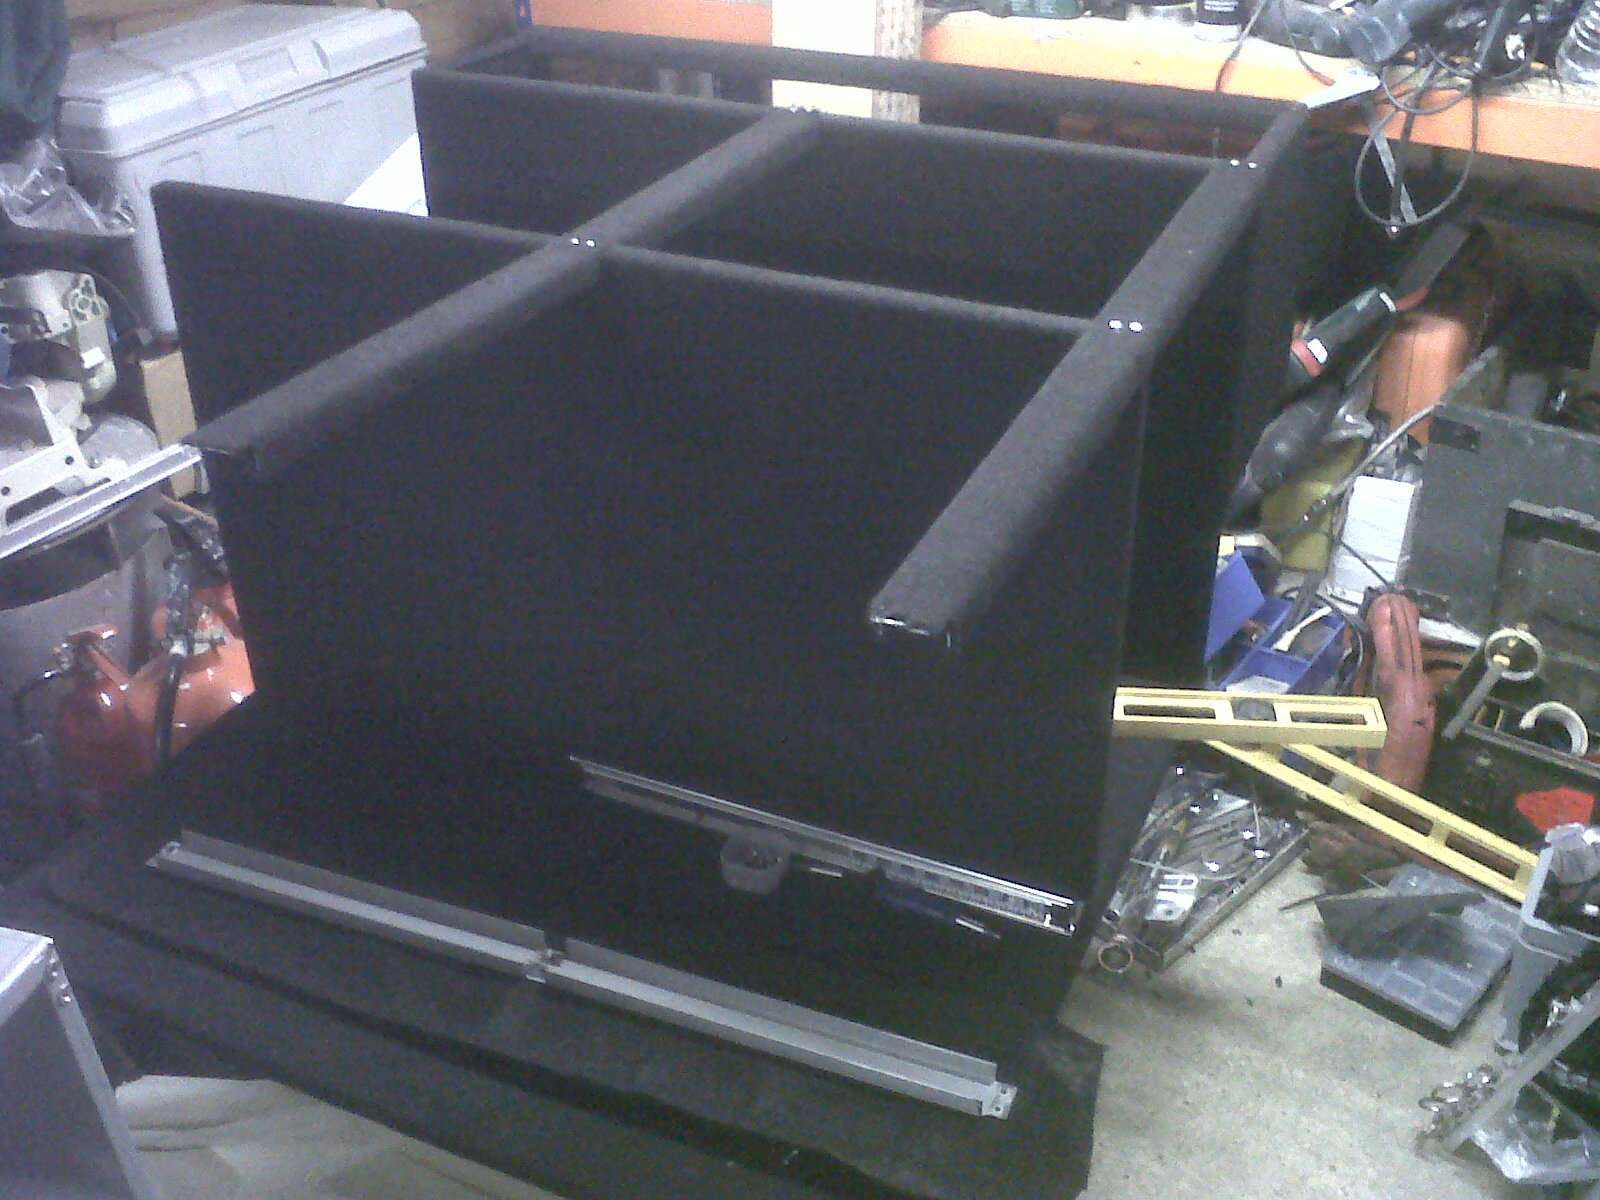
By jasong4110 at 2012-04-20
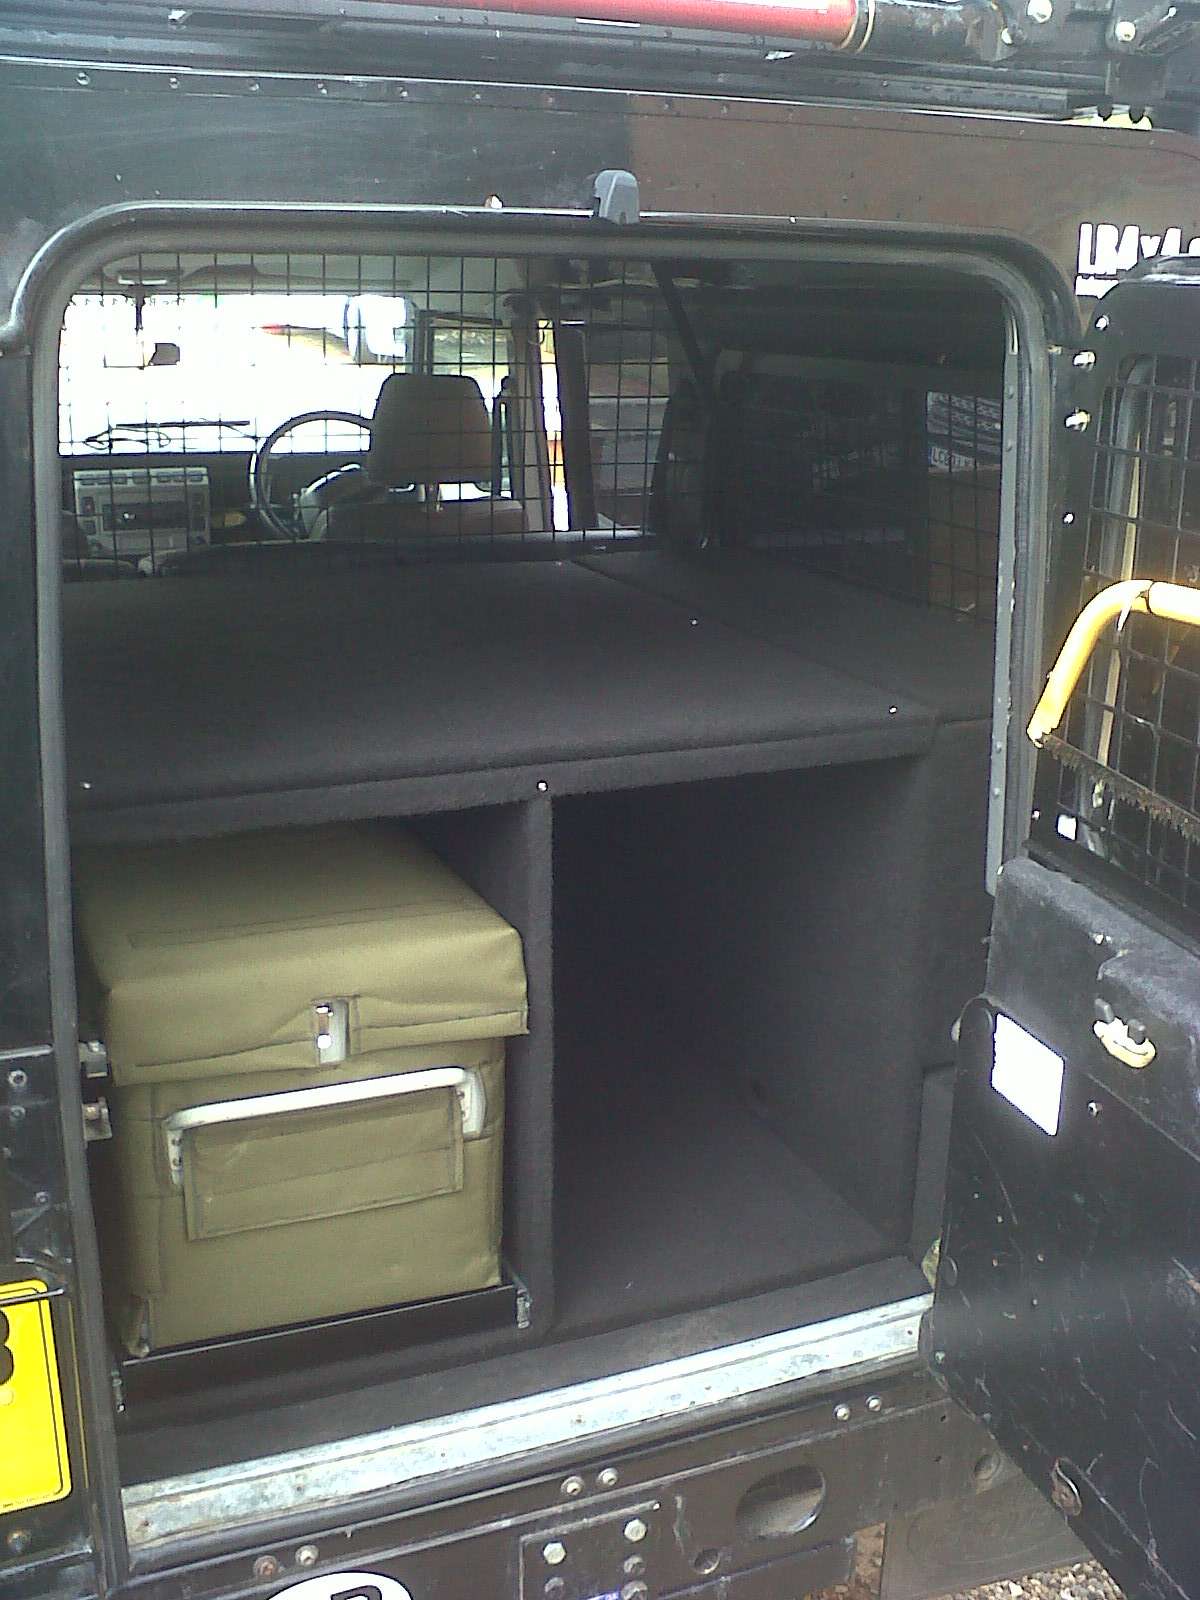
Then the unit was fitted into my truck, as I said above I need to be able to sleep on it later on so made the unit high enough to go over the bottom half of my dog guard which will then act as a sleeping platform when needed.
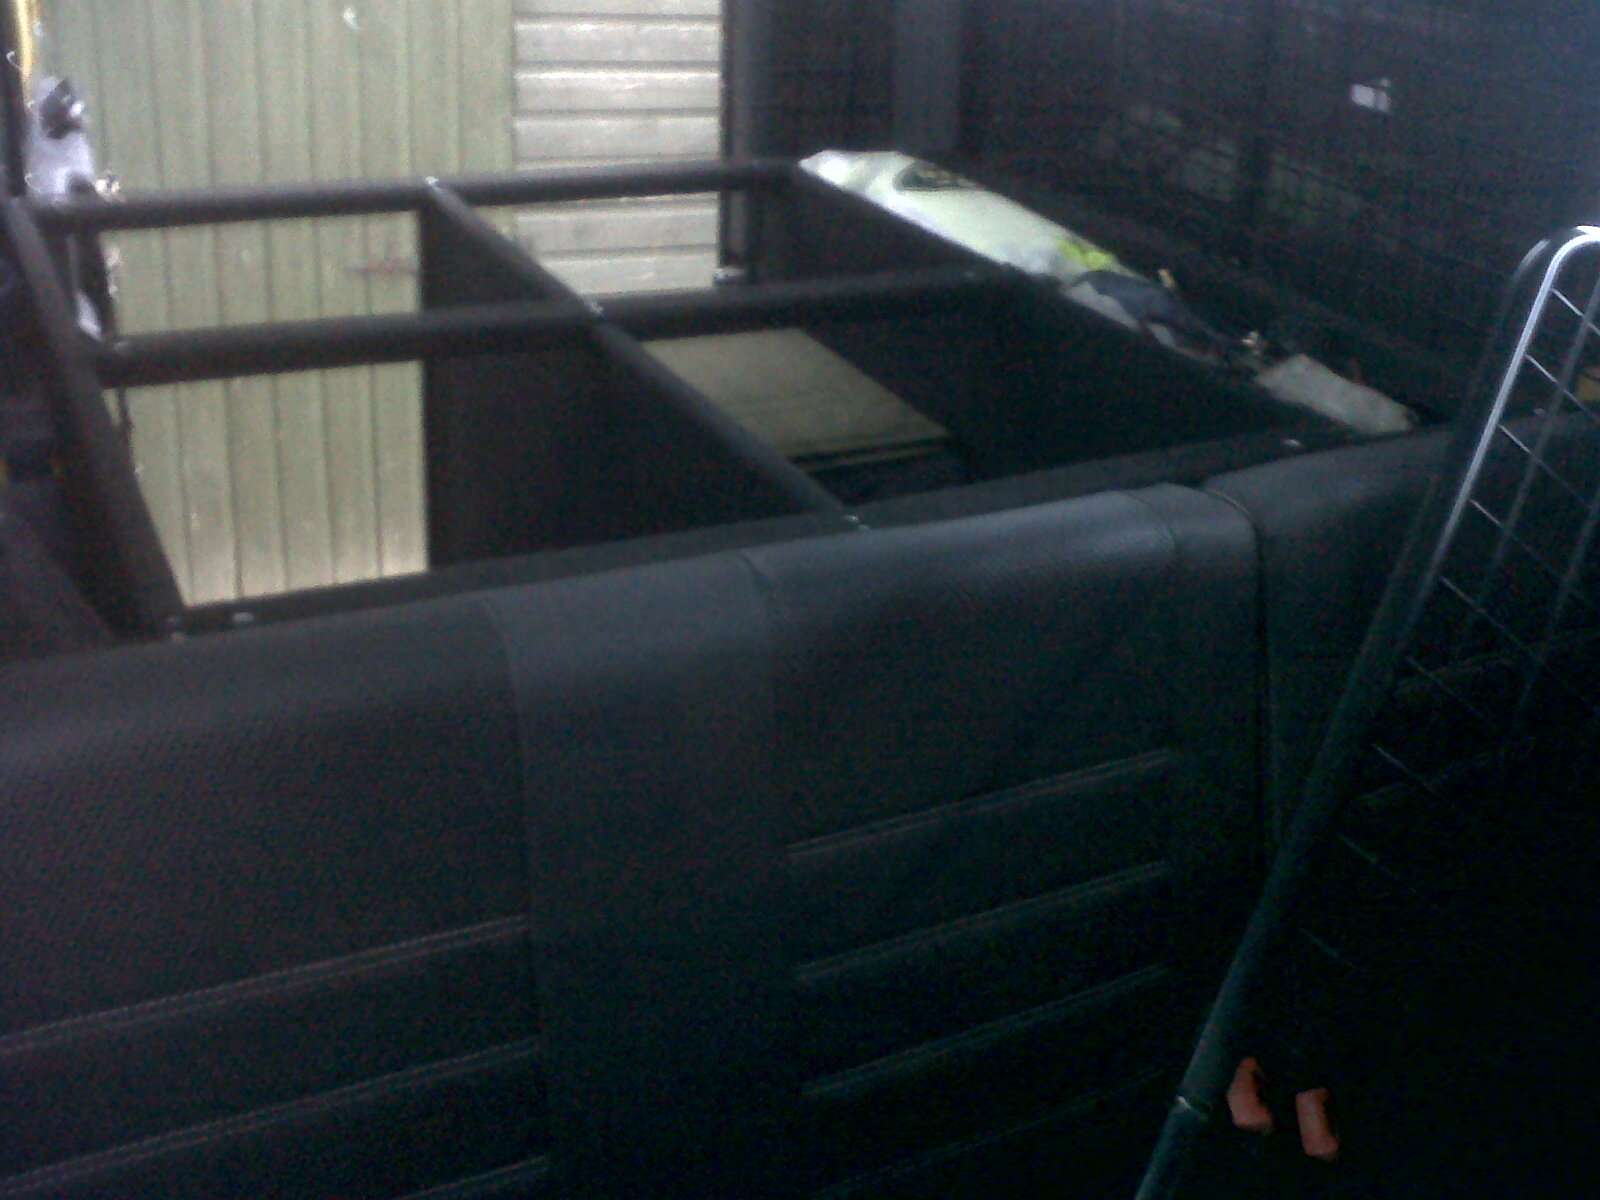
By jasong4110 at 2012-04-20
By jasong4110 at 2012-04-20
The top was made with plywood and with the side pod covers 'loose' but the centre is bolted down but still removable

By jasong4110 at 2012-04-20
By jasong4110 at 2012-04-20
By jasong4110 at 2012-04-20
By jasong4110 at 2012-04-20

By jasong4110 at 2012-04-20
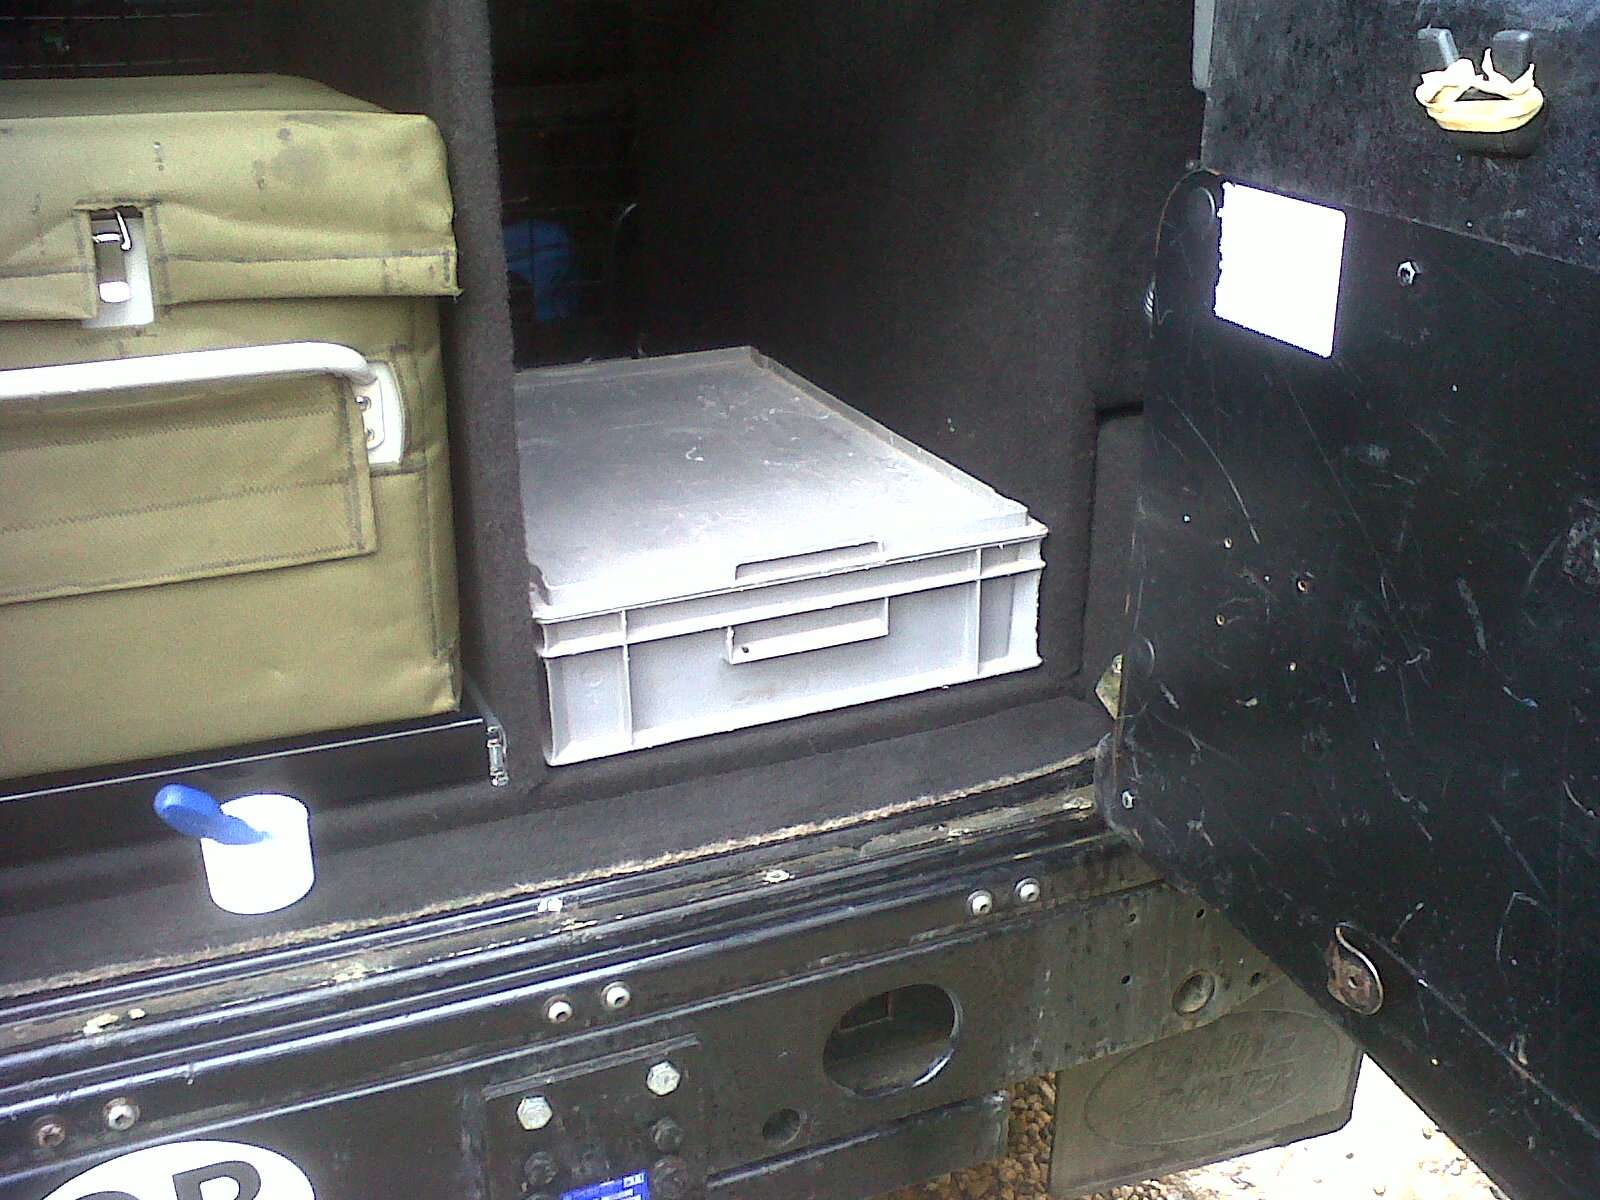
I still have power (12v and 240V) to add my 2nd aux battery for the fridge and a shelf above the boxes that will be used for coats and waterproofs but will be removable so that it forms the front part of the sleeping platform.
After taking a lot if inspiration from here before building my storage unit I felt it was time to post up my solution, I have a Land Rover Defender 110 CSW and need to retain the back seats I also wanted to make the unit removable if needed, I have an overland trailer and roof tents so don't need to sleep in the truck but will be going to Norway next February and at -40c will need to sleep in the truck.
I went through many designs but in the end decided to make the unit from 2mm zintec.
I don't have the equipment to cut and fold this type of material so got a local engineering company to cut and fold the zintec to my plans (attached below but can send non PDF copy if anyone wants them)
First photo is of the pieces back from the engineering company.
By jasong4110 at 2012-04-20
I then started to put the units together using rivnuts and studs the way the unit is fitted in the truck means that it is self bracing and does not require bolting in but lots of holes needed drilling and rivnuts needed pressing in.
By jasong4110 at 2012-04-20
By jasong4110 at 2012-04-20
By jasong4110 at 2012-04-20
By jasong4110 at 2012-04-20
As above I never intended the unit to be self supporting but an interesting side affect was it was able to support it's self so I knew it would be strong, I wanted to add a fridge slider and again this needed to be strong to support my 40l truck fridge, I tested this with my 4 1/2 year old boy!!
By jasong4110 at 2012-04-20
By jasong4110 at 2012-04-20
By jasong4110 at 2012-04-20
I then decided that I would line the unit with Veltrim to keep the noise down and stop the unit from drumming.
By jasong4110 at 2012-04-20
Then the unit was fitted into my truck, as I said above I need to be able to sleep on it later on so made the unit high enough to go over the bottom half of my dog guard which will then act as a sleeping platform when needed.
By jasong4110 at 2012-04-20
By jasong4110 at 2012-04-20
The top was made with plywood and with the side pod covers 'loose' but the centre is bolted down but still removable
By jasong4110 at 2012-04-20
By jasong4110 at 2012-04-20
By jasong4110 at 2012-04-20
By jasong4110 at 2012-04-20
By jasong4110 at 2012-04-20
I still have power (12v and 240V) to add my 2nd aux battery for the fridge and a shelf above the boxes that will be used for coats and waterproofs but will be removable so that it forms the front part of the sleeping platform.
Attachments
Every Miles A Memory
Expedition Leader
WOW!! That's well thought out!!
Forum statistics
Members online
- Kjatczak
- crystalclear
- MrGrodskyi
- Mechbot
- Cmin
- craig333
- andino
- mark5280
- ChasingOurTrunks
- mnewxcv
- slindn
- Taran Egner
- CurtStyler
- Bamagirlaz
- Curly42
- Rileydaily
- LowTech
- Cabrito
- Pink2
- Tharnacle
- MarcusG
- terrymo
- Driftwood77
- Hegear
- SnoopisTDI
- SoCal_80
- mountainkamper
- gkieser92
- claymond
- bmw2002e3
- Alltwistedup
- 38snubby
- Clrussell
- Backyard Hotrods
- pugslyyy
- lanceatm
- Ronnie Helmo
- Deleted Member 183
- g_m
- timohardin
- DSisOK
- DariuszCO
- (none)
- Dougnuts
Total: 677 (members: 51, guests: 626)