New Four Wheel Camper owner

First mod of the season.

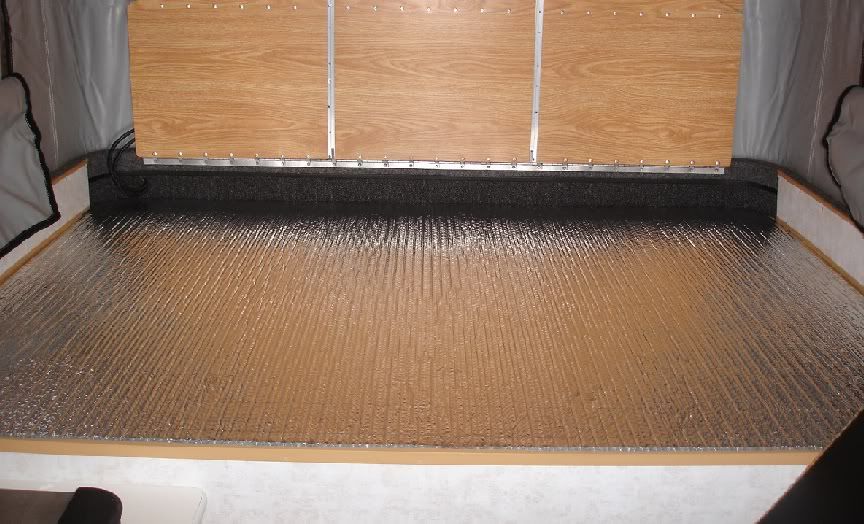
I had enough insulation on hand to do the job in pieces but I decided to buy a new roll that was wide enough to cover the entire area in one piece. Cut to fit and taped it down with double sided carpet tape.
DSC03990.jpg
 
Last edited:

tnt

Observer
N.E.,
I tried a similar mod but the repeated sliding in and out of the bed extension tore up the reflectix. Do you use the slide out section of the bed at all? If so, how do you avoid this problem?
 
N.E.,
I tried a similar mod but the repeated sliding in and out of the bed extension tore up the reflectix. Do you use the slide out section of the bed at all? If so, how do you avoid this problem?

If it starts to be a problem I will look for some thin aluminum slats for the pullout to slide on.
 
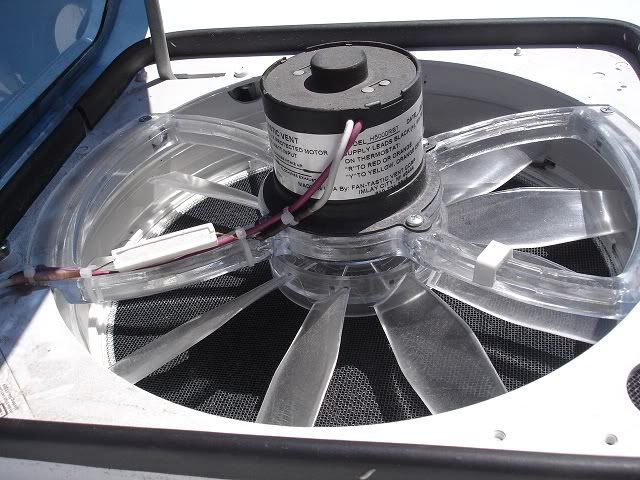
I did the fan speed reduction mod today. I found that the speed of the Fan Tastic vent was a little too fast even at speed level 1. When cooking I just need a small amount of airflow to vent out the gasses. With the original setup all of the warm air in the camper would be sucked out in just a short time. To remedy the problem I spliced in a 4 ohm 10 watt resistor.
DSC03995.jpg


Here's a more detailed write-up. I just kept it as a three speed.
 
Last edited:

1stDeuce

Explorer
A friend and I were just discussing the camp shower options... I mentioned your setup and we both looked it over again. He pointed out possibility #3 for failure mode: "Clumsy shower taker tips over, taking the whole mess with him --> Wet naked injured guy now in wet messy camper... :)

Are you using your shower setup? I just got back from Moab, where we used a sun shower one day, but it was kind of a pain, since we wanted a shower in the AM, and there wasn't as much sun, and then it's too low, even when hung from the roof of the camper. I'm thinking the 12v/water container I fill method might work out ok... Solar shower can warm the water, but using a pump to put it on me seems easier than gravity. :) I'm less concerned about cold weather, so I'll probably build an easy to assemble shower curtain that hangs off the outside of the camper. Steralite lids work great as the shower floor! :)

Not much new projects out of you this summer... Hope you're enjoying your setup!!
C

We use the shower a lot. Even when we stay at campgrounds, sometimes there is no shower available and my wife and I both like to start our day with a shower. The biggest hassle is heating the water. This camper doesn't have a water heater so we use two pots on the stove to heat up about 4 gallons for the both of us.

I did one late season upgrade to my camper. As soon as I have internet at my house again I will upload some pictures.
 
New Galley Pump

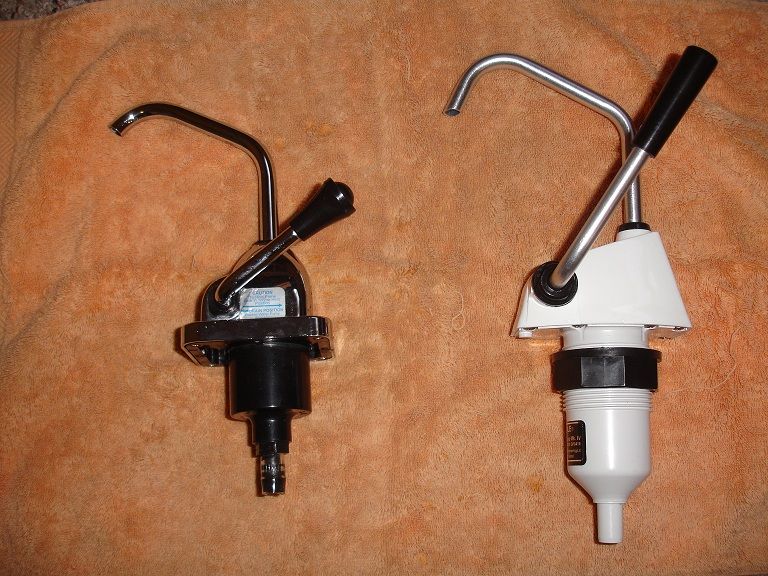
On the last few camping trips we went on in 2012, we kept finding a small amount of water in the storage area directly under the sink. It took forever to figure out where the water was coming from. To make a long story short I found that the water was leaking out of the handle of the hand pump and making its way down through the hole that the pump is mounted in. I tried to fix the problem by tightening the plastic nut located at the base of the handle but this only made the problem worse. I looked online for an exact replacement but reviews for this product were not very good. Some people had the same problem I had straight out of the package. My search for something else lead me to Whale Flipper Galley Pump.

old on left new on right
DSC04380.jpg


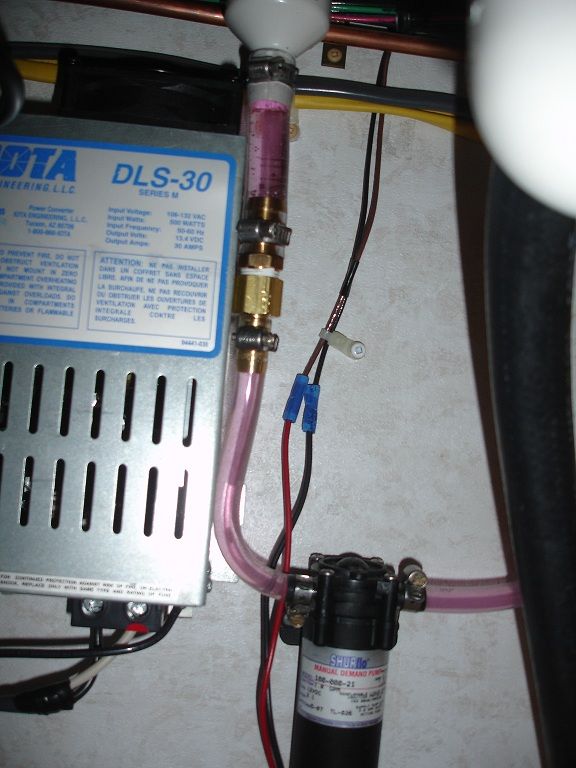
I ended up needing to make a couple of modifications in order to get everything to fit correctly. The first thing I needed to do was use a hole saw to cut the mounting hole in the countertop slightly larger. I first cut a plug to fit in the existing hole in order to hold the hole saw centered as I cut the new larger hole. Then I had to make an adapter out of brass fittings for the larger water supply line.

brass adapter
DSC04388.jpg


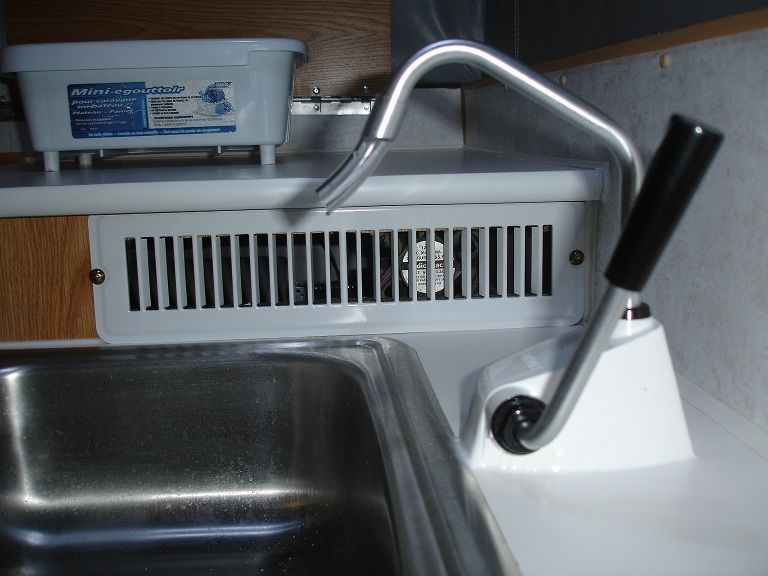
I had hoped to mount the pump with the handle on the left (opposite of the original pump) in order for the faucet head to reach closer to the center of the sink. This didn't work because in this position the handle would hit the back wall when it was being pumped. With the handle on the right, the faucet head just barely cleared the edge of the sink and a lot of water ends up splashing on top of the counter. This was fixed by extending the faucet by placing a short section of hose over the end.

DSC04389.jpg


I have no idea if it works yet because I had to winterize my camper soon after installation.
 
Last edited:
Is that an electric water pump under the sink, and if so, why the hand pump?

You're right. Four Wheel Campers offers an electric pump as an option and the hand pump is standard. When they add the electric pump (not an on demand pump) the standard hand pump is also kept. This gives me the option of using one or the other. Hand pump to save on water and battery power and electric pump when more water flow is needed. Like when filling up large pots or bottles.
 

JHa6av8r

Adventurer
You're right. Four Wheel Campers offers an electric pump as an option and the hand pump is standard. When they add the electric pump (not an on demand pump) the standard hand pump is also kept. This gives me the option of using one or the other. Hand pump to save on water and battery power and electric pump when more water flow is needed. Like when filling up large pots or bottles.

The electric water pump FWC offers now is on demand. We don't have a hand pump.
 

sheep1499

New member
Northeren like the shower mod alot!! but one thing that would make it even better, in my opinion to run a water hose attatchment on the lowest part of the containter sealed correctly and a water hose exit eather out the door or a small 1" hole in the back of the camper with a 90' added on the outside to drain all the water out! minimize chance of having a huge spill, allowes a second type of wash container for bigger items than the sink cannot contain and you dont have to dink with emptying it or worrying about it overflowing.
 
4 gallon rotopax and new LED porch light

I've been trying to figure out, for some time now, a good way to carry extra gas. On my Labrador/Newfoundland trip a few years back I carried a 5 gallon jerry can on the roof of my truck using a homemade jerry can holder. There were two problems with this setup. First, I don't like to carry anything on my roof unless absolutely necessary and second, the can holder including the crossbars weighed in excess of 35 pounds.
.
.
I like the way Overland Hadley did his Rear Mounted Jerry Can but since I didn't order my camper with corner brackets (for jack mounting) I didn't have a good attachment point. I then read this this article about how a 4 gallon rotopax was mounted to the underside of the cabover and decided that this is what I was going to do.
.
.
After receiving the can in the mail, I started having second thoughts about this mounting option. My first problem with the overcab mounting placement was that if it didn't work out or if I wanted to remove the can for whatever reason, I would be left with 8 bolt holes that I'm sure I could plug but it would never look as good as new. The second reason is that I'm really leery about carrying gas cans with the fill cap in a submerged position. Having said this I have not read anywhere about a rotopax leaking when placed on its side.
.
.
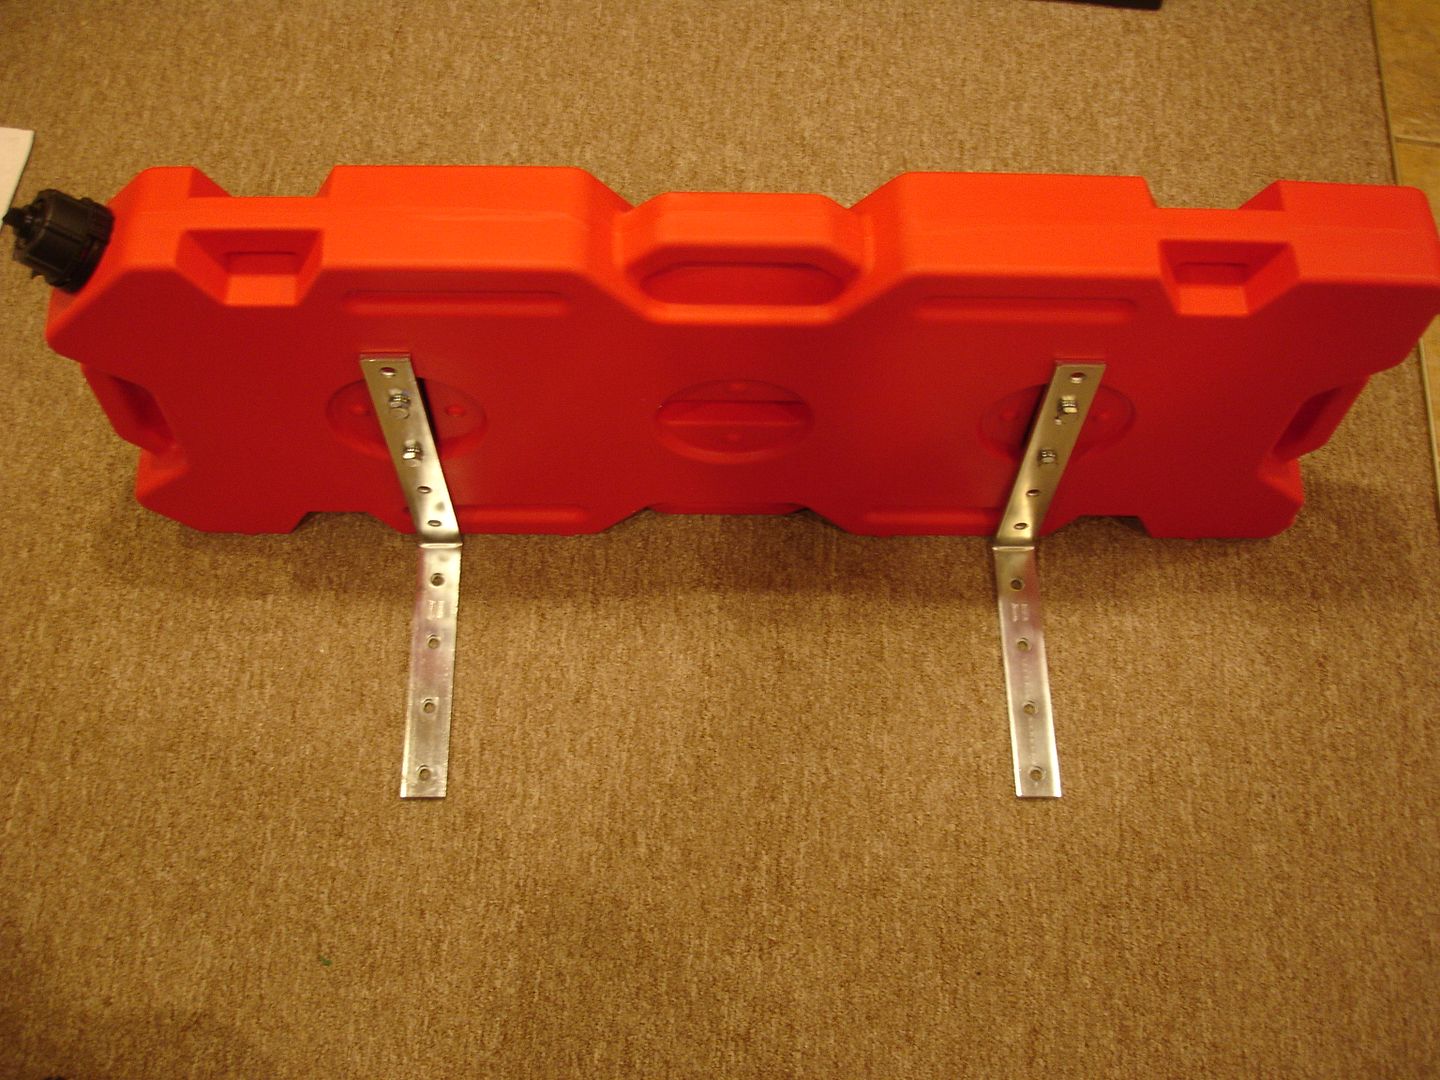
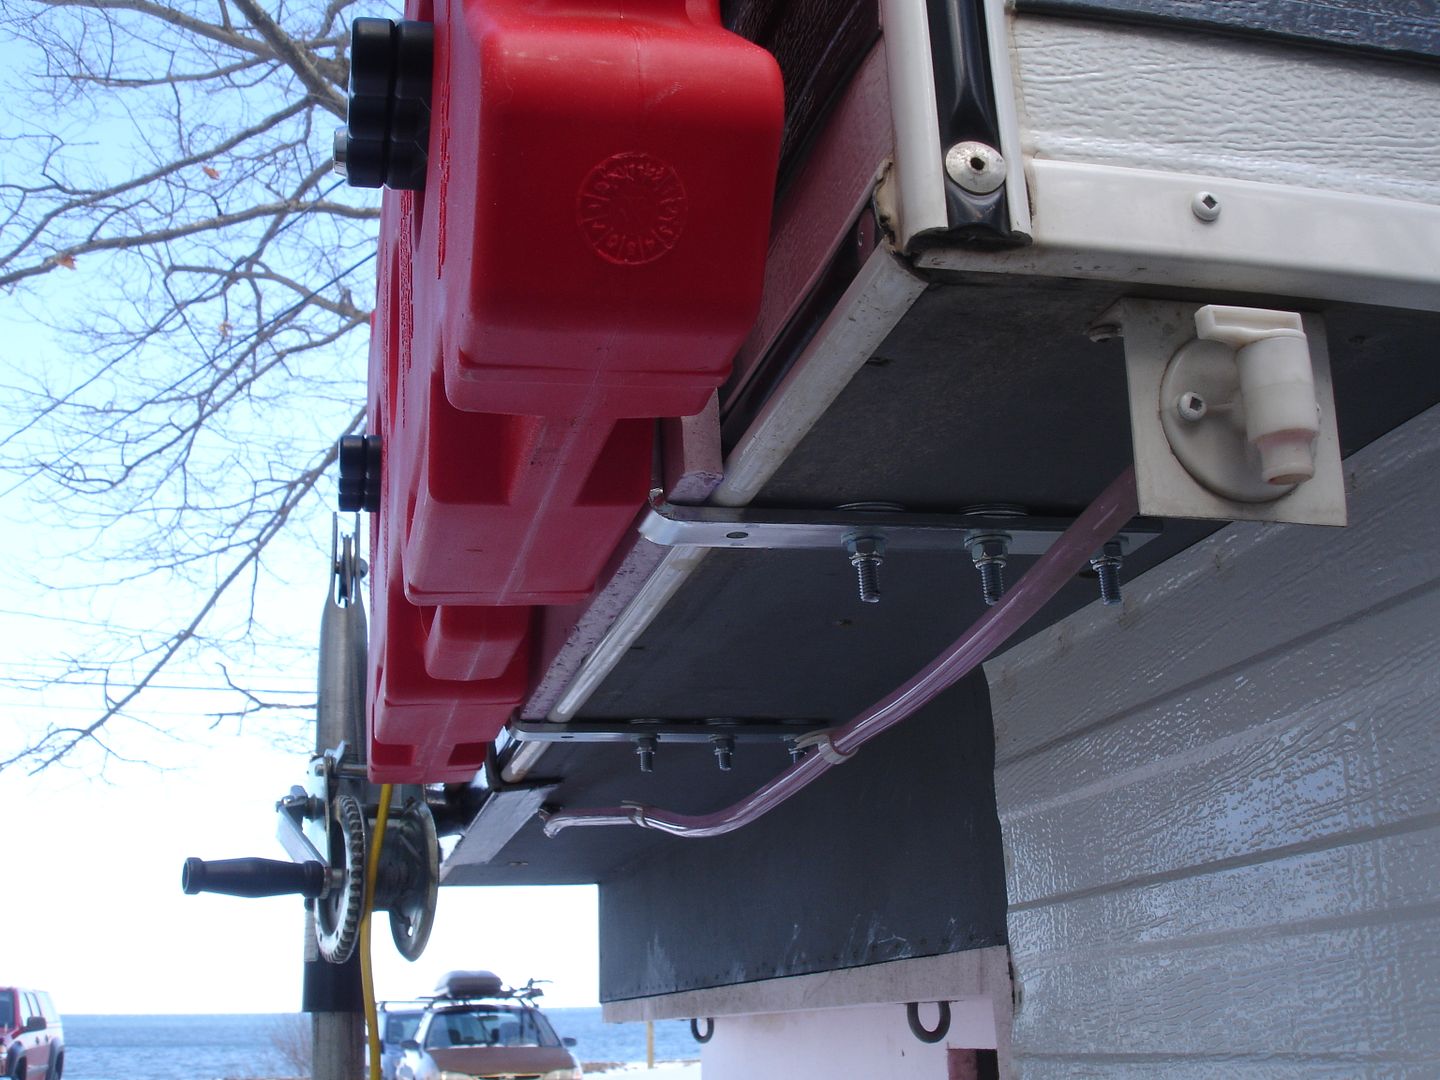
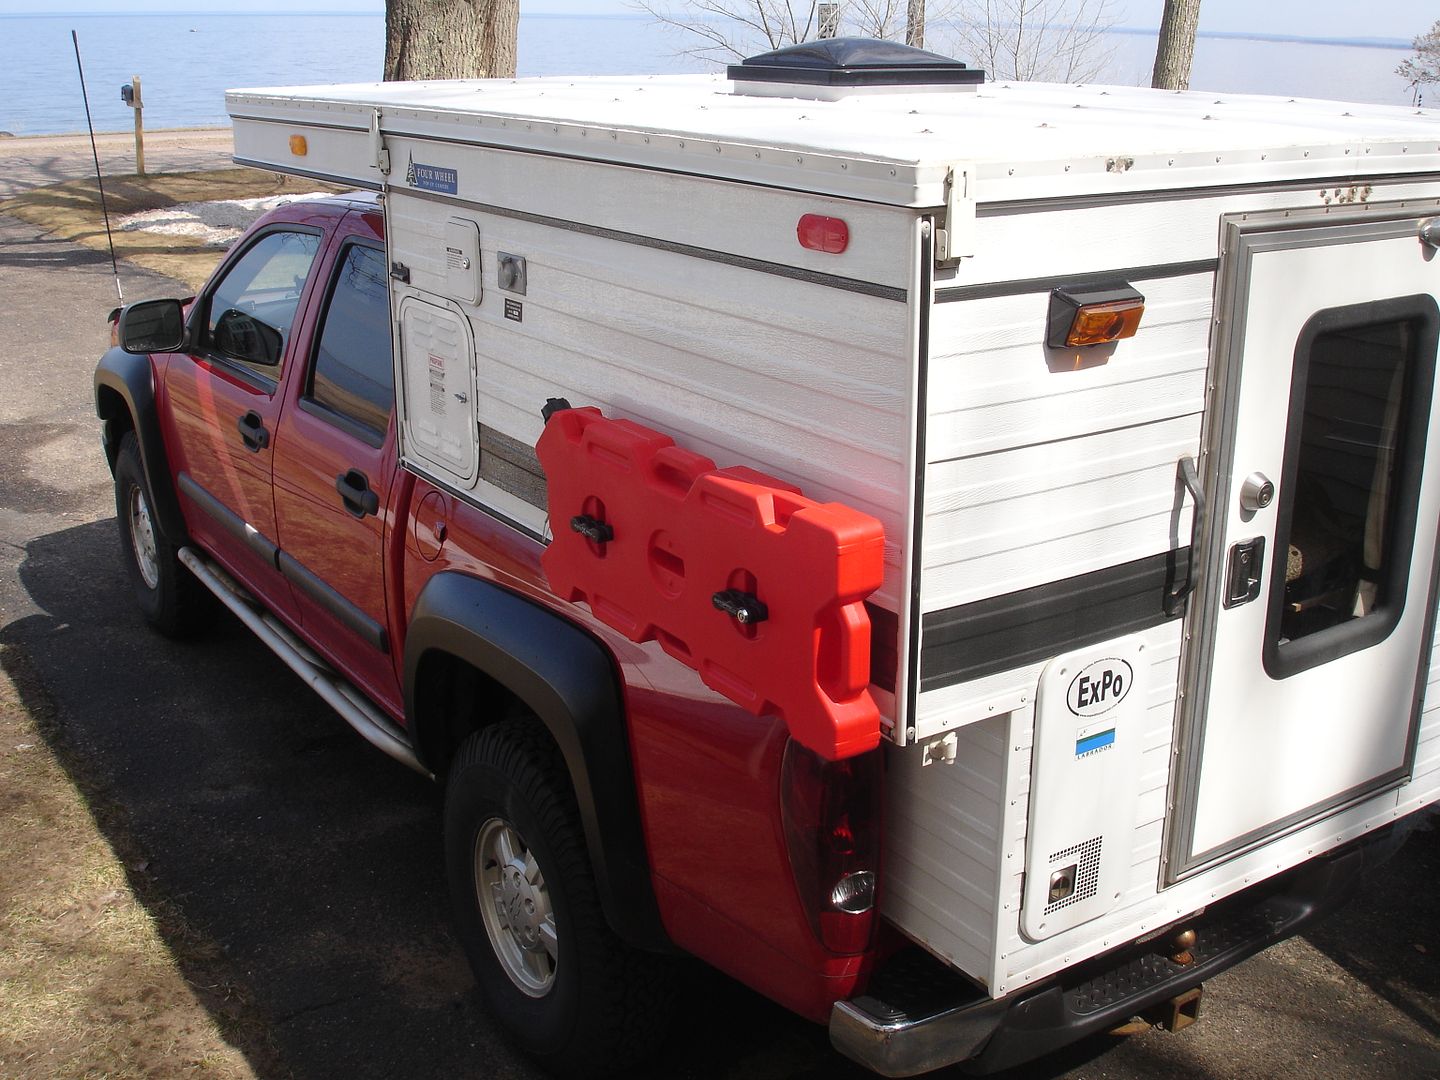
This is what I came up with. Using 10"x1.25"x.25" corner brackets I mounted the can on the side of the camper. Some modifications to the corner brackets needed to be made in order to get everything to fit properly. I used 6 carriage bolts to attach the corner brackets to the bottom of the camper.
.

.

I cut the excess length of the bolts when everything was in place.

.
One good thing about this mounting position is I don't have to take it off the truck when I fill it up. (technically I think you are supposed to place all gas can on the ground when filling up to prevent the possibility of fire caused by static electric discharge)
.
.
My second upgrade for the season was on my porch light. The one I had was starting to have problems so I ordered what appears to be the exact same model except this one came fitted with an aftermarket 21 LED "bulb" using only .32 amps at 357 lumes. Now I have 100% LED bulbs on my camper.
 
Last edited:

BCHauler

Adventurer
Your gas can mount is very innovative but do you have any concerns about off-road damage (ie tree branches, rocks etc)? I think I would be tempted to either change the location or provide some sort of cage.
 
This gas can is only 3 1/2 inches wide and it's spaced out from my truck a half inch for vibration clearance. So it really doesn't stick out that much. I will just have to be extra careful with tree and rock clearance. I can keep a good eye on it with my side view mirror.
 

Overland Hadley

on a journey
I really like your mounting solution, good job!


Funny that you mention the holes on the underside of the cabover. I now have 26 holes under there and need to drill four more, hopefully I never take out the hardware!
 

Forum statistics

Threads
185,914
Messages
2,879,582
Members
225,497
Latest member
WonaWarrior
Top