rubicon789
Observer
All,
It is finally time. After 8 years of owning this trailer as is, I have taken the plunge. I have disassembled everything and made a few repairs to the fenders and frame so far. I still have some work to do before sandblasting, but I'm sharing my work as I go. I got a Lincoln 140 welder last weekend and this is my first time ever welding. I love it but it's harder than I thought. However, it's pretty fun to mess around with.
The plans are to blast the frame and tub. Build a lid and have it skinned with aluminum or steel. Yes, I know about the galvanization of the aluminum and steal together. I am still researching the best options. Flat lids are out of the question, I want to fab something that matches the contours of the tub to allow extra room for chairs, tents, bags etc. Those ideas are still in my head, but feel free to pass on thoughts. Any thoughts around the frame of the lid? Should it be build to the exterior dimensions of the tub, so that it it goes over the lip? Should it rest directly on the lip? Should I weld so 1x1 angle to make a flat surface? Thoughts?
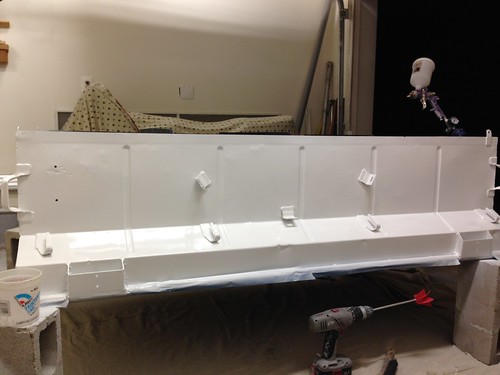
As for paint, I am trying to determine the best route. I want it to last another 50 years, so I am thinking of doing something like the Eastwood 2k Epoxy in a spray can deals (thoughts and experience using these?). There is also a ceramic paint as well. Has anyone used this one? I want the frame to be sealed in really good as I want to pass this to my kids one day.
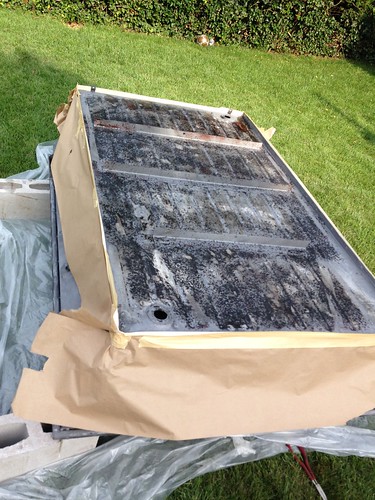
Here is where I am so far:
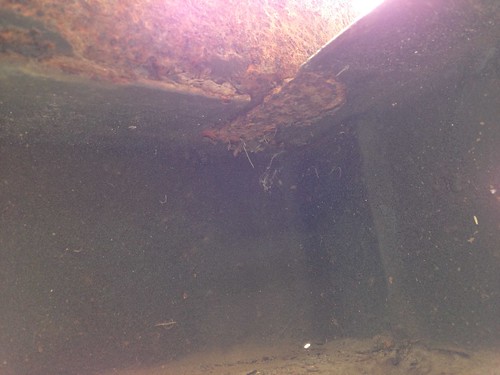
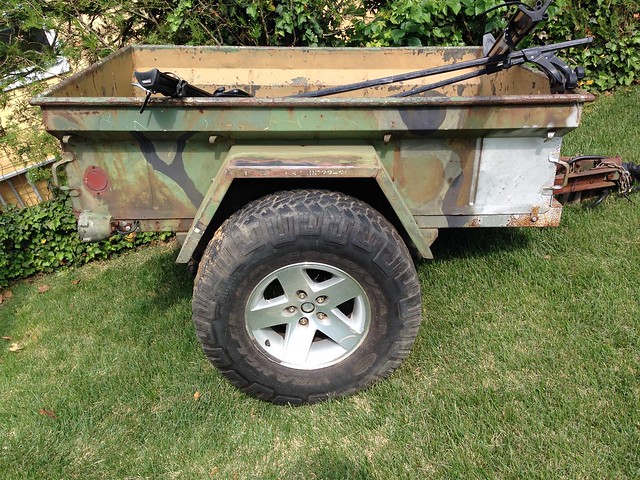
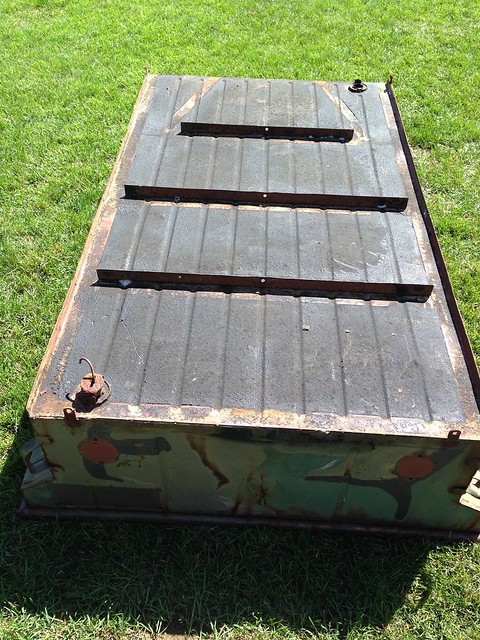
Current State
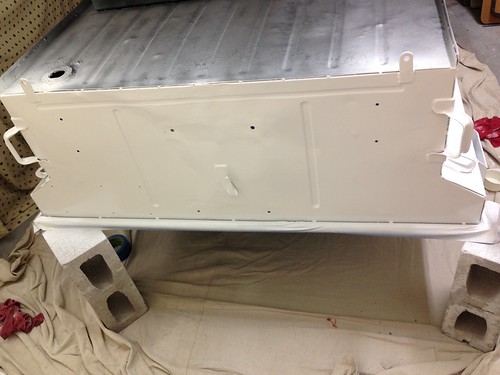
Tub off
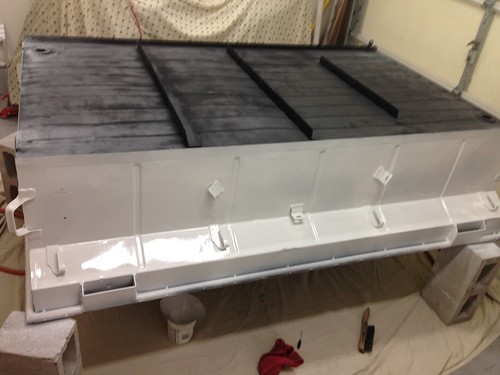
Tub apart
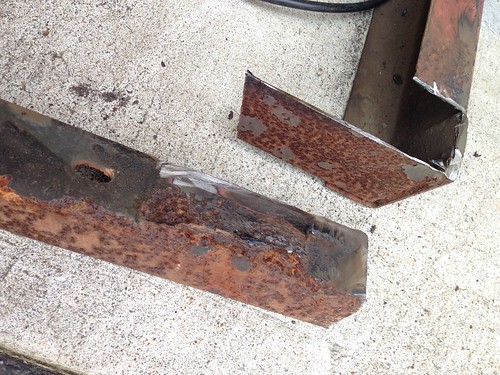
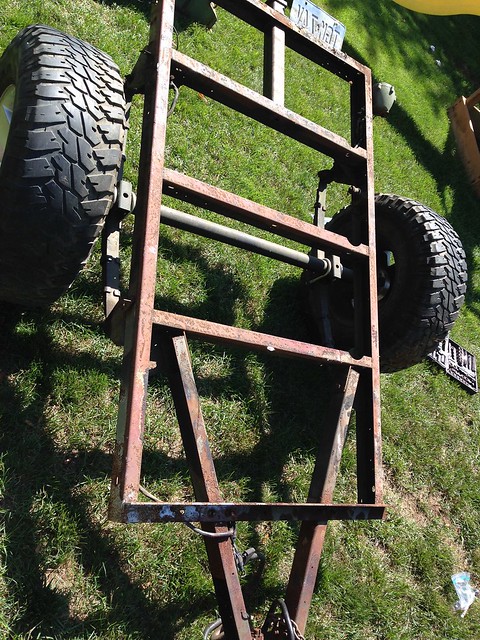
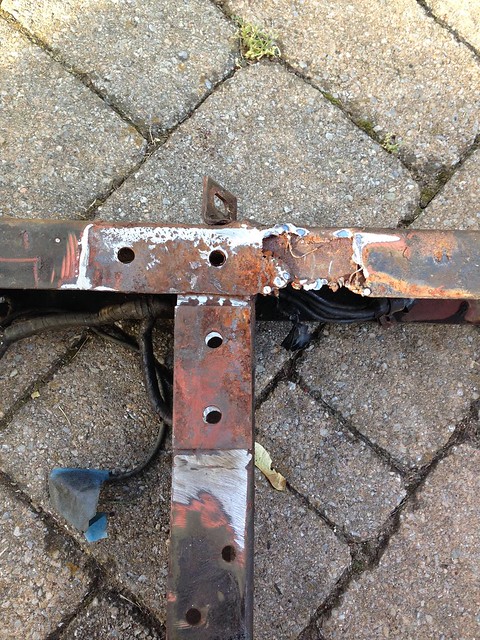
Frame Cancer
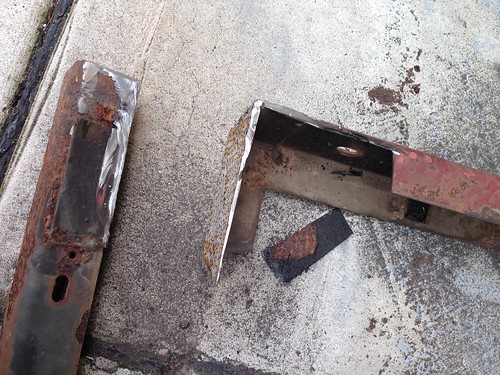
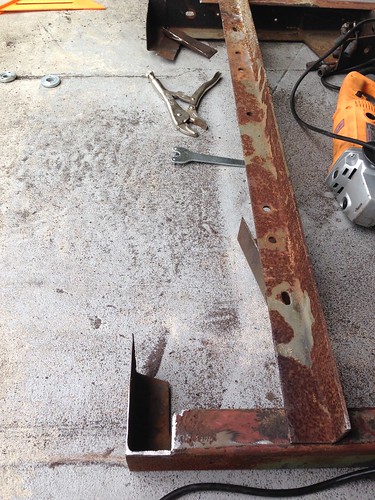
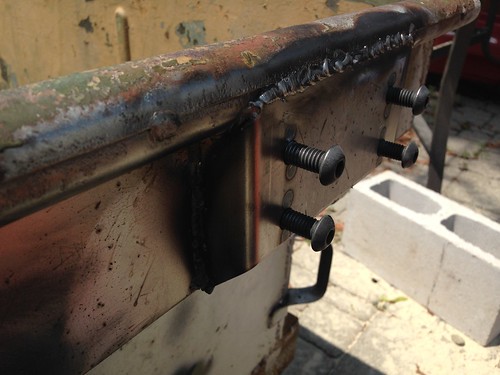
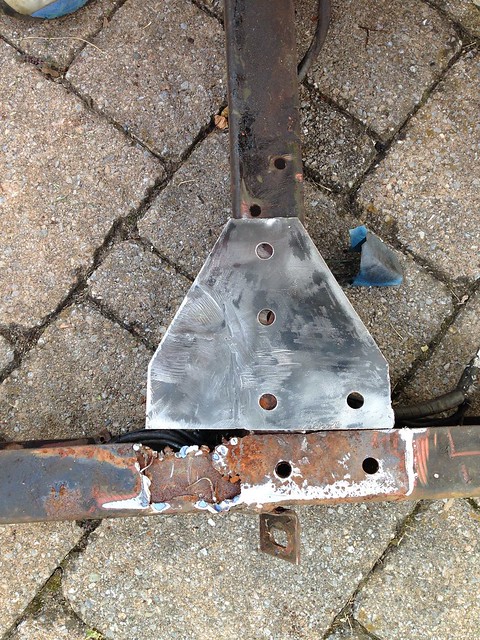
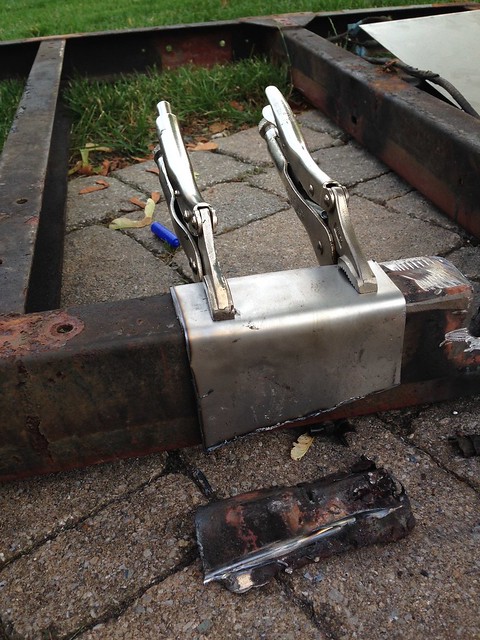
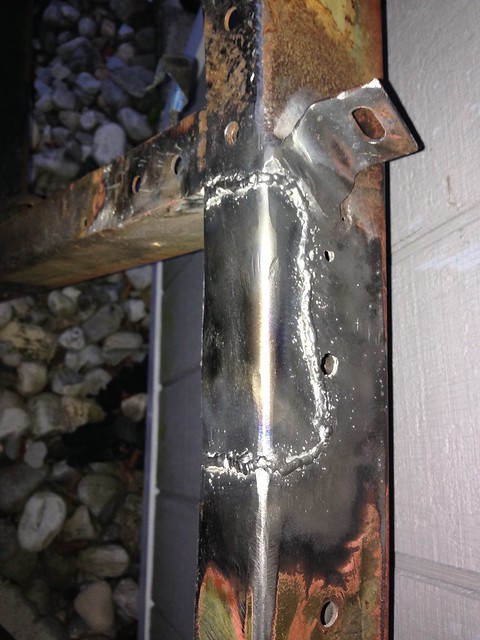
New Bracket (cut out cancer and welded a new piece)
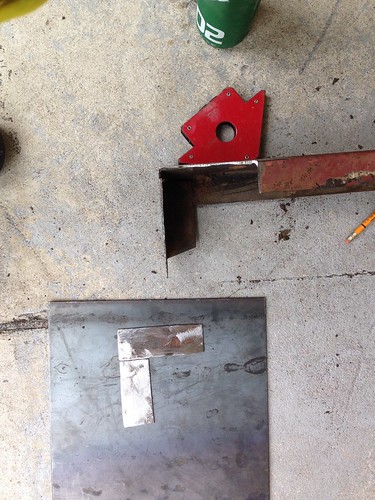
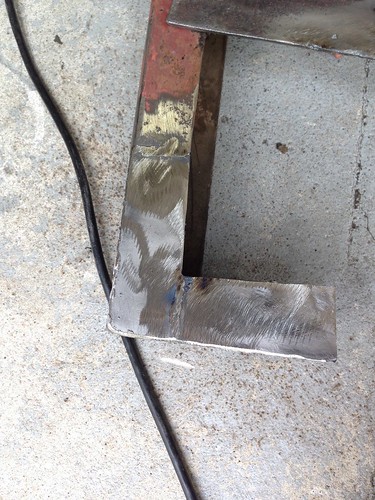
Frame Repair
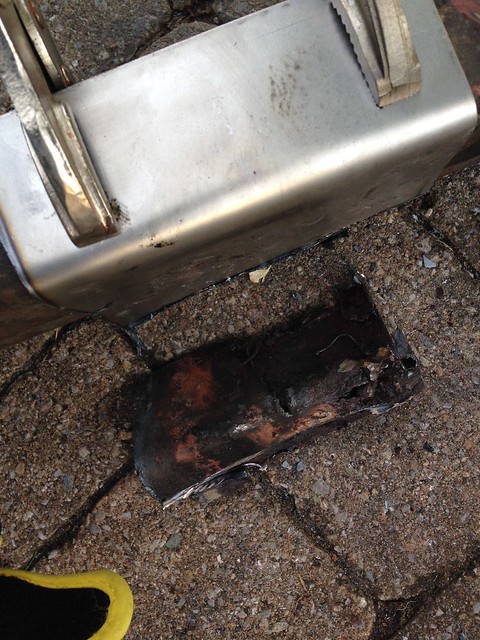
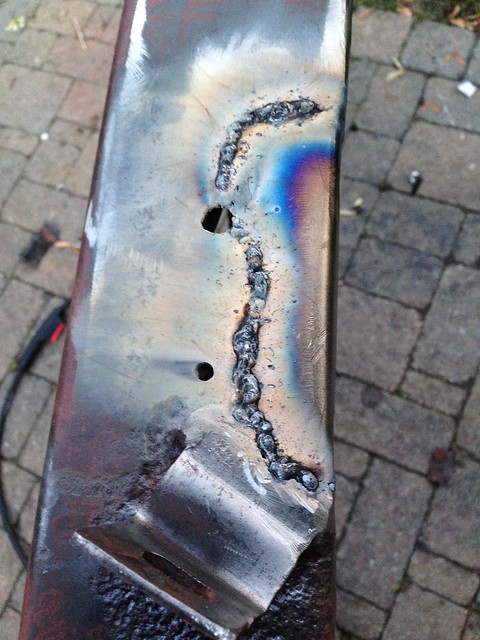
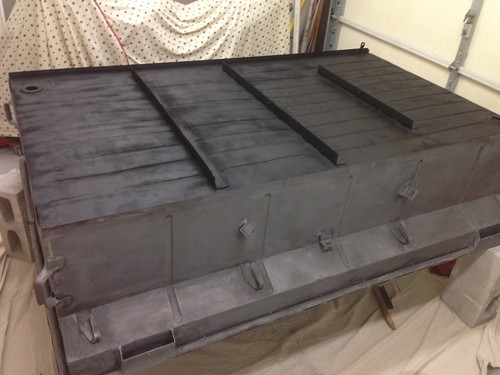
I still have to address a few other spots, mainly the hitch area, which wasn't welding all that well. There's tons of oxidation in those welds. The drain plug brackets also need to be replaced but other than that it should be ready to go to blastings after these are addressed.
The lid will be next.
Again, this is my first fabriacation attempt. It is also the first time ever using a welder. I have watched others, but have never attempted to do so myself. I will take any criticism and tips based on my pictures. Please offer advice. The frame work was like building a puzzle. Rough measure, then cut fit, cut fit, cut fit, till it was close to perfect. Then, I put a few spot welds down to hold it in place, then finished up with welding the entire seem. I think i just need to grind the weld smooth and that cancer fix is finished. More to come as this will be a build with a target finish date of mid August.
It is finally time. After 8 years of owning this trailer as is, I have taken the plunge. I have disassembled everything and made a few repairs to the fenders and frame so far. I still have some work to do before sandblasting, but I'm sharing my work as I go. I got a Lincoln 140 welder last weekend and this is my first time ever welding. I love it but it's harder than I thought. However, it's pretty fun to mess around with.
The plans are to blast the frame and tub. Build a lid and have it skinned with aluminum or steel. Yes, I know about the galvanization of the aluminum and steal together. I am still researching the best options. Flat lids are out of the question, I want to fab something that matches the contours of the tub to allow extra room for chairs, tents, bags etc. Those ideas are still in my head, but feel free to pass on thoughts. Any thoughts around the frame of the lid? Should it be build to the exterior dimensions of the tub, so that it it goes over the lip? Should it rest directly on the lip? Should I weld so 1x1 angle to make a flat surface? Thoughts?
As for paint, I am trying to determine the best route. I want it to last another 50 years, so I am thinking of doing something like the Eastwood 2k Epoxy in a spray can deals (thoughts and experience using these?). There is also a ceramic paint as well. Has anyone used this one? I want the frame to be sealed in really good as I want to pass this to my kids one day.
Here is where I am so far:
Current State
Tub off
Tub apart
Frame Cancer
New Bracket (cut out cancer and welded a new piece)
Frame Repair
I still have to address a few other spots, mainly the hitch area, which wasn't welding all that well. There's tons of oxidation in those welds. The drain plug brackets also need to be replaced but other than that it should be ready to go to blastings after these are addressed.
The lid will be next.
Again, this is my first fabriacation attempt. It is also the first time ever using a welder. I have watched others, but have never attempted to do so myself. I will take any criticism and tips based on my pictures. Please offer advice. The frame work was like building a puzzle. Rough measure, then cut fit, cut fit, cut fit, till it was close to perfect. Then, I put a few spot welds down to hold it in place, then finished up with welding the entire seem. I think i just need to grind the weld smooth and that cancer fix is finished. More to come as this will be a build with a target finish date of mid August.


")