Los Angeles -Class Attack Sub(urban), Build / Collected Werks topic - '02 k1500 Z71

rayra

Expedition Leader
a repost from Drei's topic, for folks tracking this topic


I'm STILL chasing front end noise and I've refreshed everything but the front diff / inner axle / bearings and front u-joints. And I KNOW I've got some chain slack in my transfer case. Something is still shifting around and making odd alarming noises at slow speed shifts in terrain, like turning into a driveway apron slope. If I hadn't just changed everything I'd say it sounds like a broken arm or mount or balljoint shift-clunk. And I've looked at everything I can reach, tested ever nut, jacked the vehicle up by the frame and put leverage on everything with a 6' demolition bar, nothing shifts. Afraid the only way I find out what it is will be when it breaks completely. And hopefully not catastrophically when I'm flying 75mph down the freeway.

Also, my tooled hockey puck torsion bar key mount bushings are not holding up. The frontal 'flange' is getting pinched off by rearward shifting / thrust of the crossbrace against frame mounts. But I drove a good while after those replacements were put in while still having the worn bushing control arms in place. All the steering and front suspension parts are new, now, so I might go for another hockey puck set as a better test, now tha tmost of the fore-aft shifing is eliminated. Or might go right to milling some polyurethane replacements. Same jigs, same methods, just poly instead of rubber pucks.


Still want to change engine and trans mounts too. Still on the originals and the trans rubber looks bad.


eta I think I'm going to secure the front diff inner axle bearings and seals and transfer case from driveshaft seal and at some point soon drop the front diff, transaxles and front drive shaft and open it up for an inspection and refresh. 145k mi. No signs of leaks from the front diff and I did a fluid change when I got the vehicle 5yrs ago, at 116k mi. I've already replaced the transaxles, wheel hubs etc.
But in about two weeks I start a heavy school schedule clear thru the first week in June. And 'free time' will be very limited for projects like this.
 

rayra

Expedition Leader
Flogged the Sub over the grapevine pass 2x today, hauling some furniture upstate to relations and buying a slightly used fridge from another. 5'x10' tandem axle open rental trailer, towed everything like it wasn't even there. And with the large trans cooler and the cold snowy temps outside, the trans never topped 100F. :)

santasyellowsleigh.jpg
newishfridge.jpg


That highway pass (and others) were snowed shut ~48hrs ago, clear sunny day yesterday and today and it was easy going. Back in a bit with some snowy mountain pics.
 

rayra

Expedition Leader
Slowly accumulating the bits and pieces for my carrier-mounted winch setup. Got my Anderson plugs and cabling for the front and rear extensions / connections for the winch. Going to have to fab some brackets for those plugs and make mods to rear bumper and grill.
Have the front hitch and carrier selected. Just got my 100' dyneema / synthetic winch rope. IT will save about 11# over the 3/8"x65' steel cable that comes with the winch.
So hopefully by early summer I'll have the winch setup built. Been a long time coming.

dyneema winch rope 200118.jpg


Going with the CURT bolt-in front-hitch assembly and doing the AA1PR / 02TahoeMD? center flip to raise the receiver height.
CURT 31302 Front Hitch with 2-Inch Receiver

And a 15k#-rated winch carrier
ORCISH Bumper Hitch Receiver Winch Mount Mounting Plate


eta
fairlead winch plate caught up with the rest of the shipment

winchfairleadblackaluminumplate.jpg


Hope to have the whole carrier-mounted 12k winch setup and connections and mounts done by summer. Will start finishing out the 1/0 electrical connector extensions in March. Got some other stuff I have ot do first.
 
Last edited:

rayra

Expedition Leader
Been real busy with school lately, going back to college for a 2yr degree as part of retraining for a new / 5th career and relocating out of CA. Getting real tired of driving to school as the sun rises and again for a night class as the sun sets. I'm among the first people onto the campus and the last people off of it. I foolishly took three classes on the highly compressed 5 week winter intersession. I'm gonna pull it off with good grades, but it's wrecking everything else, including my sleep patterns. But I'm hurrying. Should finish the two year with the spring semester. Had a lot of scattered class credits laying about and wanted to pile them up into something useful before leaving the state and possibly losing accreditation for the very old classes. And then it's on to classwork towards becoming an x-ray tech

Anyway, I took this while leaving class earlier tonight

subronery.jpg
 

rayra

Expedition Leader
receiver hitch winch mount / cradle ordered, as well as some more of those heavy duty SB175 electrical connectors.
https://www.amazon.com/gp/product/B01KCHE43O/ref=ppx_yo_dt_b_asin_title_o00_s00?ie=UTF8&psc=1

All that's left to get is the bolt-on CURT front receiver hitch - https://www.amazon.com/dp/B00076RLB...colid=QWZ1BSZYG6VW&psc=1&ref_=lv_ov_lig_dp_it
and the 12k winch itself. About another $500. I've bought all the small stuff. Getting to be a good pile of stuff to work on, when my school schedule eases up a bunch. Soon.

Need to start shopping for high-grade bolts for everything. Not sure anything even comes with Grade 8. You'd think the stuff would, given the application. I'll have to inspect it all as it comes. I intent to paint them all black, anyway. Not doing it for 'bling'.


eta well I got the winch carrier mount delivered today, but no time to even unbox it until Sunday.
My pile of 'to be installed' parts is getting pretty big. Once my school schedule assumes 'normal' proportions I'll have more time for vehicle work.
 
Last edited:

rayra

Expedition Leader
winch004 carrierfairlead.jpg


rough assembly on the winch carrier and fairlead plate. I need to find nicer hardware. I was originally thinking grade8 bolts, but changing my mind on that after some research, not really necessary. But I'd like some nicer looking hardware than plain old plated hex bolts. At least get something in black. And the fairlead plate, it and the carrier have 1/2" holes so I went for 1/2" bolts, tight fit, tight alignment, right. Except with that size range you cannot get a socket or wrench on the head inside the recessed holes in the face of the fairlead. Stupid design. And don't want smaller bolt shafts, because I don't want the nice radiused edse of the cable opening in the fairlead shifting around and letting the rope rub against the sharper edges of the cut opening in the carrier. So I need to find 1/2" studs with smaller bolt heads. Or some sort of socket head faster.
And reading tales of woe from others, it's a tight fit between the winch mechanism and the inner face of the carriers, so the bolts can't protrude much, or need to be installed head on the inside. So I need some bolts that are 3/4-1" in length and 1/2" in diameter and some sort of smaller head and in black. McMaster-Carr here I come. Or Fastenal. And I need similar in 3/8" dia for the carry handles on the carrier. Those could be some nice cap-head or truss-head allen bolts. That would be sechsy. I don't want to 'bling' these or make them stand out.
And I'm thinking some kind of wrap for the handles. Bicycling handlebar tape? Something cushy and grippy.
 

rayra

Expedition Leader
yeah was looking at those at McMaster but couldn't find them in black oxide. Have some Button head allen drive bolts in my cart now, bu tI'm hitting a Tractor Supply tomorrow first. I found out my local Fastenal only sells to commercial accounts now, they directed me to Fastenal.com, but they don't have a lot of variety in what I'm looking for. Oddly.
Harbor Freight has the Badlands 12k for $300 right now with a coupon code, but I'm not ready to buy it. They're up for sale like that every quarter or so, I can wait. I still have to fabricate 1/0 cable extensions and mounting brackets for the SB175 connectors fore and aft before I'm ready for the winch, anyway.

if I come up short I can always blacken the fasteners myself. There's gunsmithing compounds that will do it and long ago I blacked some hardware with a torch and some oil in a pie tin. Was more durable than just painting the parts.

I haven't looked hard yet, must be some flatbill-bro-tapout company out there selling specialty fairlead bolt sets for a ridiculous markup...


eta

no joy at Tractor Supply or Lowes or Home Depot. All I can find locally are socket head, and none in the 1/2" stud size. So I'm going to go with the McMaster Button-Head black oxide bolts, which are driven with allen heads. Should look real nice. Nice subtle detail on the black carrier.

Just ordered the CURT front hitch assembly too. The only thing left to buy now is a winch, and paying a welder to fab up the bracketry for bolting down the electrical plugs on the vehicle. That's going to take some prototyping and careful cutting of the rear bumper and front grill. Probably use foamcore or 1/8" balsa and some hot glue to make mockups of the brackets that the SB175 connectors will be bolted to. The brackets will position the wired electrical plugs on the vehicle so their openings and weather boots are centered in the access cutouts I will make at both ends of the vehicle. Both plugs will have their hot wire interrupted by a rotary cutoff switch. The rear cutoff is already in place inside my power box in the rear of the Sub. The front will be mounted somewhere on the side of the Aux battery near the radiator overflow / fill tank. It's kinda crowded there, but the Aux battery pos (+) terminal is right there. So some sort of box or board will be there, for both a fused line to a cutoff for the front power port and feed to an Aux fuse panel that's there already for comm radios.

But the winch will wait for everything else to get fabricated and installed.

And it only now occurs to me that I can use the front hitch for our hitch-mounted bicycle rack. I'd rather have them in front of me than behind me.
 
Last edited:

rayra

Expedition Leader
Fiddling around trying to suss out the wiring changes to be made for the winch connections. It's getting complicated and I'm trying to simplify things, but I've got too many things going on with the setup. Trying to meet too many options.
Also need to accommodate the big draw of the winch at full stonk and don't think I can. But I'm also reading all sorts of anecdotes about people doing much more with lower-spec wiring arrangements.

I'm going to have to make a proper circuit diagram as it's getting too complicated to hold in my head.

Further complicating things are the desire for an in-line circuit breaker for the winch cabling, rotary cutoffs on those bumper-mounted power plugs extensions, the need to keep most of the heavy cabling to the rear hot as it powers so many other things AND the need to hang an aux fuse panel off the same Aux battery that the winch cabling is hanging from. And the same terminal that is connecting the Aux to the connecting solenoid to the Starter battery / alternator charging circuit.
So it matters a bit how things are arranged, how the connections are stacked or branched. Or isolated.

winch005 sb175.jpg


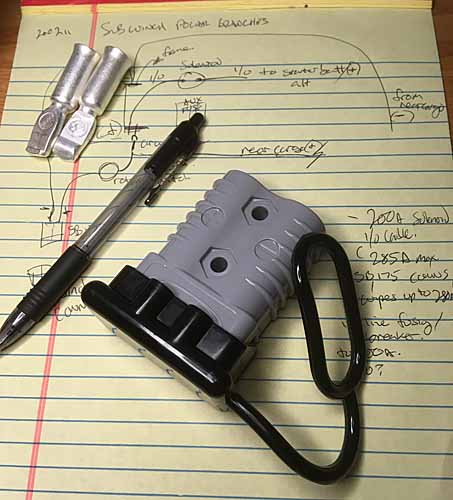
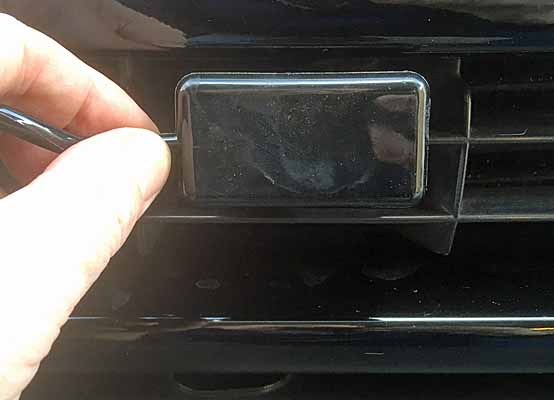
The SB175 connectors are ~2"x1" in cross-section, face-on and the rubber weather boots are 2-3/4" x 1.5" at their widest. So the grill and back bumper will have to be cut to have enough clearance for the boots and the plugs positioned so the covers stick out enough so the boots can be pulled free.
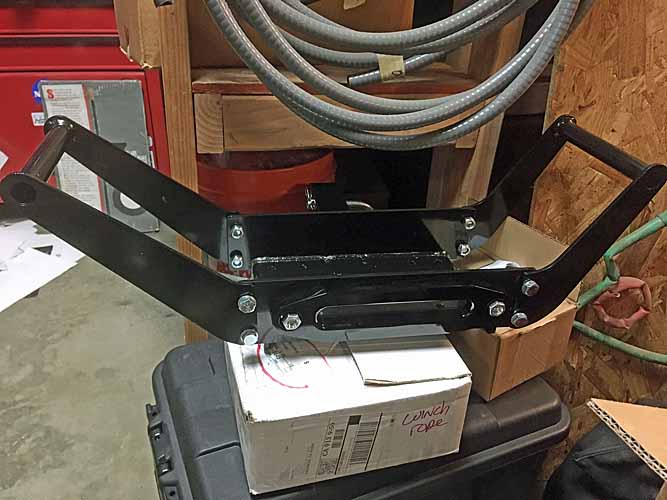
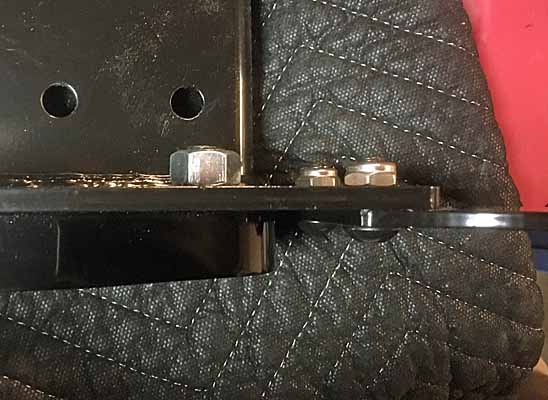
I'm going to have some mounting brackets welded up from plate stock. The SB175 plugs are made with 2 thru-holes so they can be bolted down or bolted together (stacked).
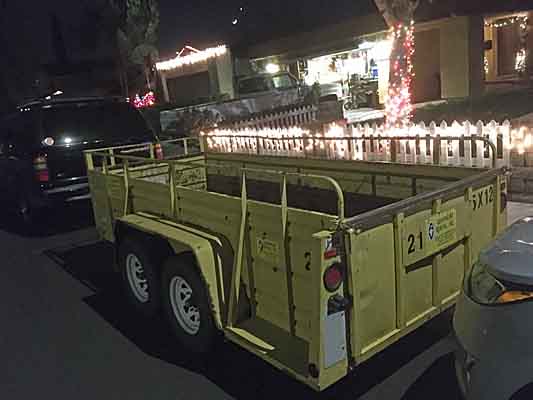
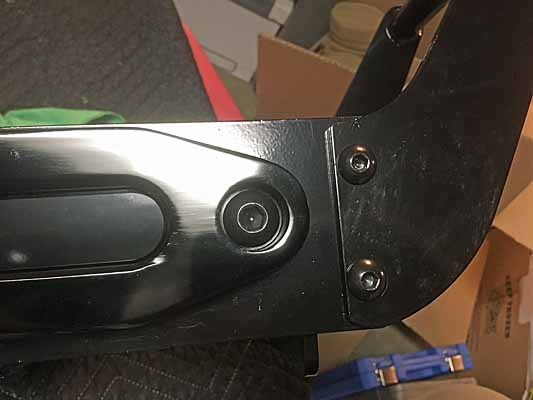
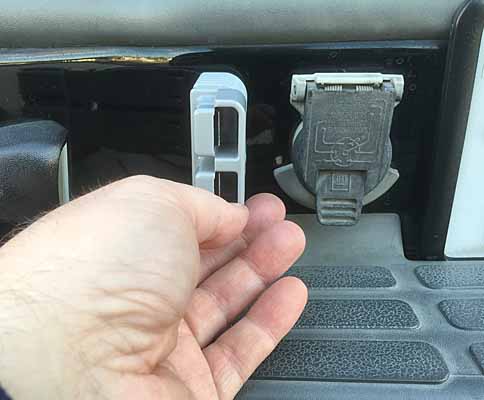
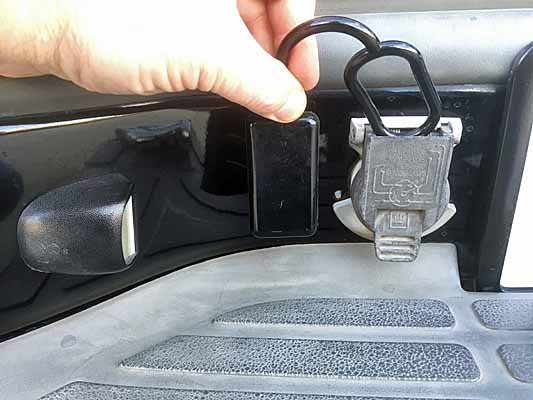
The rear bumper plug is going next to the 7-pin trailer connector I previously cut into the rear bumper skin, oriented vertically.
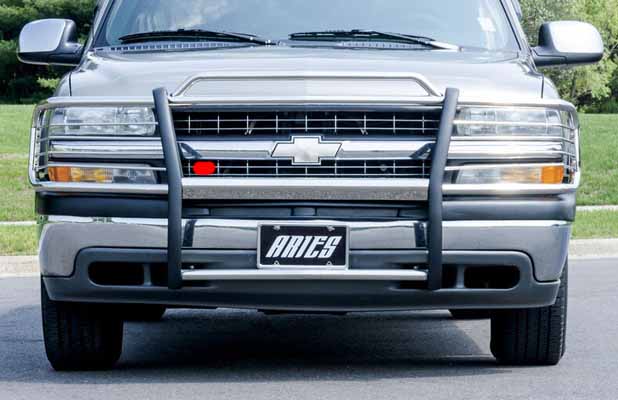
The front plug I intended to put at the passenger bottom corner of the grill, but then I though about the grill guard I'd still like to install, which will block that area.
Then I thought about the two horizontal slots just above the front plate, but again my desired front grill guard mods will interfere.
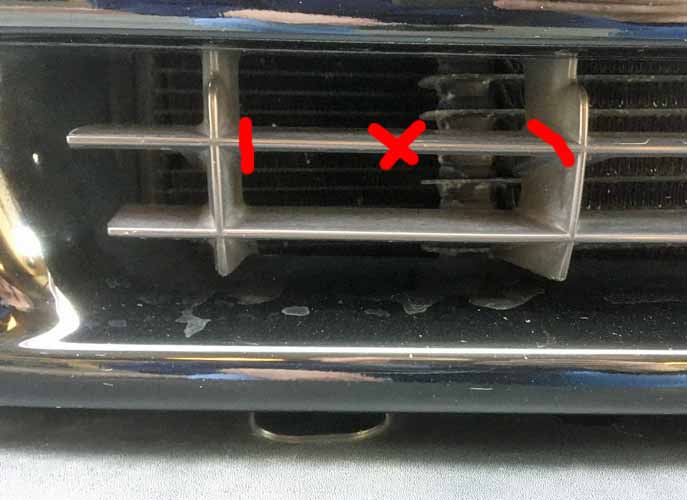
So now I'm thinking in the field of the grill, passenger side, below the middle crosspiece of the grill. That puts it well clear of the future grill guard. And a bit in front of that end of my transmission cooler. With the upside that the trans cooler brackets can also help support the electrical plug. And that way I can pop the grill itself off and on whenever, free and clear of the plug.
I'll try and take some illustrating pictures tomorrow.

The wiring diagram also gets greatly complicated by the arrangement of my rear power box. Sinc ethe power lines from the Aux battery up front run under the vehicle, up thru the cargo floor behind the driver side rear wheel tub to a mounted connector at the cargo sidewall. Then the power box's internal wiring setup plugs into it and serves various things inside the box.
I'm going to have to have a 1/0 cable pigtail inside that box going back to the cargo sidewall, which will connect with another extension / pigtail that passes back thru the floor and to the plug at the back bumper. So the cargo sidewall becomes a double pair of plugs. Already planned for and accommodated for in how I set up the first pair. Likewise the floor penetrations, planned for, not yet made.

The THNN residential / commercial 1/0 cable I'm using is cheap but rigid. Finely stranded welding cable in the same gauge is a lot more flexible. But it's a lot more expensive. And I've got plenty of THNN cable left. As well as PVC armored conduit. So I'm probably just going to fight it all again to shape the cables. At least for the rear, that should be pretty easy. But I might wimp out and spend the money for the welding cable in the front end. Way to many twist and turns to route from the Aux to where I want the plug. But I need to really take a good look at that. There's a lot of room down low in that area. The question and trouble comes near both ends. And I have to figure out how I'm going to mount all the things I want to mount at the positive side terminal of the Aux battery. And the AC lines and fill port are right in the way. And the radiator overflow / fill tank is right next door.

Have ot diagram everything, or at least all the pieces so I can more them around and figure out where things line up best.
 

rayra

Expedition Leader
Well I take back all the mean things I said about McMaster-Carr’s mother. The bolts just arrived (already). They’re going to look mahvelous.

stuck a couple in for show and tell. Might go back out there tonight and install them all properly.

The bolts are called 'button head'. Akin to a carriage bolt head in shape, or sort of a like a peened rivet head, with an allen wrench socket hole in them.

winch006 buttonheads.jpg


Still thinking about what to use to wrap the tubular handles of the winch carrier. Bicycle handlebar tape is still in the lead. Although I have some black paracord laying around doing nothing. Could do some fancy knife-handle wrapping style stuff with that, for another nice subtle detail.


eta went ahead and installed them tonight. I like the look. Not sure about the clearance of the fairlead bolts, won't really know until I get the winch and then I'll have to figure out what to do. The nuts on the handle bolts are 'thin' nylocks. All the bolts are 1" IIRC. 3/4" would be too short. I am not adverse to the idea of grinding down the fairlead bolt and nut on the inner side, if necessary for winch clearance.

winch007 buttonheads2.jpg
winch008 buttonheads3.jpg
winch009 buttonheads4.jpg
winch010 comingtogether.jpg


Thinking about wrapping the eyelet in cloth tape. And maybe painting the hook black. Not sure. Also looking forward to sewing a custom-fitting cover bag for the whole thing, out of 1000D. Something that socks around the whole thing when it's mounted and is buckled down so it's secure at 80mph.

The CURT front hitch is enroute from IL, so it will probably be installed a week from Friday, that weekend sometime. I will be flipping the center section so the receiver tube is higher up, just as @AA1PR did. The top of the receiver about the height of the bottom of the factory tow hooks. Requiring a cutout thru the plastic trim skirt on the bottom of the bumper steel. And maybe raising the license plate a little. Or I might get a hinged mount for it if that will work.

This is the cradle pictured above -

And the fairlead -


eta a mockup

winch011 mockup.jpg


The sewn cover will basically fit snug around the space framed by the carrier's handles. I'll make it fitted and it will slide on from the left like a sock with a slit at the back bottom to go around the hitch tube framing. With the right (driver's) end being an open flap that is continuous fabric to the front / driving wind and which will fold rearward across the end of the right handle and either have a couple snap-buckles on the rear edge, and a couple to close the back gap around the hitch tube. Or maybe even a zipper that starts at the bottom right front and zips the end flap shut along the bottom and back bottom edge to the hitch tube.
Or have the zip start at the front top of the right handle, go back along the handle, down the back diagonal of the handle to close the end and along the back bottom slit to snug up to the hitch tube. That does away with a lot of bottom right slack to reach over the handle top, if it zipped the other way. And some sort of snap tab to hold the zipper shut. Gusset the opening around the hitch tube. And there's nowhere for wind to get in and the whole assembly is covered.
 
Last edited:

rayra

Expedition Leader
A little exploratory surgery on my alternator this afternoon. Last couple weeks been some loud moan / chirping going on during cold morning startups, sounds like it's coming from either the alternator or the power steering pump. Steering feels and looks fine, no leaks, good fluid. Vehicle's at ~146k. I 'want' it to be the alternator, as I have the middle option 130A and am looking for an excuse to bump up to the 145A top tier of 'stock' alternators.
So I pulled it out and took it apart. Short-term intent was to grease the end bearing cap, a strategy that has worked for me before on other GM alternators. But no, this design doesn't have that. THere's a sealed bearing on the alternator shaft well inboard and the pickup / regulator assemblies are on the rear end of the shaft (and externally replaceable without even removing the alternator, if you are lucky).
So I cleaned what I could and put it back together. The copper end of the shaft, where the carbide(?) pickups ride was terribly worn, grooved even. So much so that it took some jimmying to get the front and back halves of the alternator apart. Like trying to take an old brake drum off with a similar sort of wear, the lip of the groove(s) complicate things.
Anyway, out, apart, inspected and reassembled and back in the car working in about an hour. And when I nail down the noise I'll likely get the bigger amp alternator as the replacement.

alternatorwear001.jpg
alternatorwear002.jpg


Then some farting around with Anderson plugs for the winch connections, sussing out where I want to put them, starting to think about mounting brackets for the plugs.
The bad news / good news is I only have about 7' left of that thick-strand stiff 1/0 cable (Bad - I seem to recall having more but haven't made a determined search yet). I need (4) pieces about 4-5' long. So I'll wind up buying some 1/0 fine-stranded welding cable. Which is much more costly (Bad). But it is much more flexible and will make the installs much easier (Good). There's plenty of room around both desired plug locations to route cables and install stiff support brackets to bolt the plugs to (Good).

The front plug location is as mentioned earlier being partly driven by my desire to put a (modified) Aries grill guard on the vehicle. I want to make sure the plug location doesn't conflict with that future install. Here's a marketing pic of that grill guard on my series Sub/Tahoe. The red mark is where I intend to mount the front plug -

winch016 ariesgrillguardplug.jpg


The real nice part is the size of the plug and its weather cover is such that it nicely fills two of the holes in the grid of the grill. I'll use a razor saw to removed the crosspiece there and position the plug and its rubber cover centered in the enlarged opening. I'll have to check if there's room to manipulate things but the intent is to have the rubber cover be flush with the grill face. But it might wind up 'proud' so the cover can be pulled loose.

winch012 frontplug.jpg
winch013 frontplug.jpg


The rear plug is going to be inset in the rear bumper alongside the 7-pin trailer connector, also previously relocated there from its factory location very low beneath the rear hitch crossmember. There's sufficient room in the face of the area and plenty of room behind it for bracket and plug. And the cable run forward and up thru the cargo floor next to the prior penetrations. Previously planned as well.
I'll have the rear plug positioned a bit proud of the bumper steel, so the rubber cover is easier to remove.

winch014 rearplug.jpg
winch015 rearplug.jpg
 
Last edited:

rayra

Expedition Leader
same here. Both older and newer series have a bearing cap in the rear body shell. When the missus' '05 Tahoe started to chirp there I was able to gain a little time by putting a dab of high temp wheel bearing grease in there. No such luck with this particular design. Although I really like the idea of the externally accessed regulator and pickups.
AND this early series alternator does NOT have provision for sticking a toothpick thru some holes to trap the spring-loaded contacts, like decades of preceeding Delco-Remy alternators. I had to disassemble the pickup / regulator and much of the rear plastic cover and electrical contact bolts / nuts to get the pickups out of the way in order to put the two halves of the alternator back together. And couldn't get one of the screws in that regulator cover free until I broke out the cordless driver / hammer with a fresh philips bit. Jammed it in there hard as I could and gave it some trigger and fortunately the screw broke free instead of breaking or stripping. WOuld have brought my exercise to a sudden and expensive halt if it hadn't come free cleanly.
 

rayra

Expedition Leader
I know the whole 'Overlanding' fad has created all manner of very expensive products, but man this is getting ridiculous. Winch accessories abound. Especially fancy non-hook hooks. -

https://smile.amazon.com/gp/product/B00KXAR5FA/ref=pe_41037170_475249680_em_1p_7_lm

You pull the pin on this and put it thru the loop on the end of your winch cable. When not in use you retract the cable tight and this piece lays flat and rattle-free against your fairlead. But you'll need a shackle, a strap, a(nother) hook to actually use the thing. And meantime you've paid $50-200 for an ornament. They look real nice, but that's ridiculous.


on the other hand, this $10 rubber stop is more practical. You keep a hook mounted and clamp this puck-like thing to the line behind the end loop and you can reel in your cable until the rubber stop bottoms out nice and snug.
https://www.amazon.com/KFI-Products...Warn+Winch+Accessories&qid=1581653639&sr=8-28

But the usual and free way is run your cable hook to one of your front shackles / tow points / factory hooks and draw the cable snug. Not how I'd like to run around all the time in the land of Vandals. But that's also why I elected for a hitch-mounted winch. It's not even going to be on the vehicle 99.9% of the time. And with the carrier I can just run the hook to one of the handles on the carrier. And that would let the whole thing be bagged up on the road.

eta
Here's a nice beefy hook by Warn, the biggest name in winching, but it's $75 for the 18k# version. (but it has a built in bottle opener! lulz)
https://smile.amazon.com/gp/product/B00H4PFN06?ref=em_1p_8_ti&ref_=pe_41037170_475249680&th=1
 

Forum statistics

Threads
185,911
Messages
2,879,535
Members
225,497
Latest member
WonaWarrior
Top