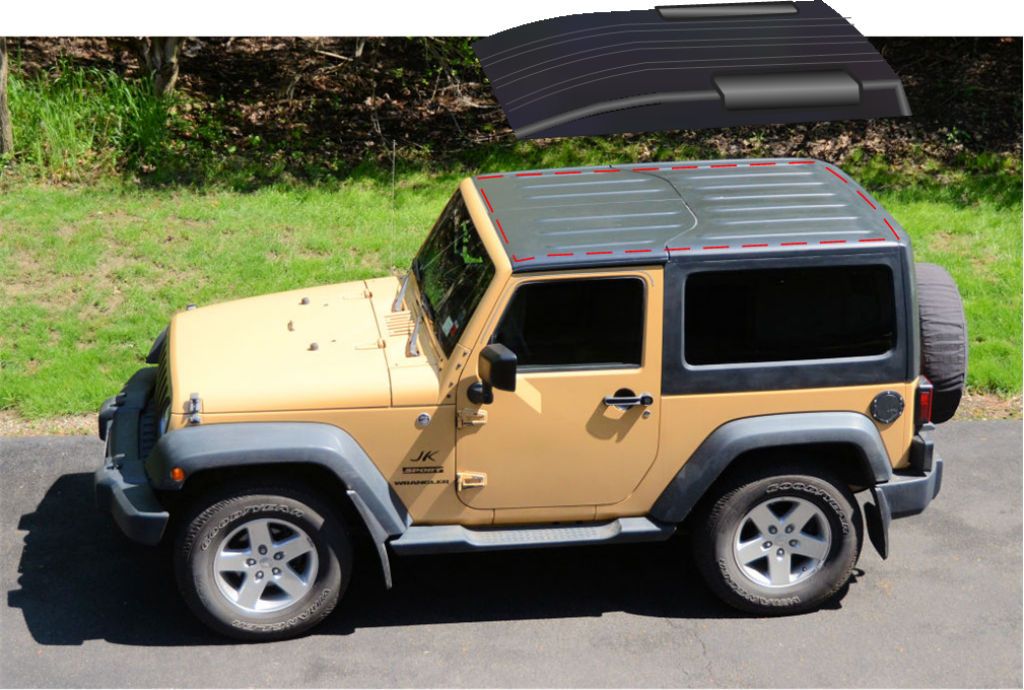
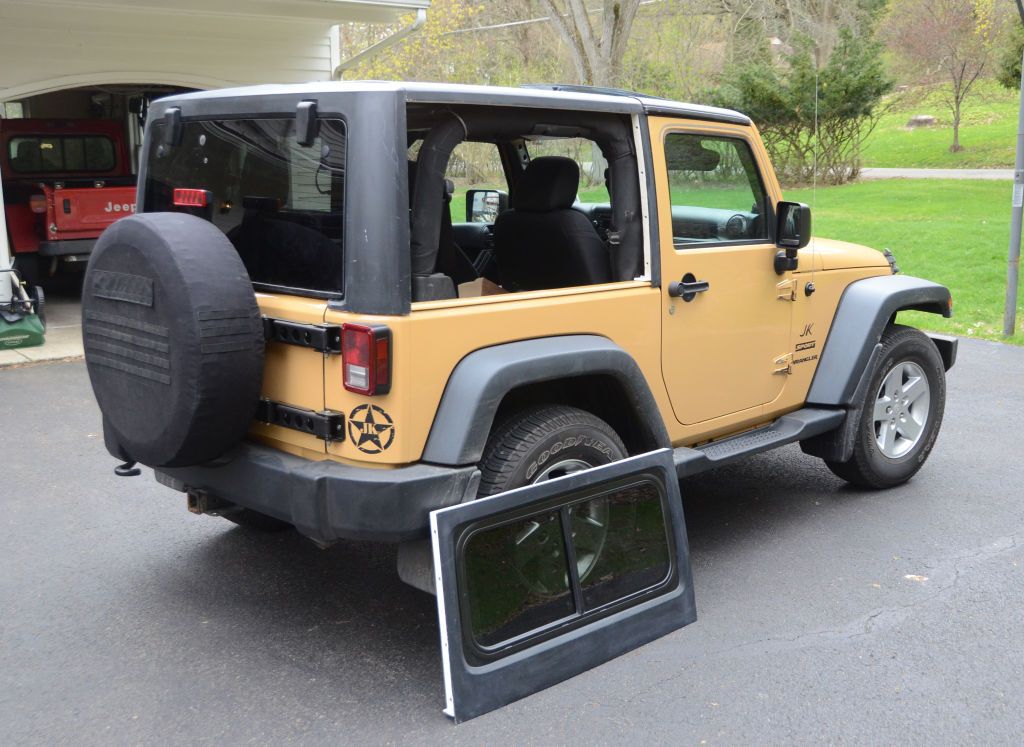
I agree. Please see the attached rough idea which is in pdf format. I would simply cut a big hole in the existing hard top and leave all of the edges in place. I would then fasten the new alpine top to the edges of the existing hard top. Please share your concerns and suggestions?
The images in your PDF are on the right track.
Getting a good seal between the new roof and the remaining hardtop parts isn't difficult. I recommend permanently bonding the new roof to the original hardtop parts with epoxy resin - the hardtop is made from the SMC variant of fiberglass so I'd recommend using epoxy resin to do the bonding. You could also use SMC-compatible polyester resin but epoxy would be stronger for this application.
I would do it as a two-step process - first, simply epoxy the roof to the hardtop with a bead of epoxy at the joint, and when that epoxy cures, reinforce the joint on the inside with fiberglass tape saturated in epoxy resin. Both steps should be done on the Jeep to ensure proper alignment.
There are two options to consider.
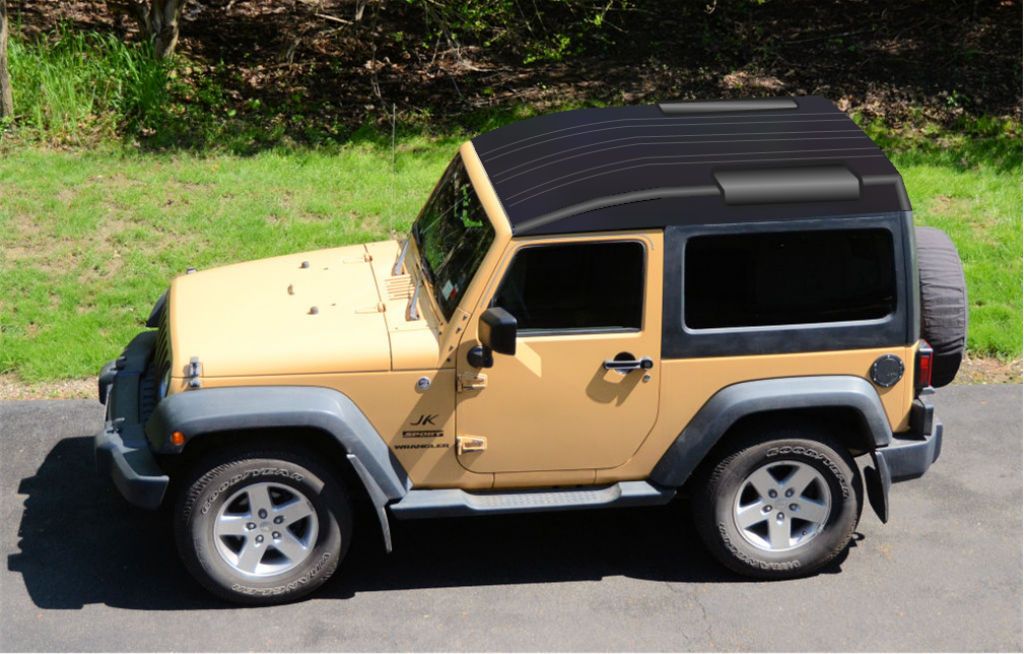
1. Permanently bond the new roof to the remains of the Freedom panels and to the rear roof section, resulting in a one-piece hardtop.
2. Permanently bond the new roof to the remains of the Freedom panels and bolt the new roof to the rear section of the hardtop. By doing this, you'll be able to remove the roof by unfastening the Freedom panel clips and unbolting the rear section. For this option you'll mold bolt flanges on the inside of the new roof panel so the roof can be bolted to the hardtop shell.
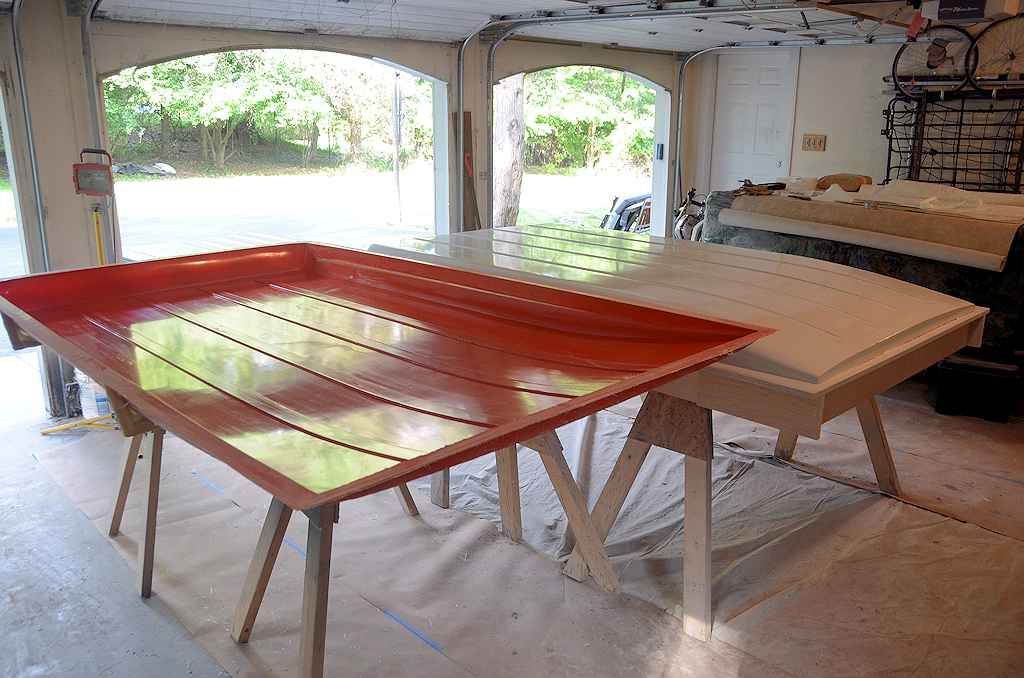
The key to success in this project is making a new roof section that fits accurately. The way I do it is to make a master for the mold out of wood. You'll want the edges of the new rood to exactly line up with the edges of the hardtop so making the master accurately is key. A few photos of the process I used to make the master for the JKU Safari Cab:
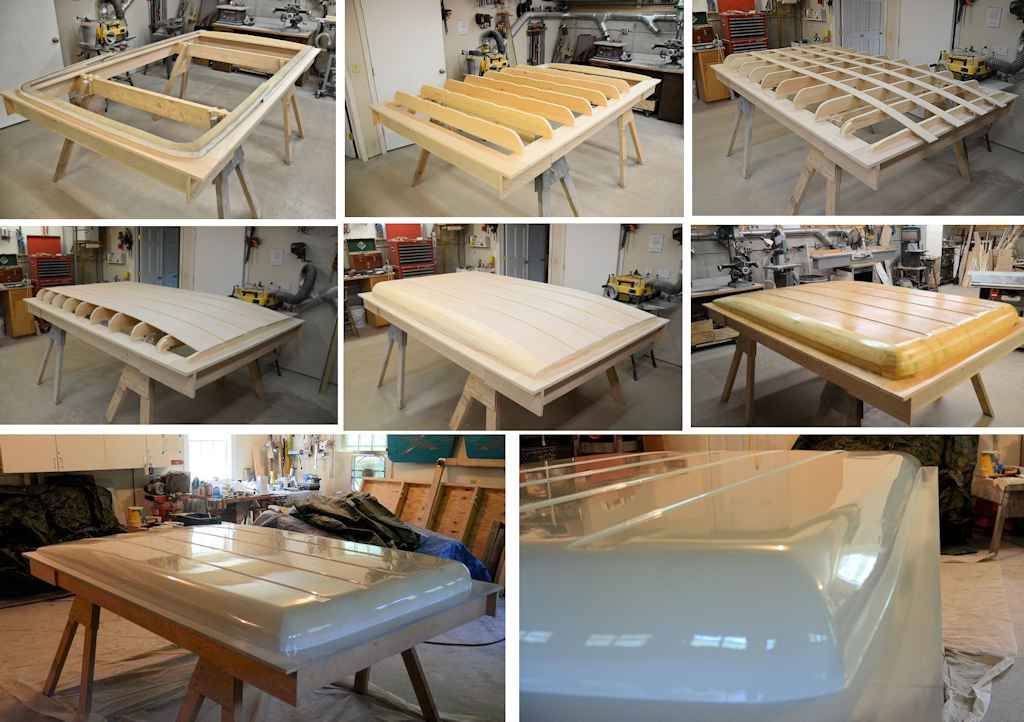
The process I use for making the master is called "lofting" in the boatbuilding business and there are plenty of books to describe the process. Before cutting the first piece of wood I design the shapes and ribs using a drawing program, the same you'd do if you were lofting a boat hull. The shell on top of the ribs is a combination of birch plywood (for the simple curves) and pine stripwood (for the compound curves), again using boatbuilding techniques typically used to make stripwood canoes. The finish on the master is part wood finish (polyurethane) followed by automotive finish (body filler and block sanding followed by epoxy primer + clearcoat).
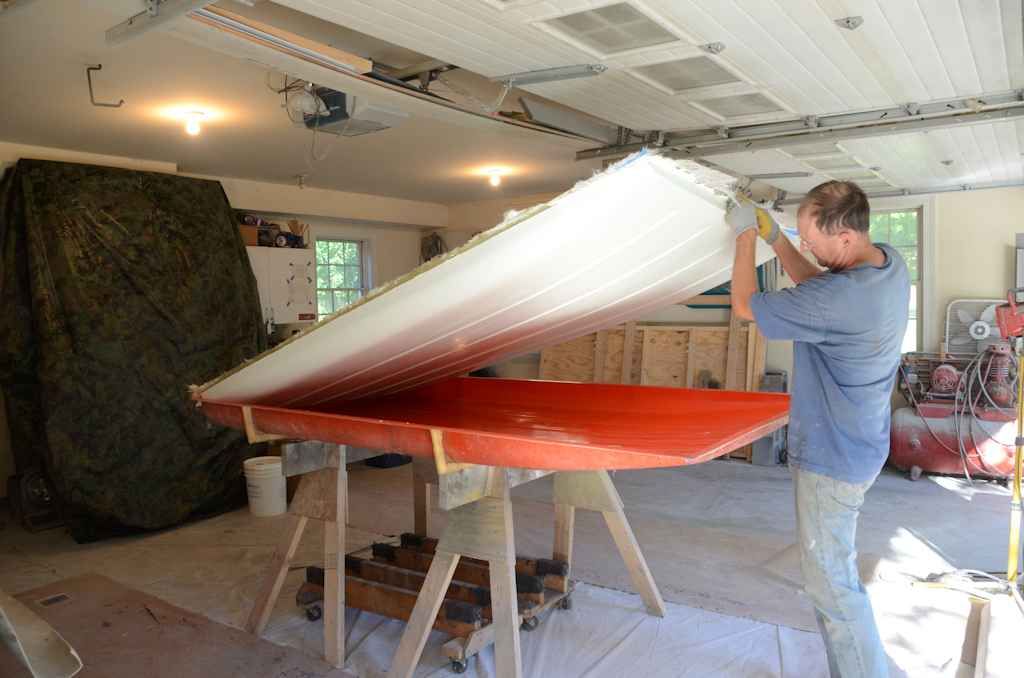
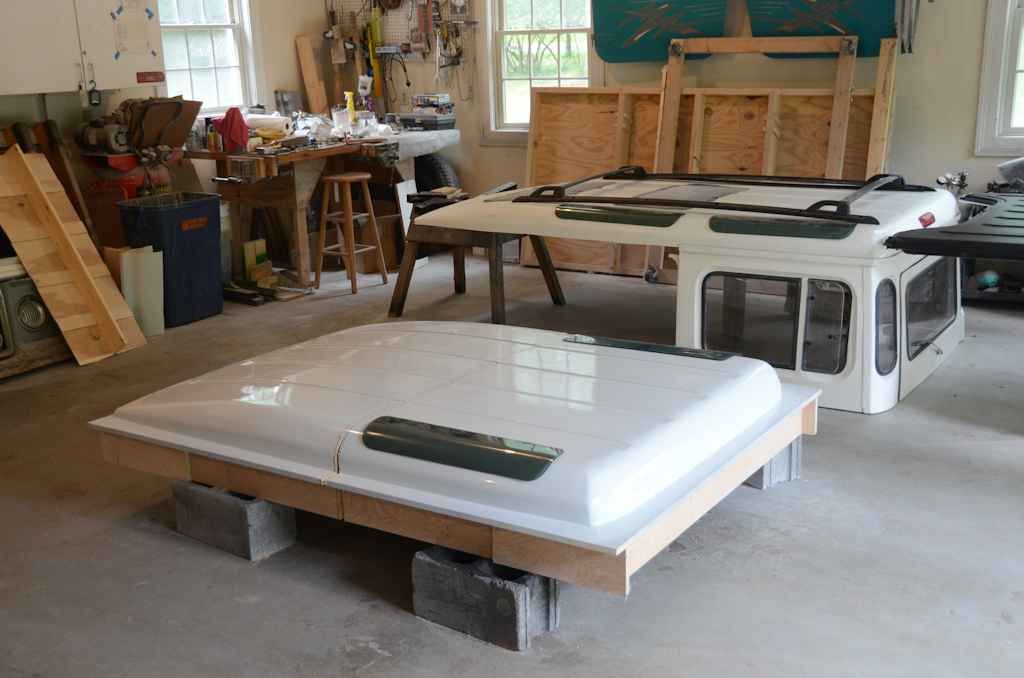
Then I make a mold on top of the master, and once it's done it'll look something like this:
And the new roof is made in that mold. Popping the new roof out of the mold:
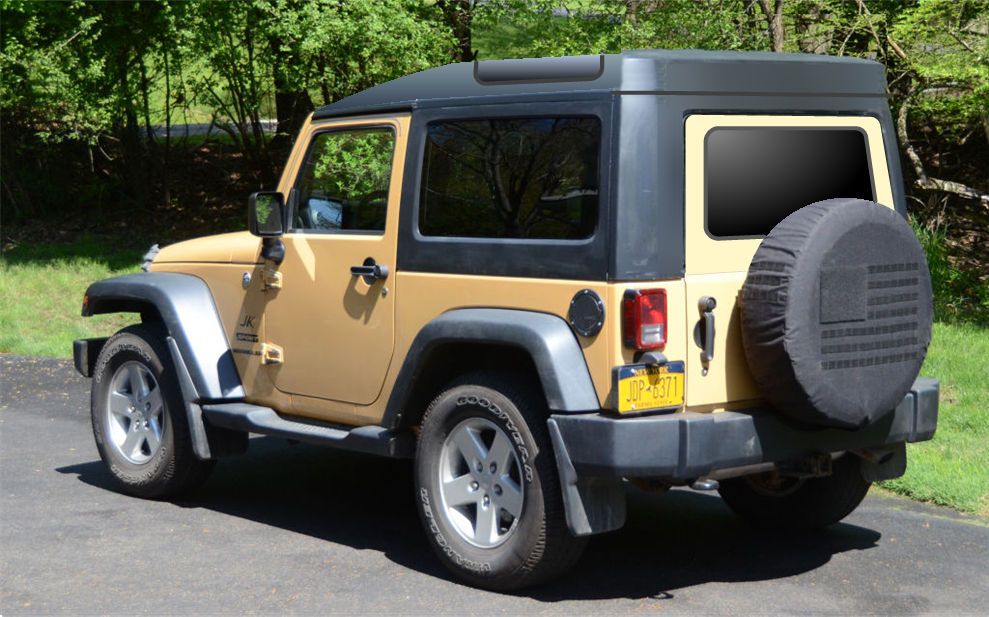
I assume you'll want to add Alpine windows to the roof, you'll also need to ensure the curve of the roof at that point exactly matches the curve of the glass so you can get a good seal. I used Discovery 1 Alpine windows in my hardtop. This photo shows a Disco Alpine window setting on the master, the photo was taken after I had made the 4dr mold and molded the parts for the 4dr hardtop; no longer needing the 4dr master I cut the master to 2dr length.
You might also consider converting the back half of the hardtop to modular while you're at it, so you can remove the side panels for an open air experience. The procedure is documented here:
https://expeditionportal.com/forum/threads/converting-a-factory-jk-jku-hardtop-to-modular.160775/.
Happy to provide any more information that might help you.

") Your comment "start with a factory hardtop and make a new roof panel like the images below" has me thinking. Perhaps I'll email you separately on this. I think your skills are considerably more advanced than mine. I fear that the hard top changes would be more difficult than the Defender front end I put on due to the necessary fiberglass work but, I might be up for the challenge.
Your comment "start with a factory hardtop and make a new roof panel like the images below" has me thinking. Perhaps I'll email you separately on this. I think your skills are considerably more advanced than mine. I fear that the hard top changes would be more difficult than the Defender front end I put on due to the necessary fiberglass work but, I might be up for the challenge.