Dennx
Adventurer
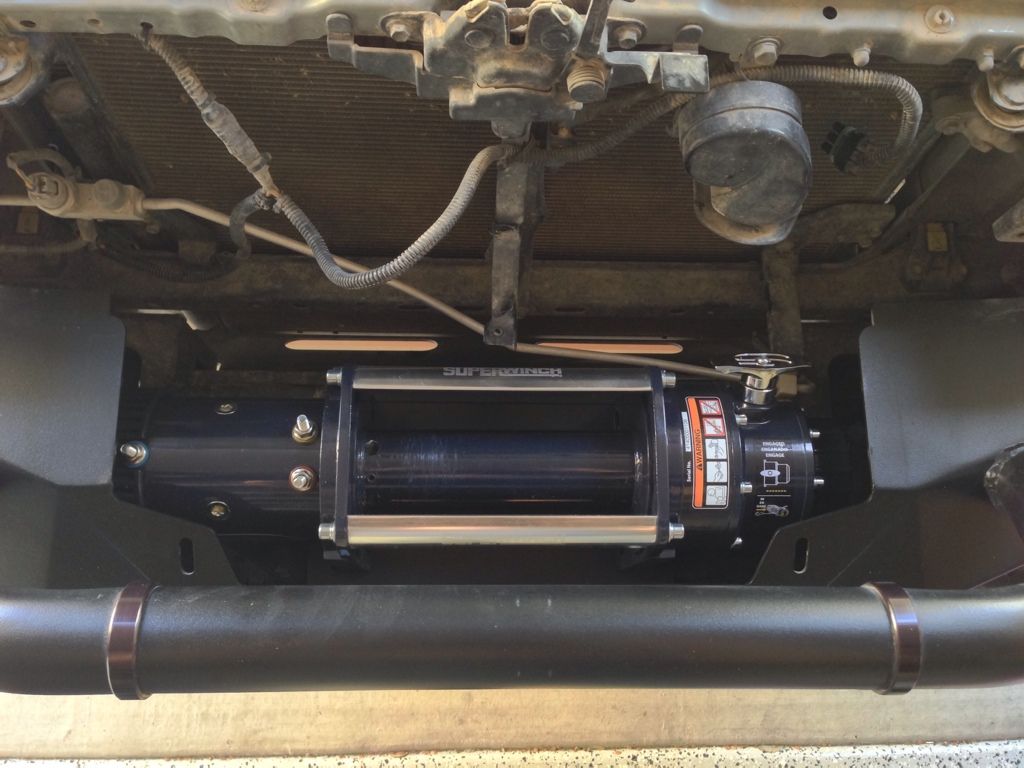
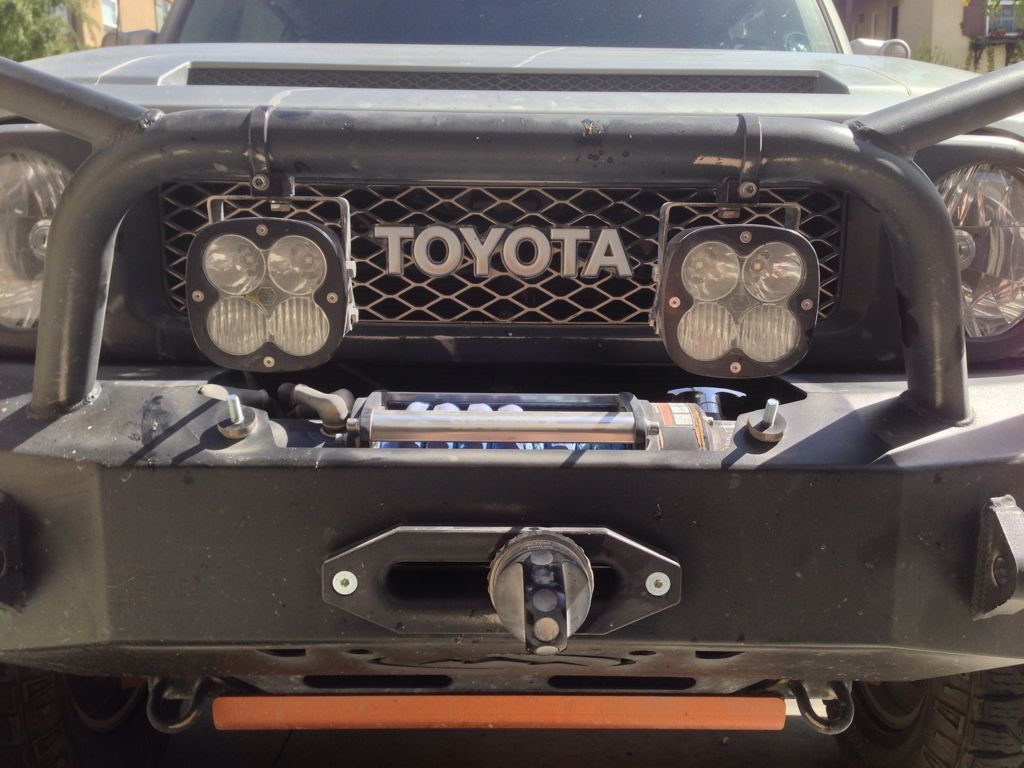
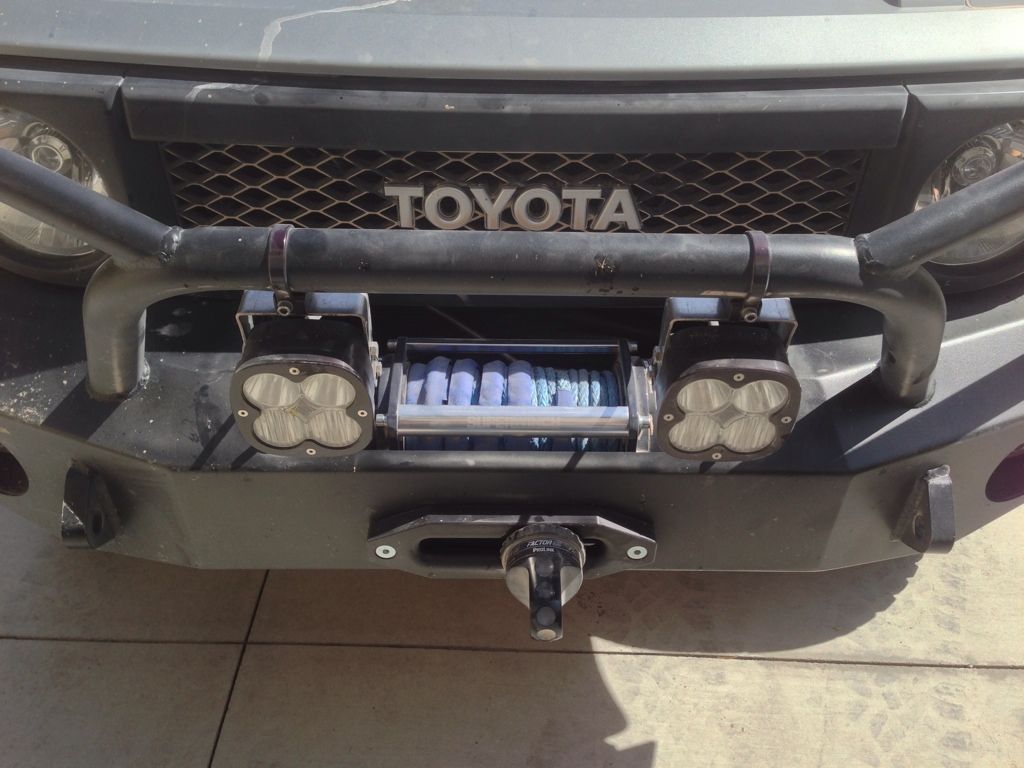
I installed a Superwinch Talon 9.5 SR with synthetic rope into my Expedition One bumper.
The winch installed easily into the bumper. I also reclocked the clutch handle out the the way so I can put the winch cover back on to protect the synthetic rope from sun damage.
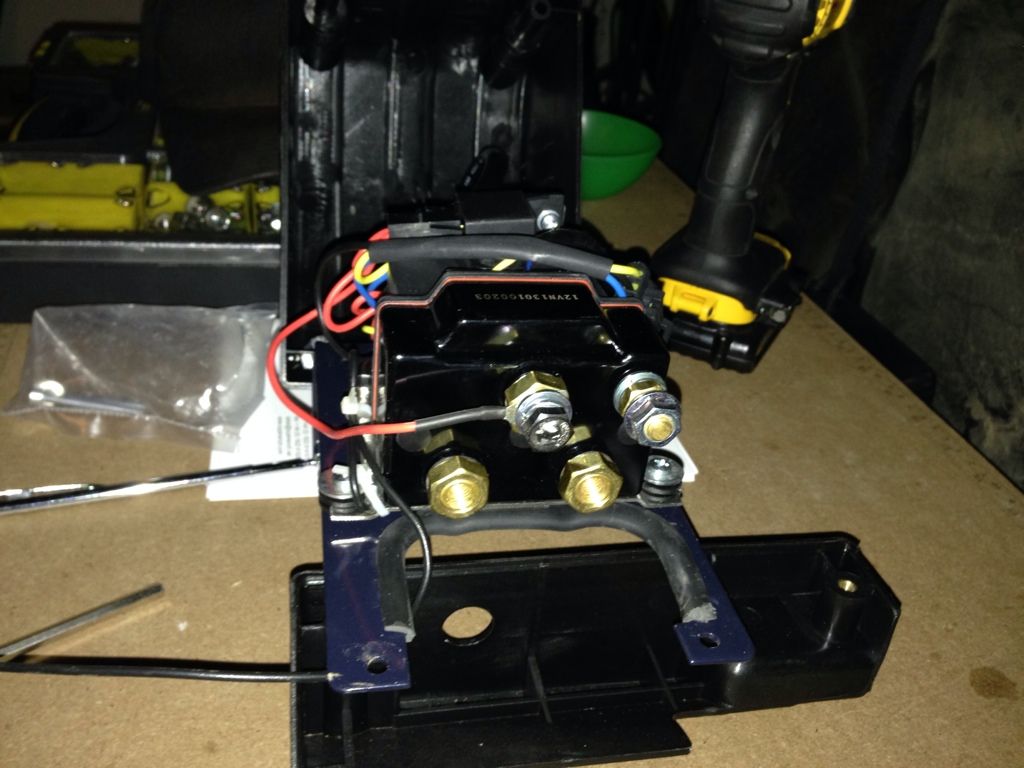
My plan was to relocate the winch control box and mount it to the top of the fuse box in the engine compartment. The box comes with the wires exiting a large hole in the bottom through a metal bracket. (pictured below). I wanted to mount the plastic box and this bracket to the top of the fuse box cover. I drilled new holes at the top of the plastic control box for nylon gland nuts for each wire for a more waterproof solution. The control box was too small after I tried to fit all 5 2AWG wires into it using the gland nuts. The 2AWG wires are just too thick to bend and bolt down. I needed a new, bigger box. I found one eBay that was the right size.
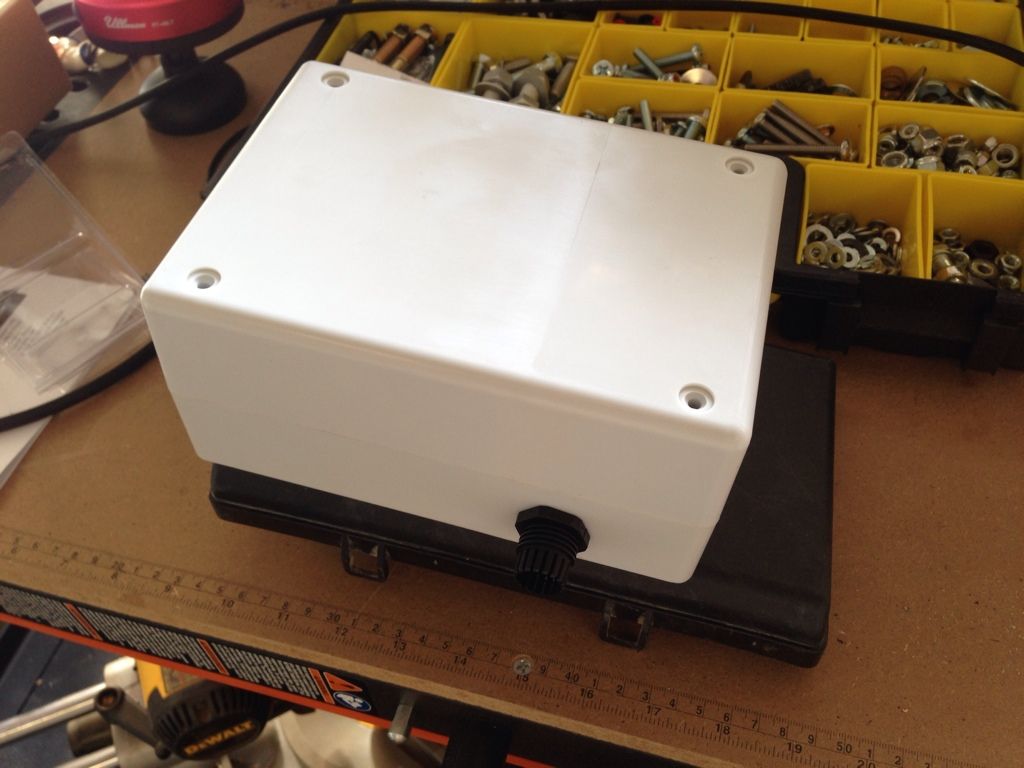
Here's the new project box sitting on top of the fuse box cover. One of the gland nuts is installed for the positive cable.
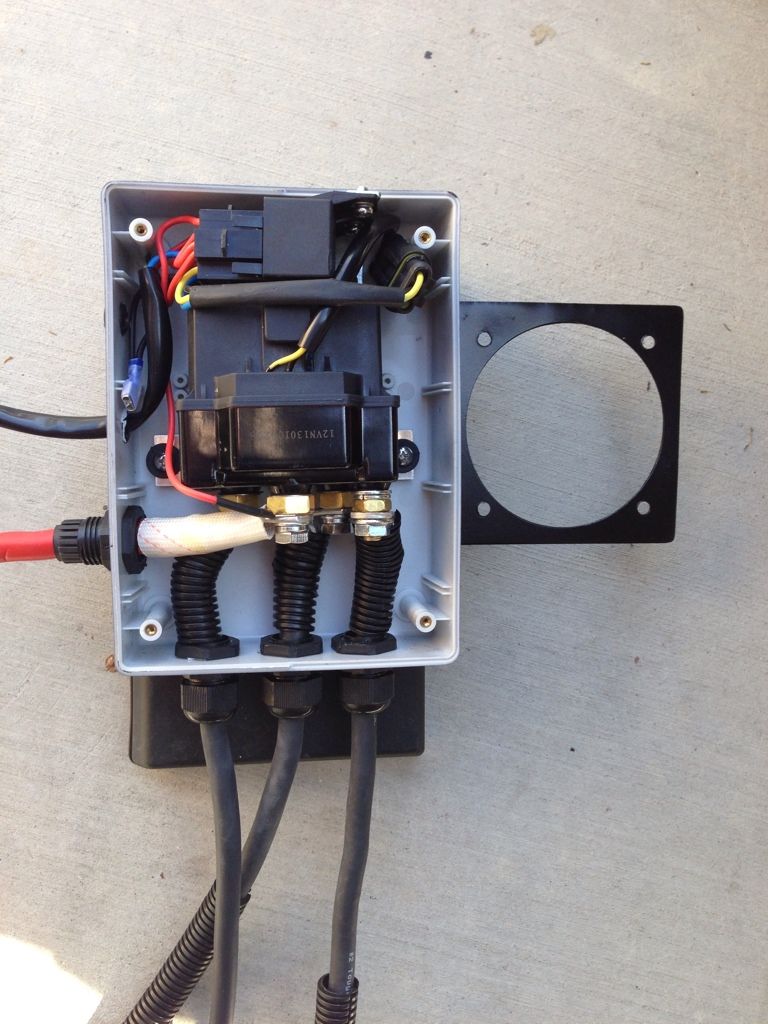
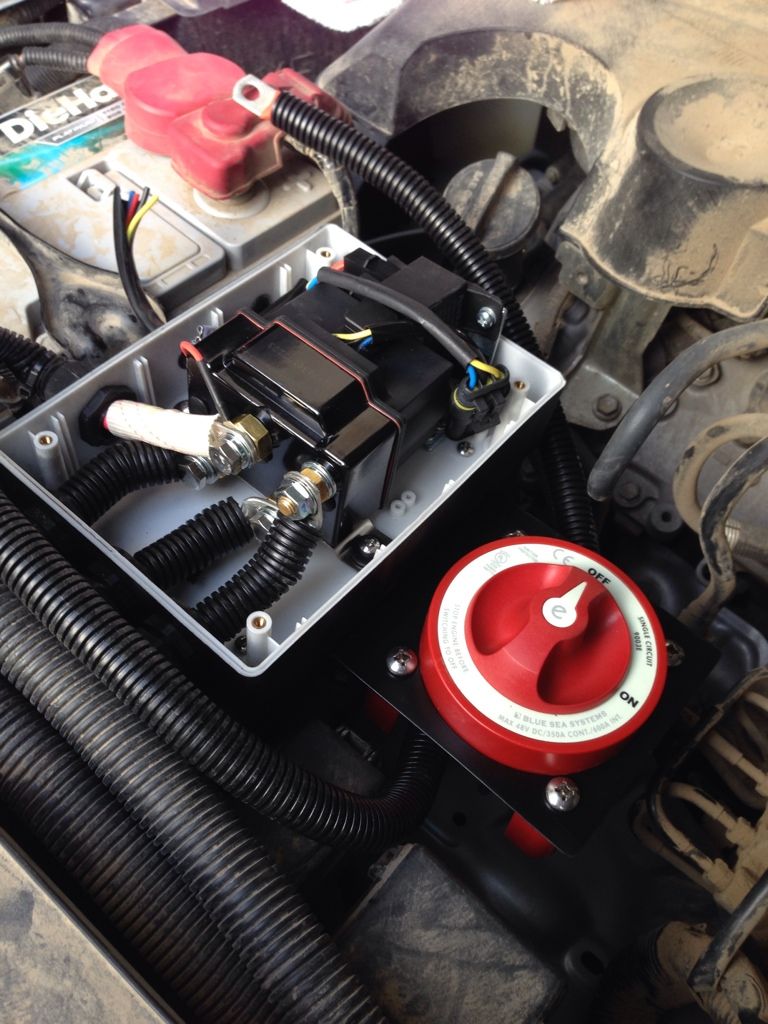
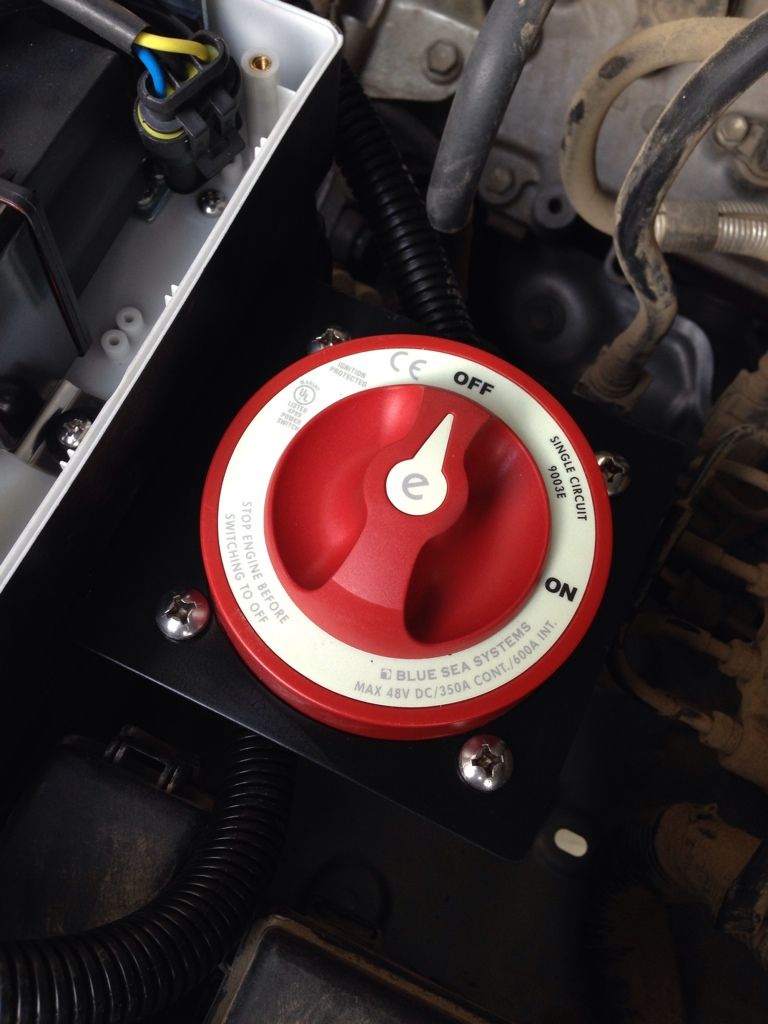
I test fit all the 2AWG wiring and remote control harness before removing everything to rattle can the box black. You can also see the sheet metal bracket I fabbed up for the Bluesea 9003E positive cutoff switch. The new control box is screwed to the fuse box cover with the metal bracket sandwiched between. Two of the solenoid mount screws go through the switch bracket to secure it.
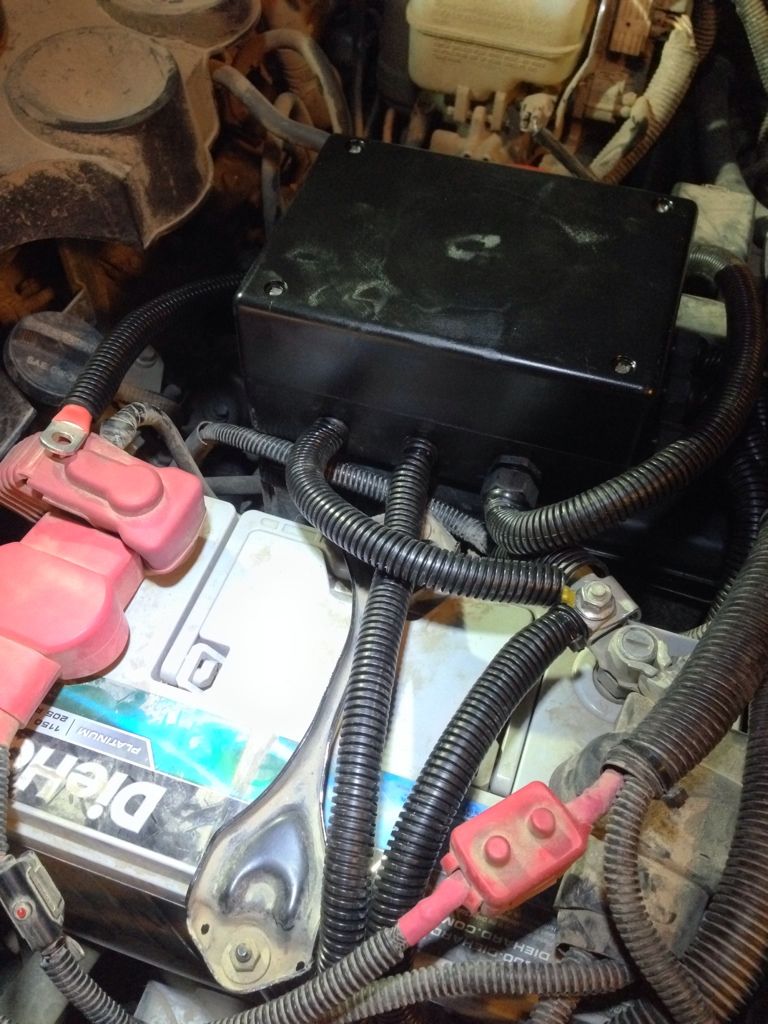
The painted control box with all 2AWG wires, winch remote harness and negative remote wire installed. The Bluesea switch is mounted to the new bracket.
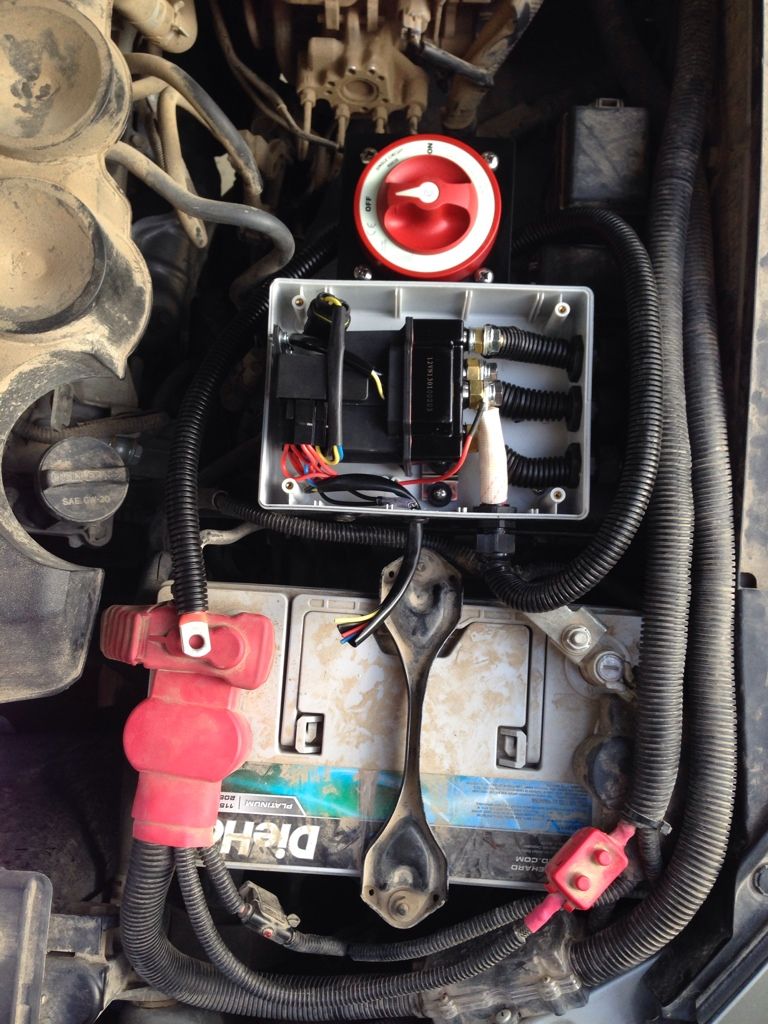
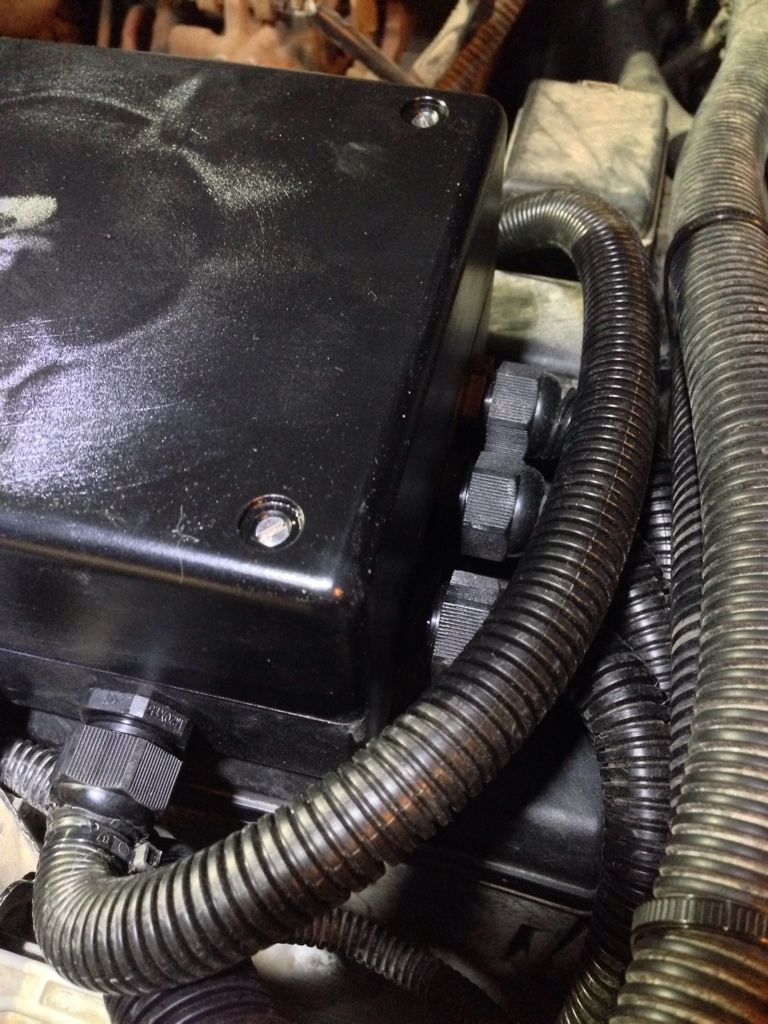
All done with the new control box except for the positive connection to the battery.
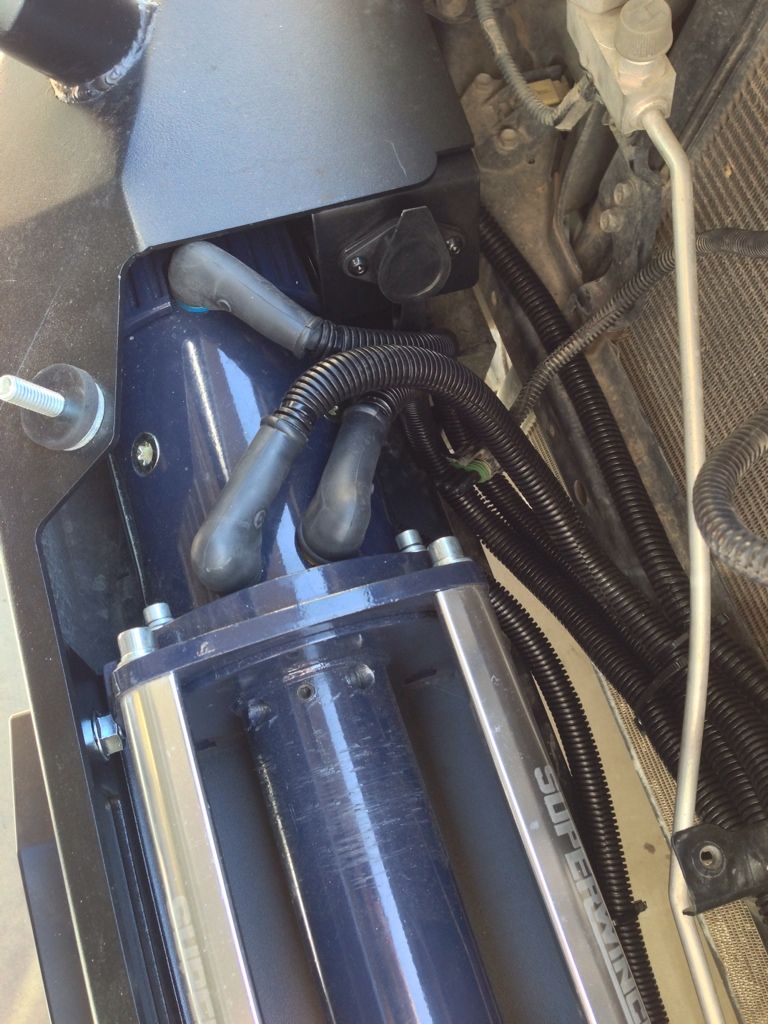
All 2AWG wires were routed behind the driver's headlight through an existing hole in the sheet metal. I used split loom on all wires and installed rubber sheet metal edge protector on all exposed areas near the wires.
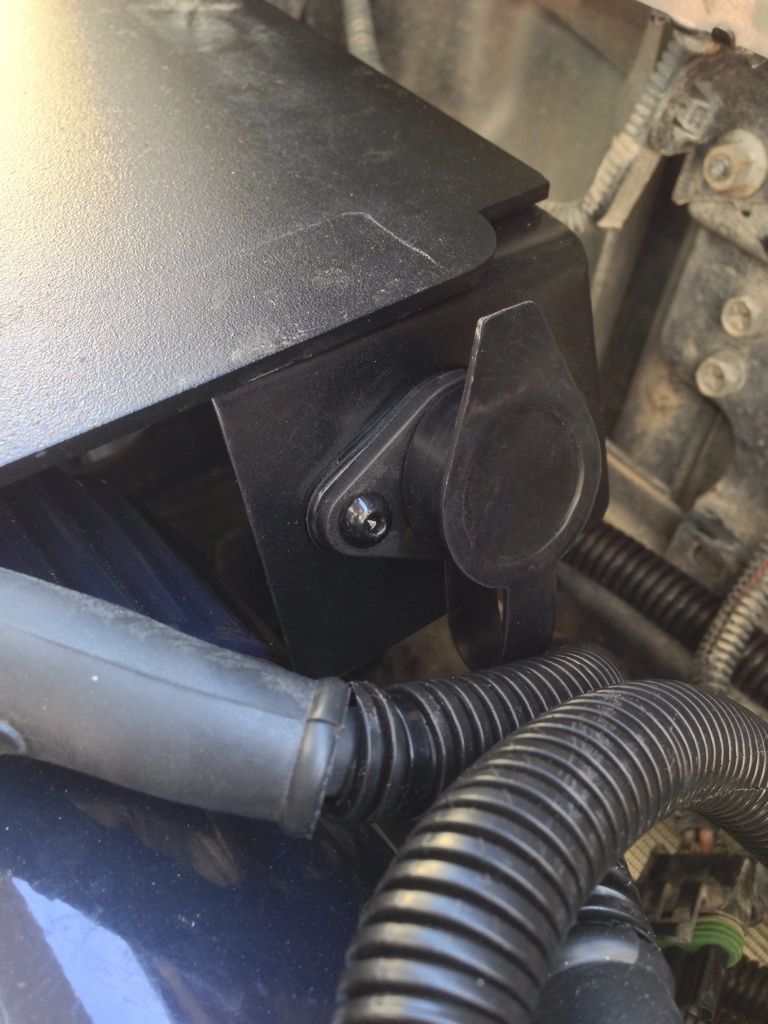
New 2AWG welding wire was used to relocate the control box in the engine compartment. I also lengthened the winch remote harness wires and installed the plug to the bumper mounted to a metal bracket out of 22 gauge sheet metal.
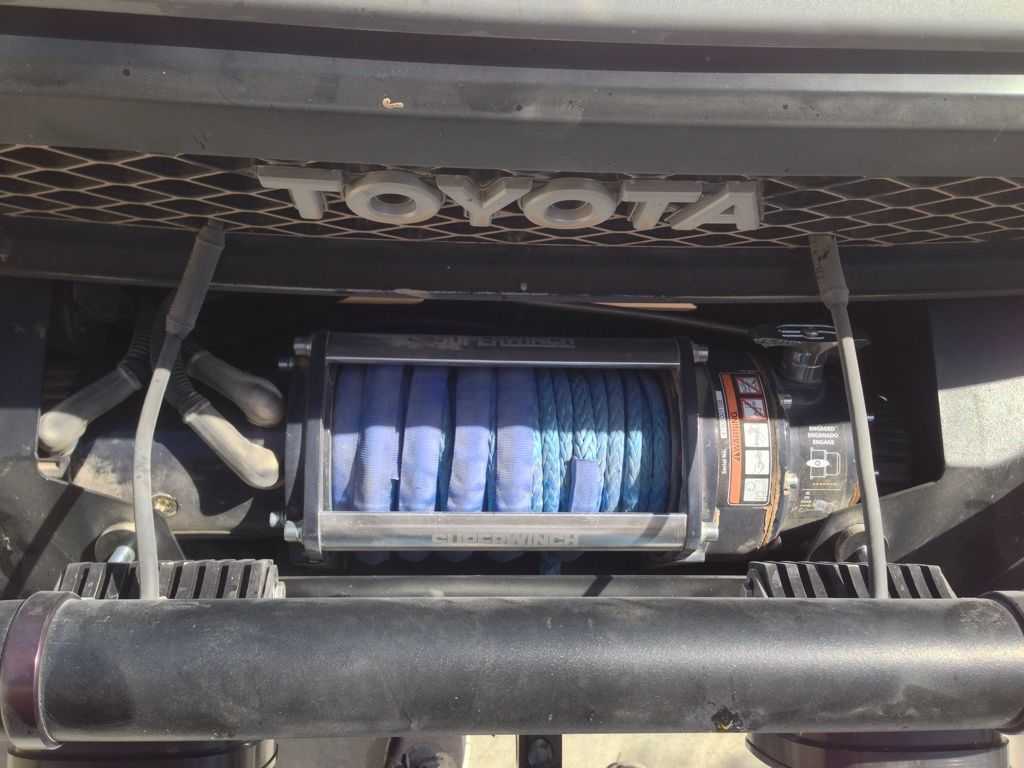
The rope installed with a Factor 55 thimble. I got a different black hawse fairlead on eBay rather than using the blue Superwinch one.
I capped the existing holes on the winch cover and found two plastic knobs online to use to remove the cover when needed. The two carriage bolts are held in place by screwing on a thick rubber washer with a slightly smaller diameter hole than the bolts. It's held up on Death Valley's washboard roads and trails so far.
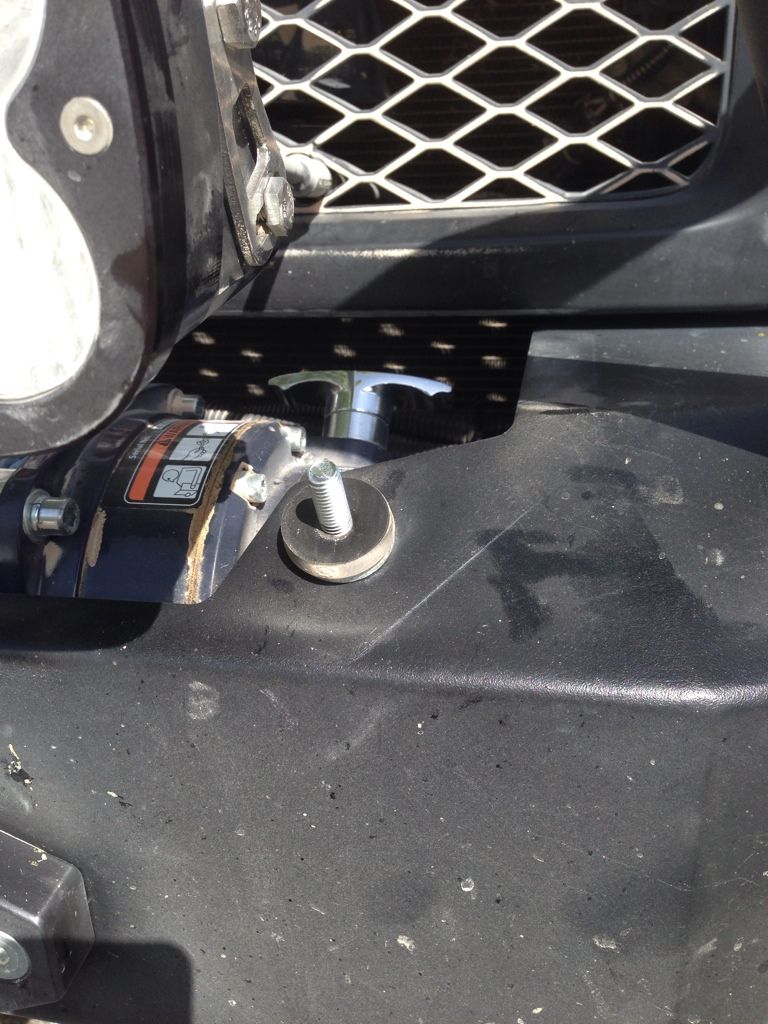
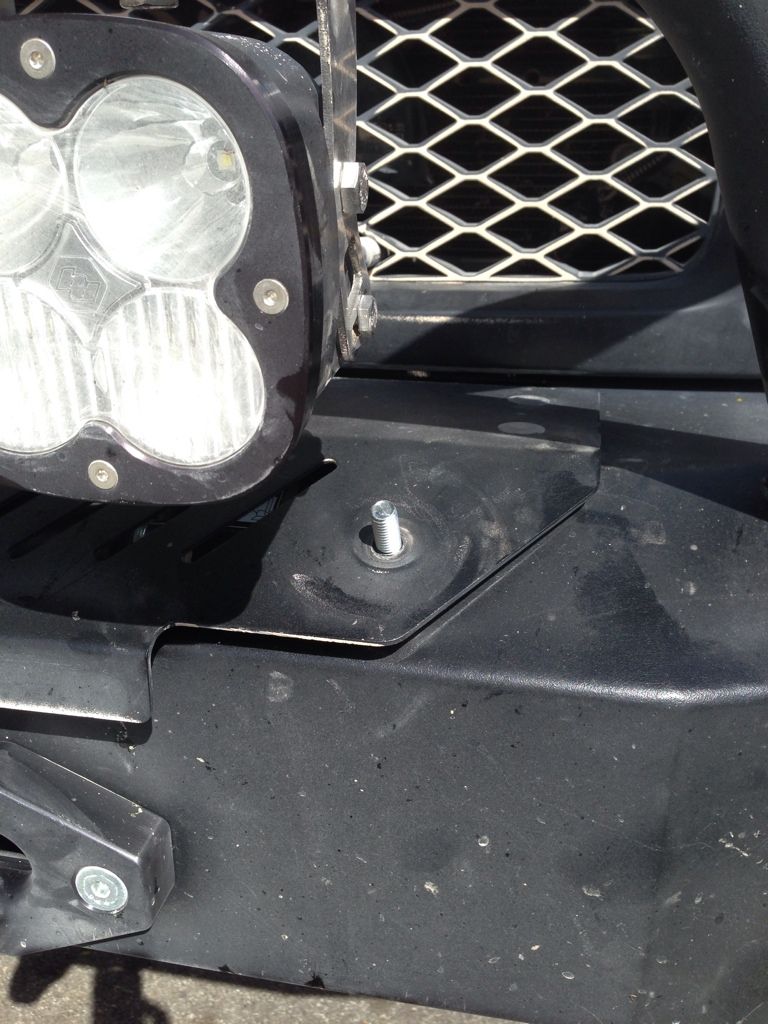
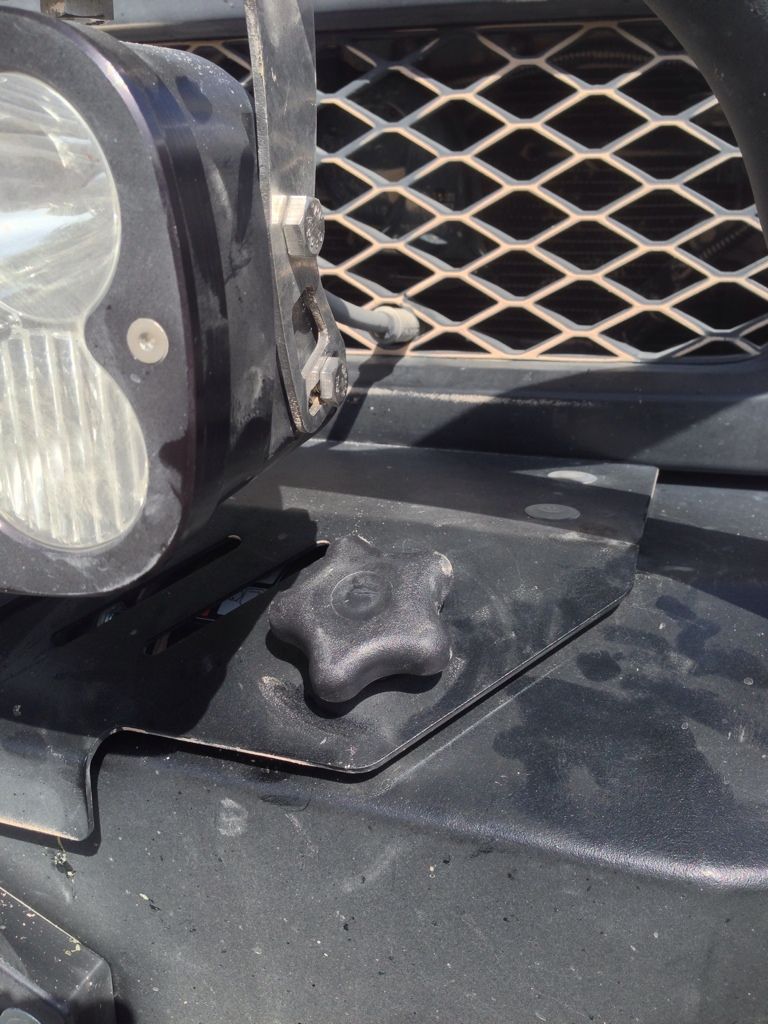
You can see the cover stands off the bumper about 1/4” or so to clear the top of the winch. The metal and rubber washers are used as spacers.

The winch installed easily into the bumper. I also reclocked the clutch handle out the the way so I can put the winch cover back on to protect the synthetic rope from sun damage.
My plan was to relocate the winch control box and mount it to the top of the fuse box in the engine compartment. The box comes with the wires exiting a large hole in the bottom through a metal bracket. (pictured below). I wanted to mount the plastic box and this bracket to the top of the fuse box cover. I drilled new holes at the top of the plastic control box for nylon gland nuts for each wire for a more waterproof solution. The control box was too small after I tried to fit all 5 2AWG wires into it using the gland nuts. The 2AWG wires are just too thick to bend and bolt down. I needed a new, bigger box. I found one eBay that was the right size.
Here's the new project box sitting on top of the fuse box cover. One of the gland nuts is installed for the positive cable.
I test fit all the 2AWG wiring and remote control harness before removing everything to rattle can the box black. You can also see the sheet metal bracket I fabbed up for the Bluesea 9003E positive cutoff switch. The new control box is screwed to the fuse box cover with the metal bracket sandwiched between. Two of the solenoid mount screws go through the switch bracket to secure it.
The painted control box with all 2AWG wires, winch remote harness and negative remote wire installed. The Bluesea switch is mounted to the new bracket.
All done with the new control box except for the positive connection to the battery.
All 2AWG wires were routed behind the driver's headlight through an existing hole in the sheet metal. I used split loom on all wires and installed rubber sheet metal edge protector on all exposed areas near the wires.
New 2AWG welding wire was used to relocate the control box in the engine compartment. I also lengthened the winch remote harness wires and installed the plug to the bumper mounted to a metal bracket out of 22 gauge sheet metal.
The rope installed with a Factor 55 thimble. I got a different black hawse fairlead on eBay rather than using the blue Superwinch one.
I capped the existing holes on the winch cover and found two plastic knobs online to use to remove the cover when needed. The two carriage bolts are held in place by screwing on a thick rubber washer with a slightly smaller diameter hole than the bolts. It's held up on Death Valley's washboard roads and trails so far.
You can see the cover stands off the bumper about 1/4” or so to clear the top of the winch. The metal and rubber washers are used as spacers.