You are using an out of date browser. It may not display this or other websites correctly.
You should upgrade or use an alternative browser.
You should upgrade or use an alternative browser.
ImNoSaint's 2.5 Thread
- Thread starter Imnosaint
- Start date
Imnosaint
Adventurer
Thanks. Fifteen if I'm lucky. What's weird is my commute seems to be the black hole of fuel efficiency since I've hit 17MPG regularly on long trips away from Interstate 15 between Bountiful and St. George, Utah. I was hoping the hubs would make a difference, but so far it's negligible. I'm sure I don't have enough data yet for a valid measruement and it's tough coming up with a constant on that stretch since the wind is always a weird variable.Nice rig, dude. What's your average MPG with such a long commute after all the mods?
Imnosaint
Adventurer
Thank you. Your SR rocks.This thing is really well thought and executed. Hats off to you sir. I always enjoy seeing this thread bumped
raysobi
Adventurer
This thing is really well thought and executed. Hats off to you sir. I always enjoy seeing this thread bumped
Agree!
I love it! Very practical and not overkill.
Imnosaint
Adventurer
The State-of-the-Build
This is my third year living out of the Nomad when I commute to Southern Utah for work, (weekly, Tuesdays through Thursdays, 700 miles) so I thought I'd post a state-of-the-build after regular use and 30,000 miles. Granted, I've mixed up the trips with my Triumph Tiger 800XC, but with the weather turning, I'll be appreciating the Nomad's insulation.
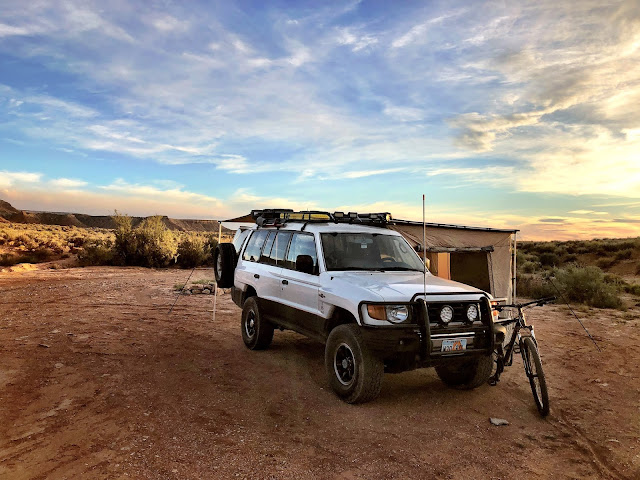
On the road my biggest disappointment is with fuel efficiency. No matter what I've done to try to improve things - cut the height of the rook rack, installed locking hubs, top-end refresh and tune up, carefully monitored tire pressure - the mileage stays the same, 14MPG on a good day. Any other direction, north to Oregon, west to California and it pulls 17MPG a number of times, one trip without overdrive. Go figure.
The OME suspension has made remarkable improvement on and off road and with the torsion bars tuned in I'm very satisfied with the corners. Now to tackle ball joints, tie rods and bushings.
The roof rack, cases and awnings have made living out of this truck much more enjoyable. Keeping the platform clear makes converting the rig into camping mode quick and seamless, made possible by freeing up under-platform space for camp gear since recovery gear is now all on top.
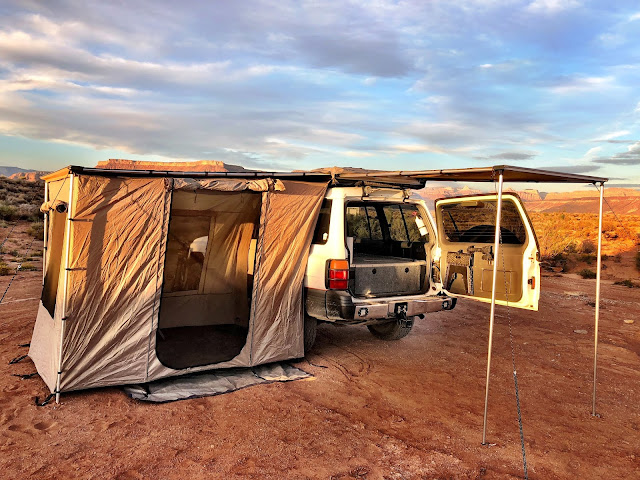
The awnings are wearing well into their third year of consistent weekly use, though the PVC lined cover is showing a little wear where it rubs on the lower tier of roof rack. Just cosmetic so far, no breach of the material. The awning material still repels water evenly and looks and feels like the day it came out of the box. Regular care of these surfaces pays off along with proper drying and stowage. The zippers are robust and work well with an occasional lube of bar soap along the teeth. All the awning hardware is robust, the joints and plastic fittings showing no stress and the rafters and legs still locking and retracting, straight as ever.
The tent room is a little worse for wear after a catastrophic squall in Valley of the Gods destroyed the frame (replaced by ARB overnight!), but all the tears and holes have been repaired and no further rips or tears have manifest. It's been deployed dozens of times and all the clips, loops and d-rings are like new. The pan floor shows little sign of wear, even with the claws of two large Golden Retrievers roaming its square feet.
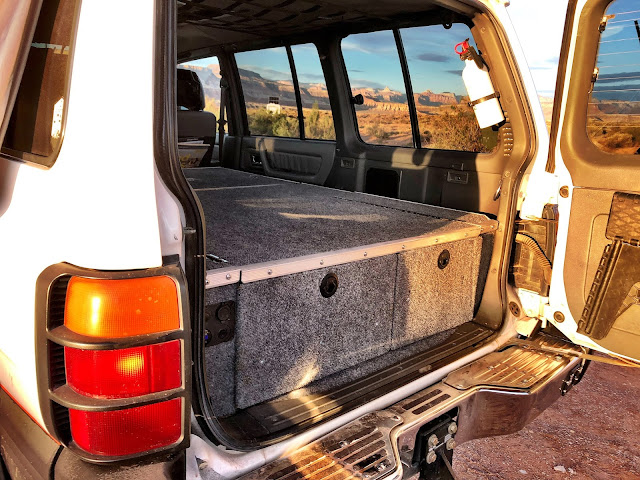
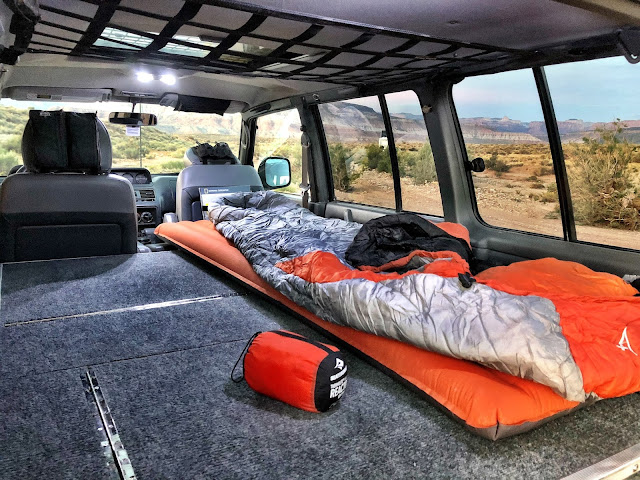
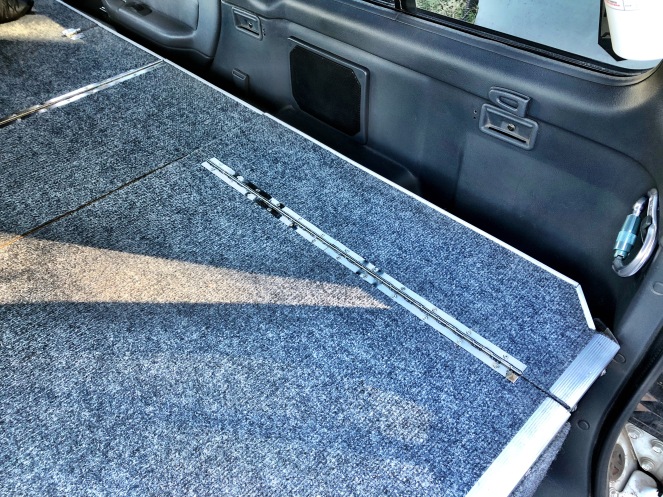
The platform was my biggest concern considering the materials I used to build it, but it's as solid as the day I finished the build. The indoor/outdoor carpet has held up well with little wear despite its rigorous weekly cleaning. Since the dogs travel on the platform and it's where we sleep, it's kept immaculate by brushing and vacuuming along with a mild detergent to keep it fresh.
All the trim is solid and the latches are still working well. I replaced the wing door hinges (left and right aft of the wheel wells) with piano hinges giving them a bit more rigidity.
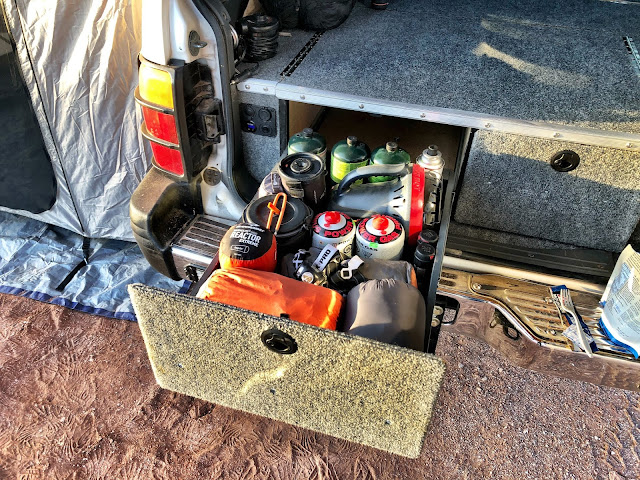
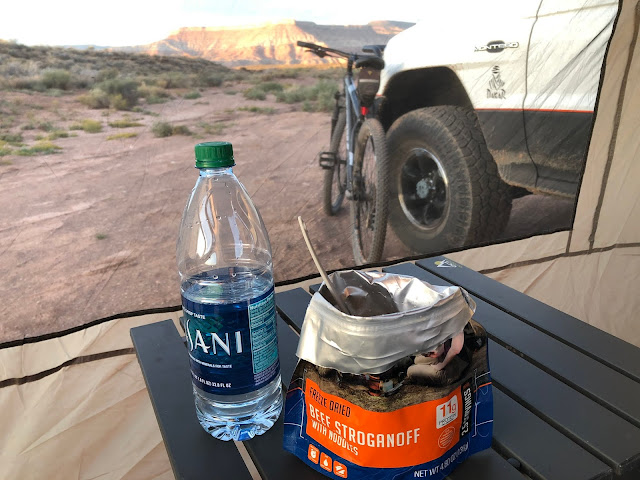
The drawer system has given no hint of trouble. I only wish I used a lockable set of sliders on the stove/sink drawer. If the Nomad is parked a little nose heavy the drawer has a tendency to slide back in, not something you want to happen with a hot or burning stove element.

Many meals have come out of this set-up, along with a lot of dishes washed. I've installed another utensil drawer just beneath the stove/sink pullout for easier access to cooking tools.
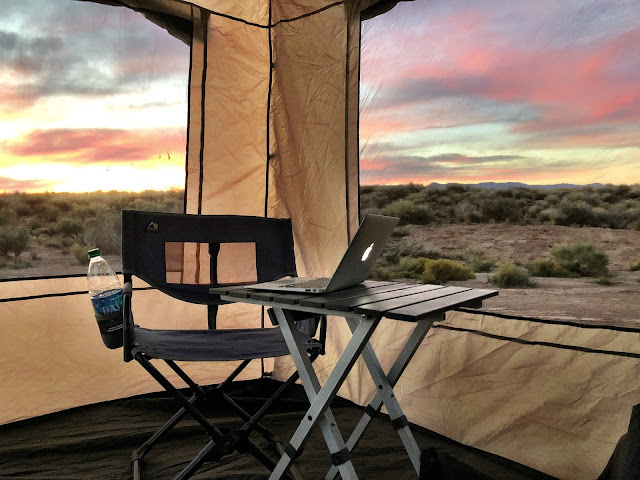
The best feature on the Nomad is something that came standard, its windows. Their views seldom disappoint me.

Next on the list is a dual battery system and fridge. If you have any questions about the build, I'm happy to help.
This is my third year living out of the Nomad when I commute to Southern Utah for work, (weekly, Tuesdays through Thursdays, 700 miles) so I thought I'd post a state-of-the-build after regular use and 30,000 miles. Granted, I've mixed up the trips with my Triumph Tiger 800XC, but with the weather turning, I'll be appreciating the Nomad's insulation.
On the road my biggest disappointment is with fuel efficiency. No matter what I've done to try to improve things - cut the height of the rook rack, installed locking hubs, top-end refresh and tune up, carefully monitored tire pressure - the mileage stays the same, 14MPG on a good day. Any other direction, north to Oregon, west to California and it pulls 17MPG a number of times, one trip without overdrive. Go figure.
The OME suspension has made remarkable improvement on and off road and with the torsion bars tuned in I'm very satisfied with the corners. Now to tackle ball joints, tie rods and bushings.
The roof rack, cases and awnings have made living out of this truck much more enjoyable. Keeping the platform clear makes converting the rig into camping mode quick and seamless, made possible by freeing up under-platform space for camp gear since recovery gear is now all on top.
The awnings are wearing well into their third year of consistent weekly use, though the PVC lined cover is showing a little wear where it rubs on the lower tier of roof rack. Just cosmetic so far, no breach of the material. The awning material still repels water evenly and looks and feels like the day it came out of the box. Regular care of these surfaces pays off along with proper drying and stowage. The zippers are robust and work well with an occasional lube of bar soap along the teeth. All the awning hardware is robust, the joints and plastic fittings showing no stress and the rafters and legs still locking and retracting, straight as ever.
The tent room is a little worse for wear after a catastrophic squall in Valley of the Gods destroyed the frame (replaced by ARB overnight!), but all the tears and holes have been repaired and no further rips or tears have manifest. It's been deployed dozens of times and all the clips, loops and d-rings are like new. The pan floor shows little sign of wear, even with the claws of two large Golden Retrievers roaming its square feet.
The platform was my biggest concern considering the materials I used to build it, but it's as solid as the day I finished the build. The indoor/outdoor carpet has held up well with little wear despite its rigorous weekly cleaning. Since the dogs travel on the platform and it's where we sleep, it's kept immaculate by brushing and vacuuming along with a mild detergent to keep it fresh.
All the trim is solid and the latches are still working well. I replaced the wing door hinges (left and right aft of the wheel wells) with piano hinges giving them a bit more rigidity.
The drawer system has given no hint of trouble. I only wish I used a lockable set of sliders on the stove/sink drawer. If the Nomad is parked a little nose heavy the drawer has a tendency to slide back in, not something you want to happen with a hot or burning stove element.
Many meals have come out of this set-up, along with a lot of dishes washed. I've installed another utensil drawer just beneath the stove/sink pullout for easier access to cooking tools.
The best feature on the Nomad is something that came standard, its windows. Their views seldom disappoint me.
Next on the list is a dual battery system and fridge. If you have any questions about the build, I'm happy to help.
Last edited:
reversecaoboy
Observer
Love it.
Imnosaint
Adventurer
House Battery Installation (AKA Dual Battery Setup)
This has been a long time in coming as for over the years I’ve weighed the pros and cons of having house power for the main purpose of powering a fridge. With the addition of the rear work lights and circuit for charging and accessories, I also wanted the peace of mind of isolating the main battery from current draw while camping, so I did the install.
Planning this out was the main challenge since the Nomad has little room under the hood for a second battery. With the sleeping platform, though, there’s a spot that the CD changer once occupied under the right platform wing.
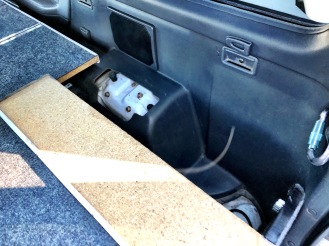
I just needed to remove that bottom corner trim and find some kind of platform and method of securing the house battery. This is where I end up in a big box hardware store where when I’m asked if I could be helped I just answer, “you wouldn’t understand.”
Trolling the aisles I came upon a mailbox base that’s about an inch high.
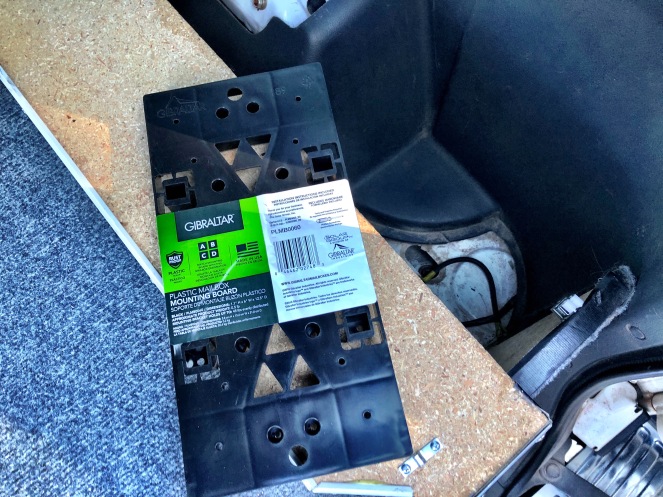
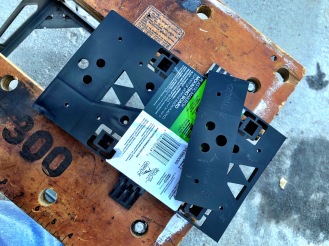
I cut its length down by a couple of inches and cut out the moulding to test fit the base.
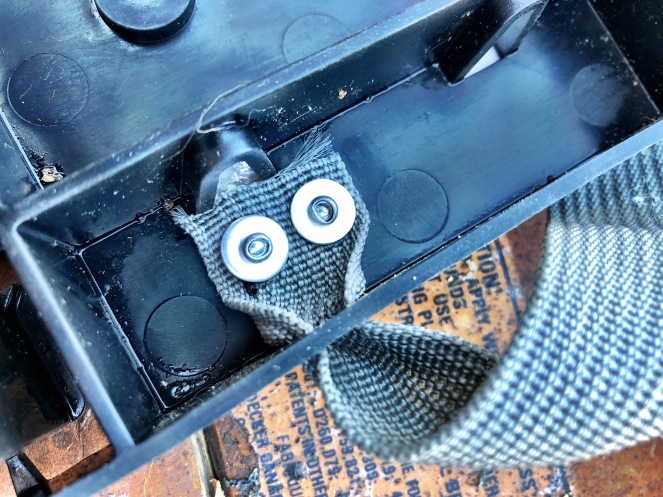
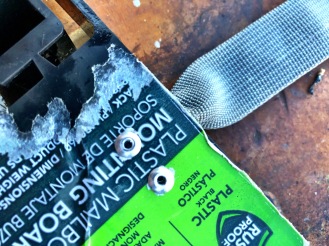
I sourced a one inch strap with buckle from an old back pack and riveted the ends to the mailbox base, providing a way to secure the battery. Once it all check out I secured the base to the sheet metal below.
With the logistics of battery placement solved, I began sorting out the circuit. After much research I picked up a Keyline Battery Isolator Pro Battery kit.
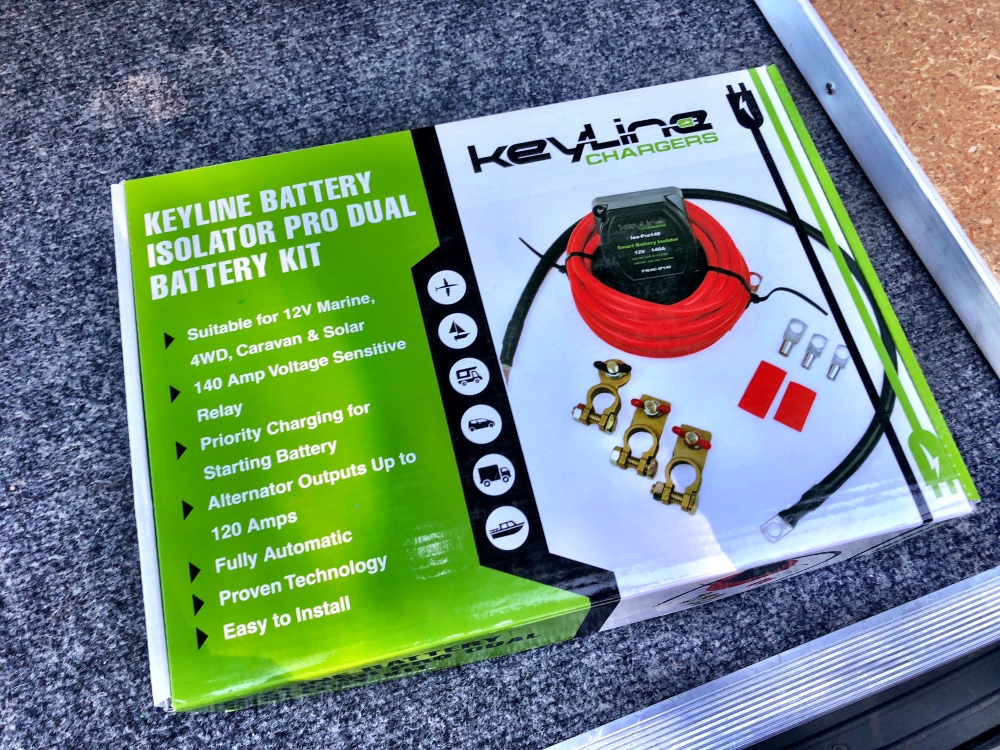
This kit has a 140amp smart battery isolator that engages both batteries to charge while the engine is running. When the engine is stopped and when the voltage drops below the unit’s cut-out at 12.8v, the SBI disengages the circuit, isolating the start battery from any draw on the house battery.
This has been a long time in coming as for over the years I’ve weighed the pros and cons of having house power for the main purpose of powering a fridge. With the addition of the rear work lights and circuit for charging and accessories, I also wanted the peace of mind of isolating the main battery from current draw while camping, so I did the install.
Planning this out was the main challenge since the Nomad has little room under the hood for a second battery. With the sleeping platform, though, there’s a spot that the CD changer once occupied under the right platform wing.
I just needed to remove that bottom corner trim and find some kind of platform and method of securing the house battery. This is where I end up in a big box hardware store where when I’m asked if I could be helped I just answer, “you wouldn’t understand.”
Trolling the aisles I came upon a mailbox base that’s about an inch high.
I cut its length down by a couple of inches and cut out the moulding to test fit the base.
I sourced a one inch strap with buckle from an old back pack and riveted the ends to the mailbox base, providing a way to secure the battery. Once it all check out I secured the base to the sheet metal below.
With the logistics of battery placement solved, I began sorting out the circuit. After much research I picked up a Keyline Battery Isolator Pro Battery kit.
This kit has a 140amp smart battery isolator that engages both batteries to charge while the engine is running. When the engine is stopped and when the voltage drops below the unit’s cut-out at 12.8v, the SBI disengages the circuit, isolating the start battery from any draw on the house battery.
Last edited:
Imnosaint
Adventurer
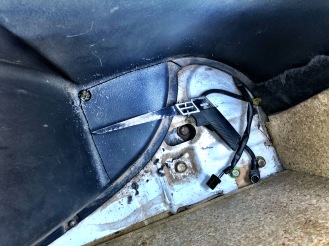
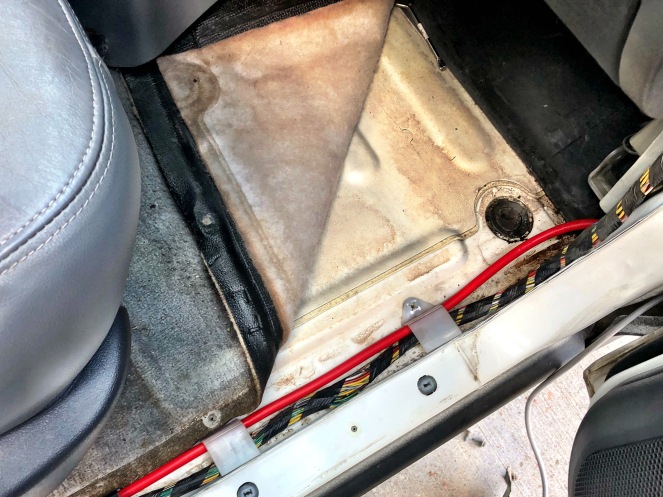
The trick now was to find a suitable spot for the SBI and run the positive cables from the unit to the house battery and to the start battery.
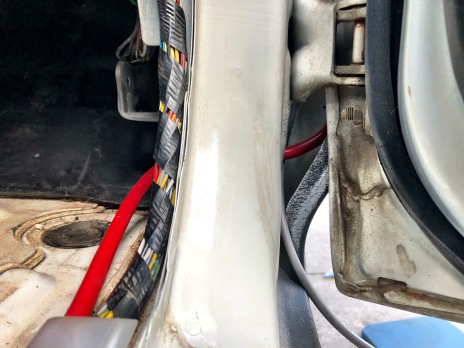
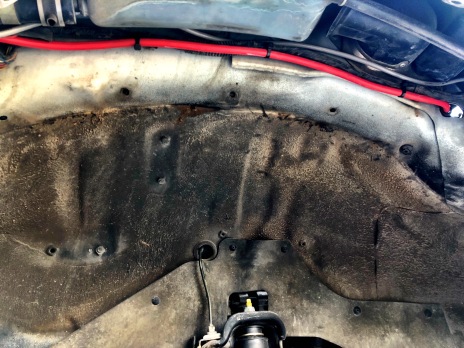
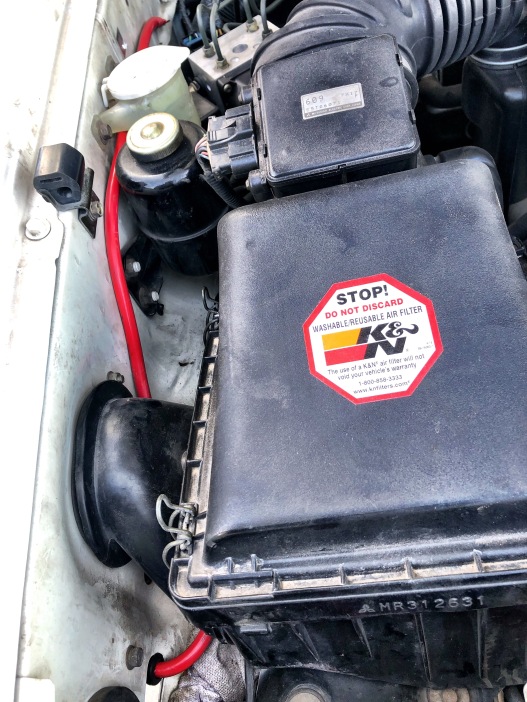
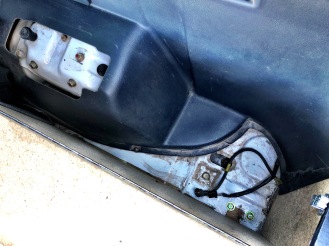
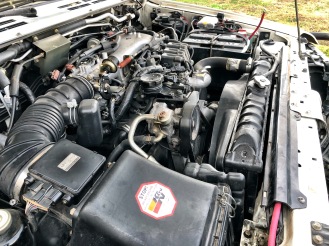
I started the cable feed from the cabin, then working in opposite directions to make the best use of the length centering it for fitment at either end. I drilled a 5/8ths hole through the sheetmetal on the right of the footwell and then through the sheet metal just below the door hinge. I popped a grommet in and fed the cable through the two holes (could ‘t get a grommet on the exterior hole) and then fed the cable up and over the wheel opening, zip tying it to the existing harness that goes to the passenger door electricals. I fed the cable into the engine compartment, under the air intake and terminated it just beyond the headlight washer fluid reservoir where I decided to locate the SBI.
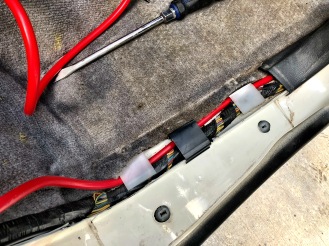
Working rearward I fed the cable through the trough used for the existing harness to the right rear corner where I’ve established the battery box. I added a ground strap as well.
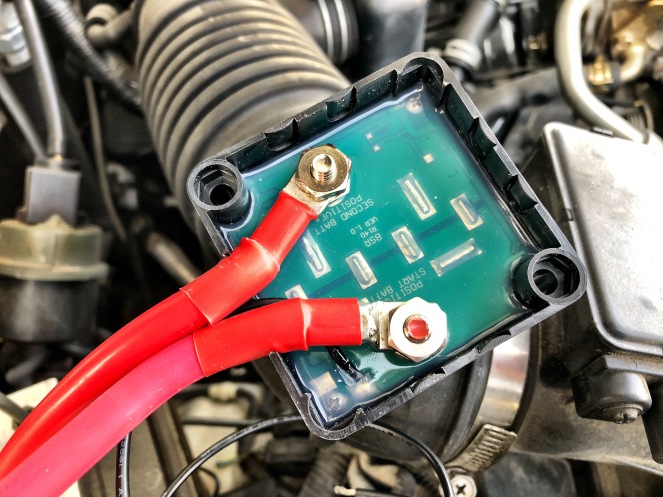
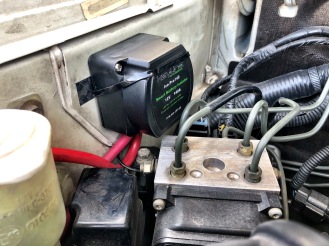
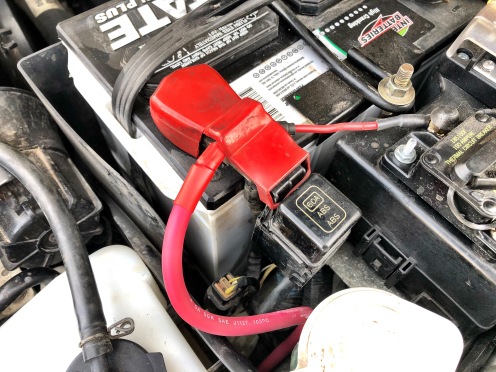
Back under the hood I connected the SBI, mounted the unit and ran the cable to the start battery.
With all the cables in place, I disconnected the negative from the start battery, connected the negative and then positive to the house battery, and then connected the positive and then the negative to the start battery, completing the house circuit.
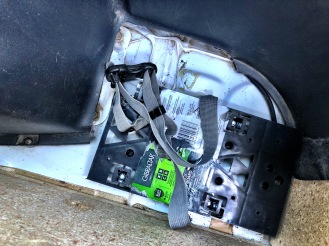
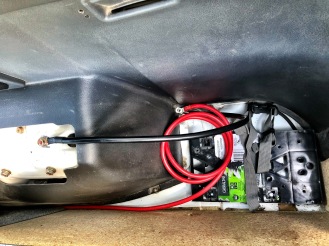
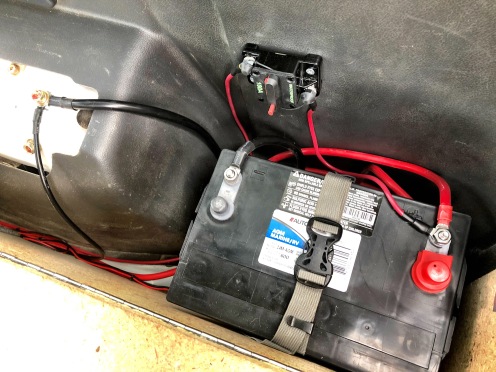
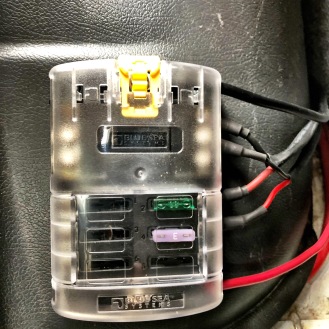
As seen above, I added a 100amp breaker in the house battery box and ran power to a second Blue Sea blade fuse block (the first is under the hood for auxiliary lighting) along with a ground coming from the same earth as the battery.
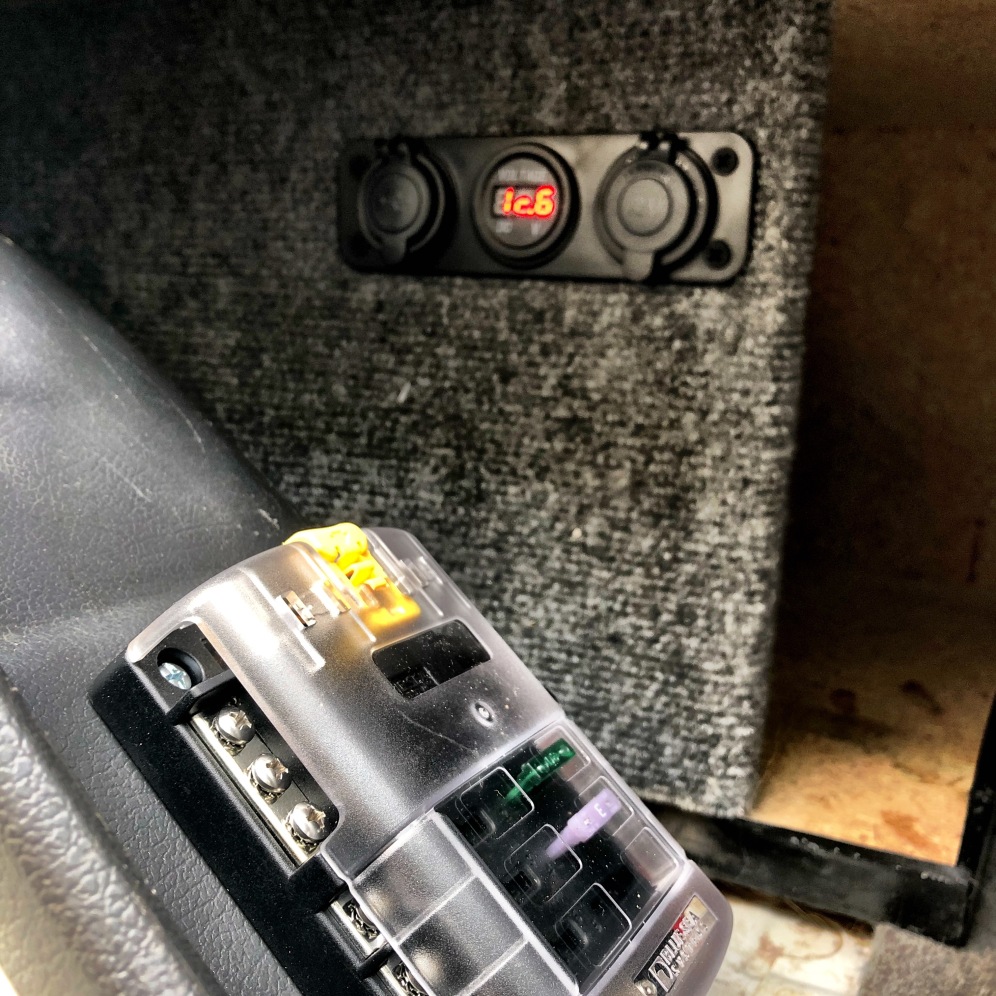
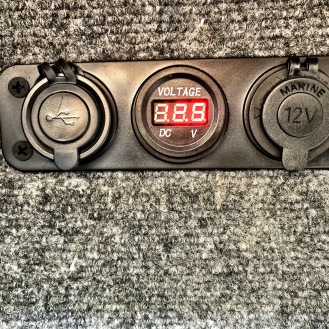
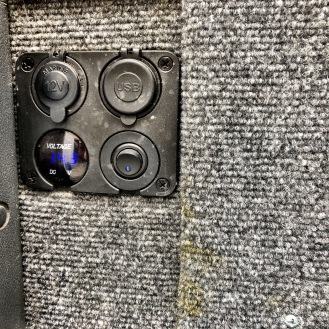
For reference, the top image is through the passenger side door looking under the sleeping platform. The fuse block is mounted on the wheel well. I ran a circuit to a panel installed under the platform to provide power for the fridge and to charge accessories, along with a volt meter. I moved the circuit I installed previously to power the rear panel and rear work lights to this house circuit as well.
I started the cable feed from the cabin, then working in opposite directions to make the best use of the length centering it for fitment at either end. I drilled a 5/8ths hole through the sheetmetal on the right of the footwell and then through the sheet metal just below the door hinge. I popped a grommet in and fed the cable through the two holes (could ‘t get a grommet on the exterior hole) and then fed the cable up and over the wheel opening, zip tying it to the existing harness that goes to the passenger door electricals. I fed the cable into the engine compartment, under the air intake and terminated it just beyond the headlight washer fluid reservoir where I decided to locate the SBI.
Working rearward I fed the cable through the trough used for the existing harness to the right rear corner where I’ve established the battery box. I added a ground strap as well.
Back under the hood I connected the SBI, mounted the unit and ran the cable to the start battery.
With all the cables in place, I disconnected the negative from the start battery, connected the negative and then positive to the house battery, and then connected the positive and then the negative to the start battery, completing the house circuit.
As seen above, I added a 100amp breaker in the house battery box and ran power to a second Blue Sea blade fuse block (the first is under the hood for auxiliary lighting) along with a ground coming from the same earth as the battery.
For reference, the top image is through the passenger side door looking under the sleeping platform. The fuse block is mounted on the wheel well. I ran a circuit to a panel installed under the platform to provide power for the fridge and to charge accessories, along with a volt meter. I moved the circuit I installed previously to power the rear panel and rear work lights to this house circuit as well.
Unless I’m seeing things wrong, I think you want a fuse on the positive terminal of your accessory battery in the back. If any point along that positive cable shorts out to the frame / body, you will have a very upset battery in the cabin of your vehicle. And now that I think about it, you also want a fuse on the battery under the hood, where your jumper cable from the back battery ties in, as well for a similar reason. Let the fuses isolate the battery as close to the positive terminals as possible.
Last edited:
Imnosaint
Adventurer
Unless I’m seeing things wrong, I think you want a fuse on the positive terminal of your accessory battery in the back. If any point along that positive cable shorts out to the frame / body, you will have a very upset battery in the cabin of your vehicle. And now that I think about it, you also want a fuse on the battery under the hood, where your jumper cable from the back battery ties in, as well for a similar reason. Let the fuses isolate the battery as close to the positive terminals as possible.
You're right. I've cut those both in. Thanks.
Last edited:
Imnosaint
Adventurer
One of the last things on the Nomad’s wish list was a set of 33″ BFGoodrich KO2 A/Ts mounted on a new set of 15″ steelies, in this case, my second choice from American Racing.
The tires are 33X10.5R15, going for a taller/skinny application to reduce rolling mass. Shaved four pounds per wheel going from the stock rims with 32″ Pathfinder A/Ts.

The tires are 33X10.5R15, going for a taller/skinny application to reduce rolling mass. Shaved four pounds per wheel going from the stock rims with 32″ Pathfinder A/Ts.
Imnosaint
Adventurer
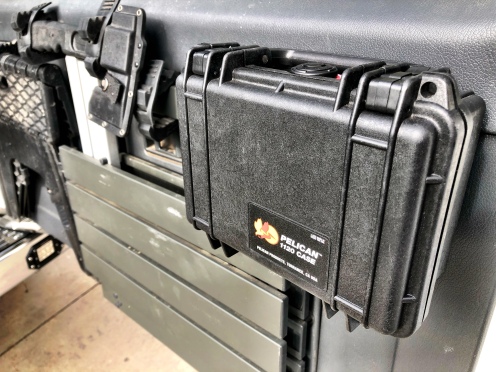
The Nomad is at that point where every square inch becomes valuable real estate, a spot to stash or stow something critical to getting there and few things ar more critical than the first aid kit. In the latest reshuffle of gear, I’ve repurposed a Pelican 1120 case for first aid storage and orginally had it attached to the driver side headrest via a Blue Ridge Overland panel, but the 3M super-industrial-strength adhesive didn’t last long and I’ve been searching for a new way to mount the kit in a readily accessible and highly visual spot.
Enter the Vivo Adapter VESA Mount Quick Release Braket kit. Working in film production, I use these to mount flat screens in a video village, so I though, why not a small Pelican case?
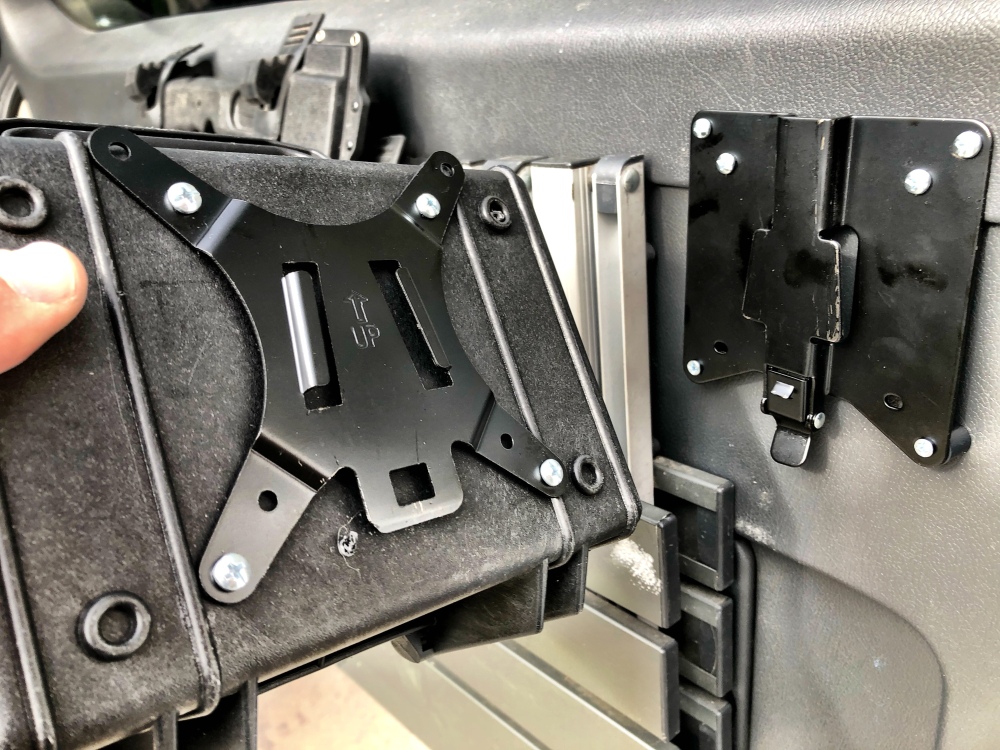
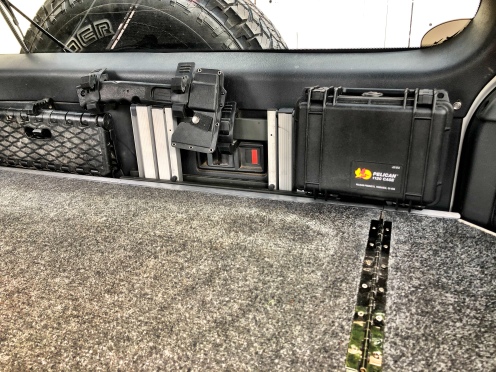
The kit has a bracket and cleat that mate together via a dovetail. The plate has a quick-release lever at the base. I mounted the bracket to the rear door in a spot where the case would clear the deck insert with the door closed, and then mounted the cleat on the back of the Pelican case.
Now the case has a rattle-free, easily accessible, very visible perch from which it can be snagged in a hurry and yet it’s out of the way.
Enter the Vivo Adapter VESA Mount Quick Release Braket kit. Working in film production, I use these to mount flat screens in a video village, so I though, why not a small Pelican case?
The kit has a bracket and cleat that mate together via a dovetail. The plate has a quick-release lever at the base. I mounted the bracket to the rear door in a spot where the case would clear the deck insert with the door closed, and then mounted the cleat on the back of the Pelican case.
Now the case has a rattle-free, easily accessible, very visible perch from which it can be snagged in a hurry and yet it’s out of the way.
Imnosaint
Adventurer
It’s been a long search, a long wait as well, but this fridge popped up on Amazon with all the specs I wanted for an onboard fridge/freezer. It’s the Alpicool C22, not an Engel nor a Dometic. Given both the budget build and the room restrictions of the Nomad, this 23 quart fridge fit the bill and it’s spot under the sleeping platform perfectly for under $270.
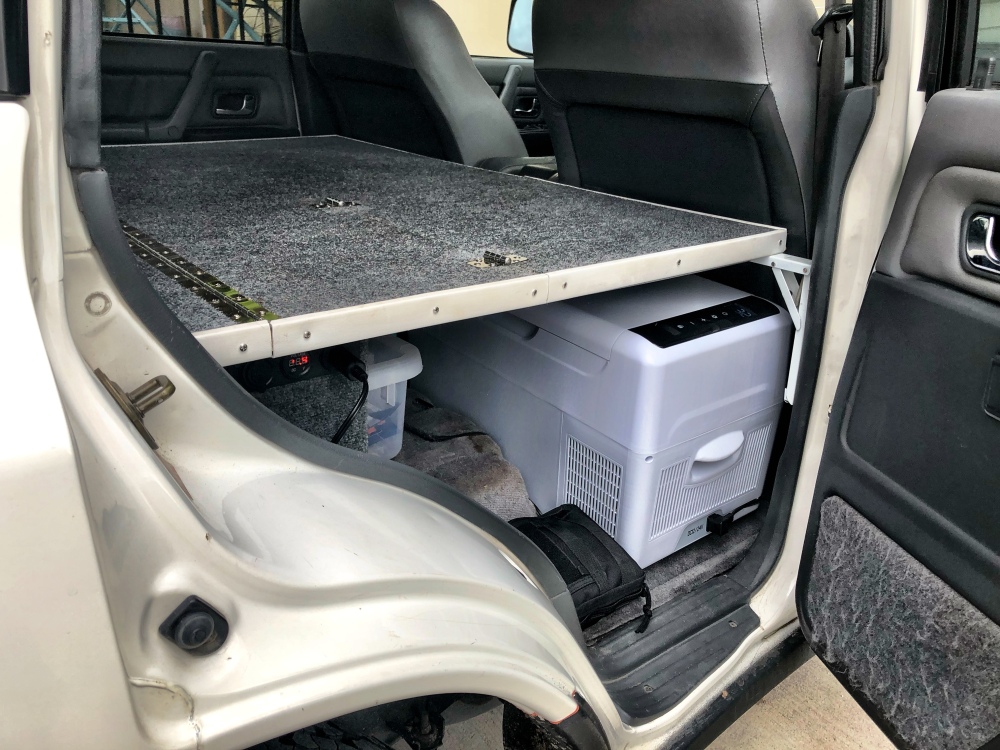
This unit powered from the Nomad’s house 12V system I installed eight months ago. There’s a service panel under the platform accessible from the RH passenger door that has a 12V plug and a USB outlet along with a voltage meter. (I’d normally post a link, but as I’ve searched for it, the C22 model is now nowhere to be found on Amazon.)
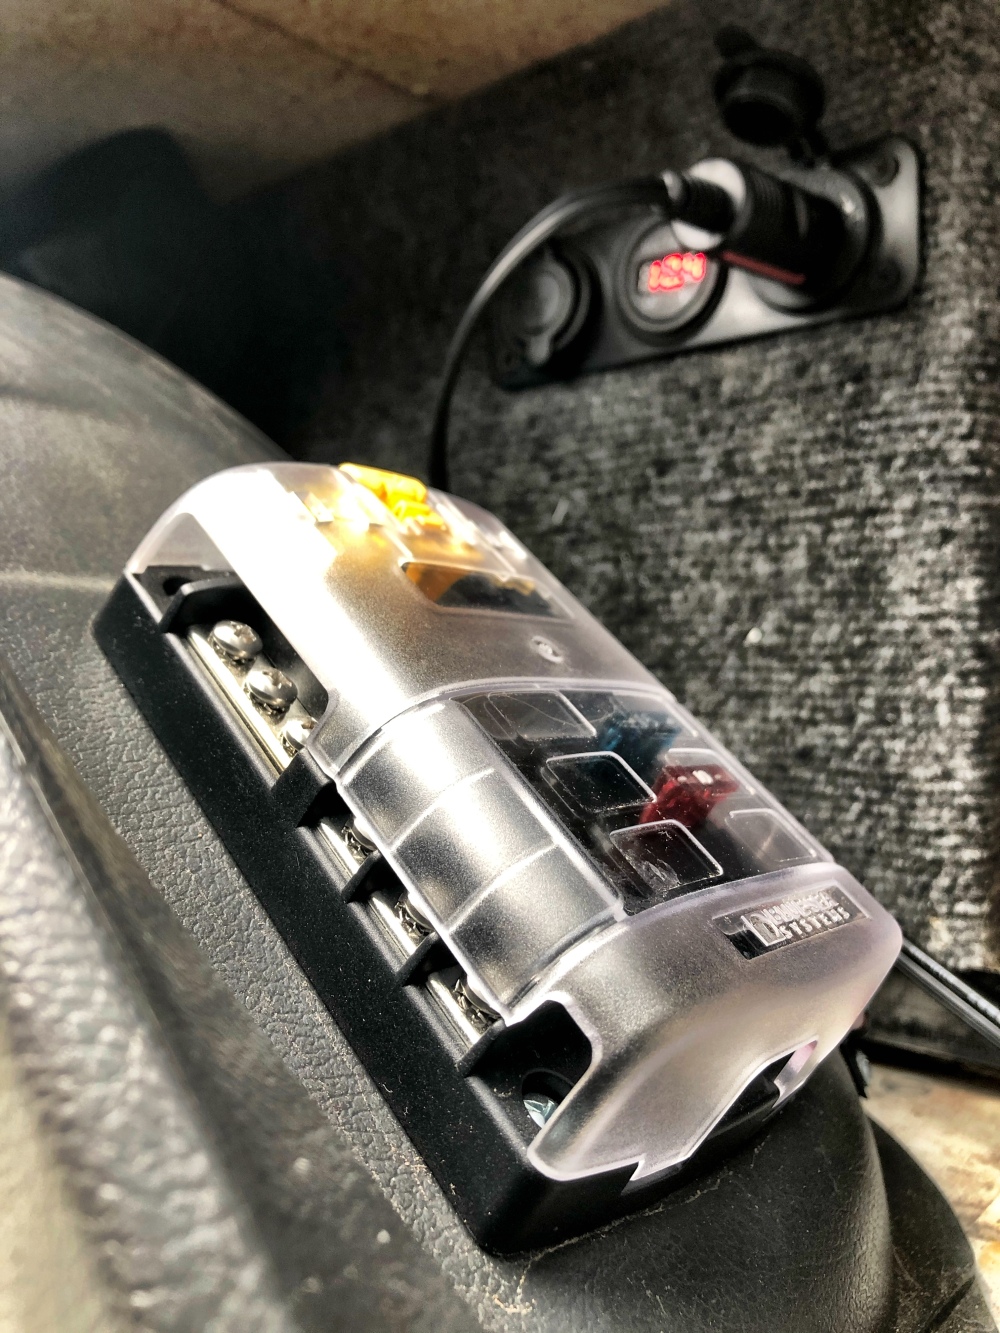
Power is distributed from the house battery via this Blue Sea blade fuse block to two panels, the one that powers the fridge and another on the rear of the platform.
The C22 fridge is Aplicool’s latest and it has its quirks, perhaps the reason it can’t be found on Amazon. It’s not plug and play, but instead requires several hours of “rest” after shipping, unpacking and powering up. I’m guessing this is a protection program to keep the compressor and electronics from damage during shipment.
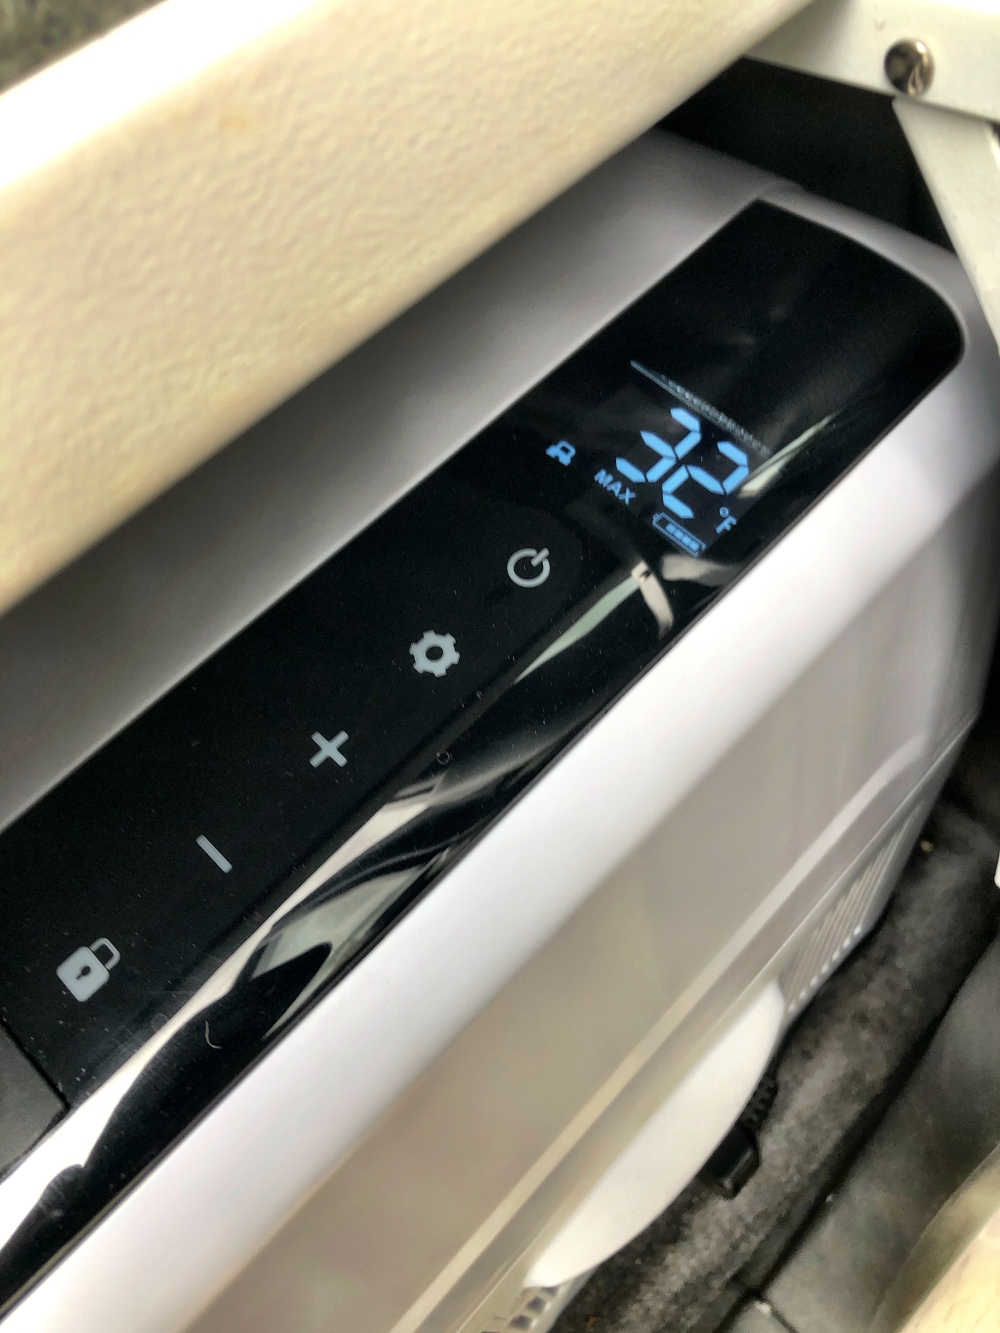
The control panel is far from intuitive and the manual is vague about operations, even missing instructions on setting user preferences such as Fahrenheit versus Celsius. A search through buyer ratings on Amazon along with a download of a manual from a previous model (under a different manufacturer) provided enough info to figure it all out. The control interface is touch sensitive and is sealed except for a USB charging port.
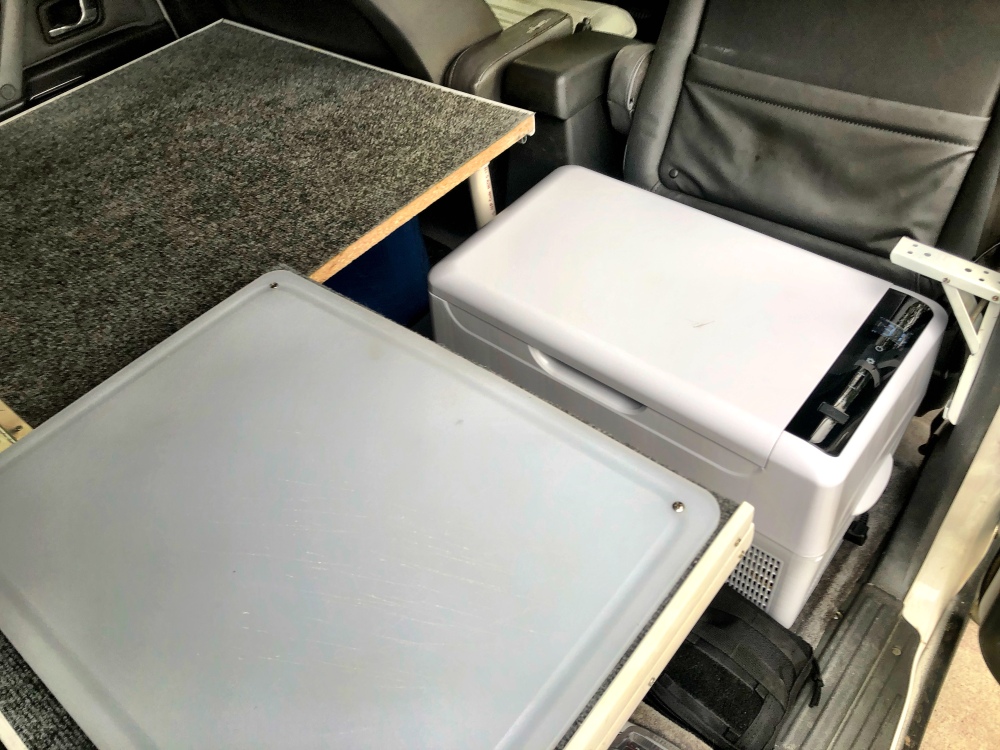
The fridge is located in its intended spot under a hinged panel on the platform behind the front passenger seat where there’s enough space around the fridge to allow air flow.
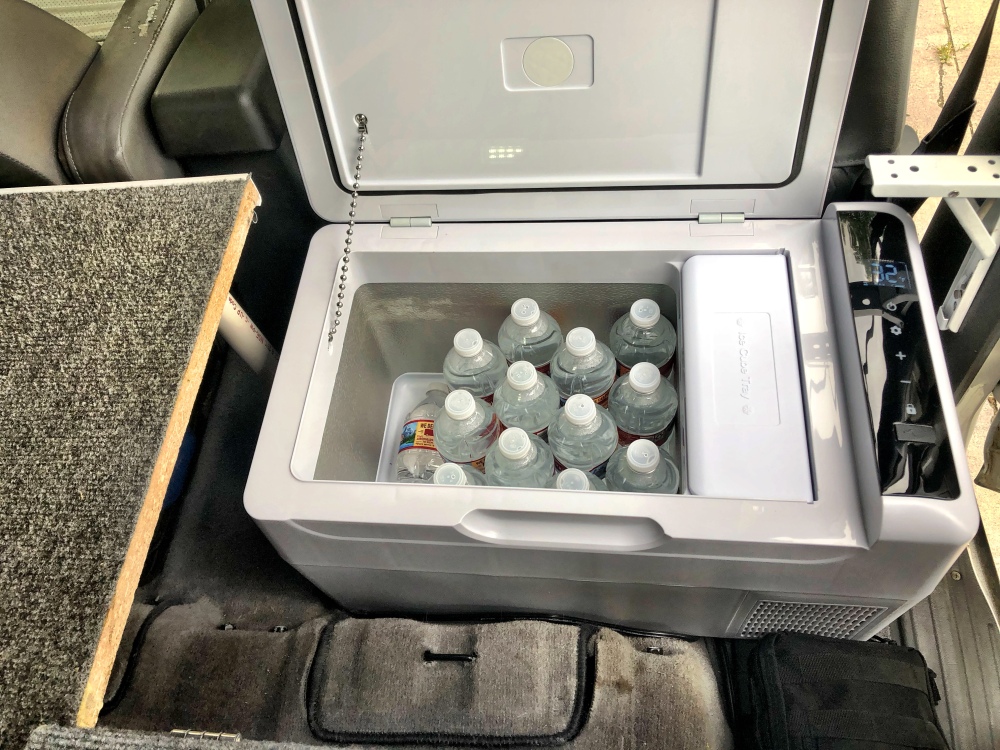
Inside its 22 Liter cabinet is an ice tray, ample enough for a pair of cocktails, along with about the same amount of room we had with a cooler full of ice. I’ll be updating this post on its performance during this summer’s adventures.
And I’m hoping it hasn’t been recalled due to spontaneous combustion.
This unit powered from the Nomad’s house 12V system I installed eight months ago. There’s a service panel under the platform accessible from the RH passenger door that has a 12V plug and a USB outlet along with a voltage meter. (I’d normally post a link, but as I’ve searched for it, the C22 model is now nowhere to be found on Amazon.)
Power is distributed from the house battery via this Blue Sea blade fuse block to two panels, the one that powers the fridge and another on the rear of the platform.
The C22 fridge is Aplicool’s latest and it has its quirks, perhaps the reason it can’t be found on Amazon. It’s not plug and play, but instead requires several hours of “rest” after shipping, unpacking and powering up. I’m guessing this is a protection program to keep the compressor and electronics from damage during shipment.
The control panel is far from intuitive and the manual is vague about operations, even missing instructions on setting user preferences such as Fahrenheit versus Celsius. A search through buyer ratings on Amazon along with a download of a manual from a previous model (under a different manufacturer) provided enough info to figure it all out. The control interface is touch sensitive and is sealed except for a USB charging port.
The fridge is located in its intended spot under a hinged panel on the platform behind the front passenger seat where there’s enough space around the fridge to allow air flow.
Inside its 22 Liter cabinet is an ice tray, ample enough for a pair of cocktails, along with about the same amount of room we had with a cooler full of ice. I’ll be updating this post on its performance during this summer’s adventures.
And I’m hoping it hasn’t been recalled due to spontaneous combustion.
Taylor1
Observer
Glad to see someone else happy with alpicool. Ive had the aplicool C15 from amazon a year now. Mine has the cheaper plastic body with basic temp and button display, but functionally it has done very well on three long weekend trips out. Its slides under the rear platform for camping and into the garage for DD duties. Models and stock available is definitely weird on amazon. I saw a another alpicool stainless body version for sale on amazon recently.
Forum statistics
Members online
- ThebigMT
- Wakeup2river
- andycygan
- seantos
- syn0s
- FJRanger
- rumin8
- LYlqoY2Fo
- Off-road Maverick
- Erockin
- Greg03XLT
- JaSAn
- TNJed
- Cgswimmer24
- Neikko
- svmaple
- Jess831
- Charles_Alarie
- Raisinhead
- austastar
- jkalodimos
- dstefan
- Ghfalls
- HFDesignworks
- lanceatm
- Fadeagray
- Victorian
- LivinAnAdvntr
- gabrielef
- stickboy27
- shouldaboughtahat
- 67 Fastback
- rlynch356
- webfoots
- metres
- TWExplor
- OverlandNSX
- Bamagirlaz
- jethro5
- Curly42
Total: 1,045 (members: 43, guests: 1,002)