Uglyduck
Adventurer
For the last year I've been searching for a backcountry navigation app that would give me all the following features:
I've used 3 other apps in the hopes that all of these features would be available and this was the only one I've used so far that does. Others offered some features like USGS maps but wouldn't import complete GPX files (waypoints only, no track) nor would they offer a tracking feature. Others still would import tracks but didn't use USGS quads. I'm partial to the USFS and USGS maps as thats what I'm accustomed to and they provide excellent data and detail.
iHike lists the features above in addition to several others:
I was apprehensive about spending more money on another nav app which was made worse by the lack of reviews for this app. I was pleasantly surprised in its design and execution. Below, I'll break down each menu and provide a discription.
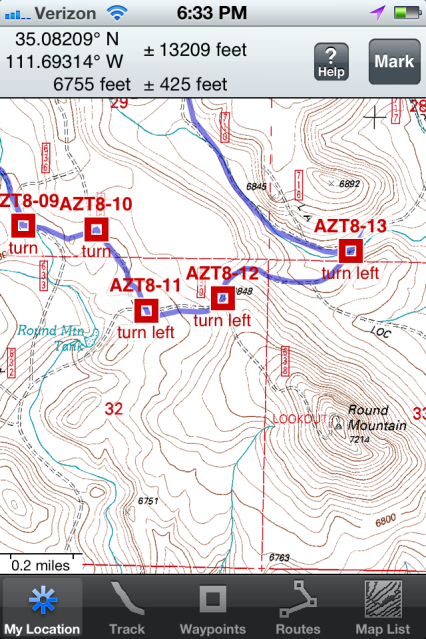
My Location:
Your location is provided via the interal GPS receiver on your device over a map of your choice. You can download both US Geological Survey maps as well as US Forest Service maps. Personally, I prefer the USFS maps as they provide the best backcountry road information for my region.
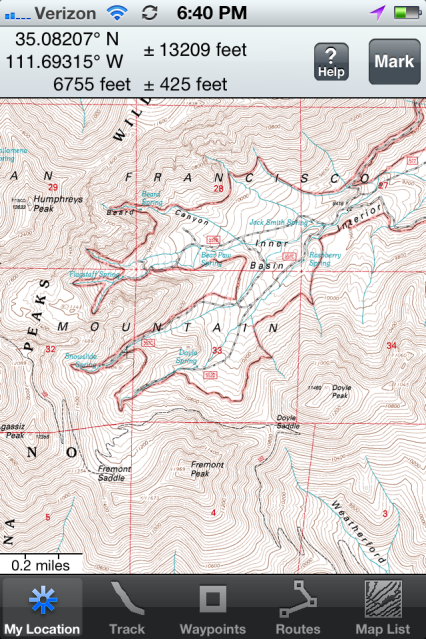
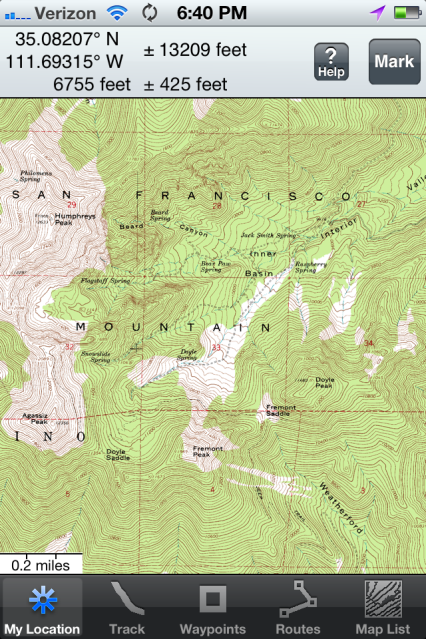
USFS Map vs. USGS Quad
Downloading maps:
This is easily done from the Map List button. Once pushed you are provided with several options to download maps as seen below. You can store up to 200 maps which is plenty for my needs.
View of the On-Map locator sub-menu. You move the crosshairs over the region you want a map for and tap Done.
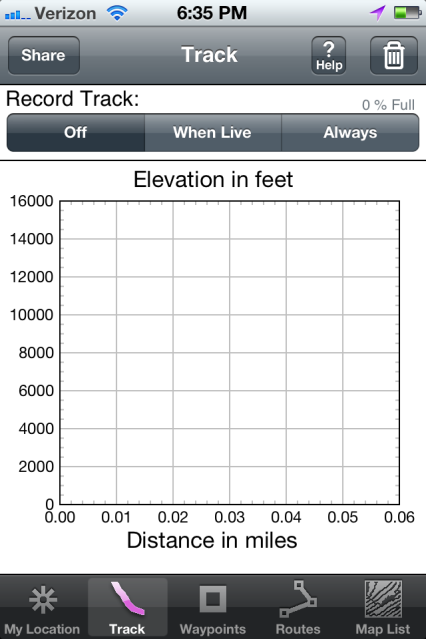
The Track page will display your trip data like mileage and elevation. You have the option of tracking your route "When Live" meaning only when the app is open and running or "Always" in which it will track you even when the device is asleep.
Waypoints:
The waypoints menu will provide you a list of each waypoint saved on your device.
Waypoints List

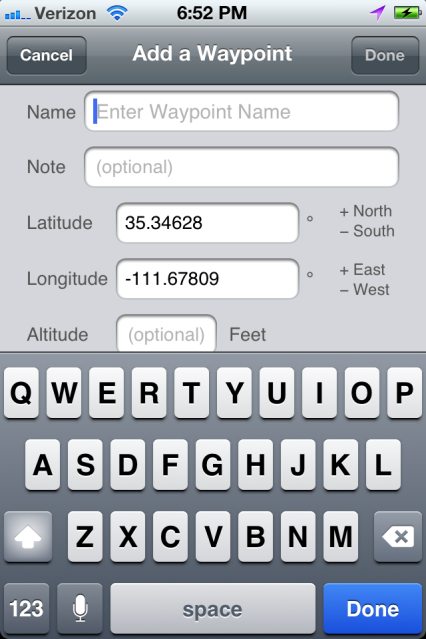
Waypoint marking menu
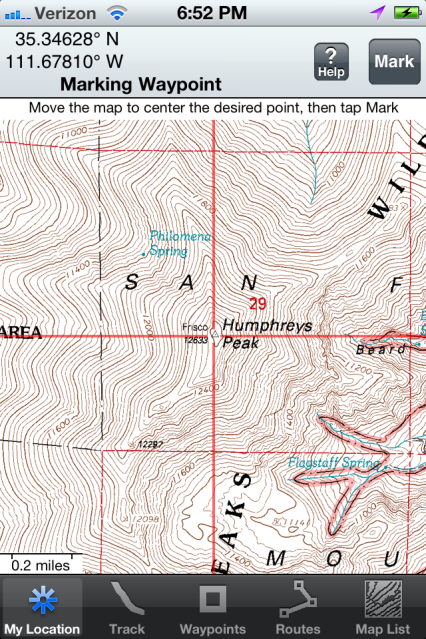
By hitting the "Mark" button on the My Location screen you can create a waypoint for your current location or one anywhere on the current map (double tap the next map to view it or download it). You simply move the crosshairs over your desired waypoint, tap "Mark", and input a name or notes. This is the easiest way to create a route and is covered in the "Help" menu within the app.
Routes
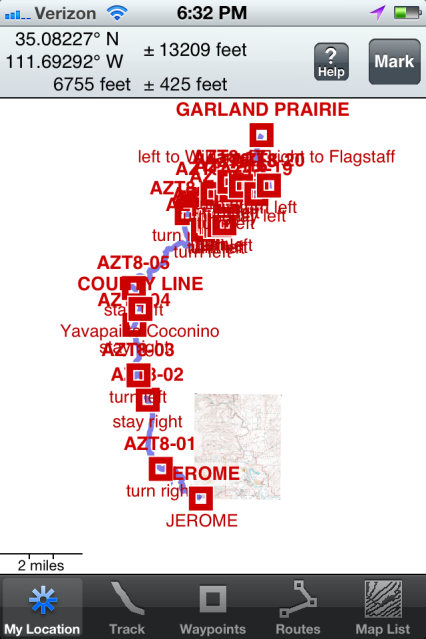
Routes can be imported in a GPX file format via email, iTunes, Dropbox, or created using waypoints already on your device. The route below was uploaded from the EXPO resources page and is from Jerome, Az to Garland Prarie, Az. The map shown is small because I panned out to show the entire route. Zooming in and out is done with the usual iPhone pinch and zoom. While in route the maps will automacally pan from one to the next as your GPS signal passes through them. You can center the map over a geographical feature or double tap "My Location" and it will lock on and center your current location.
Help Menu
Within the app is an offline help menu. It provides a step by step guide for marking waypoints, creating routes, a map key, and a description of each screen. Its an invaluable resource to provide answers on the fly and provides many shortcuts.
Conclusion
This app provided all the features I was looking for and more. In my humble opinion its features rival those of some stand alone GPS units. The developer provides consistant updates and improvements through user feedback. The app is also available on iPad and its a killer way to use it. Its loaded on my wife's 1st Gen iPad but unfortunately its the non-3G model so it doesn't have a GPS.
For reference, I hard wired an iPhone cable to my Tacoma's stereo which provides power and audio http://pac-audio.com/. This allows me to keep the iPhone charged on the road and utilize its other features. Of course, I back it up with paper maps and a compass when needed but the setup has proved reliable thus far. I plan on conducting more field trials when the roads open in the spring and will provide more information on signal reliability and accuracy. Also, I'm not affiliated with the developer, I'm simply a satisfied customer that believes many in the EXPO community could use this app.
- Live time tracking on a USGS topo map
- Import/Export GPX files
- Route planning on the iPhone
- Tracking
- Ability to use US Forest Service maps
- Free maps
- Offline maps
I've used 3 other apps in the hopes that all of these features would be available and this was the only one I've used so far that does. Others offered some features like USGS maps but wouldn't import complete GPX files (waypoints only, no track) nor would they offer a tracking feature. Others still would import tracks but didn't use USGS quads. I'm partial to the USFS and USGS maps as thats what I'm accustomed to and they provide excellent data and detail.
iHike lists the features above in addition to several others:
- Record tracks even while your device is asleep
- Measure distance and direction to any point on a map
- Set a Go To waypoint or a route and see distance, bearing, course, compass heading, and ETA
I was apprehensive about spending more money on another nav app which was made worse by the lack of reviews for this app. I was pleasantly surprised in its design and execution. Below, I'll break down each menu and provide a discription.
My Location:
Your location is provided via the interal GPS receiver on your device over a map of your choice. You can download both US Geological Survey maps as well as US Forest Service maps. Personally, I prefer the USFS maps as they provide the best backcountry road information for my region.
USFS Map vs. USGS Quad
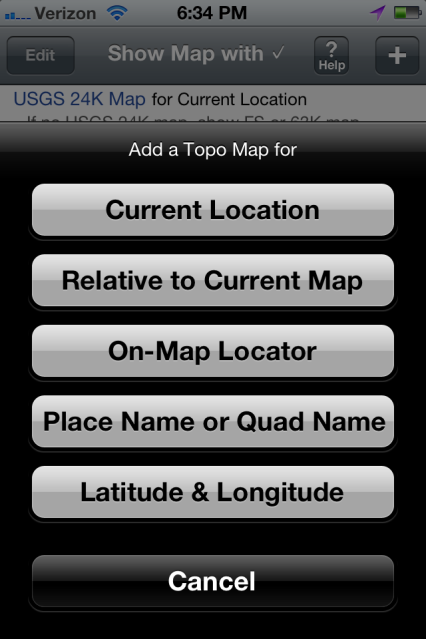
Downloading maps:
This is easily done from the Map List button. Once pushed you are provided with several options to download maps as seen below. You can store up to 200 maps which is plenty for my needs.
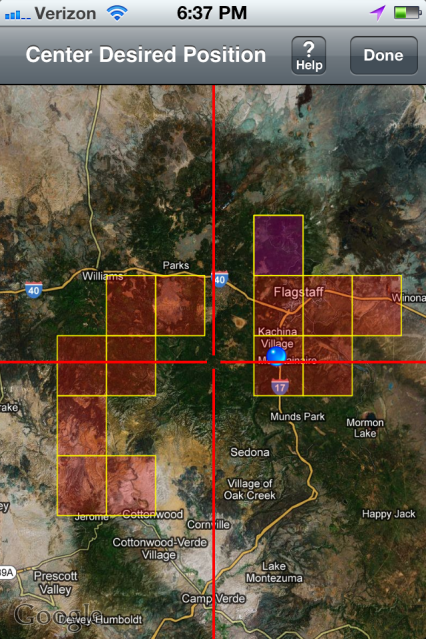
View of the On-Map locator sub-menu. You move the crosshairs over the region you want a map for and tap Done.
The Track page will display your trip data like mileage and elevation. You have the option of tracking your route "When Live" meaning only when the app is open and running or "Always" in which it will track you even when the device is asleep.
Waypoints:
The waypoints menu will provide you a list of each waypoint saved on your device.
Waypoints List
Waypoint marking menu
By hitting the "Mark" button on the My Location screen you can create a waypoint for your current location or one anywhere on the current map (double tap the next map to view it or download it). You simply move the crosshairs over your desired waypoint, tap "Mark", and input a name or notes. This is the easiest way to create a route and is covered in the "Help" menu within the app.
Routes
Routes can be imported in a GPX file format via email, iTunes, Dropbox, or created using waypoints already on your device. The route below was uploaded from the EXPO resources page and is from Jerome, Az to Garland Prarie, Az. The map shown is small because I panned out to show the entire route. Zooming in and out is done with the usual iPhone pinch and zoom. While in route the maps will automacally pan from one to the next as your GPS signal passes through them. You can center the map over a geographical feature or double tap "My Location" and it will lock on and center your current location.
Help Menu
Within the app is an offline help menu. It provides a step by step guide for marking waypoints, creating routes, a map key, and a description of each screen. Its an invaluable resource to provide answers on the fly and provides many shortcuts.
Conclusion
This app provided all the features I was looking for and more. In my humble opinion its features rival those of some stand alone GPS units. The developer provides consistant updates and improvements through user feedback. The app is also available on iPad and its a killer way to use it. Its loaded on my wife's 1st Gen iPad but unfortunately its the non-3G model so it doesn't have a GPS.
For reference, I hard wired an iPhone cable to my Tacoma's stereo which provides power and audio http://pac-audio.com/. This allows me to keep the iPhone charged on the road and utilize its other features. Of course, I back it up with paper maps and a compass when needed but the setup has proved reliable thus far. I plan on conducting more field trials when the roads open in the spring and will provide more information on signal reliability and accuracy. Also, I'm not affiliated with the developer, I'm simply a satisfied customer that believes many in the EXPO community could use this app.
Last edited:
")


