Fiberglass M416/M100 Military-style Trailer Tub Kit

jscherb

Expedition Leader
In your opinion, would it be ok to take this off-road?

Yes. If I had a roof top tent on top I'd watch how I loaded everything to keep the center of gravity low, and I'd be careful in off-camber situations, but in all the hundreds of trail miles I've done over the past 5 years the only thing that really would worry me are narrow shelf roads - I wouldn't want to back up this or any trailer on a shelf road to try to let another vehicle pass, nor would I want to negotiate very tight switchbacks on such roads. I don't do extreme obstacles since my LJ has only a 2" lift and 32" tires, so I'd say any trail the Jeep is capable of I'd be willing to take the trailer on as long as it doesn't have long shelf sections or tight switchbacks.

And I would definitely abide by signs like this...

OphirPass1_zpsdf0df090.jpg
 

jscherb

Expedition Leader
Today I installed a gas strut to keep the liftgate open (and to keep it closed tightly).

LiftgateStrut1_zps1dbtvjko.jpg


LiftgateStrut2_zpsjtenr5n1.jpg


The strut works perfectly, and applies pressure when the liftgate is closed to keep it closed. Tip about installing struts in applications like this: the top end of the strut is spaced out from the liftgate a bit with a block of wood. The reason for this is so when the liftgate is closed, the top of the strut is inboard of the bottom of the strut, therefore the force the strut is exerting in the closed position is in a direction to keep the liftgate closed. When you're closing the liftgate and get the bottom of it within an inch or two of the tailgate, you can feel the inward pressure; if you let go of the liftgate at that point it'll snap shut.

Tomorrow I'll be mocking up a kitchen counter and sink, stay tuned.
 

jscherb

Expedition Leader
Nice job!
How did you determine which strut to use for this application?
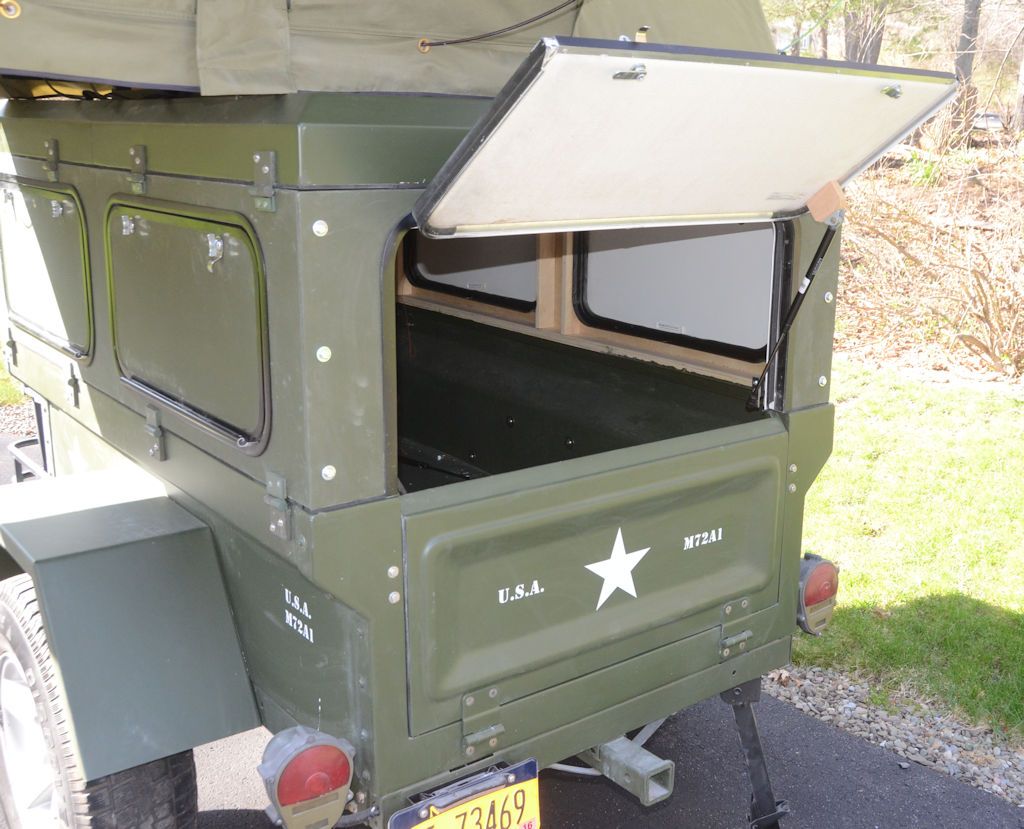
For this application I used a strut I found a while back in a surplus store for $3.00. At the time I found them I figured they'd be perfect for this application and since they were only $3.00 I bought a few. It turned out that the length and force were perfect for this and only one was required to support this light liftgate.

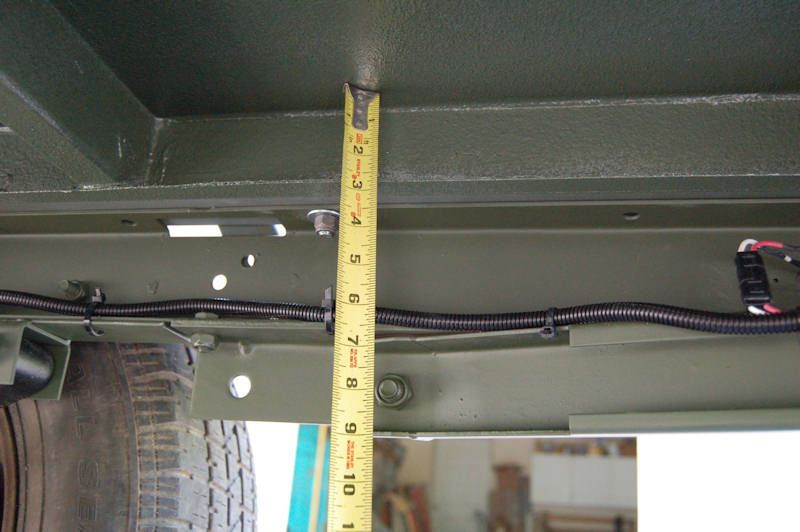
But in general, here's how I do it. You need to know the compressed length, the uncompressed length and the force. The lengths are easy enough to figure by measuring between the attachment points you plan to use with the cover or hatch closed and then open. The weight for something like this hatch is pretty easy - the hatch is very light, so almost any low force will do, say 10 lbs. But for a much larger weight, like the main cover for the trailer, I use a bathroom scale. I don't have any photos of doing this for the military trailer, but here's a photo I took when measuring for struts for the cover for my Jeep-tub trailer.

StrutForceCheck_zpsa84fa2a8.jpg


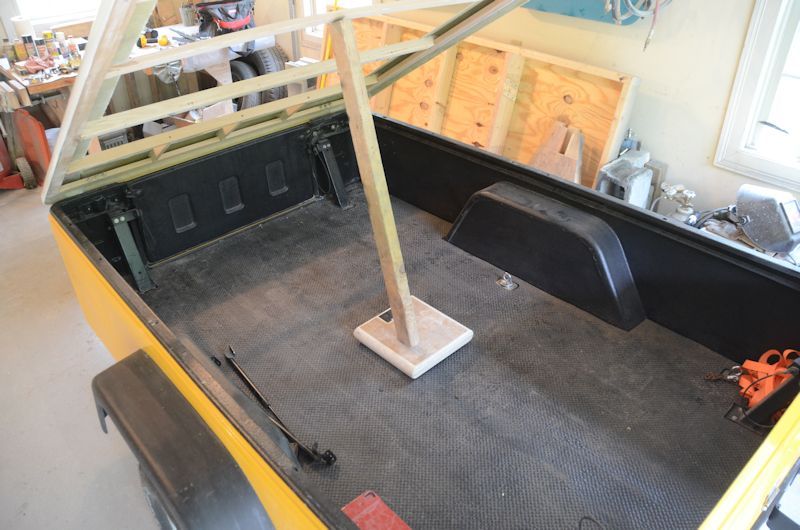
There's a board sitting on a bathroom scale and supporting the lid at the point where I plan to attach the struts. The scale shows 42 pounds, and I estimated another 25 pounds to account for the plywood that would go on later, and maybe 10 more pounds for the canvas for the camper sides. So a little over 75 lbs. total. I add another 25 percent, you want the struts to be enough over capacity so the cover is held up with some force, so two struts of about 50 pounds force each would be adequate to support this cover.

I often pick up struts in the junkyard, they're inexpensive there so I can buy a few and try them. The force of struts can also be checked also with a bathroom scale by standing above the scale and compressing the strut against the scale, which is handy to do when verifying that junkyard struts are right for an application. If I'm compressing a strut against the scale and the scale is showing 50 lbs. or a bit more, then I'd be good for this cover.

That method has always worked fine for me.

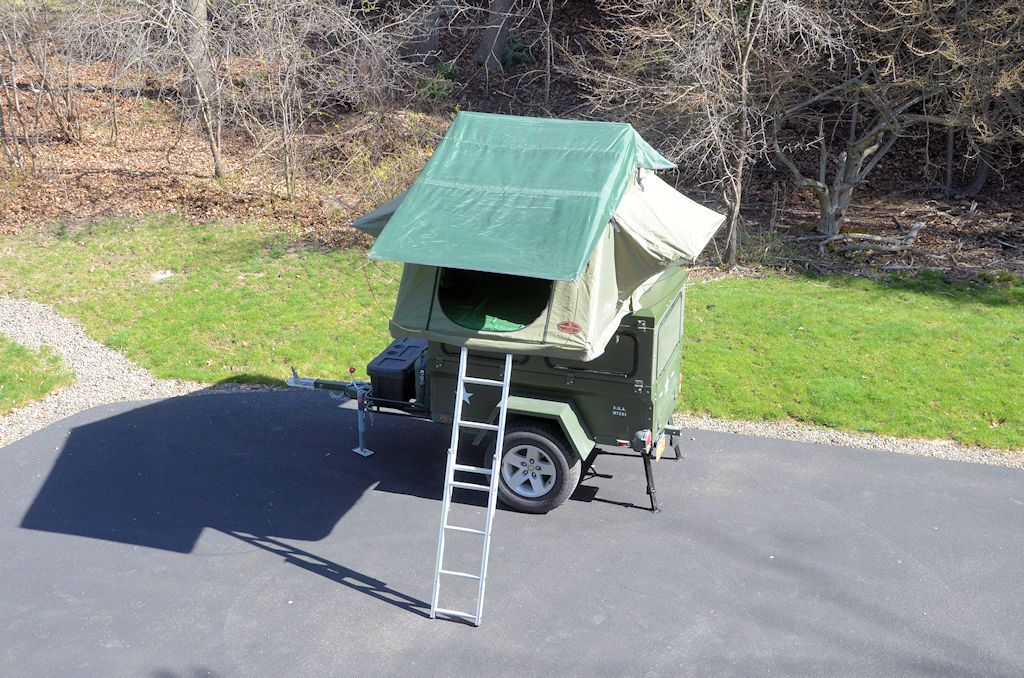
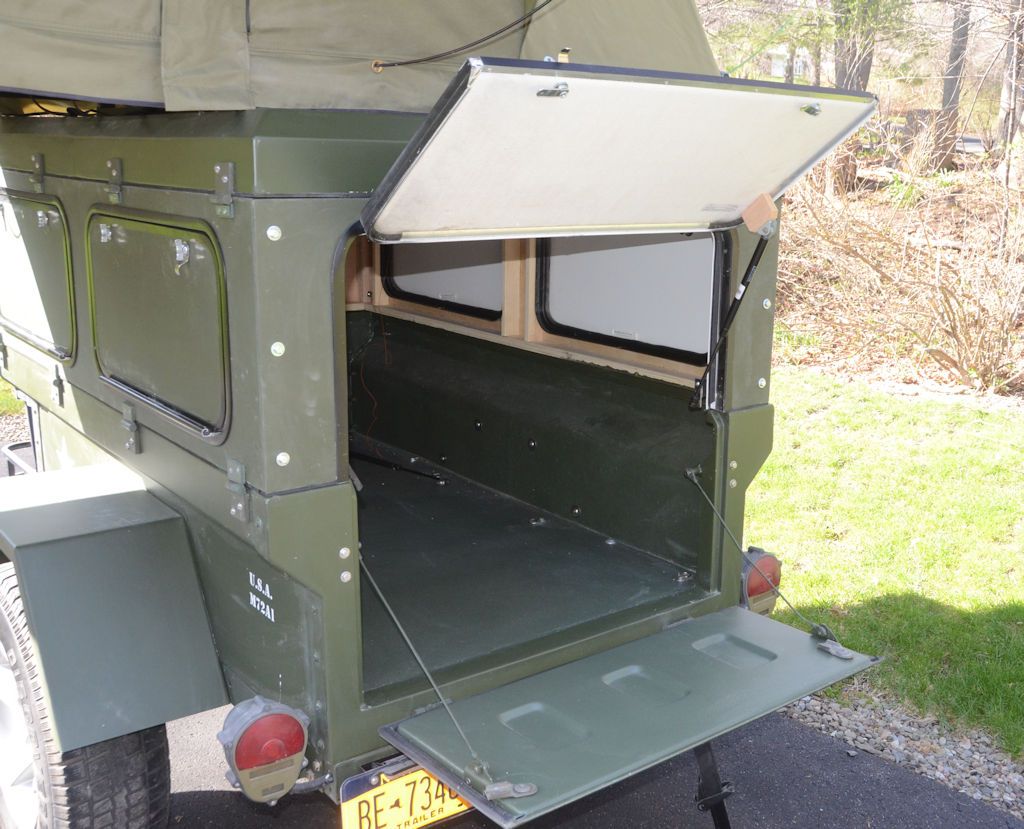
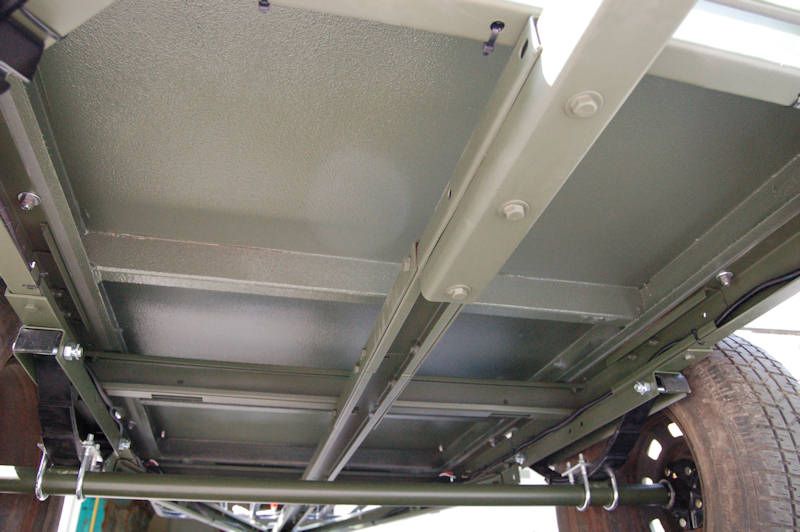
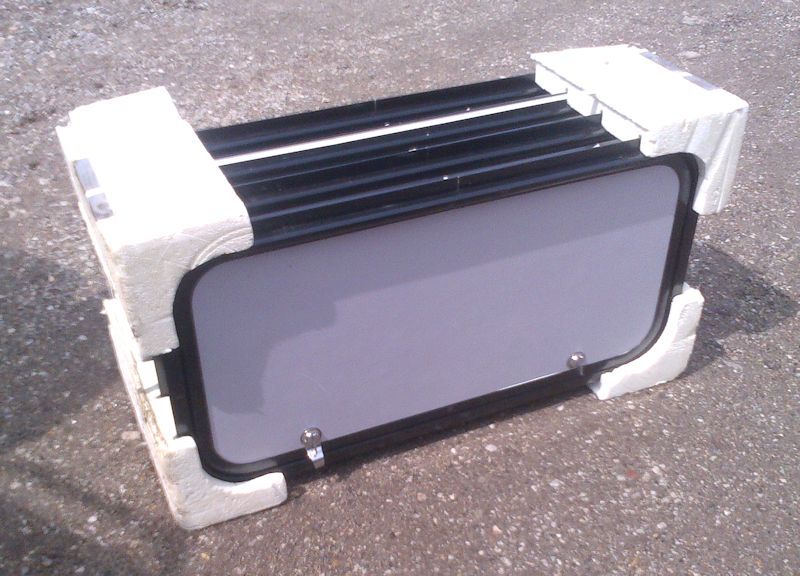
Junkyard struts installed:

StrutInstall1_zpsffc2cc27.jpg


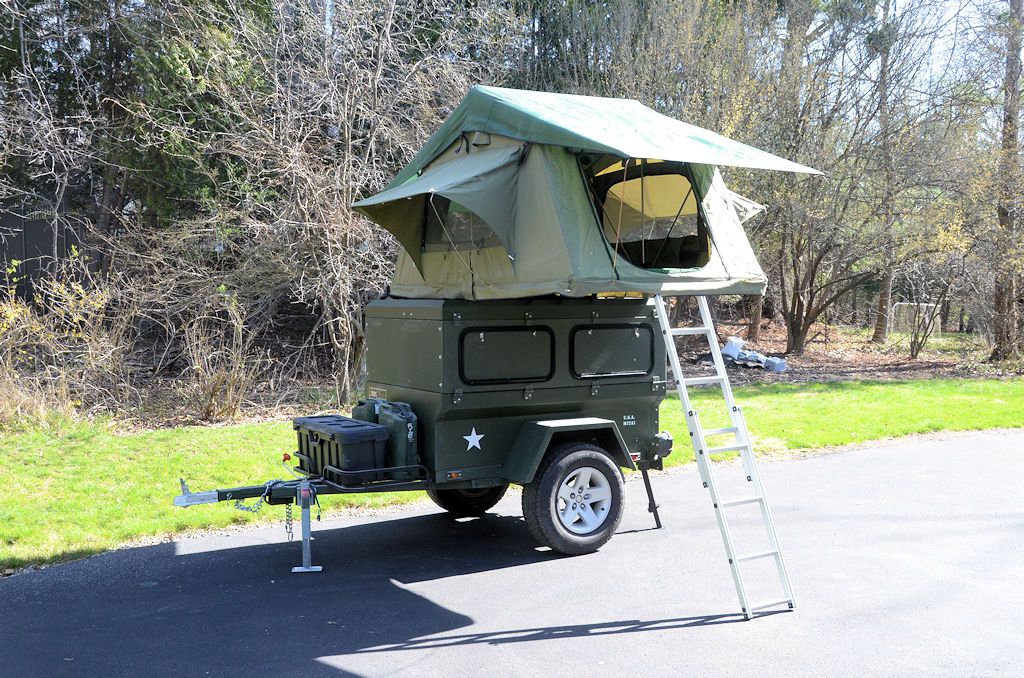
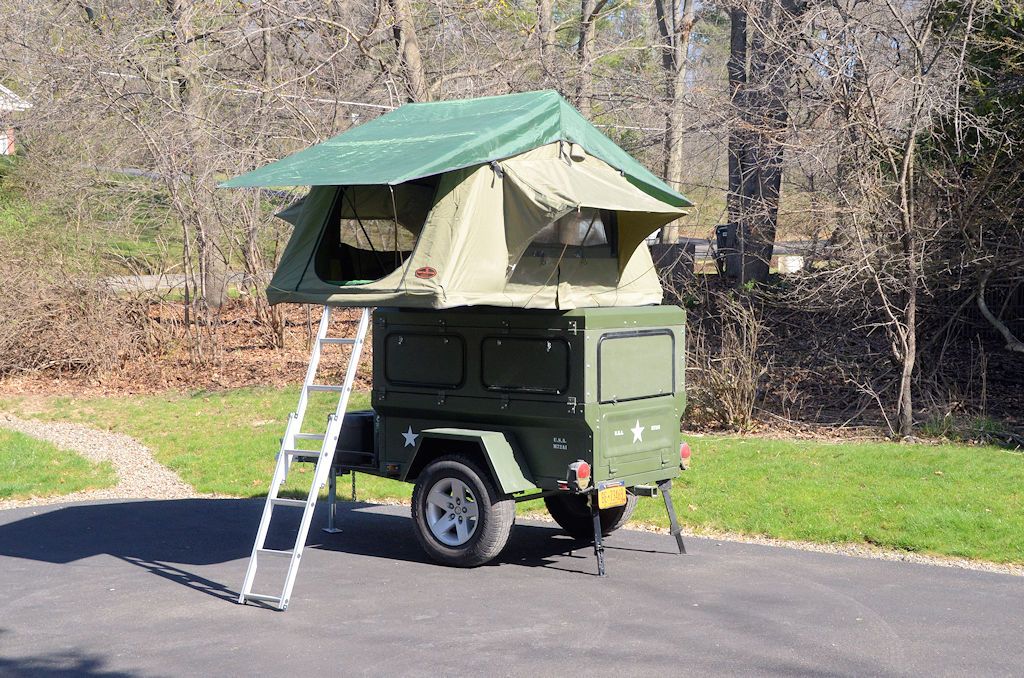
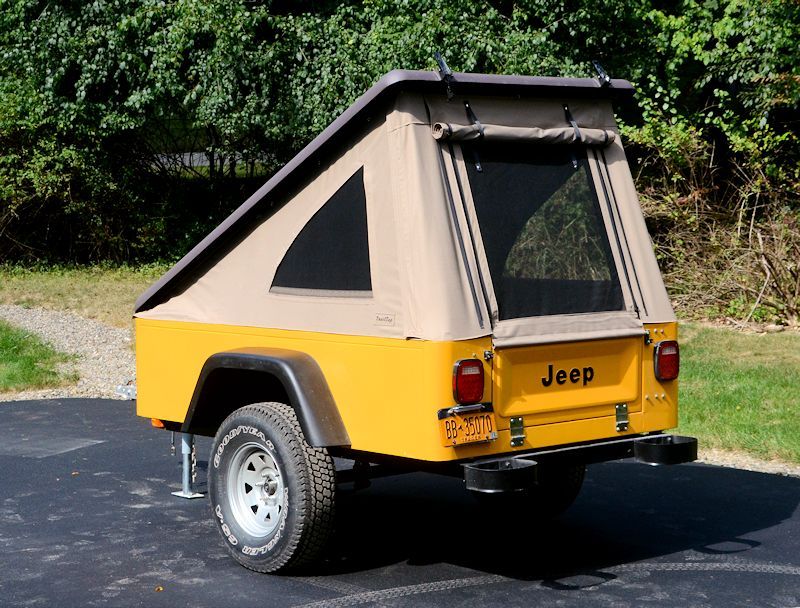
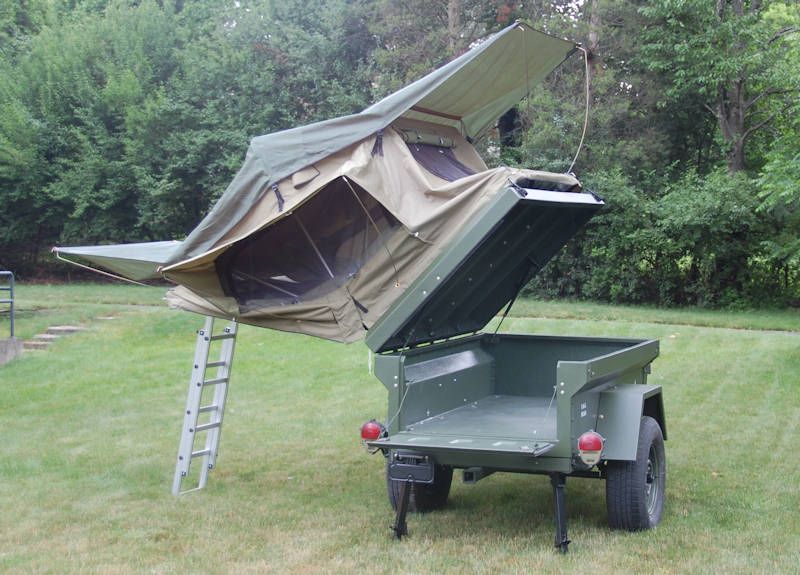
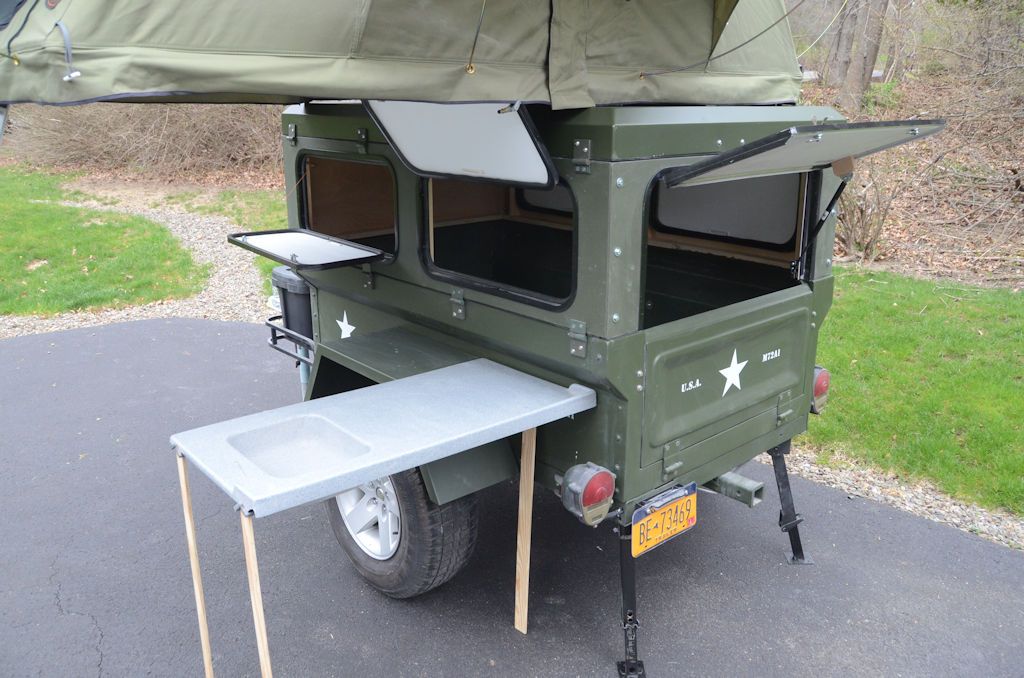
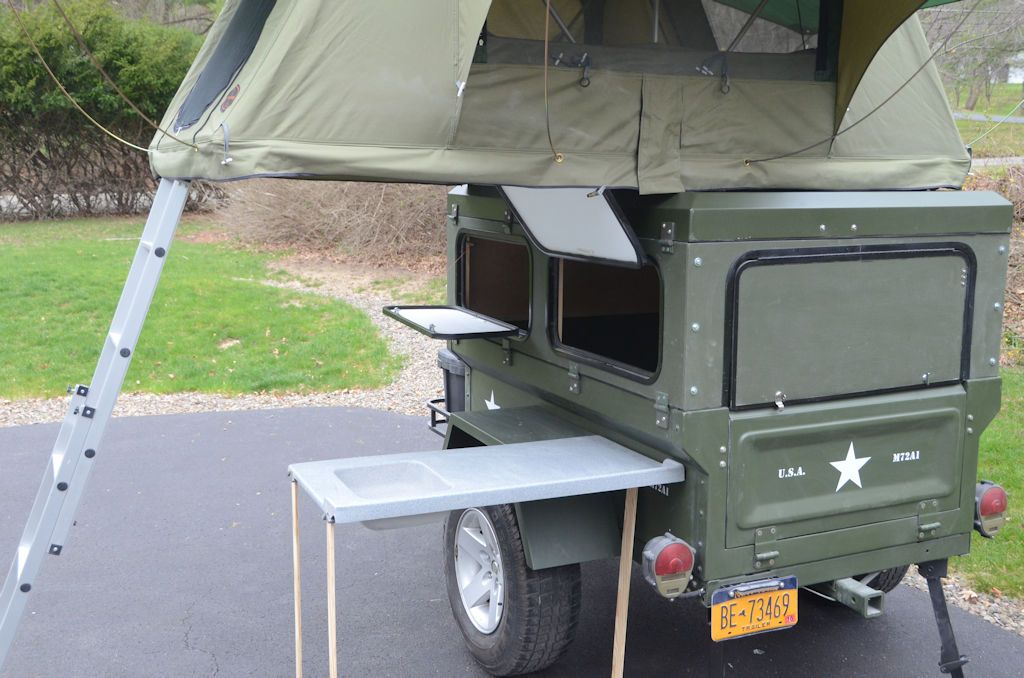
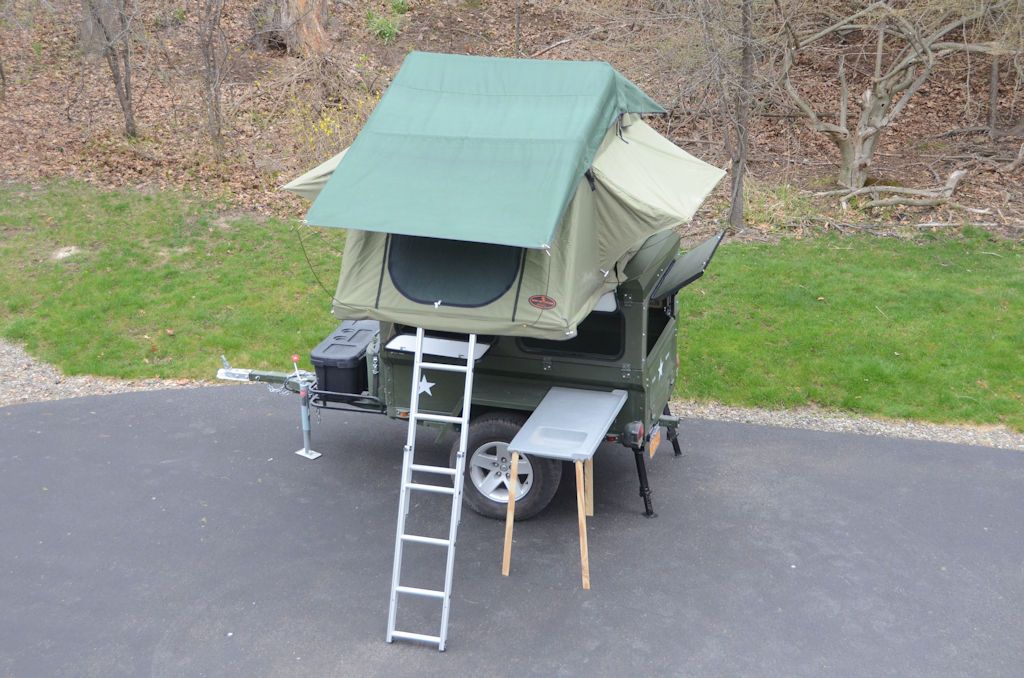
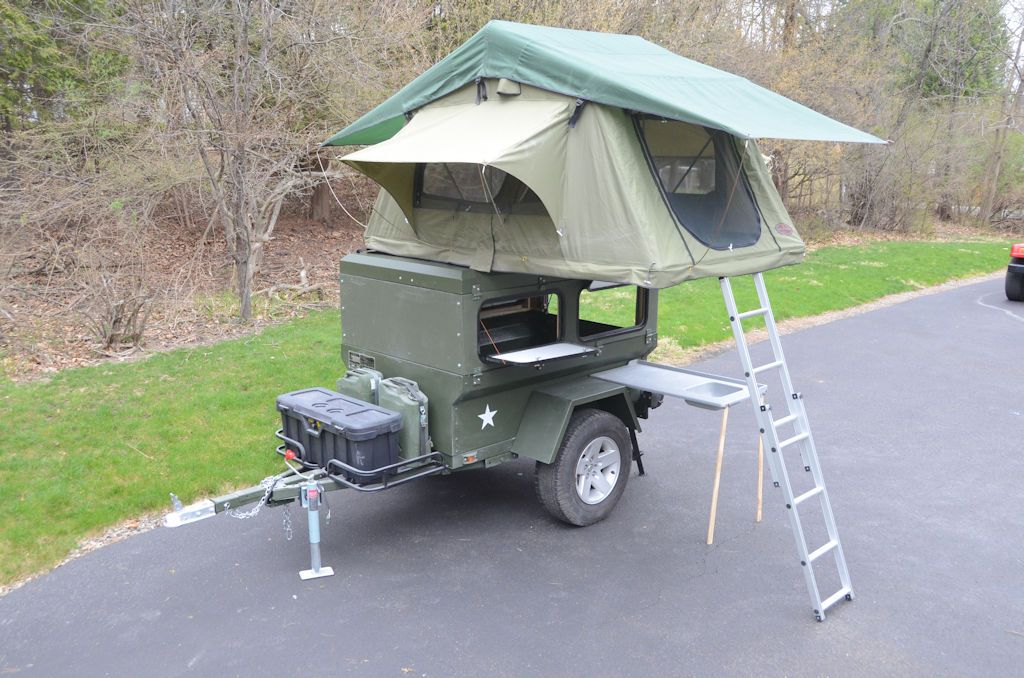
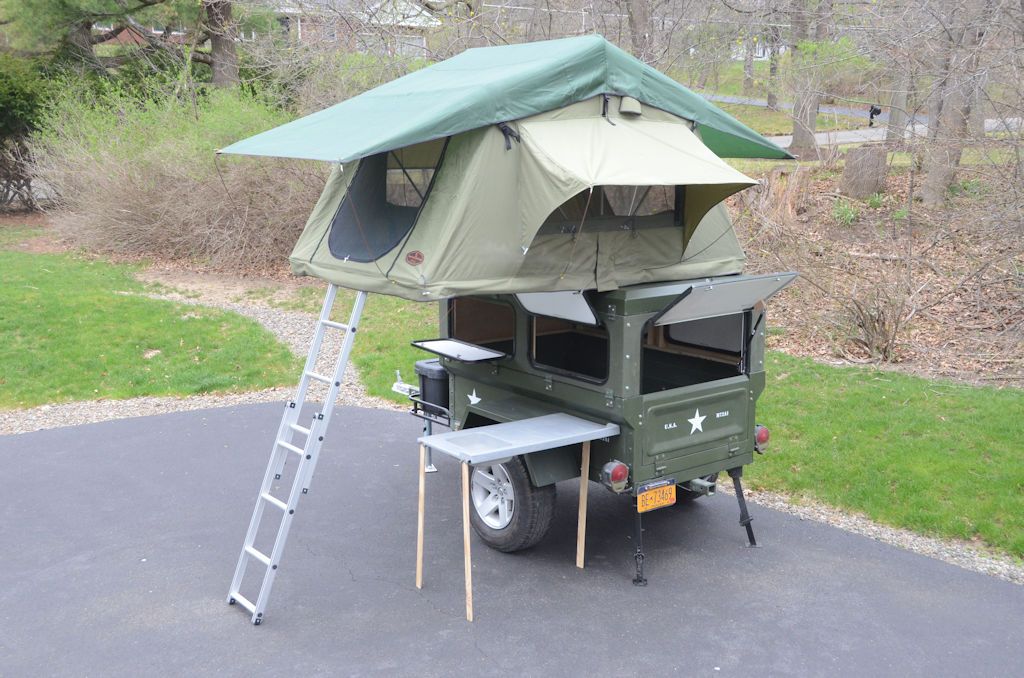
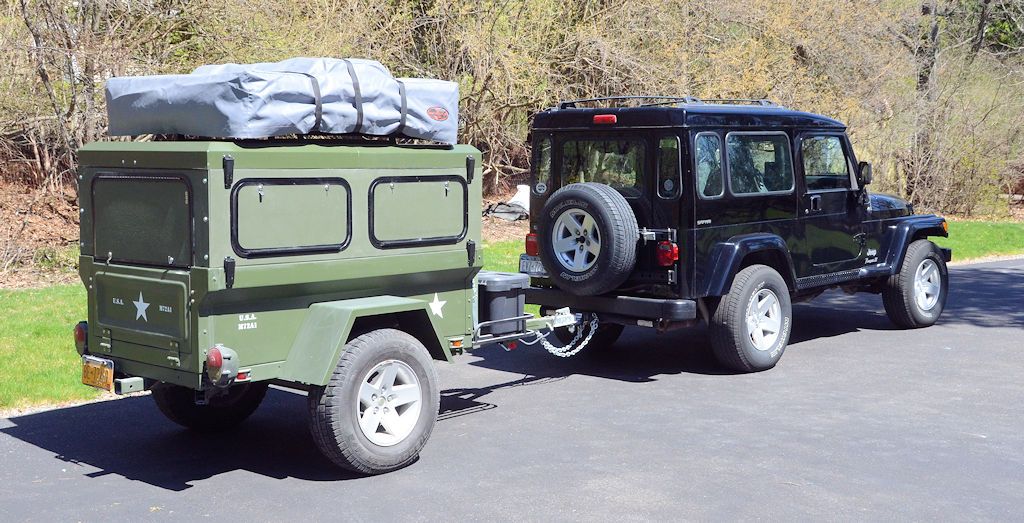
The finished cover/camper canvas:

ClamshellRescueIT11_zpsc48d2c51.jpg


You might notice that the cover in the finished photo is open to a higher angle than the unfinished cover - when I did the camper sides I decided I wanted the cover to open higher, so I went back to the junkyard and got struts with the same force but a bigger difference between the compressed and uncompressed lengths.

I used the same method when I measured for struts for the cover for this trailer.

M72RTT4_zps6697dba3.jpg
 

jscherb

Expedition Leader
Here's an idea for a kitchen setup, although if you're over 5' 10" you'd want to do it on the side opposite where you'd have the tent open so you don't hit your head on the tent (it's 5'10" from the ground to the bottom of the open tent).

KitchenConcept1_zps3fjtjfgk.jpg


KitchenConcept2_zpssxsx0ums.jpg


KitchenConcept5_zps3vxrybip.jpg


KitchenConcept4_zpsebxcxrx3.jpg


I picked up the countertop/sink at an RV surplus place for $25 a while back. I've posed it on some temporary legs at the height of the top of the fender so the fender becomes an extension of the work surface. The top of the fender is 35" off the ground, so pretty close to a standard 36" countertop height.

I've swapped the hatch above the counter to swing upwards instead of down so it doesn't cover some of the counter space.

Legs and brackets like these could be used to hook the countertop to the tub: https://www.compactcampingconcepts....p-Side-Tables/c/12943301/offset=0&sort=normal The countertop could be stored inside the trailer when traveling and hooked to brackets like these when setting up camp.

Water tank(s) could be mounted under the floor of the tub and hoses plumbed to fittings mounted just under the frame and easily accessible from the side of the trailer. I did some analysis a while back on the size of tanks that could fit under the floor, here's a photo of the underside of the military trailer and tub:

FrameUnderside1_zps979c2b52.jpg


There is about 6" between the bottom of the frame rails and the bottom of the floor (when the raised floor option is used like I've done on the prototype), but the measurement below was taken in front of the axle where the tongue triangle is bolted to the bottom of the main frame. There's almost 9" from the bottom of the floor to the bottom of the tongue rails.

FrameUnderside2_zpsa2936445.jpg


Here's the approximate size and shape of the space:

FrameStorageSpace_zpse19fc67e.jpg


Water tanks are available that would fit very nicely in that space: http://www.plastic-mart.com/category/33/rv-water-tanks?gclid=CL6Pgoul3rYCFZOHMgodQFgASQ. Looks like maybe 8-10 gallons could go on either side of the frame backbone in front of the axle, so almost 20 gallons of water under the floor. If plastic tanks like the ones linked to are used under the floor of the tub, it might be a good idea to also install a piece of sheet metal under the tanks to protect them from trail obstacles even though they wouldn't be below the bottom of the frame rails.
 

jscherb

Expedition Leader
I've got a bunch of errands to to around town this afternoon, so I've packed up the tent and I'm taking the trailer with me to make sure there's no unexpected behavior.

TentTestDrive1_zps0ekim4gr.jpg


TentTestDrive2_zpskoskor0n.jpg


TentTestDrive3_zpsbwpojwnd.jpg
 

jgaz

Adventurer
Thank you for the strut tutorial. The pictures and detail in your explanation are much appreciated.
I like where you're going with this trailer!
 

jscherb

Expedition Leader
Thank you for the strut tutorial. The pictures and detail in your explanation are much appreciated.
I like where you're going with this trailer!
Thank you. I'm very pleased with how the design worked out. I like how it looks, it went together very easily, everything works as designed, and there are lots of options for outfitting it.
 

jscherb

Expedition Leader
I've had a few questions about where one might get RV hatches like the ones I used to make the chuck wagon topper. I picked up mine at an RV surplus place called Bontragers R.V. Supplies (www.bontragers.com); the side hatches were about $18 each and the rear hatch I made the liftgate out of was about $25. They've got a great selection and the best prices anywhere, but I don't think they do mail order, so if you're not near northwest Indiana you're out of luck. I go through that part of Indiana regularly on my way to see companies in Elkhart I'm working with, and I stop at Bontragers pretty much every time.

Other than Bontragers, there are lots of hatches on eBay. Here's one that's pretty close to the size I used: http://www.ebay.com/itm/30-X-14-RV-...ash=item3aad2e213c:g:F7EAAOSwMmBVlAnF&vxp=mtr. Mine were 29" wide O.D. x 15" high O.D. and these are 31 1/4" X 15 1/2", so close enough that you could use them to do the same thing I did. Unfortunately they're about 50 bucks each.

The liftgate was made from a 36" wide hatch because that's the same width as the tailgate. Searching eBay on "rv hatch 36" usually will turn up several hatches that would serve well when modified to be liftgates. Also a little more than I paid unfortunately.

But there are hatches readily available in appropriate sizes for a project like the chuck wagon topper.

What I started with...

Hatches_zpsekvamqqi.jpg


TailgateHatch_zpso18dwydz.jpg
 

jscherb

Expedition Leader
This morning I experimented with an 81mm ammo can. Here's a few ideas.

1. It's the same height as the tub, so two could fit very nicely standing up on the tongue rails.

Dinoot81mm1_zpsmwn1zs8b.jpg


2. Sideways on the tongue.

Dinoot81mm2_zpshbsamksx.jpg


If you cut the bottom off two cans and welded the cans together at the cut-off edges, you'd end up with one can that's wide enough to go all the way across the tub for storing longer items.

3. Could mount two under the tongue rails, one on each side, with some loss of ground clearance.

Dinoot81mm3_zpsi4mzf38v.jpg


If you did that you'd still have the space on top of the tongue for a rack, jerry cans, etc. (there's no can under the tongue in this photo but you get the idea)

KitchenConcept8_zpsu1bsocsq.jpg


4. Or under the frame in the back, again with a little loss of ground clearance.

Dinoot81mm4_zpshtrgp9kk.jpg


5. On the side of the tub. I've got it positioned a little bit away from the tub to give room for the latch to open, but it could be mounted up against the tub if the latch on the top side were converted to a hinge.

Dinoot81mm5_zpsrh0zd80z.jpg
 

Forum statistics

Threads
185,894
Messages
2,879,304
Members
225,450
Latest member
Rinzlerz
Top