debated about posting a build thread. limited time these days. but, I like to pay it forward and put at least some info out there that someone else might find useful.
This will be my second offroad trailer build. This is my first:
http://offroadtrailer.blogspot.com/
http://www.expeditionportal.com/for...e-II-Addition-of-Hardsided-Folding-Camper-Top
That trailer is now for sale. PM me if interested (I don't check this site all that often, please have patience). I have not set a price yet. You could complete the camper top (very little left to do, or use as is) or remove it and the lid and you have a great M416 trailer. Air bag assist on leaf springs, 37" tires with Jeep JK bolt pattern. Brand new bearings.
The reasons I am starting a new build are the following:
- M416 requires you to lift all your gear in and out of the tub (unless you add a tailgate). With the camper top, you have to unpack fully before deploying camper. Not sure I would try lifting the lid with the camper open. Once you take all your gear out, you have to setup your kitchen and camp. Took me about an hour previously. I am lazy and don't like the setup/take down process. With two kids under 5 years, I am looking for a quicker solution. I could build a slide out kitchen, but it would basically take up all the room inside the M416.
- Trailer is a bit heavy fully loaded. I am not strong enough to lift the tongue without a jack, so getting the trailer on and off the jeep is a pain. Maybe we just have too much crap with us. But the trailer is a bit on the heavy side, especially with the camper top.
- I like building things. This second trailer is a fun new project.
The things I know I am going to miss about the old trailer
- hard-sided camper with insulation in the walls. camp in any season.
- matching tire size to jeep. swap jeep spare with trailer, so you only carry one spare.
- dust tight, waterproof storage compartment. stuff anything in there, extra clothes, down jackets, pillows etc. all stays clean and dry
- M416's are cool. cool piece of history.
- my family of 4 can sleep in the same "tent"
- no other camper in the world like this one.
- the approximately $4000 and countless hours i have into that trailer.
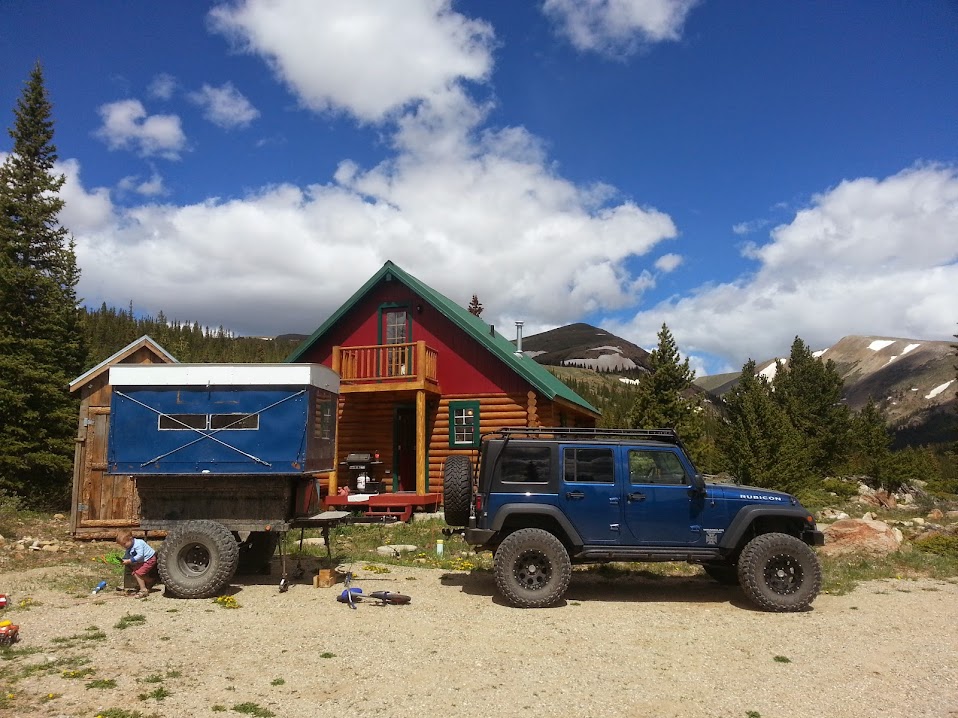
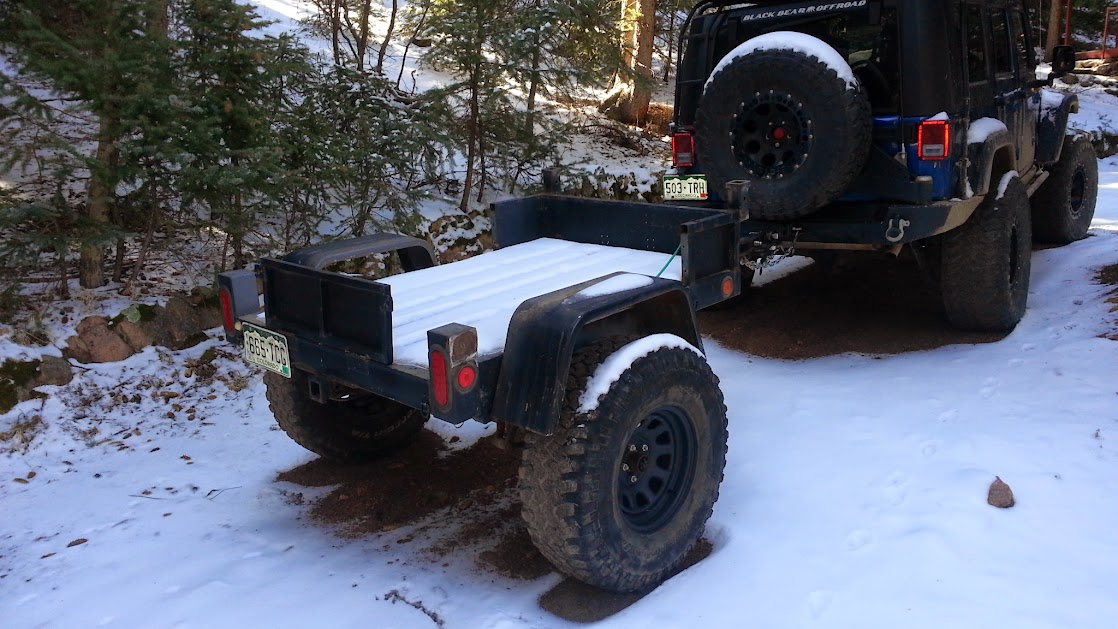
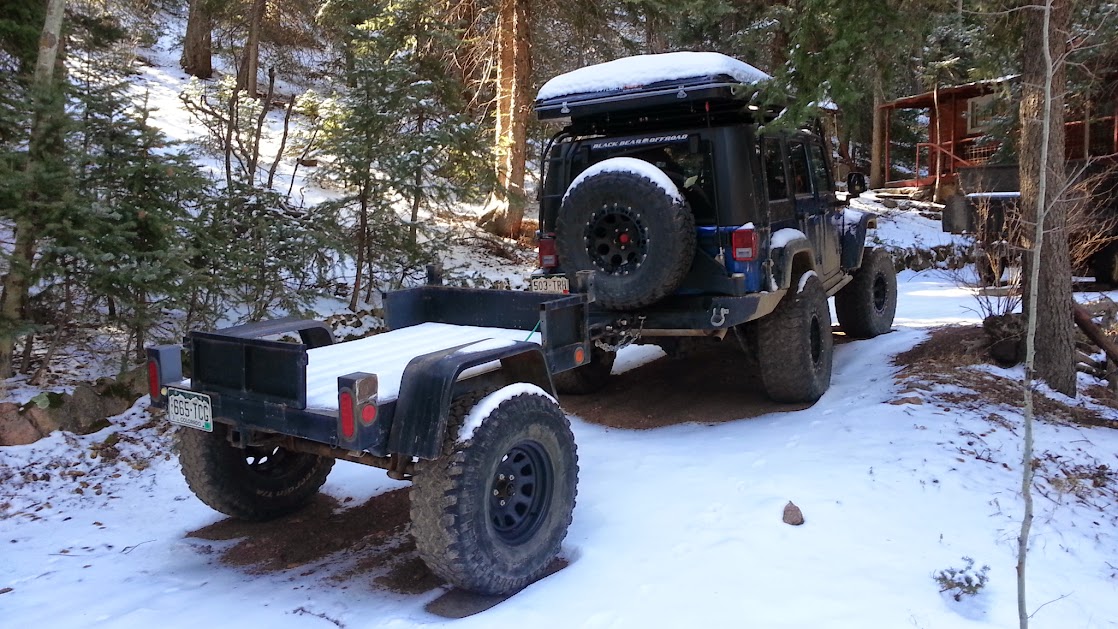
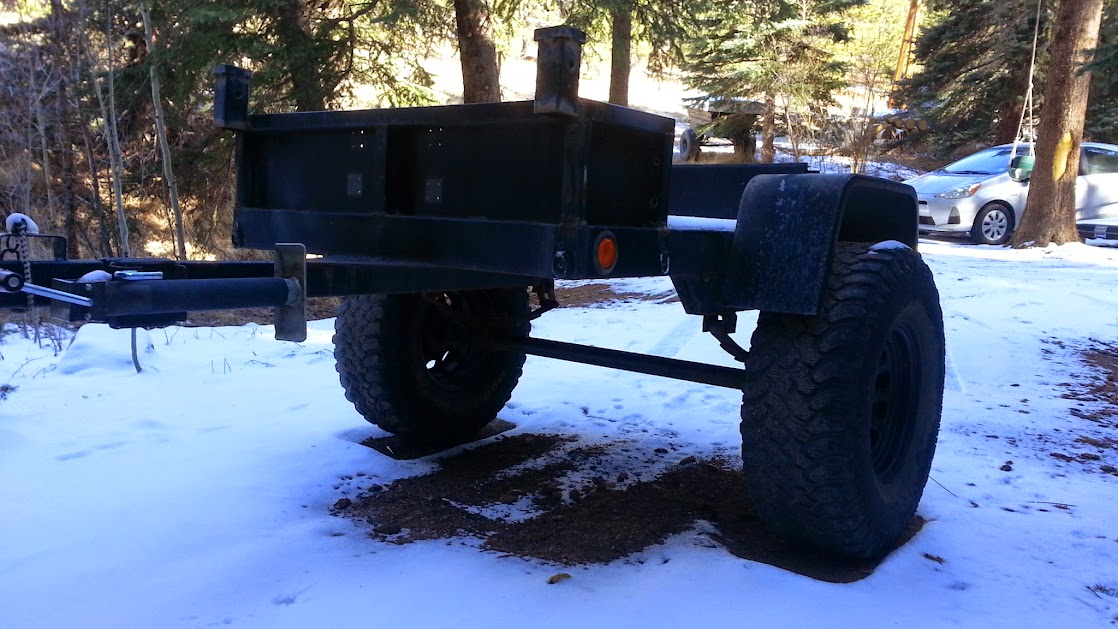
Here is the new trailer. I bought someone else's project trailer. Too good a deal to pass up.
Deal included
- homemade trailer with two aluminum truck boxes
- offbrand Autohome Maggiolina style tent - small size with aluminum ladder
- large handicap scooter type hitch cargo basket
- foldable solar panel kit
- yellow top battery
- propane tank and propane fired water heater with water tank
Here is what it looked like:


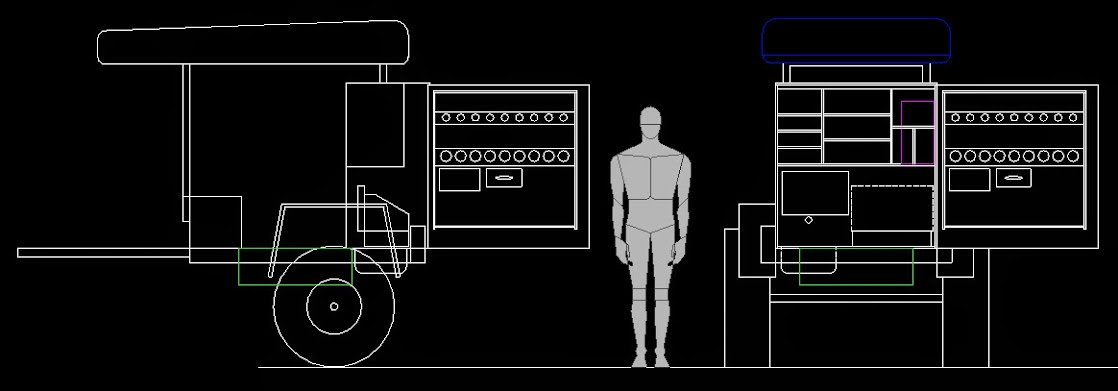
My plan
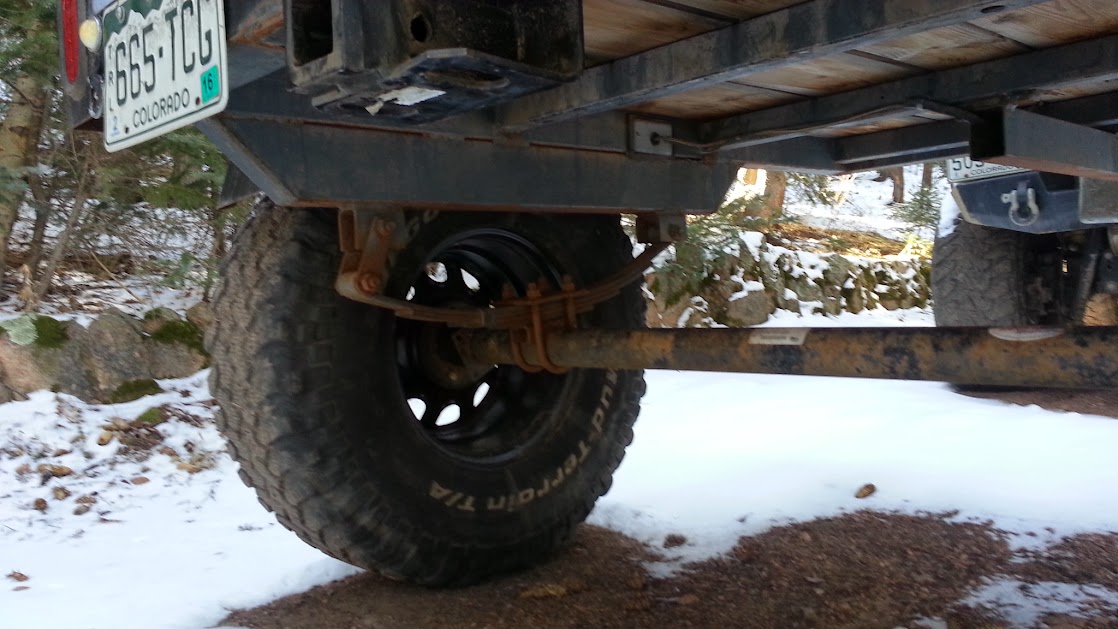
- spring over axle lift
- 33" tires (mount undersized spare under trailer)
- remove overbuilt, non-functioning metal platform.
- remove truck boxes
- remove tailgate
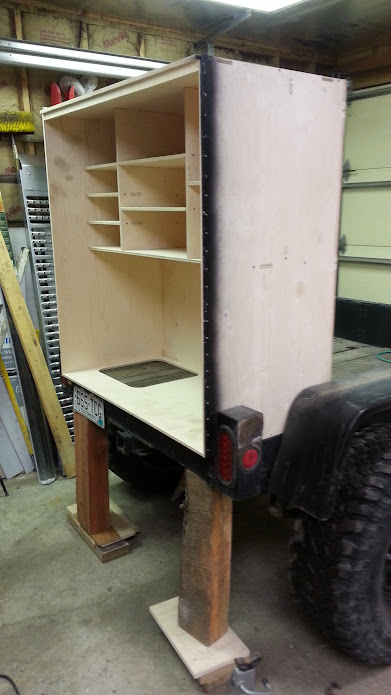
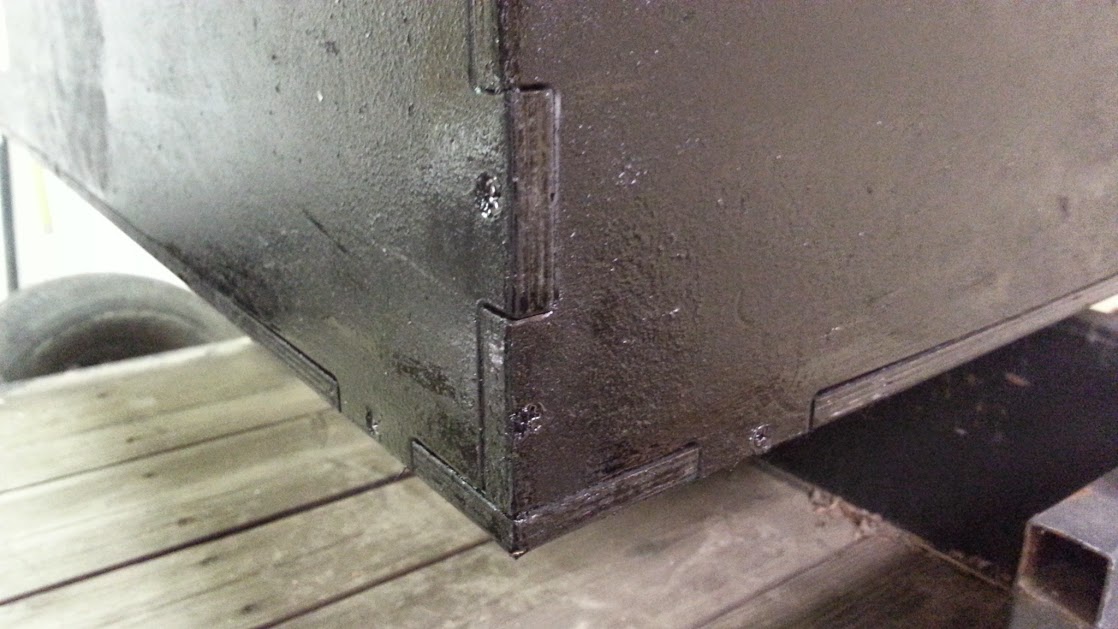
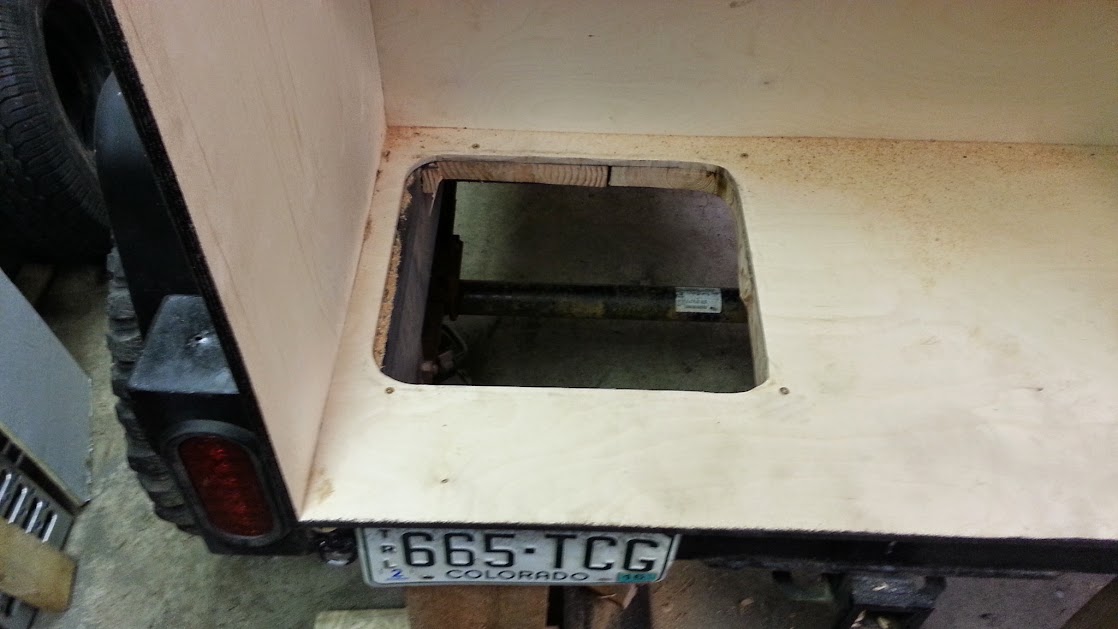
- add custom kitchen box
-remount tent up high in fixed position. same height as my jeep RTT that I recently purchased.
- permanently mounted awning. (hoping to devise awning with no legs) awning covers kitchen area.
- all sleeping bags, pillows etc will be stored in RTT's. so, no air mattresses to blow up or bedding to setup. RTT's deploy with hand crank in about 30 seconds each.
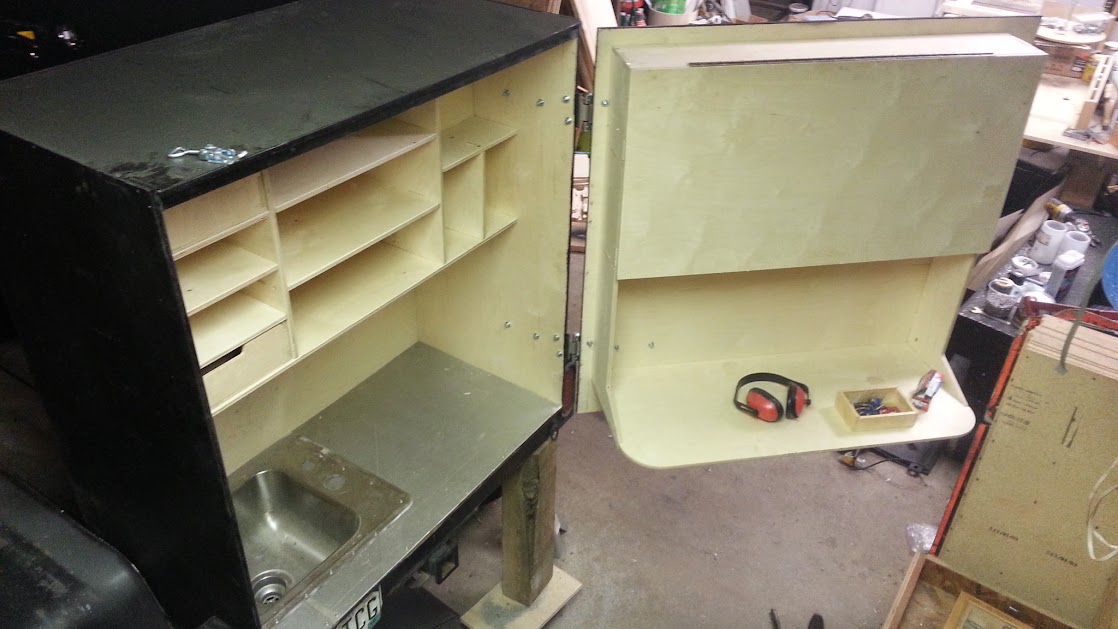
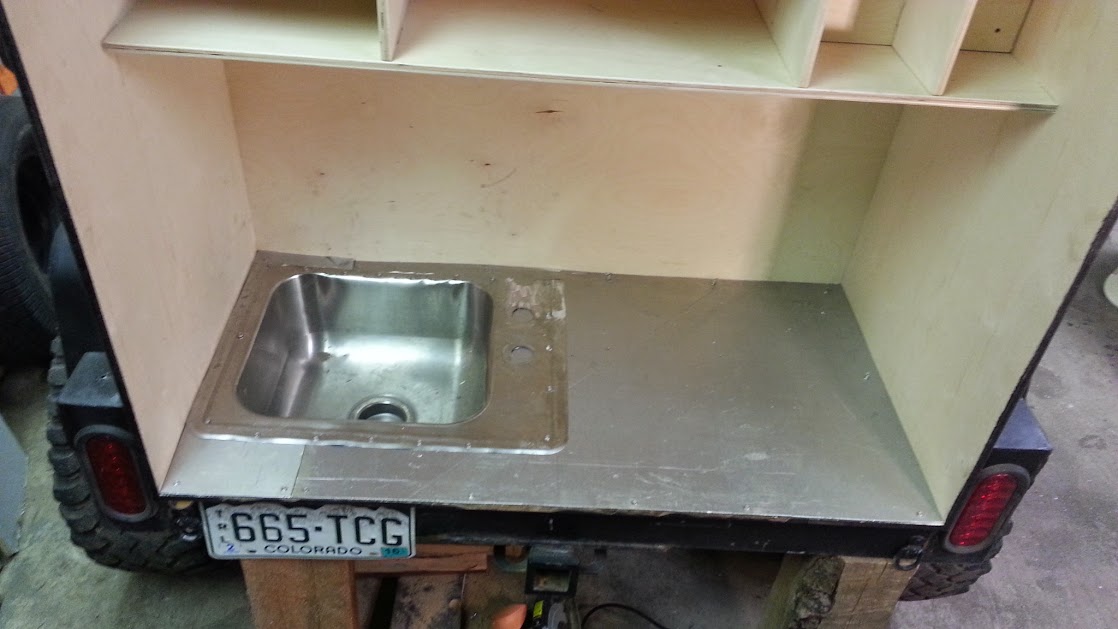
Kitchen Includes
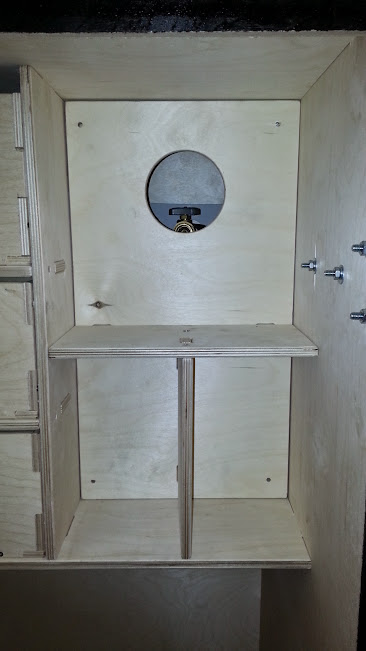
- permanently mounted and plumbed stove
- sink with gravity fed faucet. Drain to bucket or hose
- drying rack
- permanent prep counter
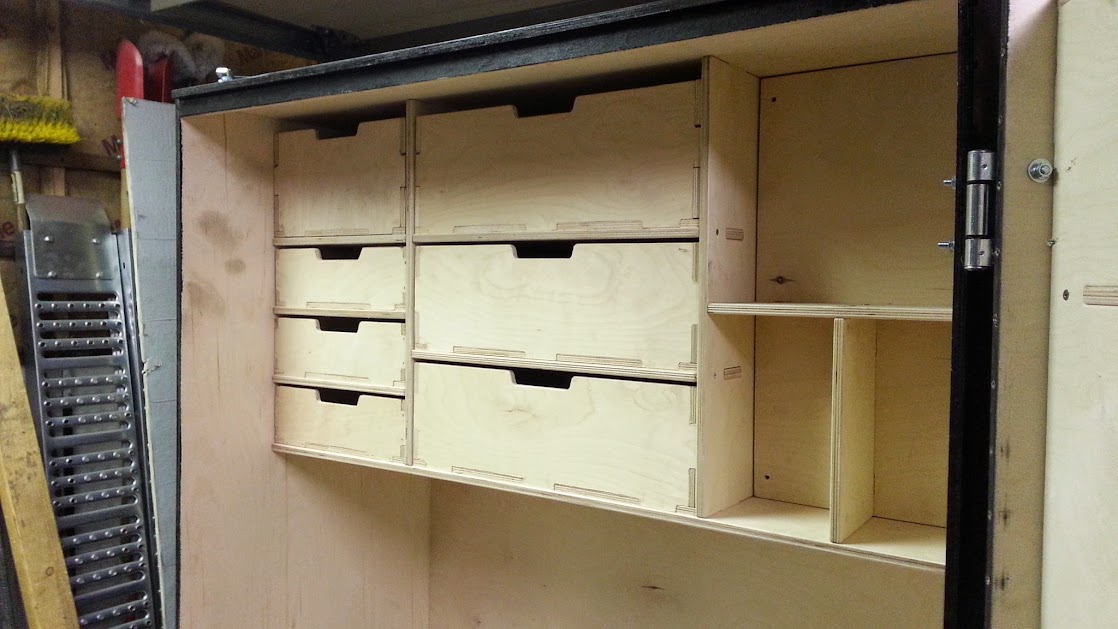
- drawers for all kitchen utensils, cups, pots, plates, etc.
- shelves for things like spices, cooking oil, sunscreen, etc.
- paper towel dispenser
Camp Setup - goal time 15 minutes.
- unhitch trailer. put down tongue jack
- deploy stabilizers in back? (not sure what these will be yet or if they are needed)
- deploy RTT's
- take bags of clothes from back of jeep, toss up in RTT's.
- open door on kitchen.
- deploy awning
- take camp chairs out of bin in trailer cargo area.
- move dry food boxes and cooler from front of trailer to ground by kitchen
this is what my RTT on my jeep looks like:
http://www.expeditionportal.com/for...NOT-the-pickup-toppers)?p=1677592#post1677592
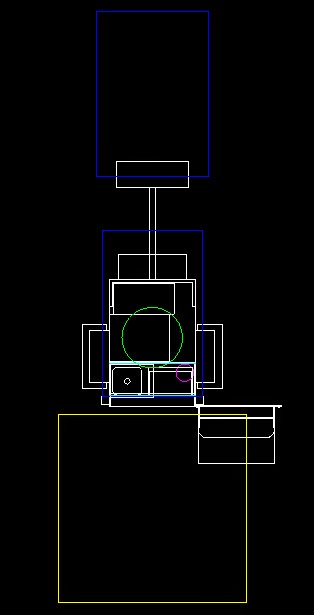
Here are my design sketches
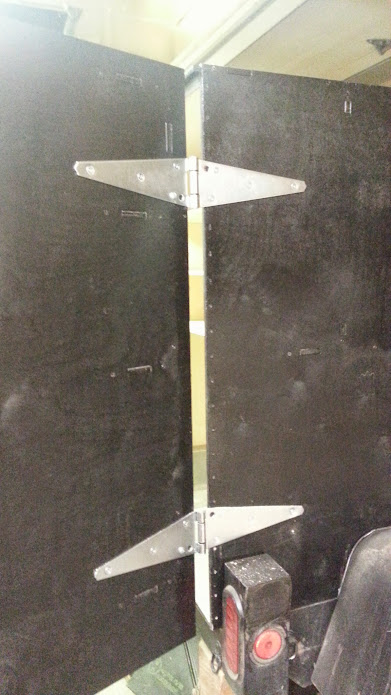
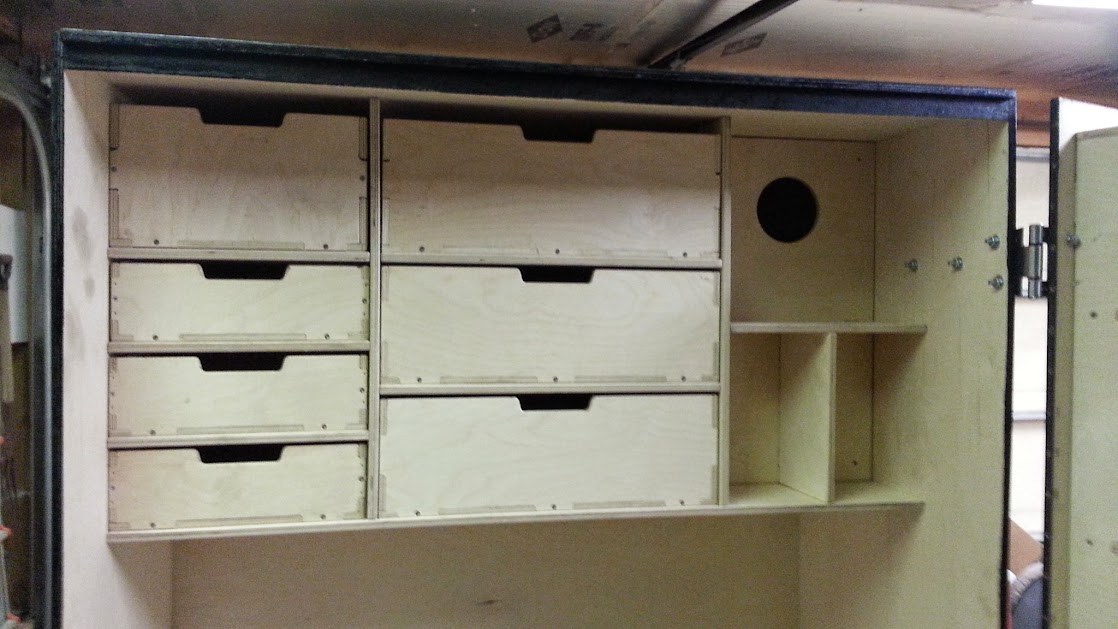
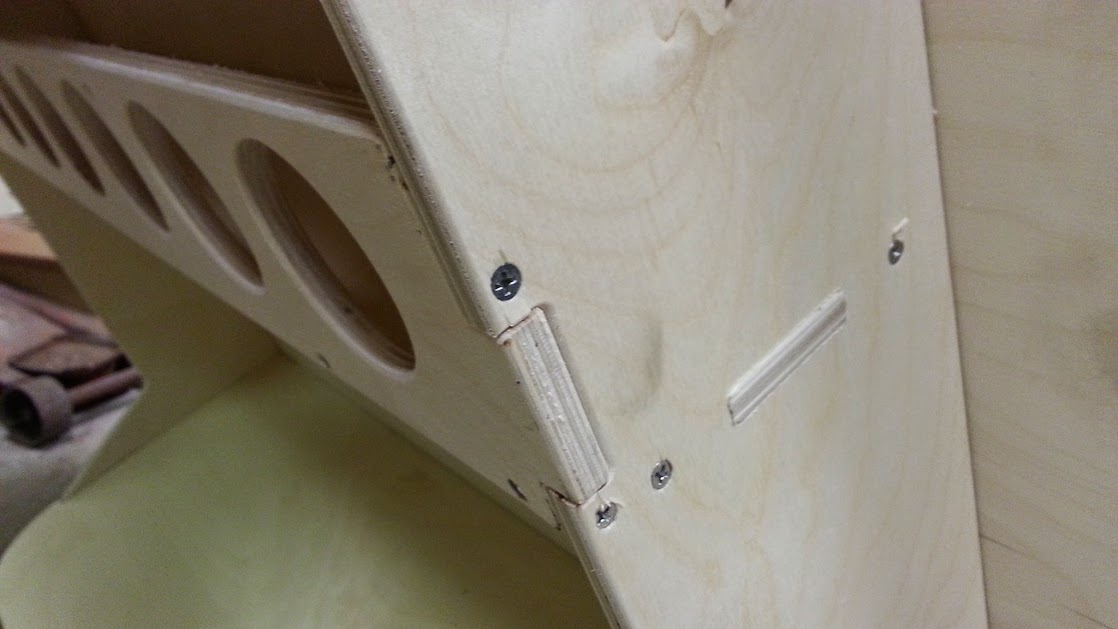
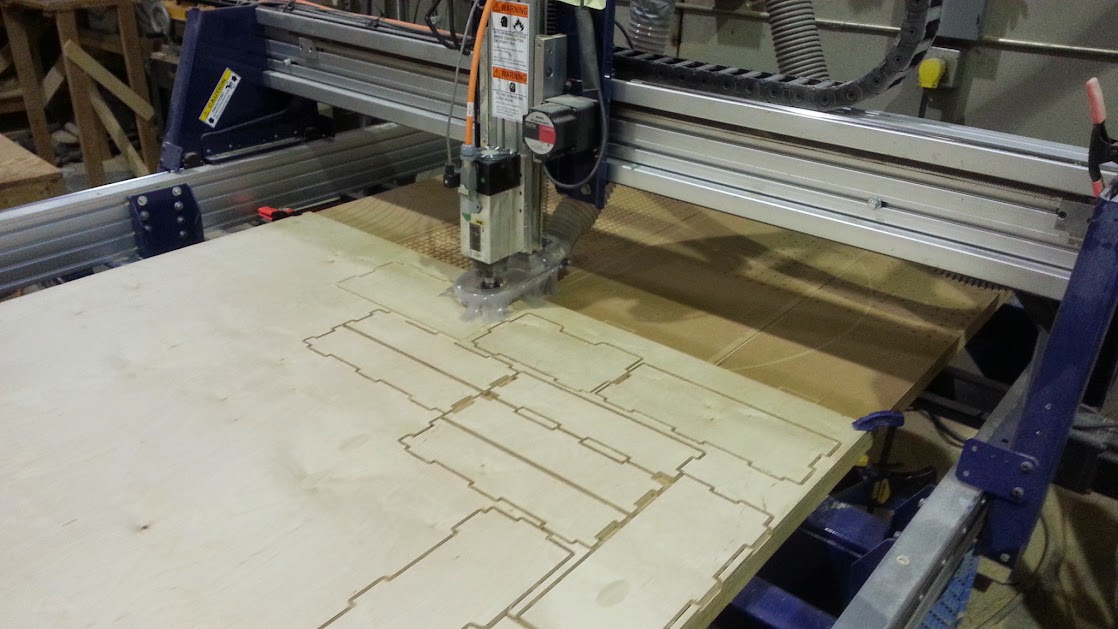
Here are the drawings for all the panels to build the kitchen box by CNC routering it

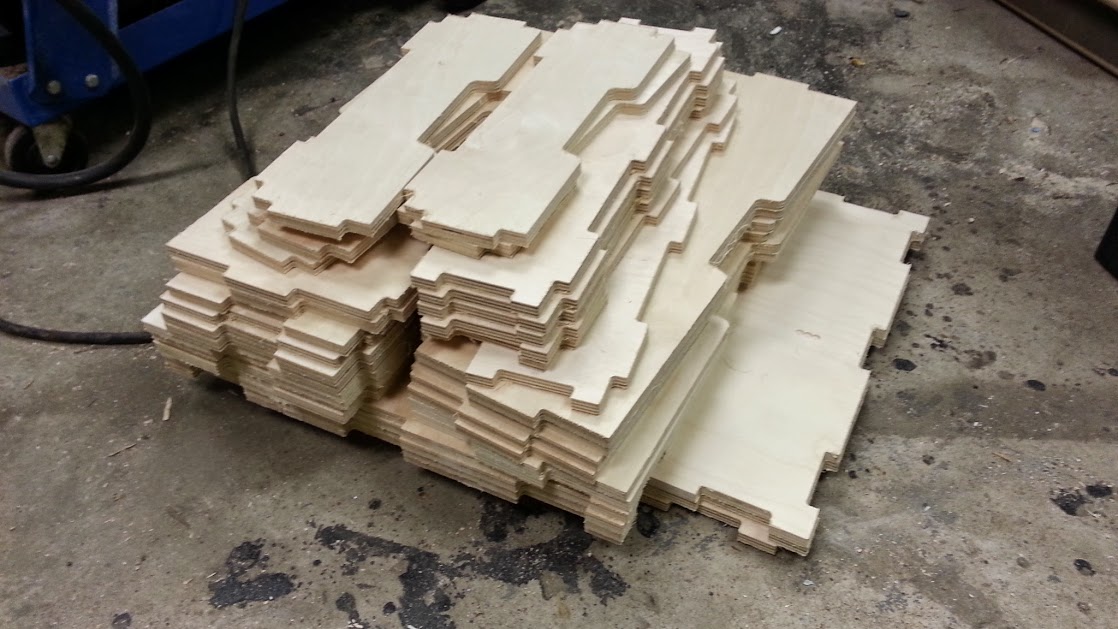
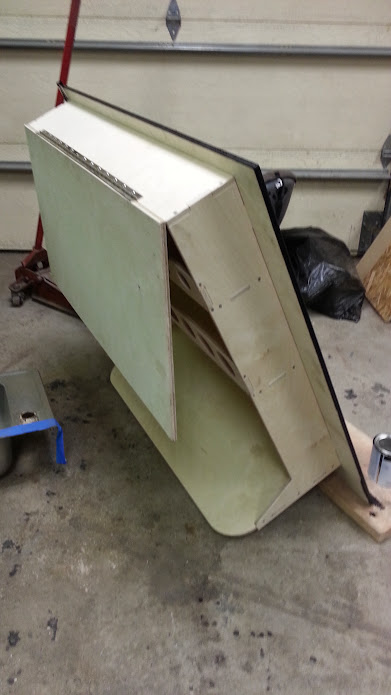
I cut out all the panels tonight from 12mm baltic birch plywood. Next step is to screw together the box. After that, paint and build crates that will slide into compartments for storage.
This will be my second offroad trailer build. This is my first:
http://offroadtrailer.blogspot.com/
http://www.expeditionportal.com/for...e-II-Addition-of-Hardsided-Folding-Camper-Top
That trailer is now for sale. PM me if interested (I don't check this site all that often, please have patience). I have not set a price yet. You could complete the camper top (very little left to do, or use as is) or remove it and the lid and you have a great M416 trailer. Air bag assist on leaf springs, 37" tires with Jeep JK bolt pattern. Brand new bearings.
The reasons I am starting a new build are the following:
- M416 requires you to lift all your gear in and out of the tub (unless you add a tailgate). With the camper top, you have to unpack fully before deploying camper. Not sure I would try lifting the lid with the camper open. Once you take all your gear out, you have to setup your kitchen and camp. Took me about an hour previously. I am lazy and don't like the setup/take down process. With two kids under 5 years, I am looking for a quicker solution. I could build a slide out kitchen, but it would basically take up all the room inside the M416.
- Trailer is a bit heavy fully loaded. I am not strong enough to lift the tongue without a jack, so getting the trailer on and off the jeep is a pain. Maybe we just have too much crap with us. But the trailer is a bit on the heavy side, especially with the camper top.
- I like building things. This second trailer is a fun new project.
The things I know I am going to miss about the old trailer
- hard-sided camper with insulation in the walls. camp in any season.
- matching tire size to jeep. swap jeep spare with trailer, so you only carry one spare.
- dust tight, waterproof storage compartment. stuff anything in there, extra clothes, down jackets, pillows etc. all stays clean and dry
- M416's are cool. cool piece of history.
- my family of 4 can sleep in the same "tent"
- no other camper in the world like this one.
- the approximately $4000 and countless hours i have into that trailer.
Here is the new trailer. I bought someone else's project trailer. Too good a deal to pass up.
Deal included
- homemade trailer with two aluminum truck boxes
- offbrand Autohome Maggiolina style tent - small size with aluminum ladder
- large handicap scooter type hitch cargo basket
- foldable solar panel kit
- yellow top battery
- propane tank and propane fired water heater with water tank
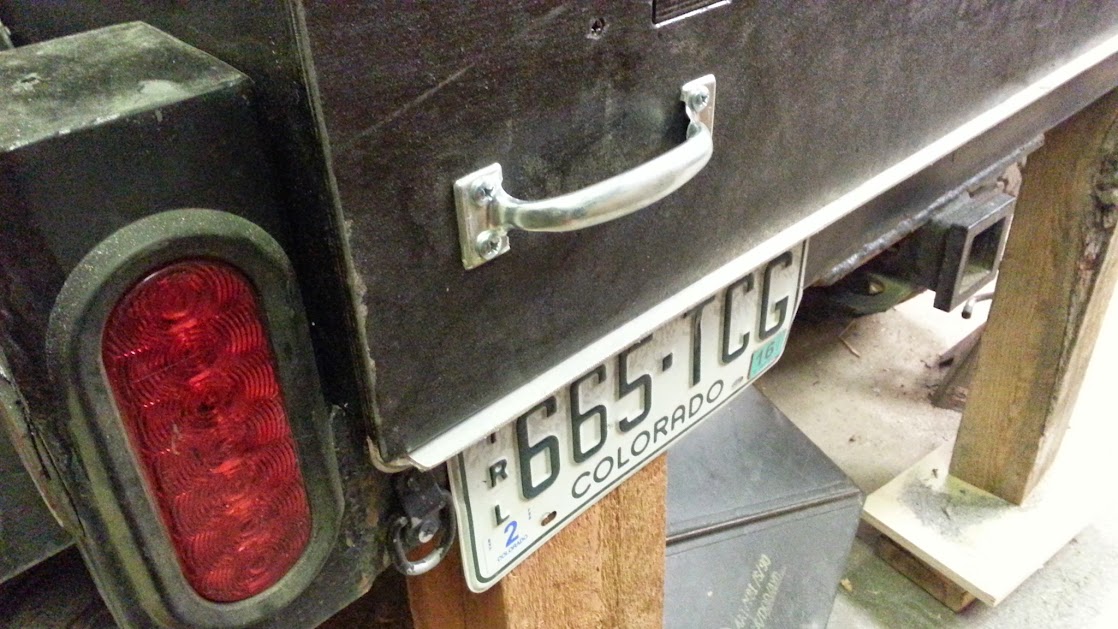
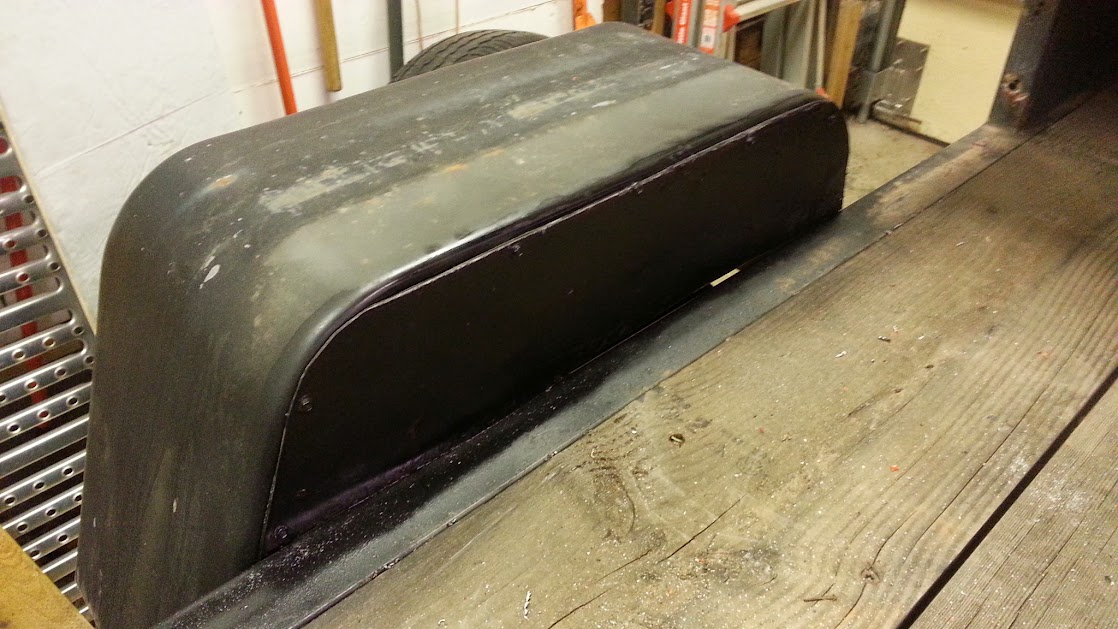
Here is what it looked like:
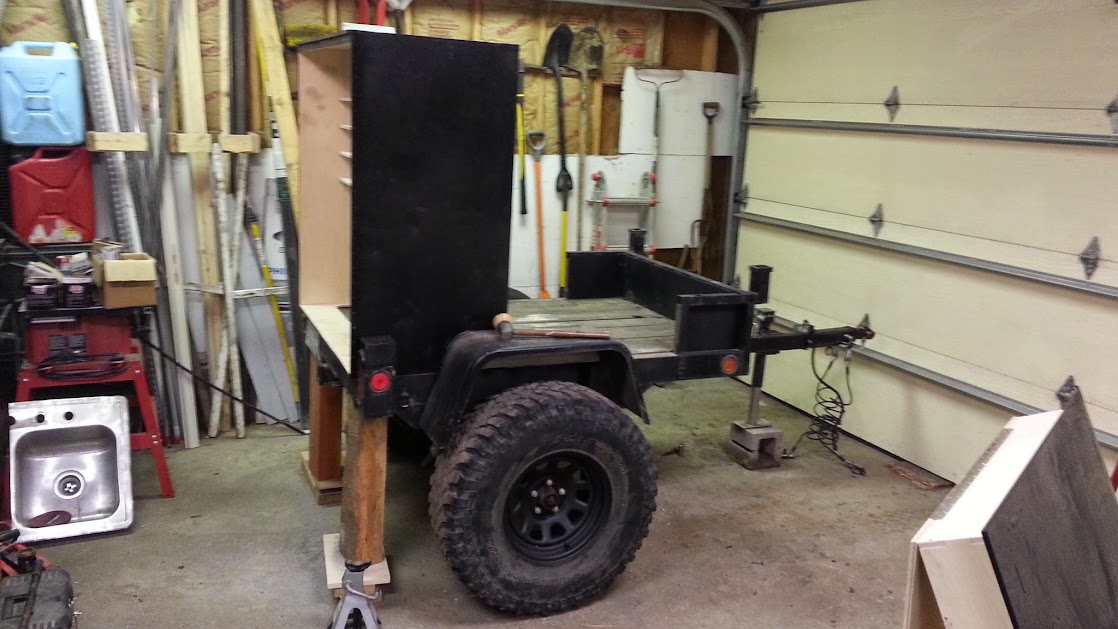
My plan
- spring over axle lift
- 33" tires (mount undersized spare under trailer)
- remove overbuilt, non-functioning metal platform.
- remove truck boxes
- remove tailgate
- add custom kitchen box
-remount tent up high in fixed position. same height as my jeep RTT that I recently purchased.
- permanently mounted awning. (hoping to devise awning with no legs) awning covers kitchen area.
- all sleeping bags, pillows etc will be stored in RTT's. so, no air mattresses to blow up or bedding to setup. RTT's deploy with hand crank in about 30 seconds each.
Kitchen Includes
- permanently mounted and plumbed stove
- sink with gravity fed faucet. Drain to bucket or hose
- drying rack
- permanent prep counter
- drawers for all kitchen utensils, cups, pots, plates, etc.
- shelves for things like spices, cooking oil, sunscreen, etc.
- paper towel dispenser
Camp Setup - goal time 15 minutes.
- unhitch trailer. put down tongue jack
- deploy stabilizers in back? (not sure what these will be yet or if they are needed)
- deploy RTT's
- take bags of clothes from back of jeep, toss up in RTT's.
- open door on kitchen.
- deploy awning
- take camp chairs out of bin in trailer cargo area.
- move dry food boxes and cooler from front of trailer to ground by kitchen
this is what my RTT on my jeep looks like:
http://www.expeditionportal.com/for...NOT-the-pickup-toppers)?p=1677592#post1677592
Here are my design sketches
Here are the drawings for all the panels to build the kitchen box by CNC routering it
I cut out all the panels tonight from 12mm baltic birch plywood. Next step is to screw together the box. After that, paint and build crates that will slide into compartments for storage.
Last edited:


")