Explorer Pod Build

compactcamping

Explorer
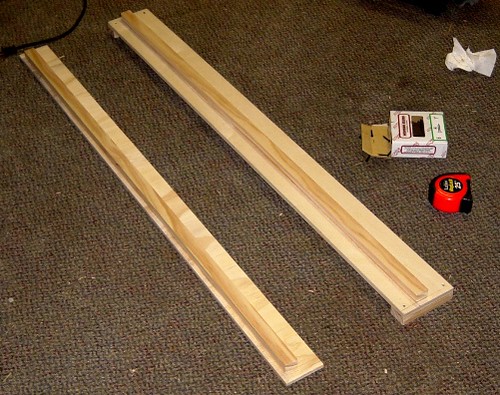
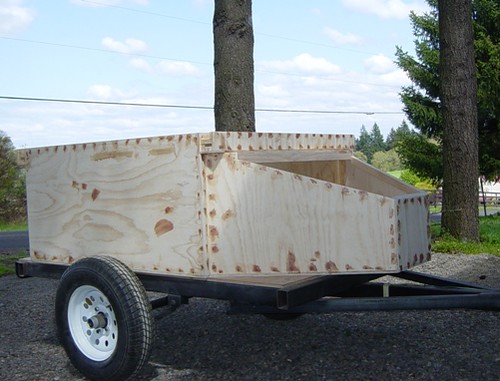
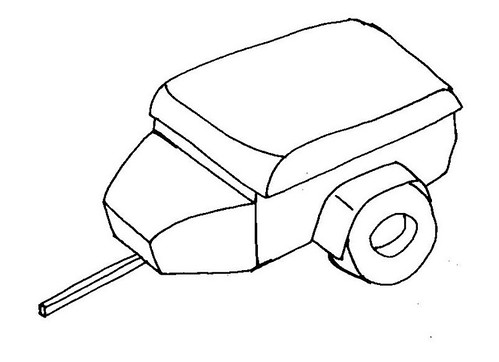
Thought people might be interested in seeing the build of my new “off-pavement” camping trailer. This isn’t meant as a hardcore off-road trailer, it’s for towing on gravel / forest service roads. It will run a “soft-ride” leaf spring suspension. It’s designed to be Tent Topped with a main rear storage area sized for Arko-Mils lidded storage boxes and a nose box storage area. The trailer box will be built out of plywood, based on my planned usage; this should be more than strong enough.

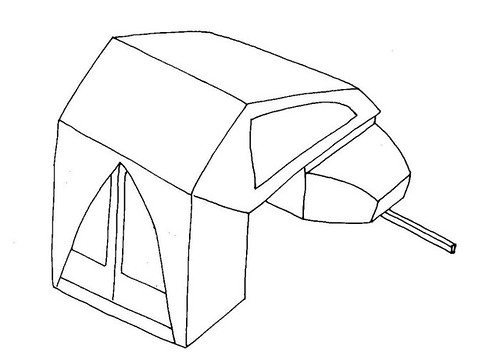
Here are sketches of the basic idea.
3459824274_d68368d19f.jpg
3459824296_4017d2040c.jpg


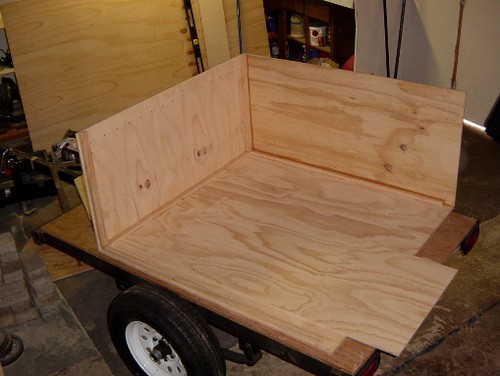
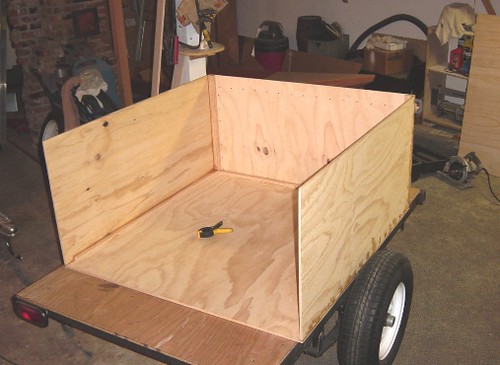
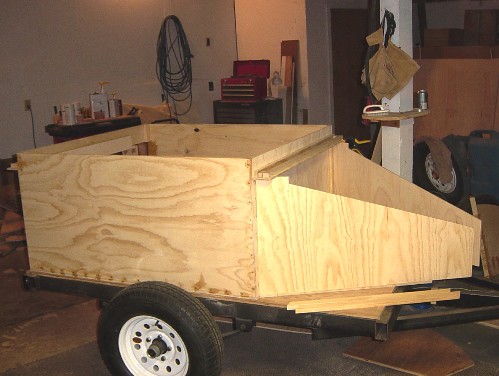
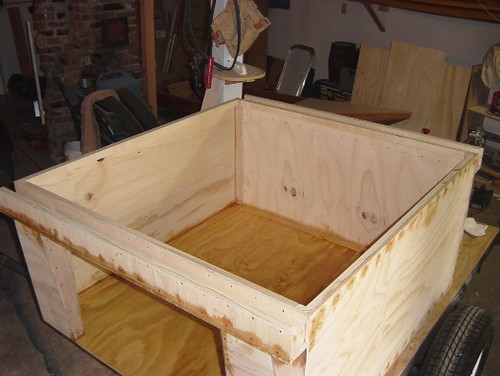
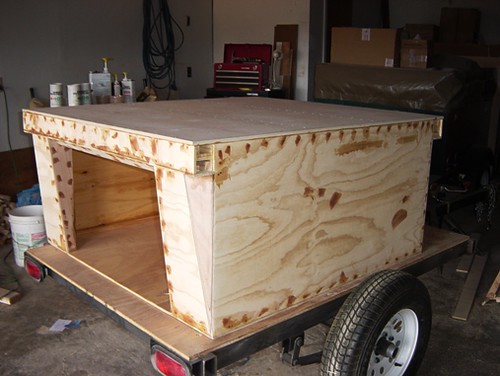
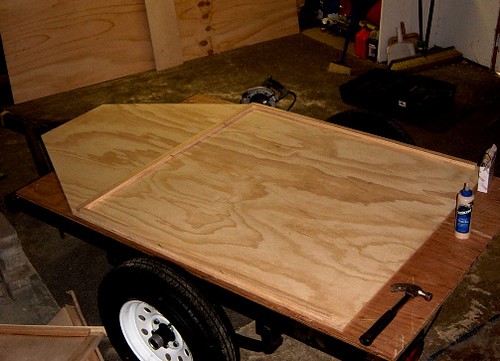
I’m building backwards from what most people do. First, I’m building the trailer box on a flat bed trailer I have, then I’ll build the frame. The basic build approach is to create the main box structure, then the rear overhang and access door area; next move to the front, creating the overhang and the nose box. I’ll then build the nose box lid, seal the inside and put the top on. The final step will be to seal the exterior with Durabak.

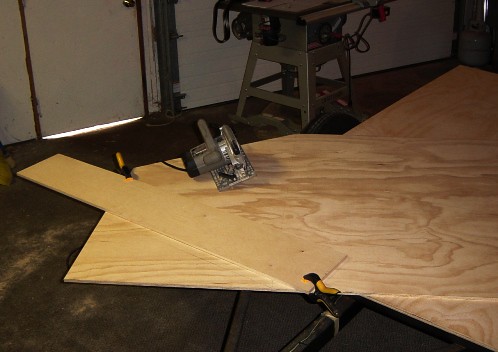
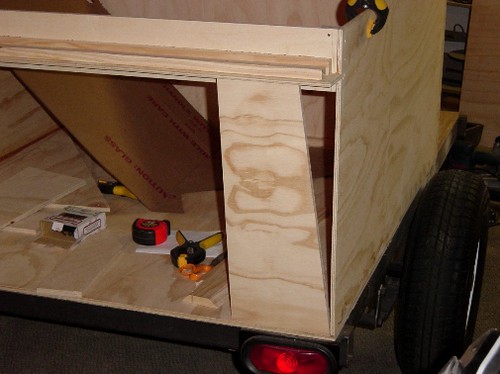
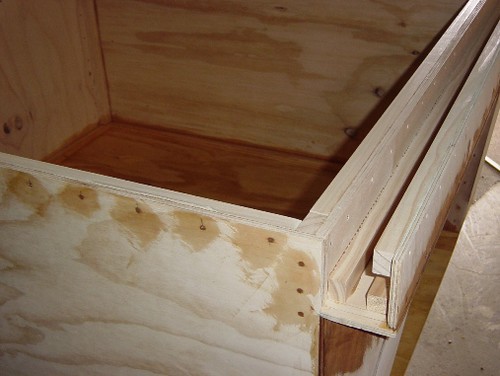
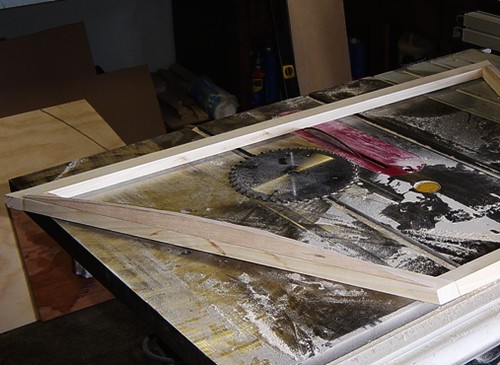
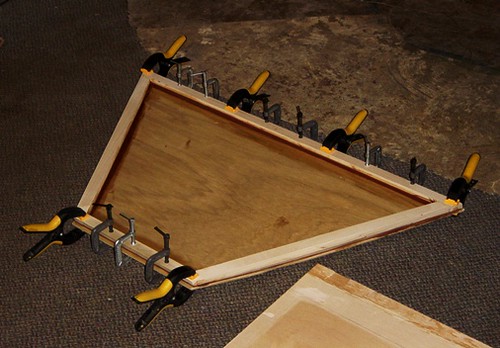
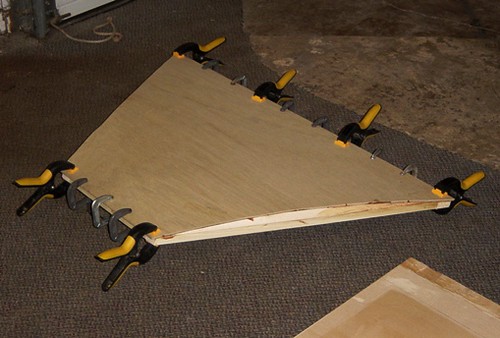
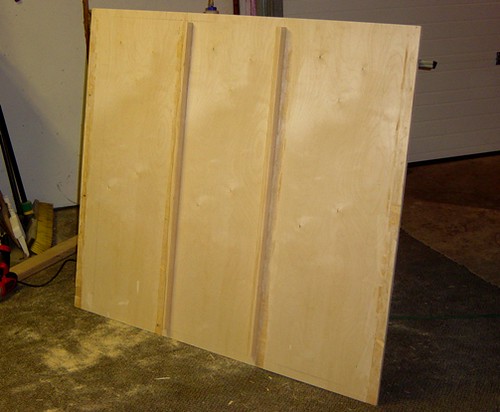
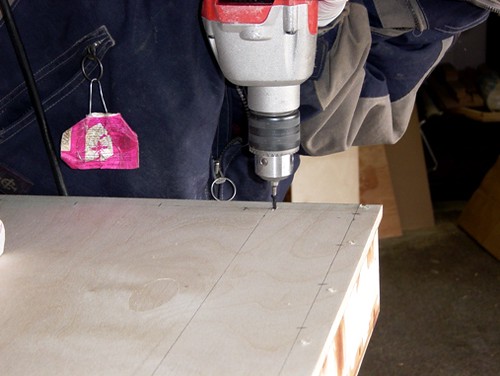
I began by cutting out the floor. The nose box sides have a 60 degree angle and are set in 1”. The 60 degree angle corresponds to the tongue a-frame braces. Next I added the corner blocks to the floor to which the walls will attach.
3458933899_1804463f9c.jpg


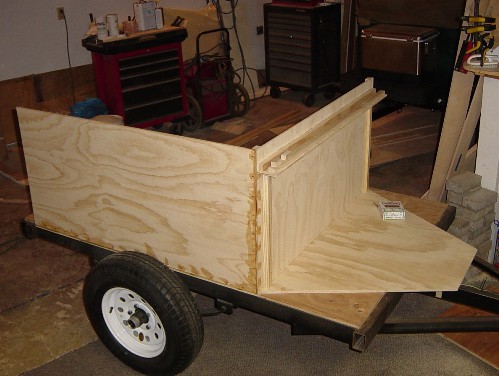
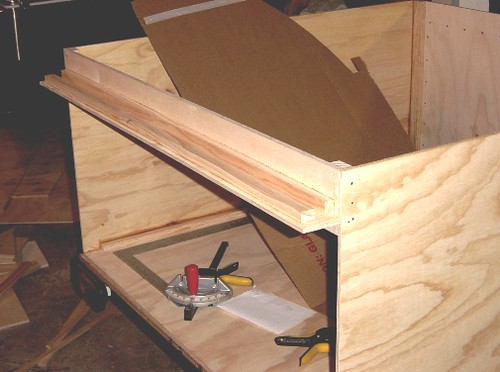
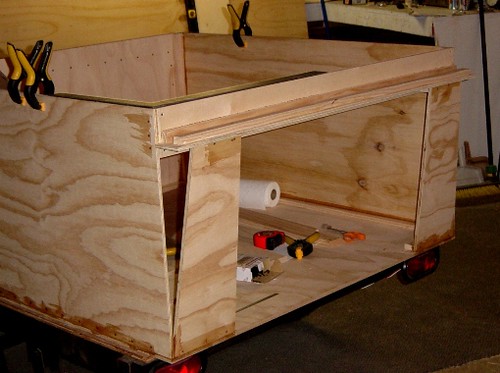
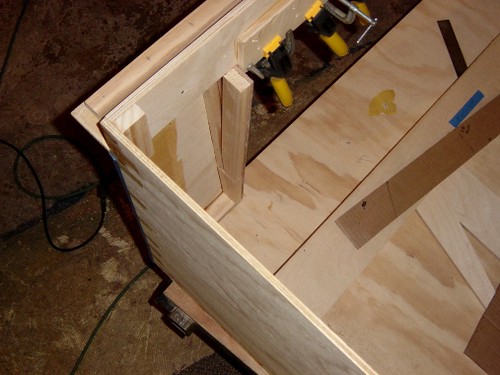
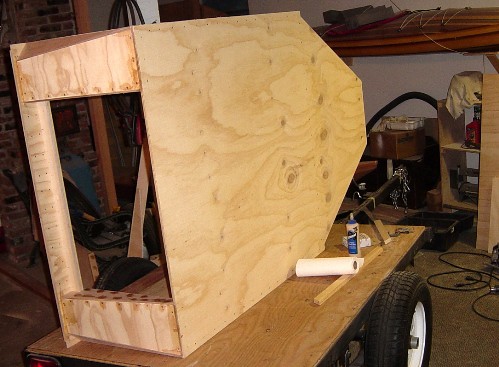
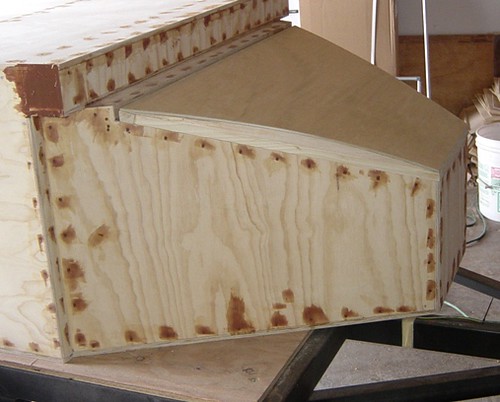
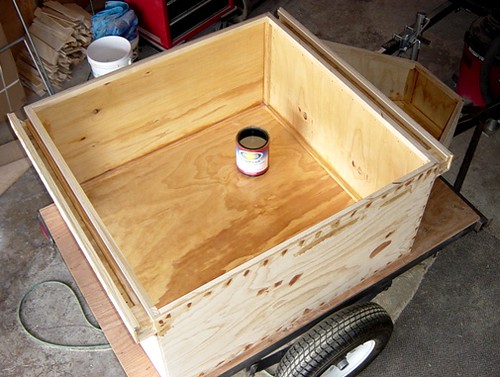
I added the front wall. Before attaching it, I added a portion of the overhang structure. I made the walls 24”, maximizing material usage and providing proper clearance for the Arko-Mils storage boxes I plan on using
3458933939_4d0cdc0ba3.jpg
3458933973_8c07c965c0.jpg


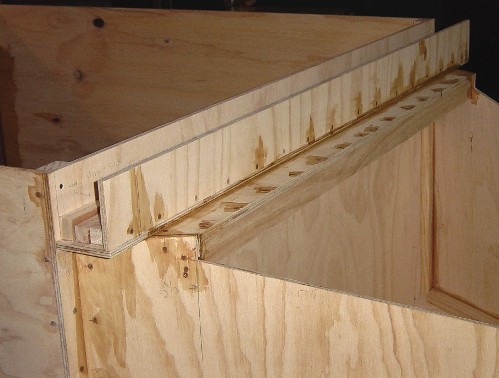
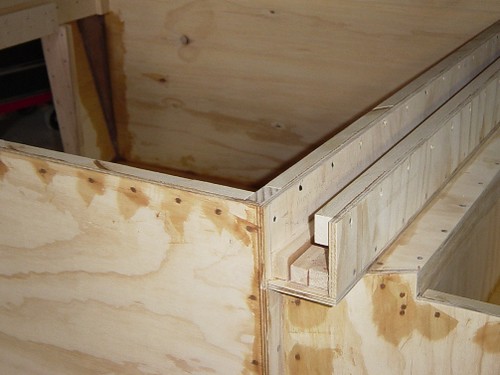
Here is a close up of the front overhang partial built.
3458934031_29ef9d5c76.jpg


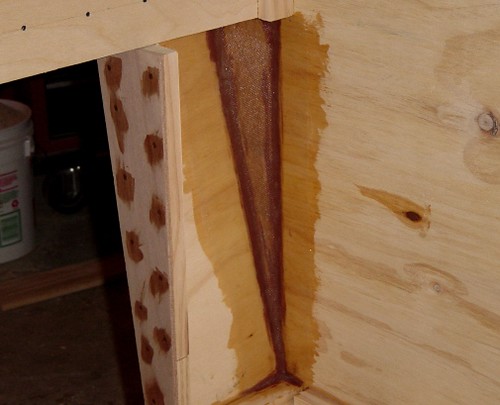
Here is a close up of the corner blocks
3458934001_4f50093855.jpg
 

compactcamping

Explorer
Next I added the side walls. Wherever I have exterior wall joints that needed to be smoothed out I glued them in place with thickened epoxy. The epoxy seals the edge grain of the plywood, fills any gaps and is waterproof. For all other gluing I use Titebond III.
3462928998_4af511572c.jpg
3462113911_0128bf3534.jpg
3462929032_2889bd75b4.jpg
3462113941_9edc76bd5a.jpg


When ripping full sheets of plywood down to size and cutting angles, a lot of time I just use a straight edge and circular saw.
3462929066_2bc73b0e84.jpg
 

compactcamping

Explorer
Now I moved to the back for working on the rear / access door area. This is one area I wanted to get away from the basic box shape by having a sloped back and angled corner.

I started by making and adding a portion of the rear overhang
3461985923_ae7b718c16.jpg
3462801036_34087f43fc.jpg
3462801054_77562e6e24.jpg


Then I added the main rear panels, they have a 10 degree angle to them.
3461985993_0590accb29.jpg
3461986023_e6751a79d2.jpg


To do the corners I used a tape and glue method. The angle pieces are cut to size, shaped and then taped in place. On the inside fillets of thickened epoxy are applied to the edges. This glues the piece in place and provides a radius so the fiberglass cloth will lay flat. Once the fillets get to the tacky stage, I epoxy fiberglass reinforcement in place.
3465981404_4a0e526732.jpg
3462801114_d82a891c2c.jpg
3461986079_3c1aaf032b.jpg


While the epoxy was curing I added the door side wings and taper panel above the door area.
3462801154_59581183b9.jpg
3461986117_01a3900e10.jpg
 
Last edited:

compactcamping

Explorer
Hikingff77, I'll be building a frame specifically for the trailer box with 2x2 square tubing and using tuned Samurai or CJ-3 springs for a soft ride.

Sseaman, Yes it does add some extra work, but I wanted to add some "character" to it, so it does look like a box.
 

compactcamping

Explorer
Thanks Titanpat57, I thought about going taller like in your build, although we normally pack light so being 24" tall should be fine.
 

compactcamping

Explorer
Next I moved to front for adding the nose box walls. I started by fitting the walls, then flipping the box on it’s side so I could install the corner blocks for mounting the walls.
3467905991_0f81e2202c.jpg
3468718996_336dd04674.jpg


Then I built and installed the vertical area under the front overhang where the nose box hinge will mount.
3467906047_f20ff446d1.jpg


Then using thicken epoxy, I glued the side and front walls in place.
3468718950_abc42d15b0.jpg
3467906065_6d16bfba8d.jpg
 

tommudd

Explorer
very similar to waht I have drawn up on every spare scrap of paper in the house. What size is the trailer floor that you started with? I ended up with a frame that is 42X48 , it was free , but was thinking of trying to build off of it to get the shape etc that I am wanting, kind of a 3/4 scale maybe

I'm here waiting for more!!!!!!!!!!
 

compactcamping

Explorer
That's funny, I swear that wasn't me looking in your window three weeks ago :Wow1:

The trailer box floor is 48" wide and 50" to where the taper starts, then another 27" to the front. The angled tongue supports will extend about 9" past the front of the nose box. I'm also planning on sizing the tongue so I can put a bike rack in front of the nose box.

I had someone by the order day that liked the shape and is thinking of a 1/2 scale version for behind a touring bike.
 

compactcamping

Explorer
Next I sealed the interior floors with a penetrating epoxy called CPES.
3480480856_049e77078d.jpg
3481220024_451a0537b7.jpg


While that was drying, I added the corner blocks around the top of the main and nose box and did a pass of filling screw holes and gaps with thickened epoxy.
3480480834_5907638dd7.jpg
3480480822_0f09a2fe8d.jpg
3479672193_082129210c.jpg
3479672219_a65585f9b4.jpg
 

compactcamping

Explorer
I've been working on the the nose box lid. I started by making a frame that matches the nose box opening. This is fun getting all the angles right, the top of the box slopes down 17 degrees, it angles in 30 degrees on each side and the outside edges get trimmed 8 degrees so they are parallel with the sides. To glue the lid frame up, I used thickened epoxy and taped the frame in place on the nose box.
3490257488_28efa80da9.jpg


I wanted some curvature to the lid so I made some curved frames and epoxied them to the top of the lid frame. For a little extra character, the curved frames angle in at 30 degrees.
3489441519_d1944b928d.jpg
3490257544_082acac160.jpg
3489441561_8d5e665033.jpg


Then I sized and epoxied the lid panel in place. After the epoxy dried, I rough sanded the edges and test fit the lid.
3490257588_5f01fac1b8.jpg
3489441591_8a0c8c752c.jpg
3494770346_e68e132848.jpg


As the epoxy dried in the above steps, I worked on getting the main box top panel ready to install. Because the top of the trailer box is part of the sleeping platform, I added two cross braces space 16” a part. Being careful not to get any on the gluing surfaces, I sealed the bottom of the top panel and the interior sides of the main box with 4 coats of Target Coatings HybriVar (This has been replaced with their new and improved
EMTECH 2000) a user friendly urethane waterborne borne alkyd varnish.
3489473991_f26bdcc54f.jpg
3489494605_cce668fb44.jpg
 
Last edited:

compactcamping

Explorer
Now it’s time to attach the main compartment top panel. As with the other exterior joints, I use thickened epoxy to glue the top in place. Here is the method I use. To ensure good epoxy penetration into the wood, I first coat both sides being joined with straight epoxy.
3497097169_e2f1fcd91f.jpg
3497913494_c5875f85fb.jpg


Then using a combination of Colloidal Silica (West System’s 406) and fine wood dust fillers, I mix a batch of thickened epoxy to the consistence of peanut butter. This allows it to fill gap well and not flow out of the join while curing. Using a cut-off 1” chip brush, I spread it on one side of the joint area.
3497913546_821e6b36eb.jpg
3497913578_69aba9140c.jpg
3497913608_688082595c.jpg


With the help of an assistant, I set the top on and use trim head screws to clamp it in place.
3497913622_bc55c98caa.jpg
3497913654_52b2f30048.jpg
 

Forum statistics

Threads
185,815
Messages
2,878,493
Members
225,378
Latest member
norcalmaier
Top