Saratoga
Adventurer
Hiya
Well. With my previous vehicles I have had a semi-permanent installation, only removing them when the vehicle has left me. My FT8800 (second hand when I picked up my M6 licence) survived 3 cars; but with the arrival of Rose, my D2 XS, I decided on another radio. My 2e0 licence allows me up to 50w RF output, which both the old and new radio manage.
The new one was my original choice, but funds and being a newbie dictated I go for what was recommended by the local radio club, my trainer and others with radios whom I took the advice from.
However, 5 years later, and with better employment I felt I could afford the upgrade to coincide with the new car.
So. I now have a Kenwood TM D710 for my main (and only) rig. I have plenty of hand held radios but a vehicle mounted system is better for lots of reasons. Mostly because sometimes 10w is needed over 5w in the terrain I'm in. There was a time constraint; an event I volunteered for. The FT8800 could have been used, but if the new radio was in, even better! The FT8800 is going to a licensed mate in Wales who will put it to good use too!
Once again, I asked around. I read up on forums, the Yahoo mailing lists for both the radio and vehicles, and asked friends with knowledge of the systems. I came to the conclusion that placing the radio as far from the engine was a good thing, and in a ventilated area. So the boot was the best option, considering the amount of interference I would no doubt get from the engine. I have already heard that the injectors are particular noisy on the system...I also wanted it covert, as I like having my expensive equipment shielded from prying eyes that could encourage someone to break in and relieve me of it!
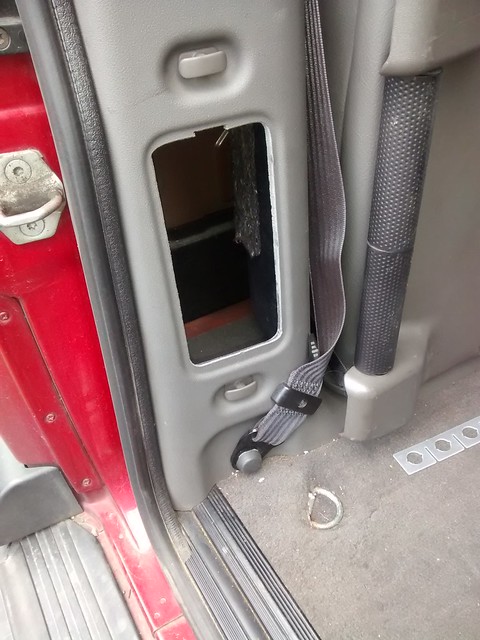
Initially I thought about removing a boot forward facing seat and mounting it in a box built into the space vacated. However, upon investigating it with a friend, we discovered some 'holes' or 'empty bits' in the boot. It was also the time when I was contemplating fitting trailer electrics and 'The Space' was ideal and a quicker option too. On the nearside there is a long metal plate in there and a right angled section of insulation in the other side. We're not sure why they were different, or to what purpose each part served. But we went for the rear nearside space.
I was going to run a pair of 25a 12v feeds to the boot from the front and picked up 10m of the stuff. Where and how to run it?
My choice was underneath, against the chassis or body and clip it up out of the way, but I was overruled by someone who knew better and was an electrical and automotive engineer for more years than I've been alive... It was decided to put it behind trim panels and under carpet. The usual places, but it wasn't easy. We'd have to find another way to get it from the engine bay into the cabin, but that was further ahead in the plan. We had to get the wires that far forwards to start with.

I needed an extension set. I could have used regular cat5 or cat8 (network ethernet cable) but considering that some of the innards were shielded for a reason and I didn't want to have to take the cables out again just to fix something I should have done in the first place; a trip to Radio World in Walsall got me the parts I needed. (£65).
The cable run to the front was going to consist of two data cables, a twin speaker mono lead and a power lead from the Kenwood Expansion Pack.
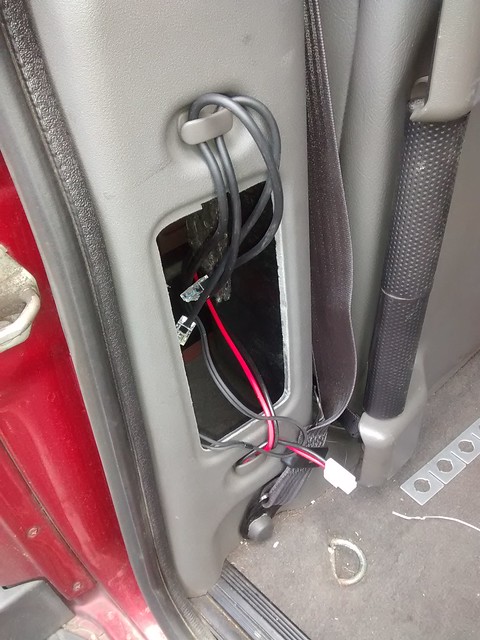
The front of the cables were sealed and zip tied in a plastic bag to protect the connectors and with the help of welding wire we threaded it through the nearside section behind the seat housing to the passenger nearside seatbelt mounting. From there it was routed under the carpet to come out in front of the mid level seats. The tail end of the wires were 'secured' to handy clips in the boot.
Thankfully there were two of us, as without Franc's help I would have learnt more curse words by now and maybe even routed it differently... Probably because I would have run out of time!
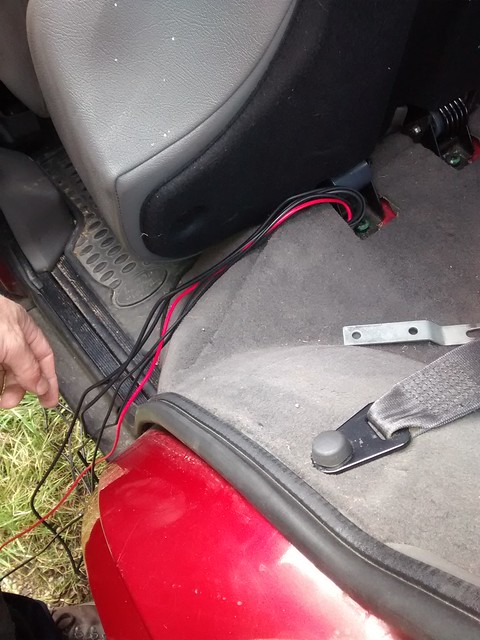
They travelled under the carpet leading down into the mid passenger footwell, carefully, so as not to catch or be crunched, then we had to make A Decision.
That was to cut the carpet, but I couldn't see another way to get it lifted and it looked like the seats had been bolted over the carpets... But with care we did a neat job to get the cables through and under the footwell up next to the transmission tunnel.
Undoing the two screws in the elbow-box we lifted that up and ran the cables down inside the transmission tunnel next to the gearbox.
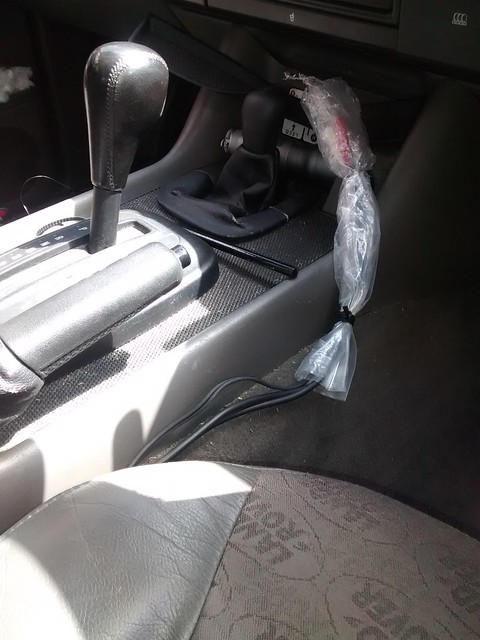
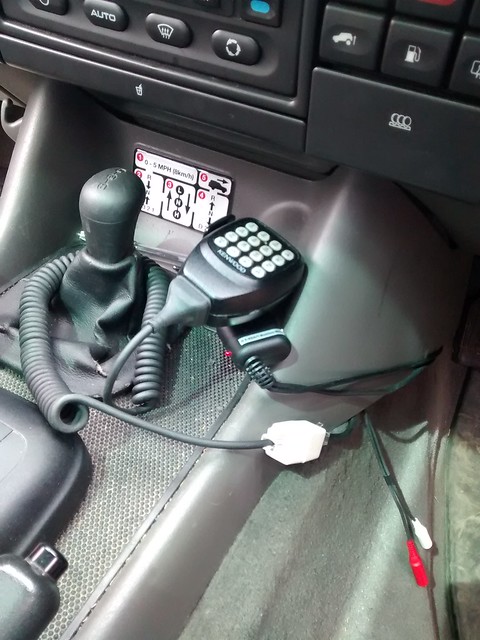
It was about here that the first set of extension cables ended. The two speaker cables, Head Data and Microphone plus Power. At this point, a GPS puck was added to the mix. It needed power, so we used the one next to the transmission range lever. It'll probably stay there as it fits quite well, albeit with power only with ignition on. It was also worn and rejected most things plugged in there.
The microphone cable had a female to female block, so that was secured with heavy duty velcro to the side of the transmission tunnel. The speaker cables were clipped 'in that area' to just dangle until I found speakers to use/mount and the other cables
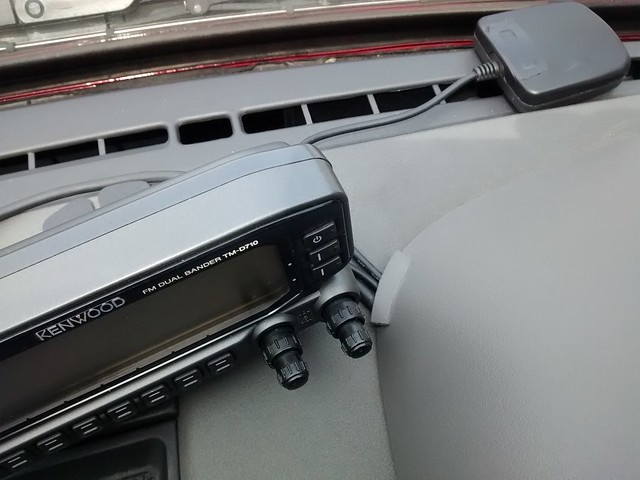
Some isopropyl alcohol was used to clean the dash up and then the base fitted for the head unit.
The cables remaining were run up behind the dash and through the binnacle, popping out on top. A 'flap' made in the binnacle housing meant the cables could neatly slip out and yet be held there too.
The power cable was run into the engine bay through a grommet that we molested with some wire, several cups of Lady Grey Tea, a chunky kit kat (orange flavour) and pliers... Maybe some swear words were used too.
They were attached to the common rail on the fuse box for power, individually fused too and we ran an additional 25a cable into the cabin using the same method. It worked out pretty well, coupled with adding another power block in the car just behind the elbow box.
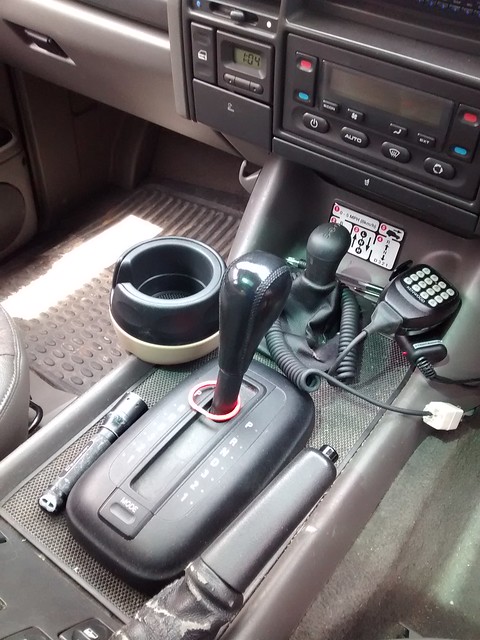
We also managed to fit the beige cup holder. Only one, as I donated the other to a worthy cause... If I had received it from my mate sooner I may have made it darker with paint, but I didn't have the time...
The frame for holding the radio was attached in place, lined up, drilled and tapped with captive nuts. It was then just a matter to attach the radio to it, attach the cables, slip it inside and pop the Allen key bolts through to hold it in.
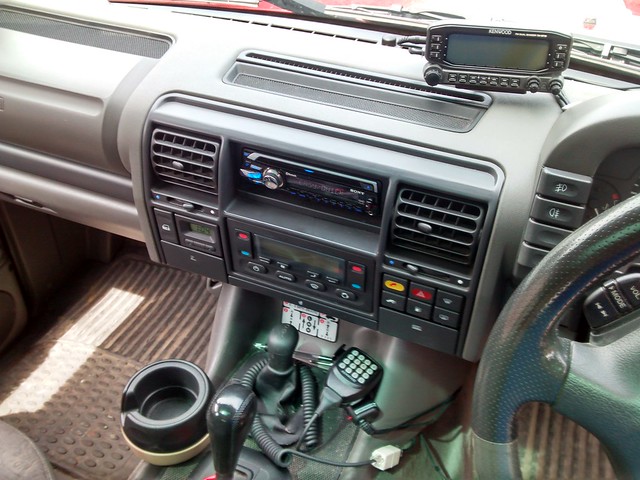
With the flap back in place there isn't much to show it's there... The fly lead was required as it was actually quite a tight fit to access the antenna cable. Especially as I have two to use for the task.
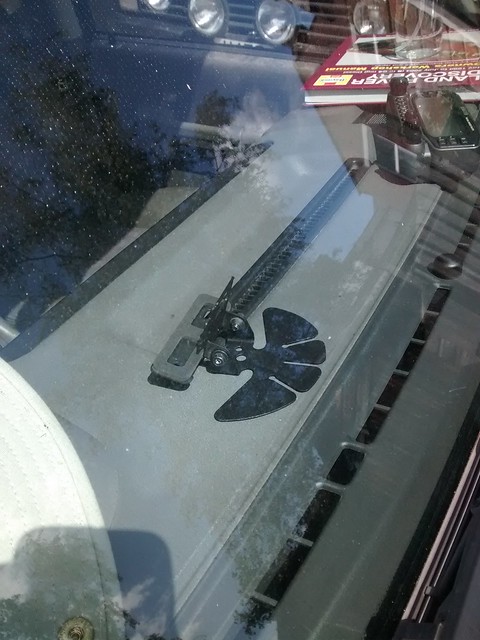
See that black bracket towards the top? As it is an APRS radio, I've got that to run a small antenna in the vehicle, without having to take it out and leave it on the roof. The radio will only run when I need it and everything can stay hidden or disguised until then. When I want to, I have a larger mag mount antenna to go on the roof.
Well. With my previous vehicles I have had a semi-permanent installation, only removing them when the vehicle has left me. My FT8800 (second hand when I picked up my M6 licence) survived 3 cars; but with the arrival of Rose, my D2 XS, I decided on another radio. My 2e0 licence allows me up to 50w RF output, which both the old and new radio manage.
The new one was my original choice, but funds and being a newbie dictated I go for what was recommended by the local radio club, my trainer and others with radios whom I took the advice from.
However, 5 years later, and with better employment I felt I could afford the upgrade to coincide with the new car.
So. I now have a Kenwood TM D710 for my main (and only) rig. I have plenty of hand held radios but a vehicle mounted system is better for lots of reasons. Mostly because sometimes 10w is needed over 5w in the terrain I'm in. There was a time constraint; an event I volunteered for. The FT8800 could have been used, but if the new radio was in, even better! The FT8800 is going to a licensed mate in Wales who will put it to good use too!
Once again, I asked around. I read up on forums, the Yahoo mailing lists for both the radio and vehicles, and asked friends with knowledge of the systems. I came to the conclusion that placing the radio as far from the engine was a good thing, and in a ventilated area. So the boot was the best option, considering the amount of interference I would no doubt get from the engine. I have already heard that the injectors are particular noisy on the system...I also wanted it covert, as I like having my expensive equipment shielded from prying eyes that could encourage someone to break in and relieve me of it!
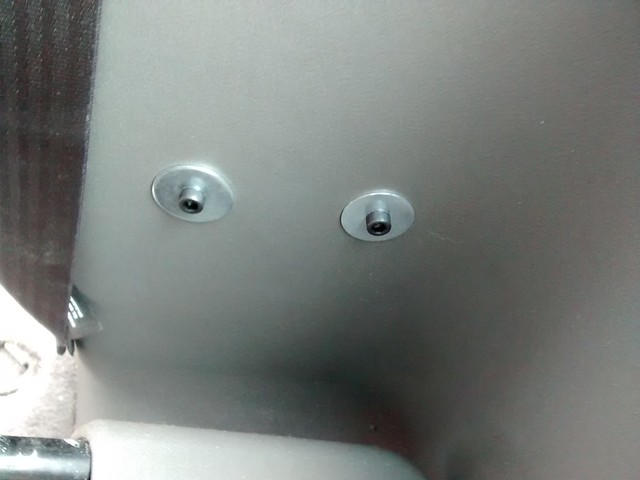
Initially I thought about removing a boot forward facing seat and mounting it in a box built into the space vacated. However, upon investigating it with a friend, we discovered some 'holes' or 'empty bits' in the boot. It was also the time when I was contemplating fitting trailer electrics and 'The Space' was ideal and a quicker option too. On the nearside there is a long metal plate in there and a right angled section of insulation in the other side. We're not sure why they were different, or to what purpose each part served. But we went for the rear nearside space.
I was going to run a pair of 25a 12v feeds to the boot from the front and picked up 10m of the stuff. Where and how to run it?
My choice was underneath, against the chassis or body and clip it up out of the way, but I was overruled by someone who knew better and was an electrical and automotive engineer for more years than I've been alive... It was decided to put it behind trim panels and under carpet. The usual places, but it wasn't easy. We'd have to find another way to get it from the engine bay into the cabin, but that was further ahead in the plan. We had to get the wires that far forwards to start with.
I needed an extension set. I could have used regular cat5 or cat8 (network ethernet cable) but considering that some of the innards were shielded for a reason and I didn't want to have to take the cables out again just to fix something I should have done in the first place; a trip to Radio World in Walsall got me the parts I needed. (£65).
The cable run to the front was going to consist of two data cables, a twin speaker mono lead and a power lead from the Kenwood Expansion Pack.
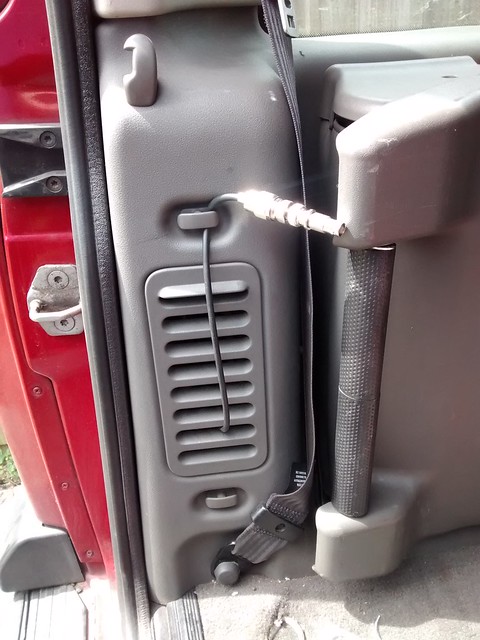
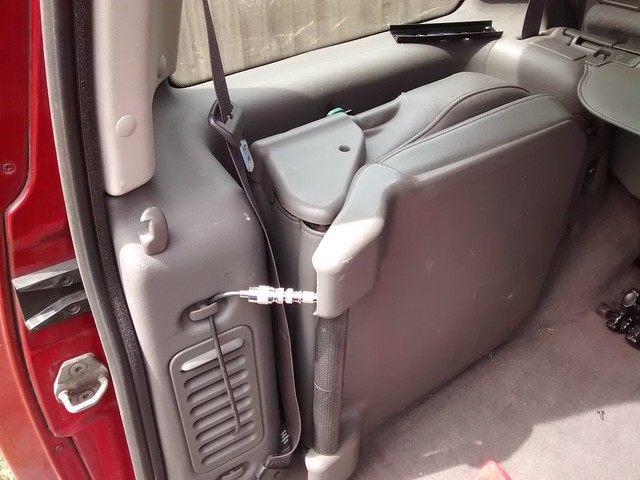
The front of the cables were sealed and zip tied in a plastic bag to protect the connectors and with the help of welding wire we threaded it through the nearside section behind the seat housing to the passenger nearside seatbelt mounting. From there it was routed under the carpet to come out in front of the mid level seats. The tail end of the wires were 'secured' to handy clips in the boot.
Thankfully there were two of us, as without Franc's help I would have learnt more curse words by now and maybe even routed it differently... Probably because I would have run out of time!
They travelled under the carpet leading down into the mid passenger footwell, carefully, so as not to catch or be crunched, then we had to make A Decision.
That was to cut the carpet, but I couldn't see another way to get it lifted and it looked like the seats had been bolted over the carpets... But with care we did a neat job to get the cables through and under the footwell up next to the transmission tunnel.
Undoing the two screws in the elbow-box we lifted that up and ran the cables down inside the transmission tunnel next to the gearbox.
It was about here that the first set of extension cables ended. The two speaker cables, Head Data and Microphone plus Power. At this point, a GPS puck was added to the mix. It needed power, so we used the one next to the transmission range lever. It'll probably stay there as it fits quite well, albeit with power only with ignition on. It was also worn and rejected most things plugged in there.
The microphone cable had a female to female block, so that was secured with heavy duty velcro to the side of the transmission tunnel. The speaker cables were clipped 'in that area' to just dangle until I found speakers to use/mount and the other cables
Some isopropyl alcohol was used to clean the dash up and then the base fitted for the head unit.
The cables remaining were run up behind the dash and through the binnacle, popping out on top. A 'flap' made in the binnacle housing meant the cables could neatly slip out and yet be held there too.
The power cable was run into the engine bay through a grommet that we molested with some wire, several cups of Lady Grey Tea, a chunky kit kat (orange flavour) and pliers... Maybe some swear words were used too.
They were attached to the common rail on the fuse box for power, individually fused too and we ran an additional 25a cable into the cabin using the same method. It worked out pretty well, coupled with adding another power block in the car just behind the elbow box.
We also managed to fit the beige cup holder. Only one, as I donated the other to a worthy cause... If I had received it from my mate sooner I may have made it darker with paint, but I didn't have the time...
The frame for holding the radio was attached in place, lined up, drilled and tapped with captive nuts. It was then just a matter to attach the radio to it, attach the cables, slip it inside and pop the Allen key bolts through to hold it in.
With the flap back in place there isn't much to show it's there... The fly lead was required as it was actually quite a tight fit to access the antenna cable. Especially as I have two to use for the task.
See that black bracket towards the top? As it is an APRS radio, I've got that to run a small antenna in the vehicle, without having to take it out and leave it on the roof. The radio will only run when I need it and everything can stay hidden or disguised until then. When I want to, I have a larger mag mount antenna to go on the roof.