Overlandtowater’s solid axle suburban

Overlandtowater

Well-known member
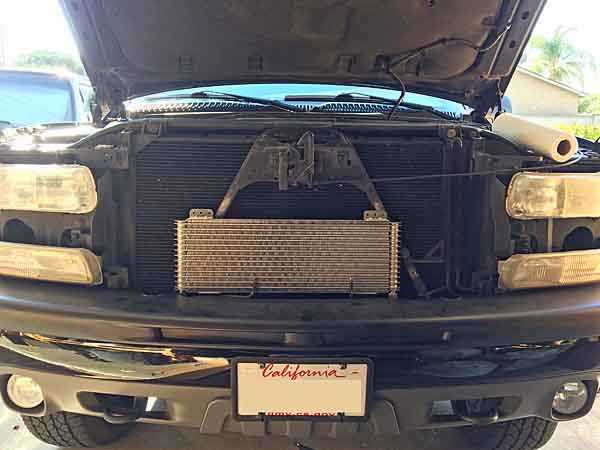
I felt good today but think I over did it....I got the front keys on and the front shocks on....The keys went on super easy, 3 whacks with the baby sledge (10lb head on a 12" handle)and they were both loose. The guy at the parts store called me a liar.... there was no way I changed them both and had the tool back in an hour. LOL front measures 36 1/4" on both fronts from the ground to the fender on 265 16's and the rear measures 38 3/4" on the driver and 39 on the passenger side... I was disappointed on the Zone front shocks the threads where painted over and I tried to use a where brush but a no go. I had to break out the tap and die set to clean the treads, not a big deal but to an extra bit of time to do. The torsion keys I picked up doesn't do much do they? One thing I did notice was the passenger side had a yellow sticker and the driver side had a blue sticker. I assume they blue is a stiffer spring. Last pick for a laugh.KIMG0846[1].JPGKIMG0847[1].JPGKIMG0848[5].JPGKIMG0849[1].JPGKIMG0851[1].JPG
 
Last edited:

Overlandtowater

Well-known member
So I did some driving around and did some more tightening on the torsion bars, got the front to 37" on front with the bolts tightened all the way up. Still have about a fingers width of down travel before the droop stop hits the upper a arm. I still have to put in the shocks on the back but my arthritis started acting up by the time I got done with the front. The truck drives so much better than before.
 

rayra

Expedition Leader
That's pretty high. I think I'm at 35-3/4" on 265/70/17s, with about 8+ threads still to go on the adjuster bolts. I was down to 4 threads for a while but ran the bolts back out a bit.

Z71 stance comp 160816.gif


stancecompare2.gif
 

Overlandtowater

Well-known member
Front, rear, and side I will run it like this for a little while to see how bad the front is, on the street it rides better now than before but I'm use to driving an overloaded f250 work truck for 8 hours a day so I don't mind the rough ride.KIMG0856[1].JPGKIMG0857[1].JPGKIMG0862[1].JPGKIMG0861[1].JPG
 
Last edited:

Overlandtowater

Well-known member
That's pretty high. I think I'm at 35-3/4" on 265/70/17s, with about 8+ threads still to go on the adjuster bolts. I was down to 4 threads for a while but ran the bolts back out a bit.

Z71 stance comp 160816.gif


stancecompare2.gif


Rayra how much space do you have between upper A arm and the droop stop? I have about an 1".
 

rayra

Expedition Leader
maybe 5/8". I can get the first knuckle of my index finger in there. Did you buy offset or 'problem fixer' uppers? At a loss to explain your getting more height, yet with more clearance there, unless your tire / wheel combo is taller than mine?
I'm on the stock 17" rims, 265/70-17 @40psi. I think I'm recalling my older measurements from my vortec topic, but those were taken some time ago and when those animated gifs were made.
I just went and took a fresh measurement in my driveway, I'm 37-1/8" over the front hubs and 38-5/8" over the rear. I have my stock Z71 rear coils on top of 2" spacers. About a half tank of gas and about 200# in rear platform drawers. It looks pretty level sitting in the street, overall. I have no idea it the wheel well openings are level with each other on the body. I guess the way to figure that out is check level on the side bars, jack the vehicle so those are level and then measure the wheel well heights.
 

Overlandtowater

Well-known member
Rayra as far as I know every thing is OEM on my front I got it from an old man who had everything done at the stealership. But I do plan on putting the problem solvers or SPC uppers on when I need too only problem is I could buy a complete problem solver front end for the price of the SPC uppers. My tires are 285/75/16 half wore at 40psi measures 29.5".

I got the rear shock on after work and started to drop the tank and spun the weld nut on the front tank strap.....ARGGGG! So I guess I will just have to cut the strap pull the tank completely out and weld the nut back on. unless anyone knows another trick.


zone shocks gave me 2.5" more shock I didn't realize the stock self levelers where topped out with H2s on.KIMG0863[1].JPG
 
Last edited:

jonb8

Adventurer
UHHGG, I kept my rear shocks and I think I'm stretching it... I ordered Billsteins like the front, I should have just done it to start with... Hope you get the tank off..
 

Overlandtowater

Well-known member
So after crawling round under the rig after buttoning up the lift I found the sound in the frontend.......I grabbed the flange on the driver side front axle shaft and what it wiggles.....no oil dripping but I can wiggle it so I assume its the bearing, it has new wheel bearing and cv shaft on the driver side. I figure the previous owner was searching for the sound also and never found it, that or they did find it and gave up.
 

Overlandtowater

Well-known member
So the trans cooler I bought is not as big as I thought..... What do you all think take out old and put in new or run it in series with the factory cooler?KIMG0870[1].JPGKIMG0871[1].JPG
 
Last edited:

Overlandtowater

Well-known member
Also I changed out the fuel pump it would run fine and it had good pressure all the way to a 1/4 tank and it would kit running like it was out of fuel.....dropped the tank with 4" left I the bottom of the tank. everything was going smooth until the front bolt spun the staked nut, I broke out the dremmel and cut the bolt out, I almost cut the strap...glad I didn't, straps were 56 bucks and the bolt repair kit was 7.... the Delphi was a direct swap.KIMG0864[1].JPGKIMG0867[1].JPGKIMG0865[1].JPGKIMG0866[1].JPG
 
Last edited:

rayra

Expedition Leader
dobber not sure about running both, don't think it would be too restrictive, given that a single larger cooler would have just as much tubing, basically.

I was very disappointed when I first saw where the factory cooler is mounted, it's top half is basically obstructed by the center bar of the grill and the chevy bowtie. When I mounted my replacement aftermarket cooler I deliberately offset it to right above the bumper cladding and towards the passenger side as much as practicable for mounting purposes. Tried to get as much direct airflow thru it as possible. And either that or just the huge size of it really paid off. Trans temps are ridiculously low.

most of my cooler install notes and images start hree
https://www.expeditionportal.com/fo...lected-werks-topic-02-k1500-z71.172800/page-3

I initially used the mounting hardware included wtih the new cooler and did not cut the factory metal lines, instead choosing to add overly long loops of rubber hose to ensure there'd be no kinks. I wasn't sure about the mounting location and was in a hurry to get it road-worthy again.

transcooler12.jpg


Later on I re-did the mounting with 3/4"W flat aluminum bar stock. And again later I got some 3/8" compression fittings (compression on one end, barbed hose fitting on the other and used the barbed fittings in the new cooler) and cut the factory lines and shortened the rubber hoses. That's on pg 7 of my build topic.
There's pics of the fittings I used and where I decided to cut the factory lines. The upper line on the engine radiator, right below the overflow hose is the 'OUT' which feeds into the factory trans cooler.
 

Overlandtowater

Well-known member
thank rayra I will have a little time before I put in the cooler Im going to wait until I drop the pan and put in the shift improver kit (less spills if it all drains from the pan..

I started the knock sensor job.....not too bad the only thing I had a problem with was trying to get the hose off the vacuum line above the throttle body, I don't know what its called but it has a hard plastic vacuum line and a electric plug. It has a c-clip style lock but I was not able to get it to slide out and broke it.

I thought I would be smart and pull all the connections on the passenger side of the motor so swing the wiring over the top and lay it on the driver side...wrong there is one ground wire on the back of the block that keeps you from doing that....

The intake has oil in it like 99% of LS engines so I will be putting together or picking up a catch can. There was not too much crud on the top of the valley but is still has plenty. Also there is a lot of oil build up in the intake runner on the plastic part of the intake and the intake ports in the head, I will try and clean all of that up before putting it back together. Its suppose to rain tomorrow so I wont be working on it I pulled it apart in the open drive way at the house and not under the car-port...

The knock sensors are both corrodes as all get out. I cannot believe it wasn't constantly throwing a code.KIMG0872[1].JPGKIMG0873[1].JPGKIMG0875[1].JPGKIMG0877[1].JPG
 
Last edited:

Overlandtowater

Well-known member
also if you are doing the knock sensor and you plan on extending the vent lines now would be the time, easy access. here is the dirty valley and the corroded knock sensors. the vent tubes are the last picture, I would hate to have to find them with the intake still on.KIMG0878[1].JPGKIMG0881[1].JPGKIMG0879[1].JPG
 
Last edited:

Forum statistics

Threads
185,910
Messages
2,879,495
Members
225,497
Latest member
WonaWarrior
Top