Tkhawk
Adventurer
It's the frontrunner rack. The only modification that I made to the rack to make it work was to add spacers between the bracket and inside of the roof to keep the height just right.What rack/rack brackets are those?
It's the frontrunner rack. The only modification that I made to the rack to make it work was to add spacers between the bracket and inside of the roof to keep the height just right.What rack/rack brackets are those?
Well it's done finally... kinda. I got the wrong black paint and I will eventually clean up the inside where I had to go back and add epoxy under the flanges. But I love it! Thank you @jscherb for the instructions and help along the way!
Hi Ron,Long post warning—-
Hi Jeff! I’ve been reading about your work over the last few days and it is amazing. Thank you so much for the designs, inspiration, tutorials, and community support over the last 5 years!
I picked up a hardtop for my 2 door jk last week from an allegedly 2017 rubicon. It was supposed to have some scratches and one “gouge” but at a great price so I drove 3 hours to get it. There was some repaired damage when I got there, but it was dark and I thought all I needed was some paint- not the case. Somebody sold this guy a sport with rubicon stickers on it and I think this top has been in an accident. There are cracks everywhere and the top looks crooked / bowed out near the passenger door. The roof inner/outer skin is even separating on the drivers side. I’ve never had a hard top so I didn’t even know what to look for at the time of purchase.
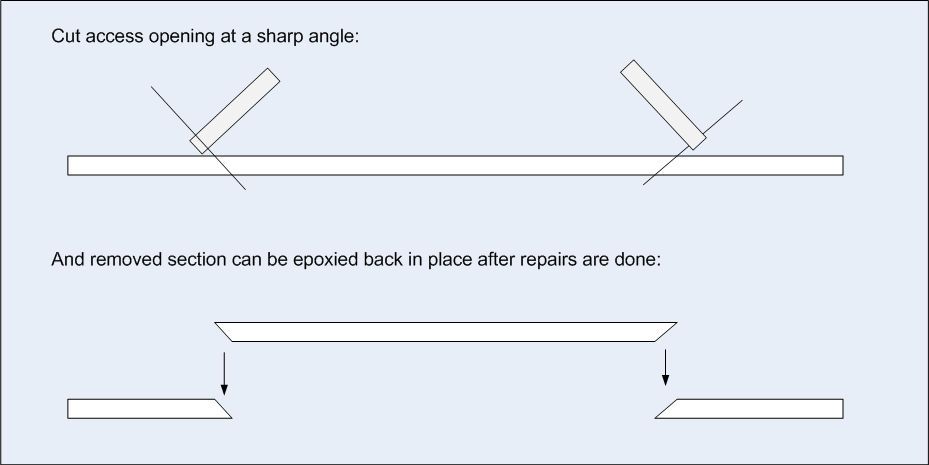
I’m thinking that a modular conversion and a series of repairs are the only thing that could get this top back to square. I could cut the panels, fix the cracks with the panels on a bench, and re-align everything through manipulation of the flanges. I’ve already ordered most of the supplies you’ve mentioned, but had a question about doing the cracks.
Most of the damages are on double walled portions and one of the small cracks is at the roof inner/outer seam. Given the high number of cracks and their locations, Would it be worth it / possible to cleanly sever the inner and outer shells to access the back side of the damage, or would I have to cut a series of access holes or create backing plates? Some of the cracks (one on the back panel for example) run across 3 contour lines (top, to main panel, to rear window for example). How would you tackle something like that?
Replacement skins are unavailable for affordable prices and I don’t want to waste a piece that can be salvaged so I am committed to fixing this. I greatly appreciate any help you can provide and thank you again for all of the support you’ve already given the community!
Ron
.jpg)
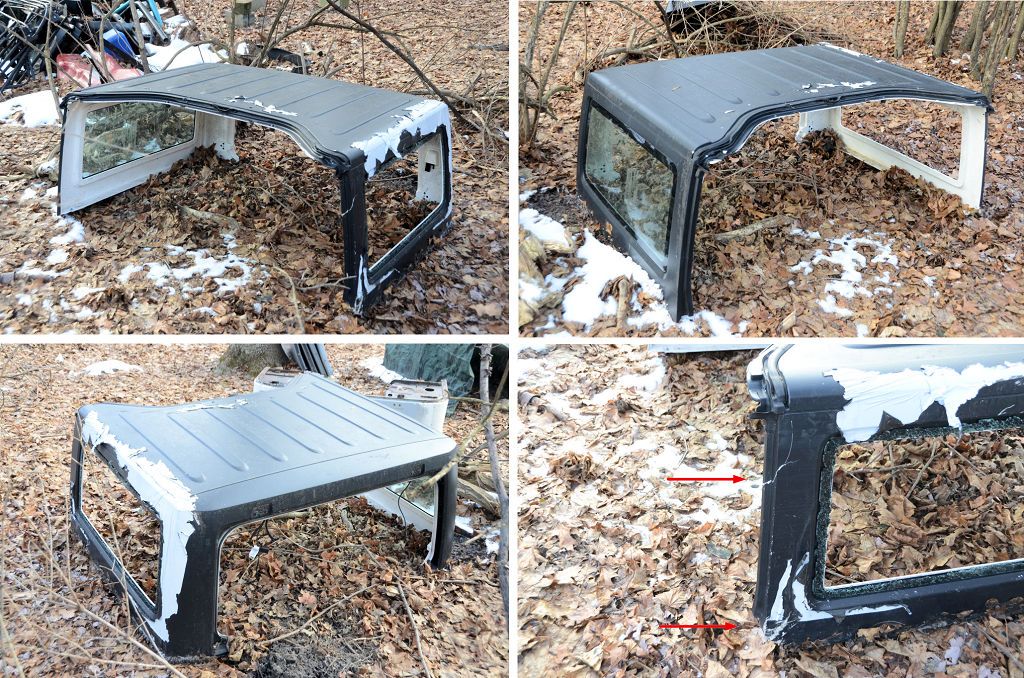
 Driver Rear Upper Corner. The crack starts just at the top line and comes down into the window area
 Passenger Panel is bowed out, should be flush with door - looks like damage to the whole upper right corner of the side panel
 Passenger Panel front and outboard damage with door open
 Rear Passenger Corner, there is a crack in the groove but it extends perpendicularly out and to the rear of the panel a few inches
 Passenger Side panel channel crack. This crack will be removed when i cut the panel off but it does cross into the window area and into the top area at different places
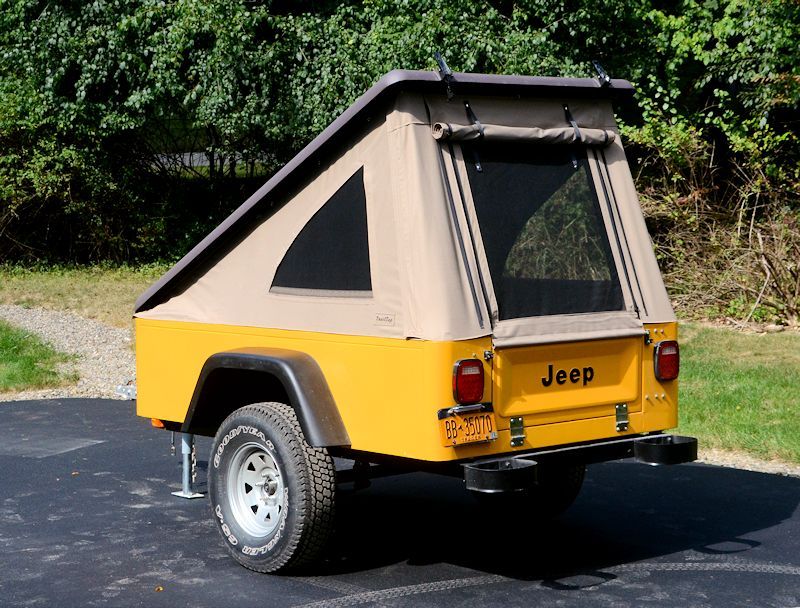
From the photos the damage seems consistent with the hardtop being "racked", meaning pushed a bit into a trapezoidal shape - like the image below, except not as extreme as shown by the lines...
 harrisonlu.com

Leaving the top and rear together will make it vulnerable to cracking at the roof/rear corner when it's removed/stored/reinstalled, you would have to be careful not to stress it when removing/storing/installing. Adding the joint there means that all the parts are basically flat and easy to store disassembled without stressing any joints.I'm picking up a top to cut up this afternoon.
Jscherb, is the process easier to cut the top into the 4 parts? I was originally just thinking of leaving the top and rear panel intact and just making the sides modular, but looking through the process it might make the mounting flanges harder to form.
Leaving the top and rear together will make it vulnerable to cracking at the roof/rear corner when it's removed/stored/reinstalled, you would have to be careful not to stress it when removing/storing/installing. Adding the joint there means that all the parts are basically flat and easy to store disassembled without stressing any joints.


