Chevy Colorado or GMC Canyon Setups

Crazy Schooner

Fortune's A Mistress
Older setups.

2006 GMC Canyon, manual, I5 - I was always changing stuff on it, mostly out of boredom or wanting to try new things out
Ran an ARB Pilbara tent and ARB 82qt fridge on a modified Front runner bakkie setup.
Red%20Truck%20Stock%20Bumper-X3.jpg

IMG_7840-X3.jpg


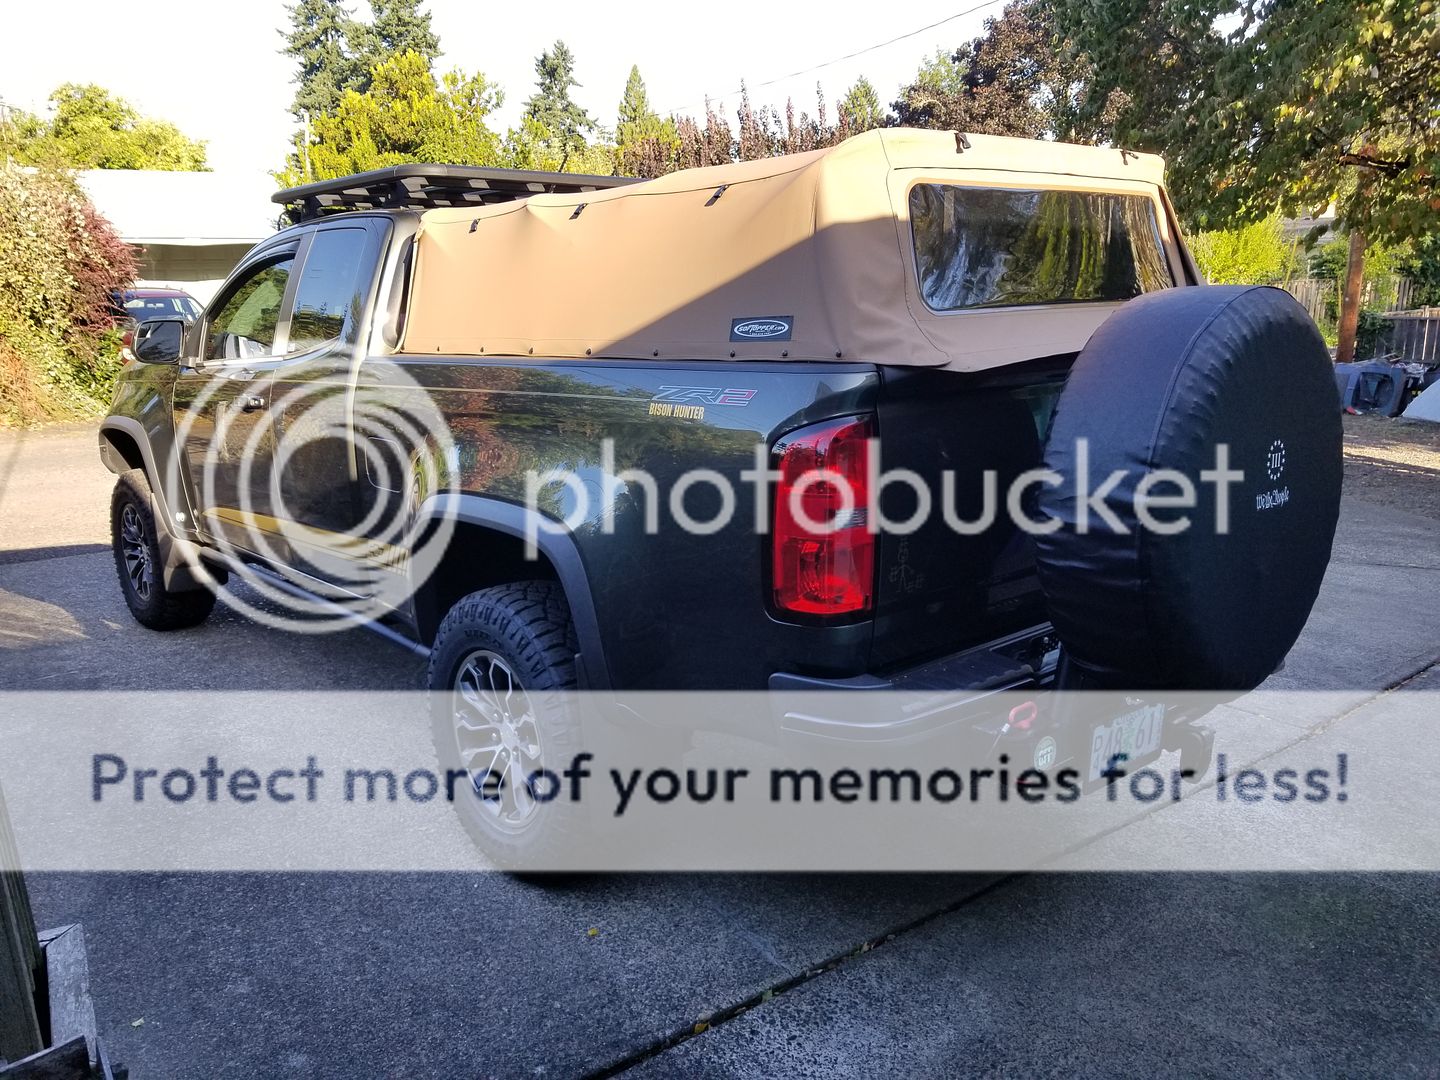
2012 Chevrolet Colorado - automatic, V8 - sold it before I could decrank the torsion bars and drop in a 4" lift.
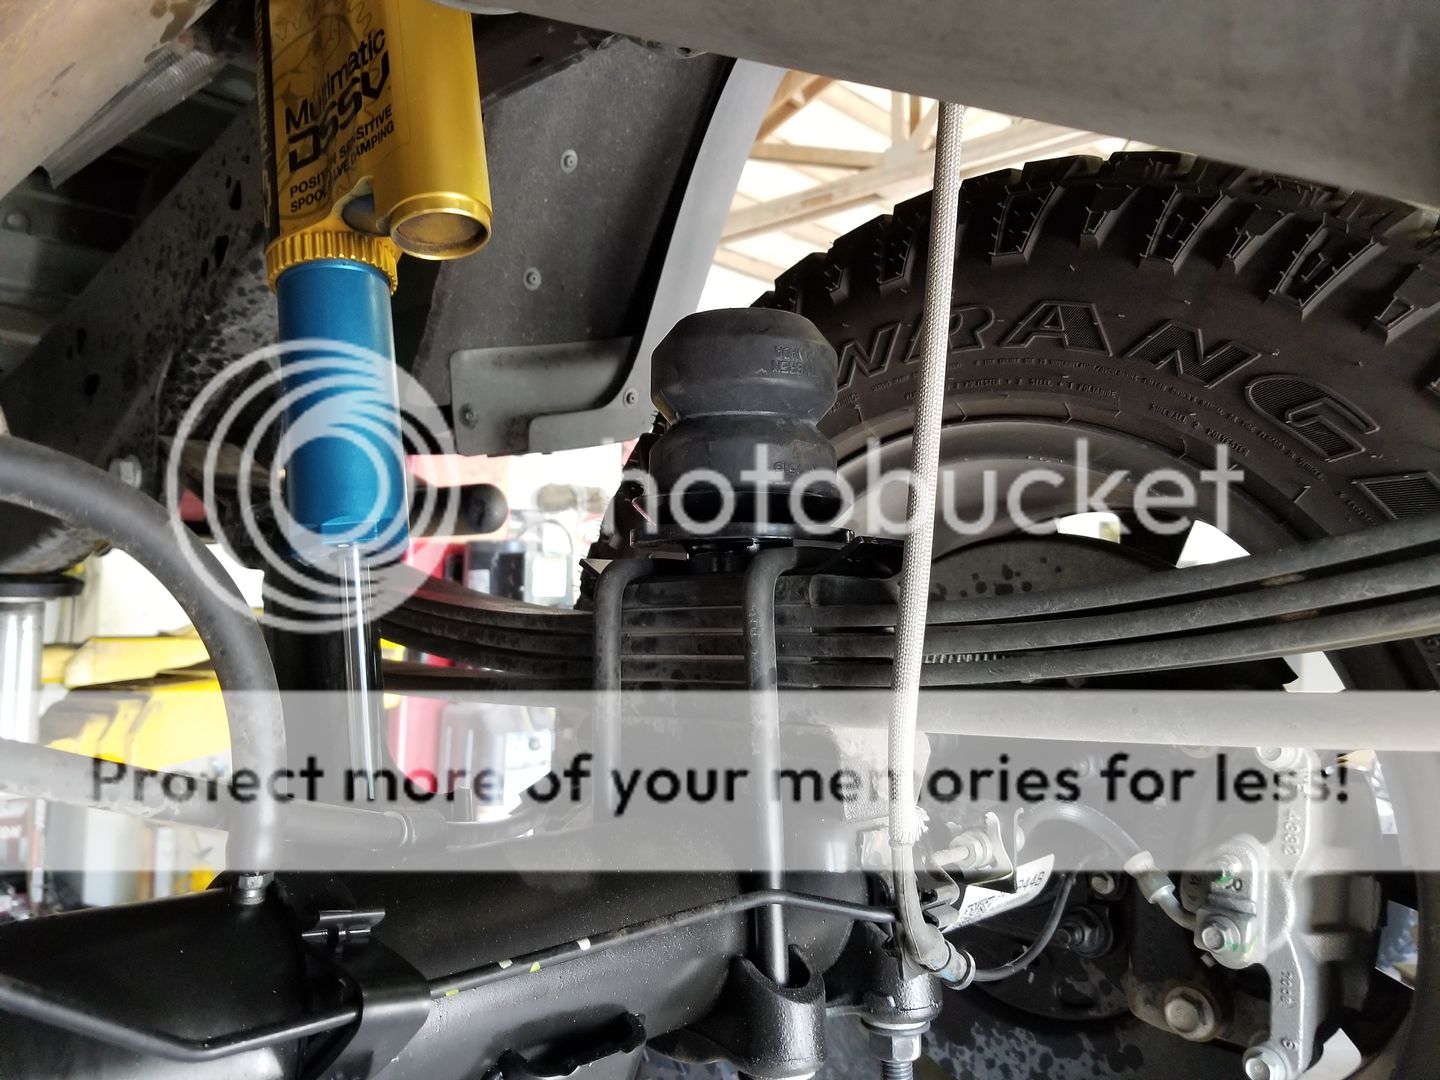
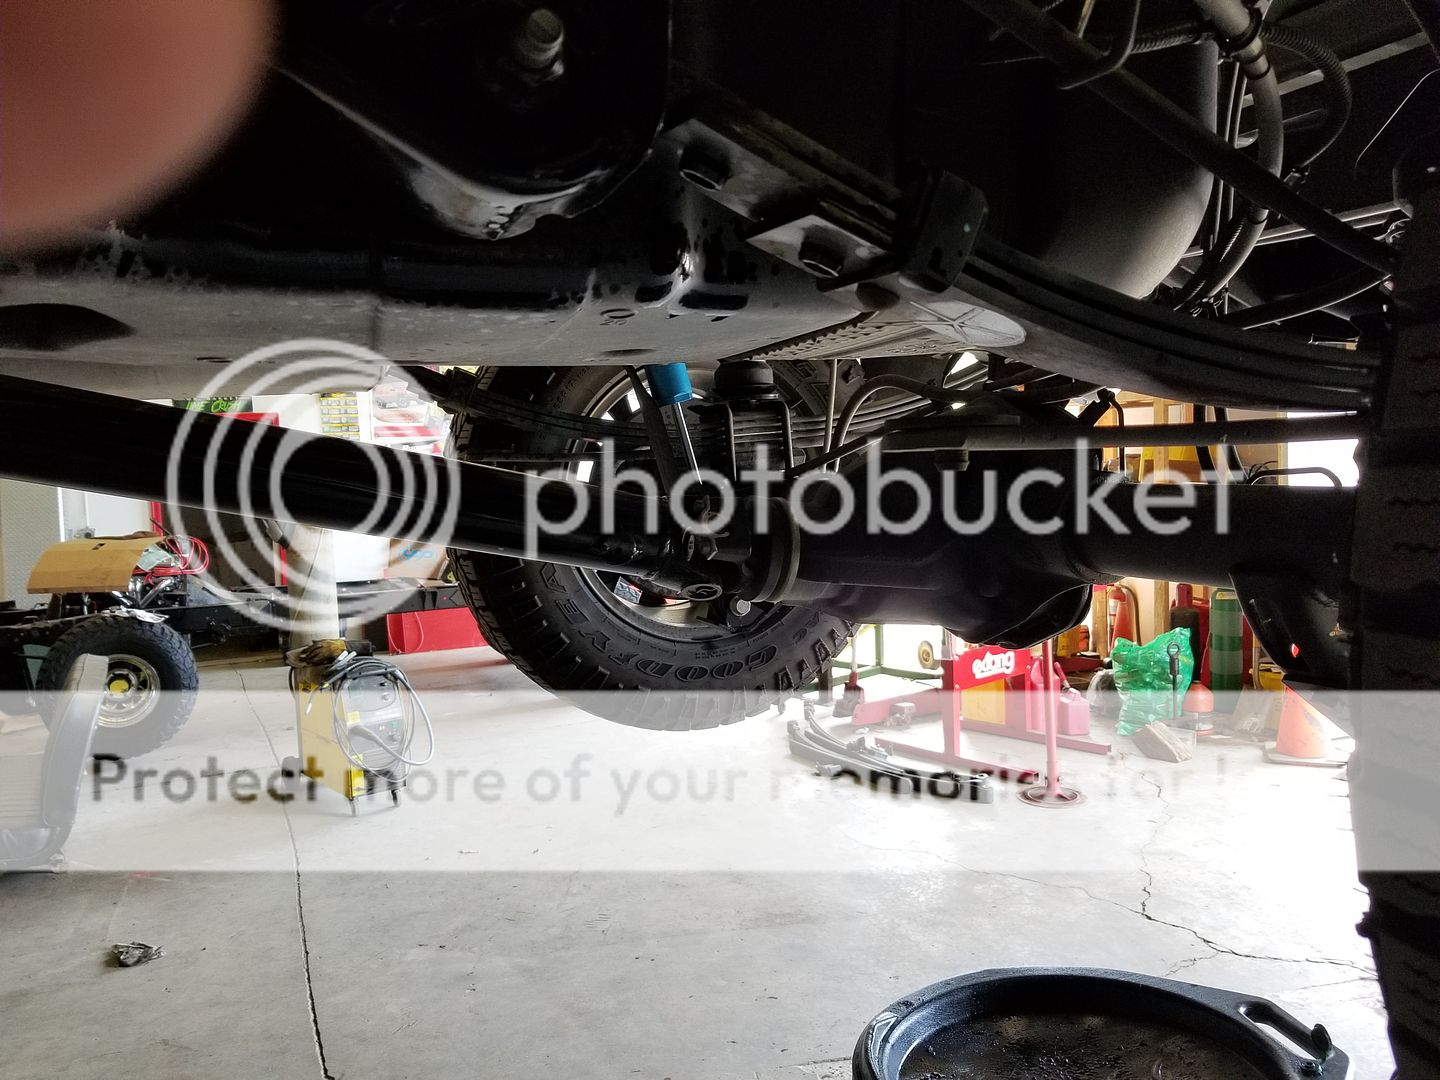
I also ran tons of different setups on this truck. Got mostly tired of just sitting in this bodystyle. I never could get fully comfortable on longer drives.
Various hardshells/softshells. Tried a couple different racks as well. Ended up selling it with a modified all-pro tacoma rack.
IMG_3411-X3.jpg

bw-X3.jpg
IMG_4228-X3.jpg


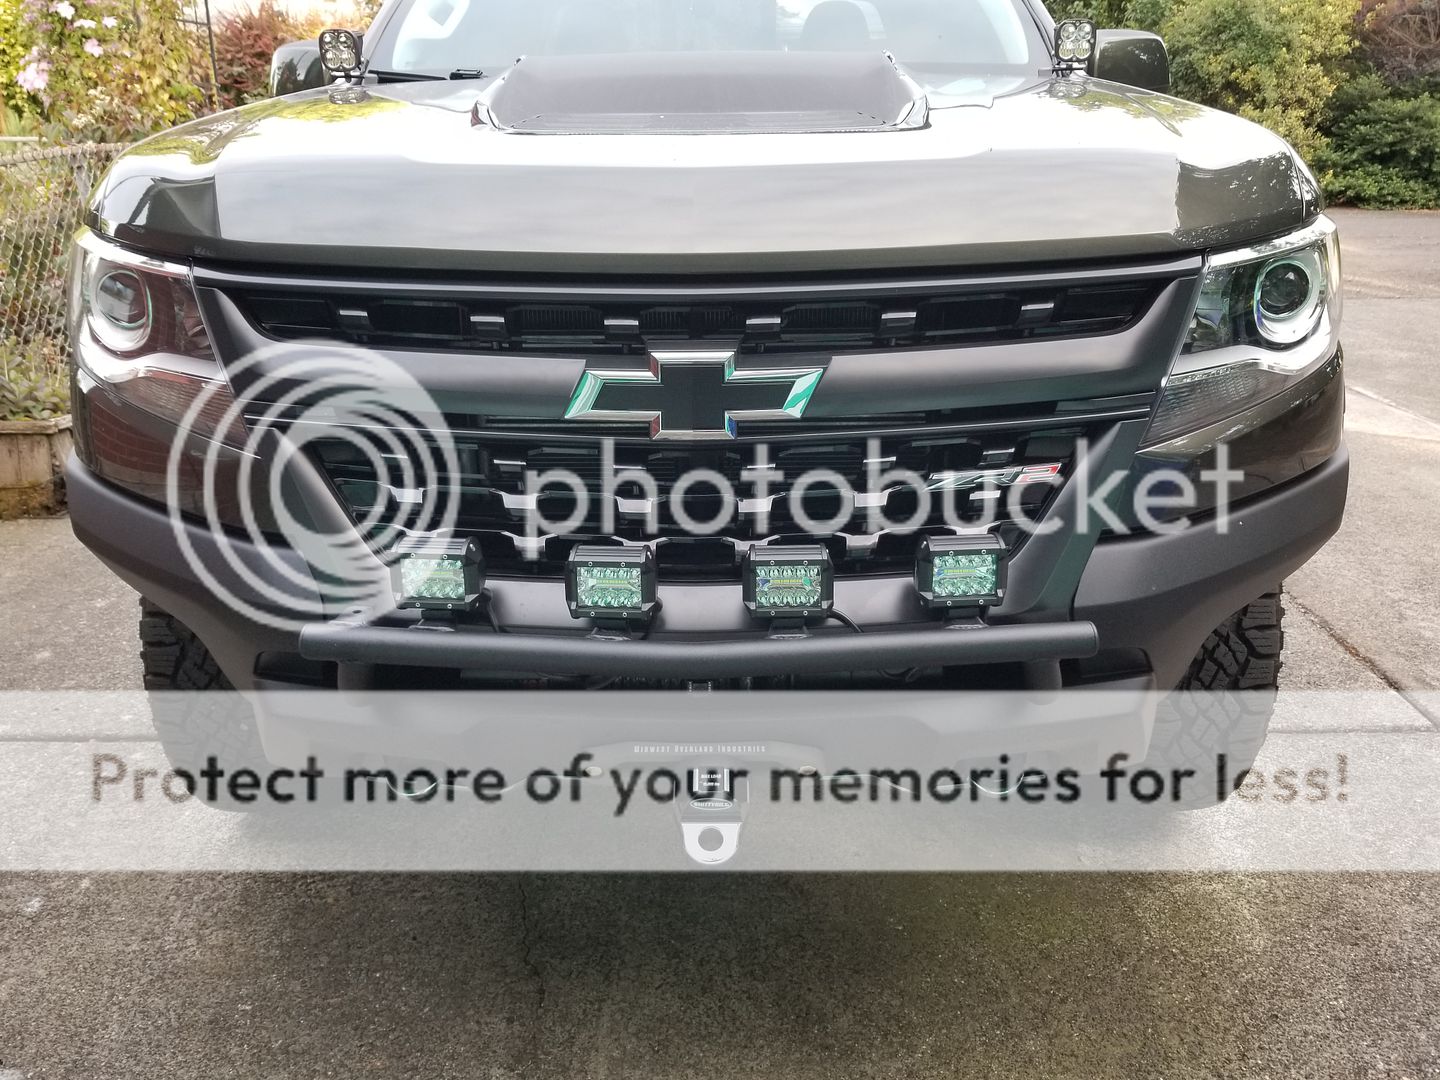
2019 Colorado ZR2 - gasser
Didn't have it very long, portions of the heater system kicked the bucket and I got offered more on trade in then I paid, so I traded it back in.
Rigid%20A1-X3.jpg
Chromstica-X3.jpg
 

Tenchi64

New member
My plan for the build was to make everything as portable and removable as possible while still providing space for electrical and mechanical as well as a bed platform for the kids. The hope was to fit a family of four somewhat comfortably in the camper. Whether that will be a success is to be determined but it has worked really well so far. I settled on a mixture of built-ins and removable bins to allow for the space inside for four people. The bins can come out to make room for sleep or stay in if I'm solo or just with my wife.

When I started the auxiliary battery system, I really wanted to stuff the battery somewhere under the truck bed. However, there wasn't much room so I settled on a homemade portable battery box. I found a renogy 100ah gel battery on craigslist for $100 and got a 30a DC-DC charger on amazon warehouse deal for $105. I ran wire from my starter battery to the charger. I put a fuse block and some connectors on the box. The charger is also an MPPT solar capable so I wired a sae plug for a future panel. I eventually ditched the tool box enclosure but kept the portability by wiring in quick disconnects. The wire to the starter battery connects to the auxiliary battery via and anderson plug. The solar panel and Drifter switch panel connect via sae connectors.


rsemOo9.jpg

7v3UPqW.jpg


Easily my favorite part, not counting the camper itself, is the diesel heater. Being able to keep myself and four year old comfortable with lows in the 20s.
CFU7Q8r.jpg

fu2xHSE.jpg


I carpeted the side wall panels. I ended up ordering a generic Bedrug mat. It was a little pricier than just using automotive carpet but it was really easy to work with. It has ~1/2in foam backing and I was able to attach adhesive velcro so they are easily removable. It's strong enough to hold small velcro organizers. I haven't done any rough roads with them so we'll see how well they actually hold.

The stock dome light always bothered me. I did led strip lights all the way around on a dimmer. The strip lights are mounted inside an aluminum channel with a diffuser. I have the dimmer wired downstream of a switch so you can set the brightness and keep it there. The interior lights are wired to a new switch on the stock panel and I donated the existing light switch to the exterior lights. The strip provides really even light over the tailgate.

I found a mattress on amazon that fit the space perfectly so I don't need to get custom cushions made. It has a waterproof cover which is good for kids.

I put mini d-rings all over the extrusion so I can use bungees to hold stuff.

Finally put sheets on the mattress. I'm usually in a sleeping bag but now with the heater I'll probably switch to a blanket so the sheets will be nice.

It's packed up for a trip down south so it'll be interesting to see how warm weather camping goes... glad I have the fan.
I have a decked system and I am putting on an AT summit on mine and was thinking whats next. This is awesome work and I plan on doing a lot of the work you did here. Thanks for the inspiration. I may post my journey and if you see it looks similar to yours. take it as flattery :cool:
Two question: How hard is it for you to move things around to carry lumber or longer pieces?
How is the bed secured?

Thanks!

Currently, the bed platform in the back is a separate and sits on the bed rail on one side and some angle aluminum mounted to the main cabinet on the other side. It is bolted down with 2 bolts so I remove that panel fairly regularly if I need to move something tall and long. For sheet goods, it helps as it creates a platform. So 4x8 typ stuff can just rest on the cabinets and I leave the back glass open.

The main cabinet down the right side is bolted to the truck bed in the front (rivnut) and clamped to the bed rail in the back. So to remove is pretty trivial (2 fasteners). However, I really haven't had the need to remove that part. I recommend getting a rivnut tool (I got a cheap harbor freight one).
 

Tenchi64

New member
Thanks!

Currently, the bed platform in the back is a separate and sits on the bed rail on one side and some angle aluminum mounted to the main cabinet on the other side. It is bolted down with 2 bolts so I remove that panel fairly regularly if I need to move something tall and long. For sheet goods, it helps as it creates a platform. So 4x8 typ stuff can just rest on the cabinets and I leave the back glass open.

The main cabinet down the right side is bolted to the truck bed in the front (rivnut) and clamped to the bed rail in the back. So to remove is pretty trivial (2 fasteners). However, I really haven't had the need to remove that part. I recommend getting a rivnut tool (I got a cheap harbor freight one).
I'm going to mount fridge slide/cabinet to my decked system. Still figuring that out as it has to be bolted down to the steel frame.
Where did you find the small bed to fit back there. 5-10 minute google search didn't come up with anything good.

Next week I will be installing my AT Summit on the back of my truck after its wrapped to match my truck.

I found the mattress on amazon... it just happened to be exactly the right length and comes with a waterproof cover (good for kids). The only negative is that it is memory foam which the firmness is temperature dependent and around freezing and below, it gets rock hard... easy enough to warm up but just something to consider:
https://www.amazon.com/gp/product/B07FKT17Z3/
 

emulous74

Well-known member
I'm going to mount fridge slide/cabinet to my decked system. Still figuring that out as it has to be bolted down to the steel frame.
Where did you find the small bed to fit back there. 5-10 minute google search didn't come up with anything good.

Next week I will be installing my AT Summit on the back of my truck after its wrapped to match my truck.

I mounted mine by removing everything out of the "wide" drawer and crawling in the drawer to tighten the nuts on the bolts that went through, you can also see where the metal is to drill into. You can also follow the divets that are there for the decked track system


Tenchi64

New member
Very Nice setup and the tip helps as I was thinking I was going to have to unbolt the middle to lift. I am curious if i can get a narrower fridge/rail and fit it over the smaller drawer. Also thinking of putting the a panel on the bottom corner. It seems like a perfect spot to put usb ports, voltmeter, switches for lighting, etc. I'll post some before and after pictures..
 

Hoooogan

Member
well, I figure i may as well drop my setup here too...

She's a 2018 ZR2 with a lot of junk in the trunk. Most notable are the visual upgrades - Relentless bumpers, Baja Designs lights, Leer 100R shell with DIY rack and ARB Awning, 1.25" BORA Wheel spacers, 589 Fabrication leveling kit

Overall, roughly 900# extra weight. She rides a bit lower than stock as you could expect, hauling that much weight. But man, the ride is amazing (coming from a Tacoma on Kings). The extra weight compliments the factory spring/shock combo almost perfectly.

Future holds 35's, 4.56 gears, OME leafpack, Kings or ICON, shock relocation, hydro bumps, some AEV skids, maybe the AEV highmark flares, real sliders, possibly a Trifecta Tune.

c.PNGa.PNGE.PNG
 

Forum statistics

Threads
185,814
Messages
2,878,490
Members
225,378
Latest member
norcalmaier
Top