Root Moose
Expedition Leader
I LOL'ed.

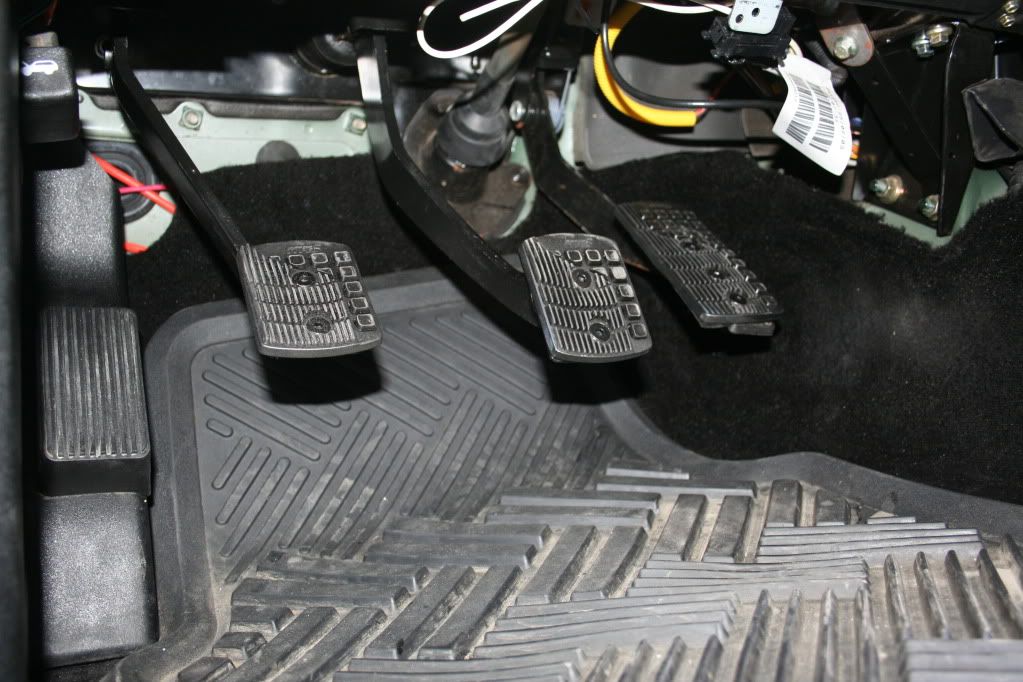
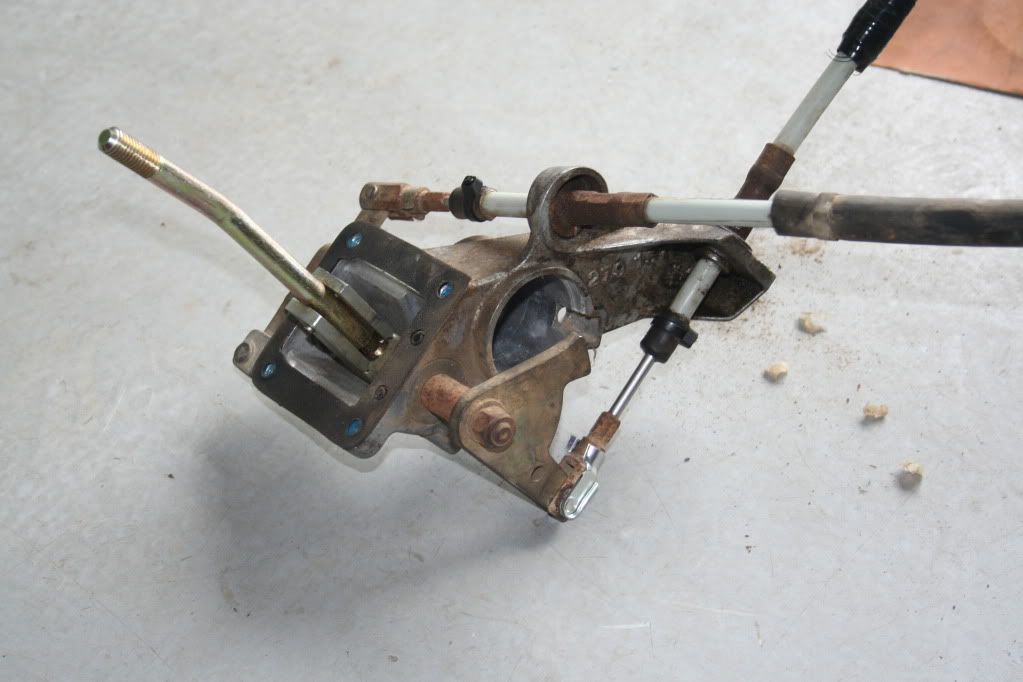
") I like the way they look and I wanted to move the pedals around a bit. I'm using the D1 clutch pedal, and the D2 auto brake pedal. I cut the pedals down to fit the pedal covers properly. I moved the clutch pedal over to the right a bit, to get it away from the dead pedal. By using the D2 auto brake pedal, I was able to shift it farther over to the right than I could with a D1 brake pedal. I wanted it closer to the gas for heel-toe. And, I put the gas pedal cover over to the left, closer to the brake, again for Heel-toe. There's enough space I shouldn't have a "Toyota moment" even wearing boots, but now it's possible to heel-toe. I thought I'd have to bend up new lines, but I was concerned because the OEM lower line has a flex section built in, since the powertrain moves so much. I wanted to retain that, but didn't have a good way of doing it with the parts I could get at the local shops. Interestingly, I found out how the LHD clutch routing works. The line starts on the left side of the bellhousing, and crosses over the top of the bellhousing to the RHS. From there there is a short jumper to the RHD clutch MC. For LHD vehicles, they still use that same lower section. Then the upper pipe crosses back over the top of the engine to the MC on the LHS! :Wow1:
I like the way they look and I wanted to move the pedals around a bit. I'm using the D1 clutch pedal, and the D2 auto brake pedal. I cut the pedals down to fit the pedal covers properly. I moved the clutch pedal over to the right a bit, to get it away from the dead pedal. By using the D2 auto brake pedal, I was able to shift it farther over to the right than I could with a D1 brake pedal. I wanted it closer to the gas for heel-toe. And, I put the gas pedal cover over to the left, closer to the brake, again for Heel-toe. There's enough space I shouldn't have a "Toyota moment" even wearing boots, but now it's possible to heel-toe. I thought I'd have to bend up new lines, but I was concerned because the OEM lower line has a flex section built in, since the powertrain moves so much. I wanted to retain that, but didn't have a good way of doing it with the parts I could get at the local shops. Interestingly, I found out how the LHD clutch routing works. The line starts on the left side of the bellhousing, and crosses over the top of the bellhousing to the RHS. From there there is a short jumper to the RHD clutch MC. For LHD vehicles, they still use that same lower section. Then the upper pipe crosses back over the top of the engine to the MC on the LHS! :Wow1:
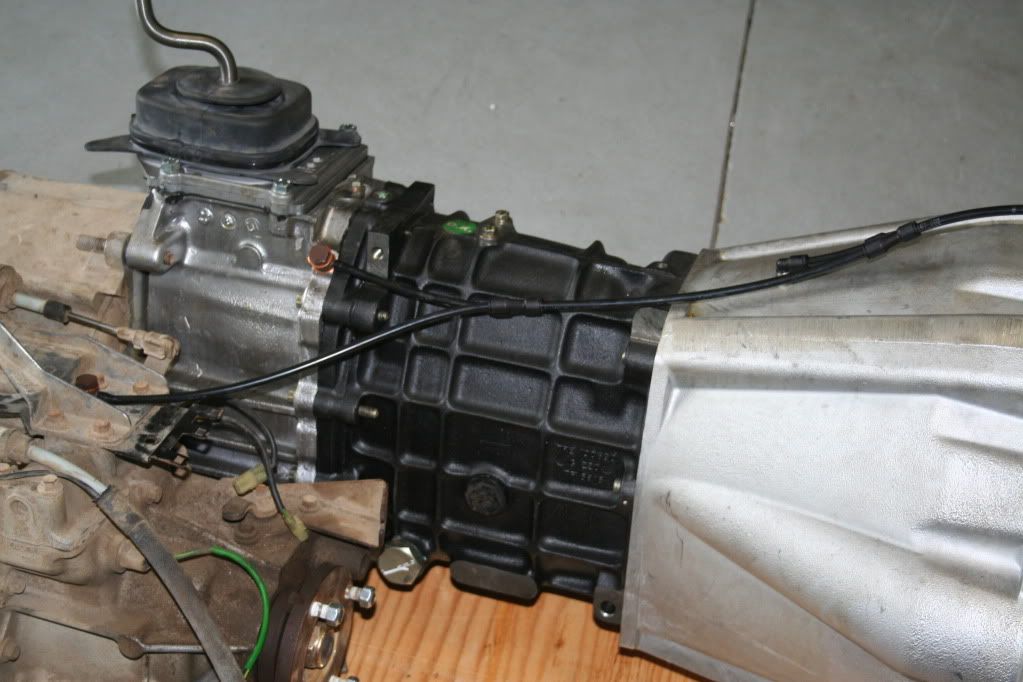
Sounds like the syncromesh isn't 100%. If you shift slow, with so little inertia, the output slows a lot, and the syncro has to work. Shift really fast, and they slow down just enough to sync naturally? Proof would be in the downshifts.I rowed through all the gears, checking out the clutch, etc, looking at the empty outputs from the LT230 spinning. All seems well. The 3-4 shift is a bit baulky, but I figure it's because with no inertia connected to the transmission output to keep the output shaft spinning.... I dunno, we'll see. I found it was fine if I shifted fast enough from 3-4 that the LT230 didn't stop spinning. If I shifted slow, 4 would baulk.
I think the output spinning is harmless - just a bit of friction between the shaft and the free-wheeling cogs. It goes away when the clutch is disengaged and the input shaft doesn't turn.The clutch seems to work perfect as well. I notice in neutral with the clutch out, the outputs spin a bit. I had noticed that effect when the box was on the ground, turning the input by hand with the box in neutral, the output had a bit of drag on it, though you could hold it. Soon as I push in the clutch, the outputs stop.
I figure as long as I never buy a Honda, I'll never know what I'm missing.