You are using an out of date browser. It may not display this or other websites correctly.
You should upgrade or use an alternative browser.
You should upgrade or use an alternative browser.
Build - Fiberglass & Foam Truck Camper
- Thread starter underkill
- Start date
underkill
Active member
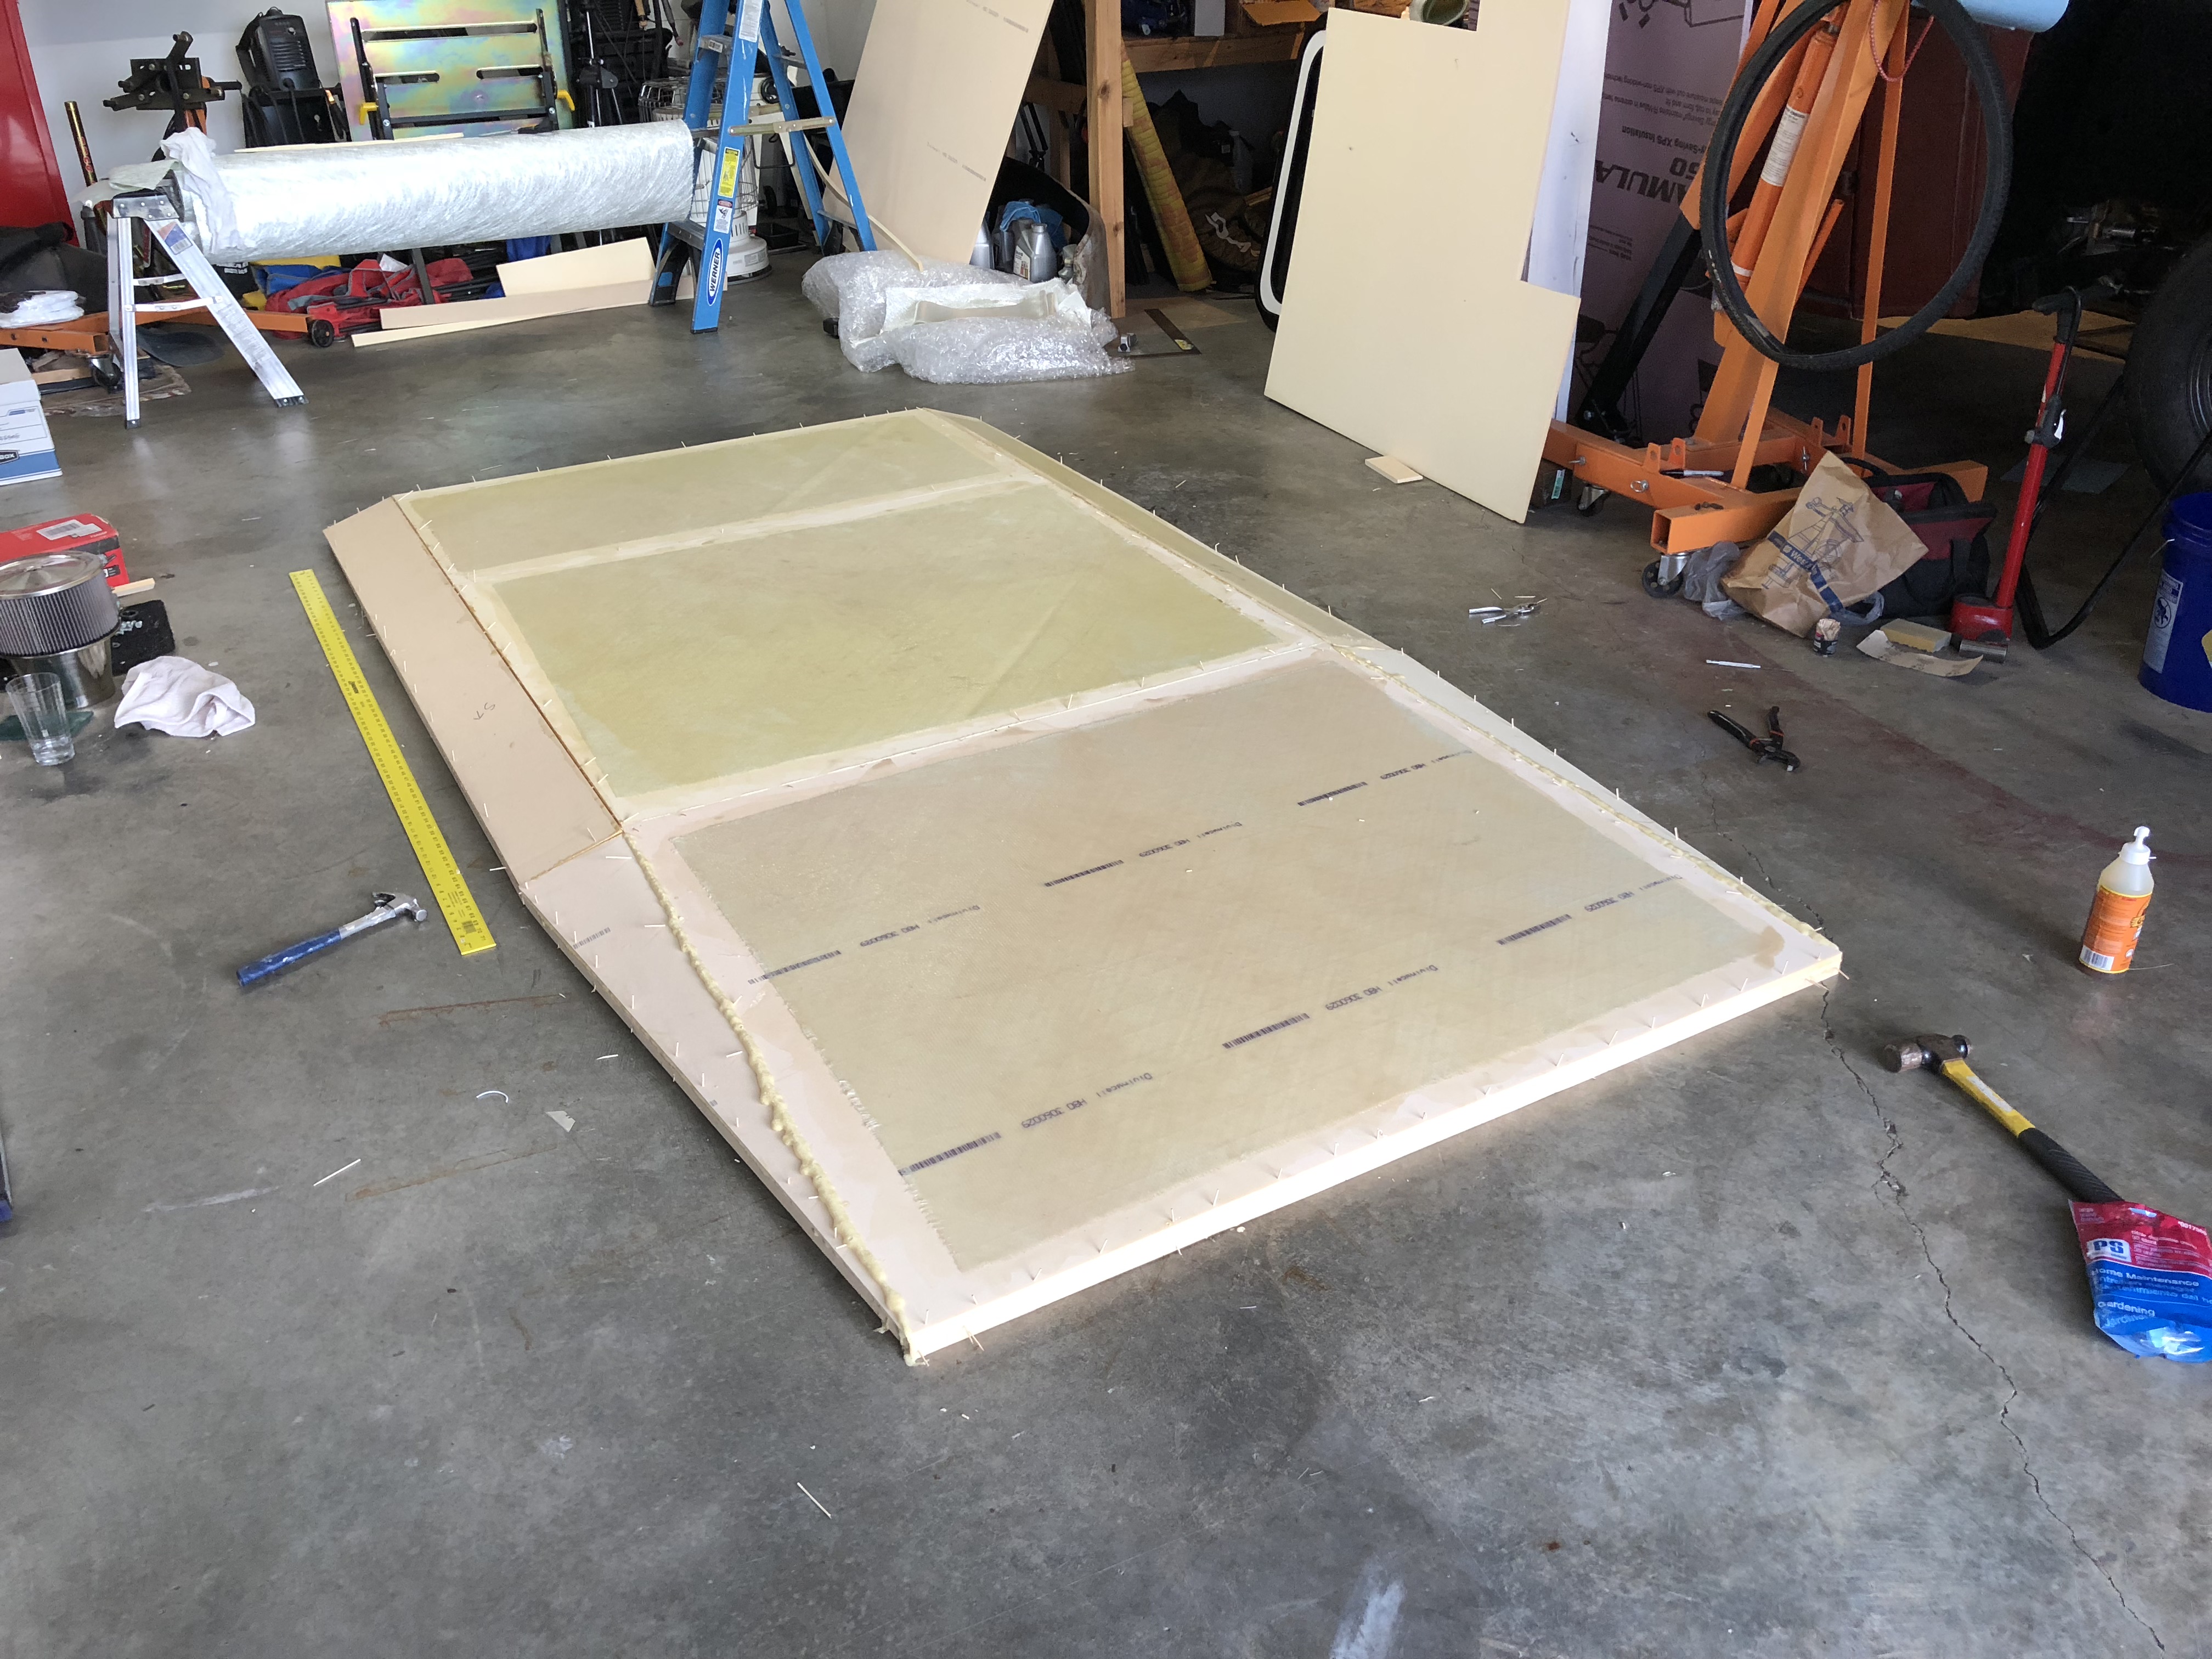
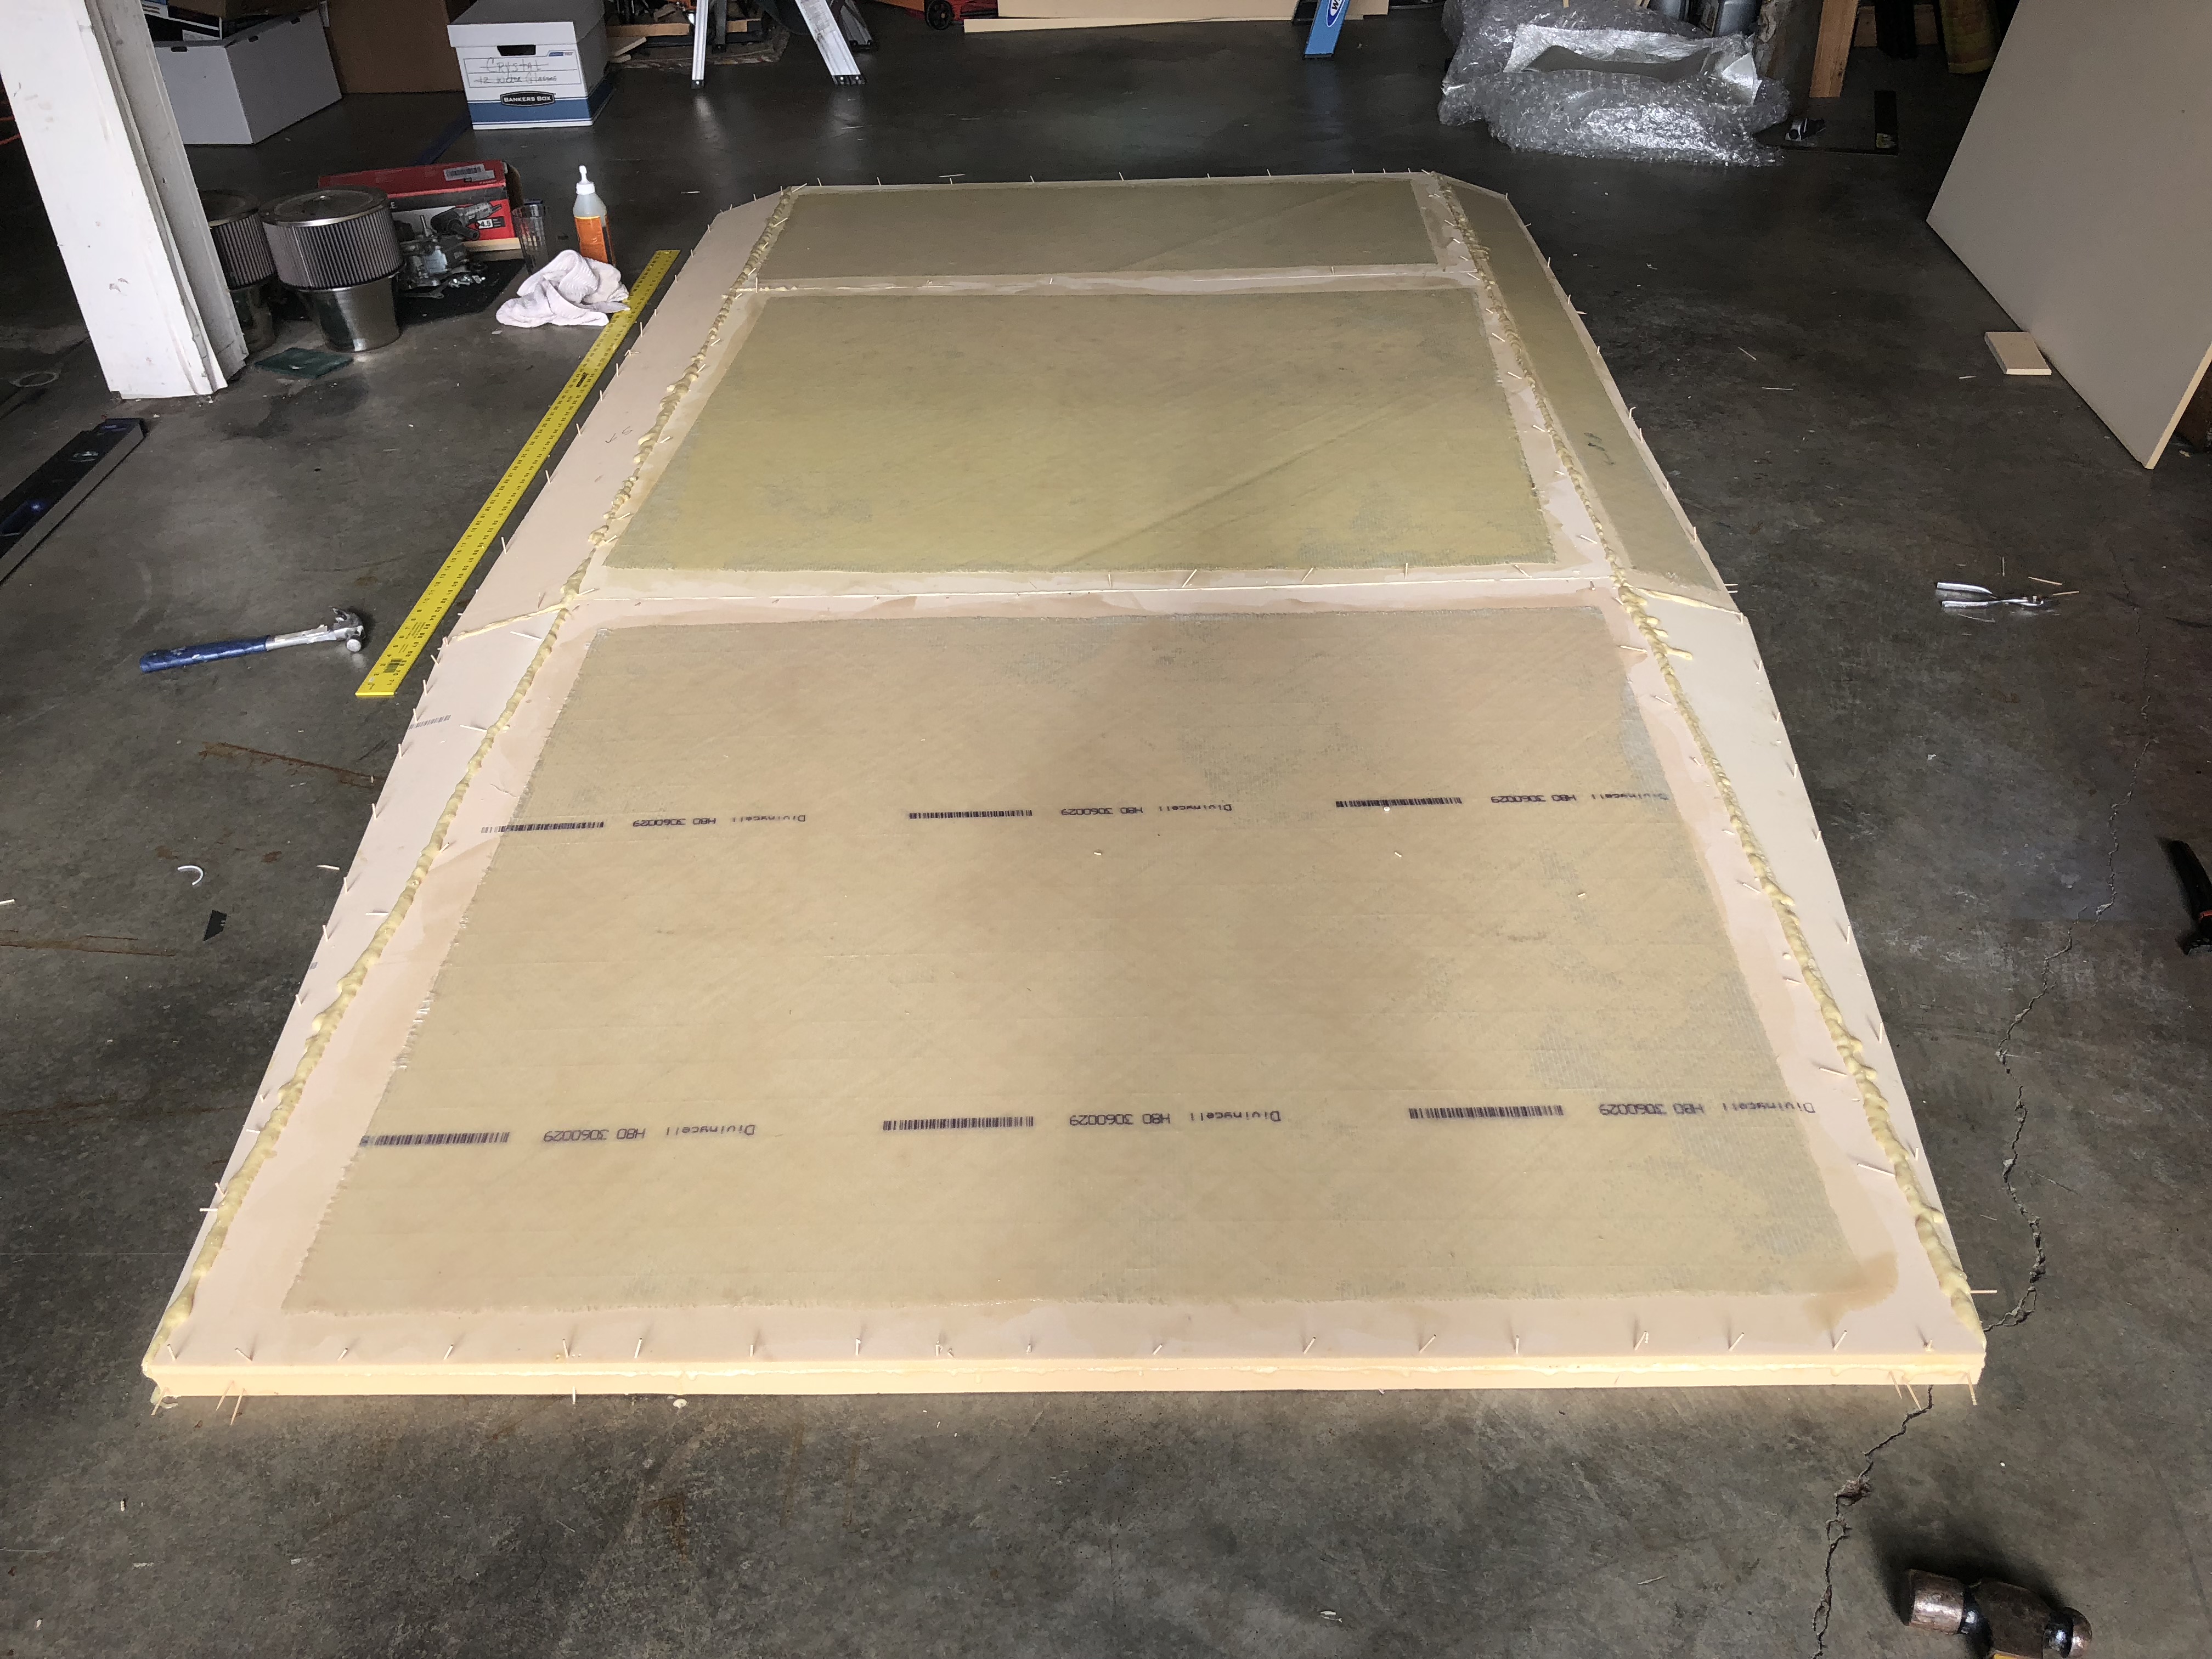
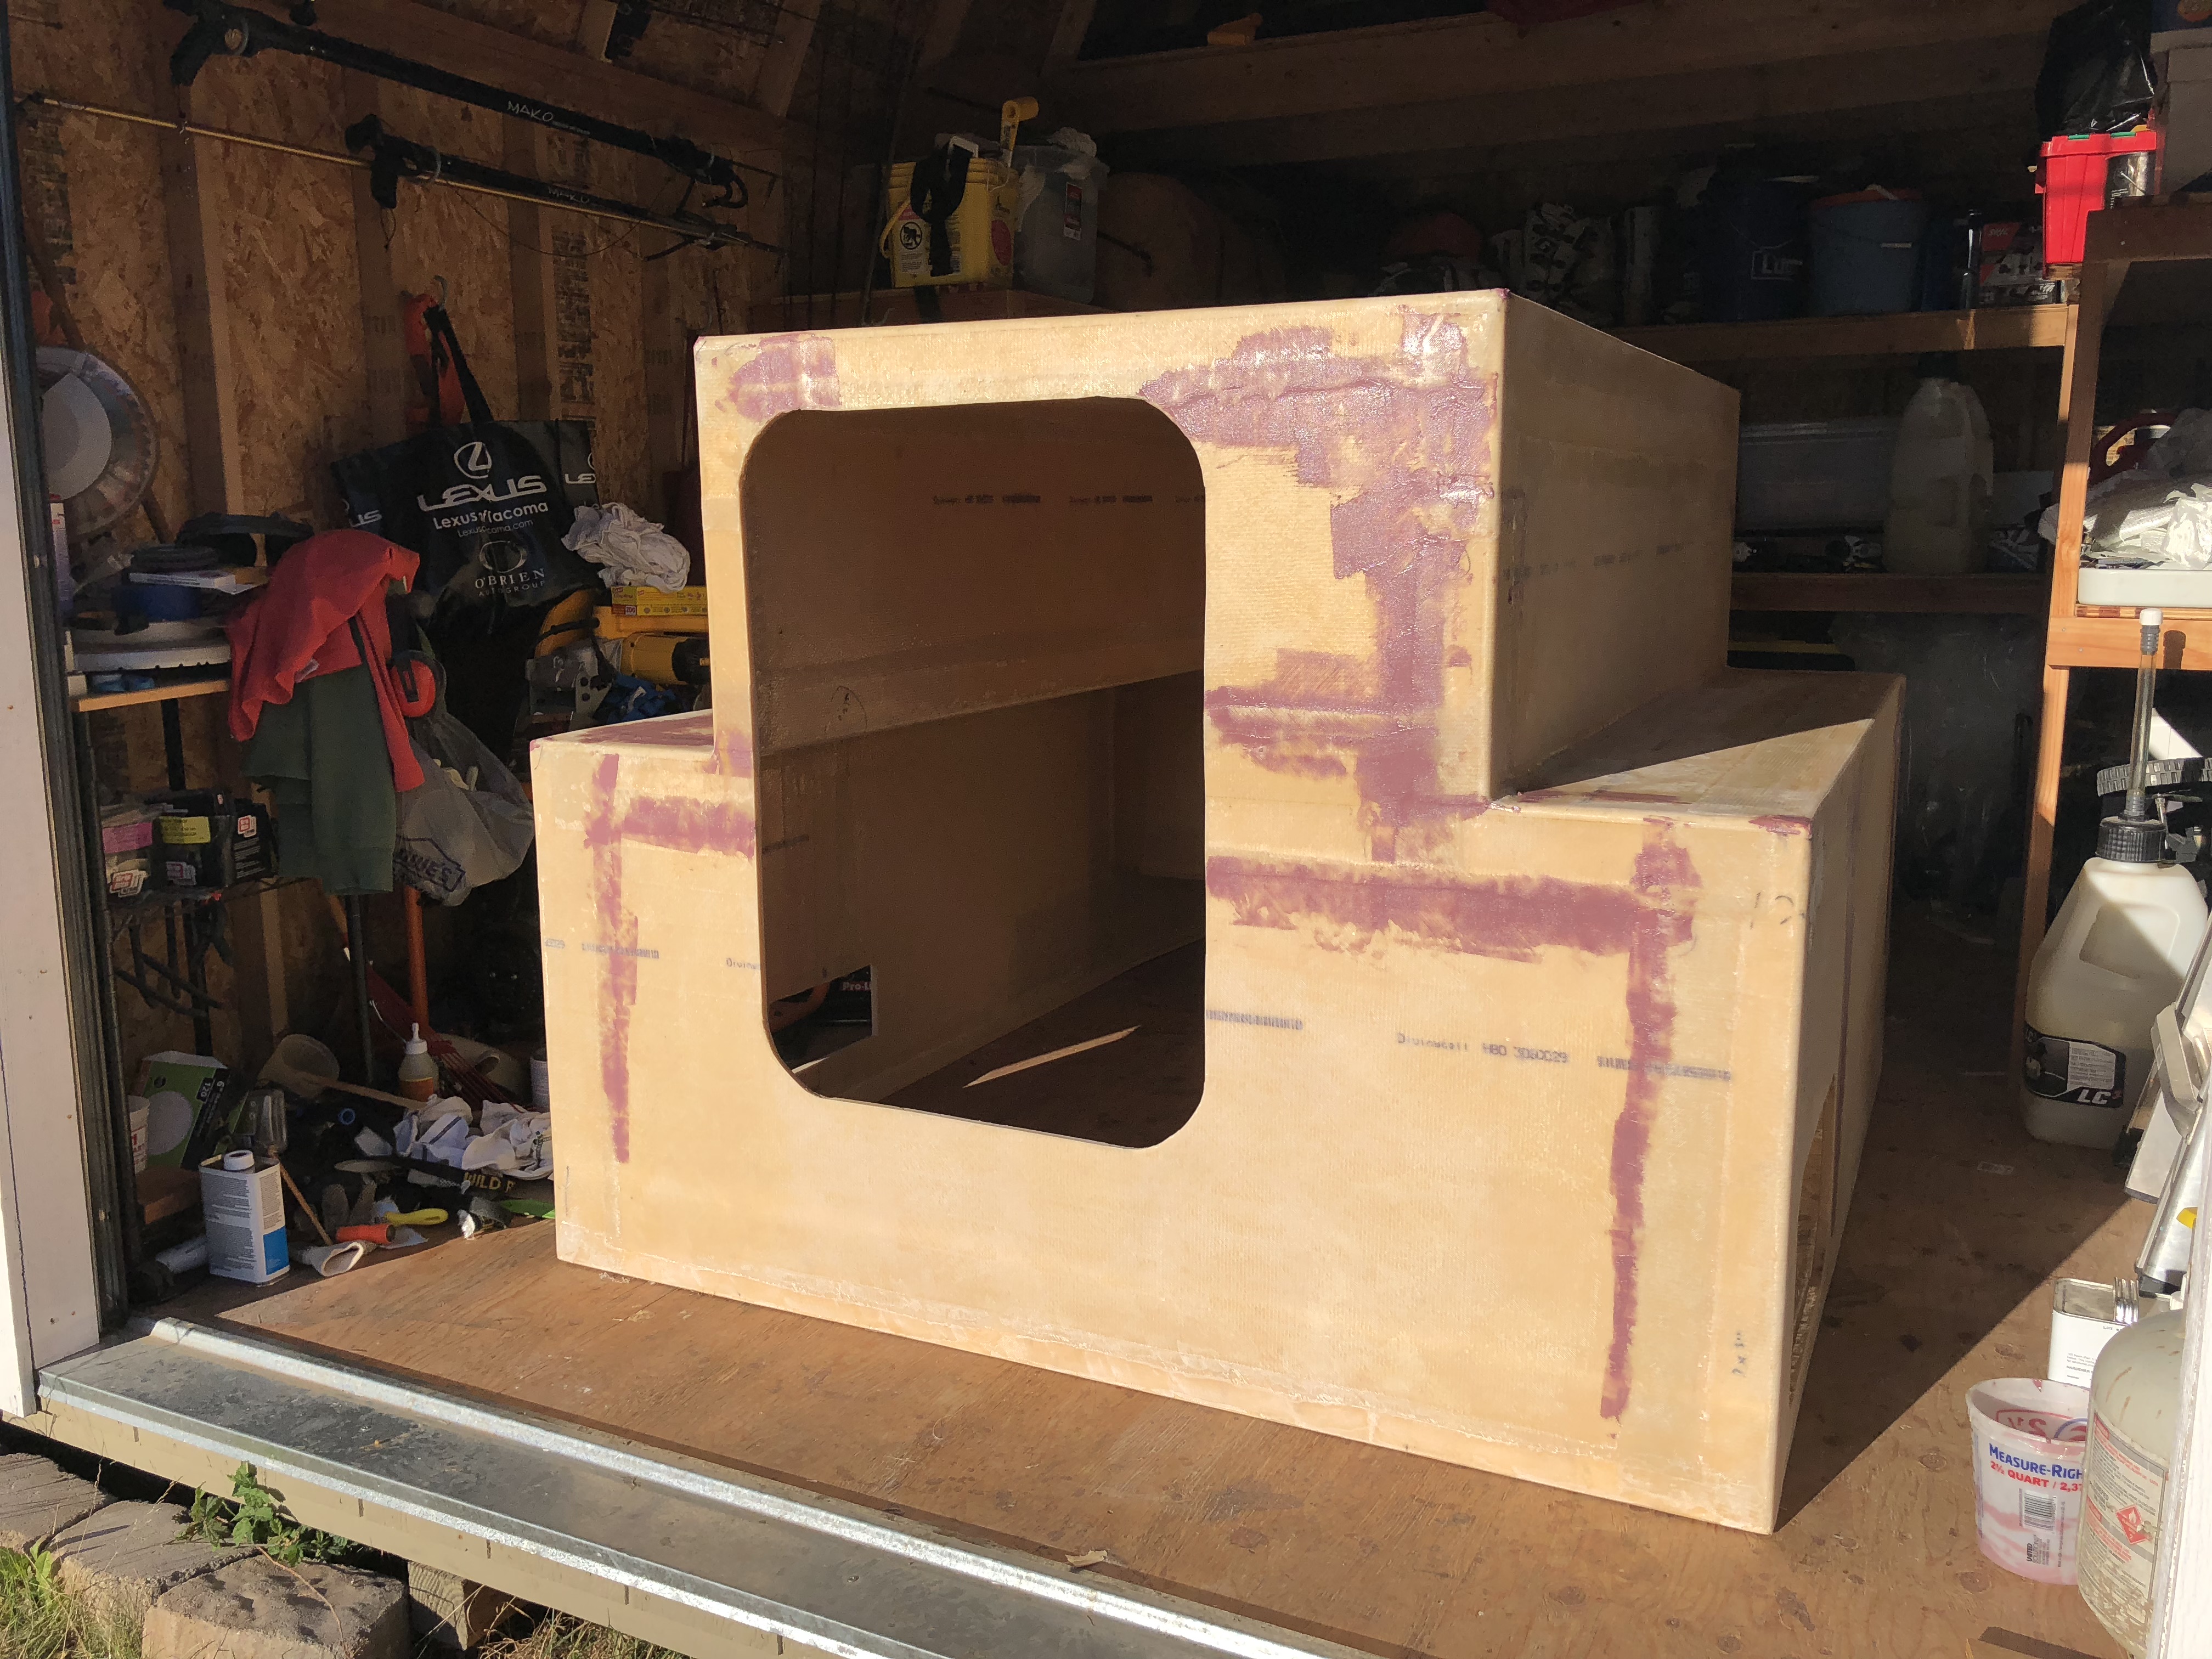
Today we finished laying up the other side of the roof panels
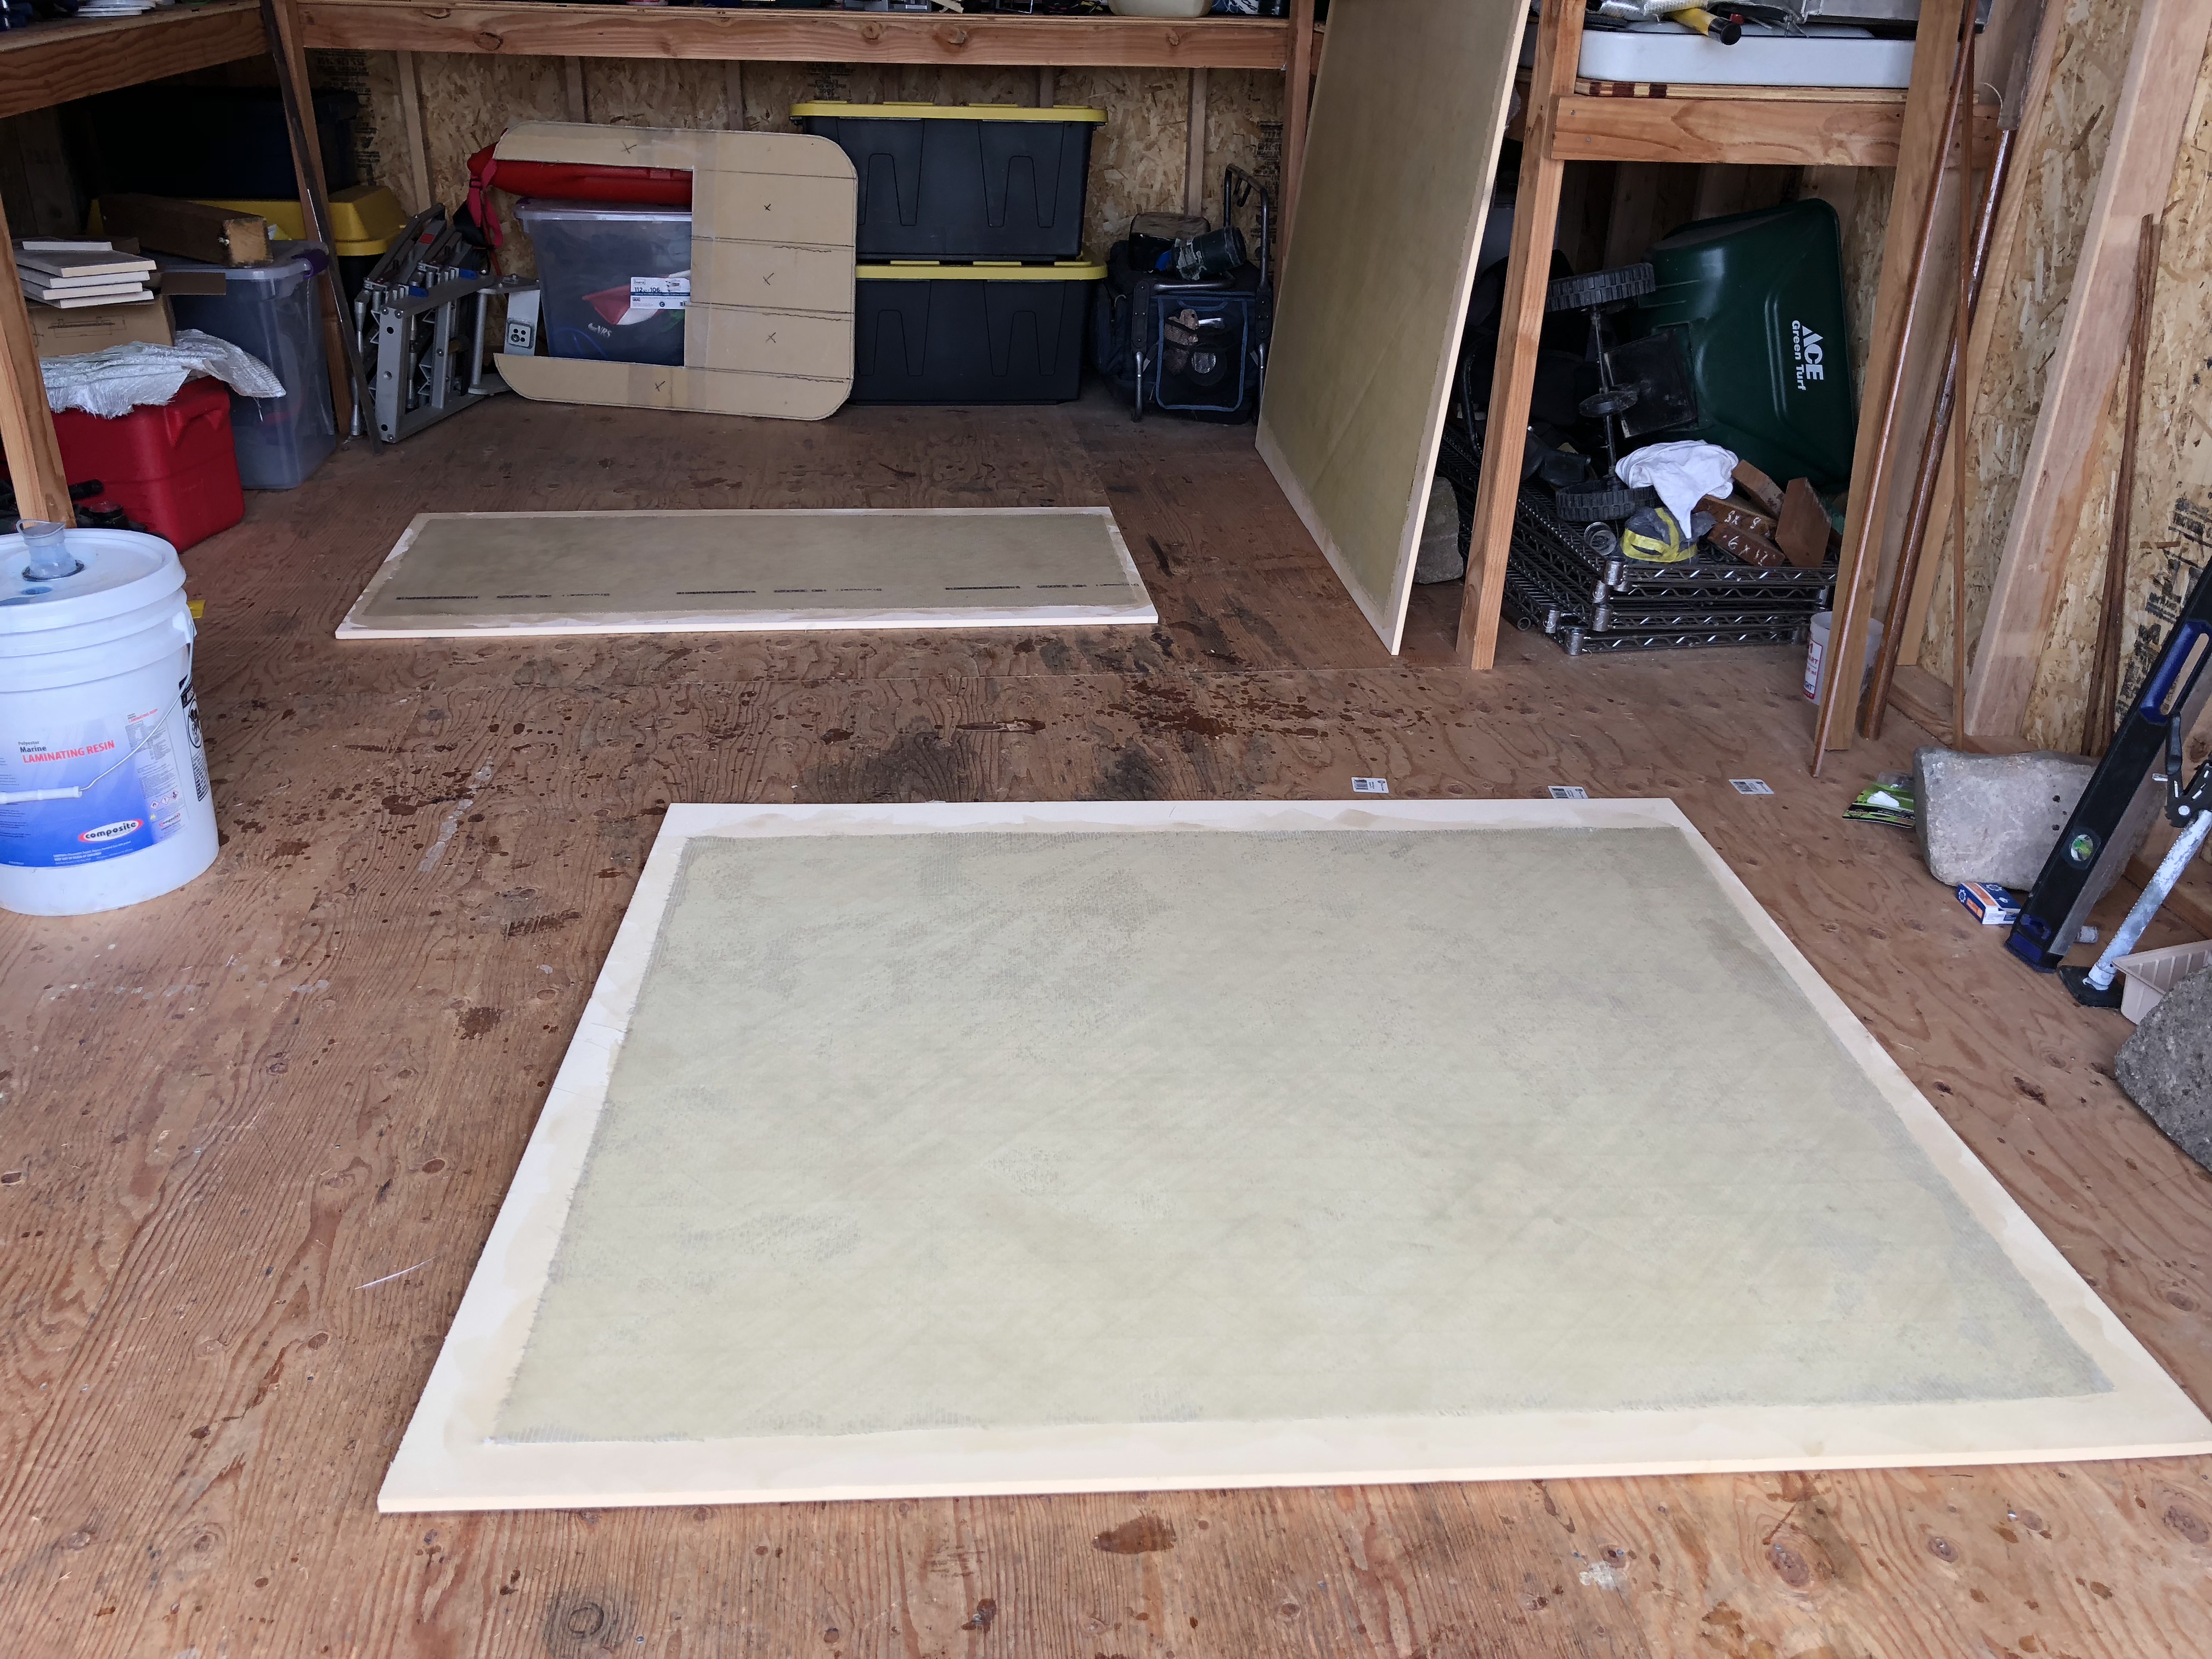
...and started adding some more layers of to the lip around the shell.
At this point, something happened that I wouldn't have predicted.. we ran out of resin! I thought it was ridiculous when we bought the full 10 gallon resin setup. How could we possibly use that much!? but... yeah we did... that's a lot of fiberglass.. Since our day just started, Jason ran to West Marine and vastly overpaid for a few little cans to keep us going until we could make it back to the store for more. We finished our roof panels and had dinner while they set up outside in the sunshine. Now we can actually start assembling the roof panels!
We started with the front section, pinning the panels to the pink foam jig underneath. Then wetted the surfaces down (sometimes just pouring water into the cracks between the panels) and poured gorilla glue in there. That would start foaming up while we got the rest of the panels put together!
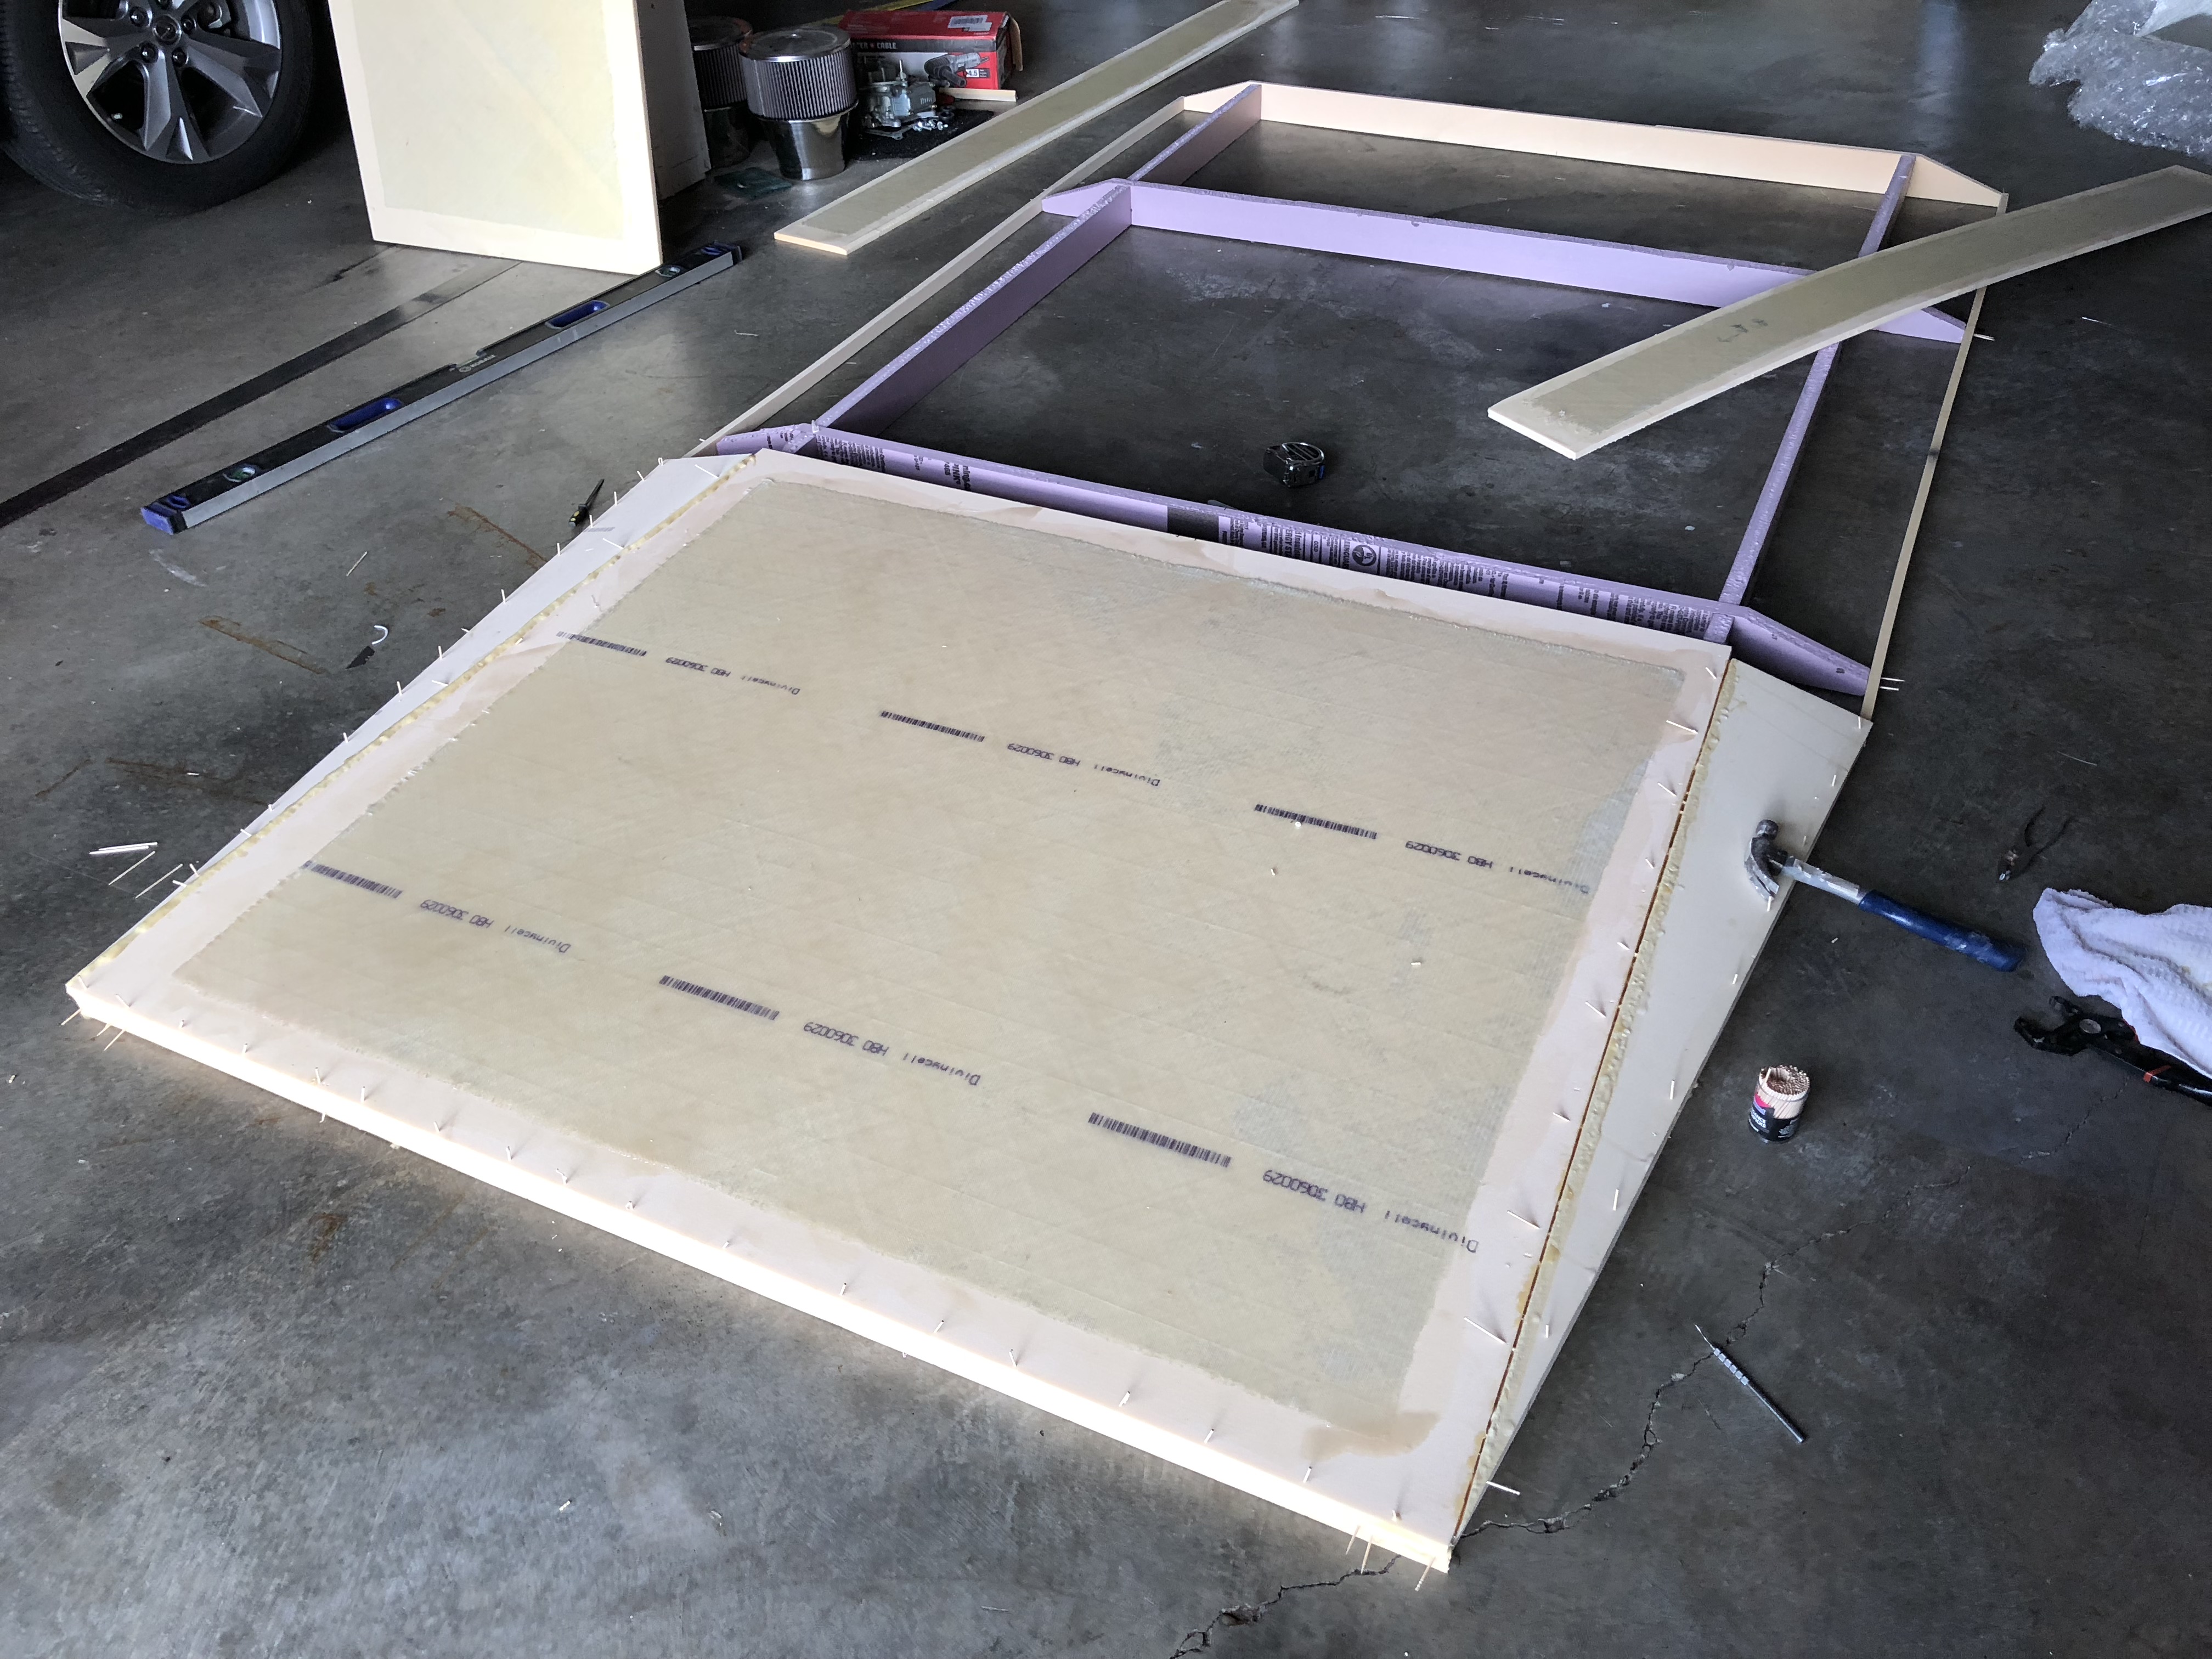
Didn't take many pictures of the process because it was so sticky. I used every single toothpick in the house. We had some gaps that were larger than I thought they were going to be, so the foaming gorilla glue went straight to the floor of the garage, which should be fun to clean up later. Now we just have to wait until tomorrow for all of the glue to set up and see what the final result is! I think the shape of the roof is going to look really cool on top of the camper!
...and started adding some more layers of to the lip around the shell.
At this point, something happened that I wouldn't have predicted.. we ran out of resin!
I thought it was ridiculous when we bought the full 10 gallon resin setup. How could we possibly use that much!? but... yeah we did... that's a lot of fiberglass.. Since our day just started, Jason ran to West Marine and vastly overpaid for a few little cans to keep us going until we could make it back to the store for more. We finished our roof panels and had dinner while they set up outside in the sunshine. Now we can actually start assembling the roof panels!We started with the front section, pinning the panels to the pink foam jig underneath. Then wetted the surfaces down (sometimes just pouring water into the cracks between the panels) and poured gorilla glue in there. That would start foaming up while we got the rest of the panels put together!
Didn't take many pictures of the process because it was so sticky. I used every single toothpick in the house. We had some gaps that were larger than I thought they were going to be, so the foaming gorilla glue went straight to the floor of the garage, which should be fun to clean up later. Now we just have to wait until tomorrow for all of the glue to set up and see what the final result is! I think the shape of the roof is going to look really cool on top of the camper!
underkill
Active member
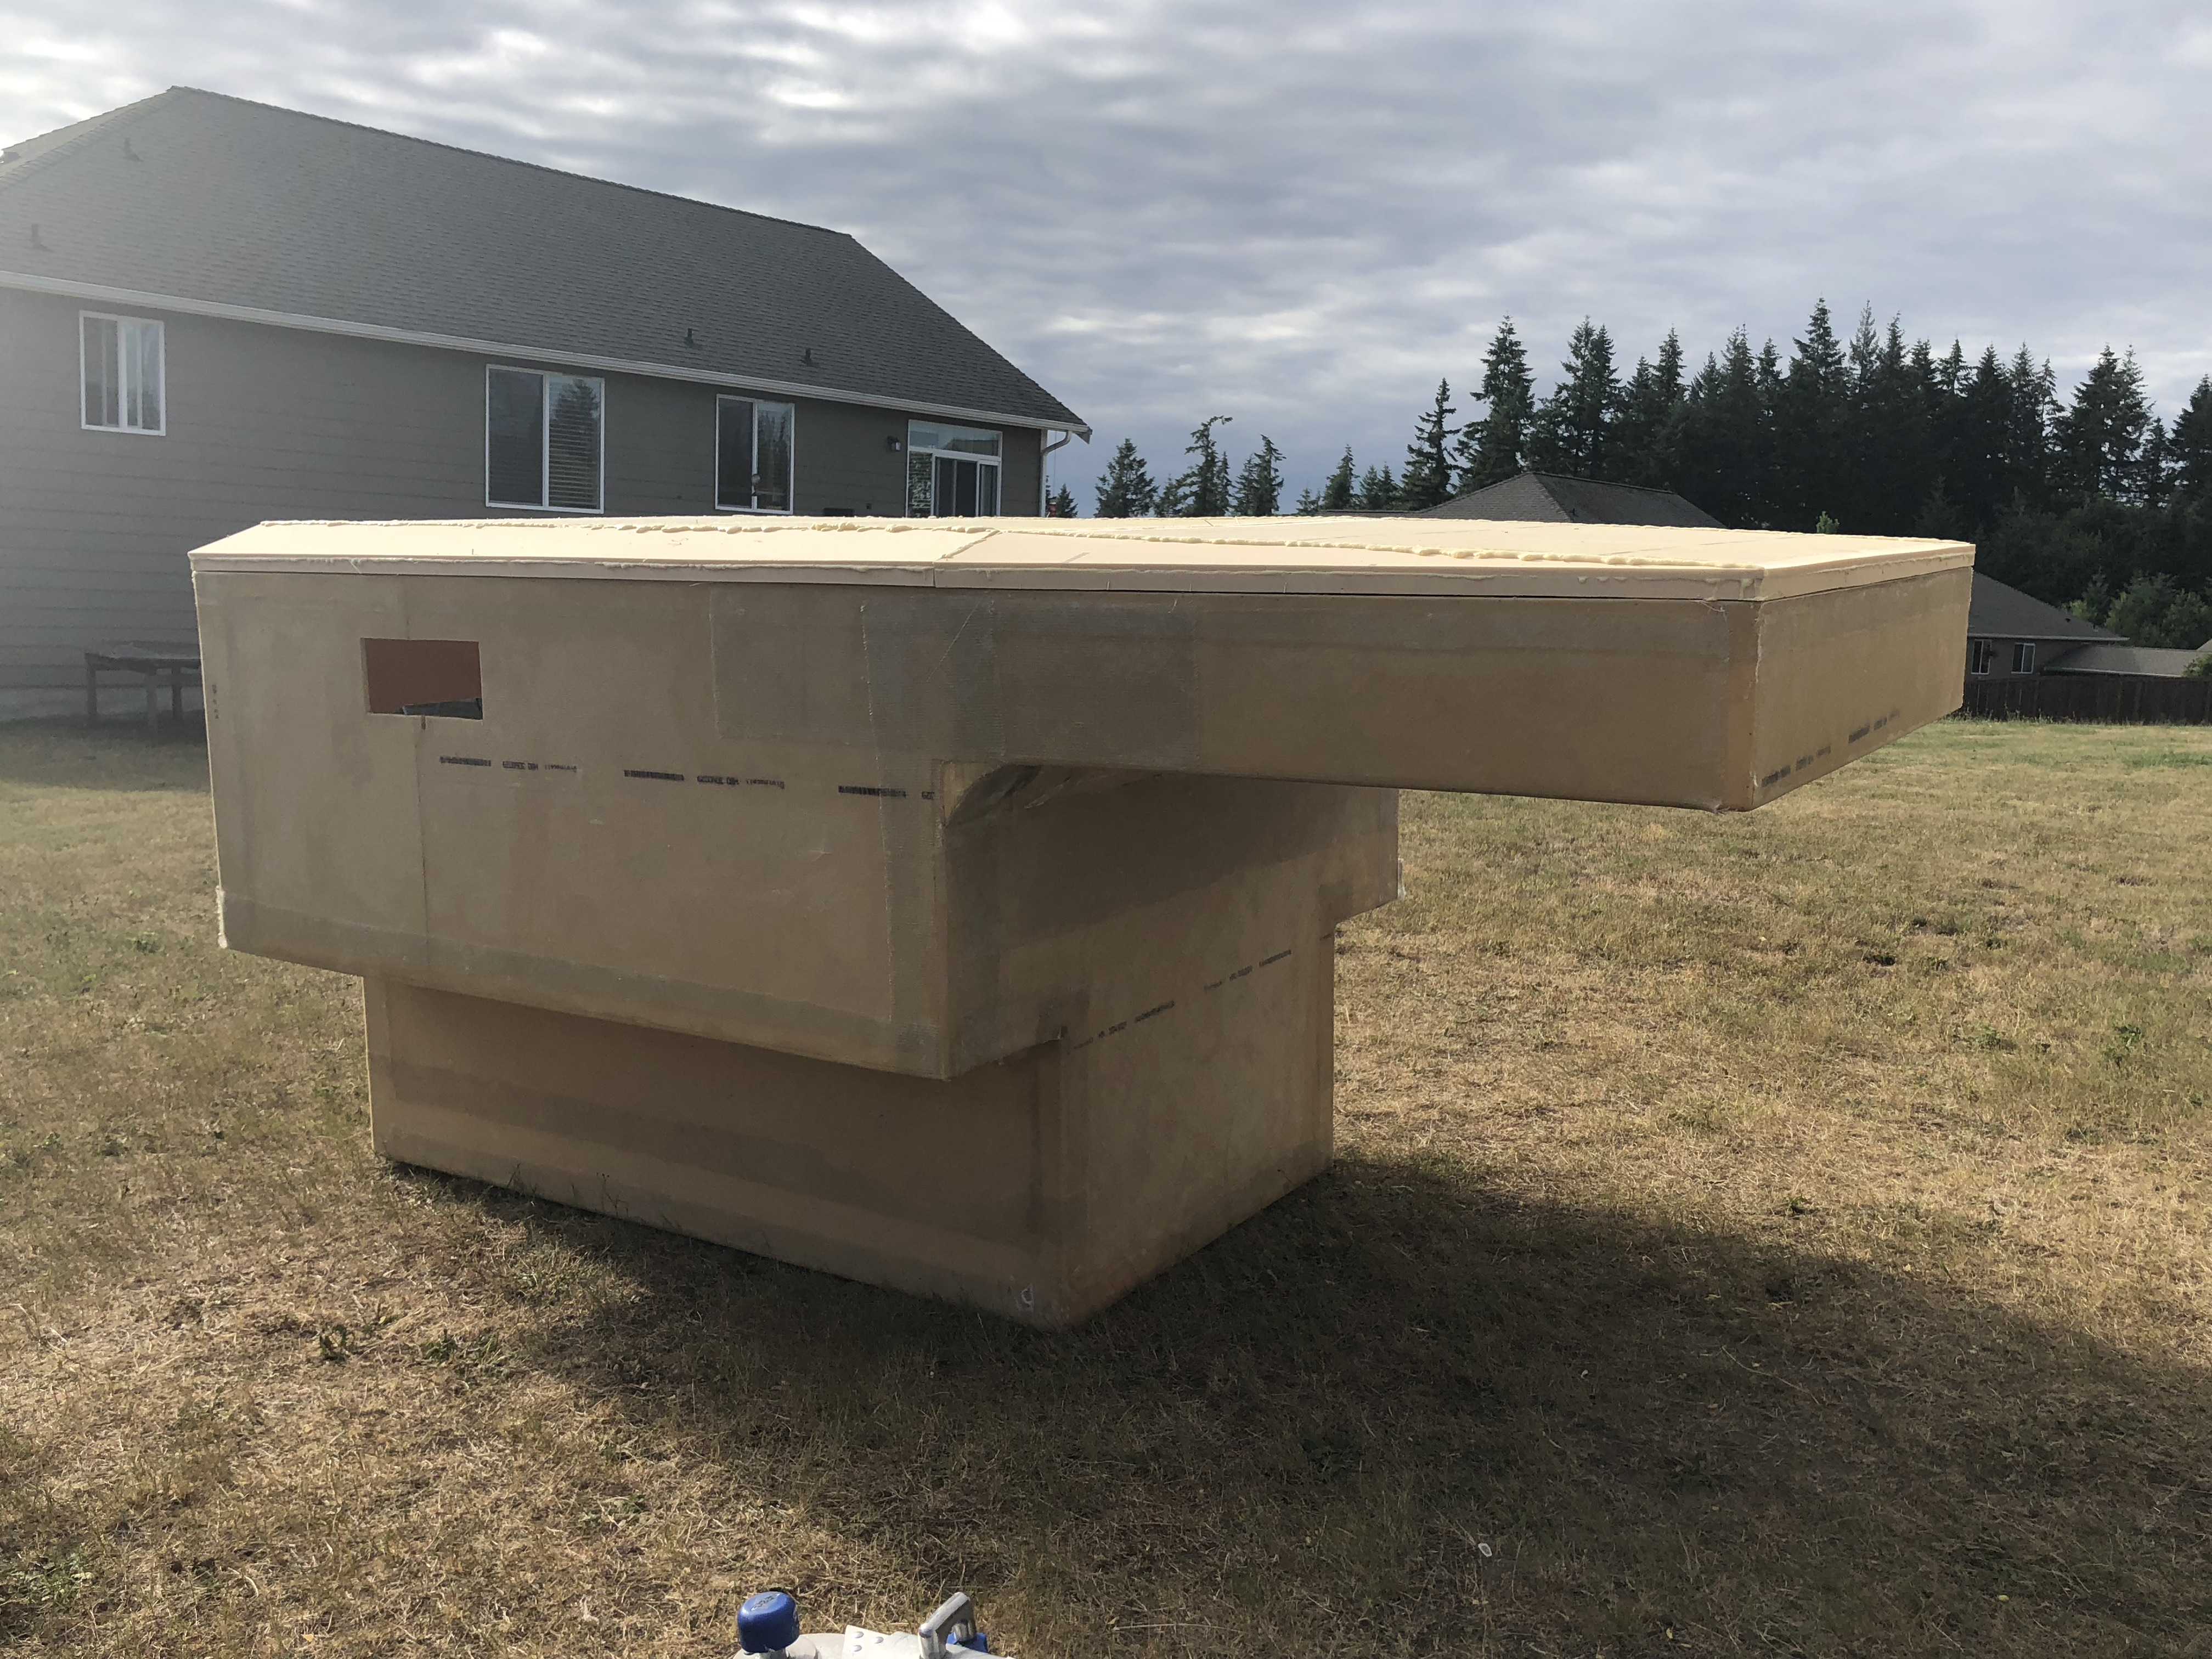
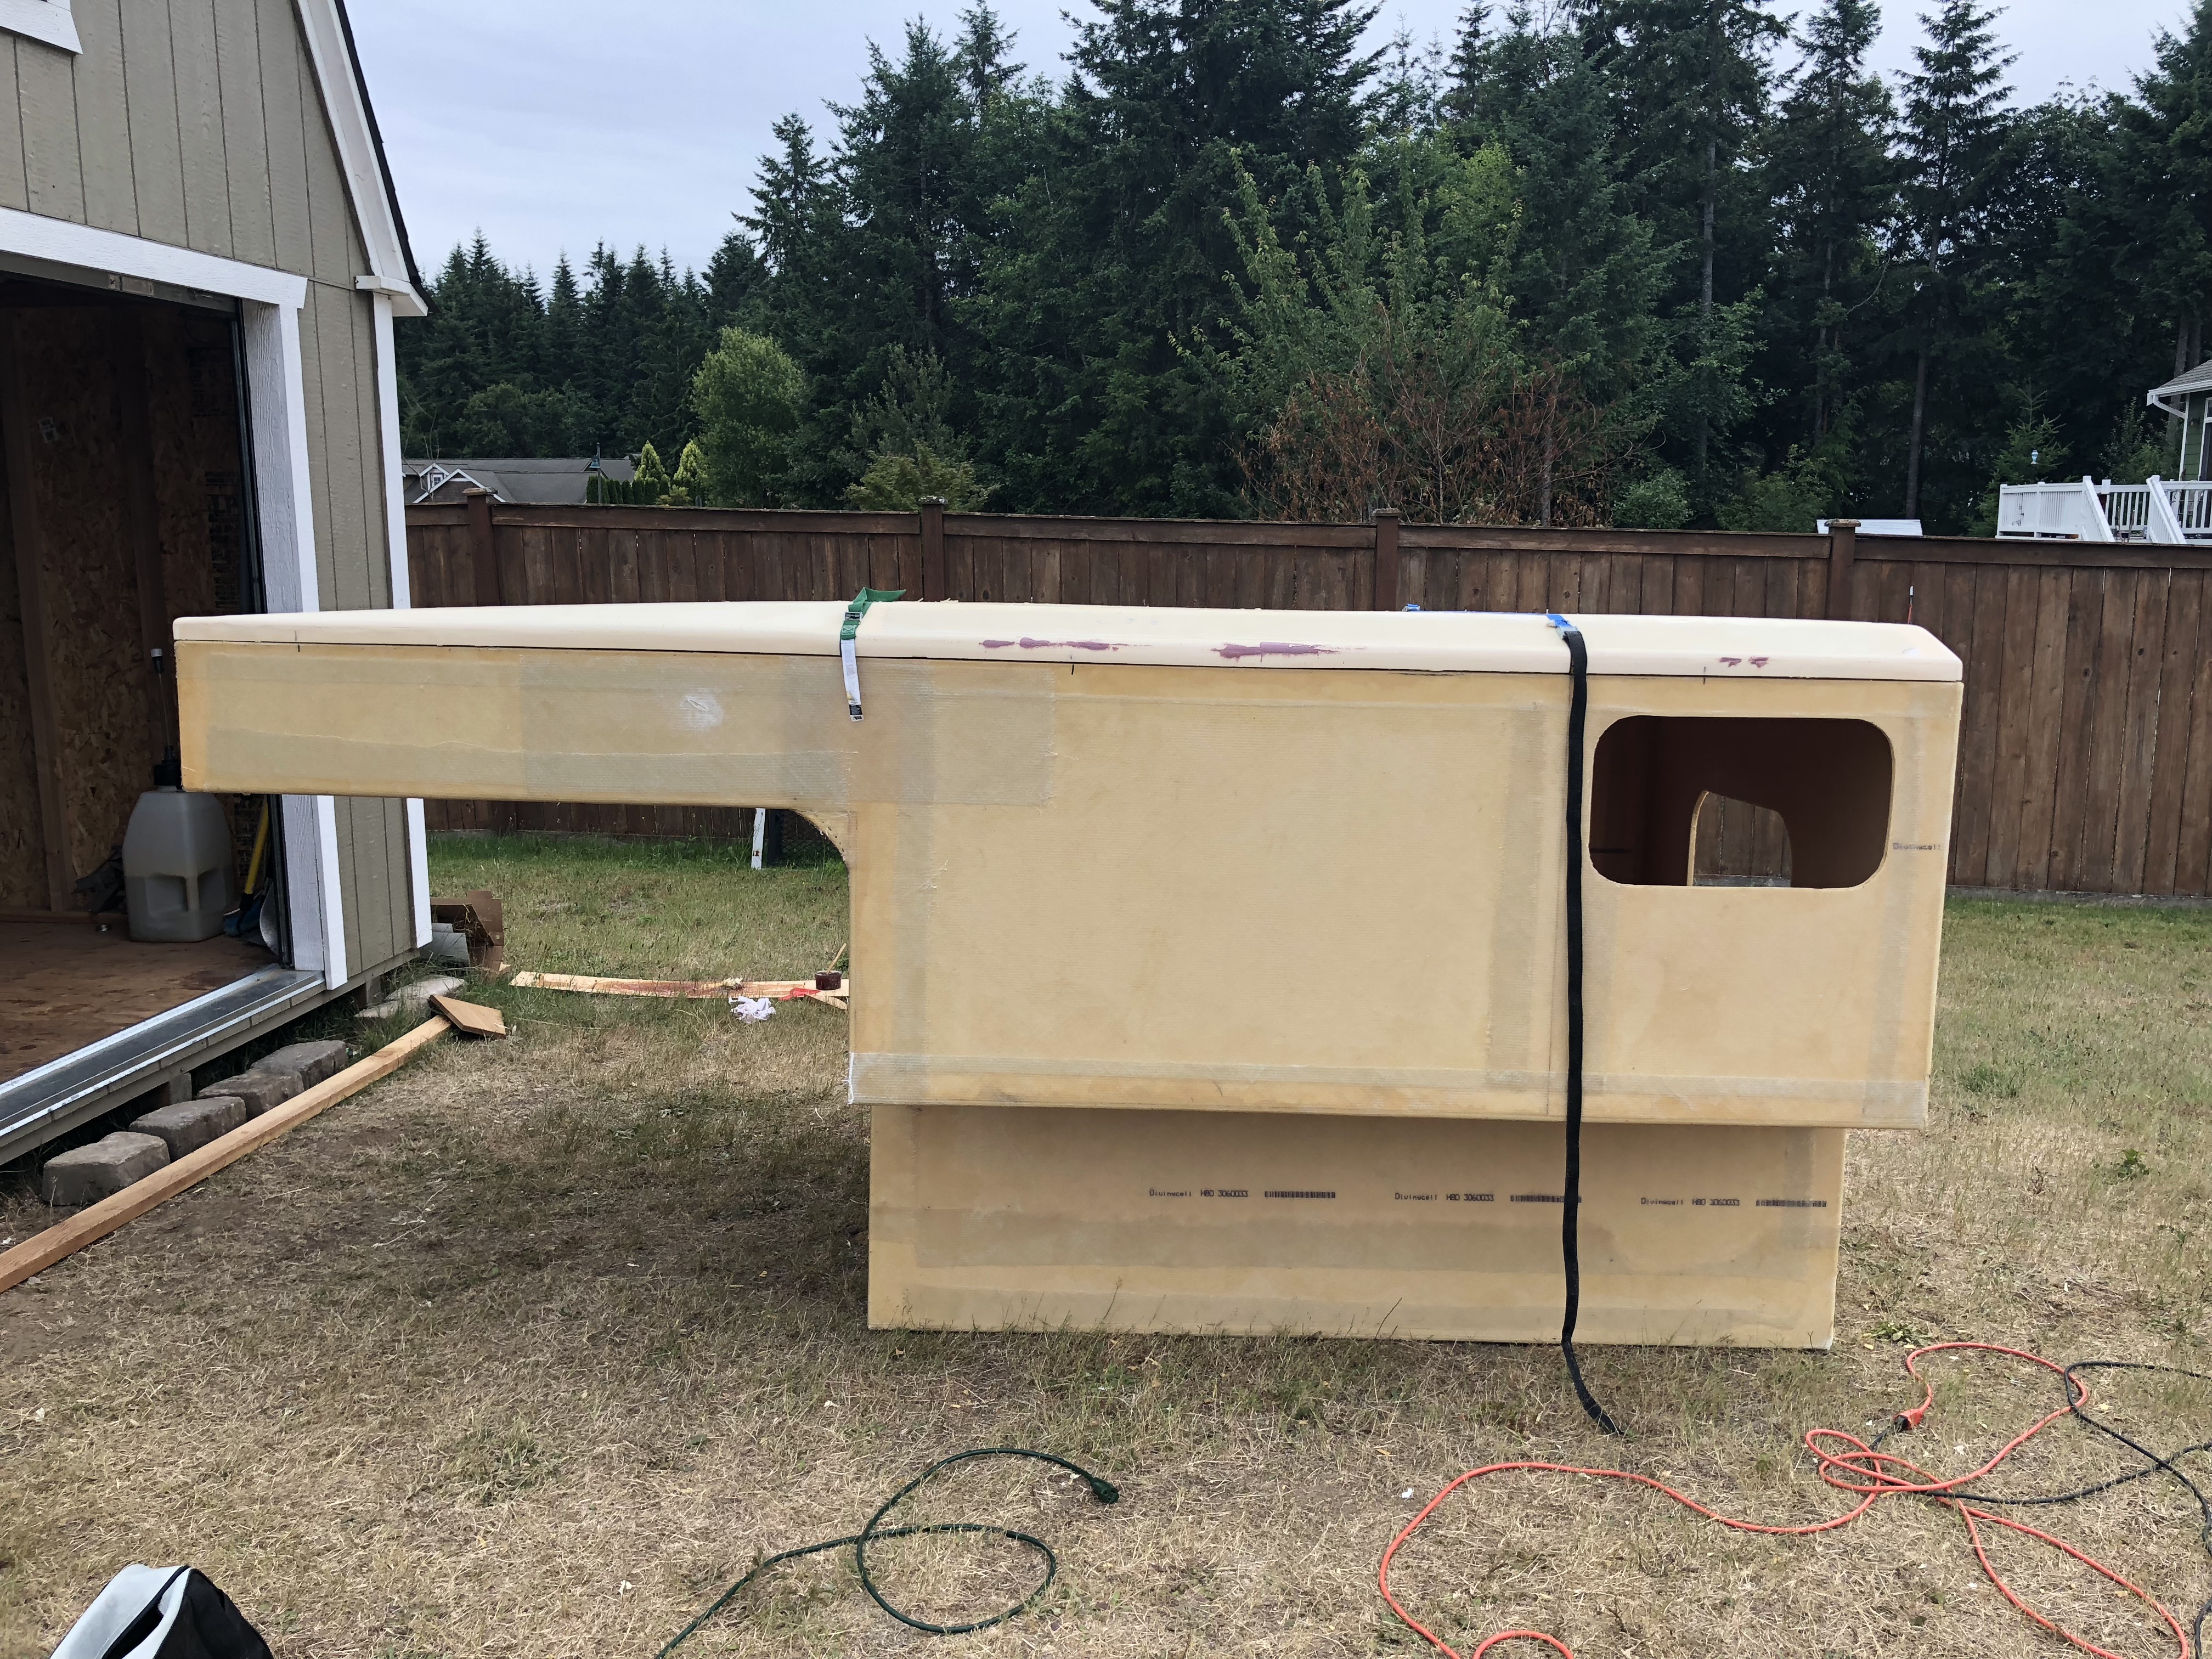
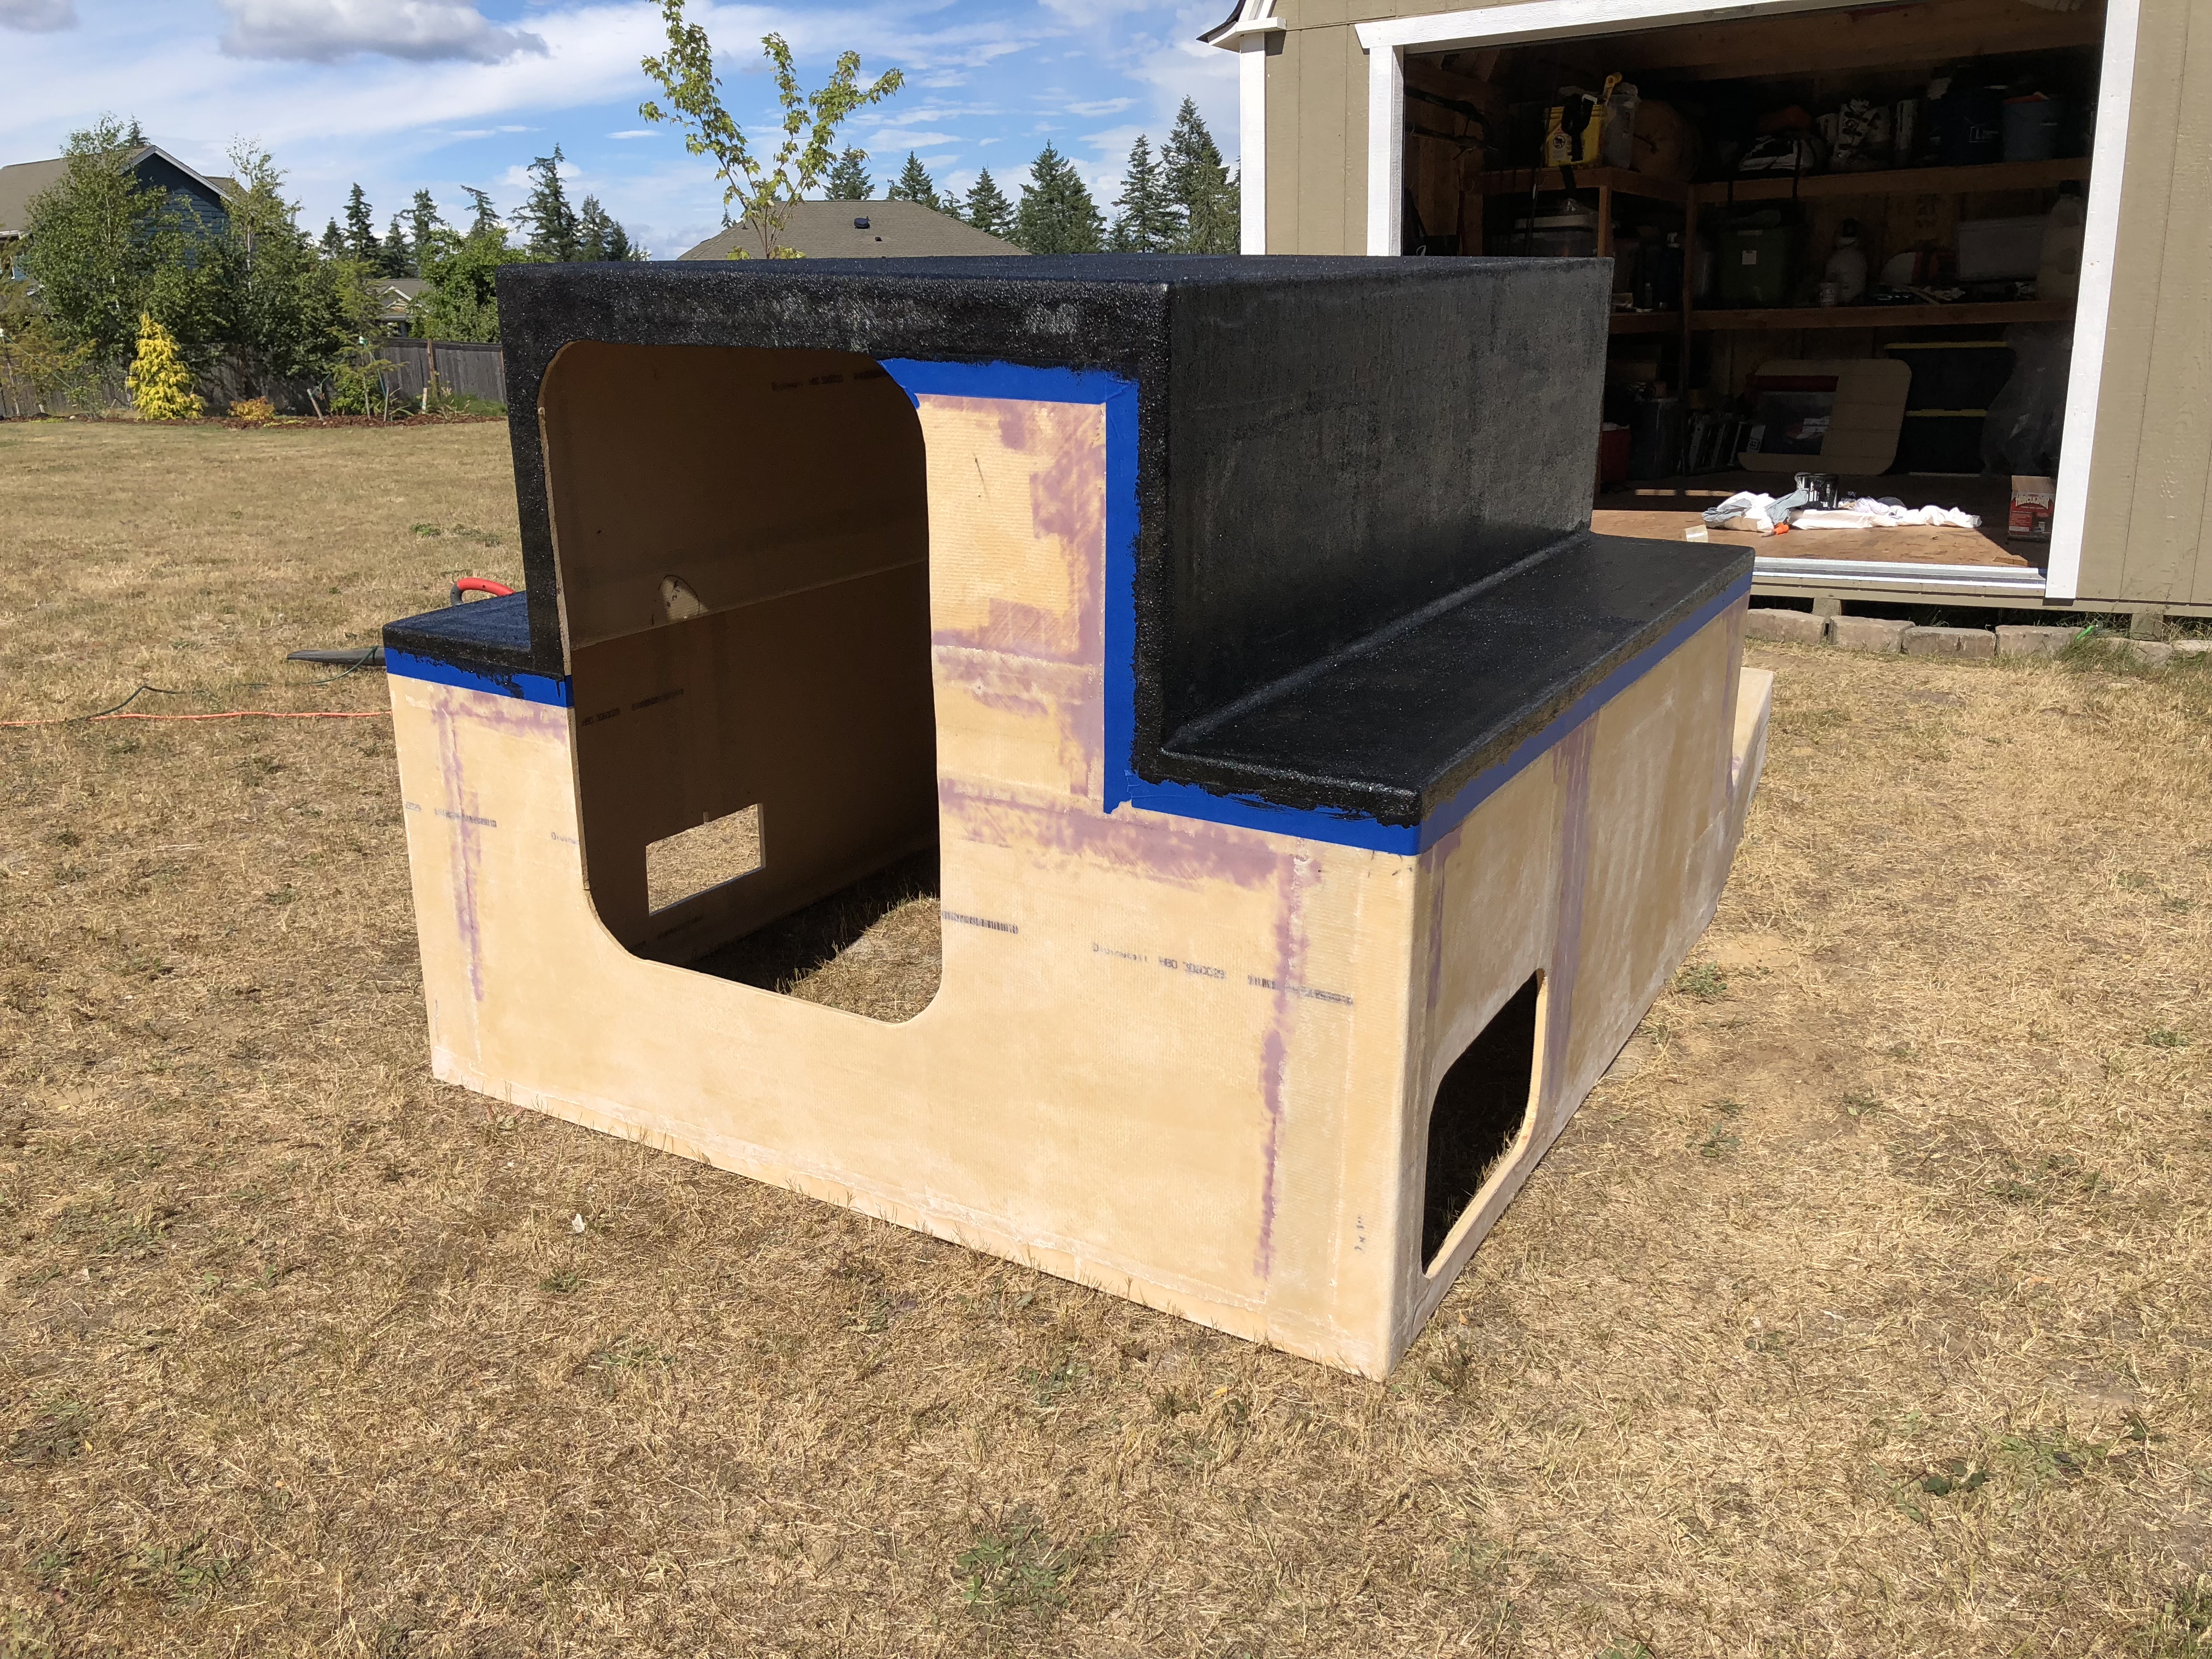
Turns out I was way too worried about gluing the roof to the garage floor as it just easily peeled up. That makes life easier. Here's the final product!
We couldn't NOT carry this thing out and test fit it on the camper! It looks awesome! Still doesn't fit perfect, but we're working on that!
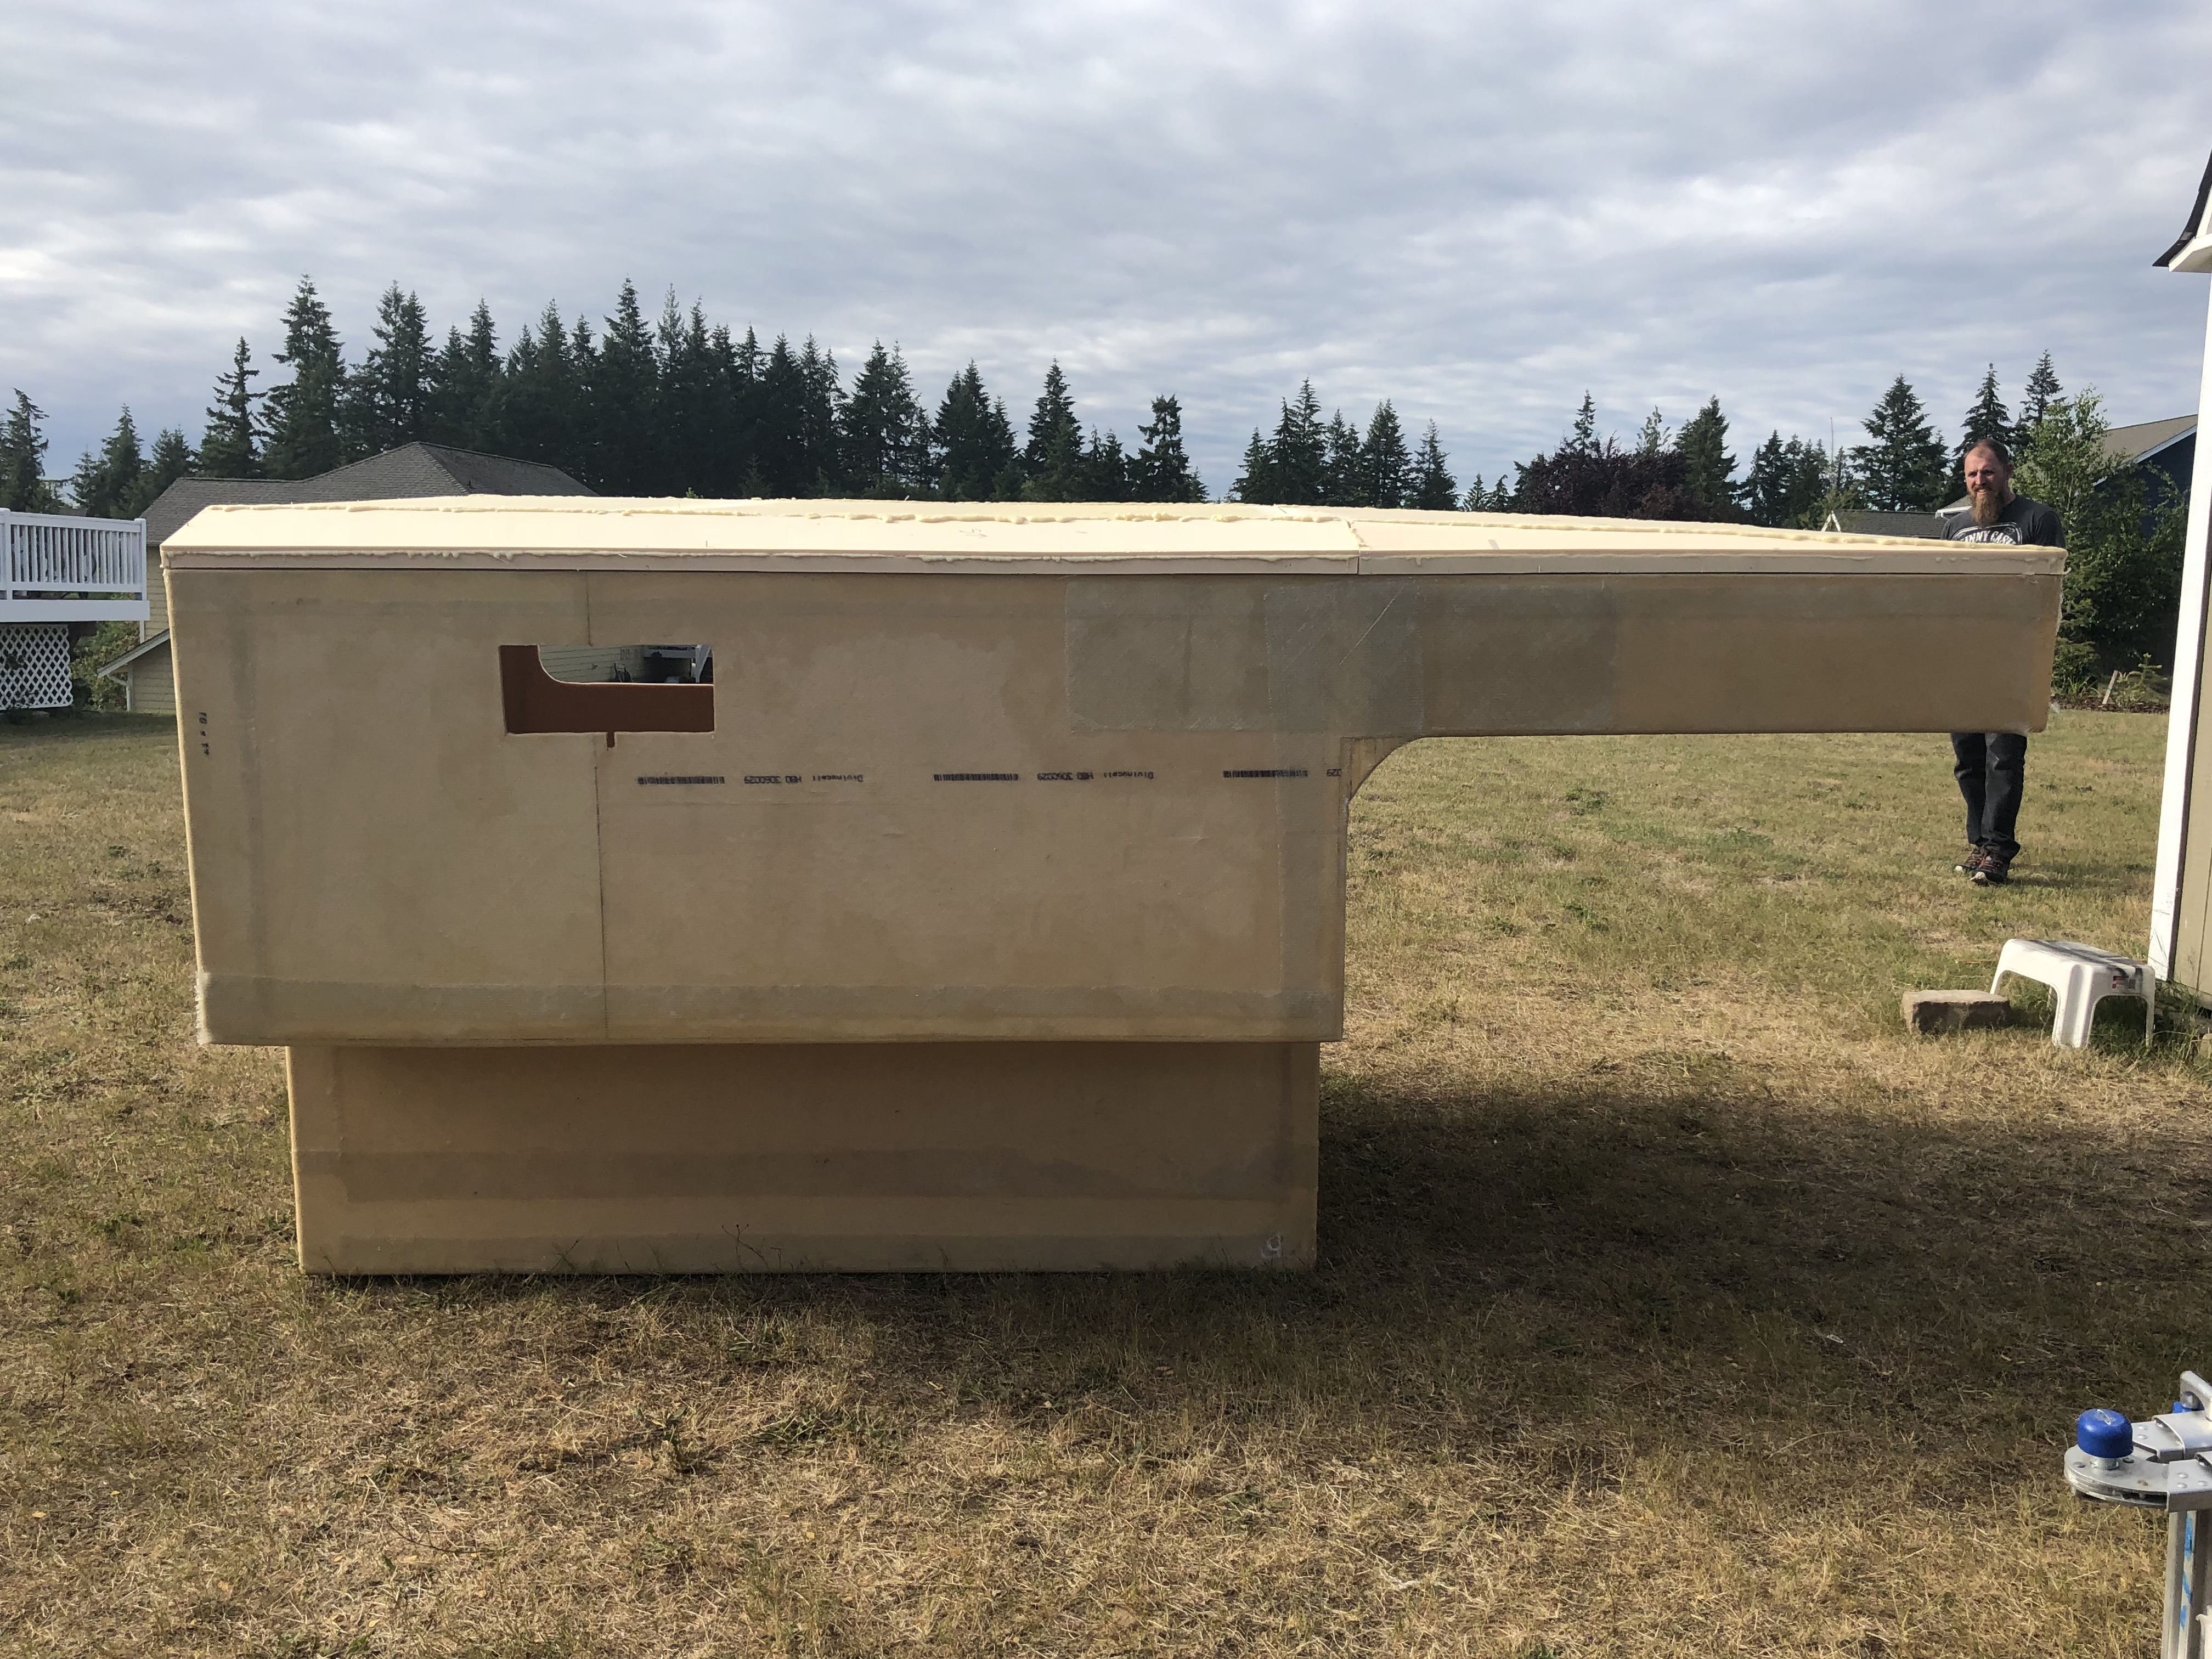

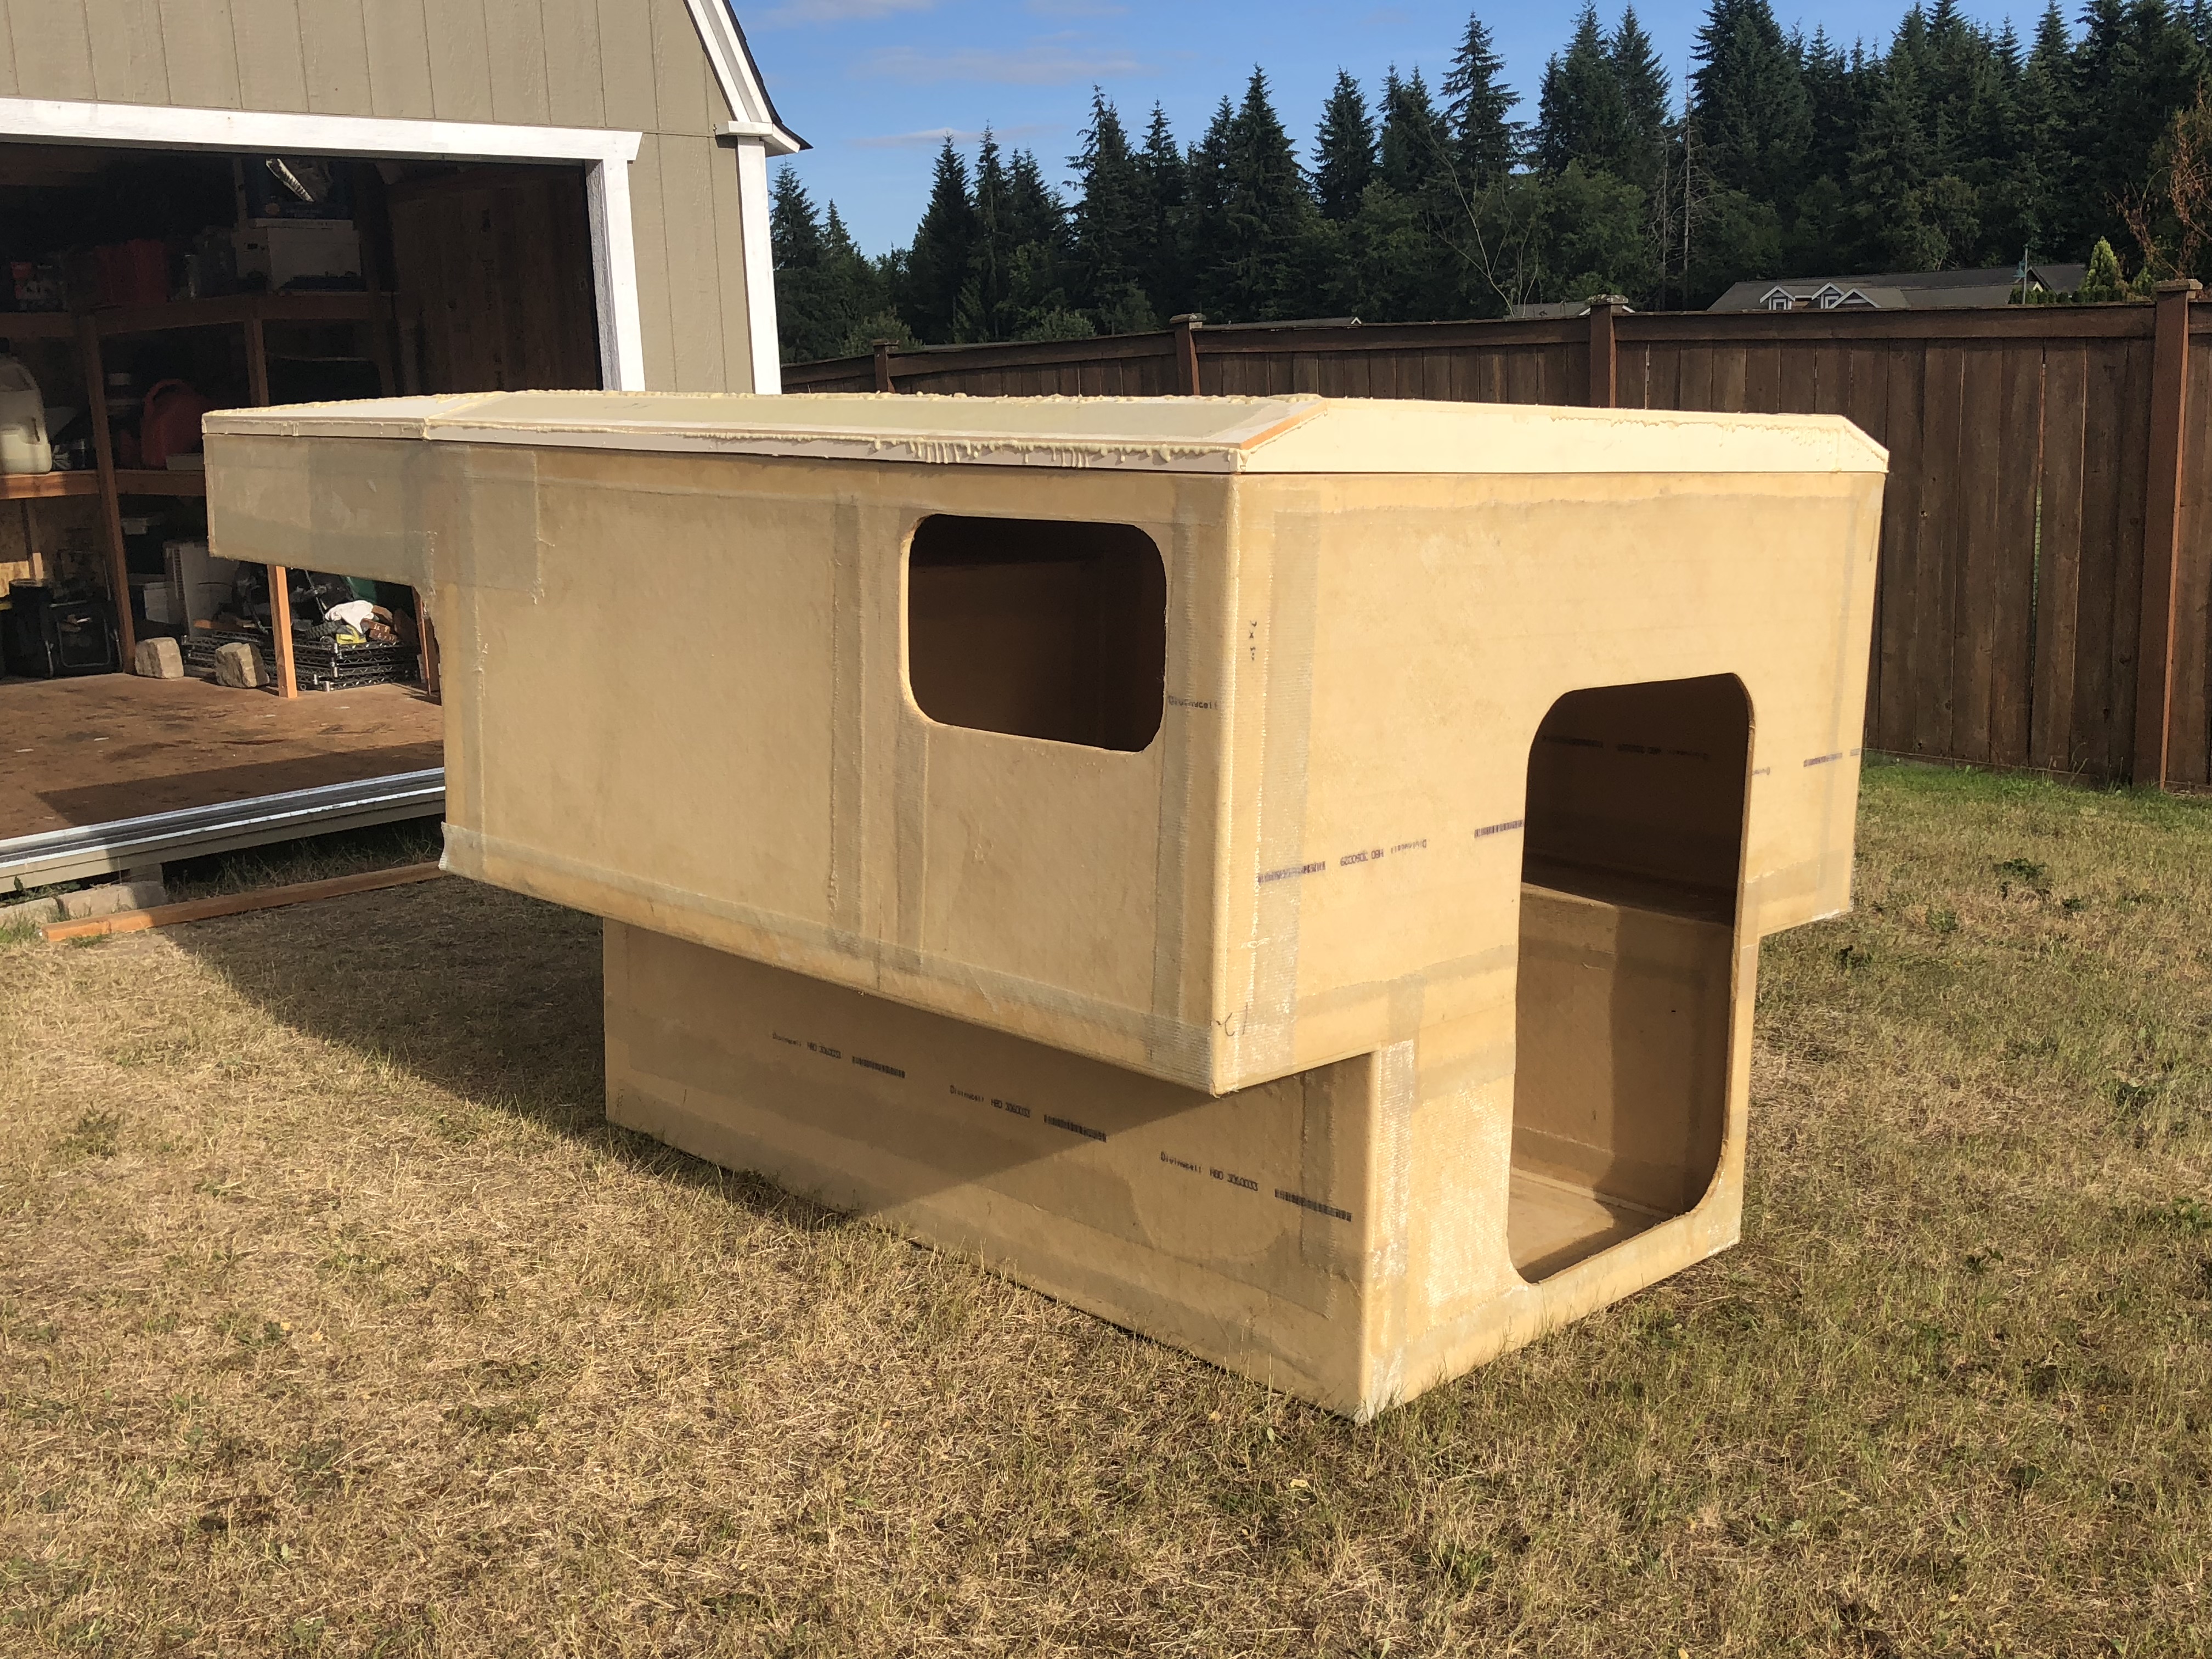
Turns out that I can sit comfortable in the camper with the roof down! Jason has to slouch a little bit, but it wouldn't be bad to crawl in here to get out of the rain or something. It's starting to look like a real camper!
We couldn't NOT carry this thing out and test fit it on the camper! It looks awesome! Still doesn't fit perfect, but we're working on that!
Turns out that I can sit comfortable in the camper with the roof down! Jason has to slouch a little bit, but it wouldn't be bad to crawl in here to get out of the rain or something. It's starting to look like a real camper!

underkill
Active member
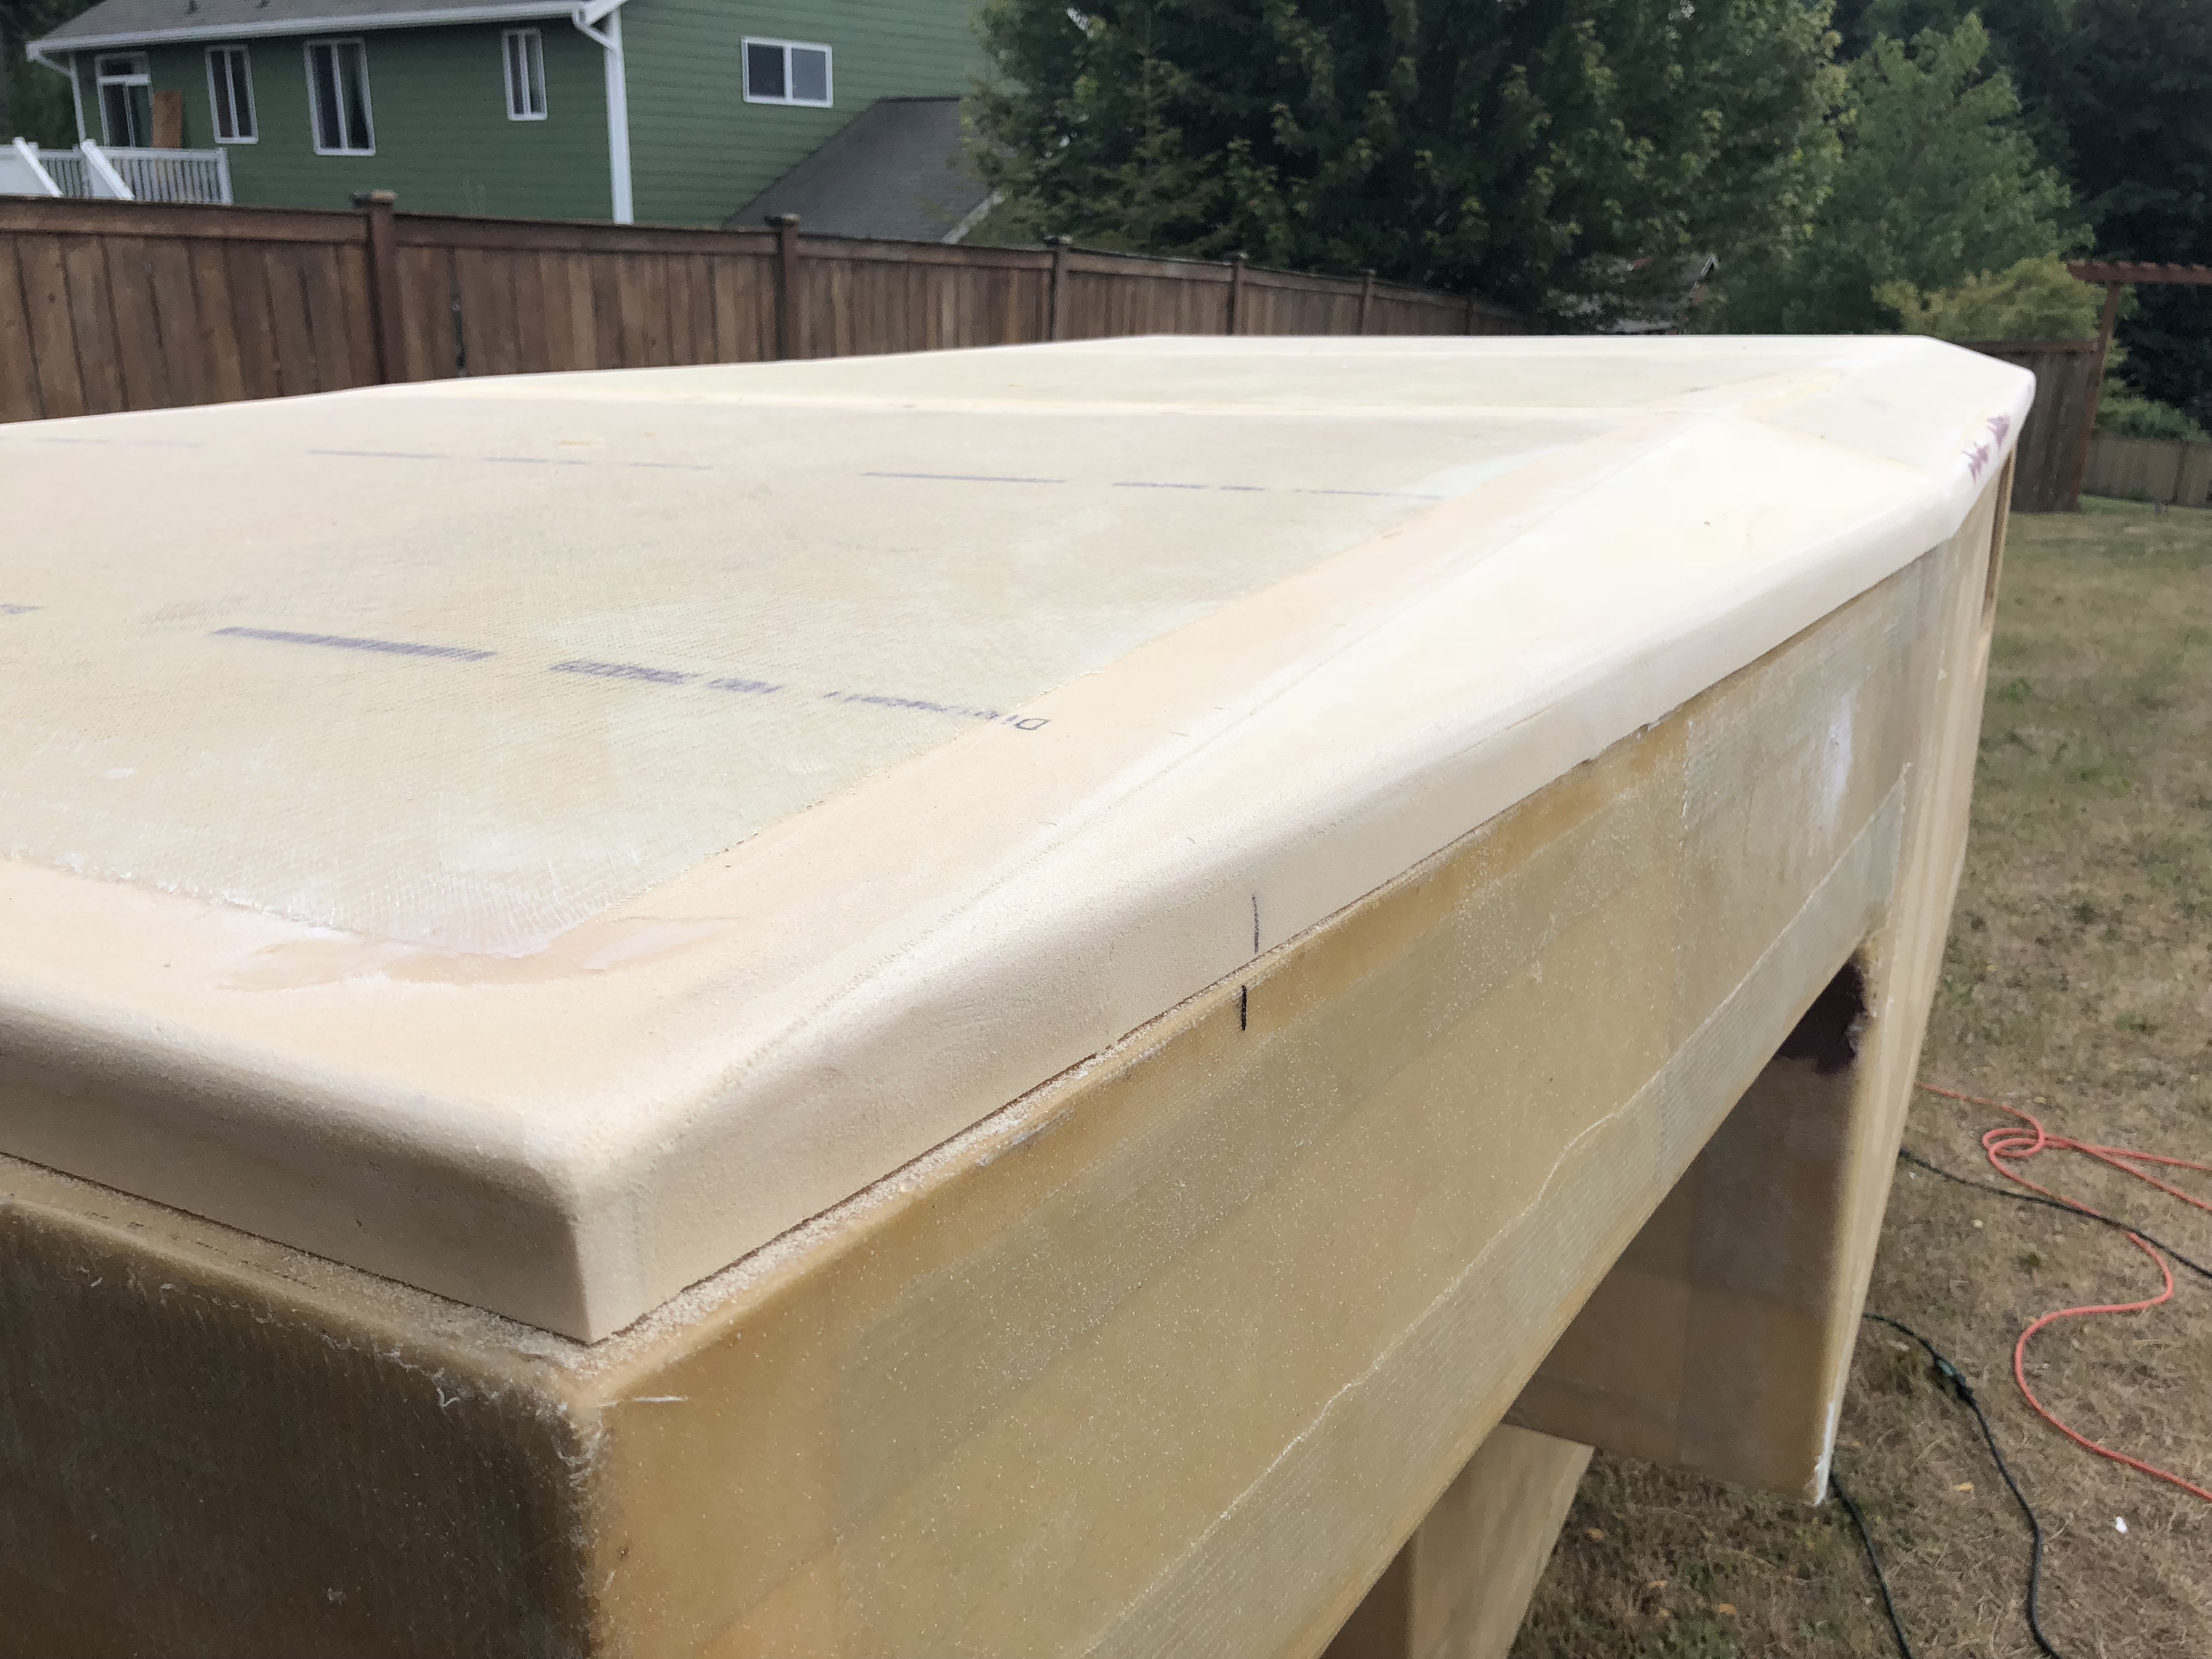
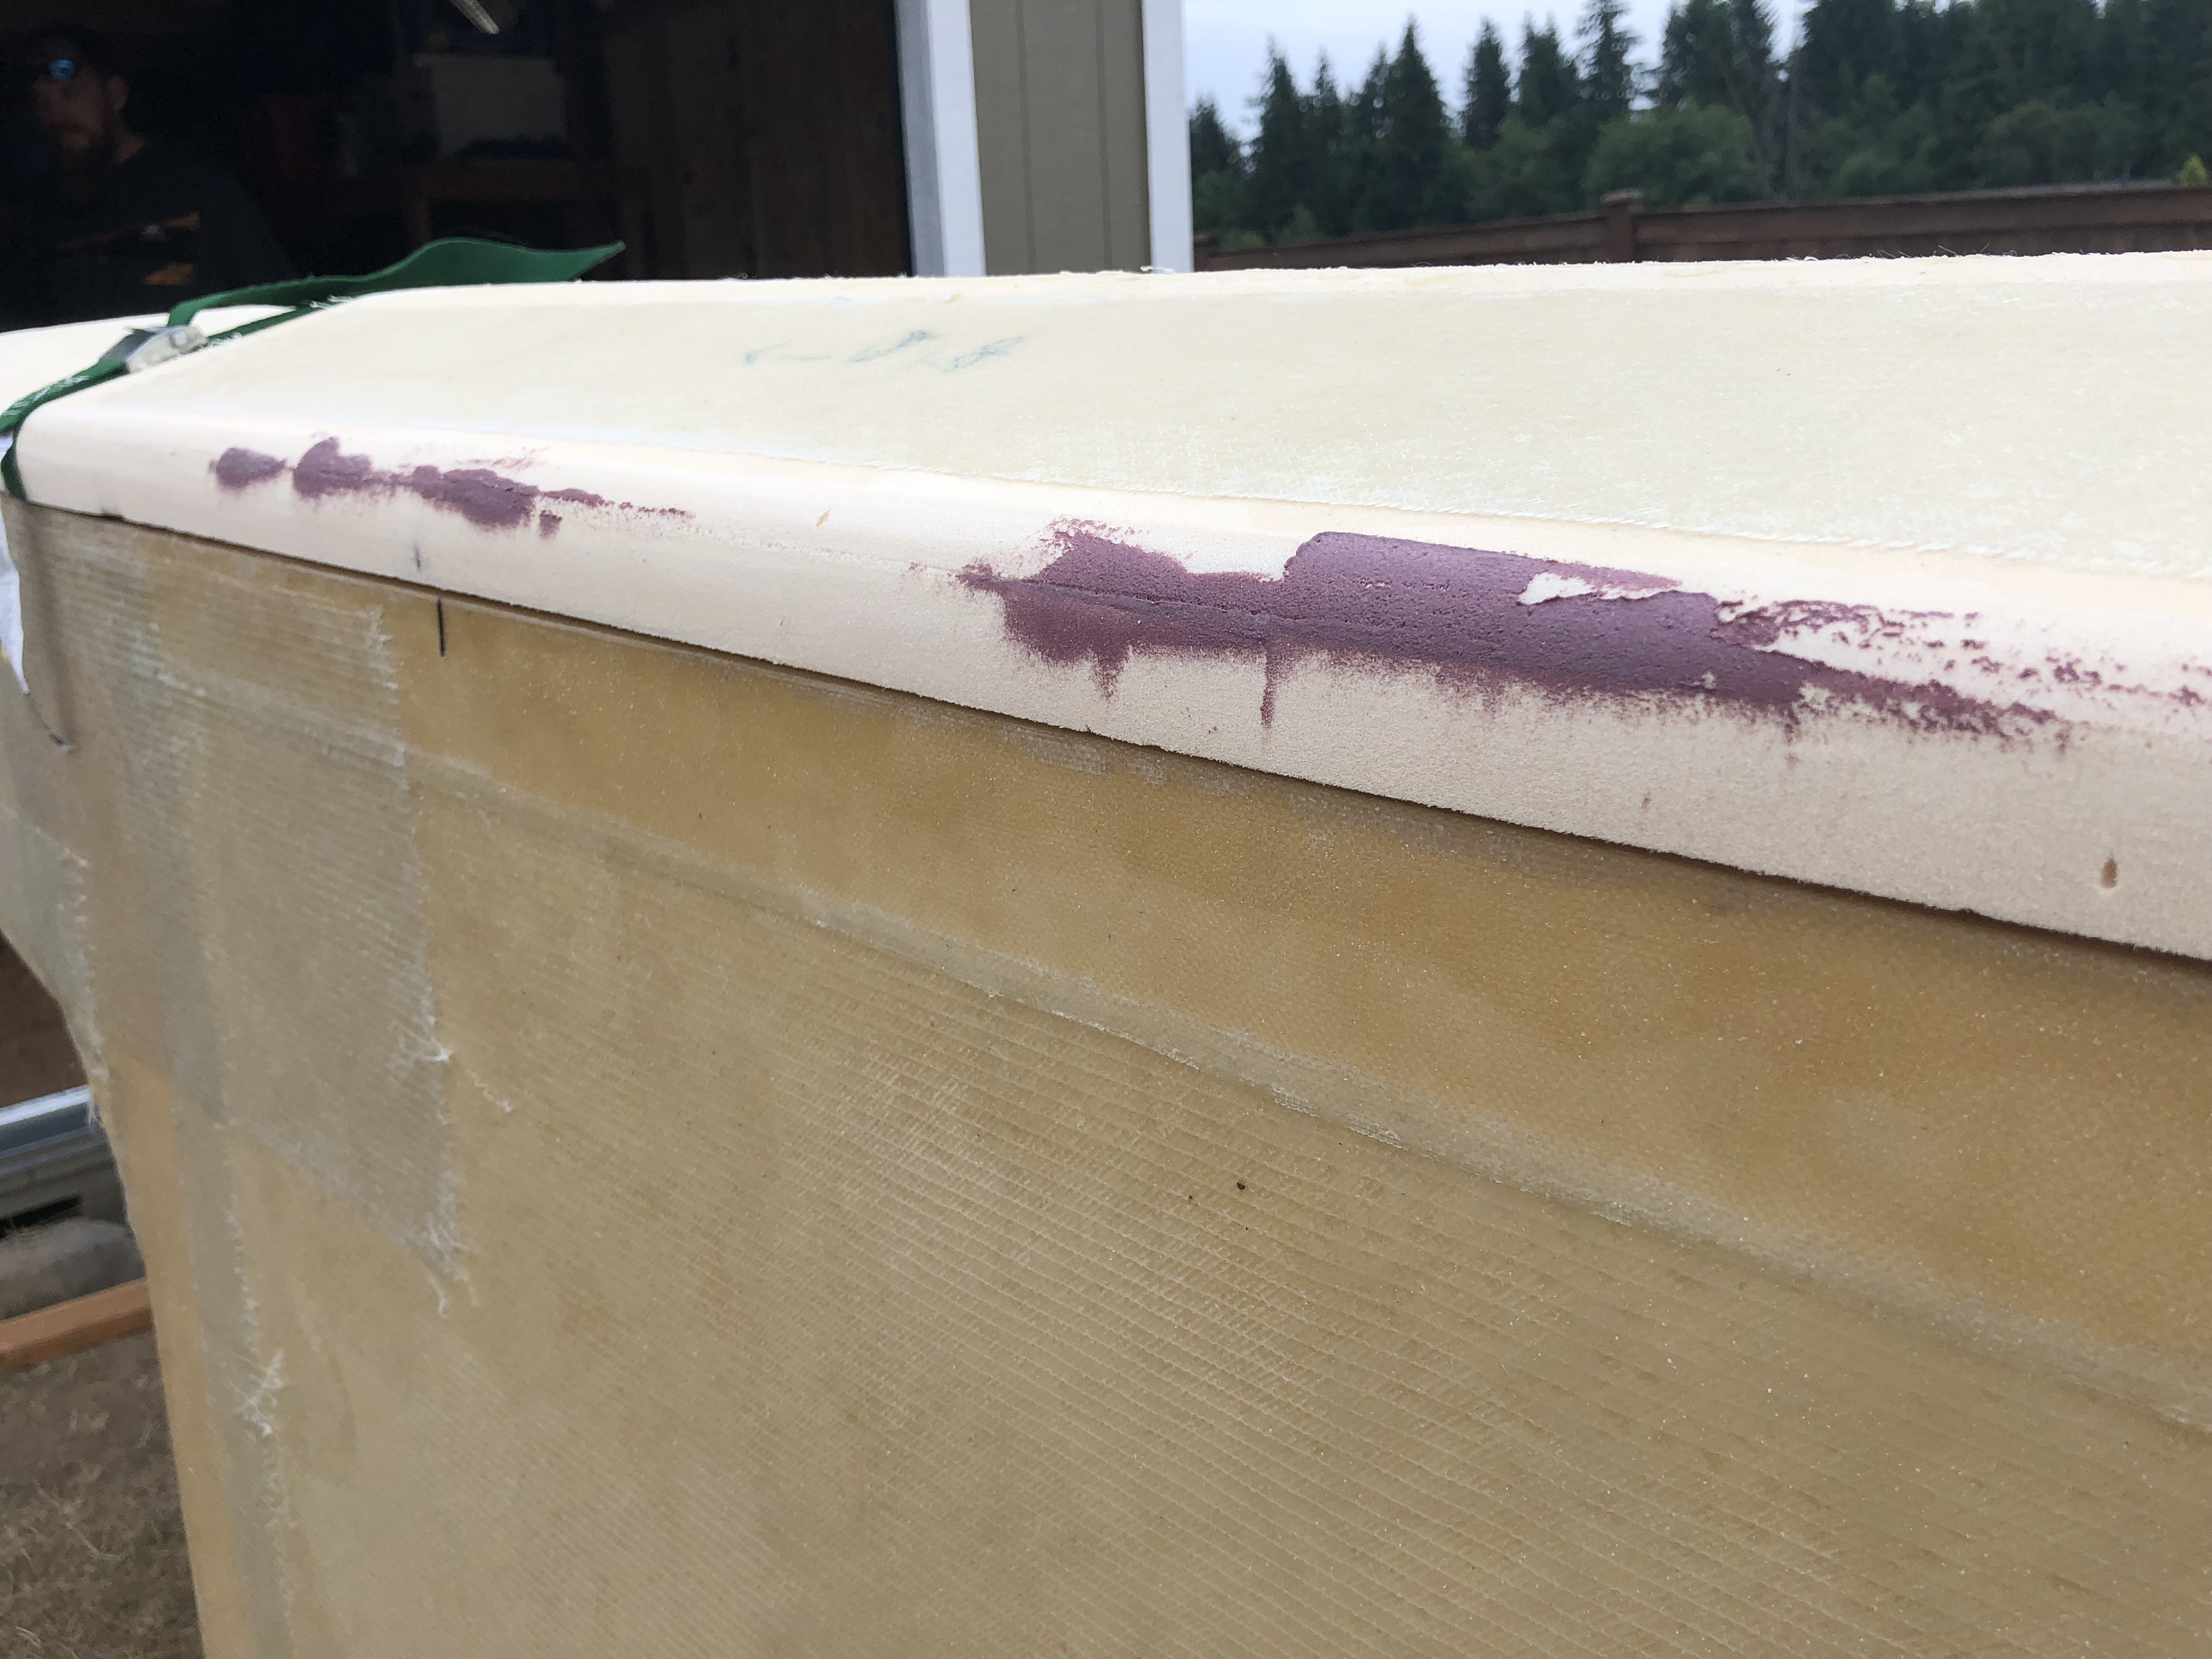
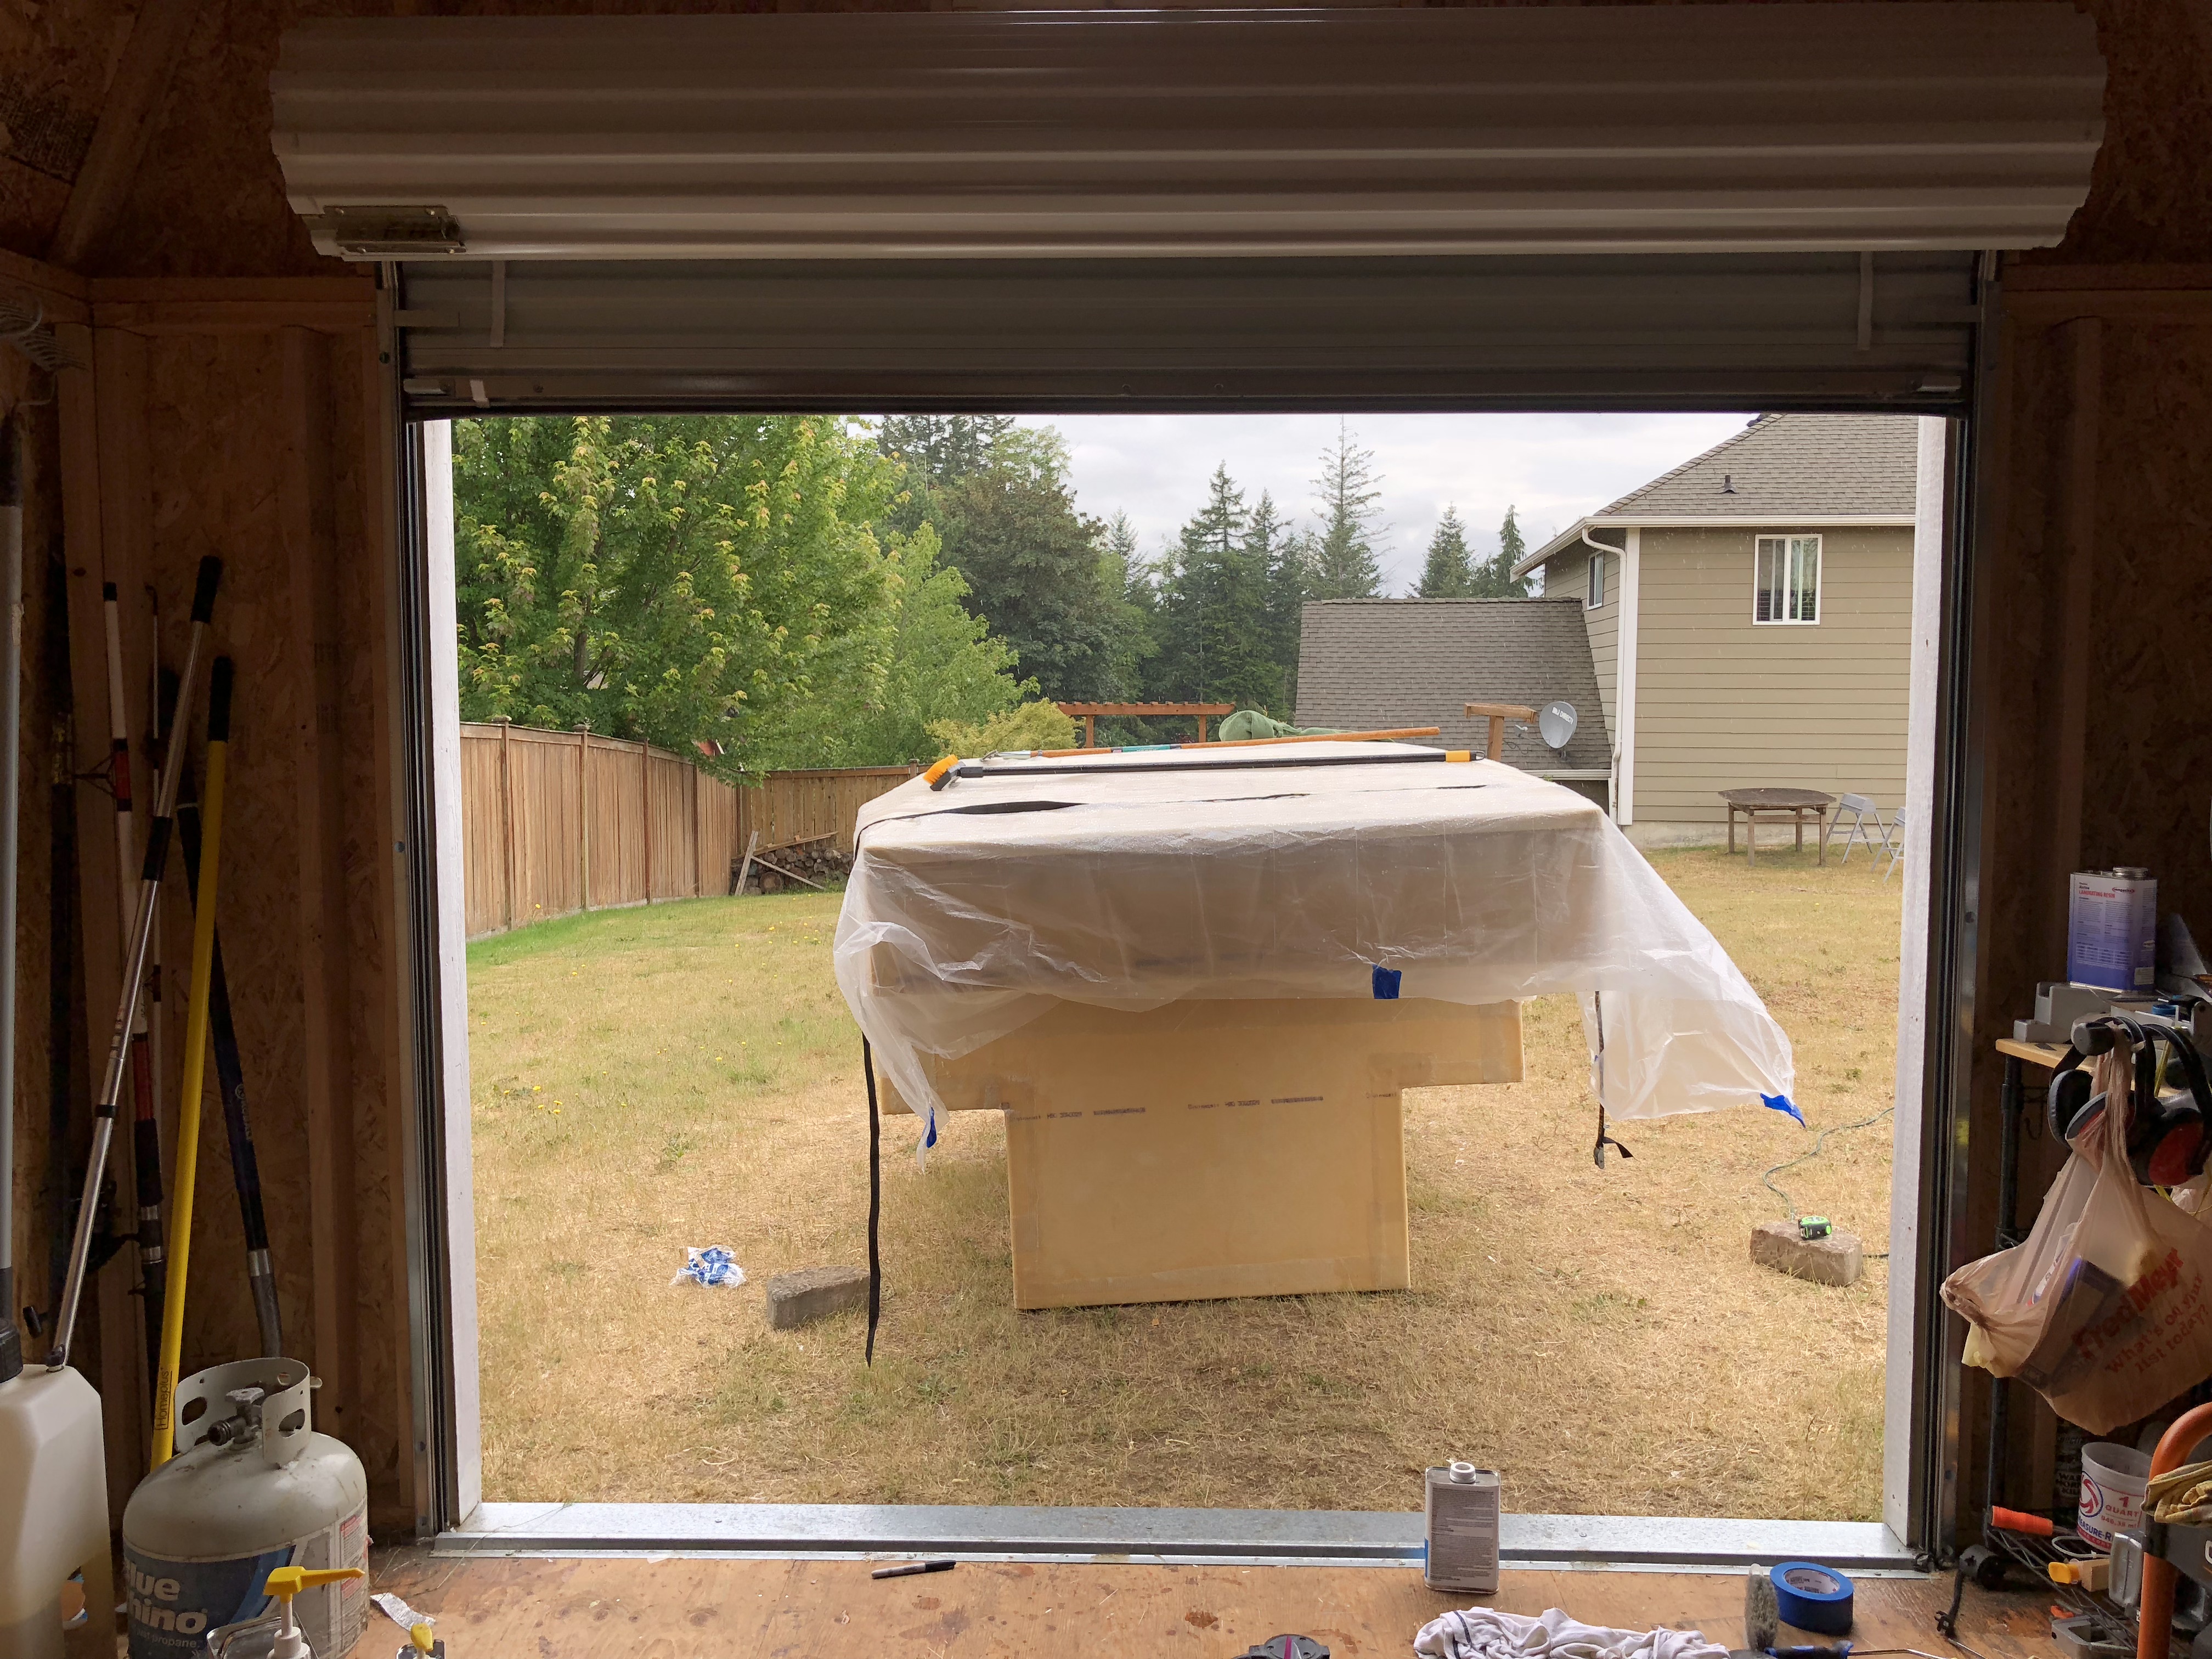
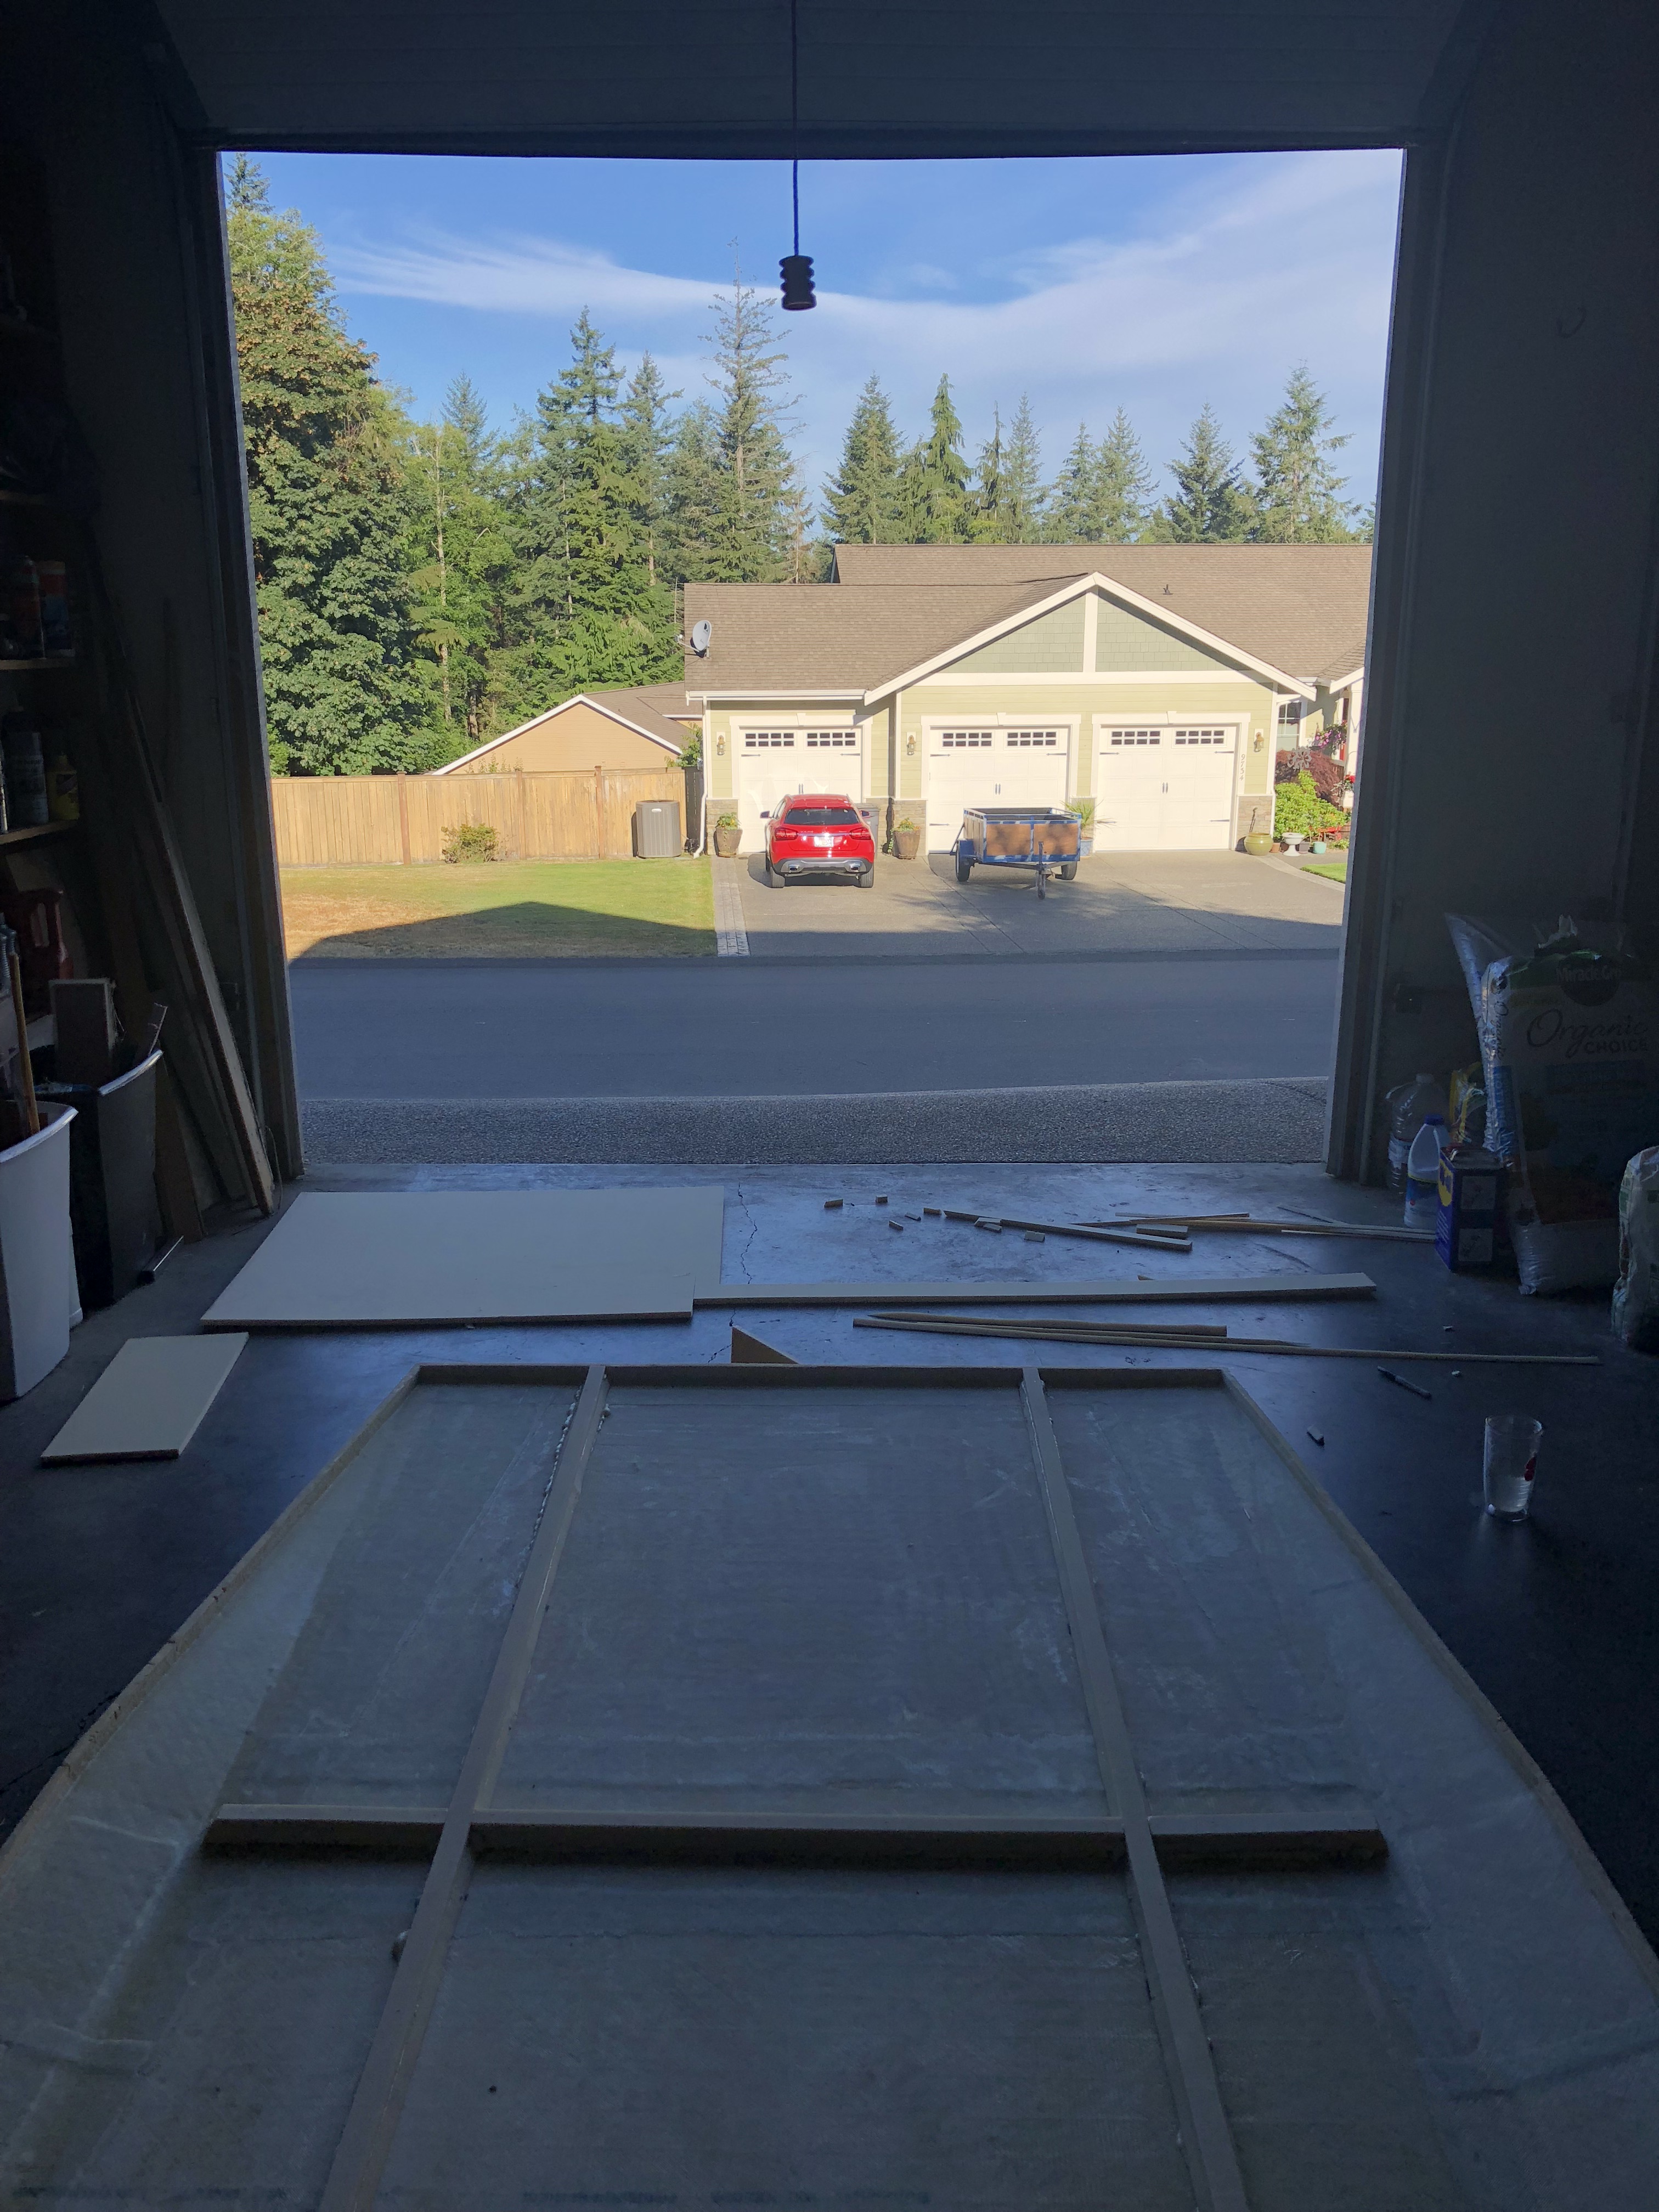
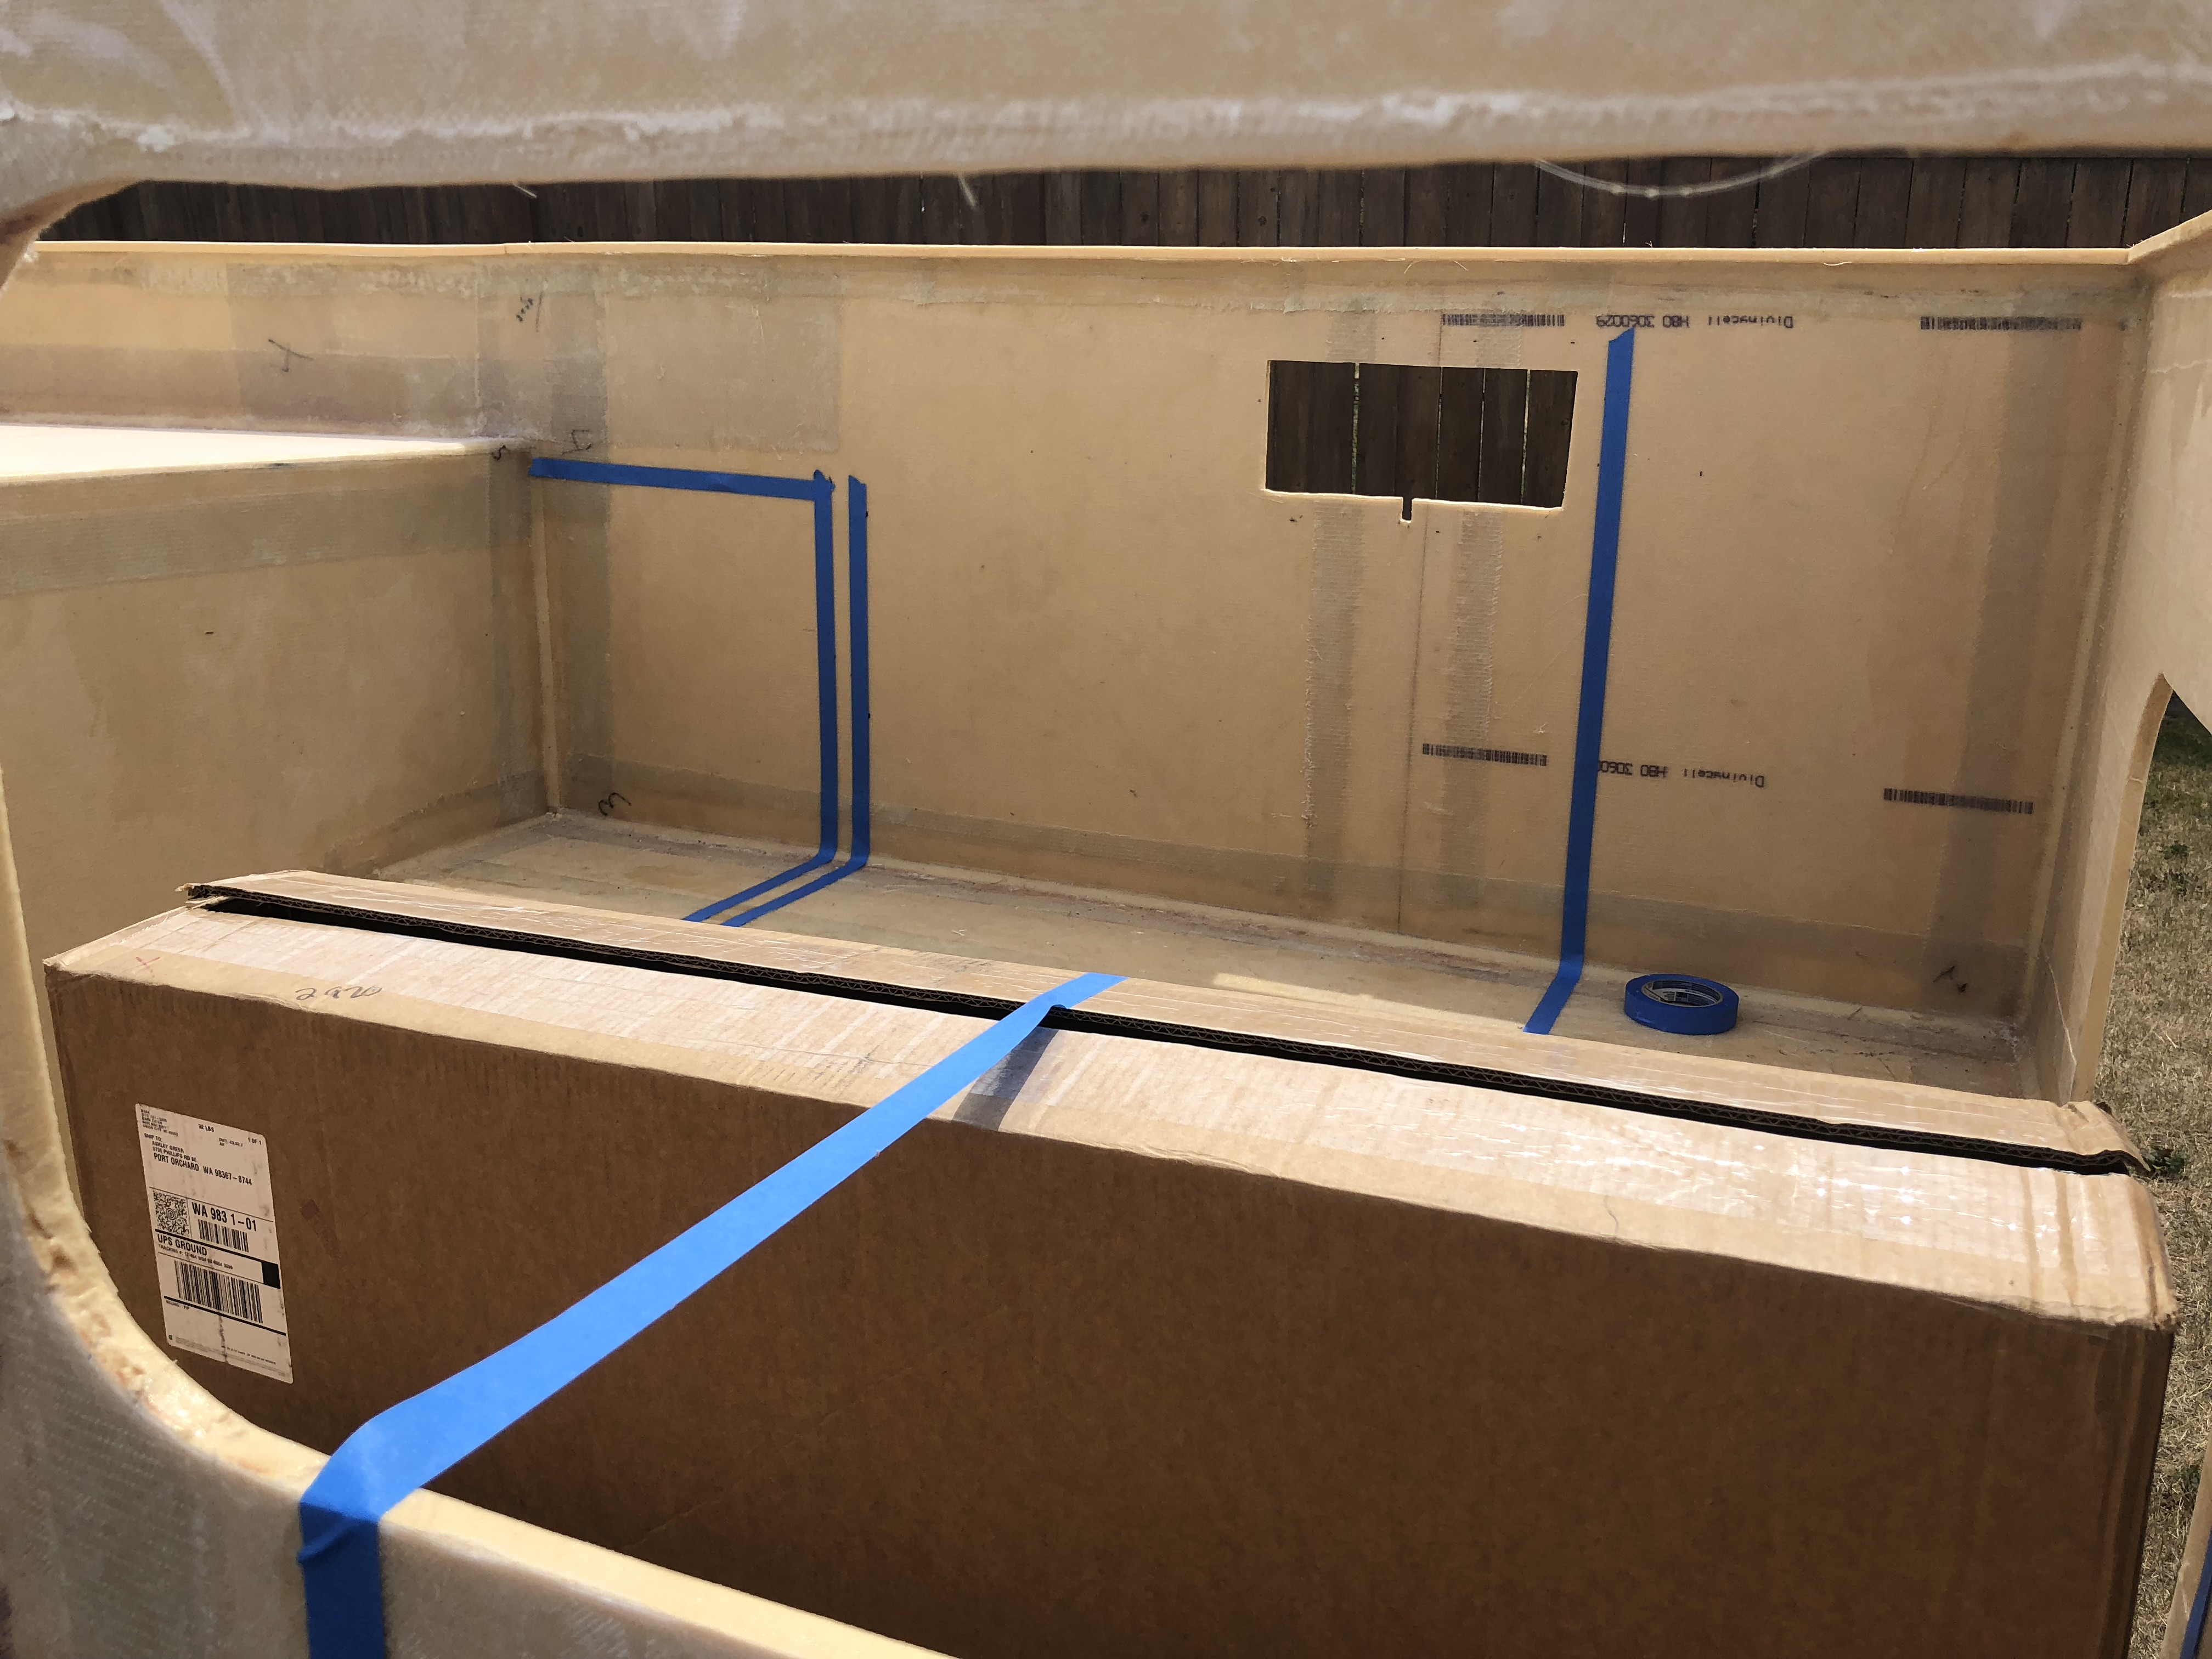
Since it's important for the roof to fit the shell and our garage floor is not super flat, we decided to lay up the top of the roof while it's still sitting on the camper. We started by putting a large sheet of plastic between the two pieces.
We had a few jacks inside the camper to make sure the middle of the roof didn't sag and various other weights to hopefully get the roof into the shape that it needs to be before we glass it. We have two of those extending rods that people use in the back of their truck beds to hold cargo in place. We had one for when we had the bed rack and roof top tent on our truck and lived out of tubs, but it was so useful that we bought a second one!
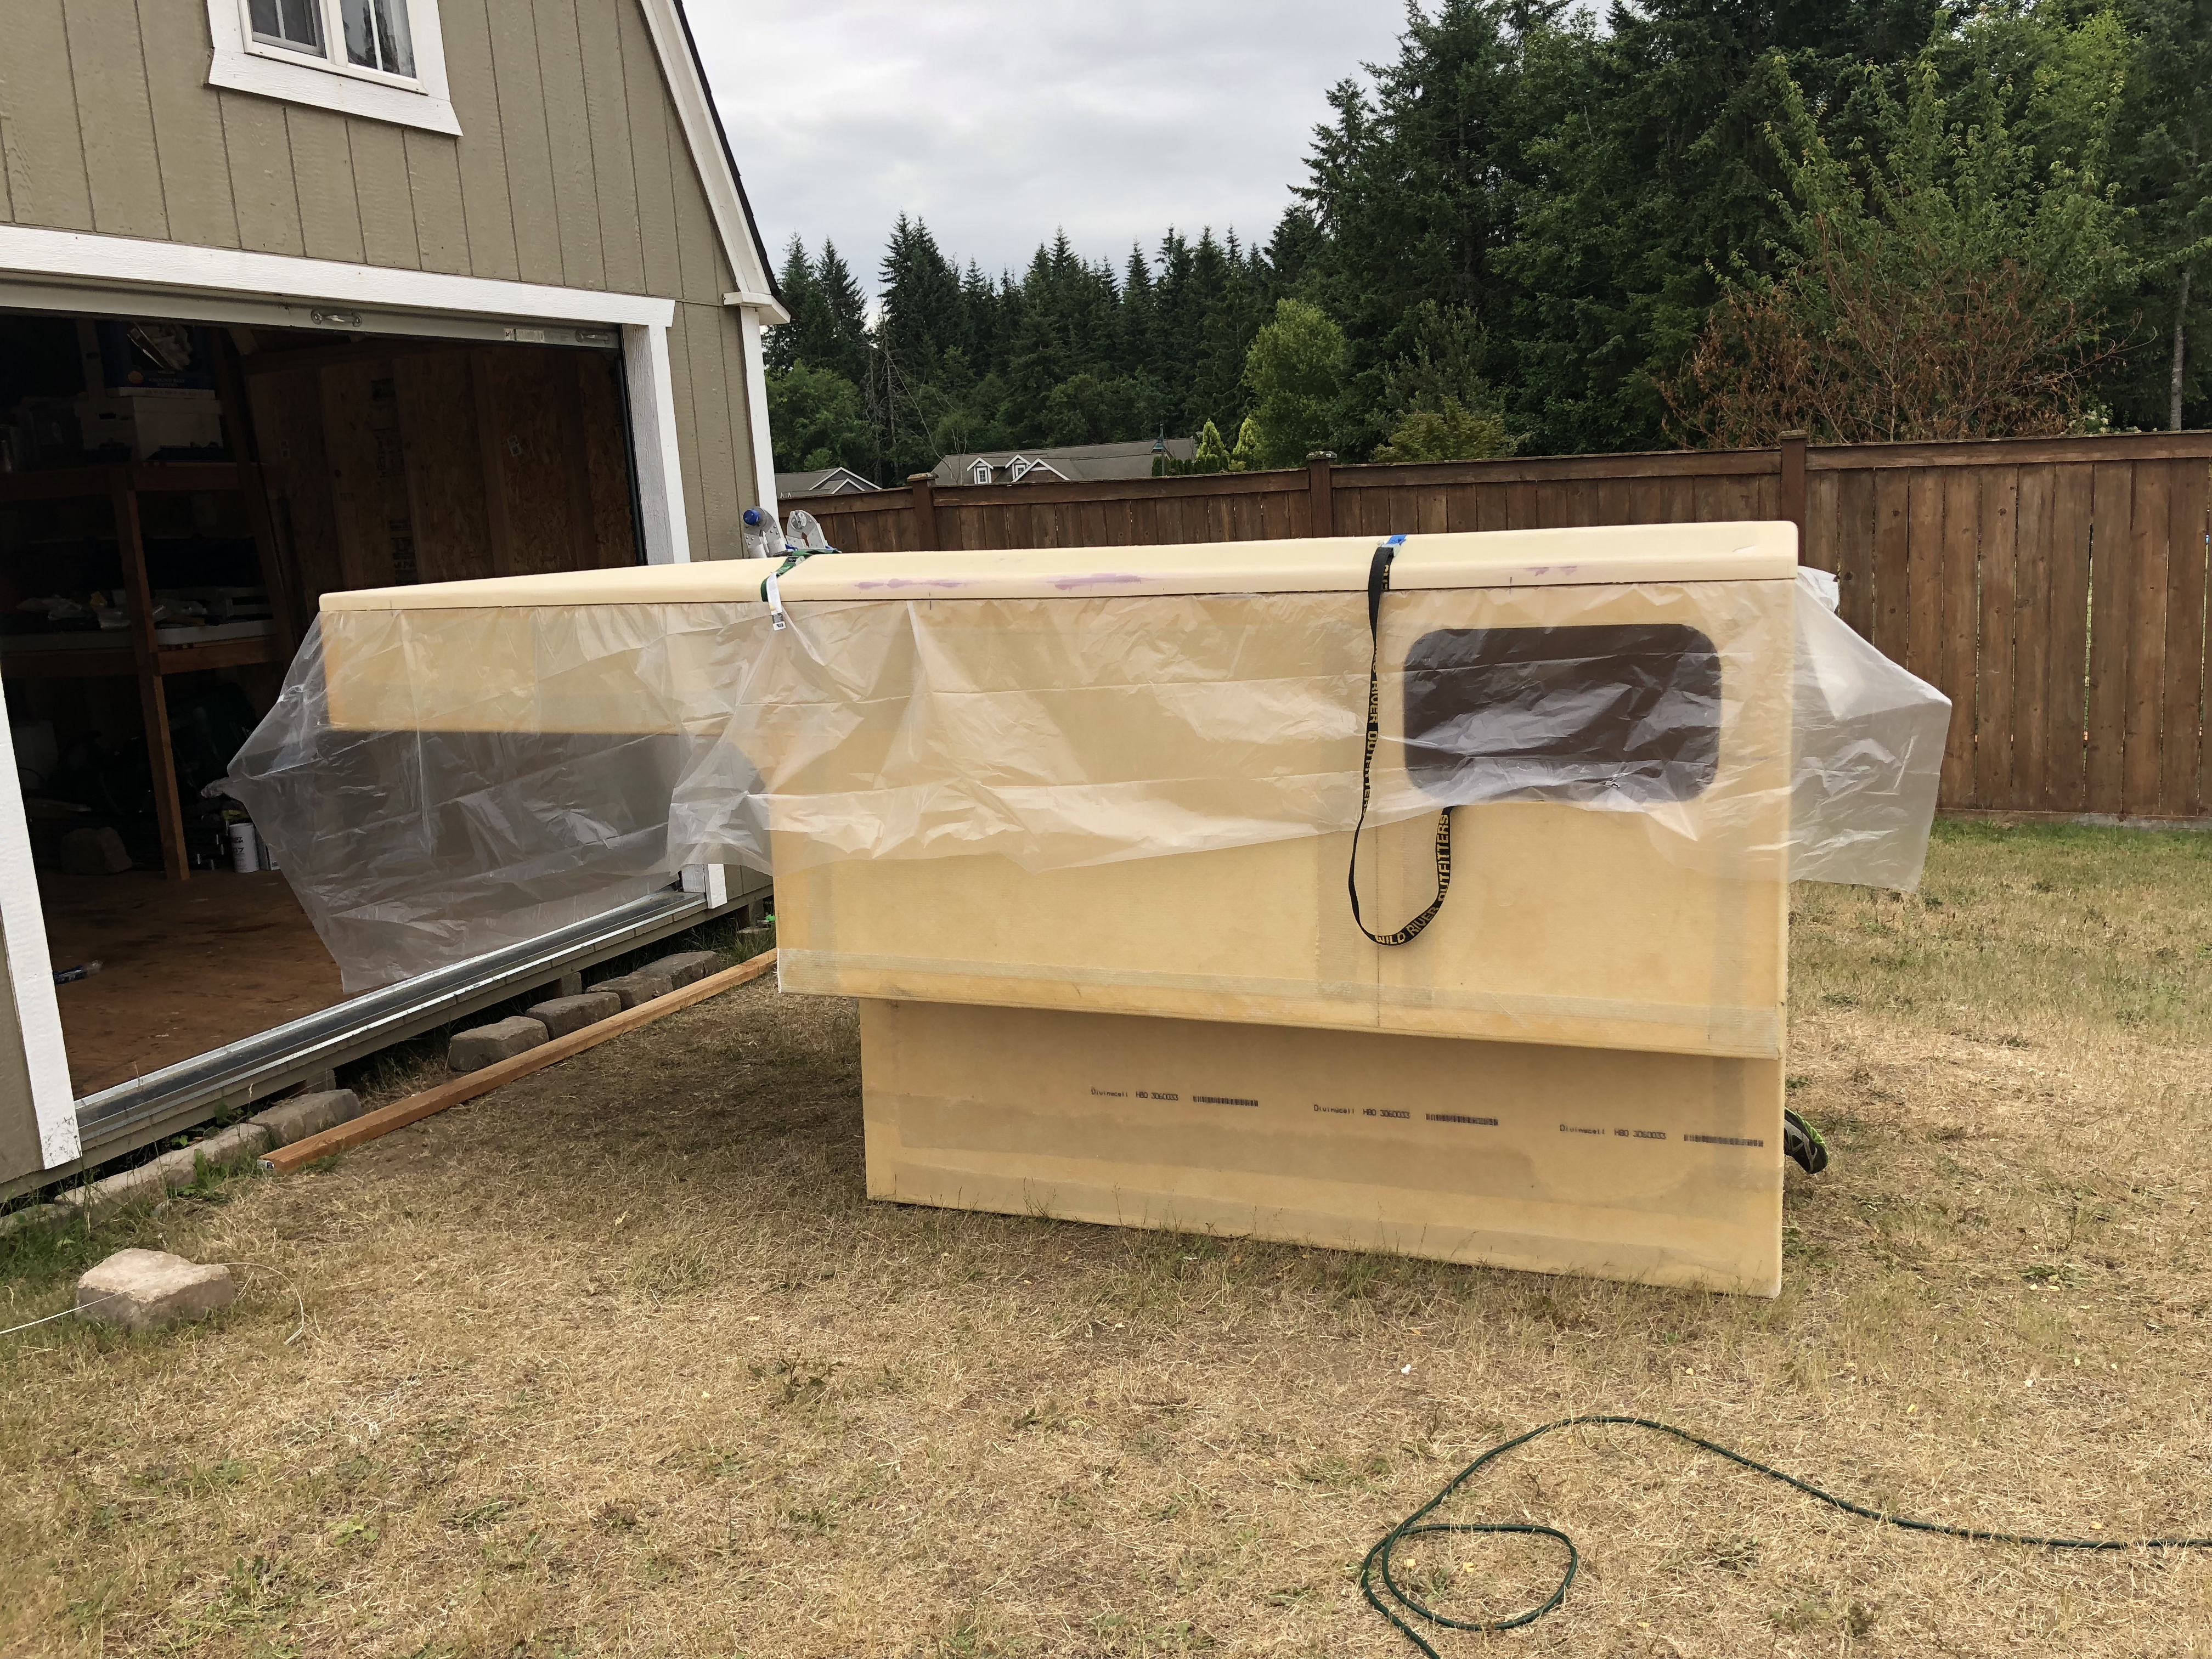
Most of the roof is finished. The weighted bucket is holding that edge down a little bit.
Since it's so large and we're just going to work on it the next morning, the camper spent its first night outside! ...covered with plastic of course.
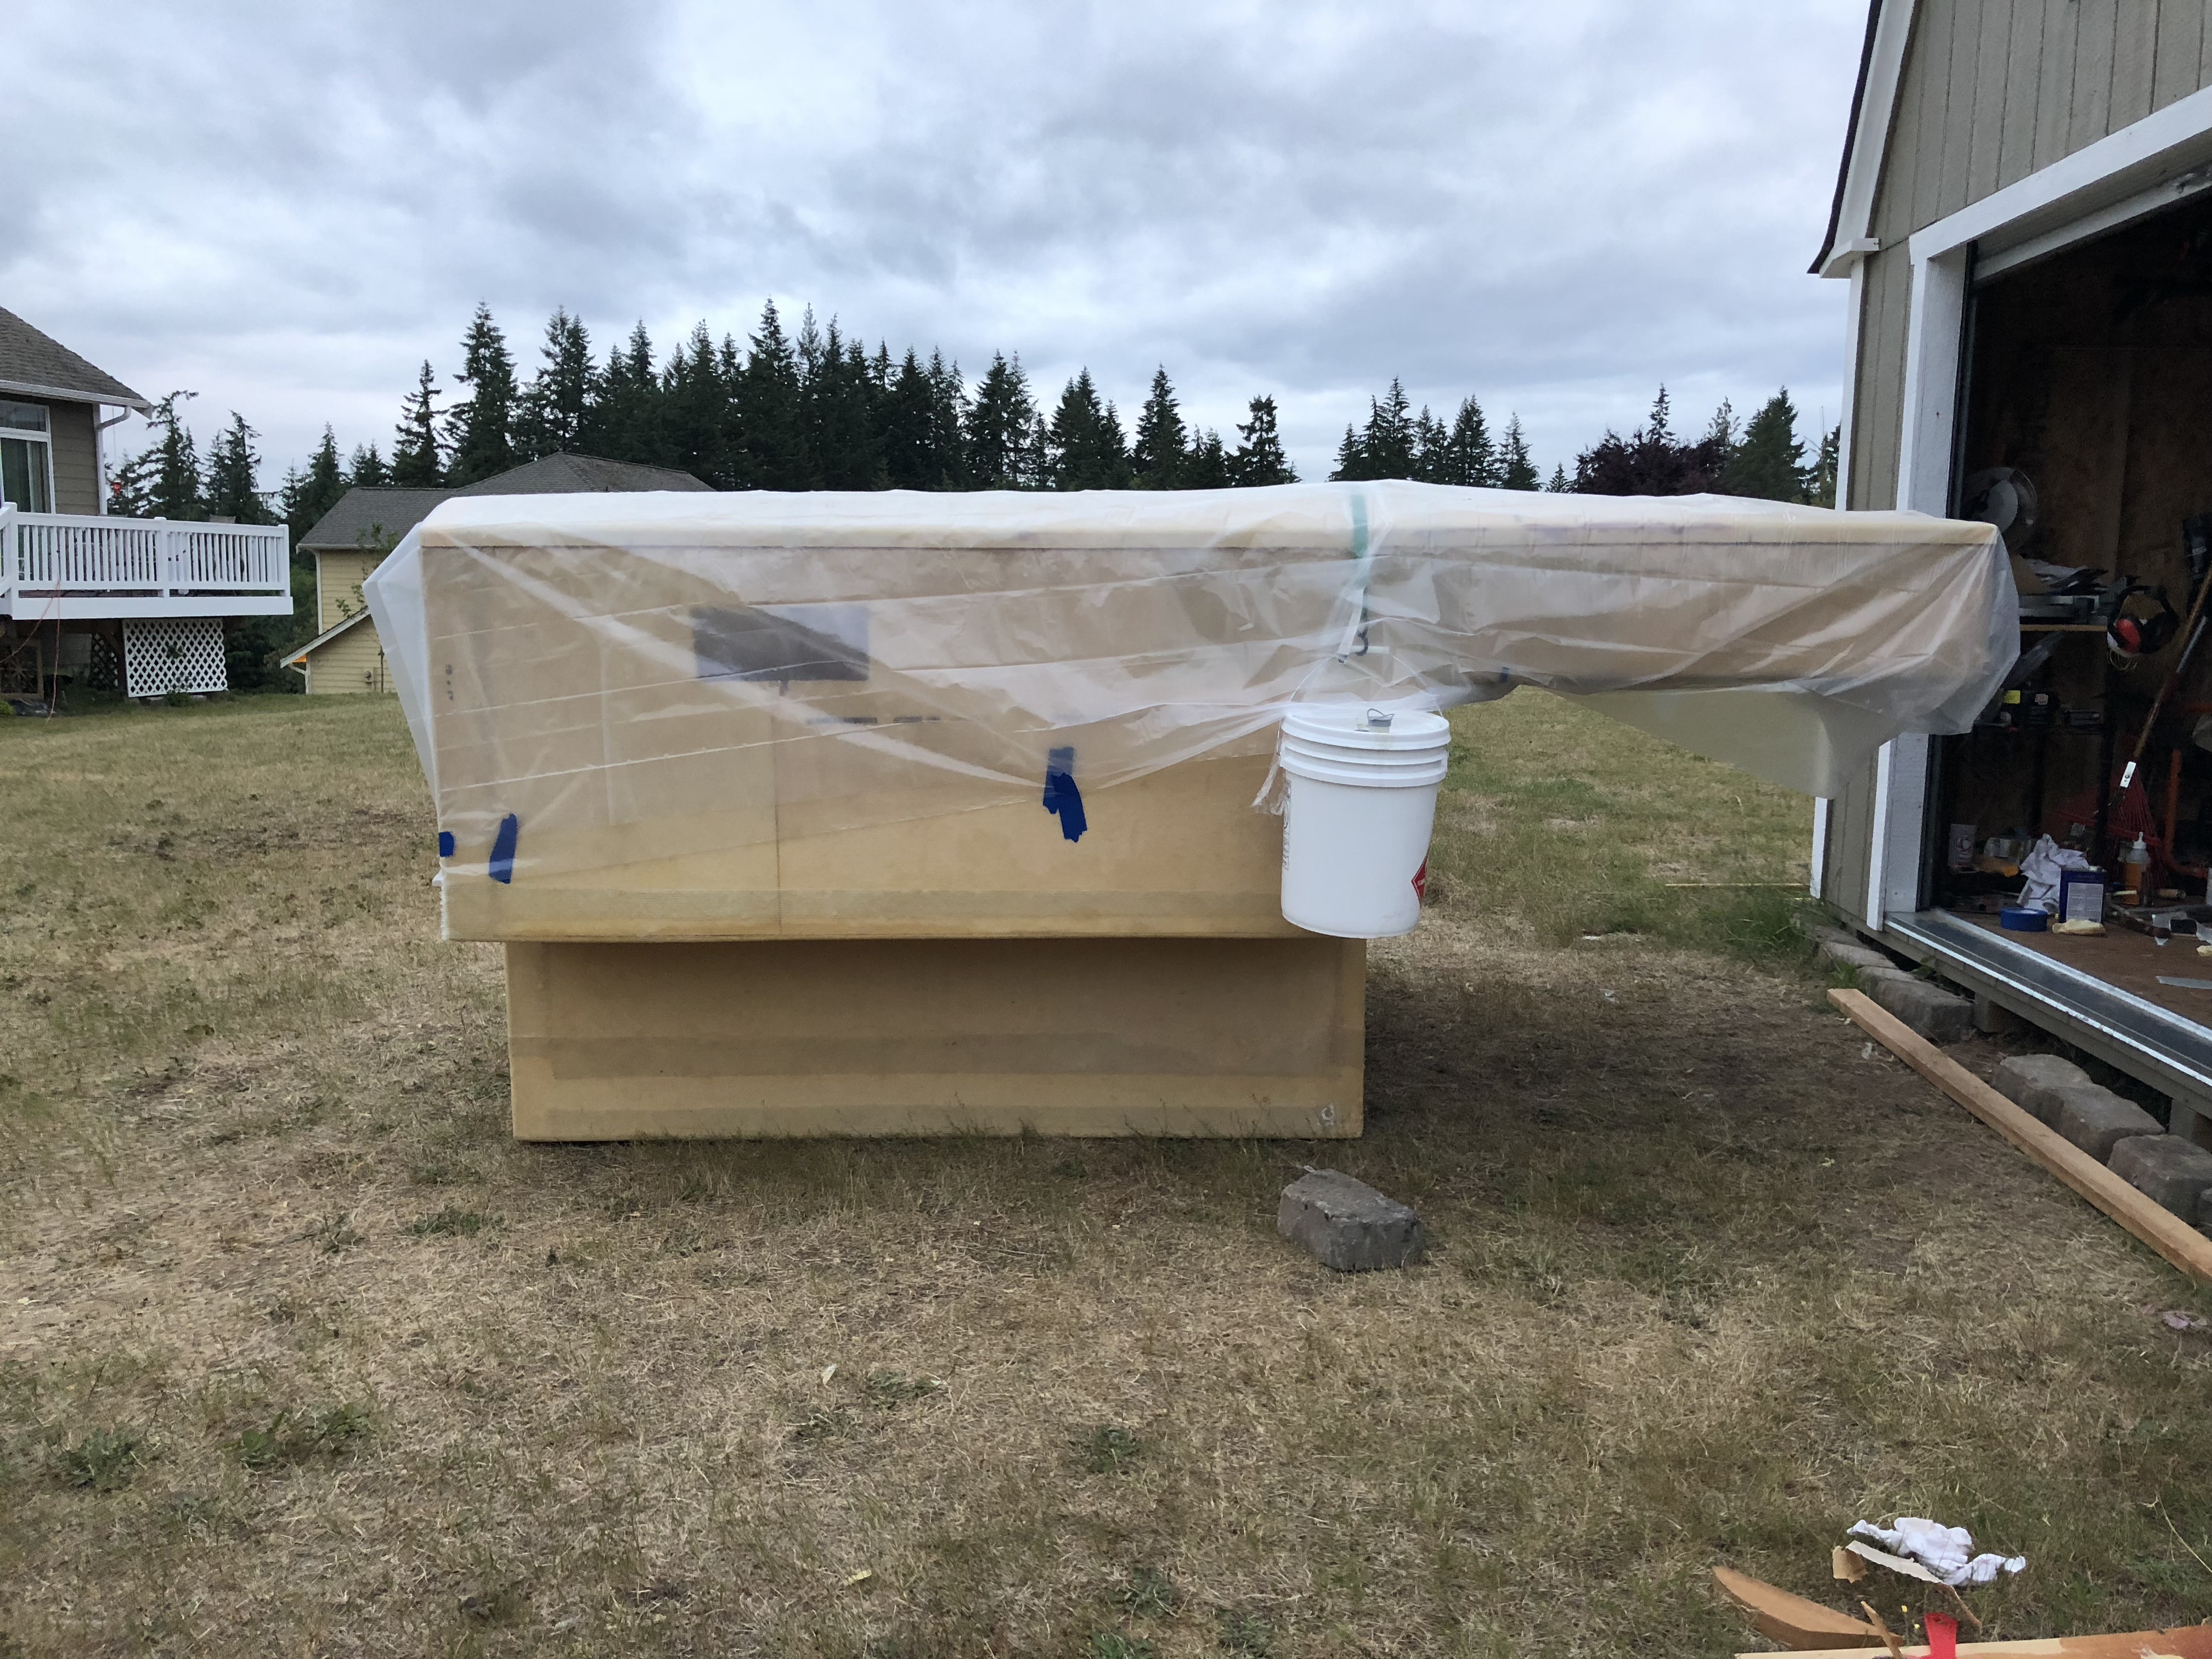
I should also add that we have little paving stones surrounding our shed and we used those things more than is really reasonable to weight things down and hold them in place. A little awkwardly shaped, but they were a big help! If I were to do this again I'd probably buy a couple square concrete blocks and not change a thing in our process!
We had a few jacks inside the camper to make sure the middle of the roof didn't sag and various other weights to hopefully get the roof into the shape that it needs to be before we glass it. We have two of those extending rods that people use in the back of their truck beds to hold cargo in place. We had one for when we had the bed rack and roof top tent on our truck and lived out of tubs, but it was so useful that we bought a second one!
Most of the roof is finished. The weighted bucket is holding that edge down a little bit.
Since it's so large and we're just going to work on it the next morning, the camper spent its first night outside! ...covered with plastic of course.
I should also add that we have little paving stones surrounding our shed and we used those things more than is really reasonable to weight things down and hold them in place. A little awkwardly shaped, but they were a big help! If I were to do this again I'd probably buy a couple square concrete blocks and not change a thing in our process!
underkill
Active member
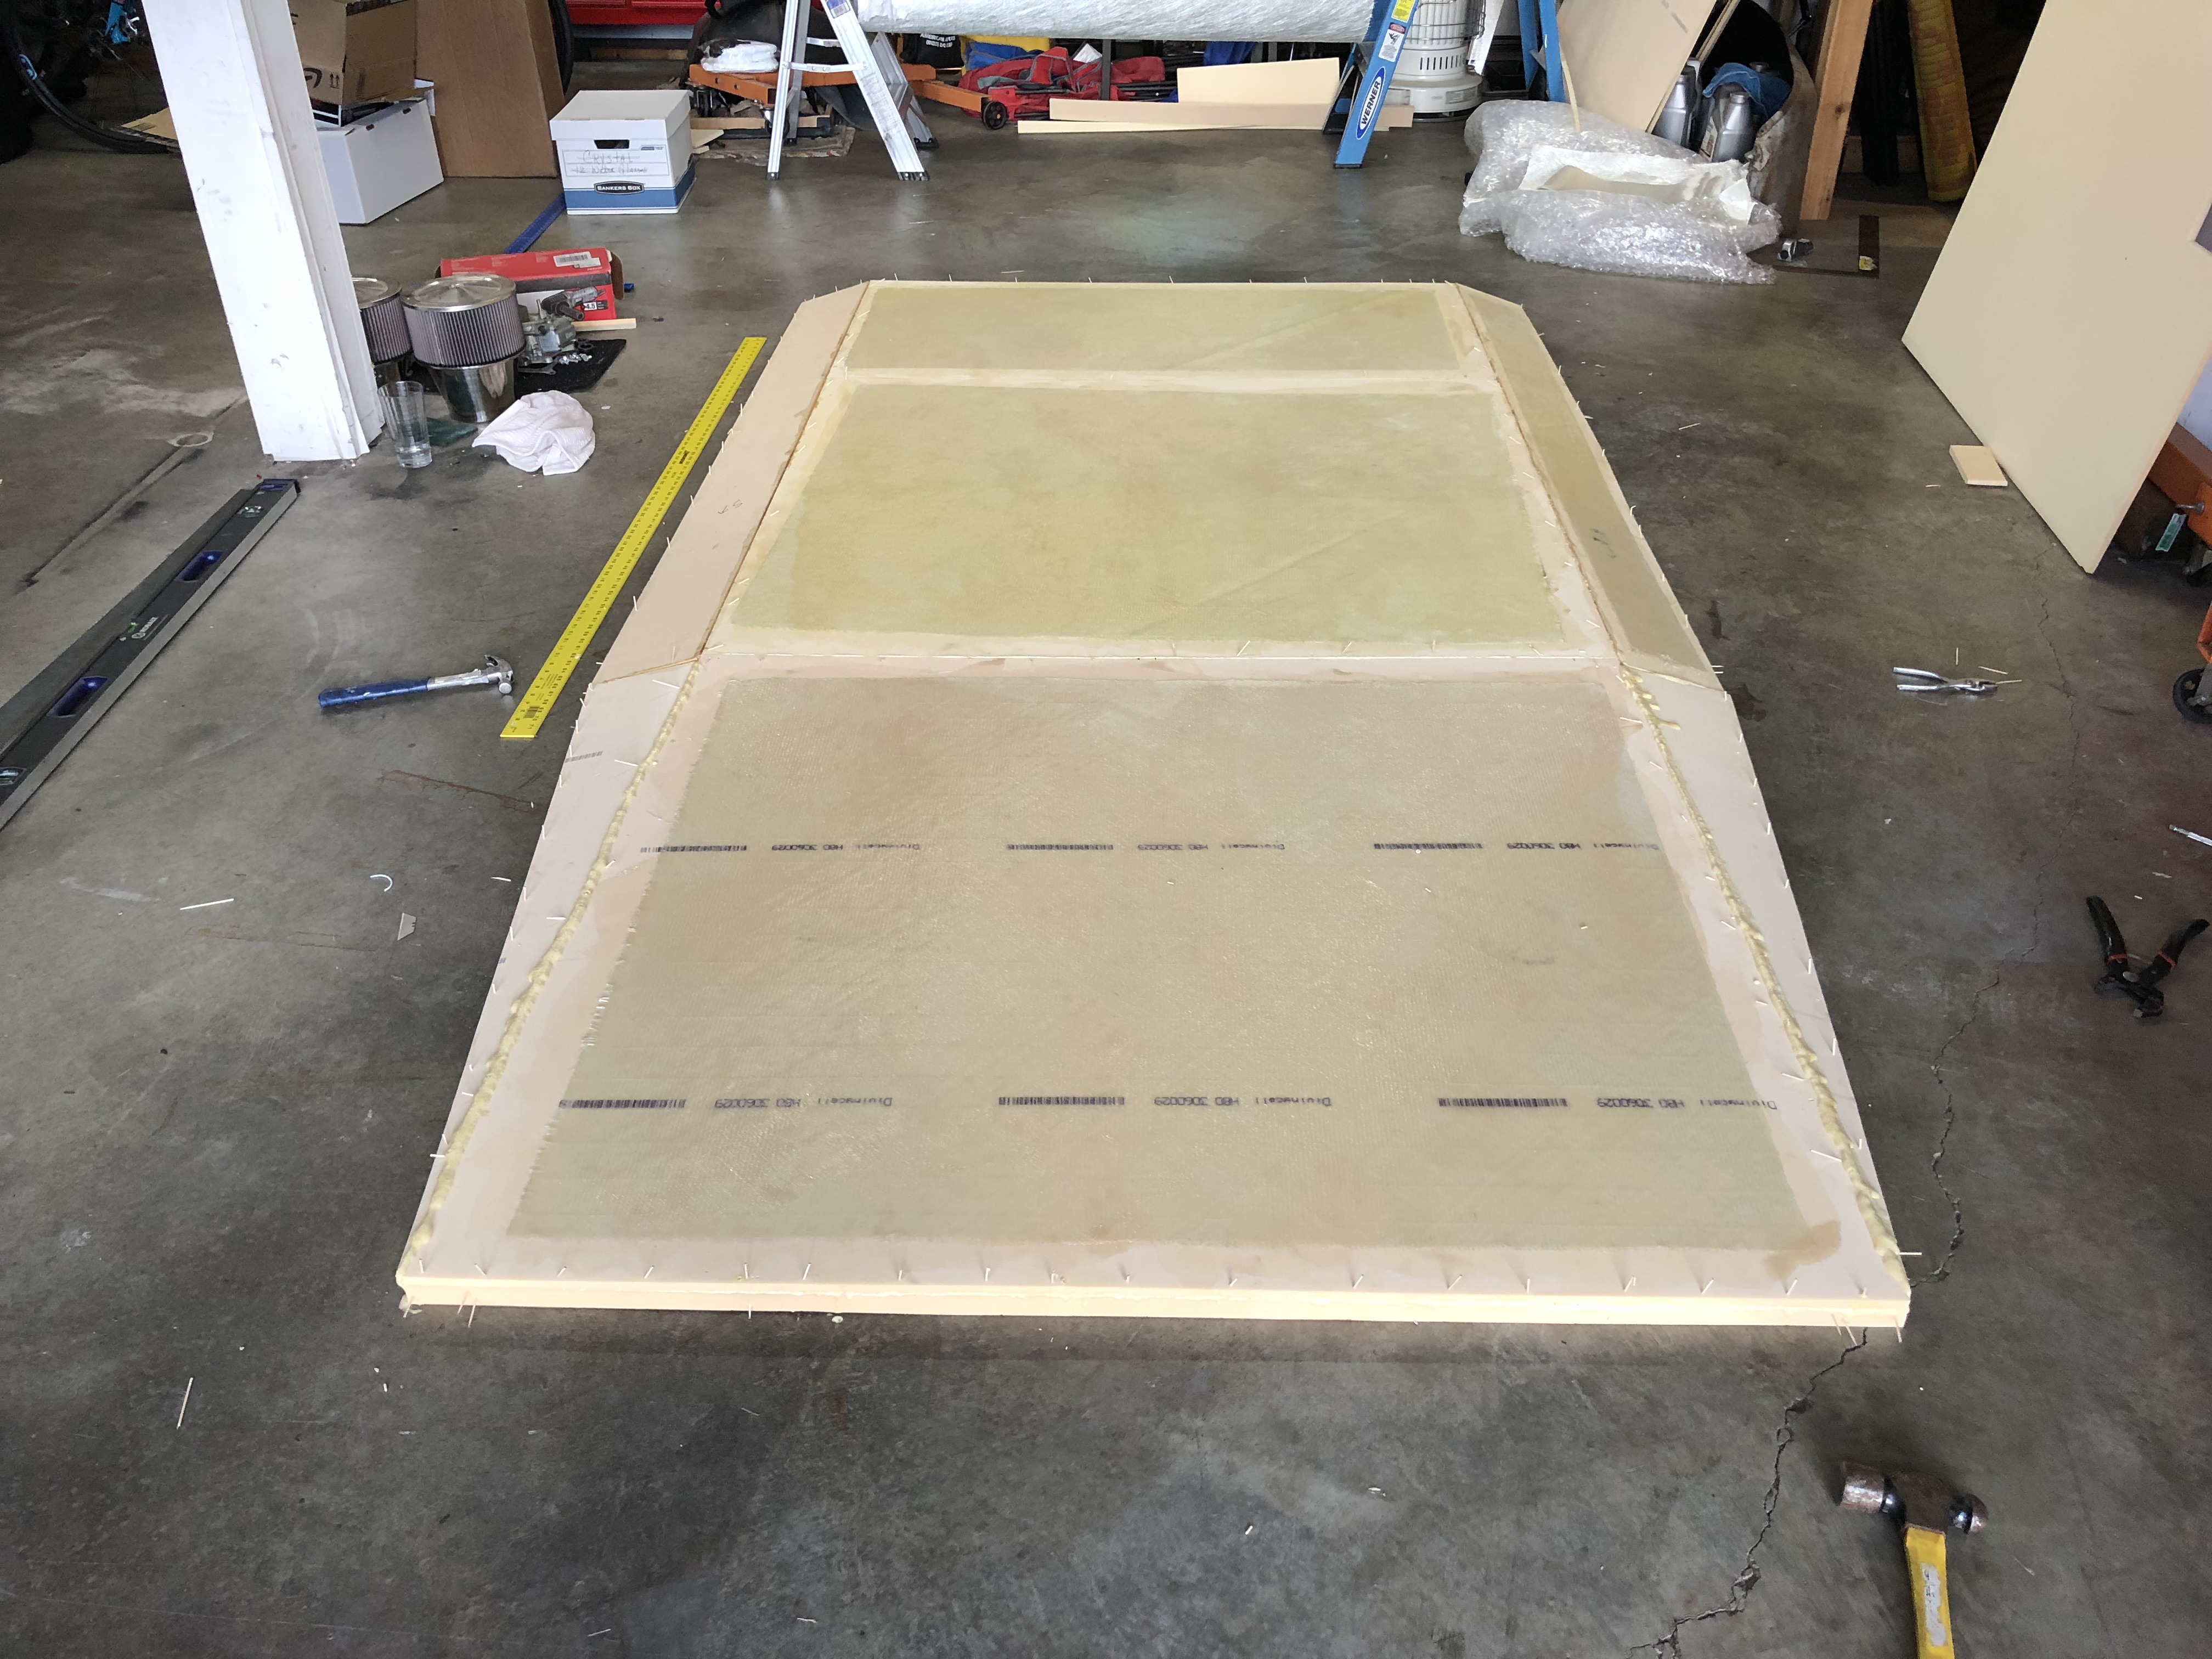
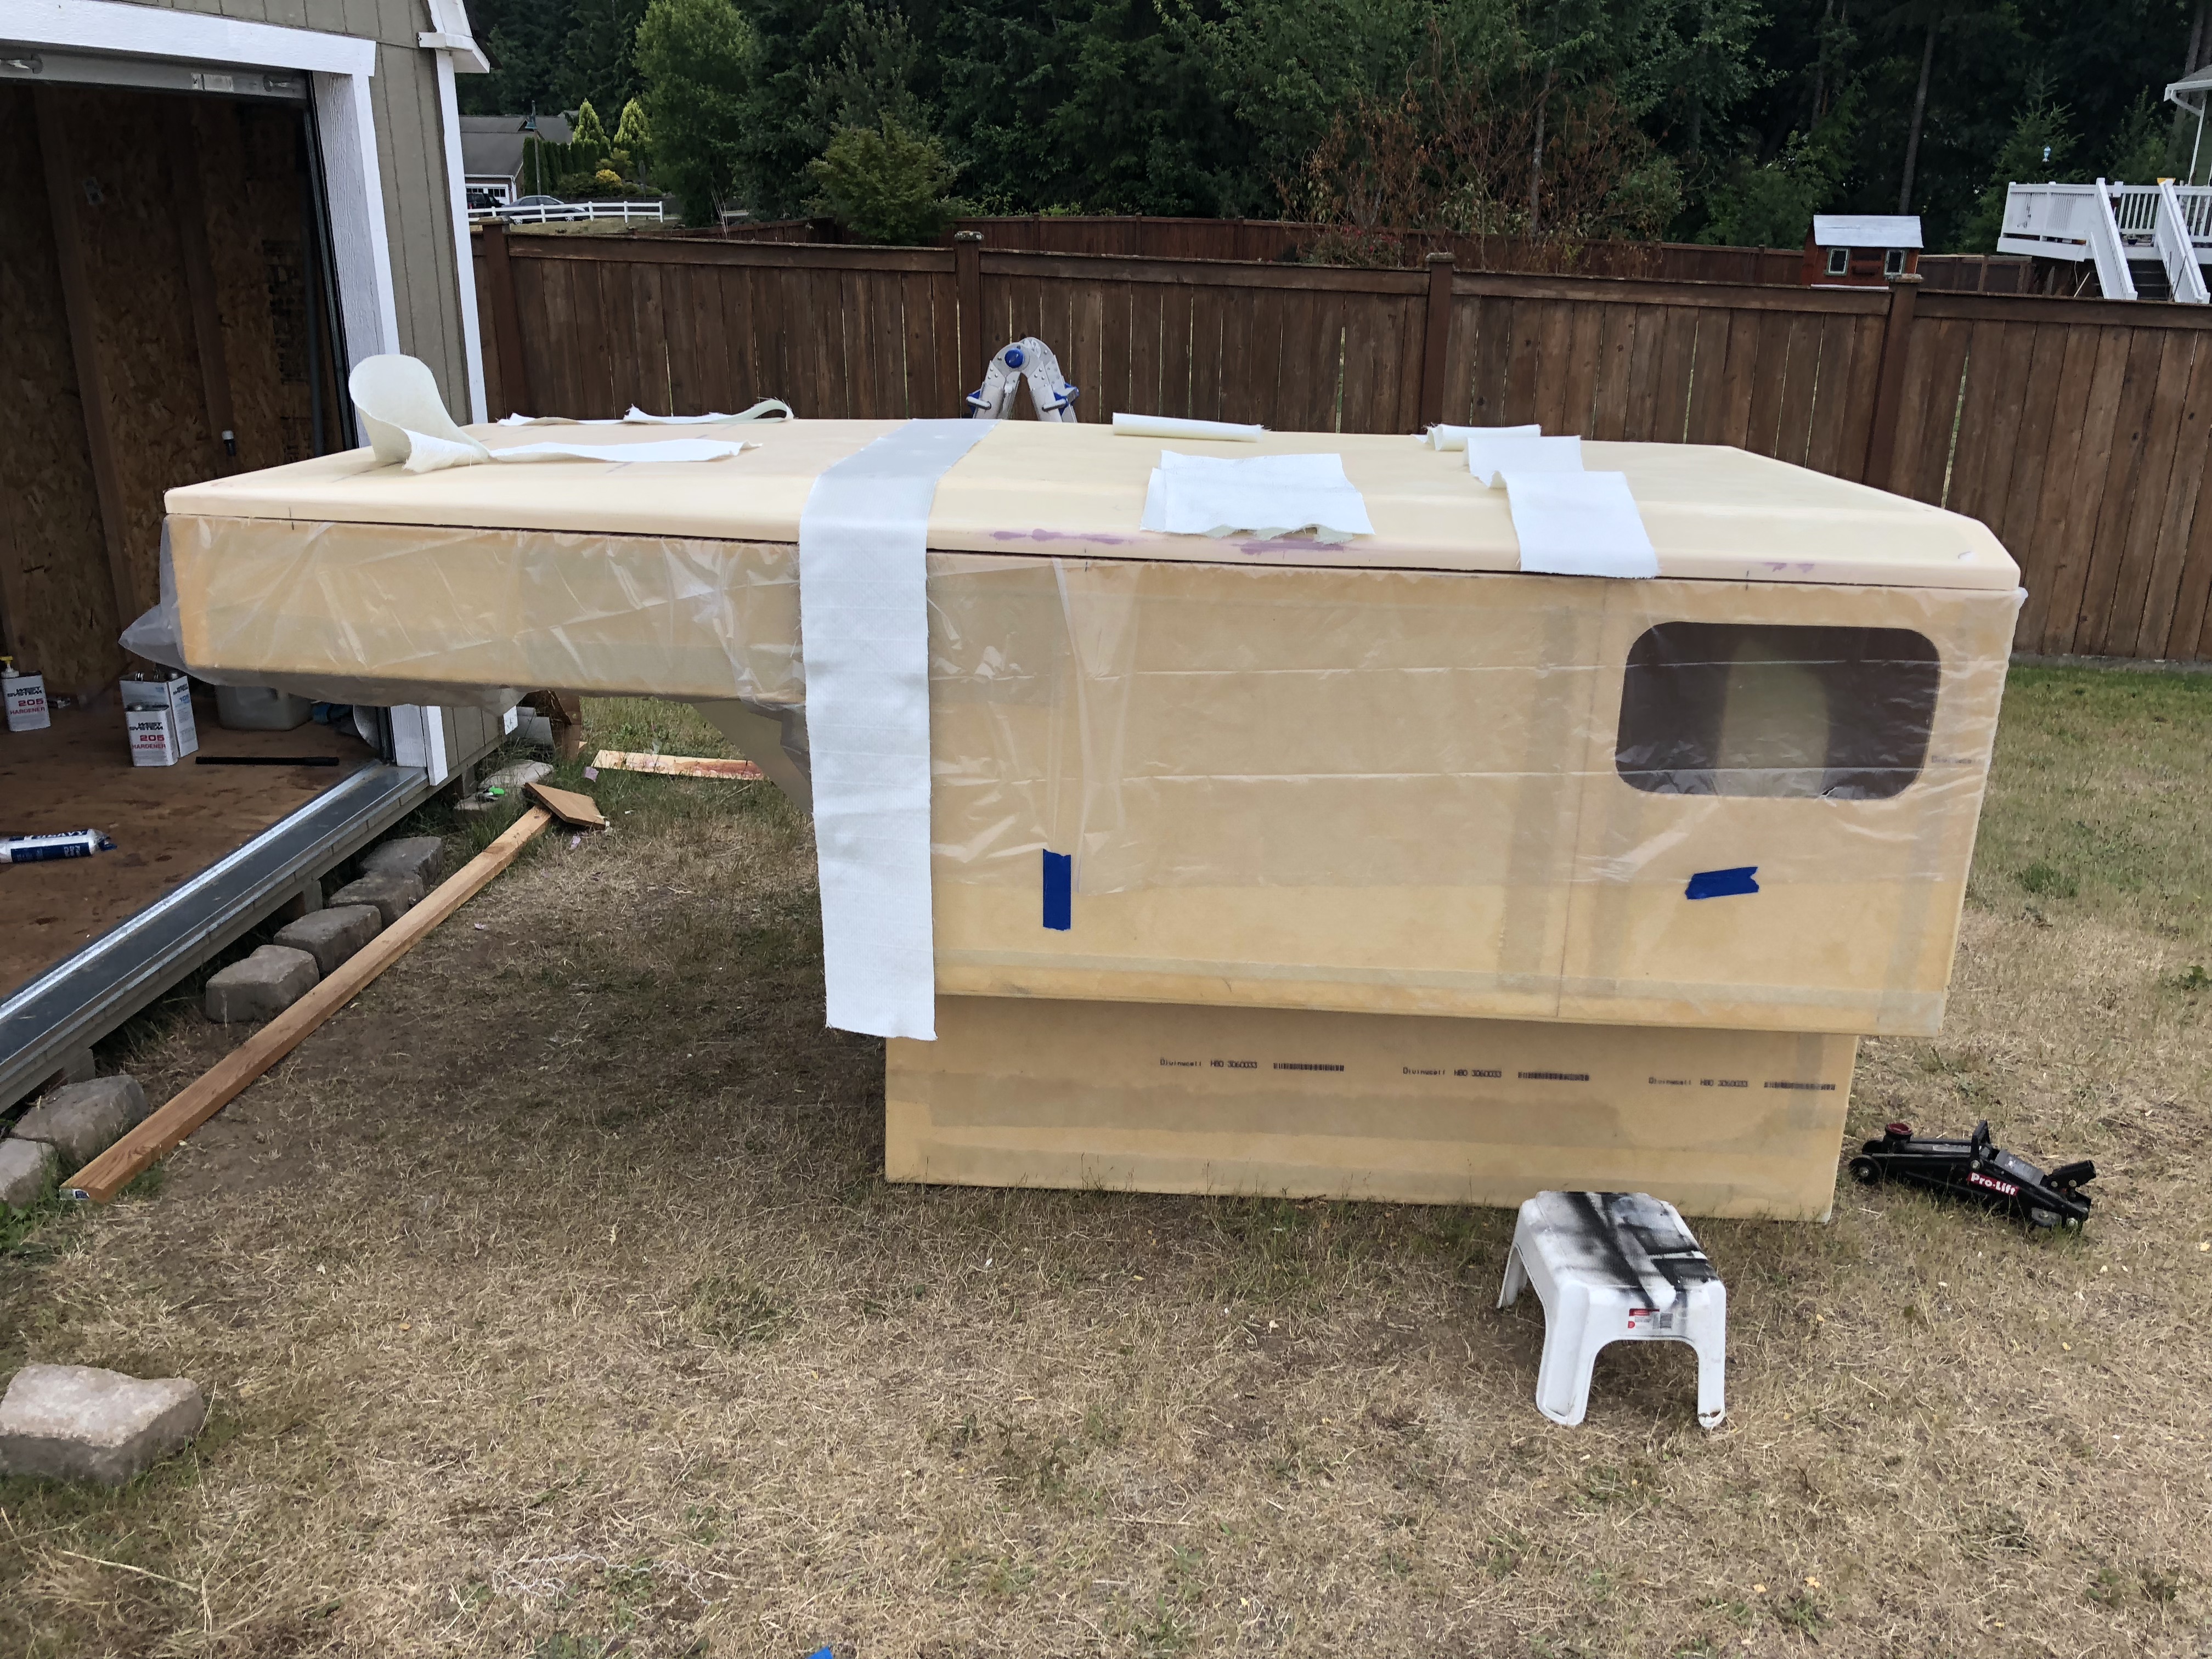
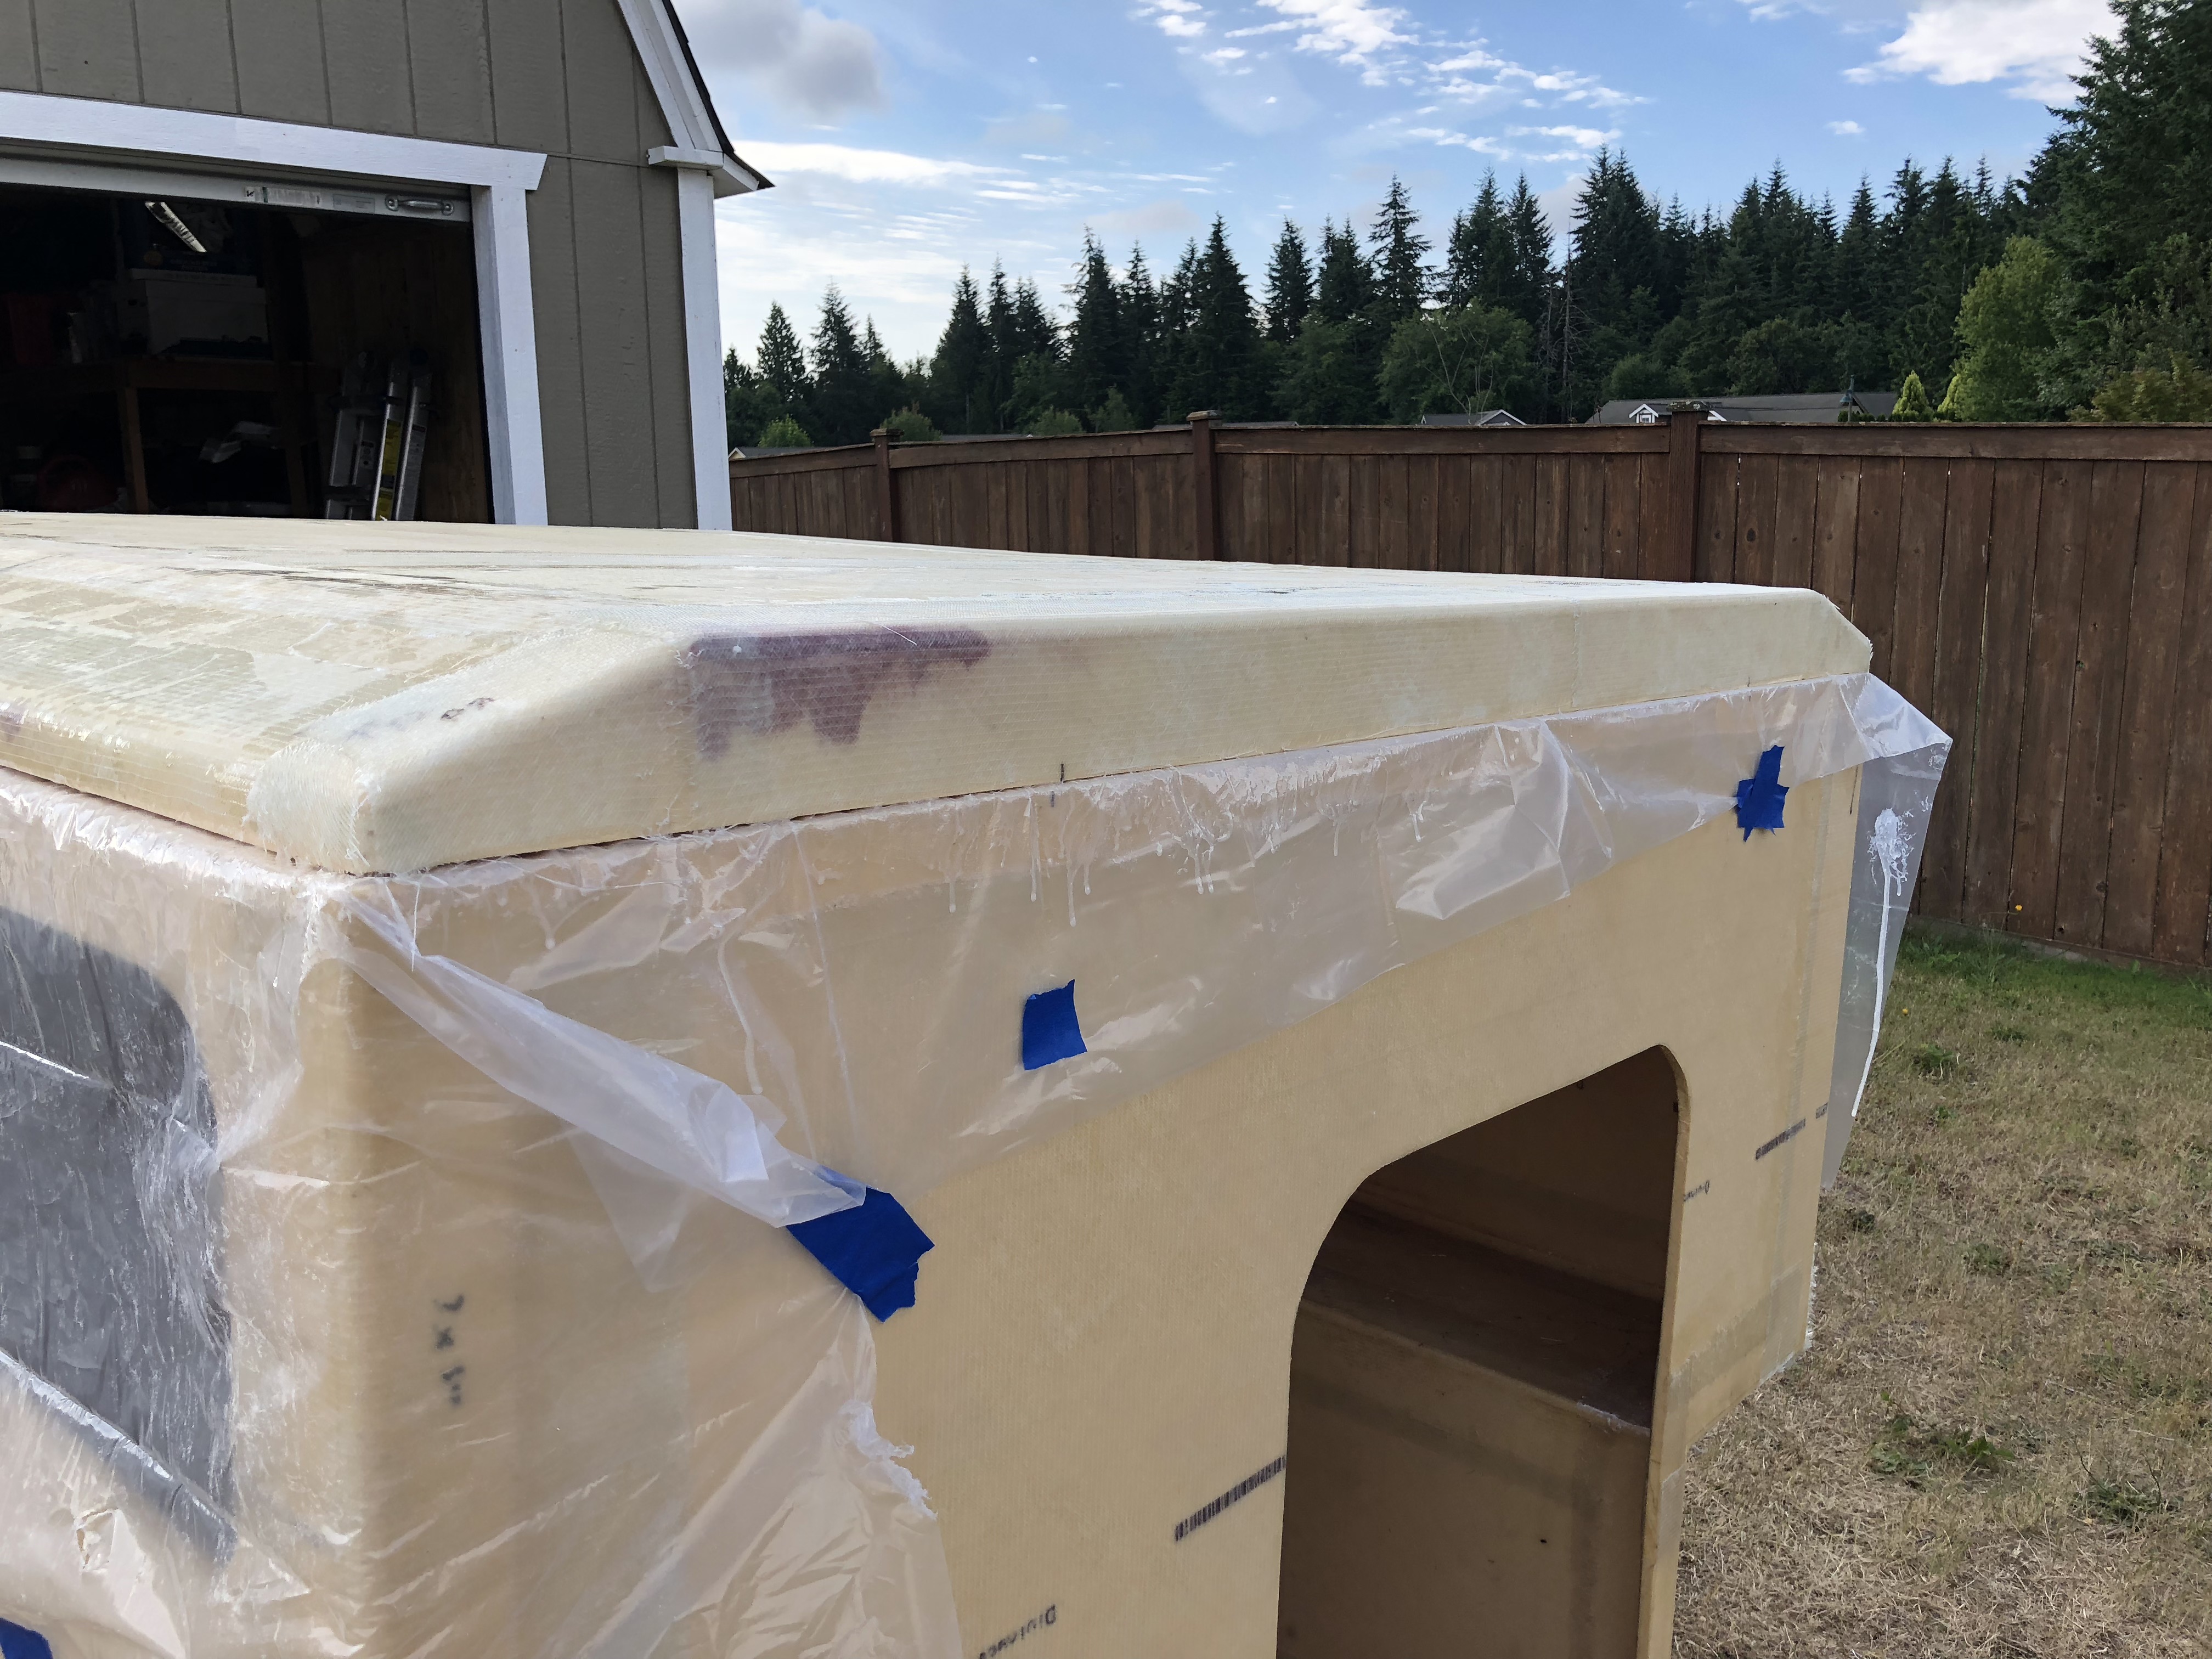
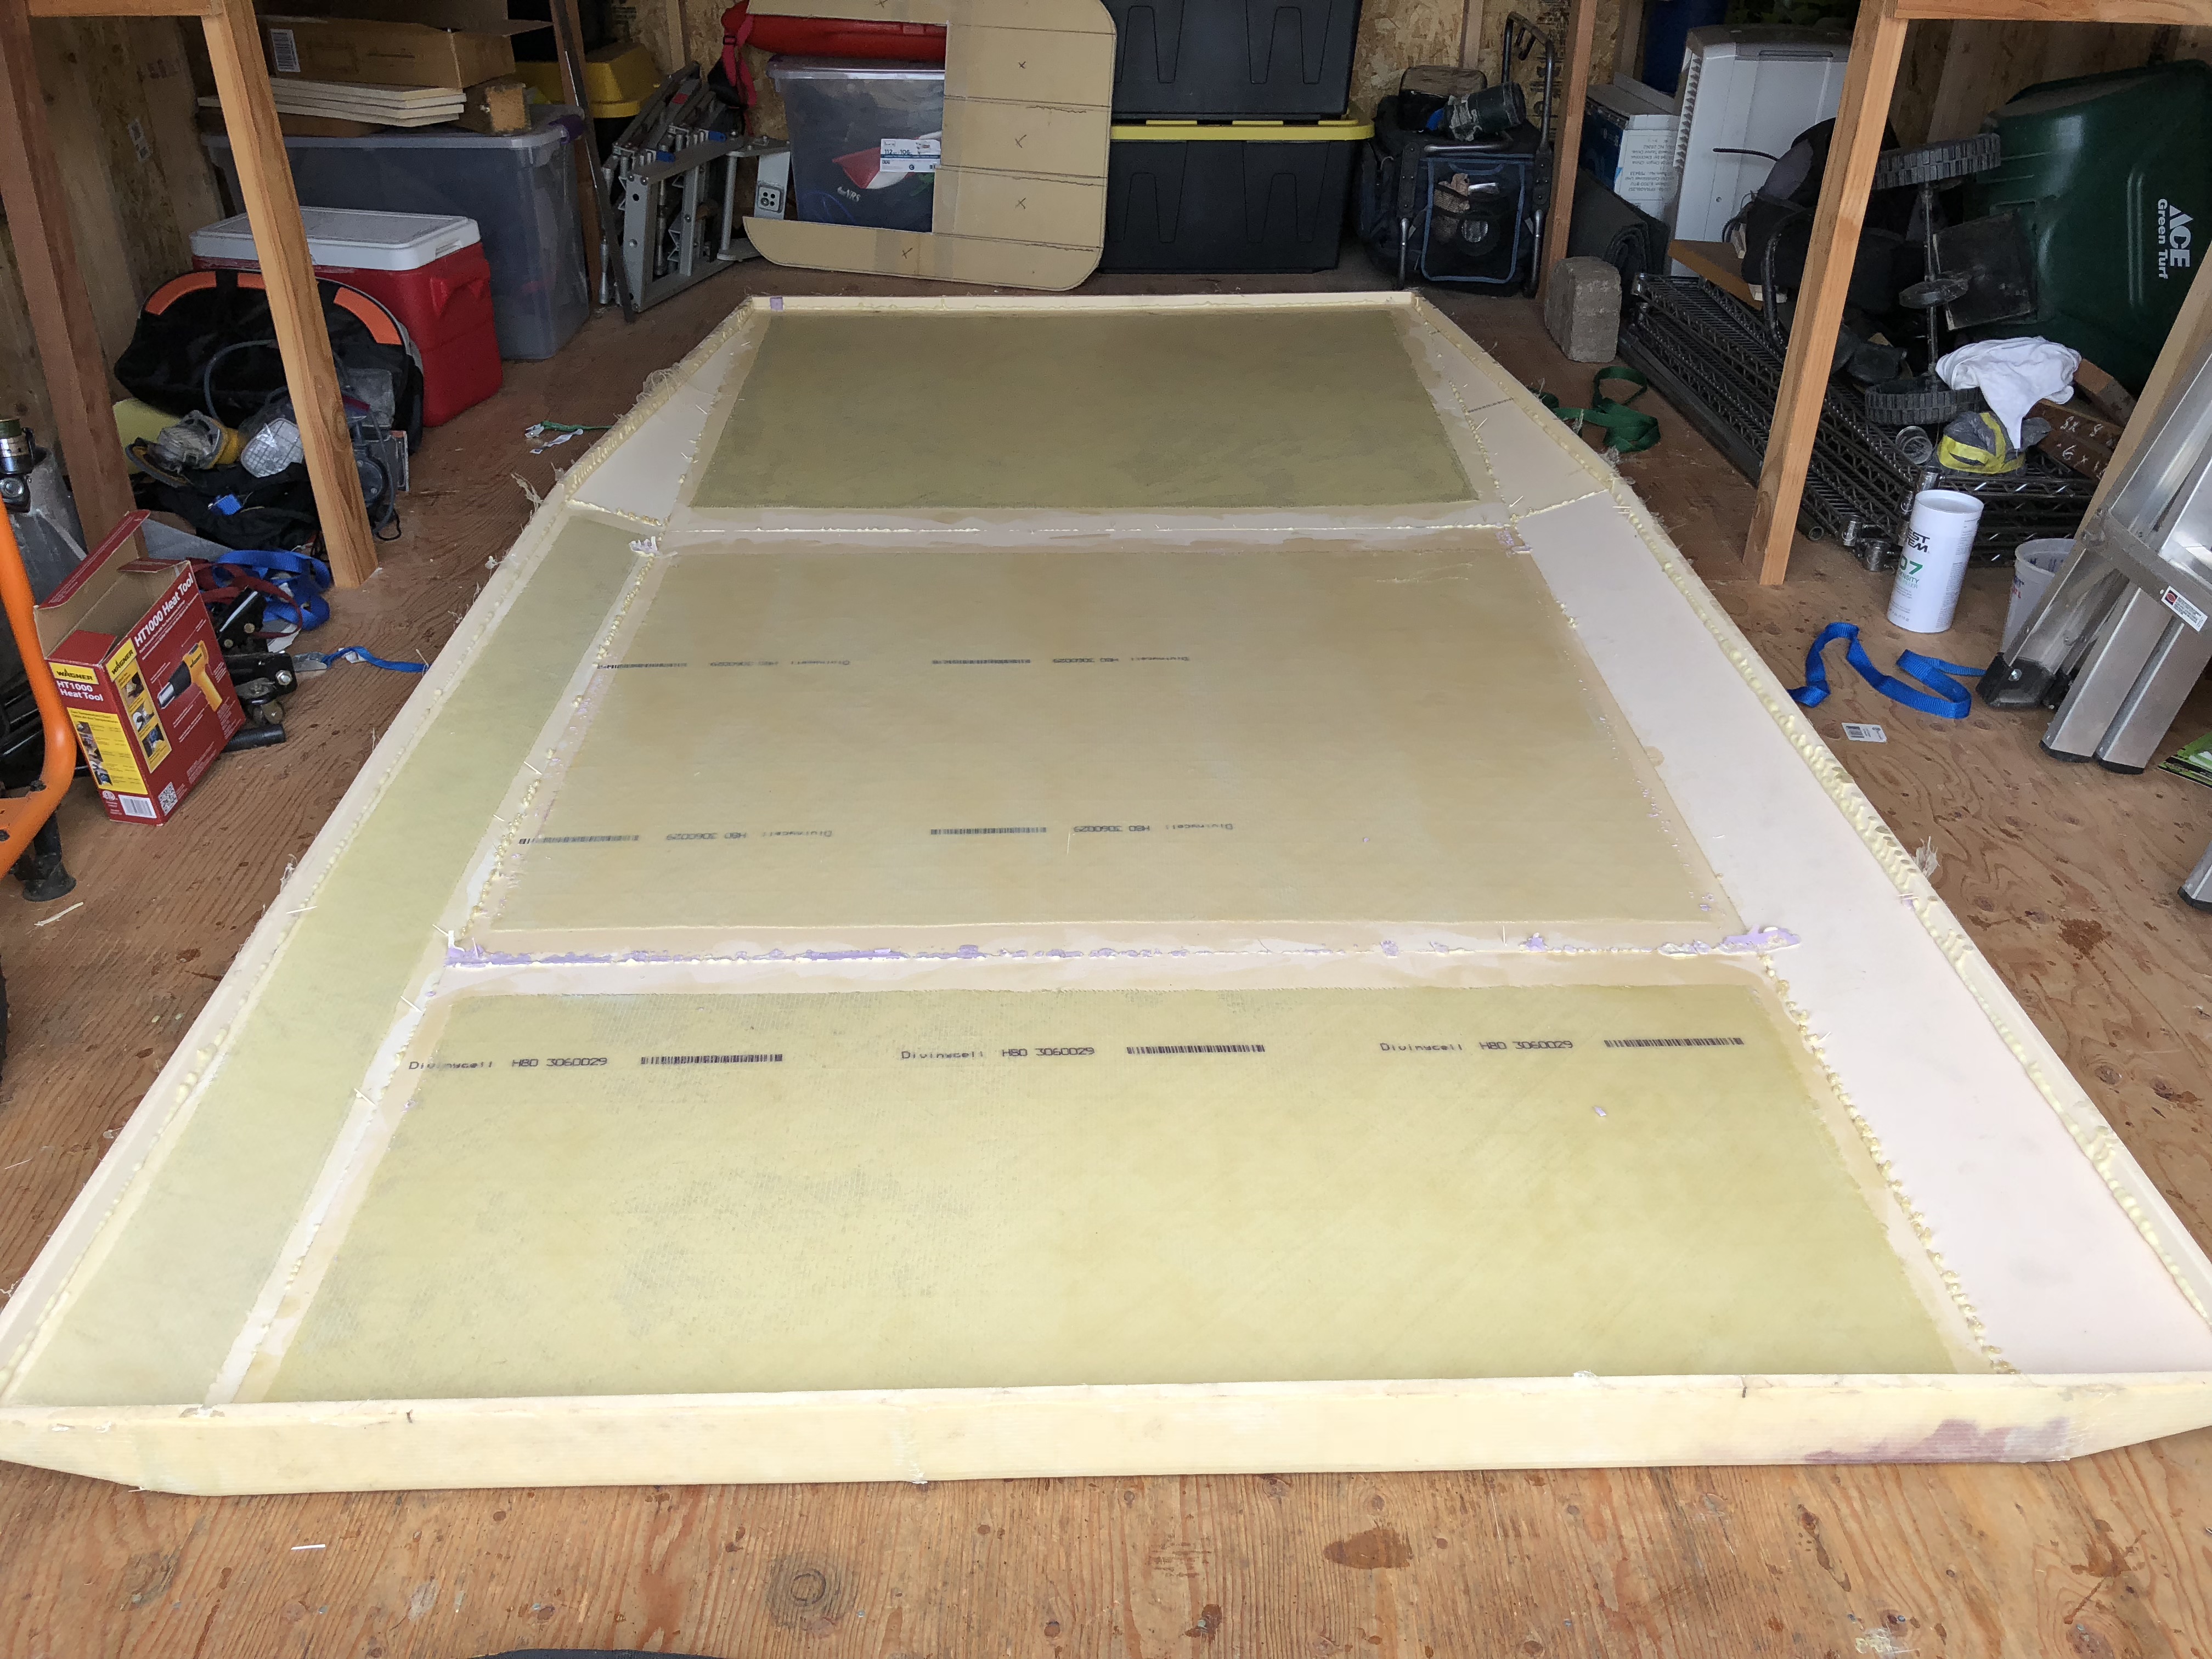
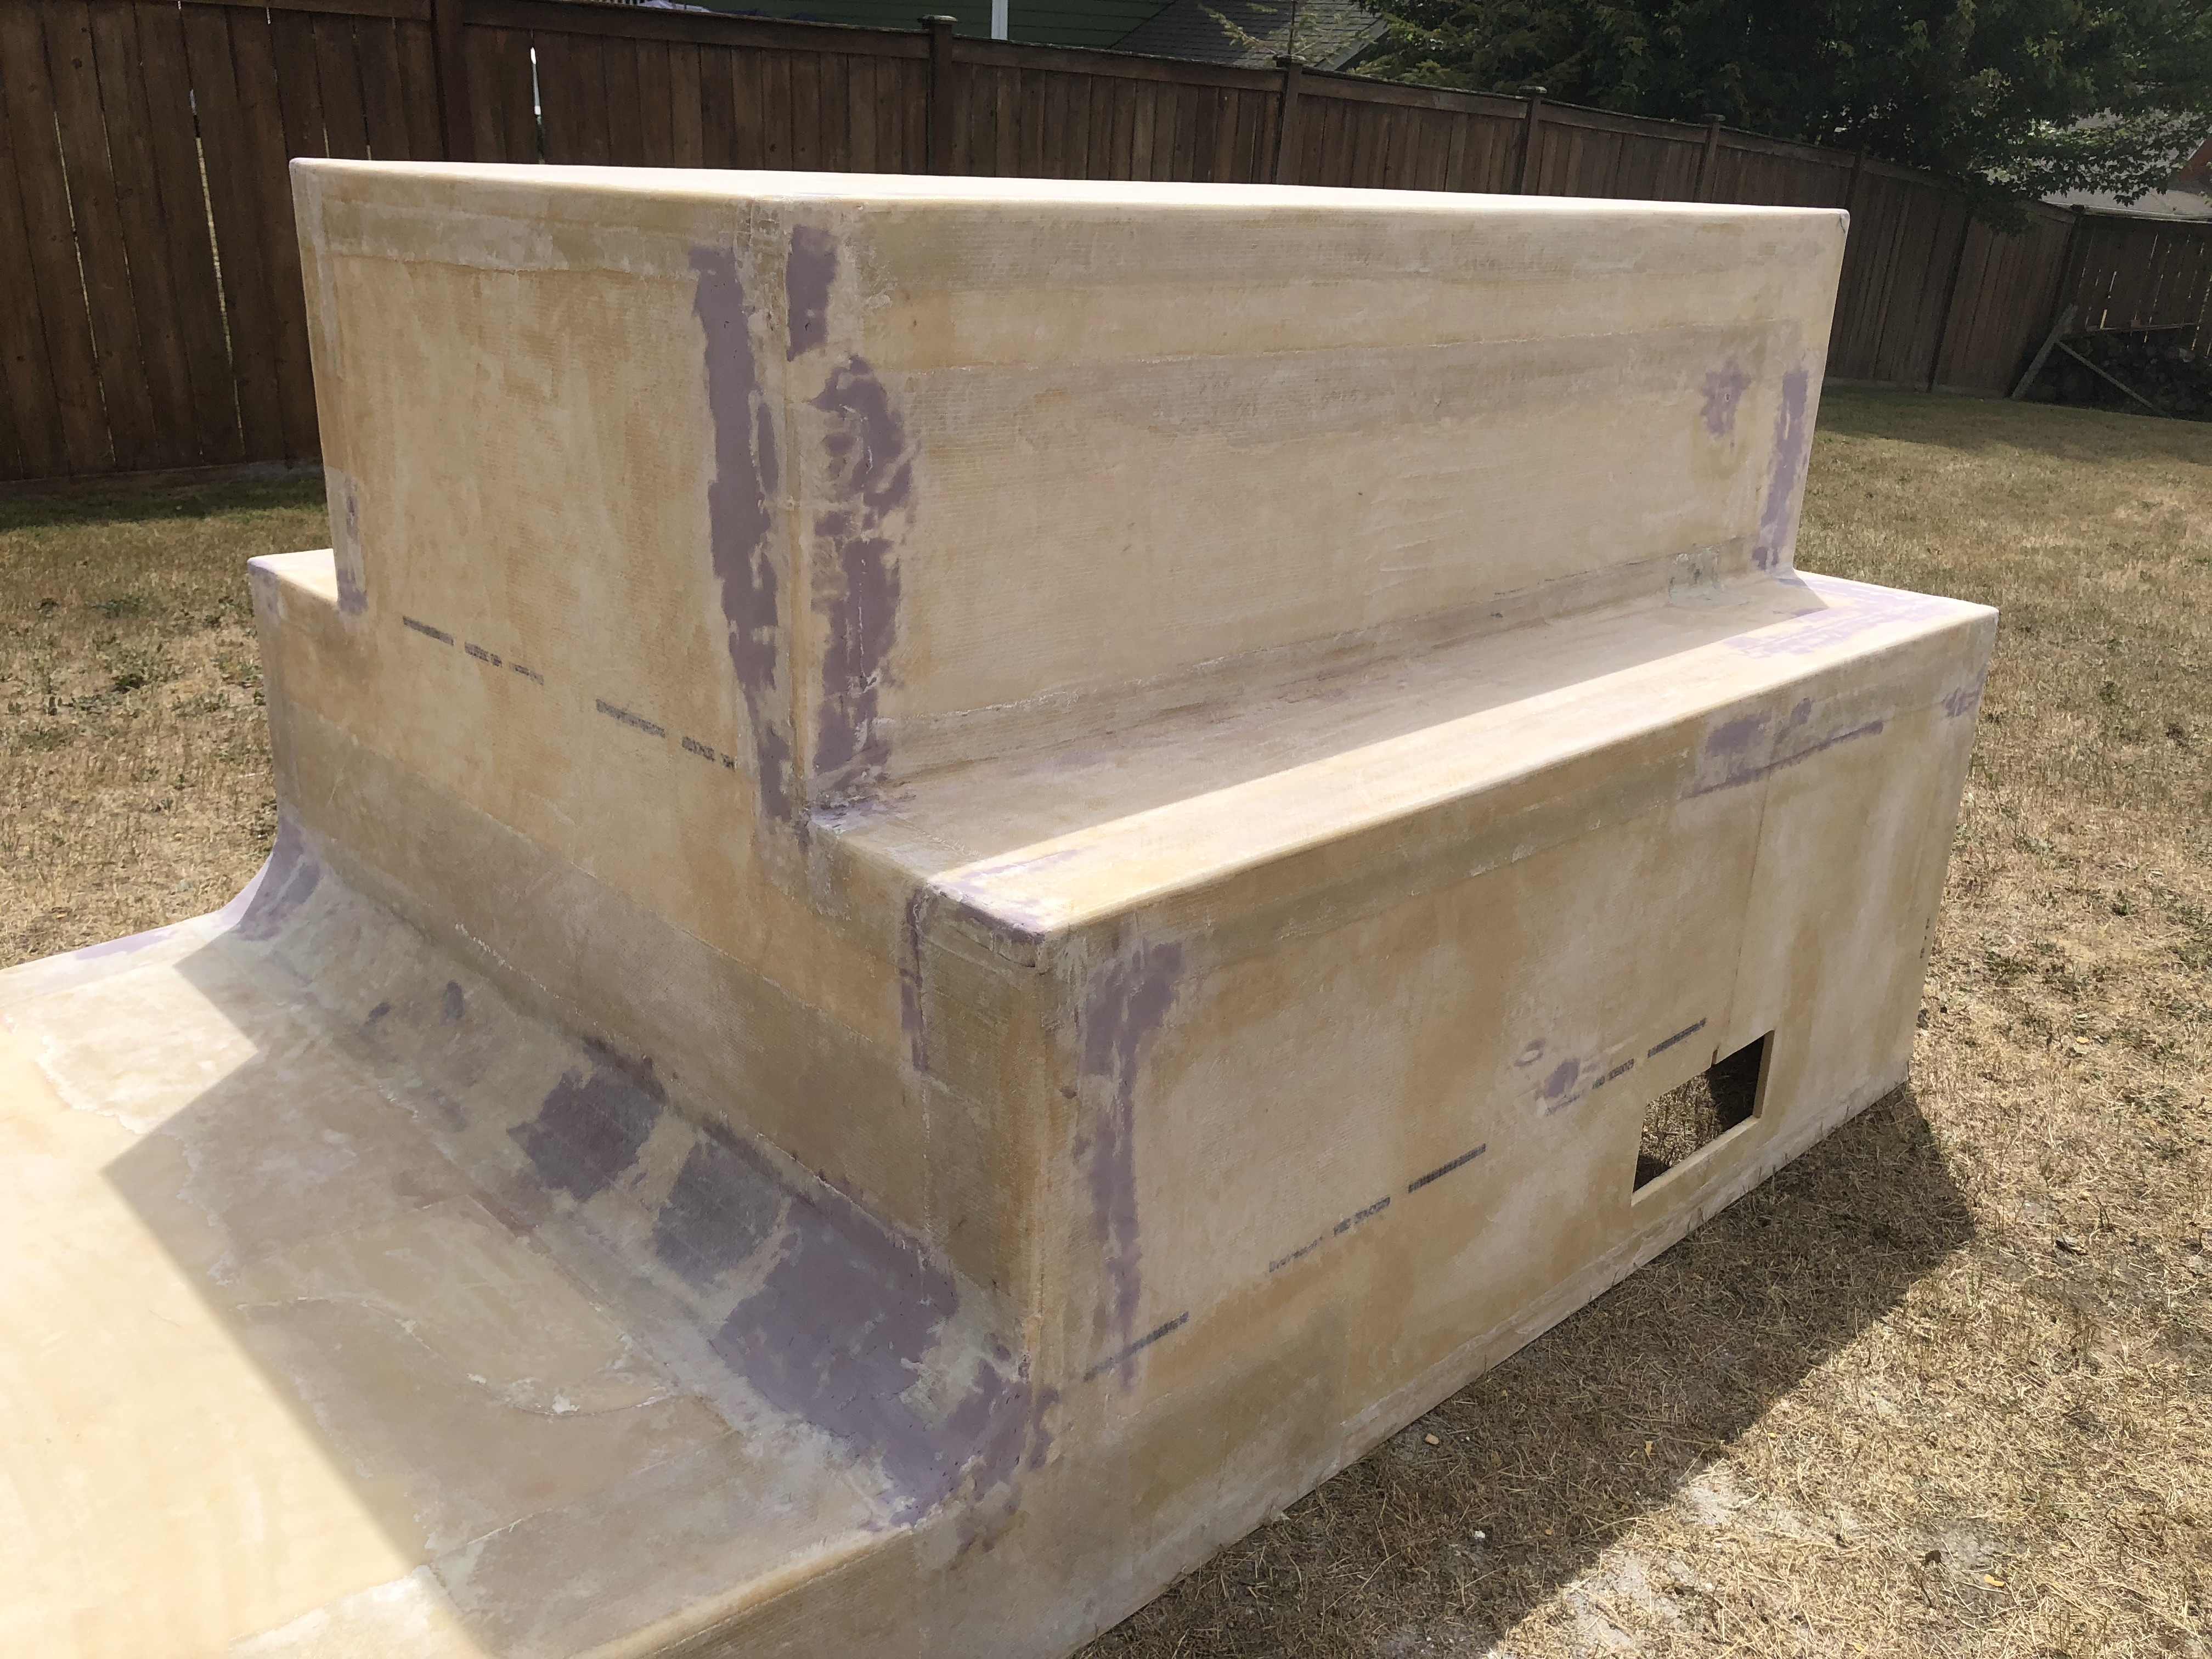
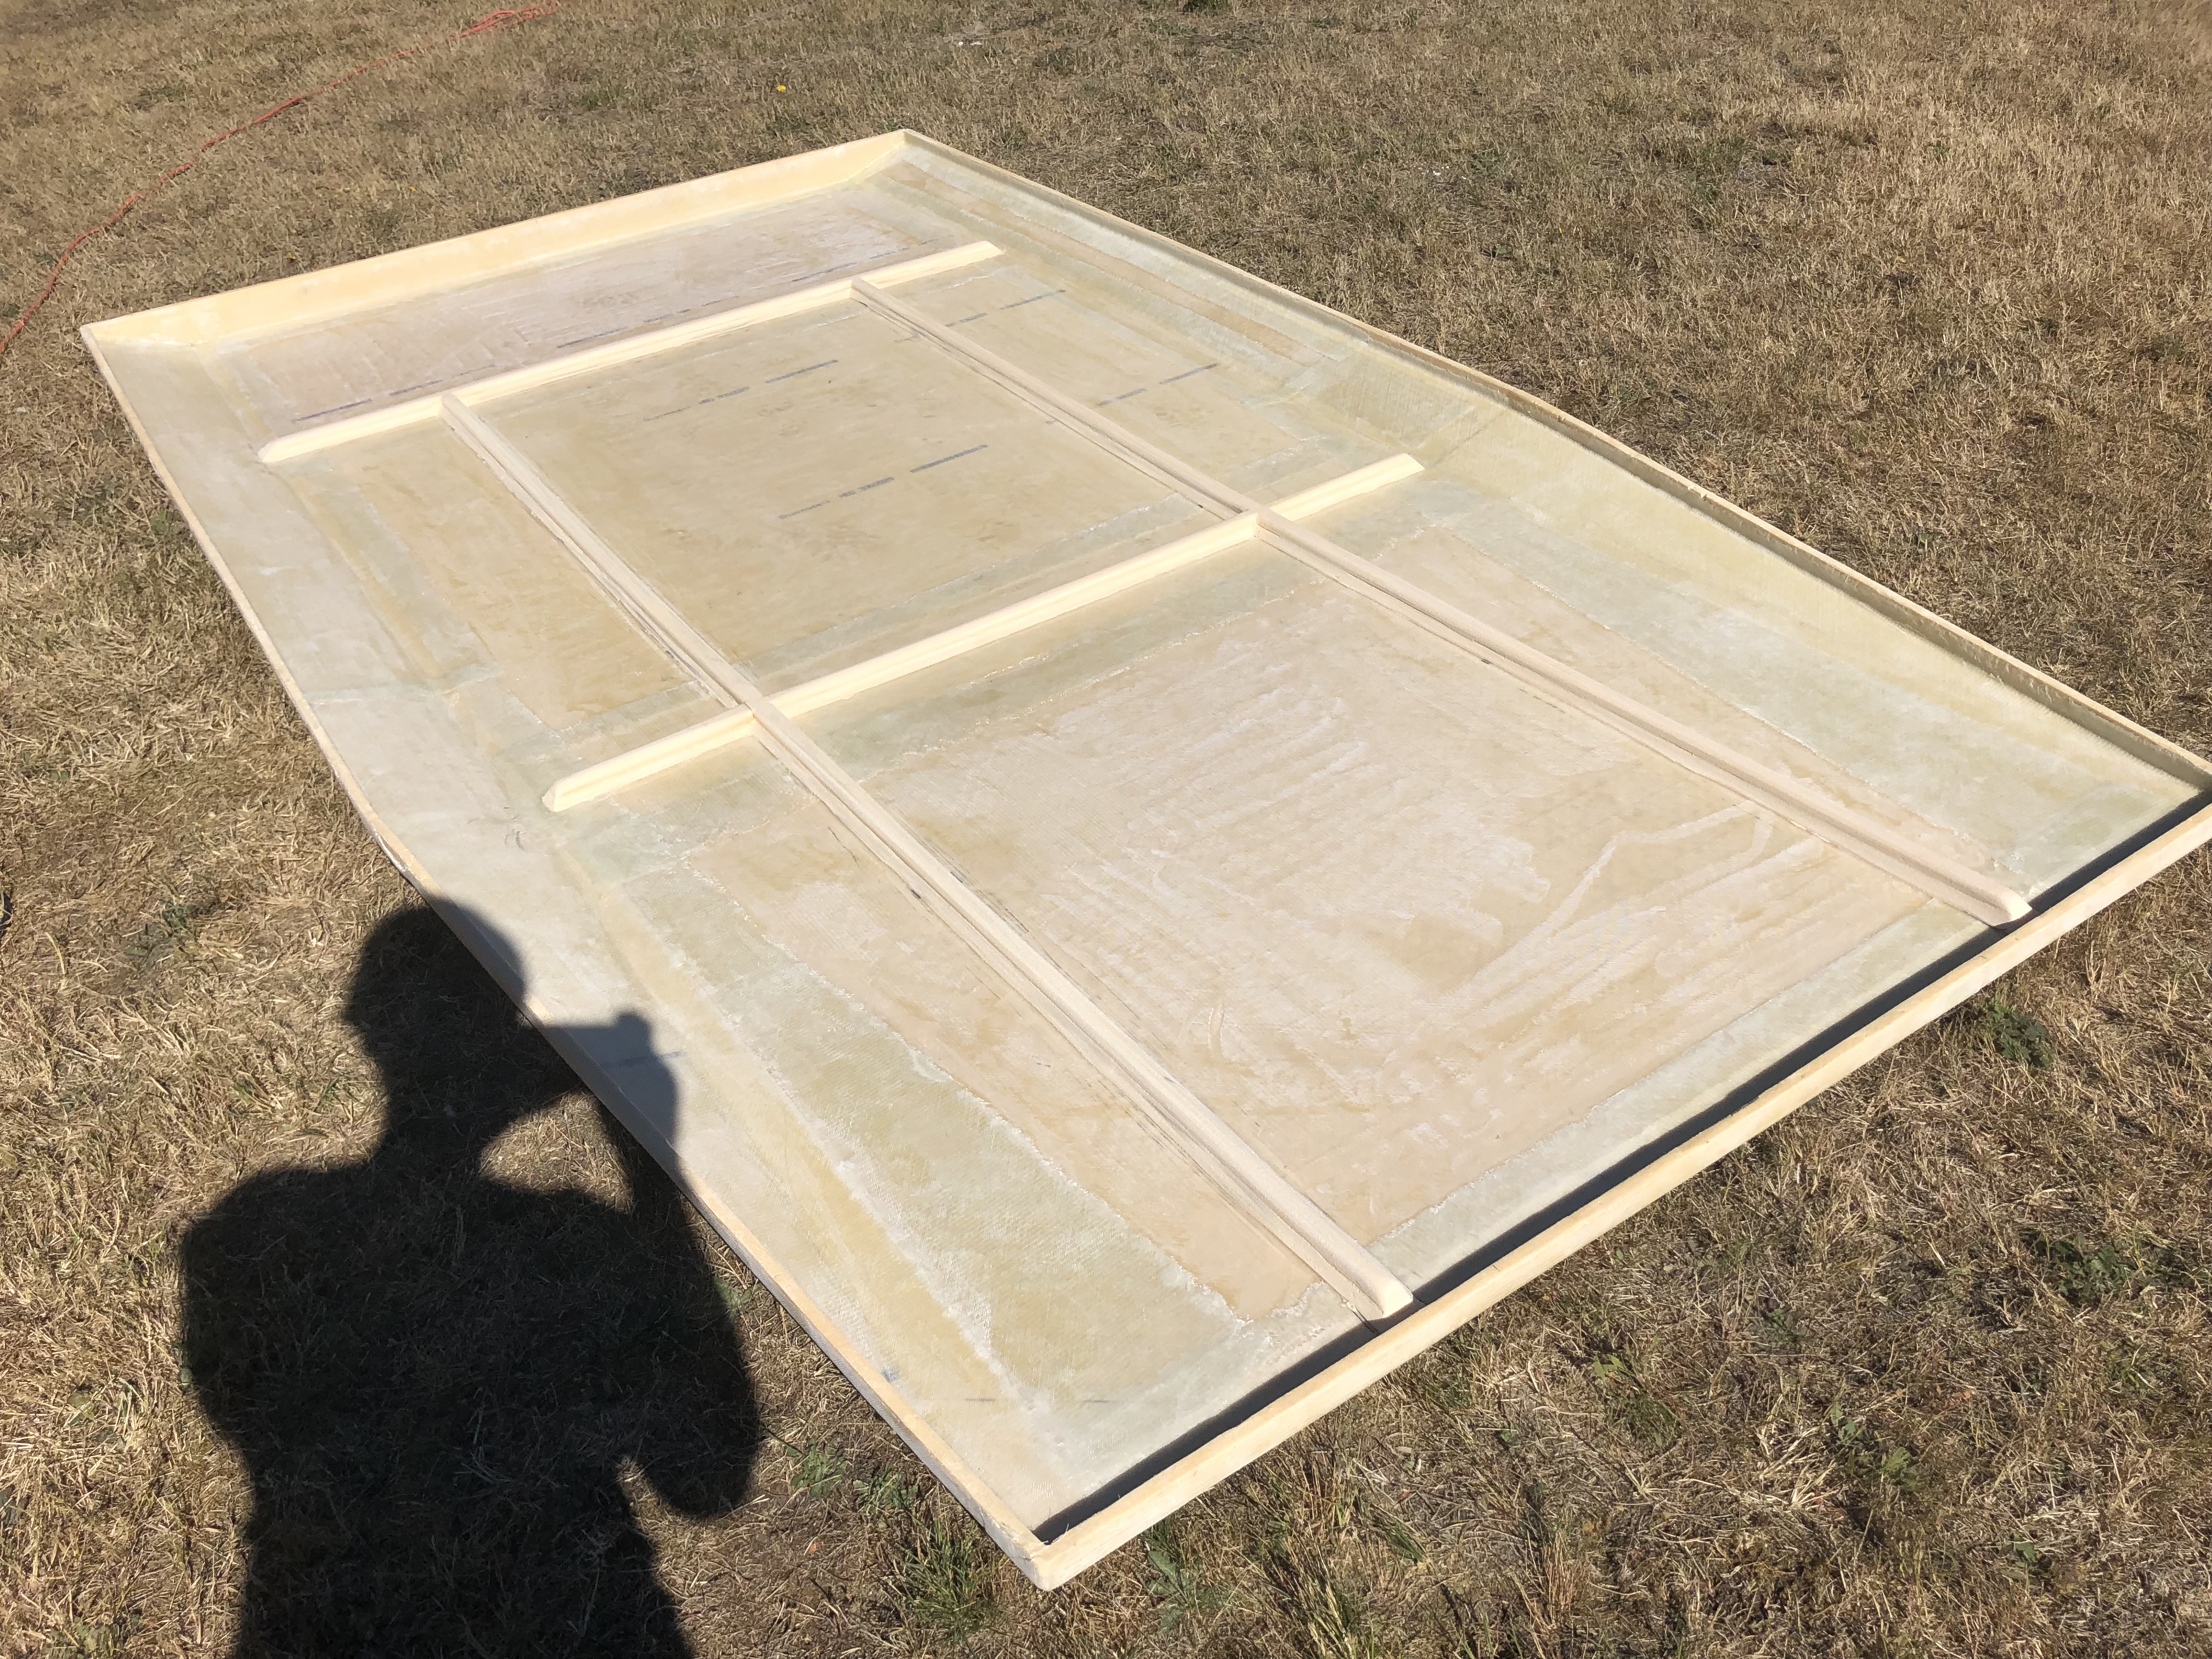
I took today off of work and was up bright and early prepping last night's fiberglass so I could finish up the front and back edges.
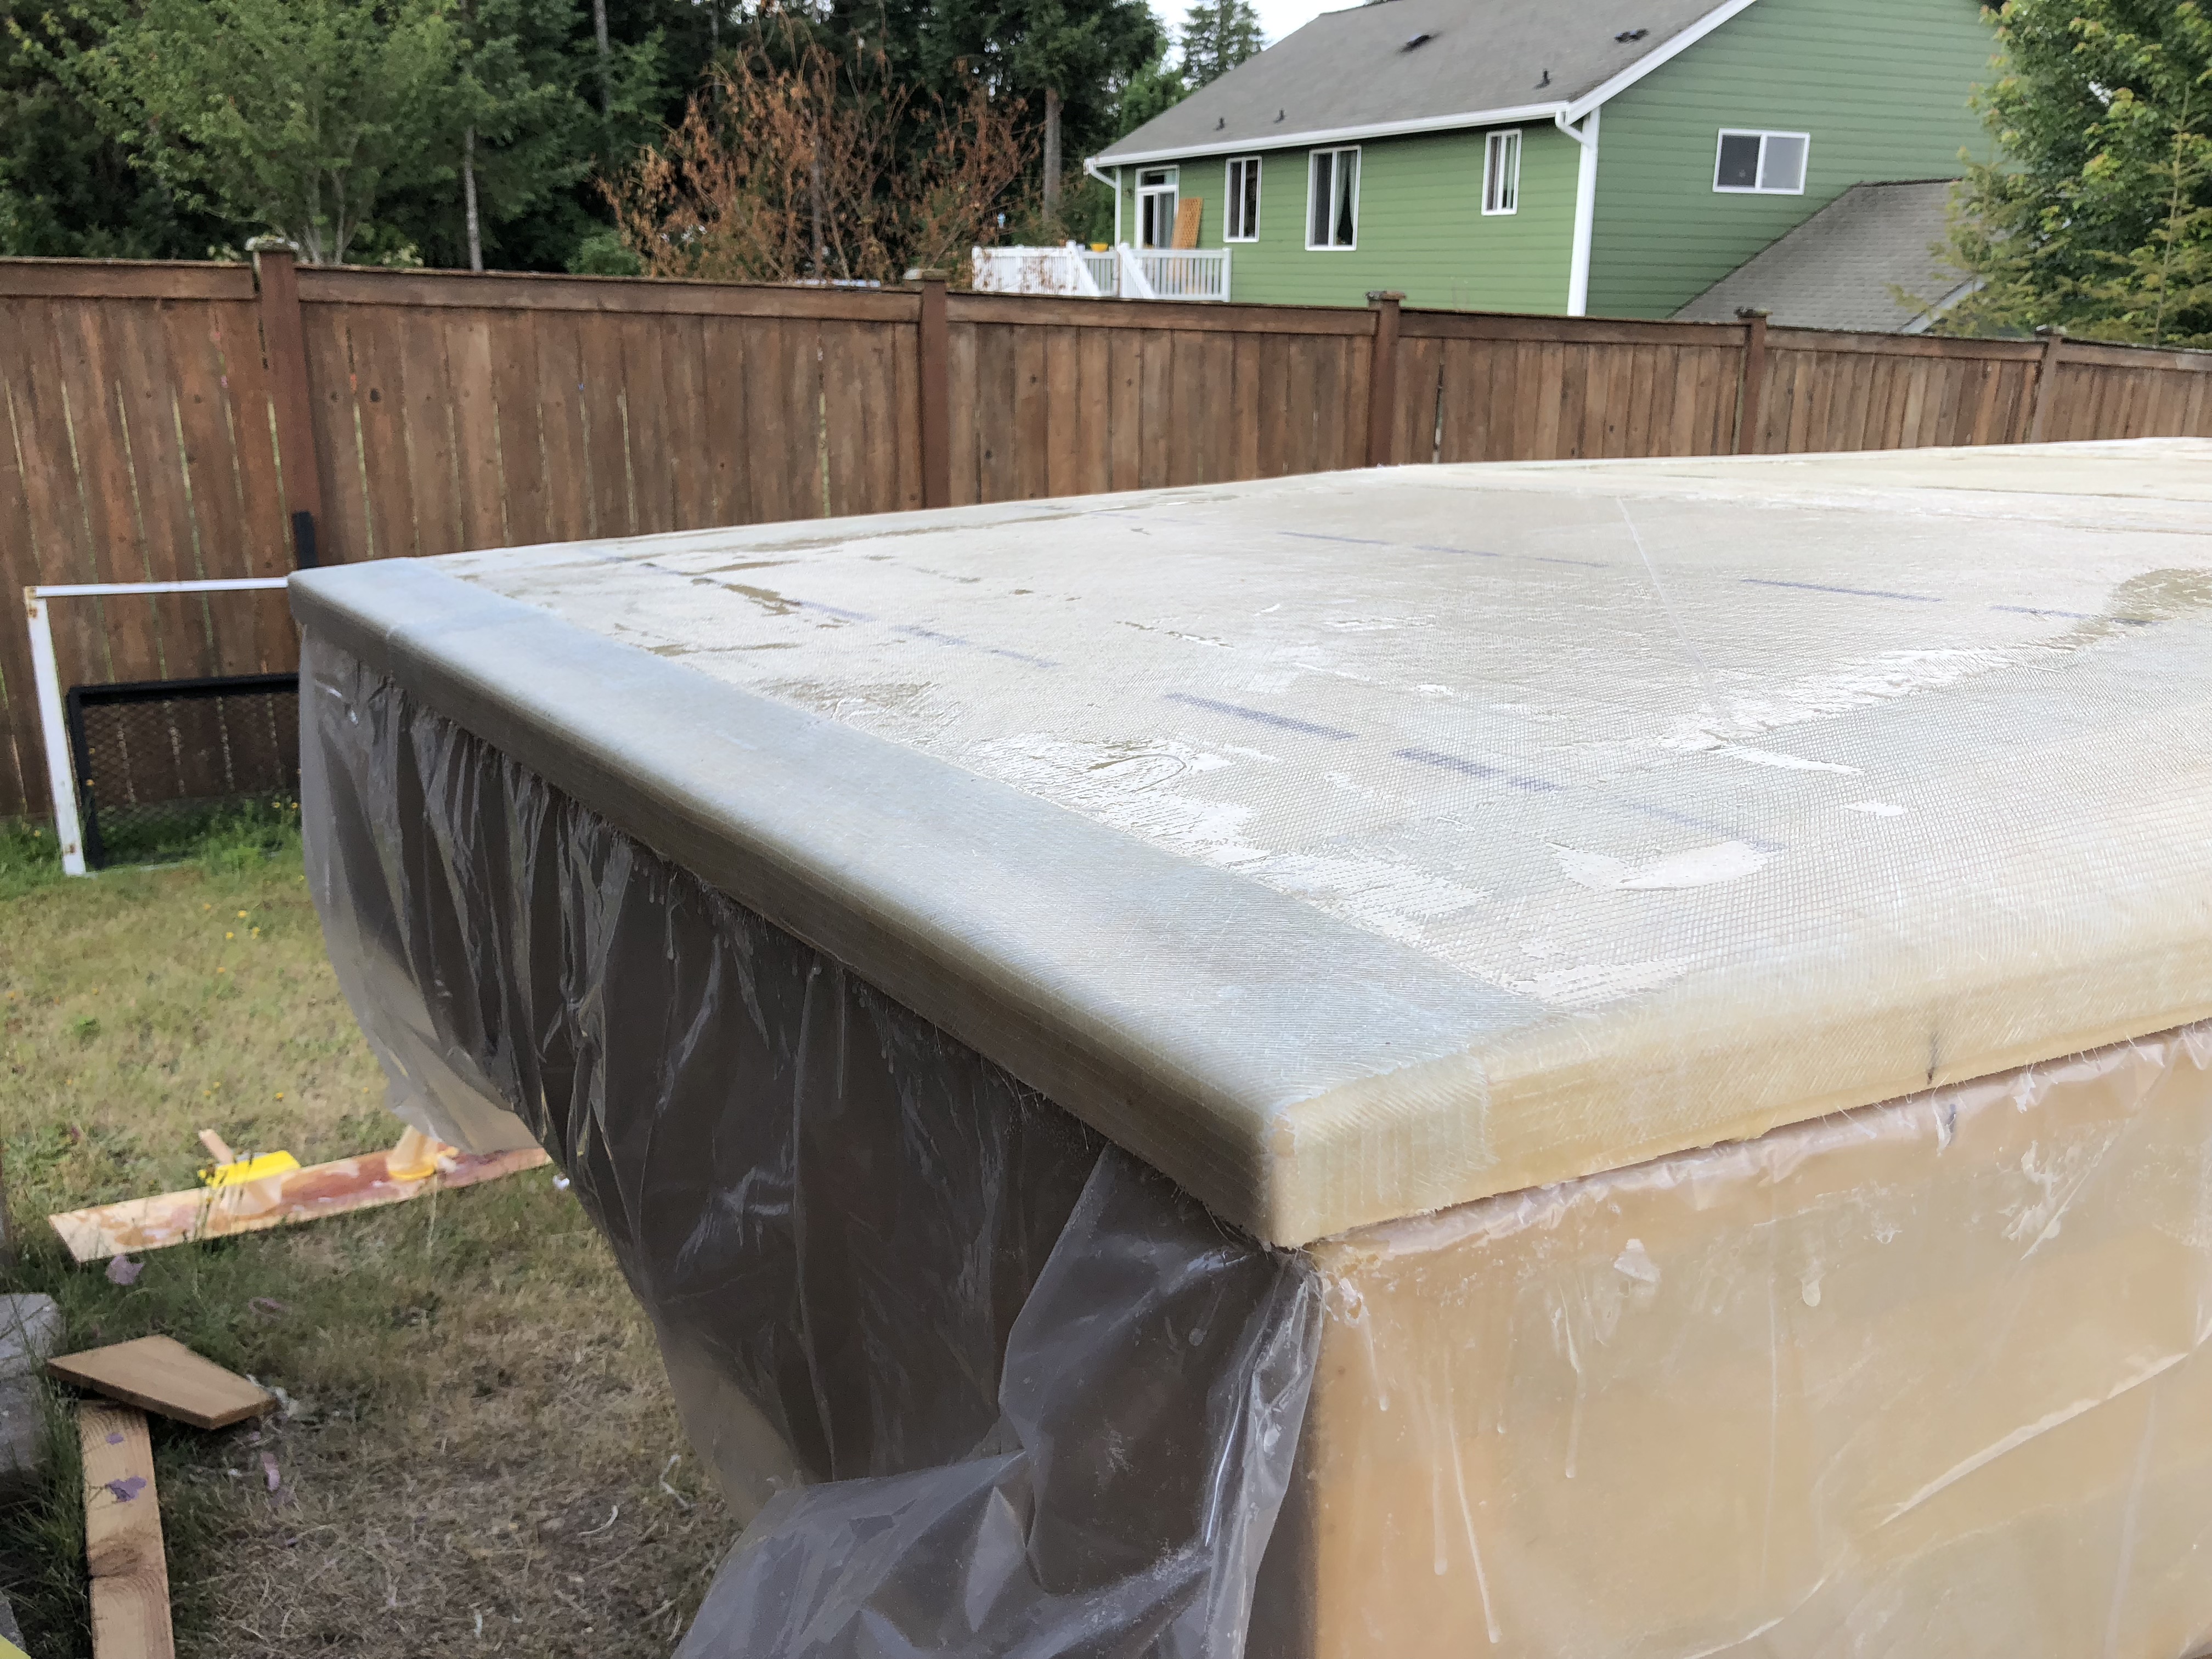
The corners still need a little cleanup, but it's pretty much done!
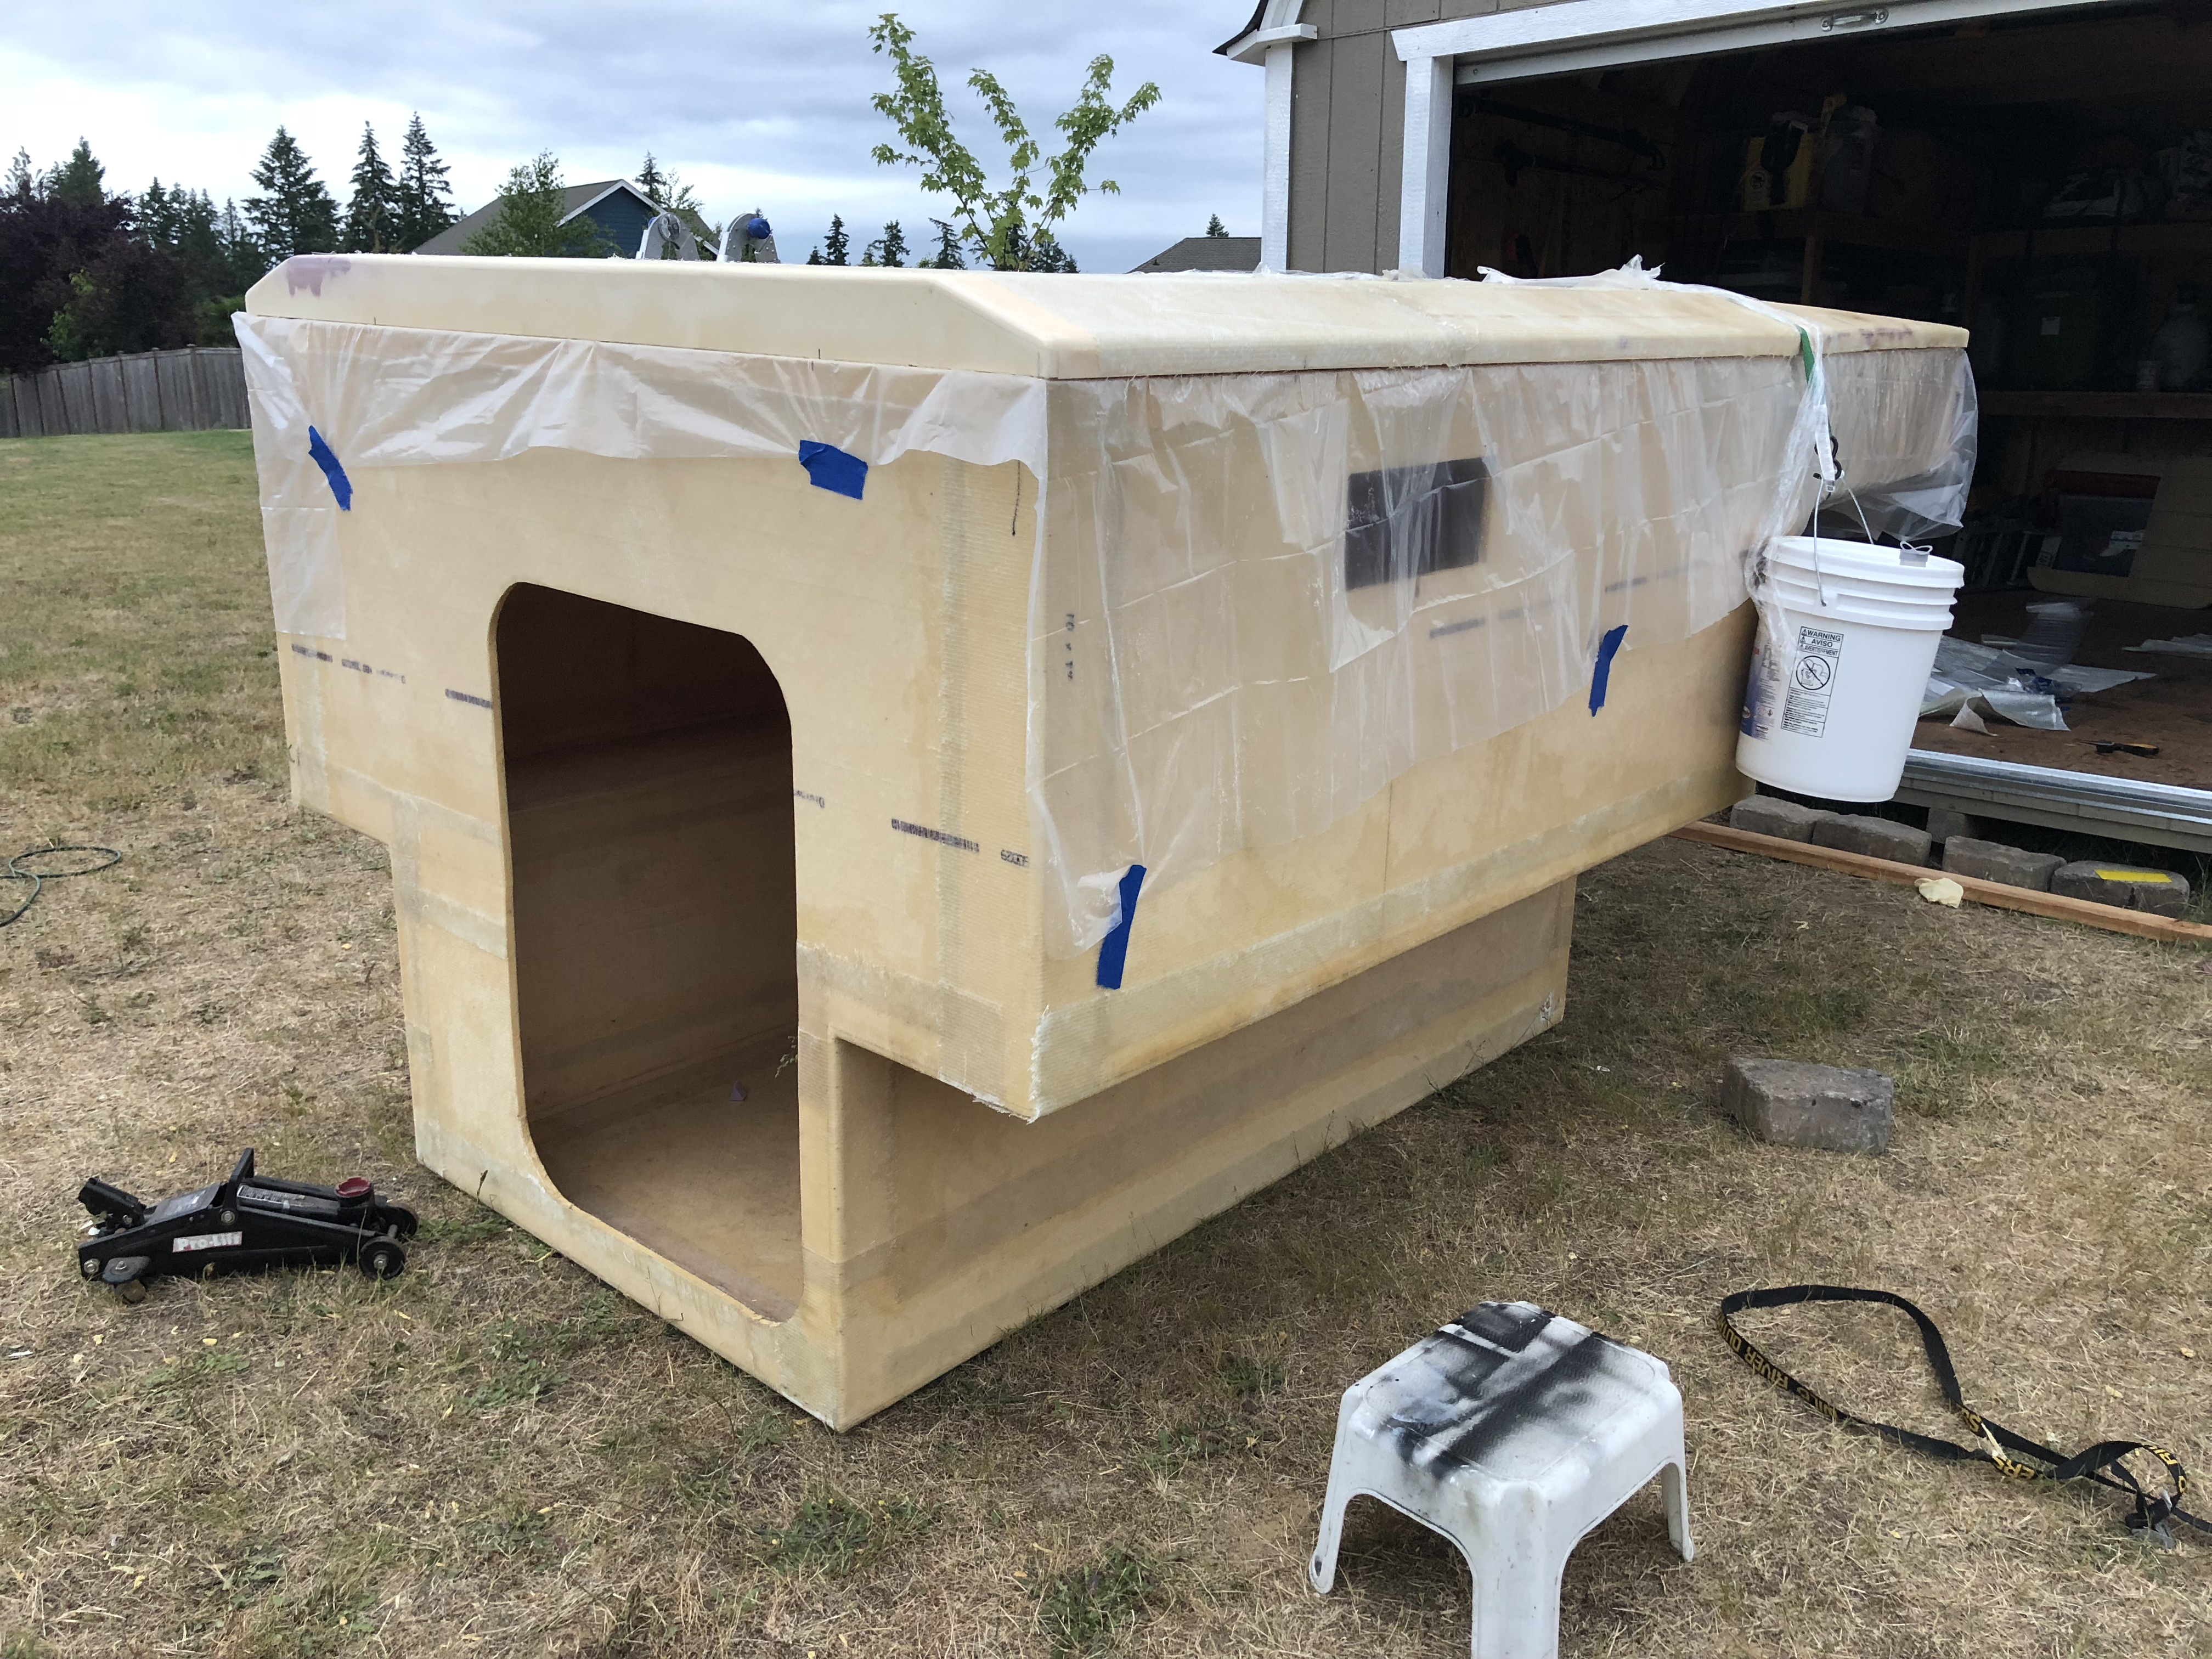
While waiting for that to cure, I went to the garage to mess around with other stuff and had just made it back outside when it started to rain! Luckily I had the plastic sheet that we put on it last night handy and got it covered quickly. I had just gotten the plastic sheet on (after fighting with it because it's huge) when it started to rain pretty hard and I scrambled to find whatever I had laying around to hold the sheet down... Tie down straps and a broom etc...
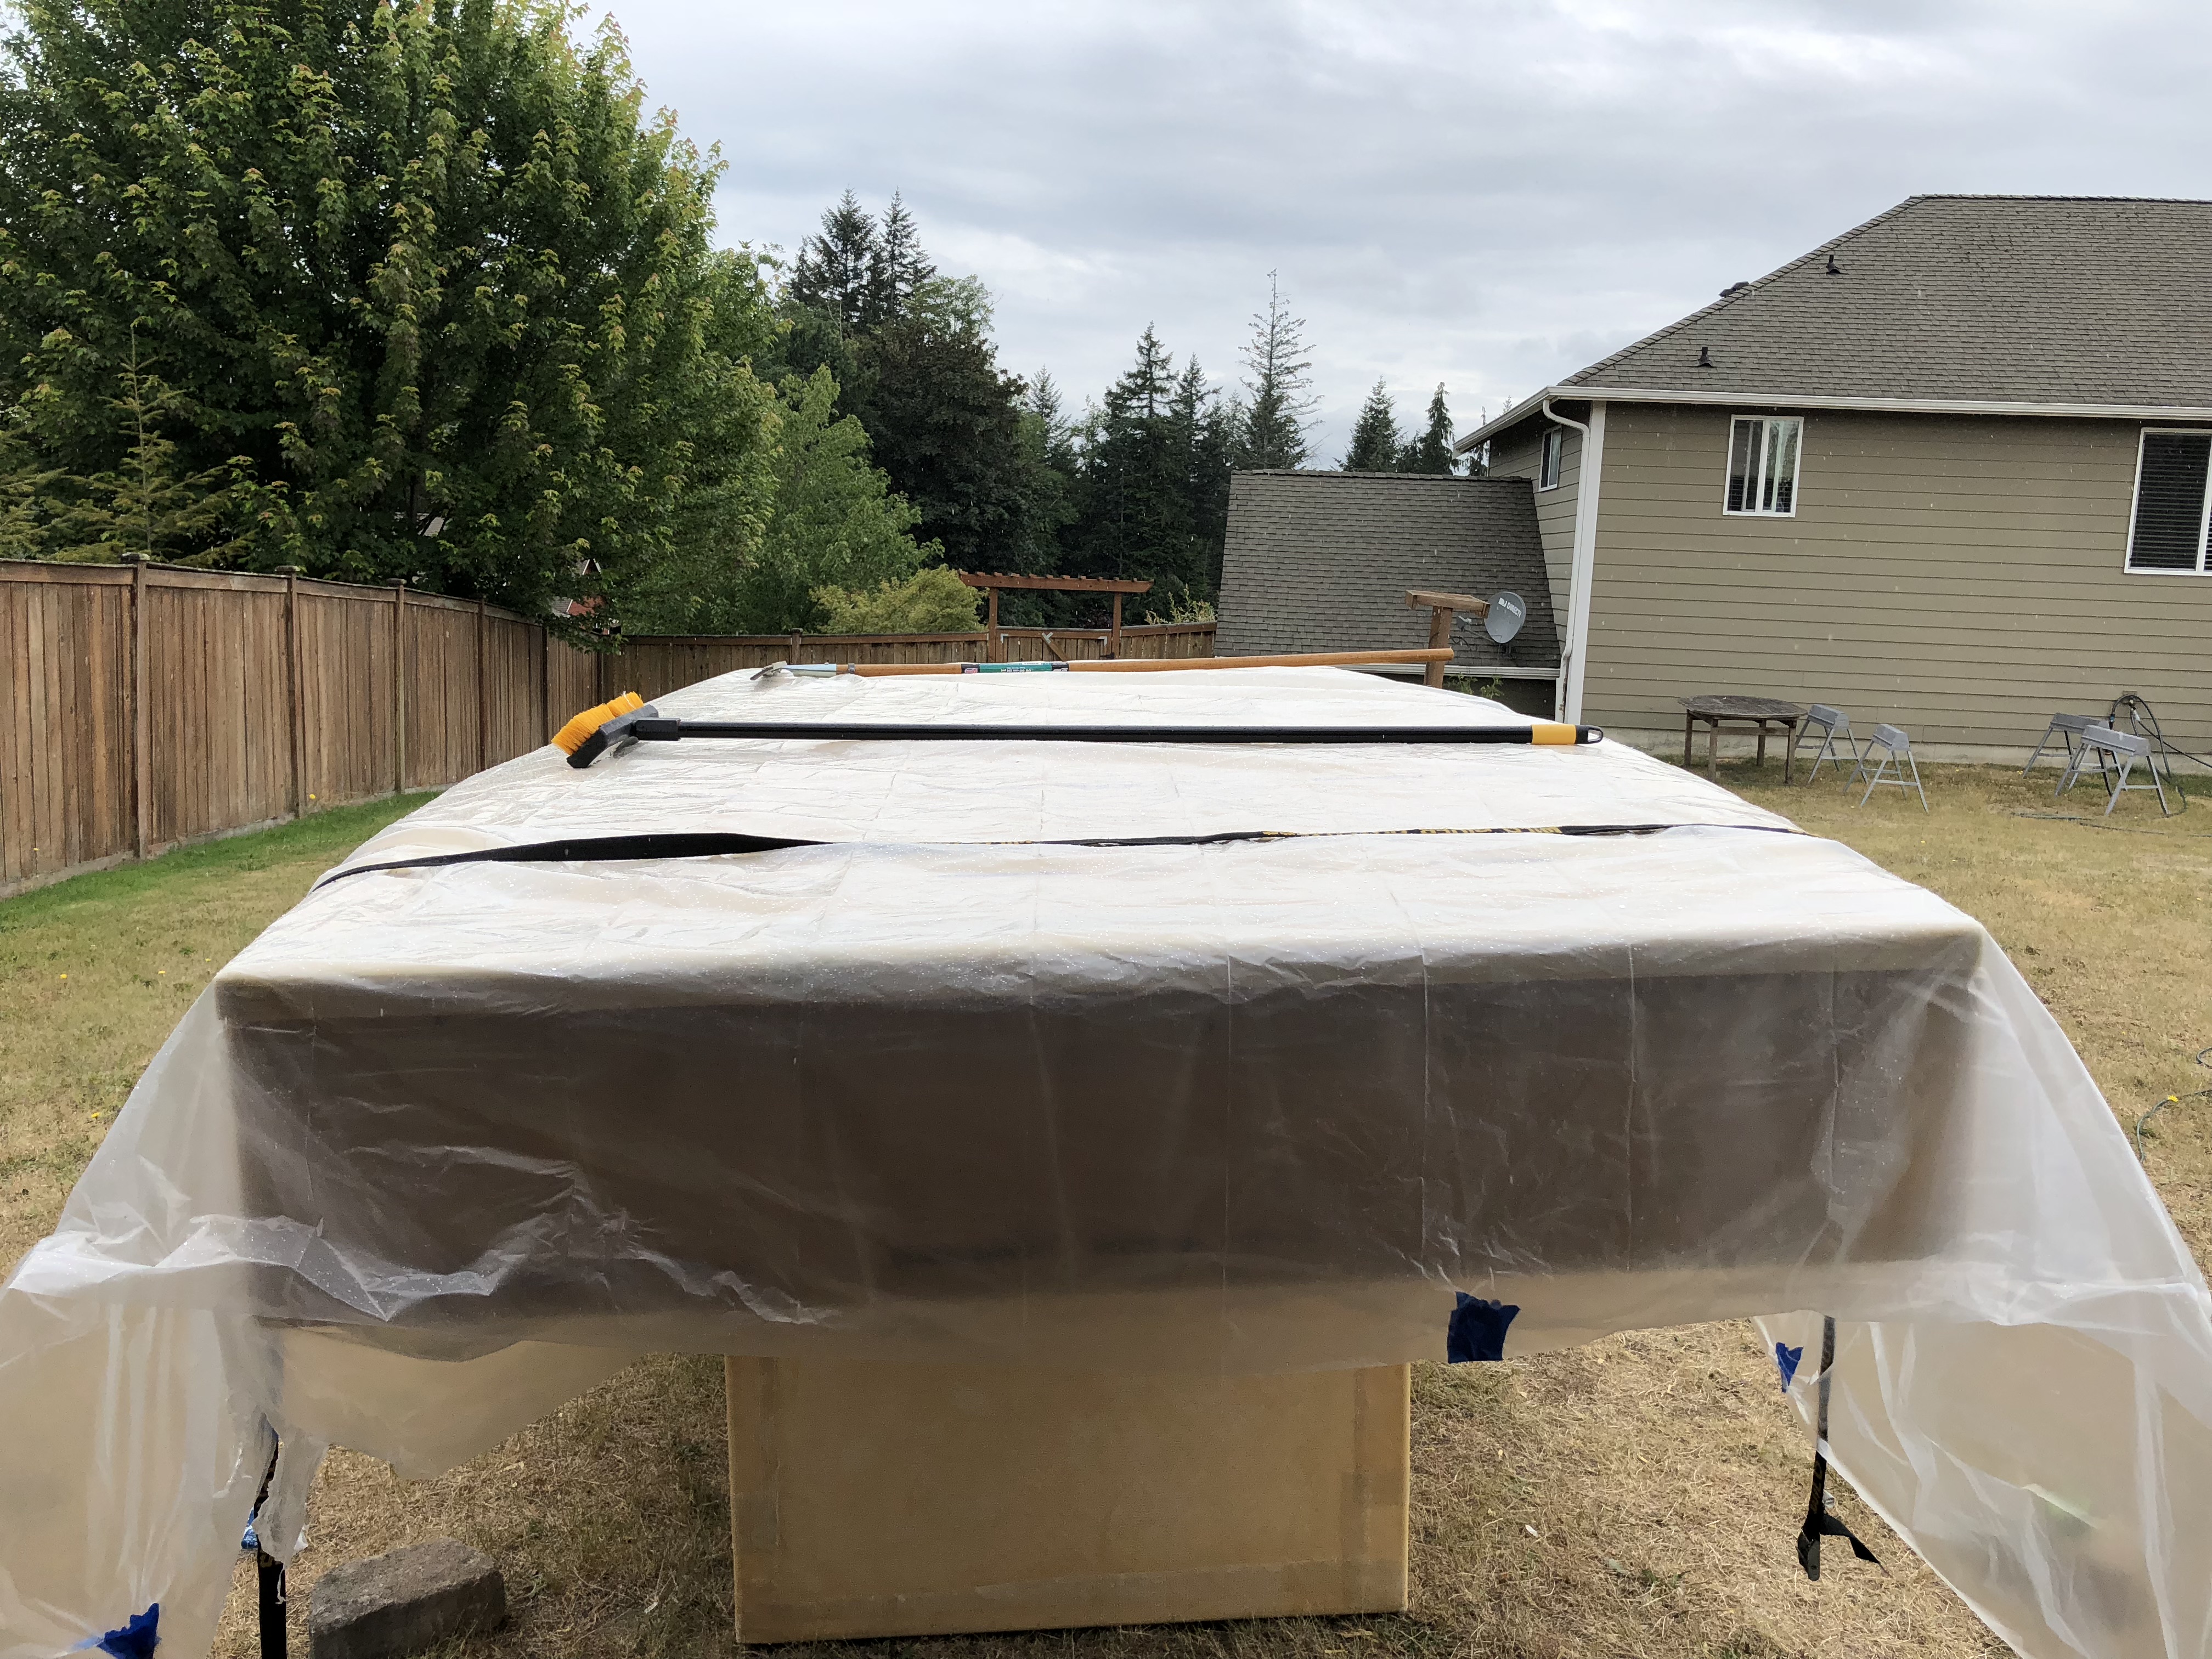
I just sat inside the shed and watched the rain and wind.
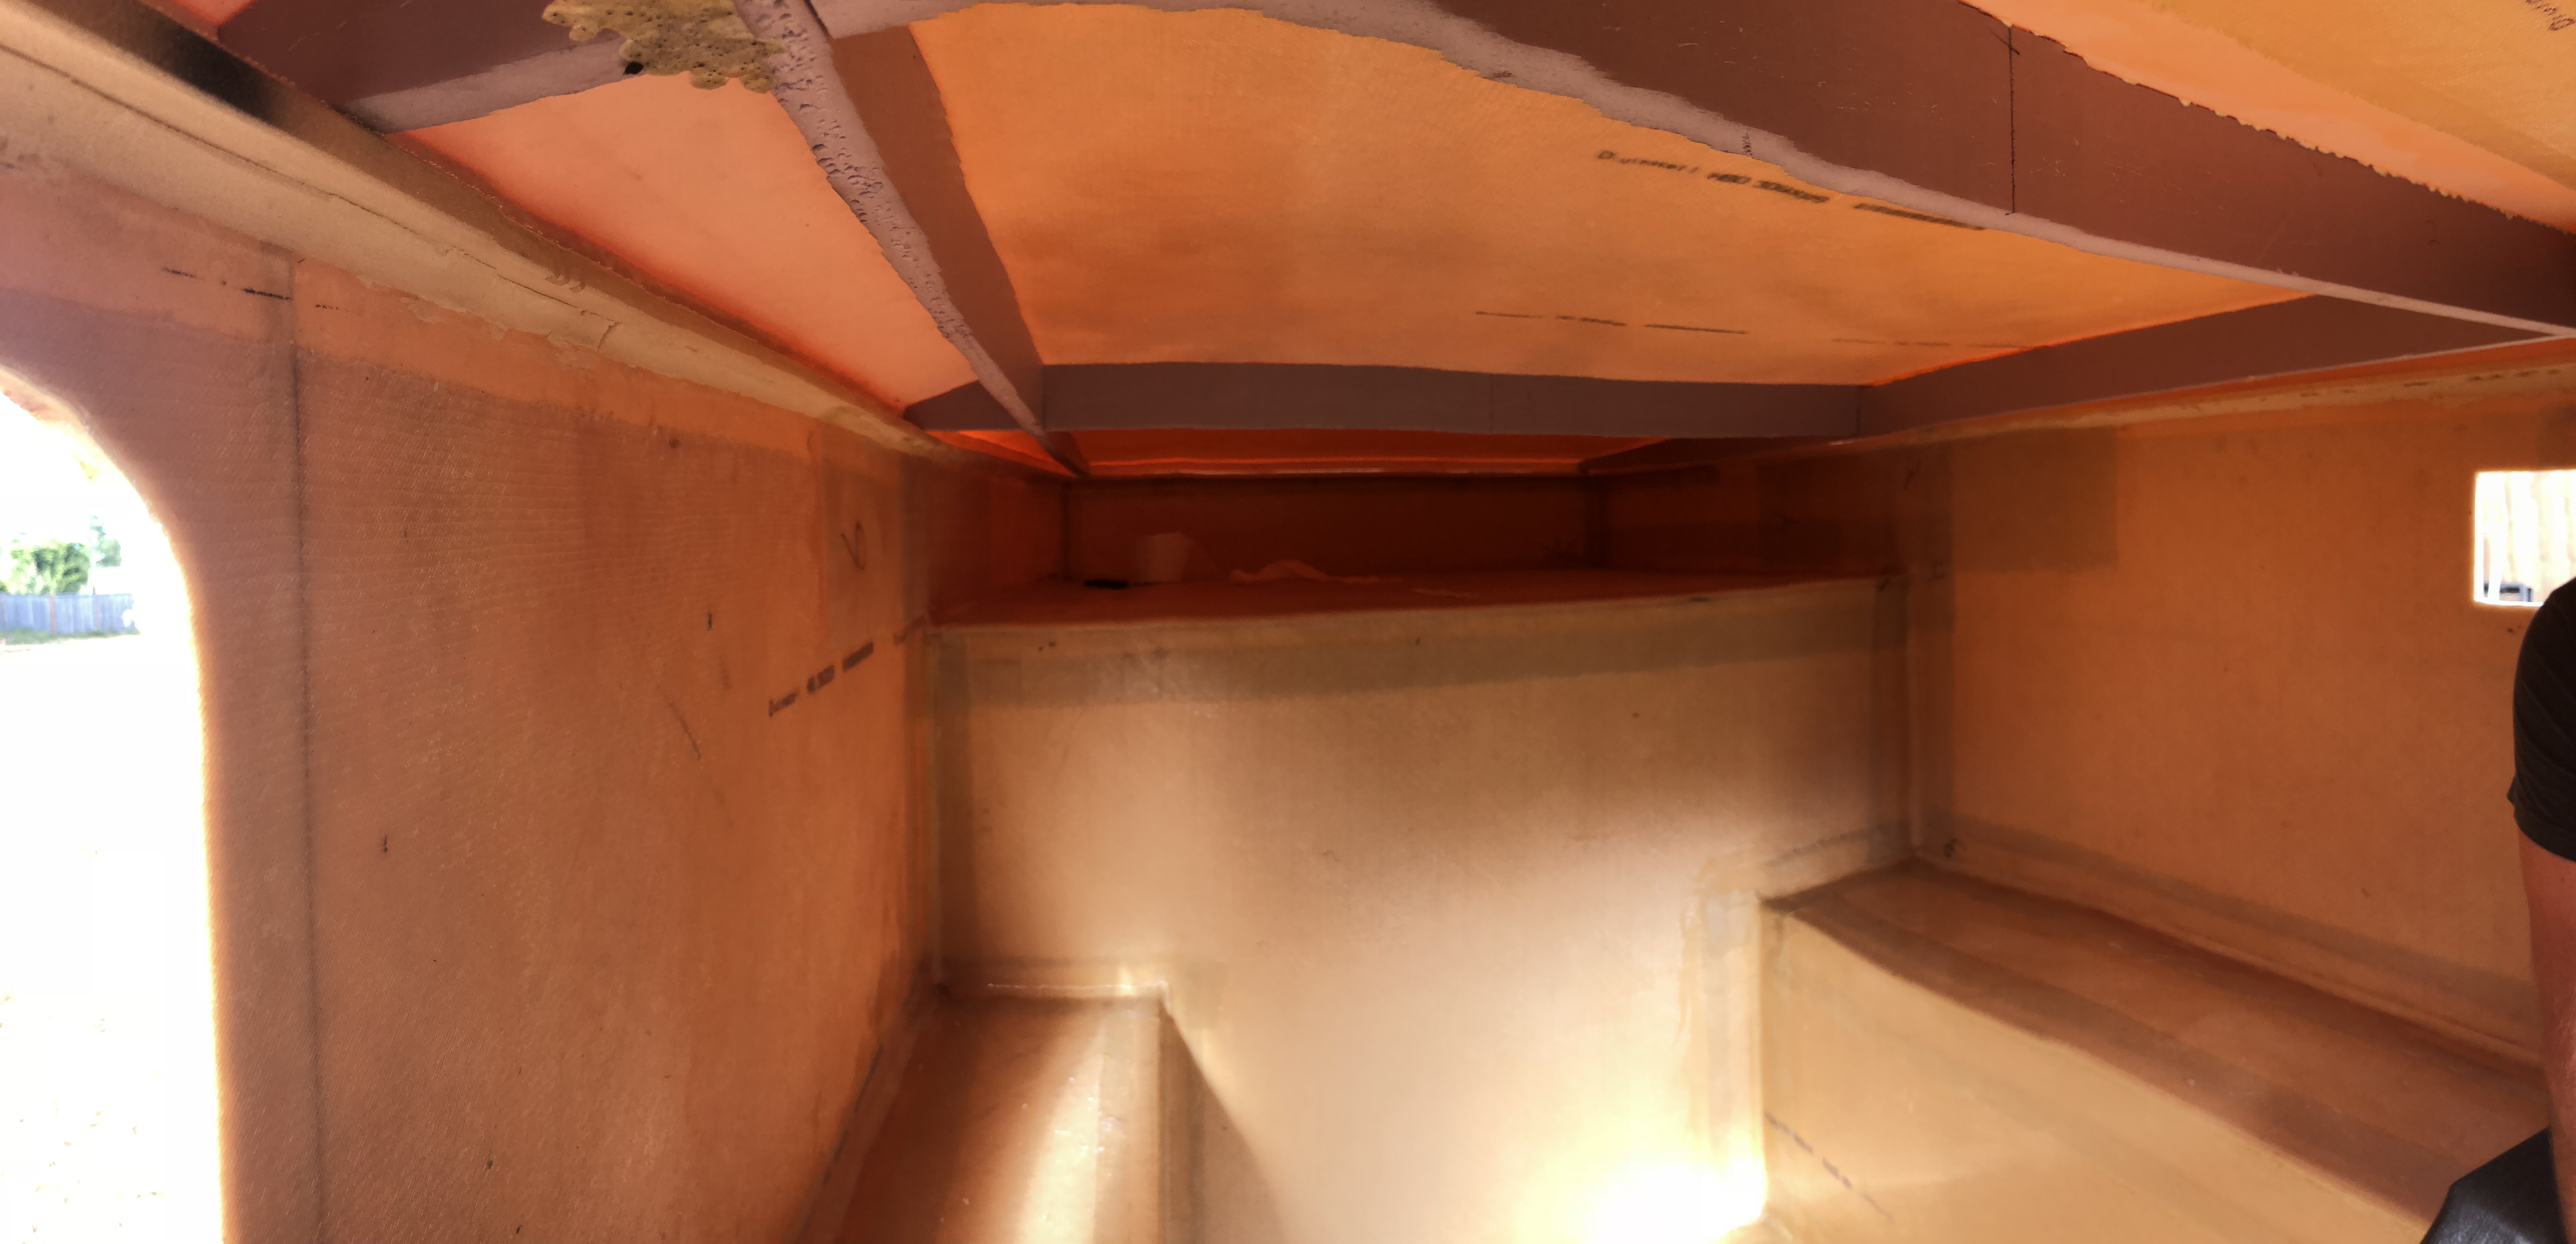
So yeah, it's not even assembled and it survived its first rainstorm! The rain stopped and there wasn't even any water inside despite not having a door installed. I got the roof off and flipped upside down in the shed so I could start prepping the underside. It's very stiff even with only one completed side. Still less stiff than the camper shell itself because it's such a large unbraced panel. Jason and I are still discussing how to properly brace the inside. There's a balance between having enough structure so the roof doesn't flex, but not having huge beams in the head room. That's a debate for another day.
I had to rip out the chunks of pink foam that were now glued to the roof.
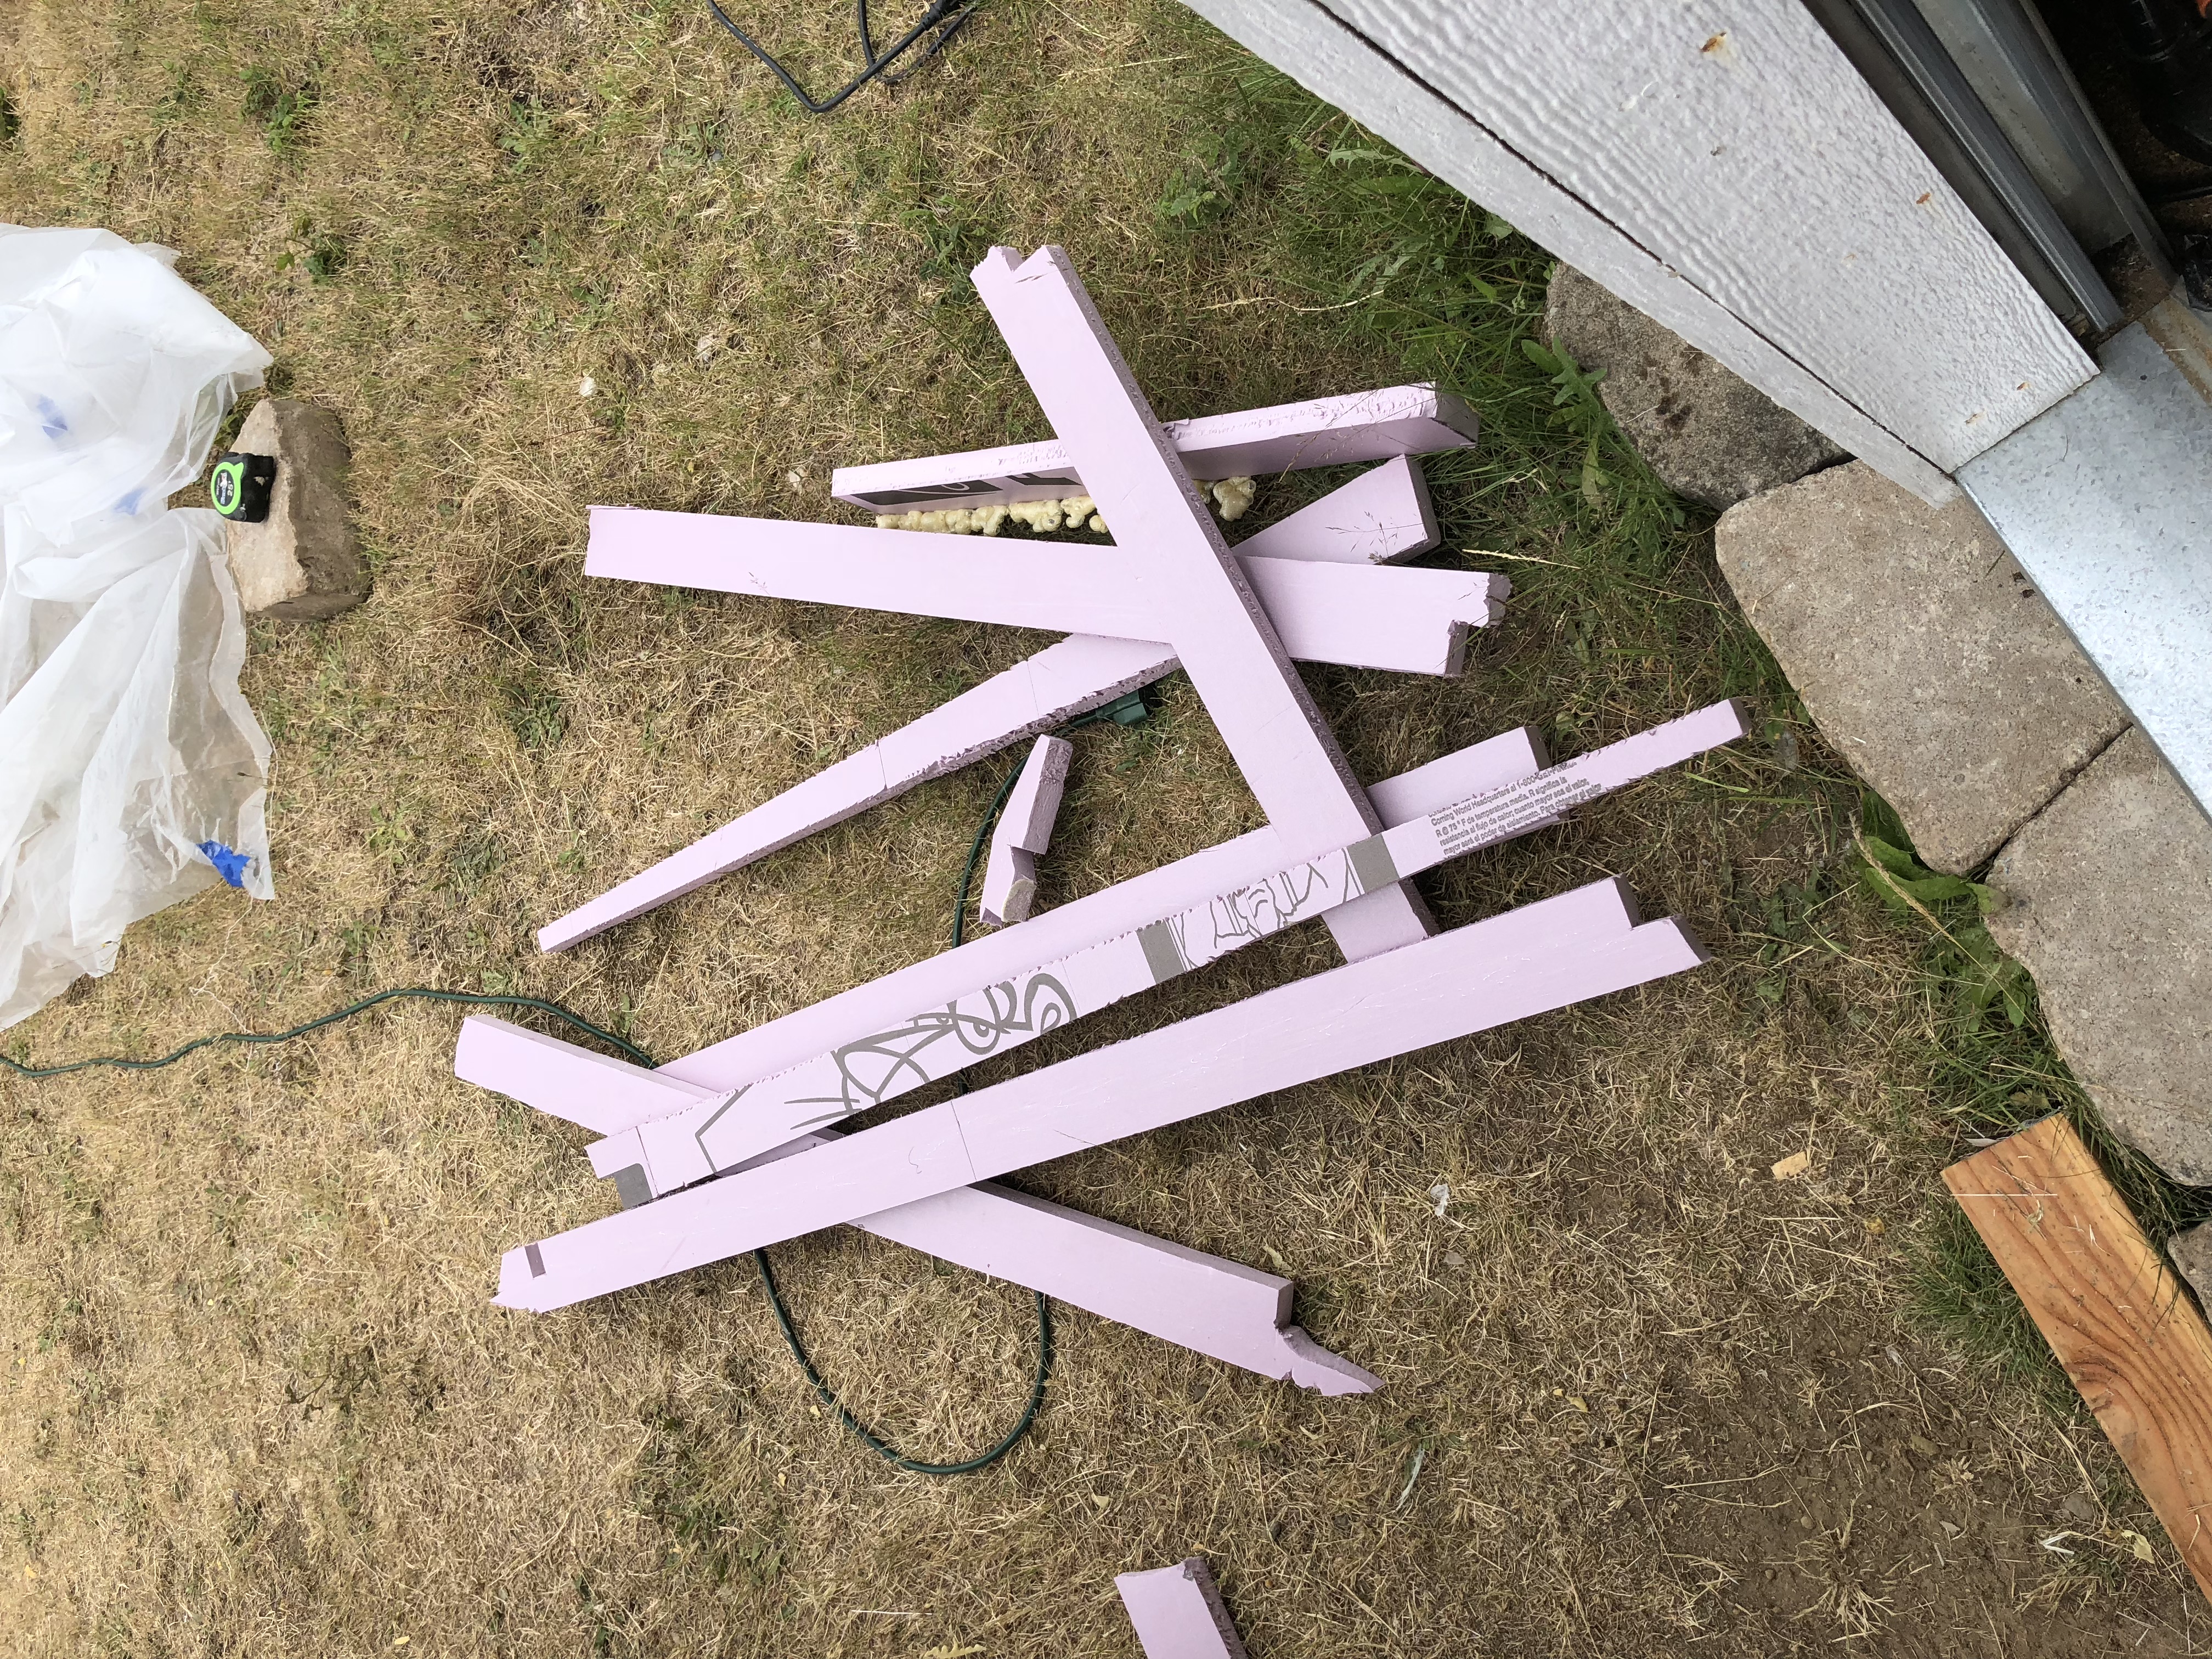
So much glue...
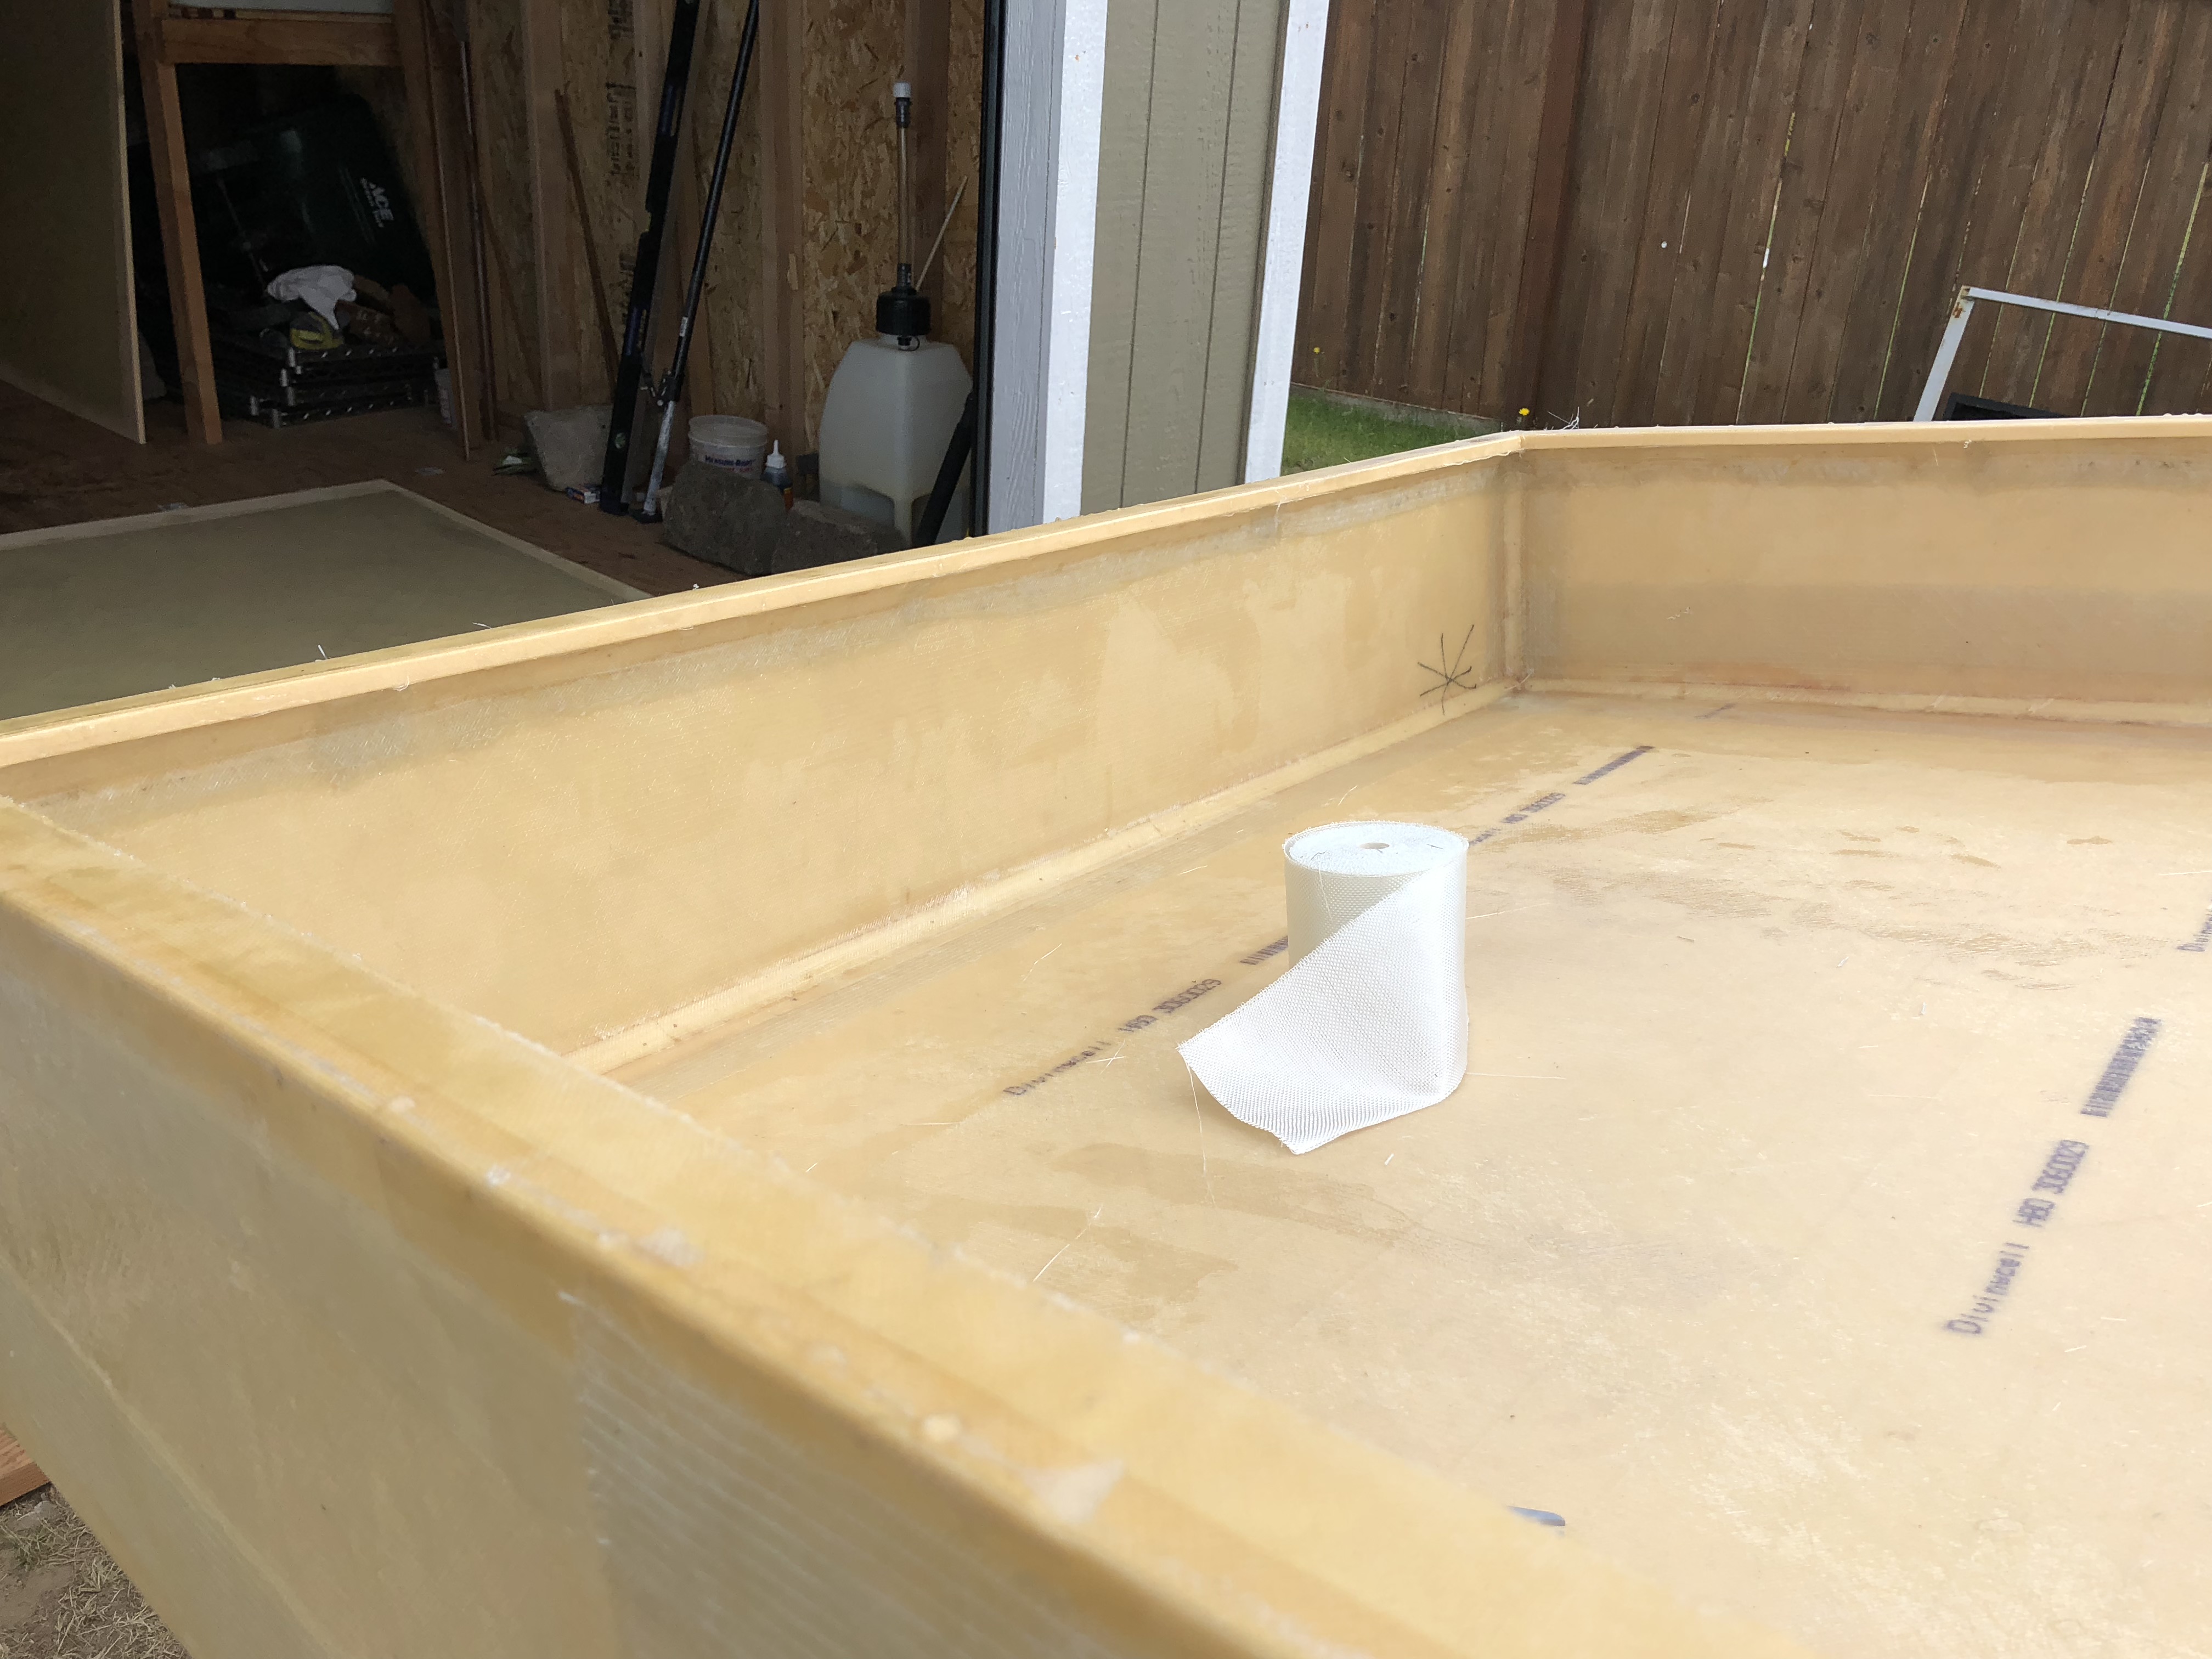
I really didn't actually want to deal with the roof today, so I went back out to the shell to finish up the roof gasket area with the 6oz tape. The tape is pretty easy to do by myself.
I ended up finishing the entire roof surface, but didn't get a single picture of it! It's done though!
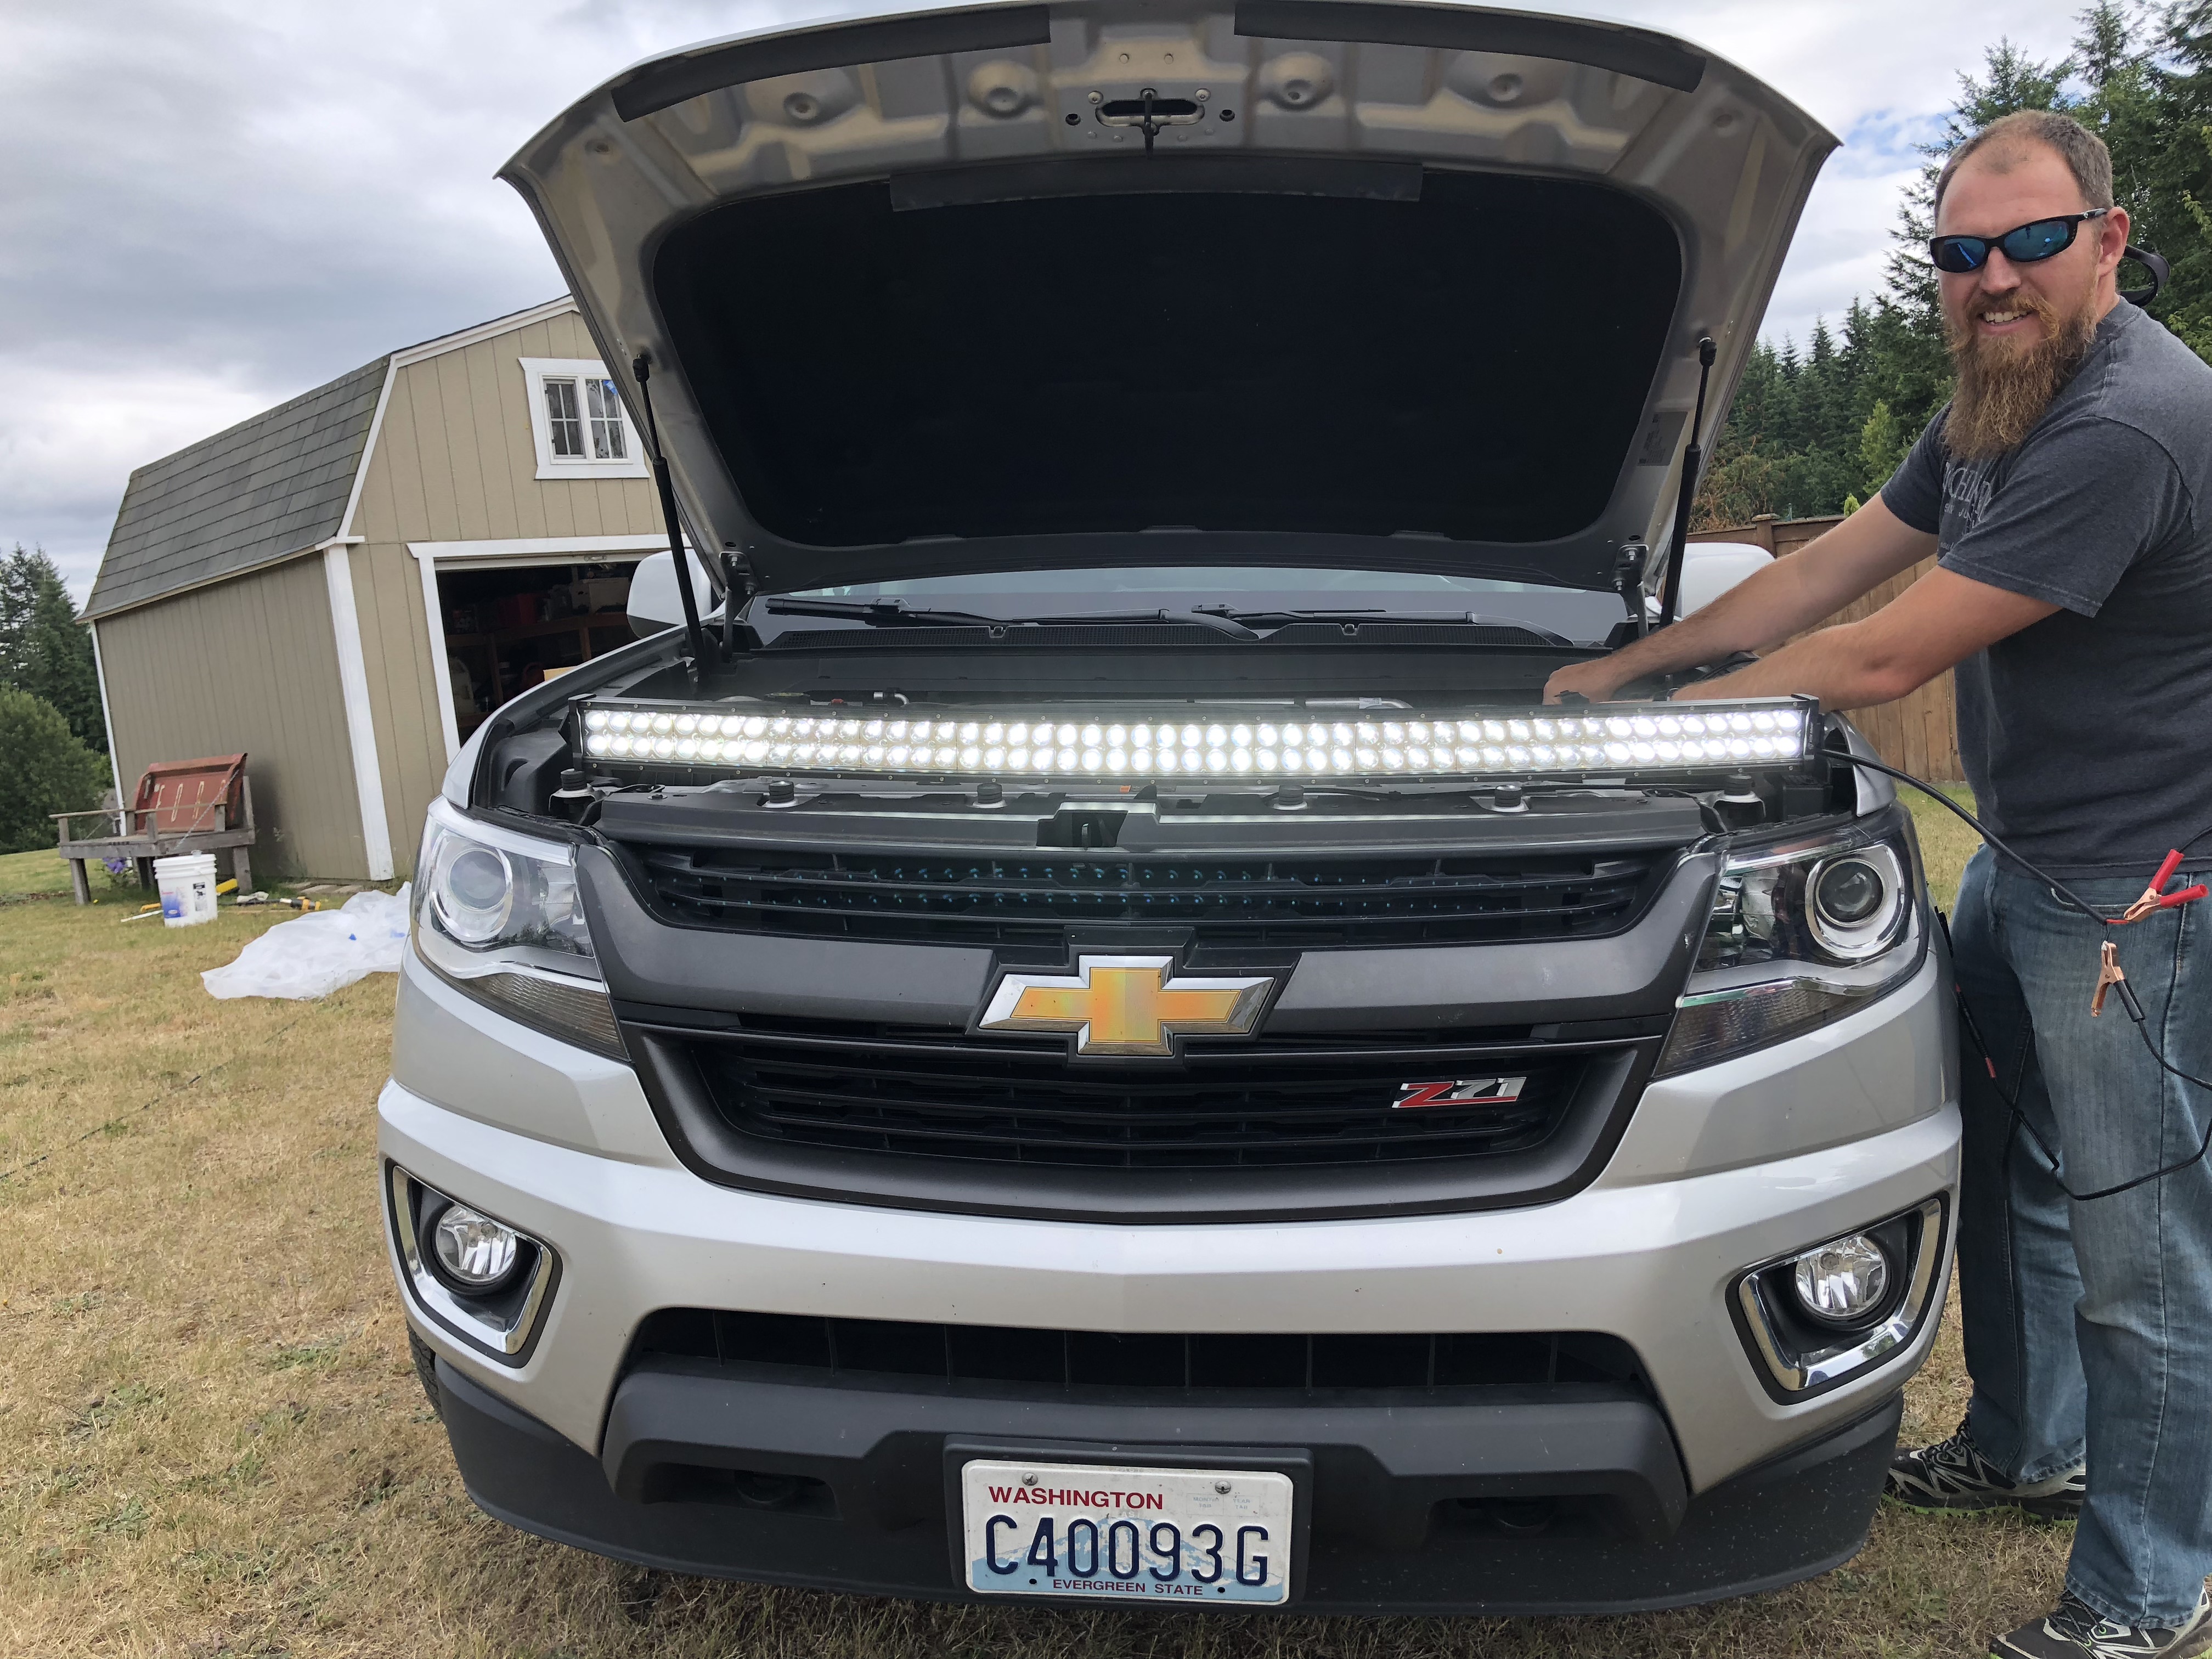
We decided that the front of this camper needs a huge LED light bar on it...but for maximum coolness points it needs to be one of the sweet curved ones. We also didn't want to spend thousands of dollars for the name brand ones, so we got one of the ones with good reviews off of Amazon. It's pretty legit and super bright even in the middle of the day!
The corners still need a little cleanup, but it's pretty much done!
While waiting for that to cure, I went to the garage to mess around with other stuff and had just made it back outside when it started to rain! Luckily I had the plastic sheet that we put on it last night handy and got it covered quickly. I had just gotten the plastic sheet on (after fighting with it because it's huge) when it started to rain pretty hard and I scrambled to find whatever I had laying around to hold the sheet down... Tie down straps and a broom etc...
I just sat inside the shed and watched the rain and wind.
So yeah, it's not even assembled and it survived its first rainstorm!
The rain stopped and there wasn't even any water inside despite not having a door installed. I got the roof off and flipped upside down in the shed so I could start prepping the underside. It's very stiff even with only one completed side. Still less stiff than the camper shell itself because it's such a large unbraced panel. Jason and I are still discussing how to properly brace the inside. There's a balance between having enough structure so the roof doesn't flex, but not having huge beams in the head room. That's a debate for another day. I had to rip out the chunks of pink foam that were now glued to the roof.
So much glue...
I really didn't actually want to deal with the roof today, so I went back out to the shell to finish up the roof gasket area with the 6oz tape. The tape is pretty easy to do by myself.
I ended up finishing the entire roof surface, but didn't get a single picture of it! It's done though!
We decided that the front of this camper needs a huge LED light bar on it...but for maximum coolness points it needs to be one of the sweet curved ones. We also didn't want to spend thousands of dollars for the name brand ones, so we got one of the ones with good reviews off of Amazon. It's pretty legit and super bright even in the middle of the day!
underkill
Active member
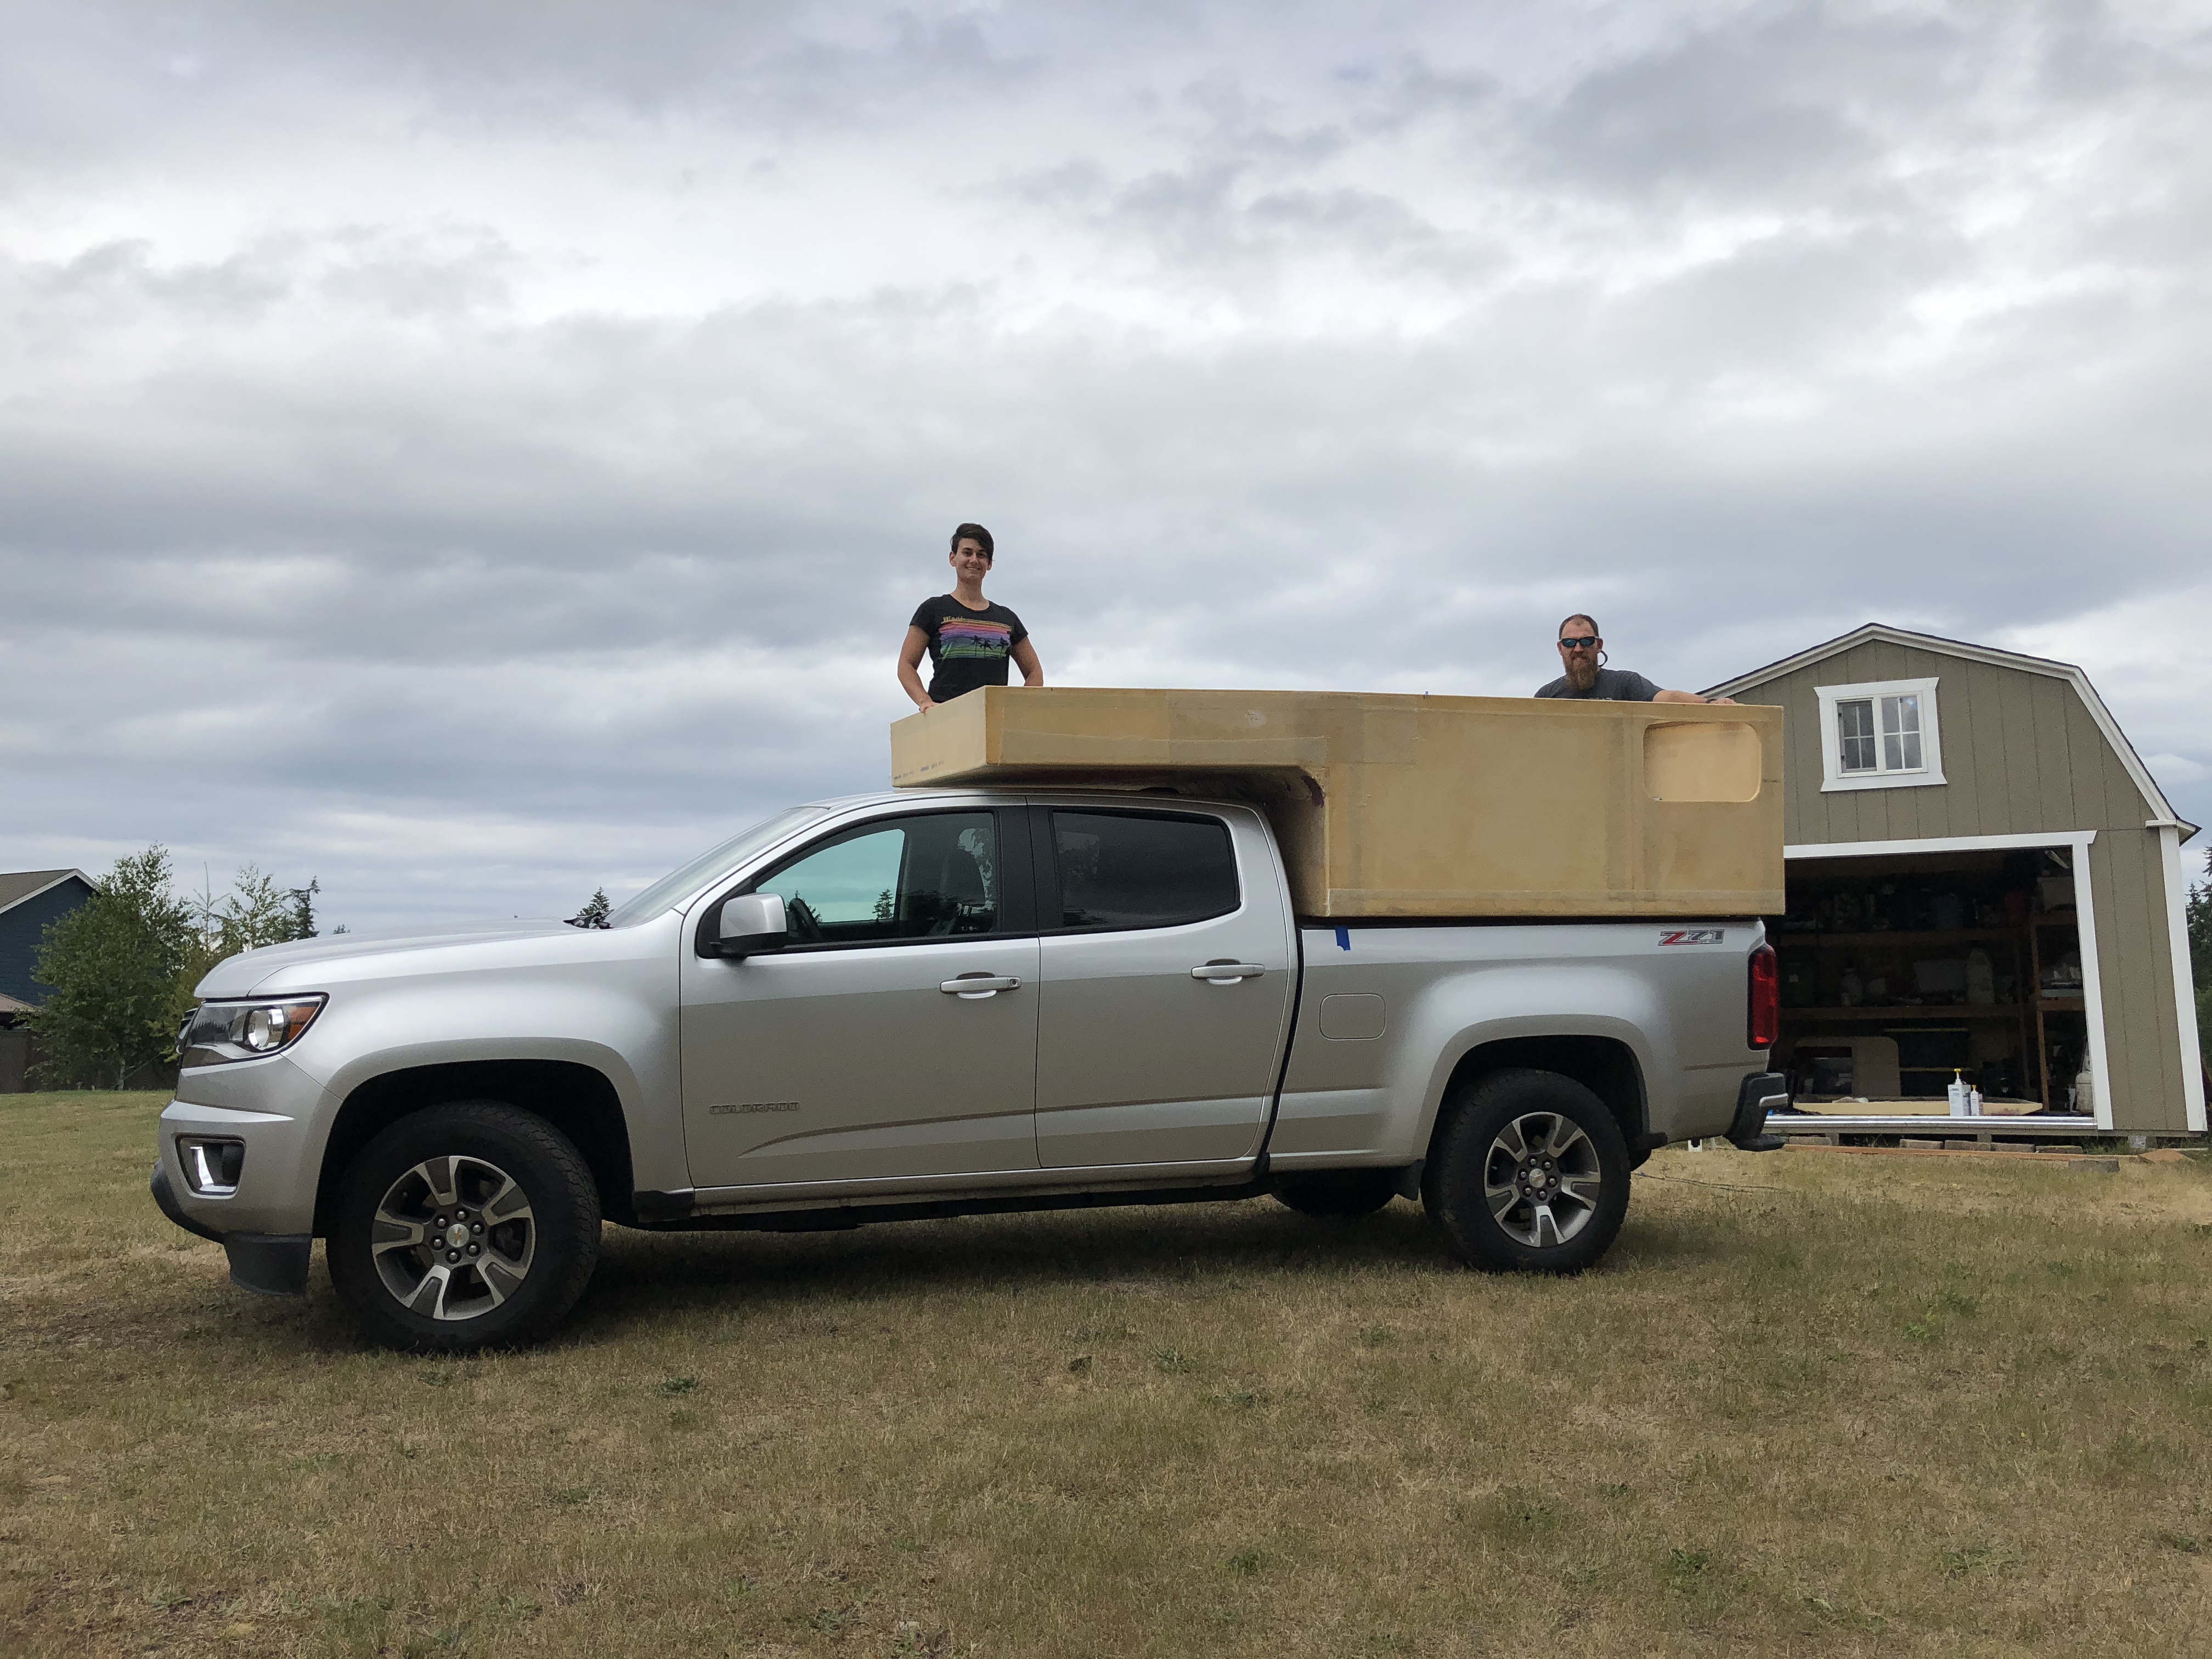
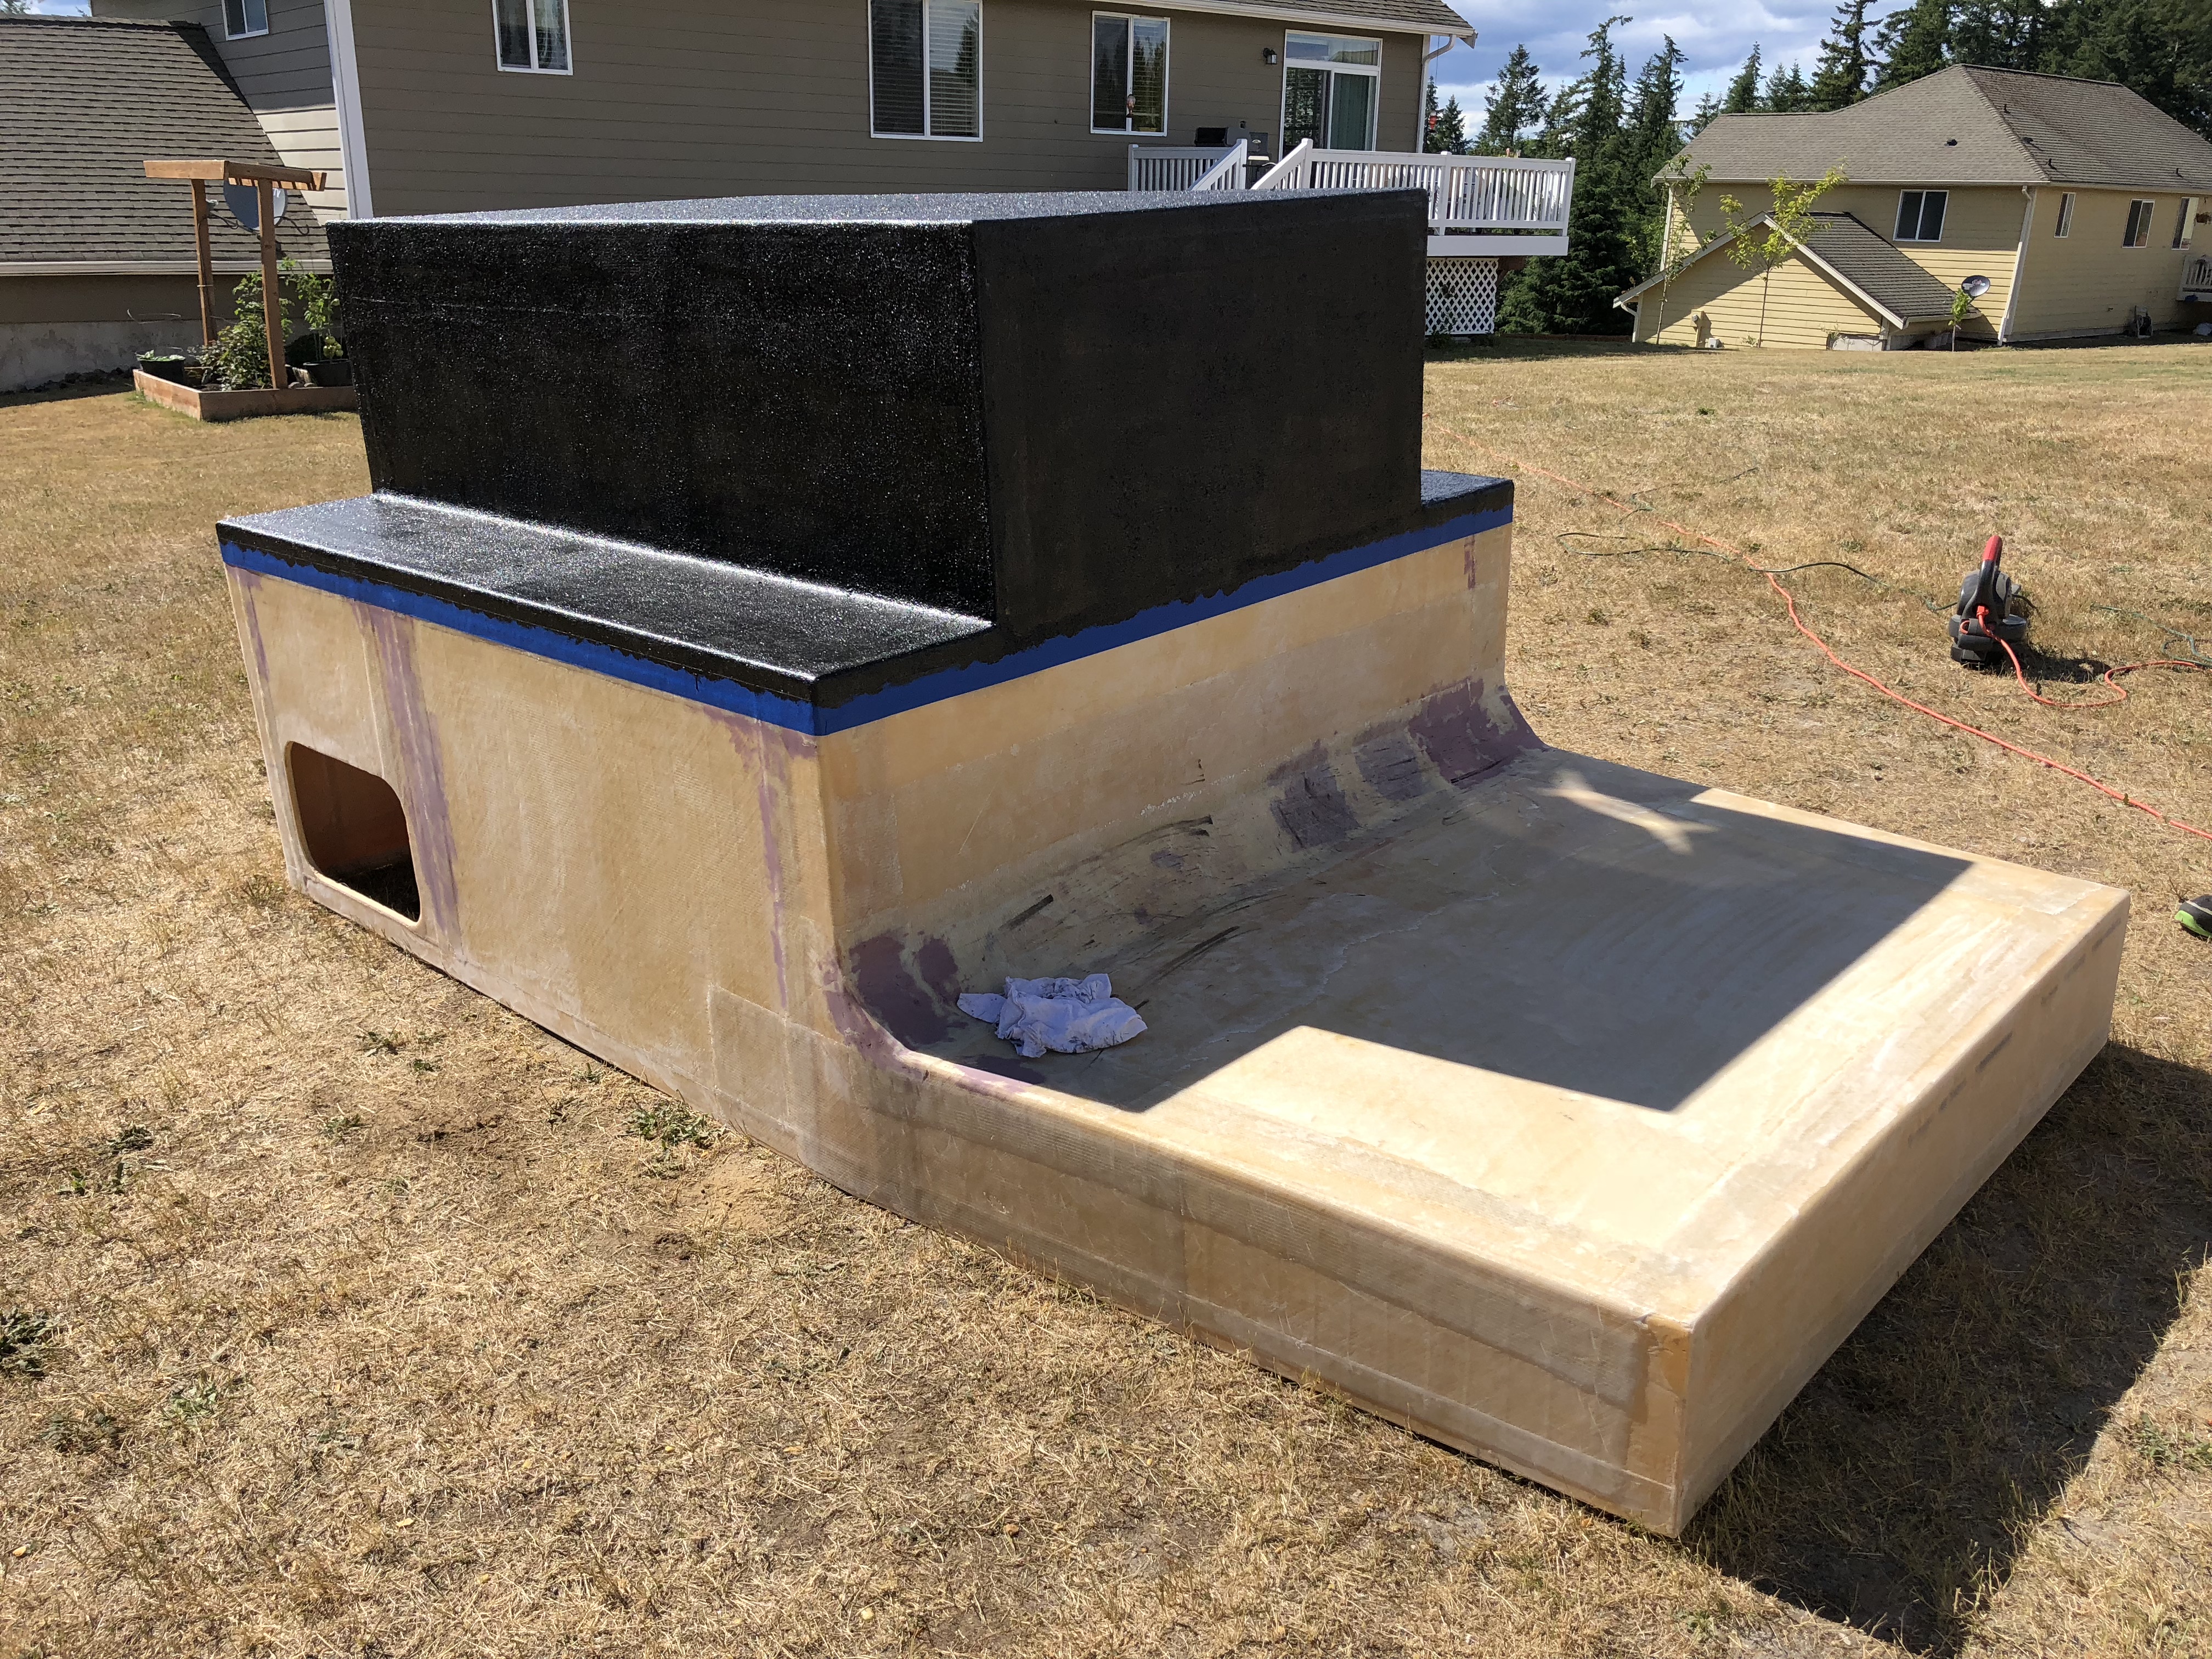
Even though I had a full 3d model and autocad drawing of the camper at the beginning, things change during actual fabrication and I had forgotten some dimensions. We needed to put the camper in the truck to figure out where to reinforce with more fiberglass for the tie down points. I wish we could have seen it on there with the roof, but it's not there yet. With all the additional fiberglass, it's a little heavier than it was last time we put it in the truck, but it's still easy to lift with 3 people.
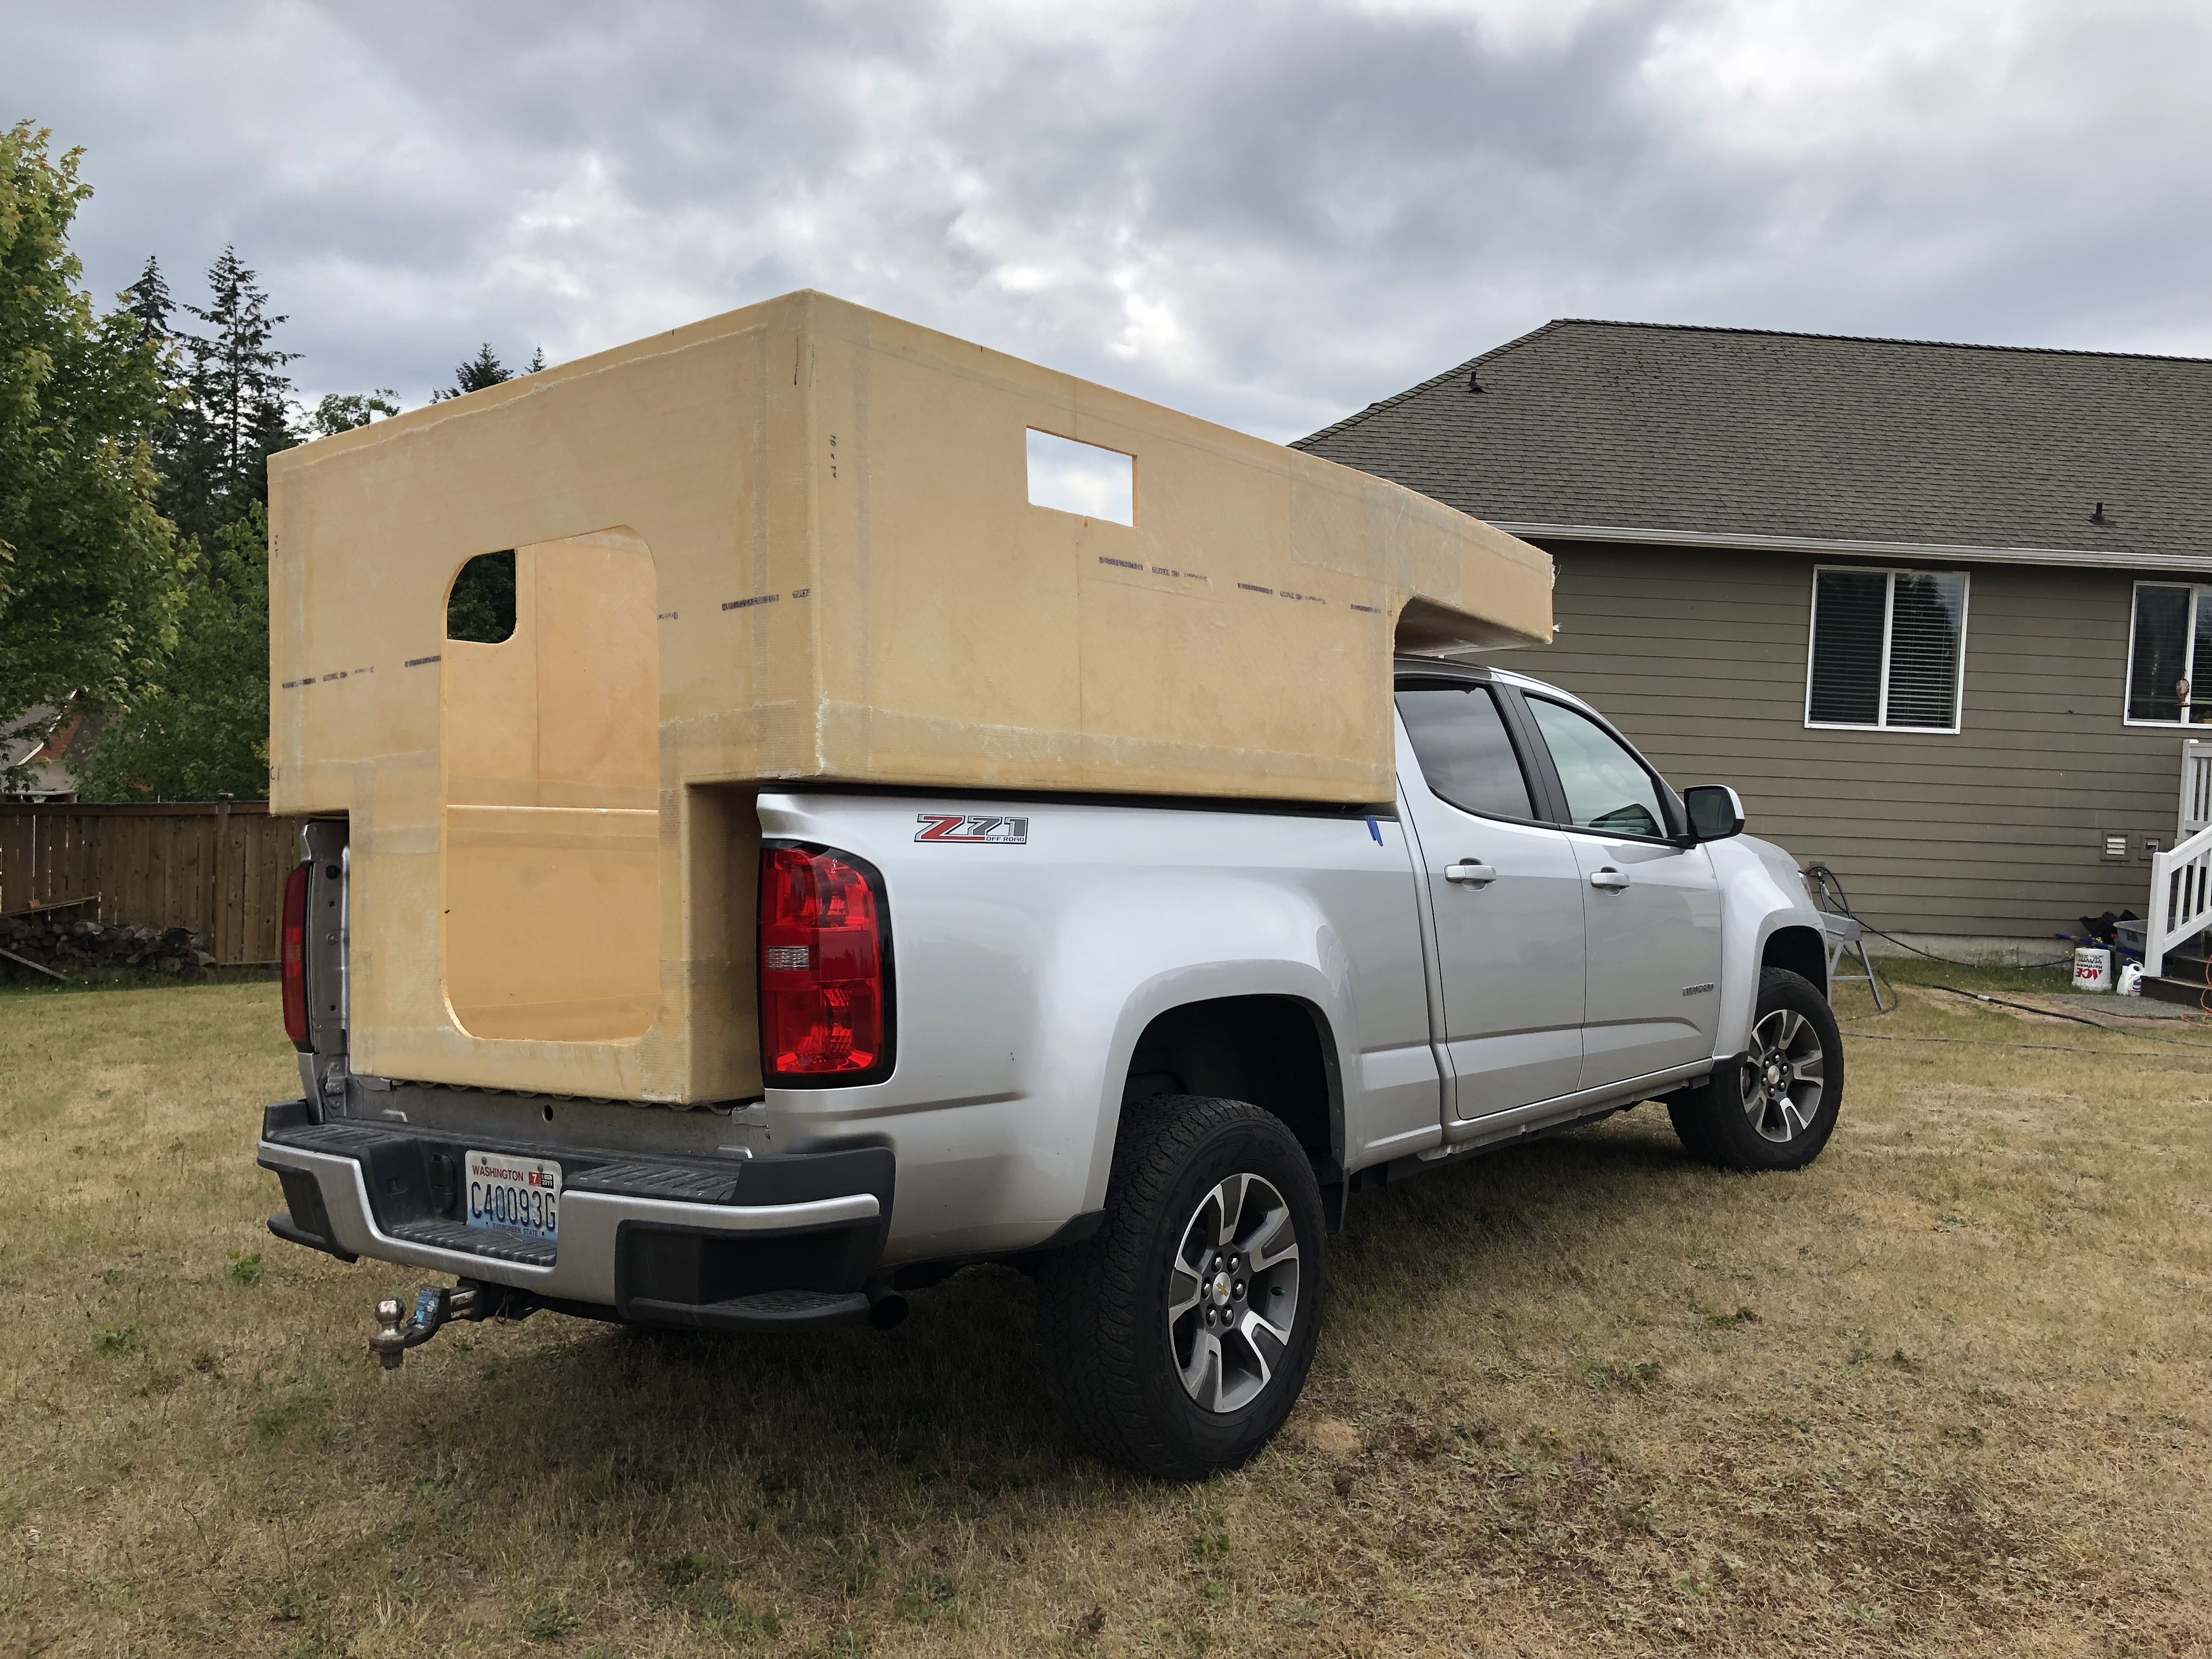
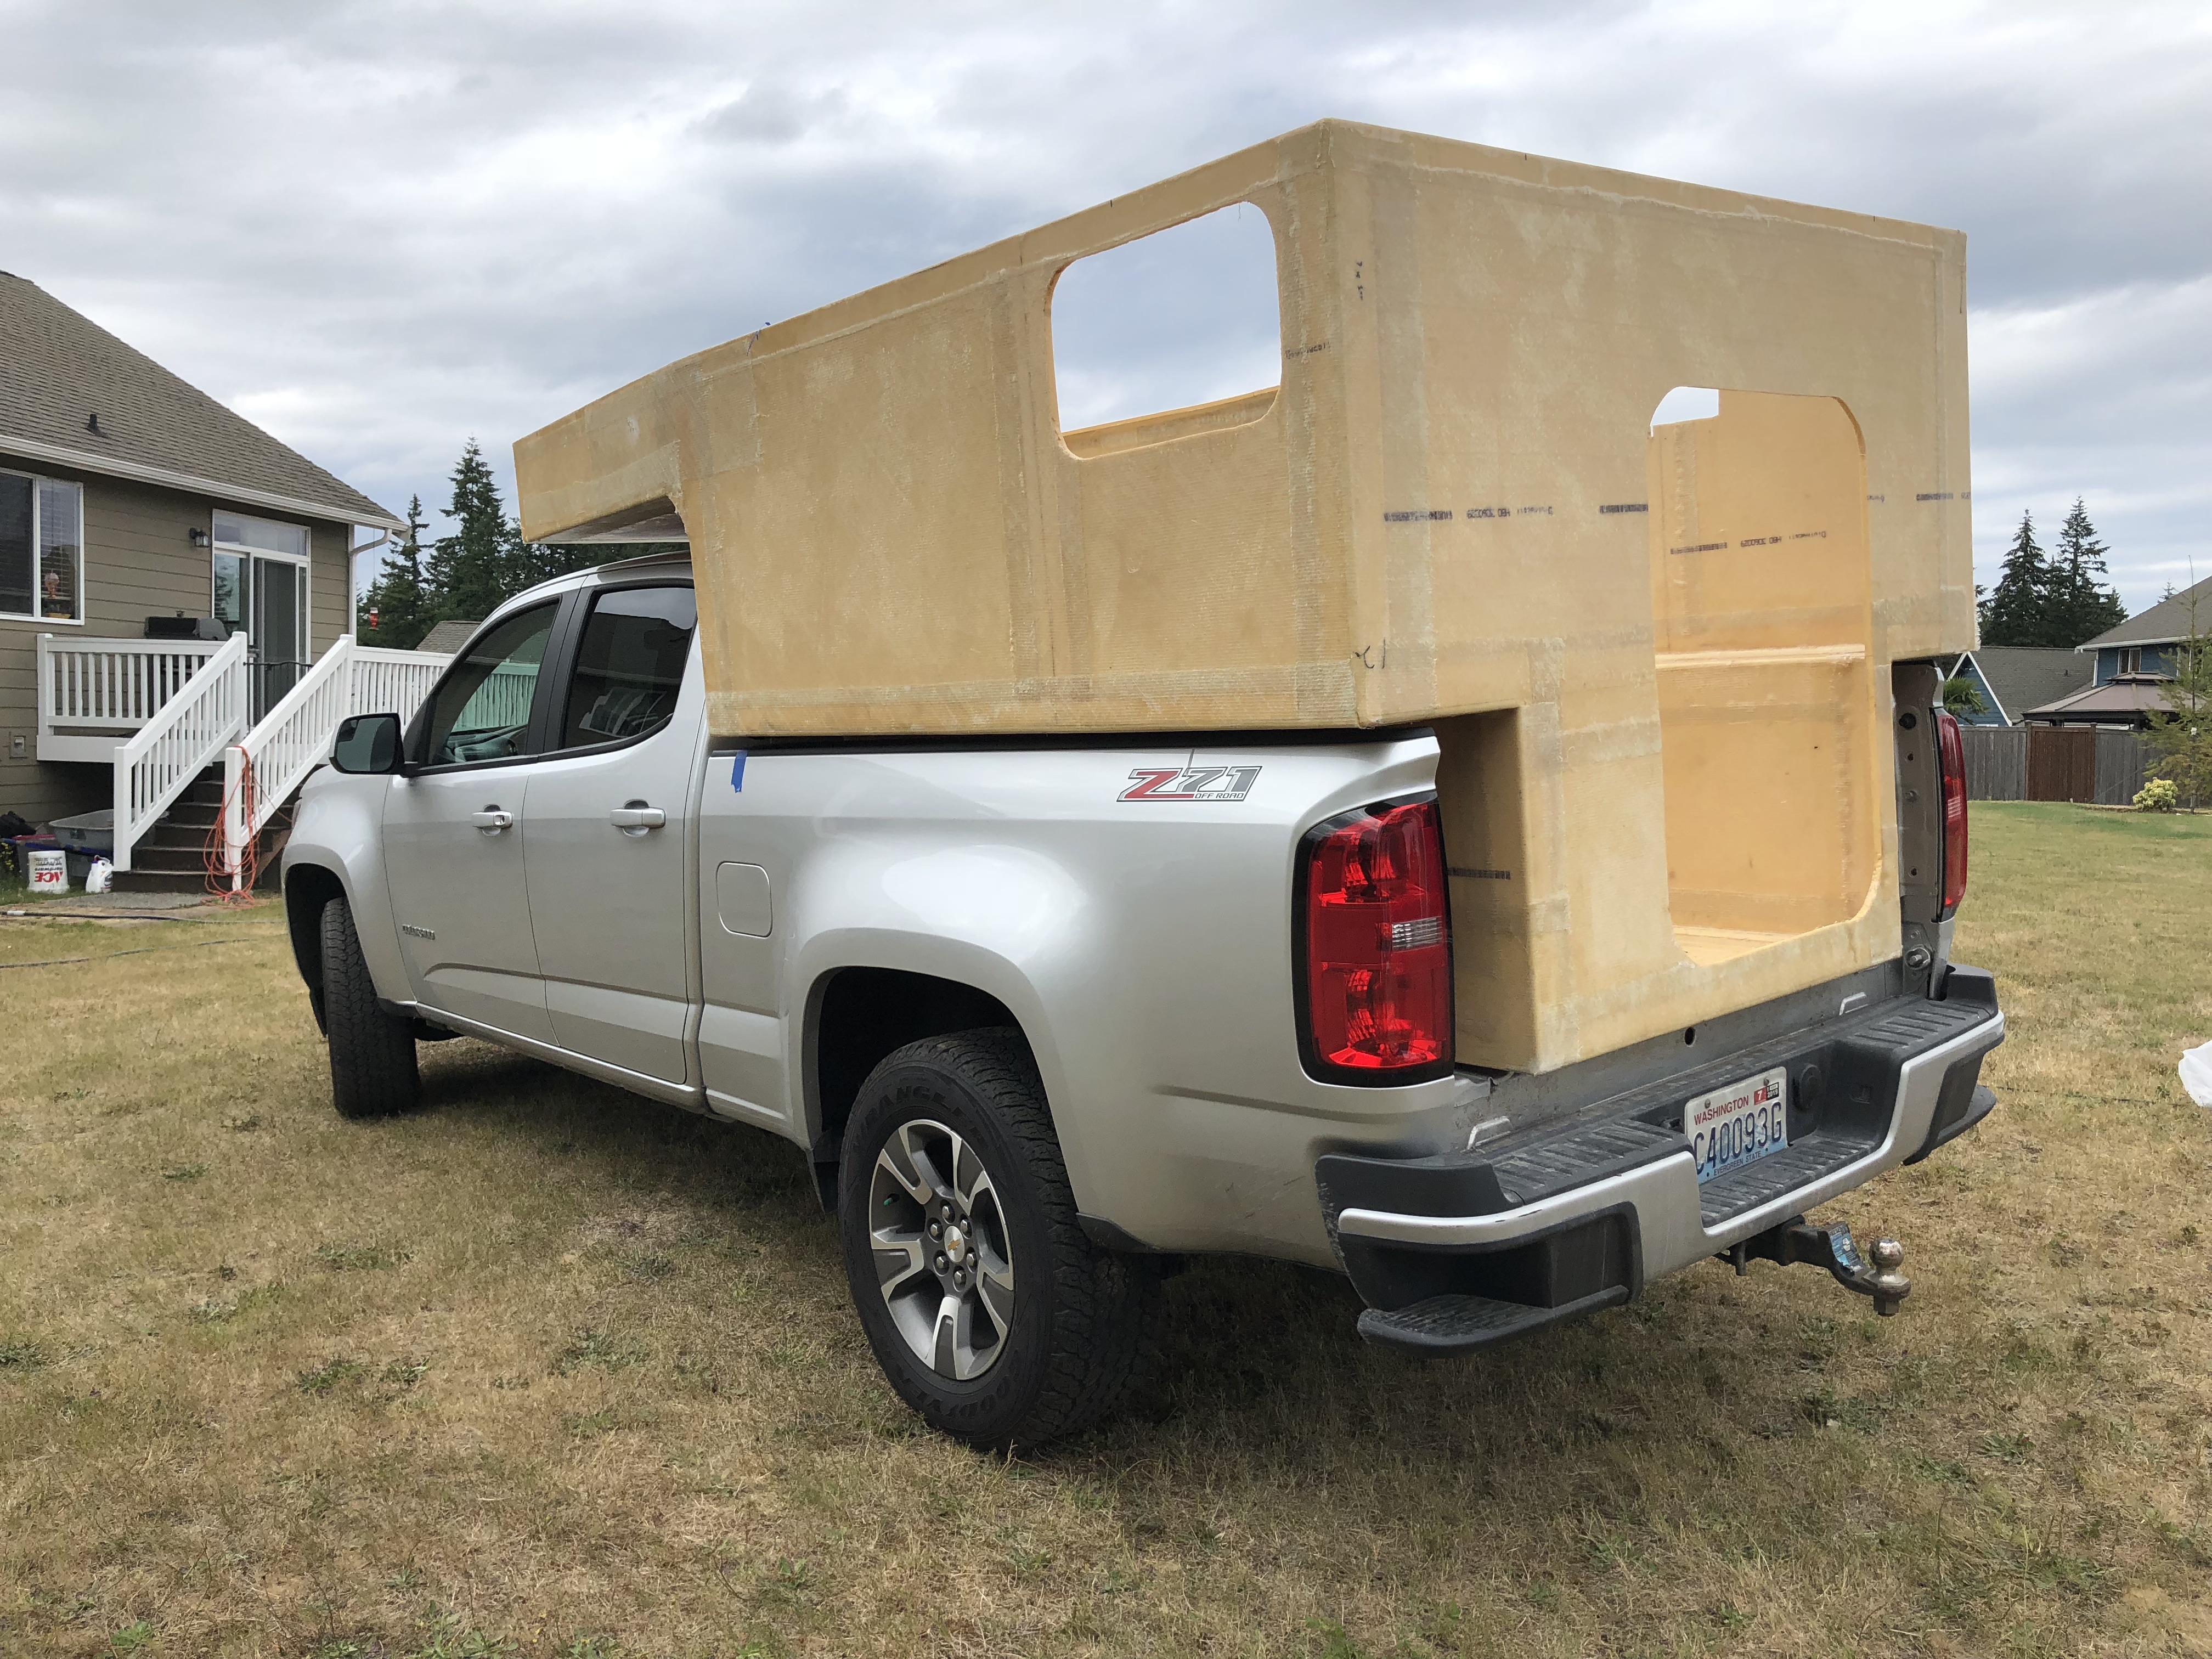
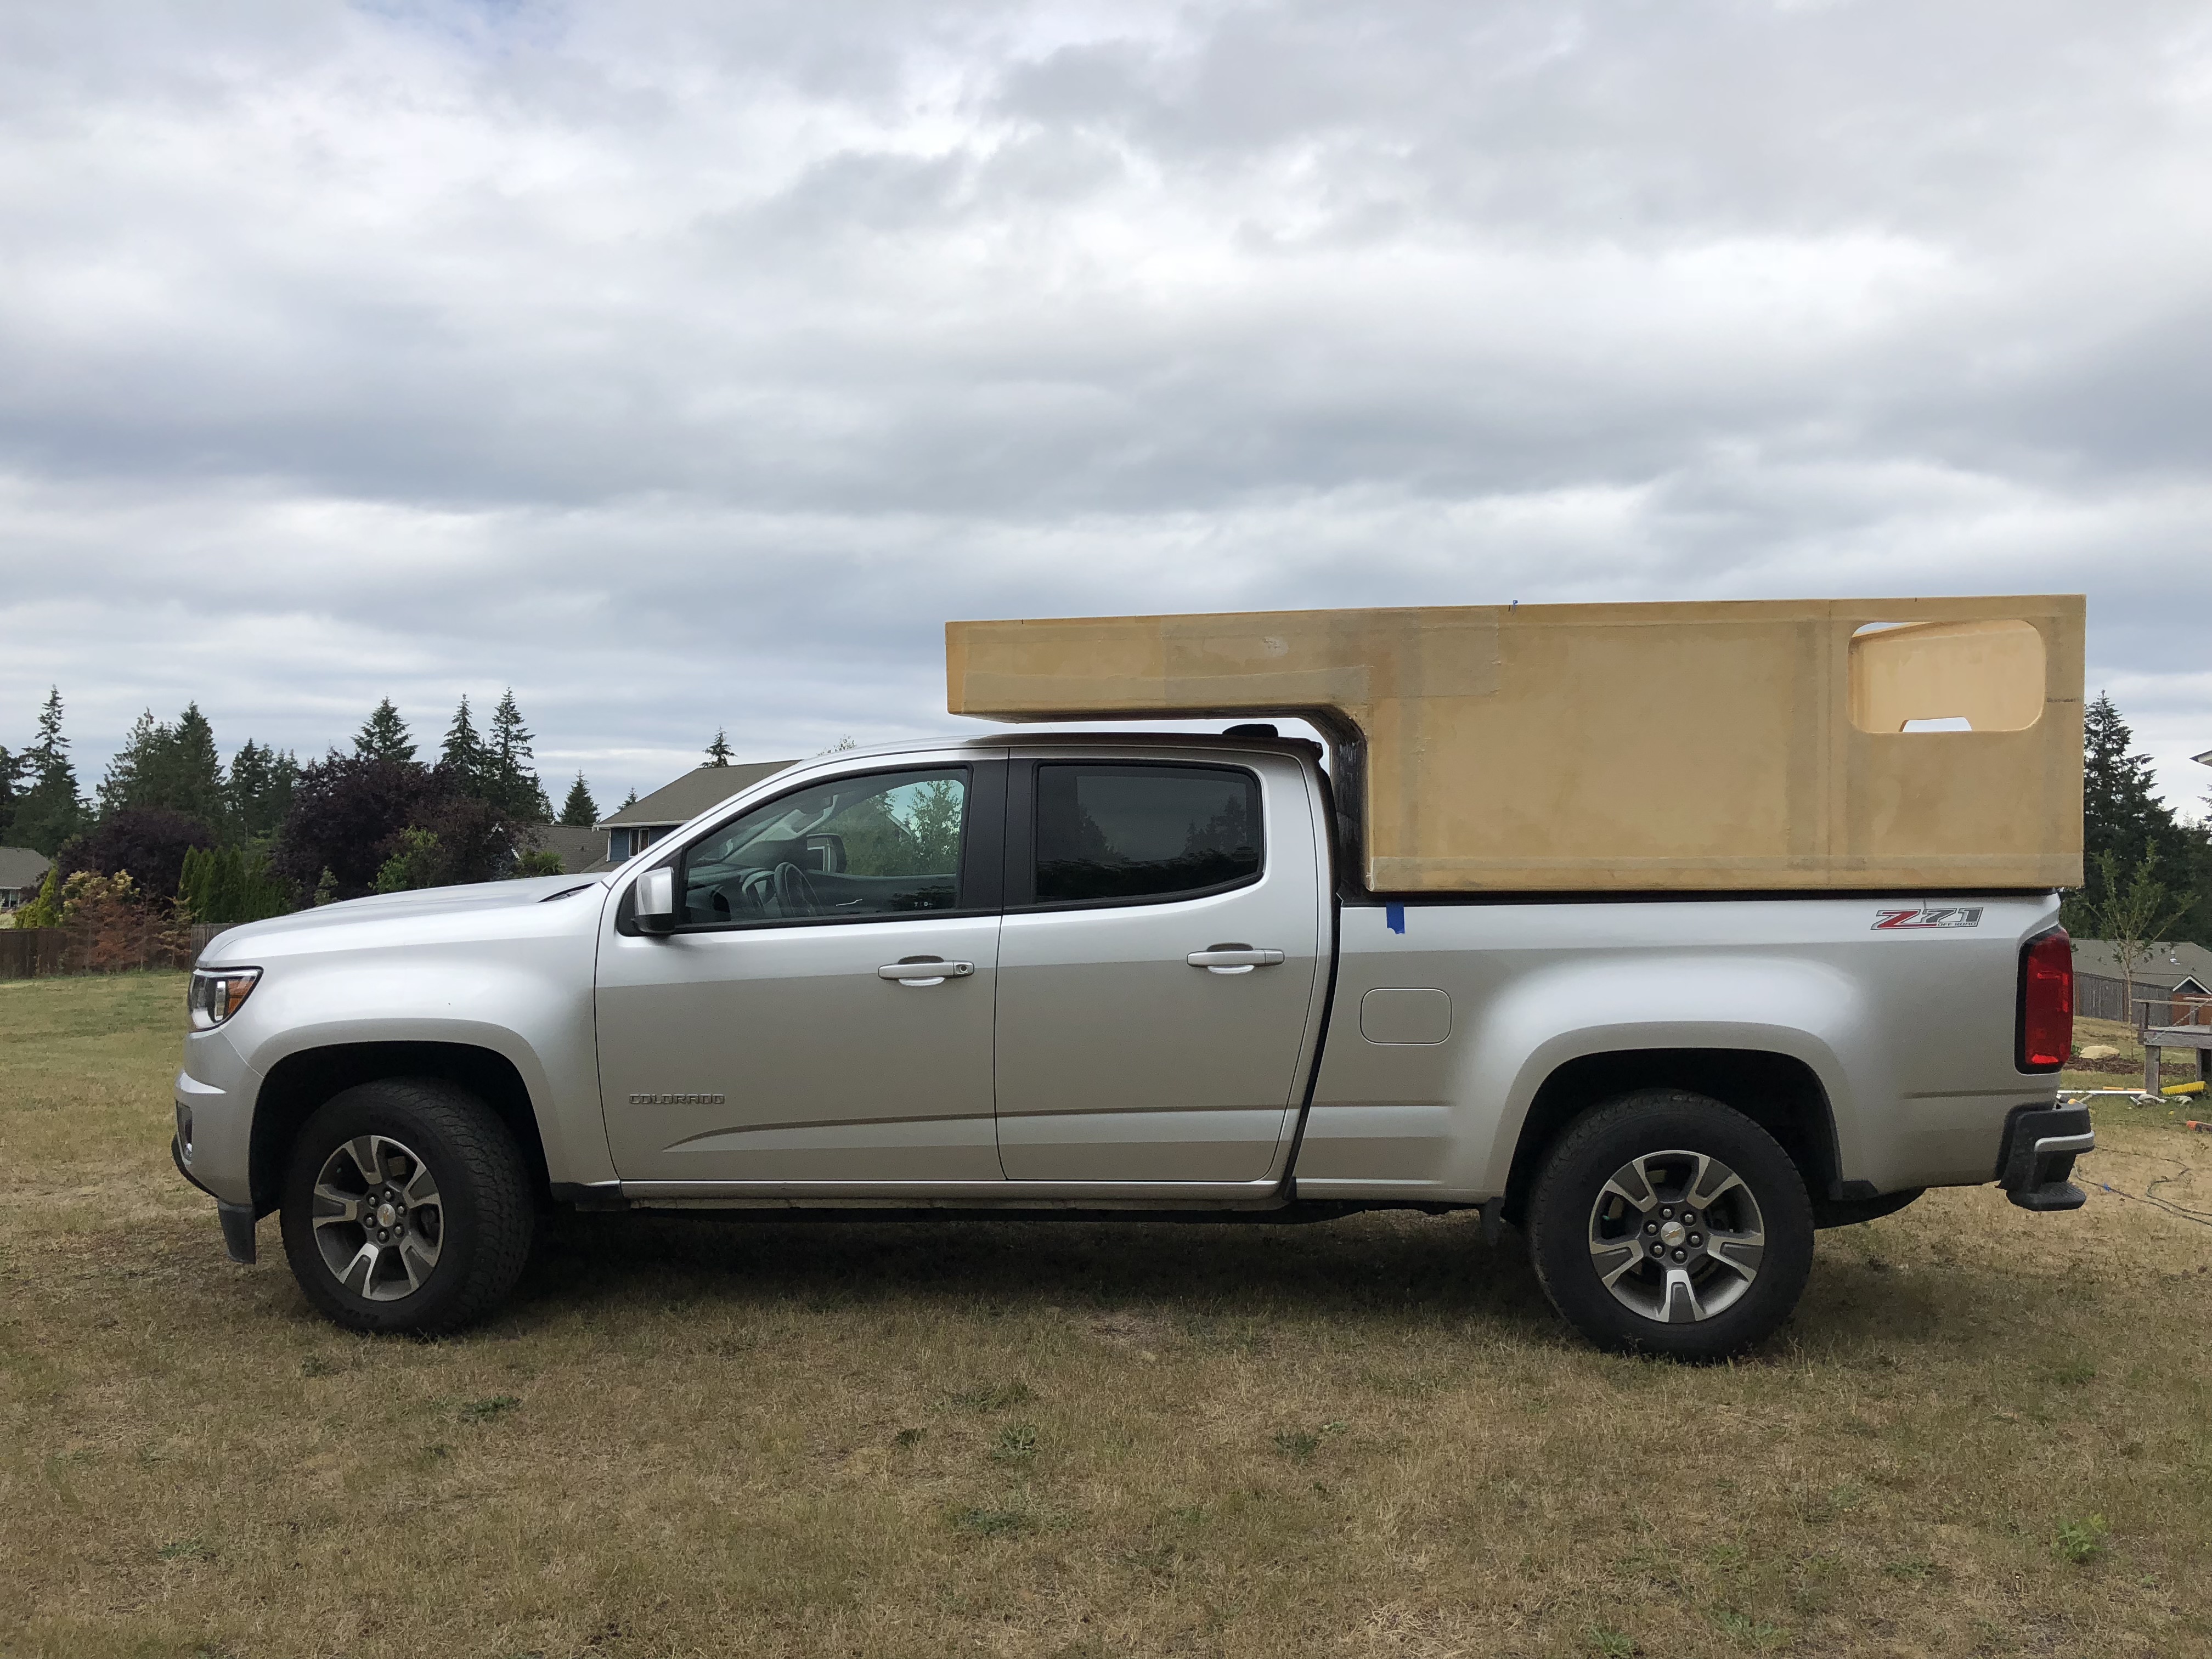
Since the shell was in the truck and the glass is mostly done, we did some deflection testing on the cabover part since that was the part we were most worried about failing. I climbed up into the very front edge (worst case scenario, we'll never be sitting in the front of the cabover part, our weight should be mostly centered just forward of the bulkhead) and bounced around gently. With me at roughly 140lbs we got maybe a half inch of deflection. I think it's stiff enough to not stress about anymore.
The angle of the picture makes it look way closer than it actually is. So no worries there! It definitely wasn't touching the roof!
underkill
Active member
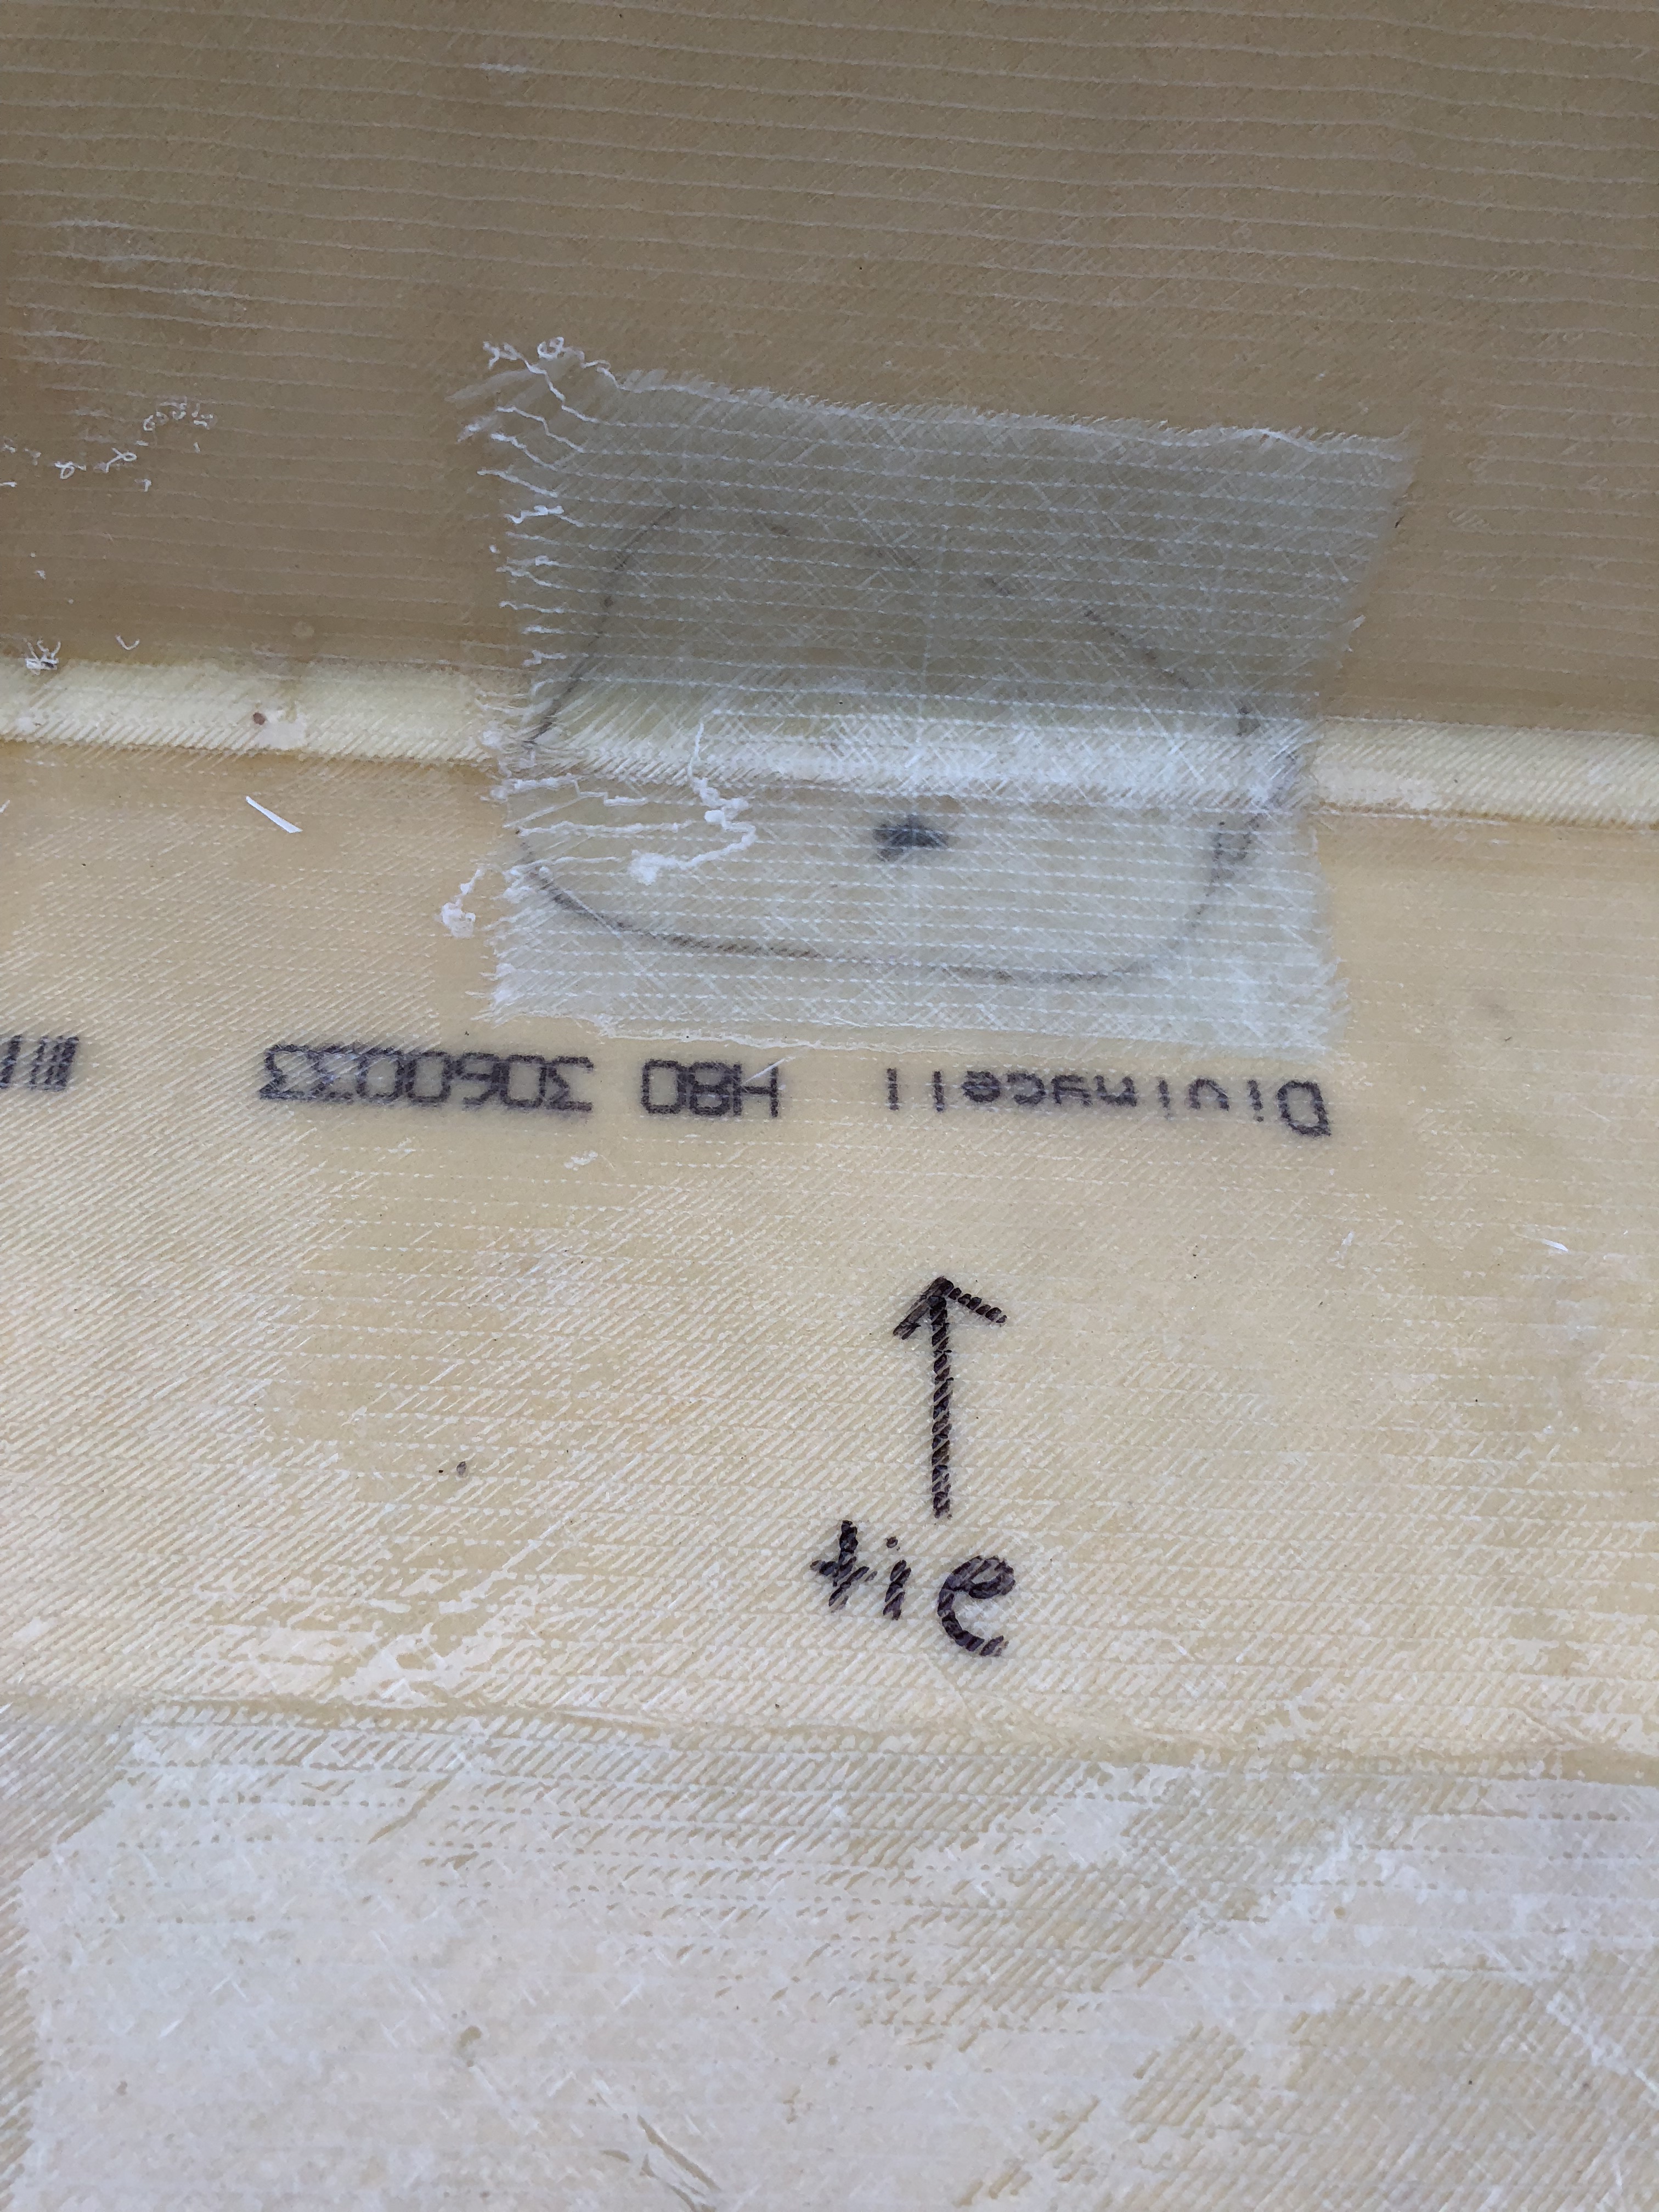
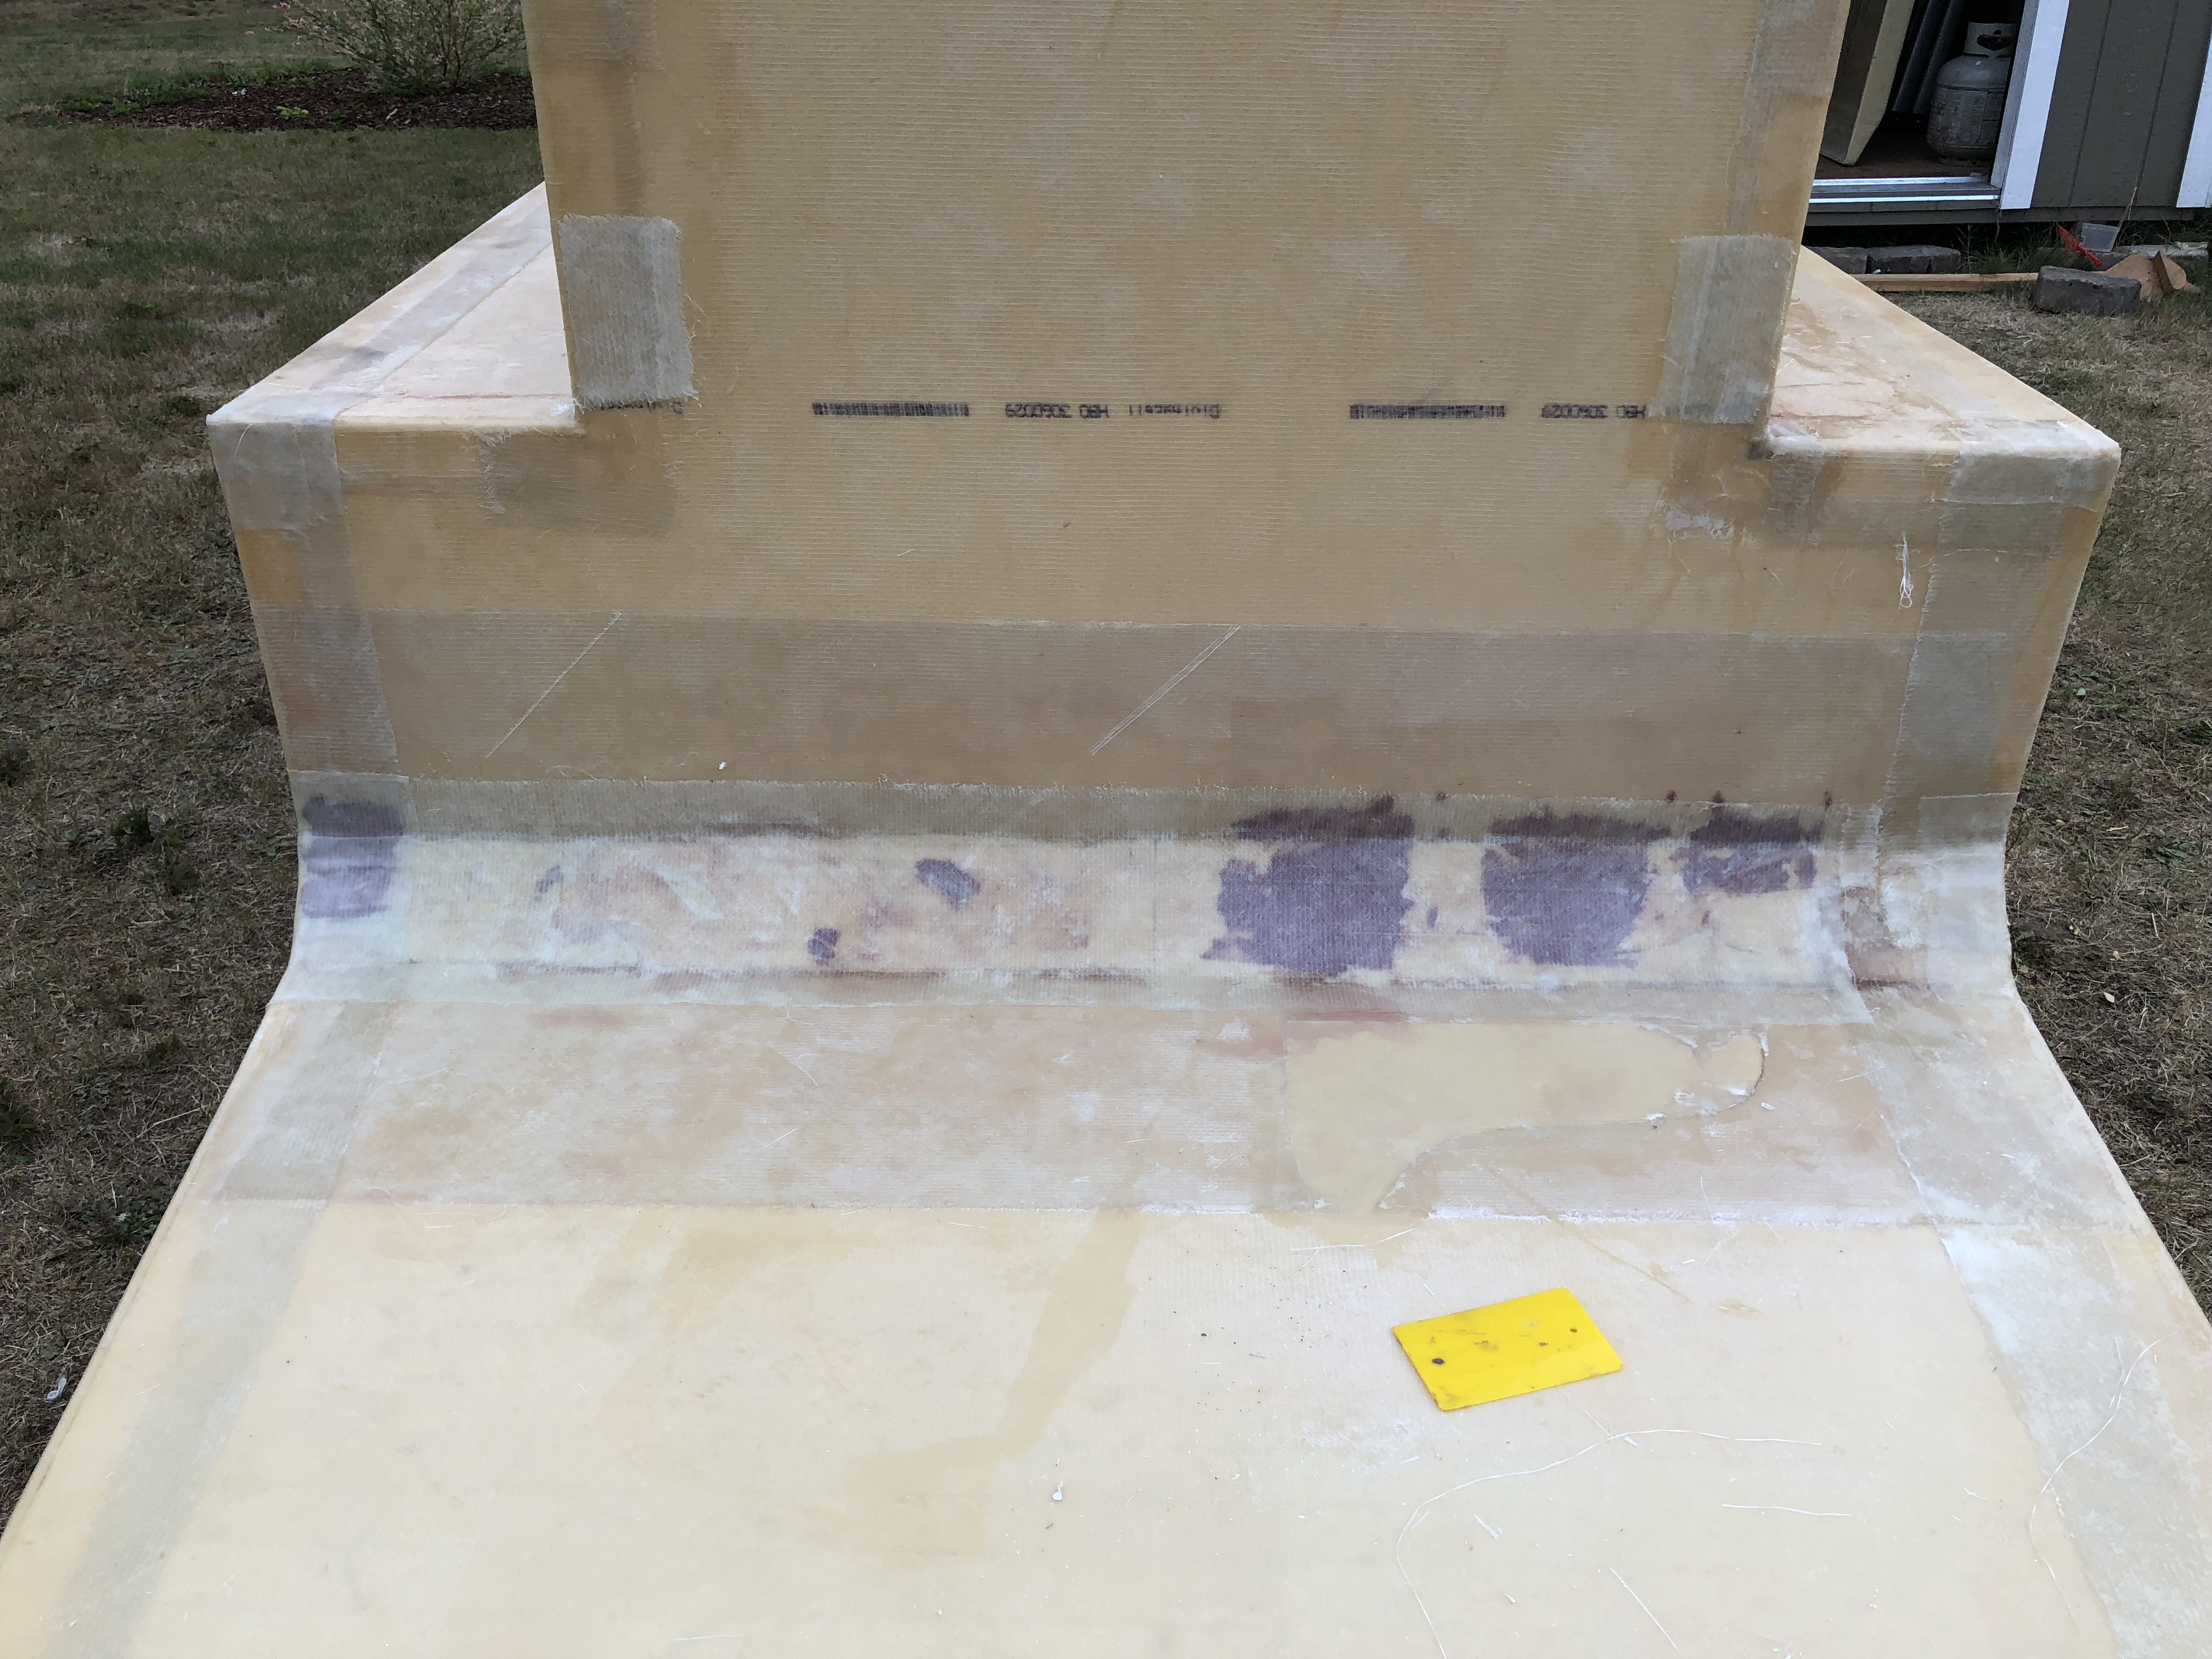
One of the things we don't like about a lot of other campers is how much they extend over the bedrails and the various ways that people tie them to the trucks outside the bed. Our plan was to use the tie down points inside the truck, since we predict our camper is going to be lightweight enough to not be a problem. We located the best spot for the attachment points on the shell and added a few layers of fiberglass for more strength.
We did have some small places that needed touch up with fiberglass that we worked on while we were already mixing stuff for the tie down points. Things like the corners got small strips of 6oz and other spots got a little more filler.
I worked on this thing for 14 hours straight today! I'm beat! but here it is snugly in the shed!
If you decide you need stronger tie down points in the truck this is what I did...
(ignore the text in the box below and just follow the link, lol)

 www.coloradofans.com
(ignore the text in the box below and just follow the link, lol)
Truck camper
underkill
Active member
Thanks for the tip! We haven't found the need for stronger tie down points on the truck (yet, I suppose), but we used those threaded rings for bolting through the camper floor!If you decide you need stronger tie down points in the truck this is what I did...
(ignore the text in the box below and just follow the link, lol)
Truck camper
underkill
Active member
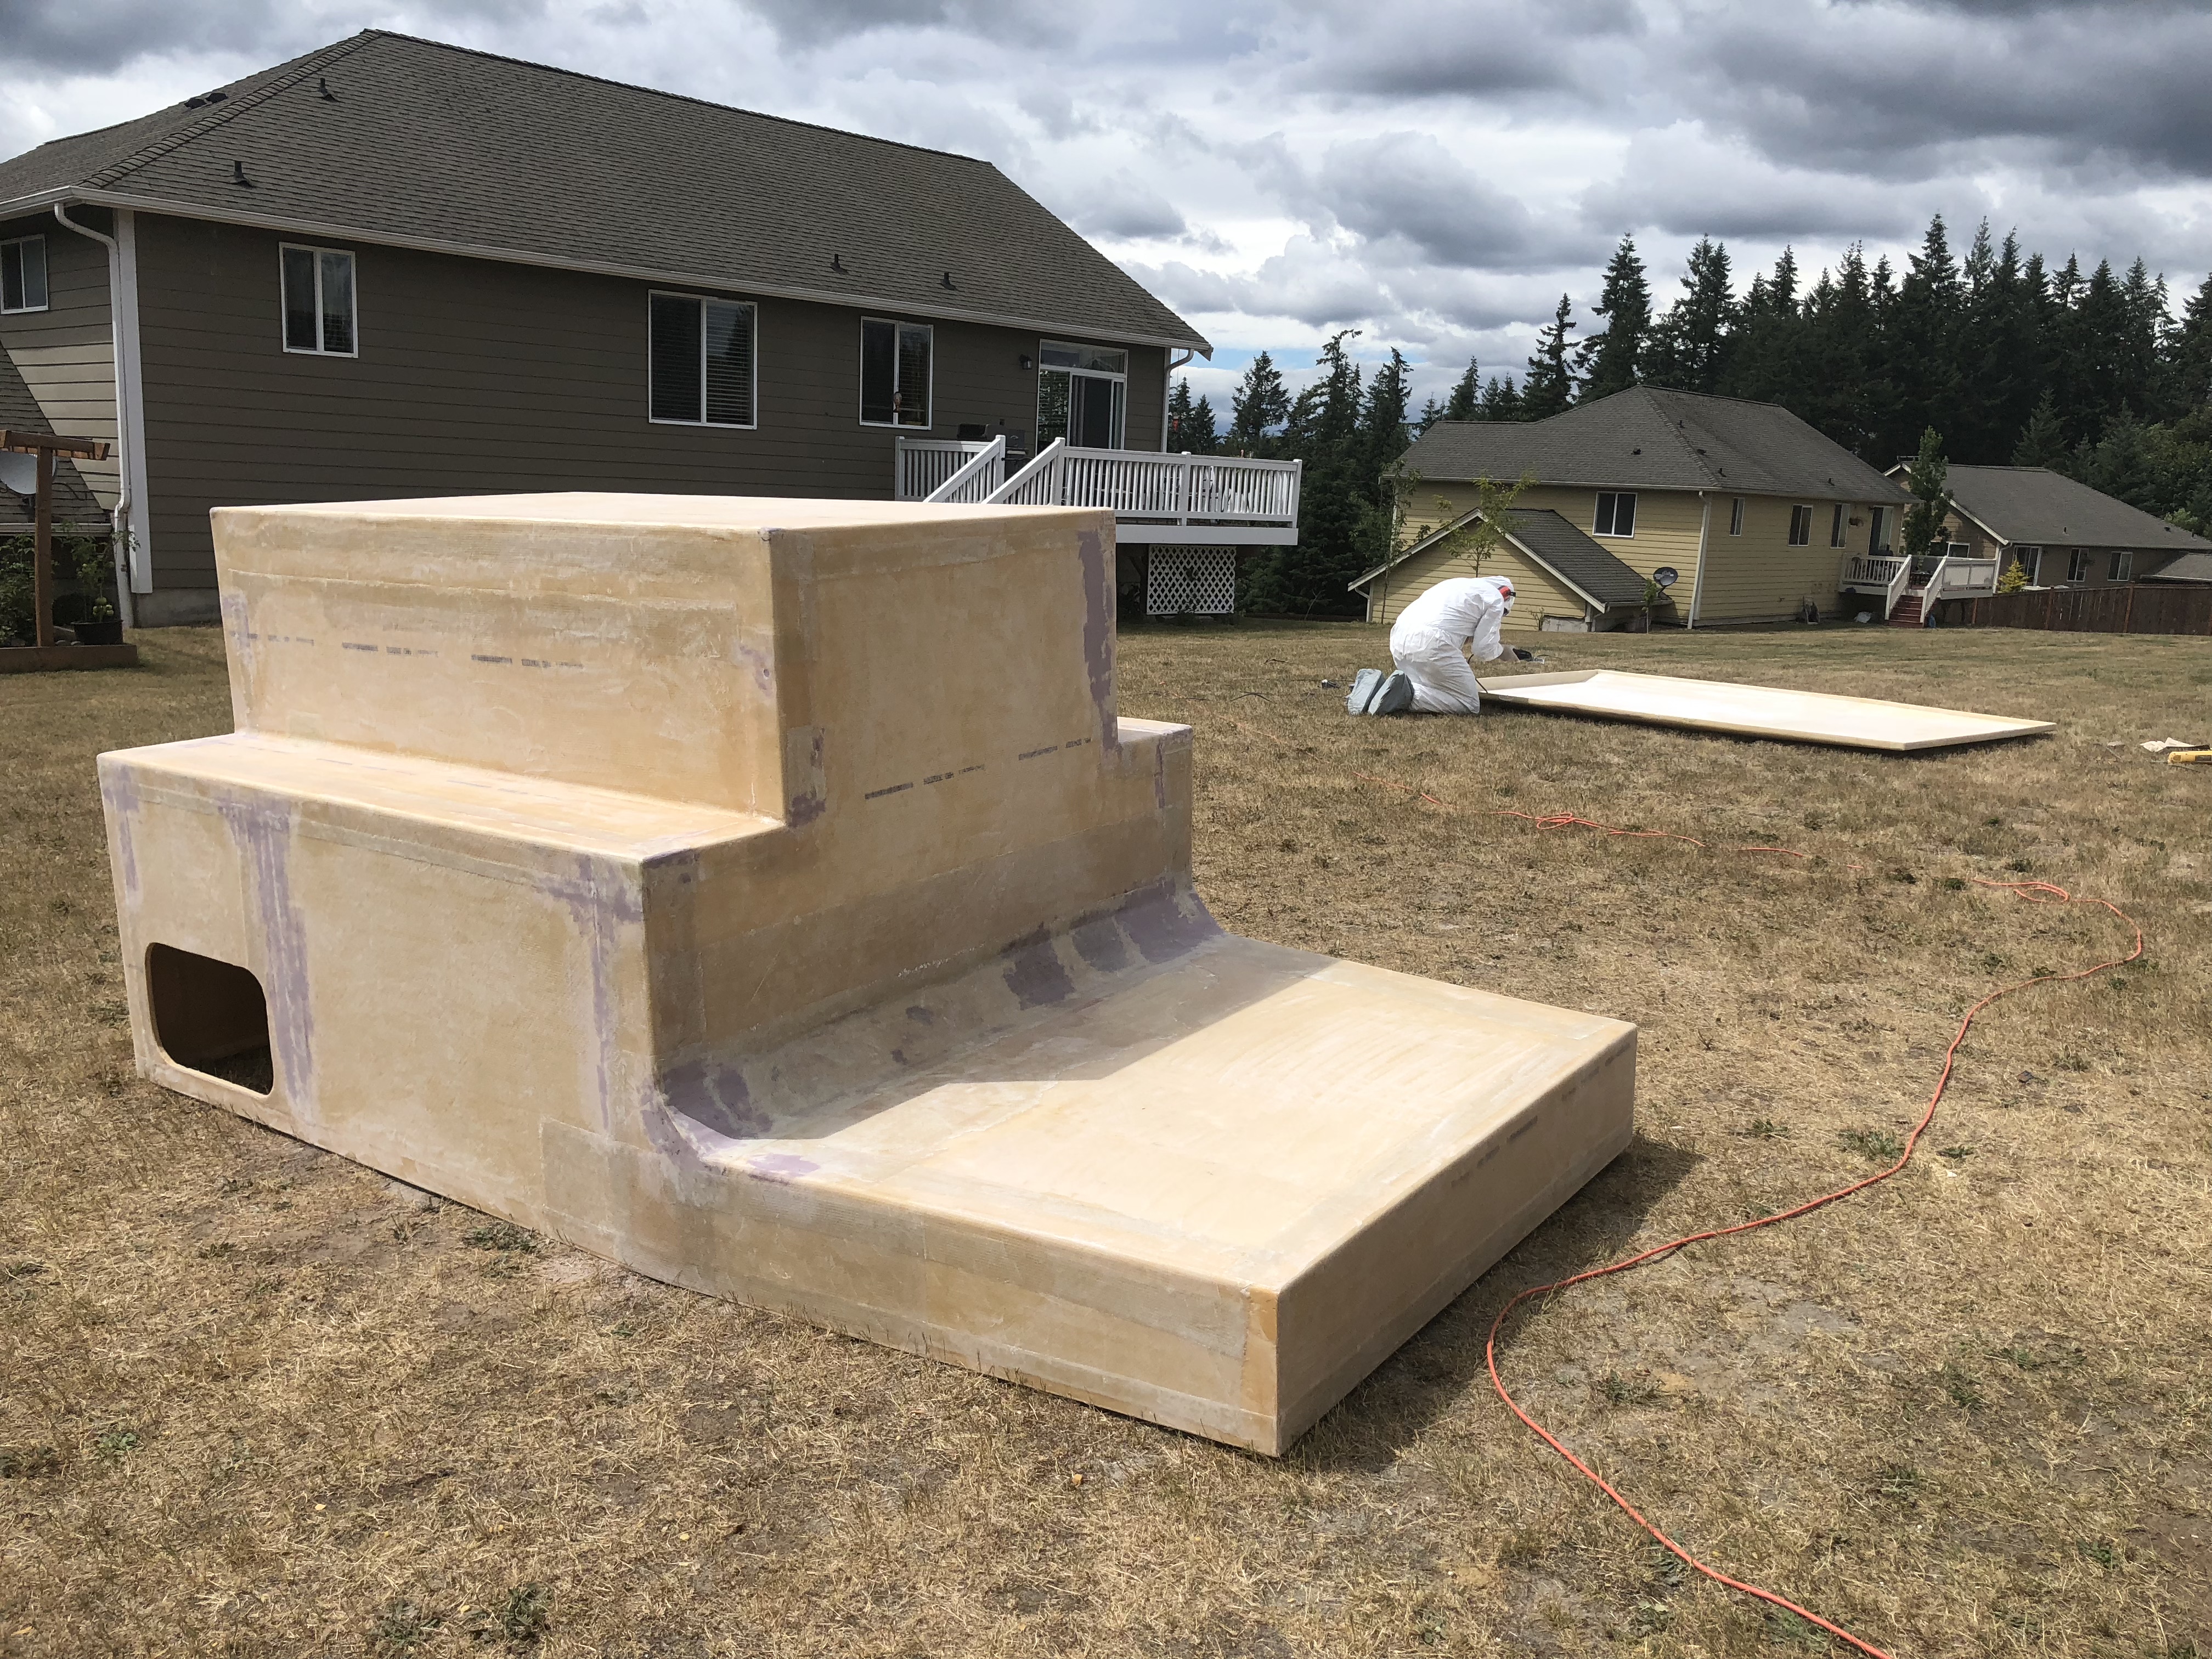
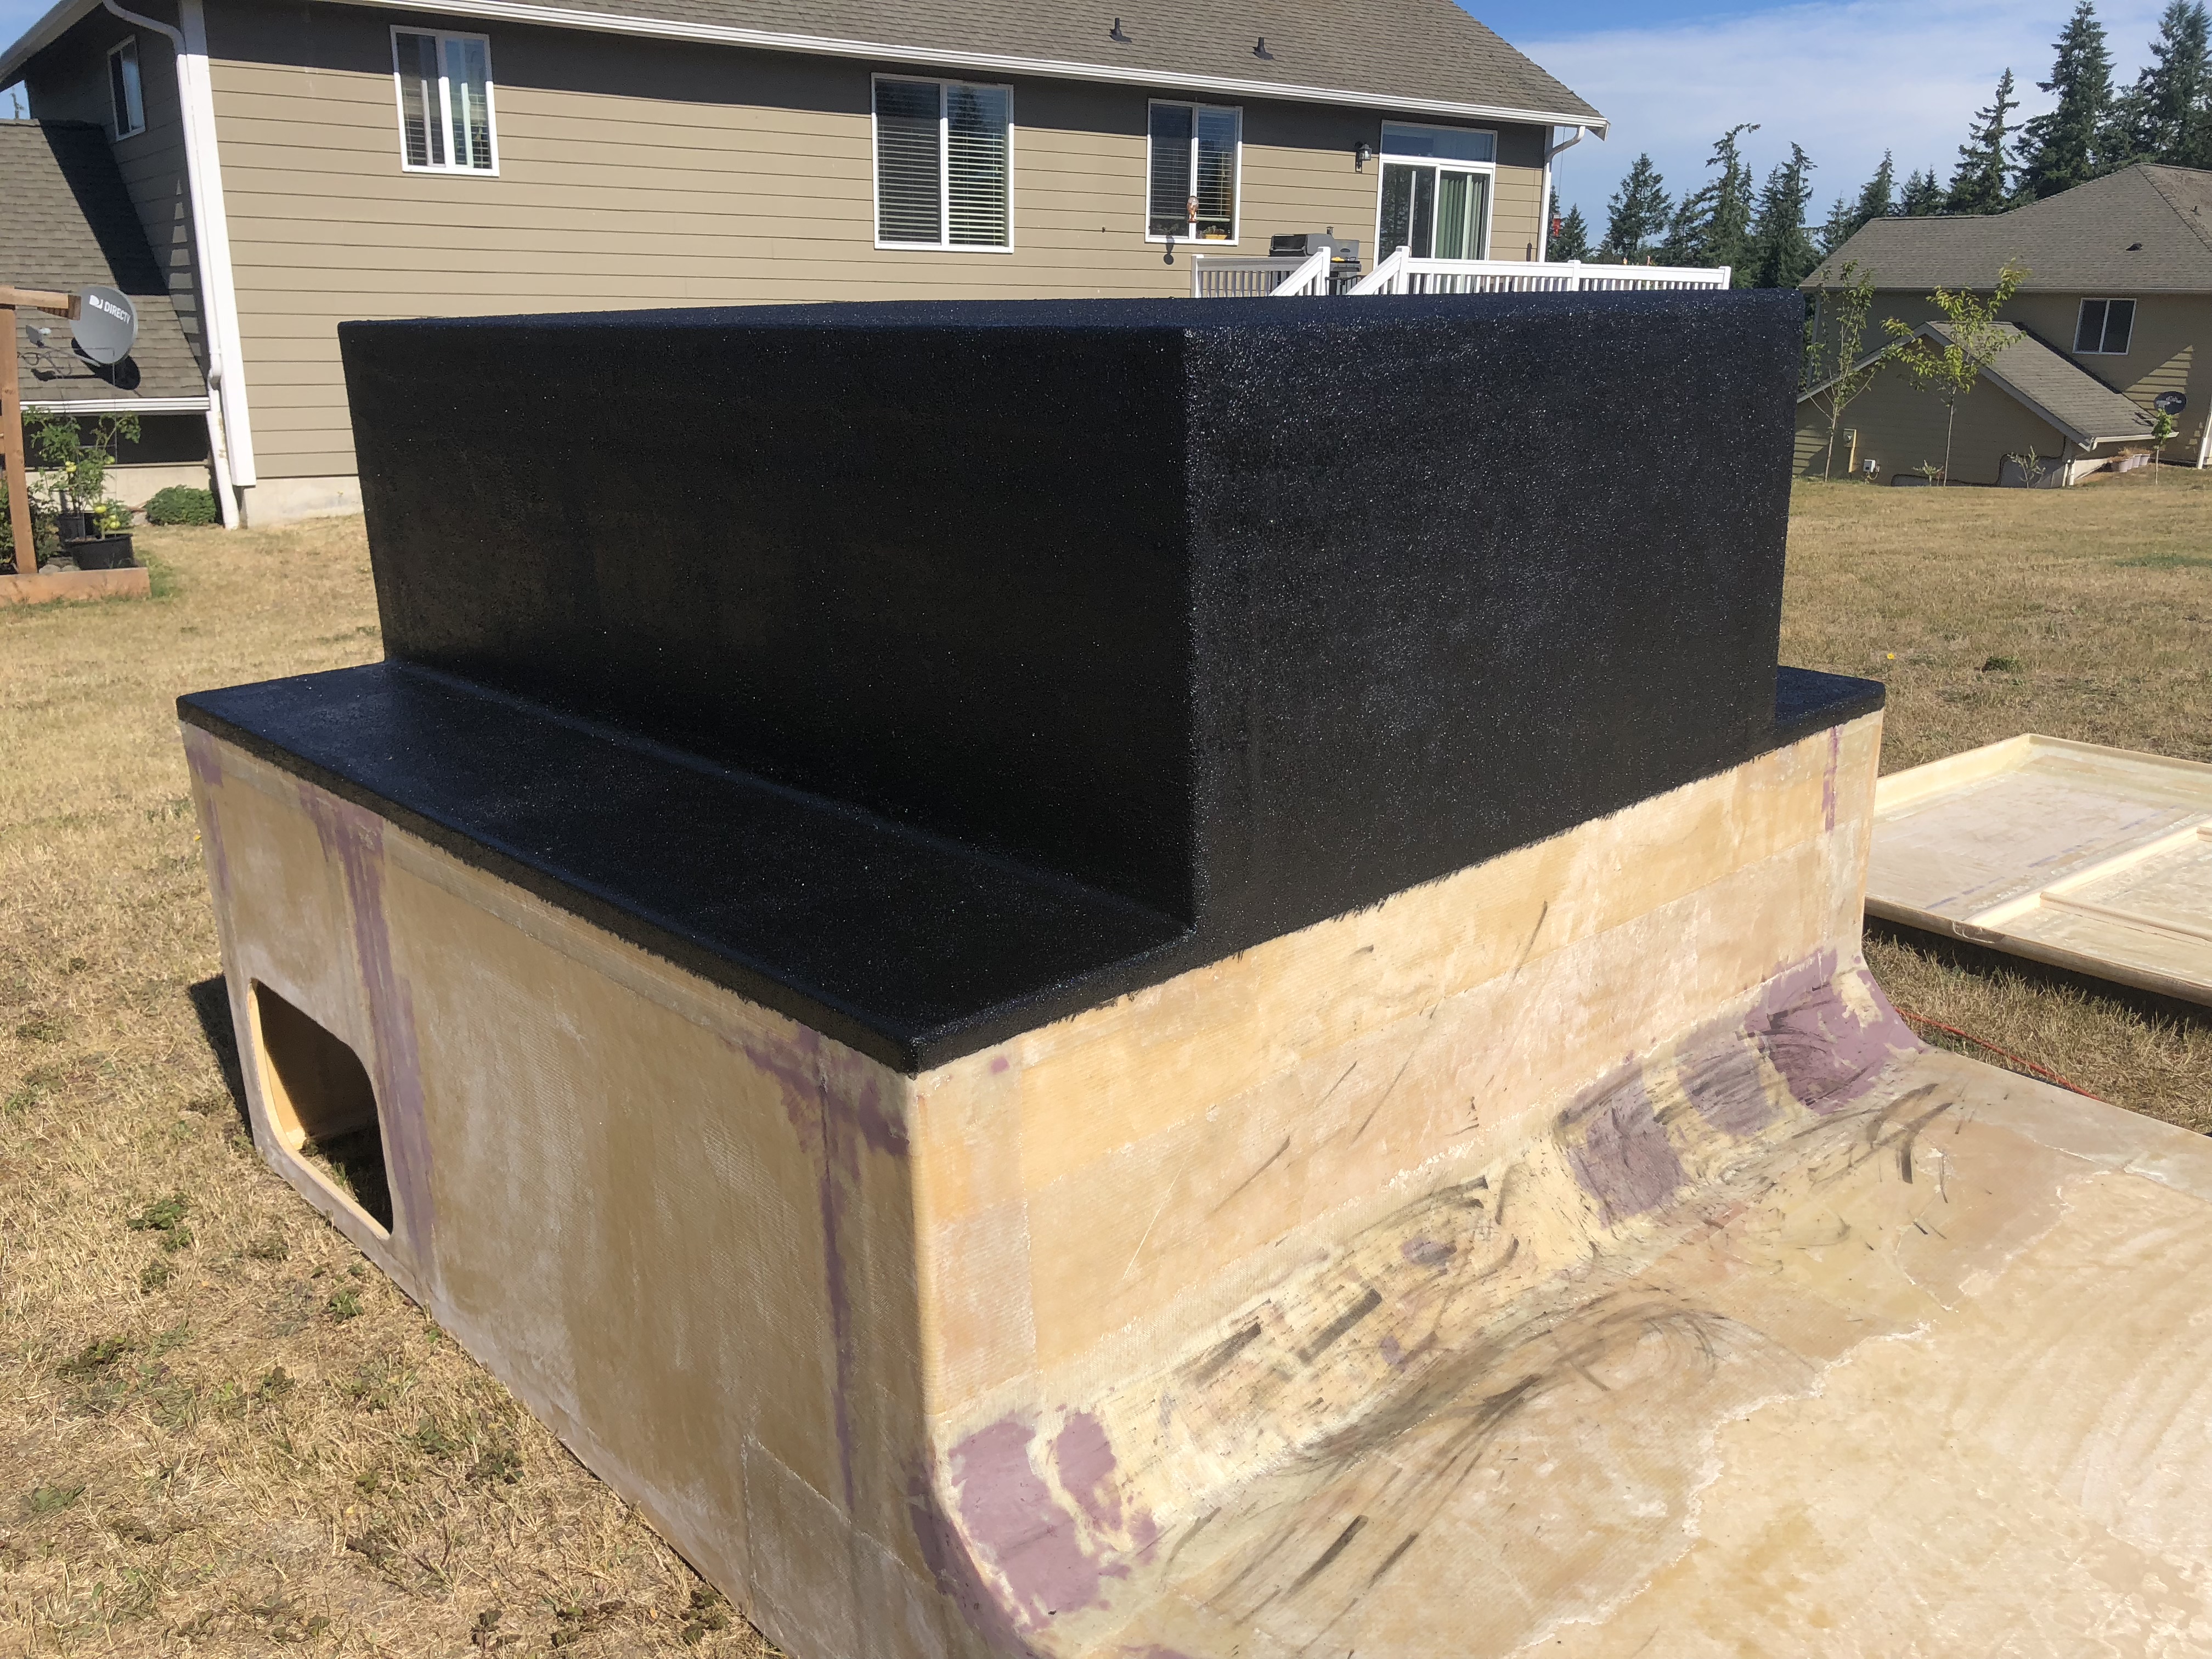
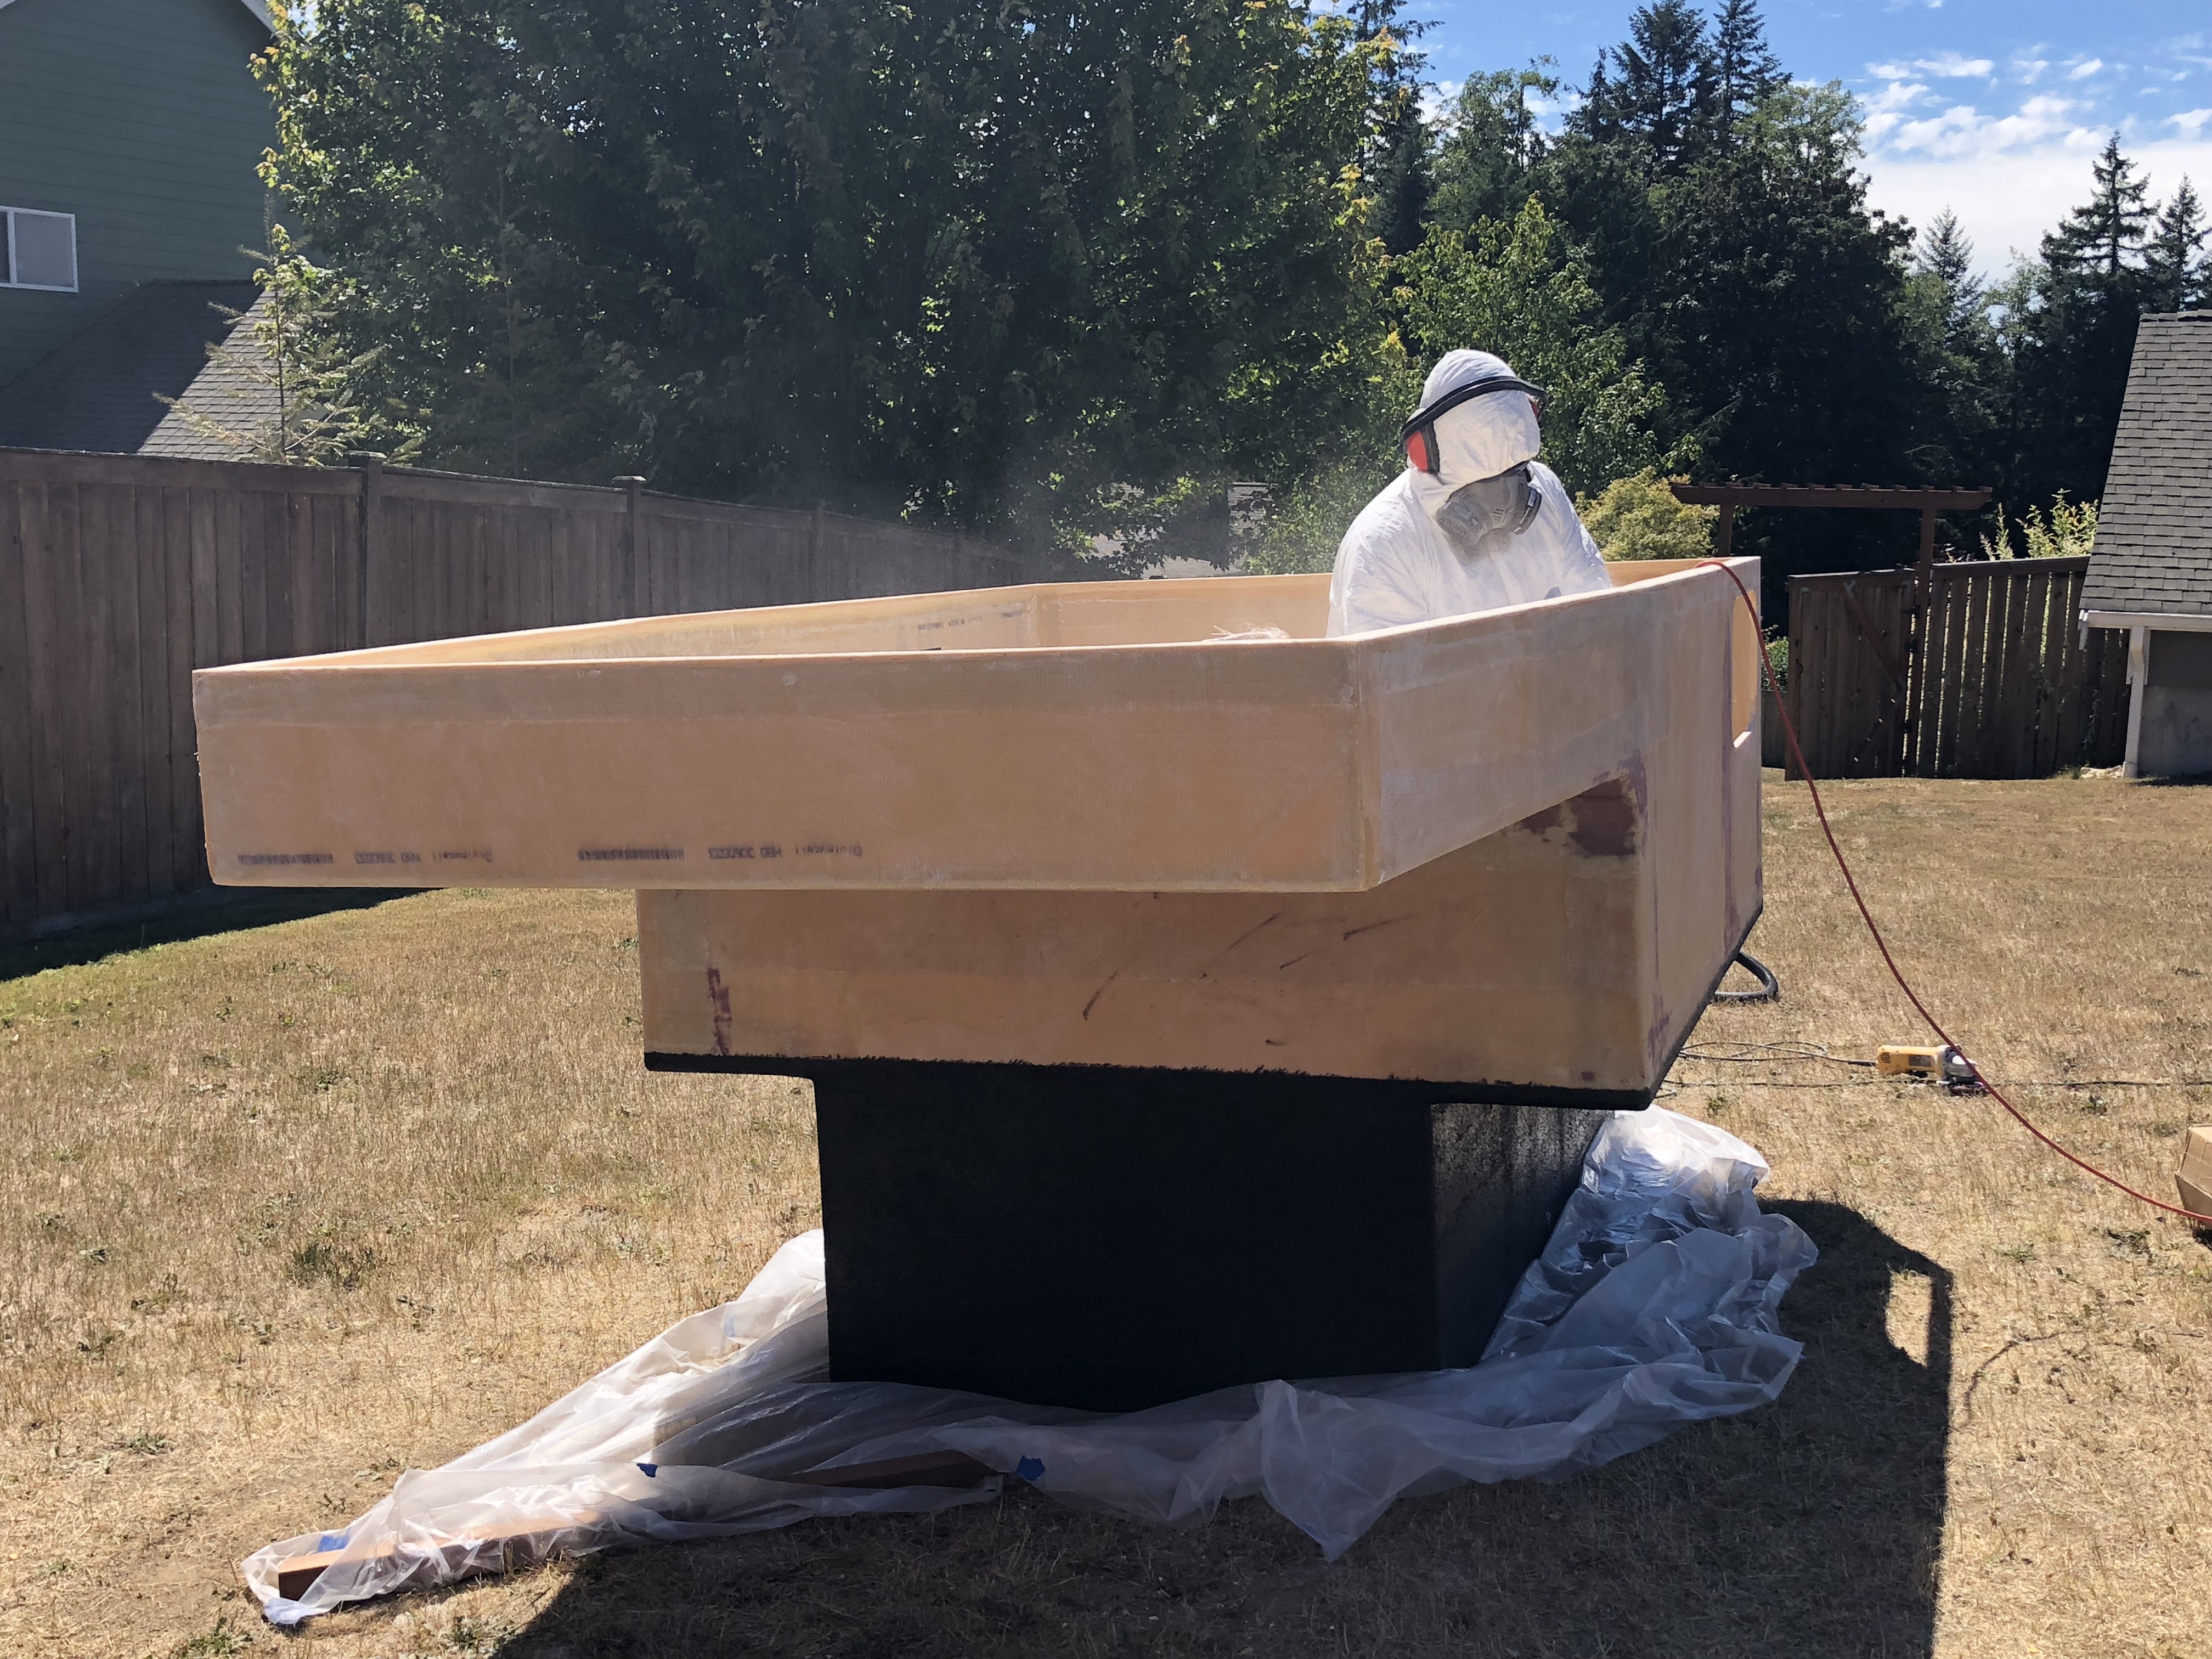
Well, as much as I've been dreading it, it's time to start sanding and prepping the fiberglass for paint. I hate fiberglass dust, so I made sure to wear all the protective equipment. Worth it, but it was so hot. Pretty miserable.
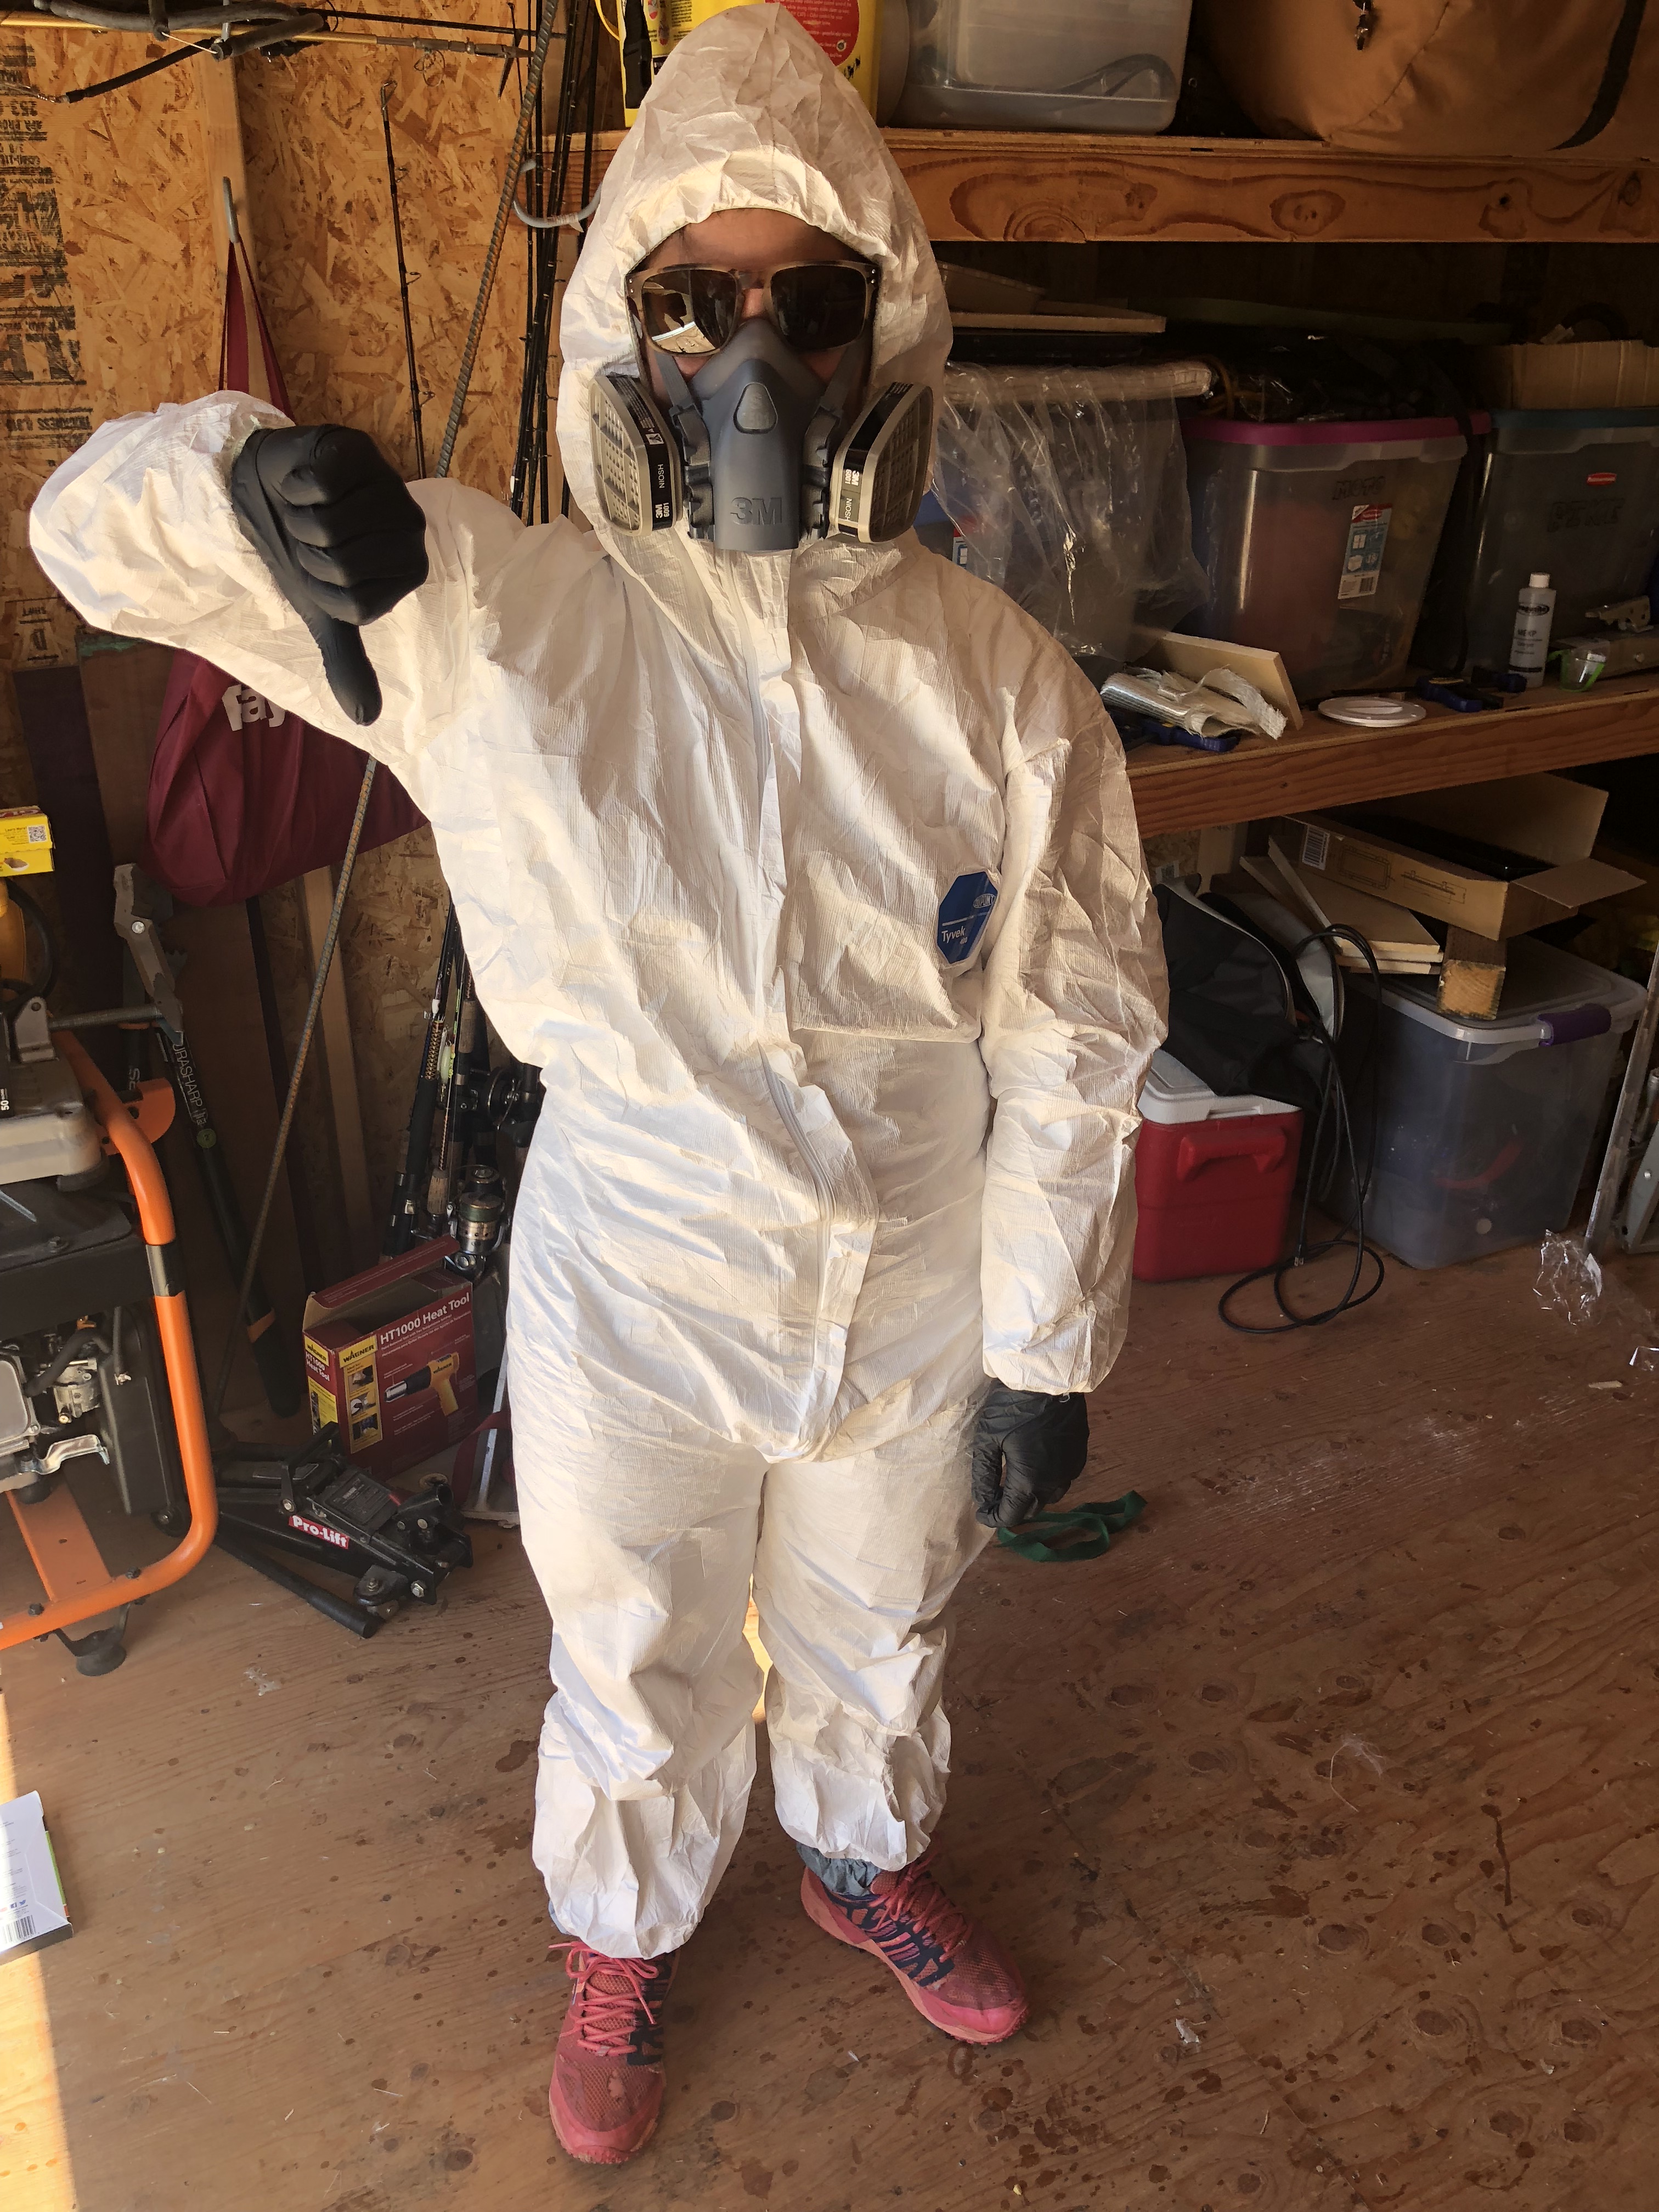
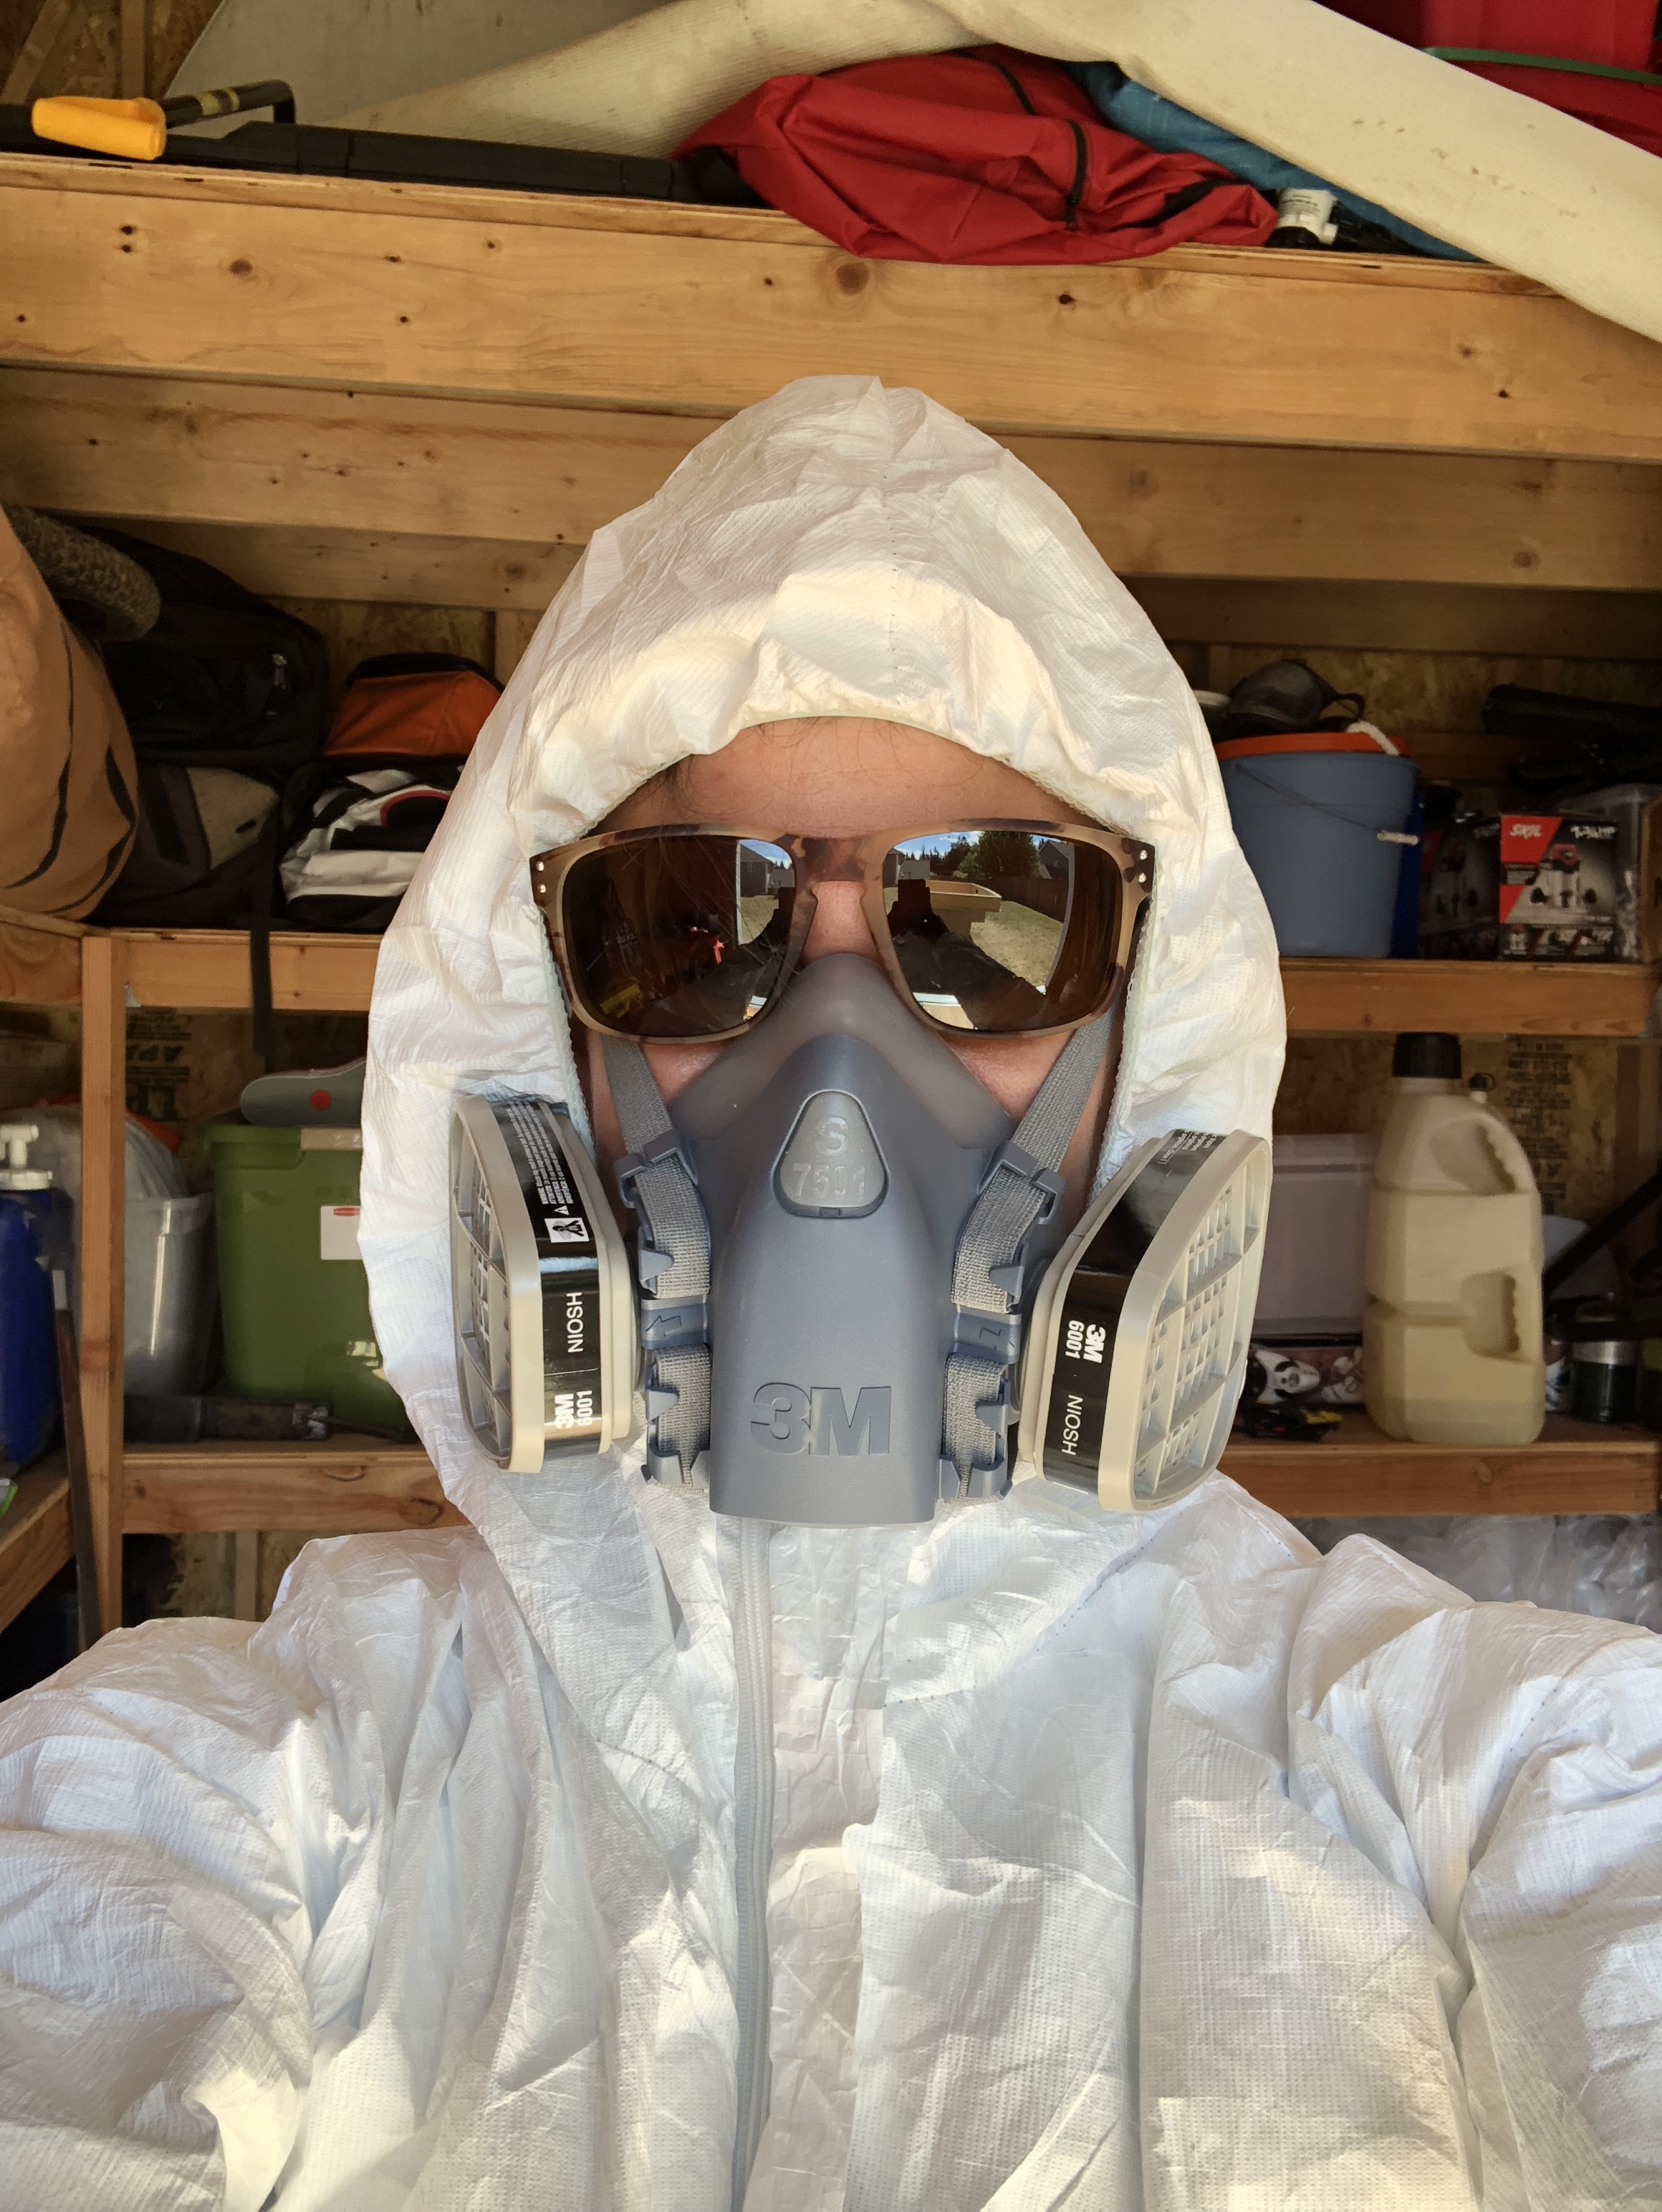
Pretty sure I have some form of heat stroke now.. but the sanding is done! We also went through and added some filler. Since the fiberglass is so thick, it makes fairly obvious seams where it overlaps, so hopefully we can get that smoothed out so it's less noticeable.
Pretty sure I have some form of heat stroke now.. but the sanding is done! We also went through and added some filler. Since the fiberglass is so thick, it makes fairly obvious seams where it overlaps, so hopefully we can get that smoothed out so it's less noticeable.
underkill
Active member
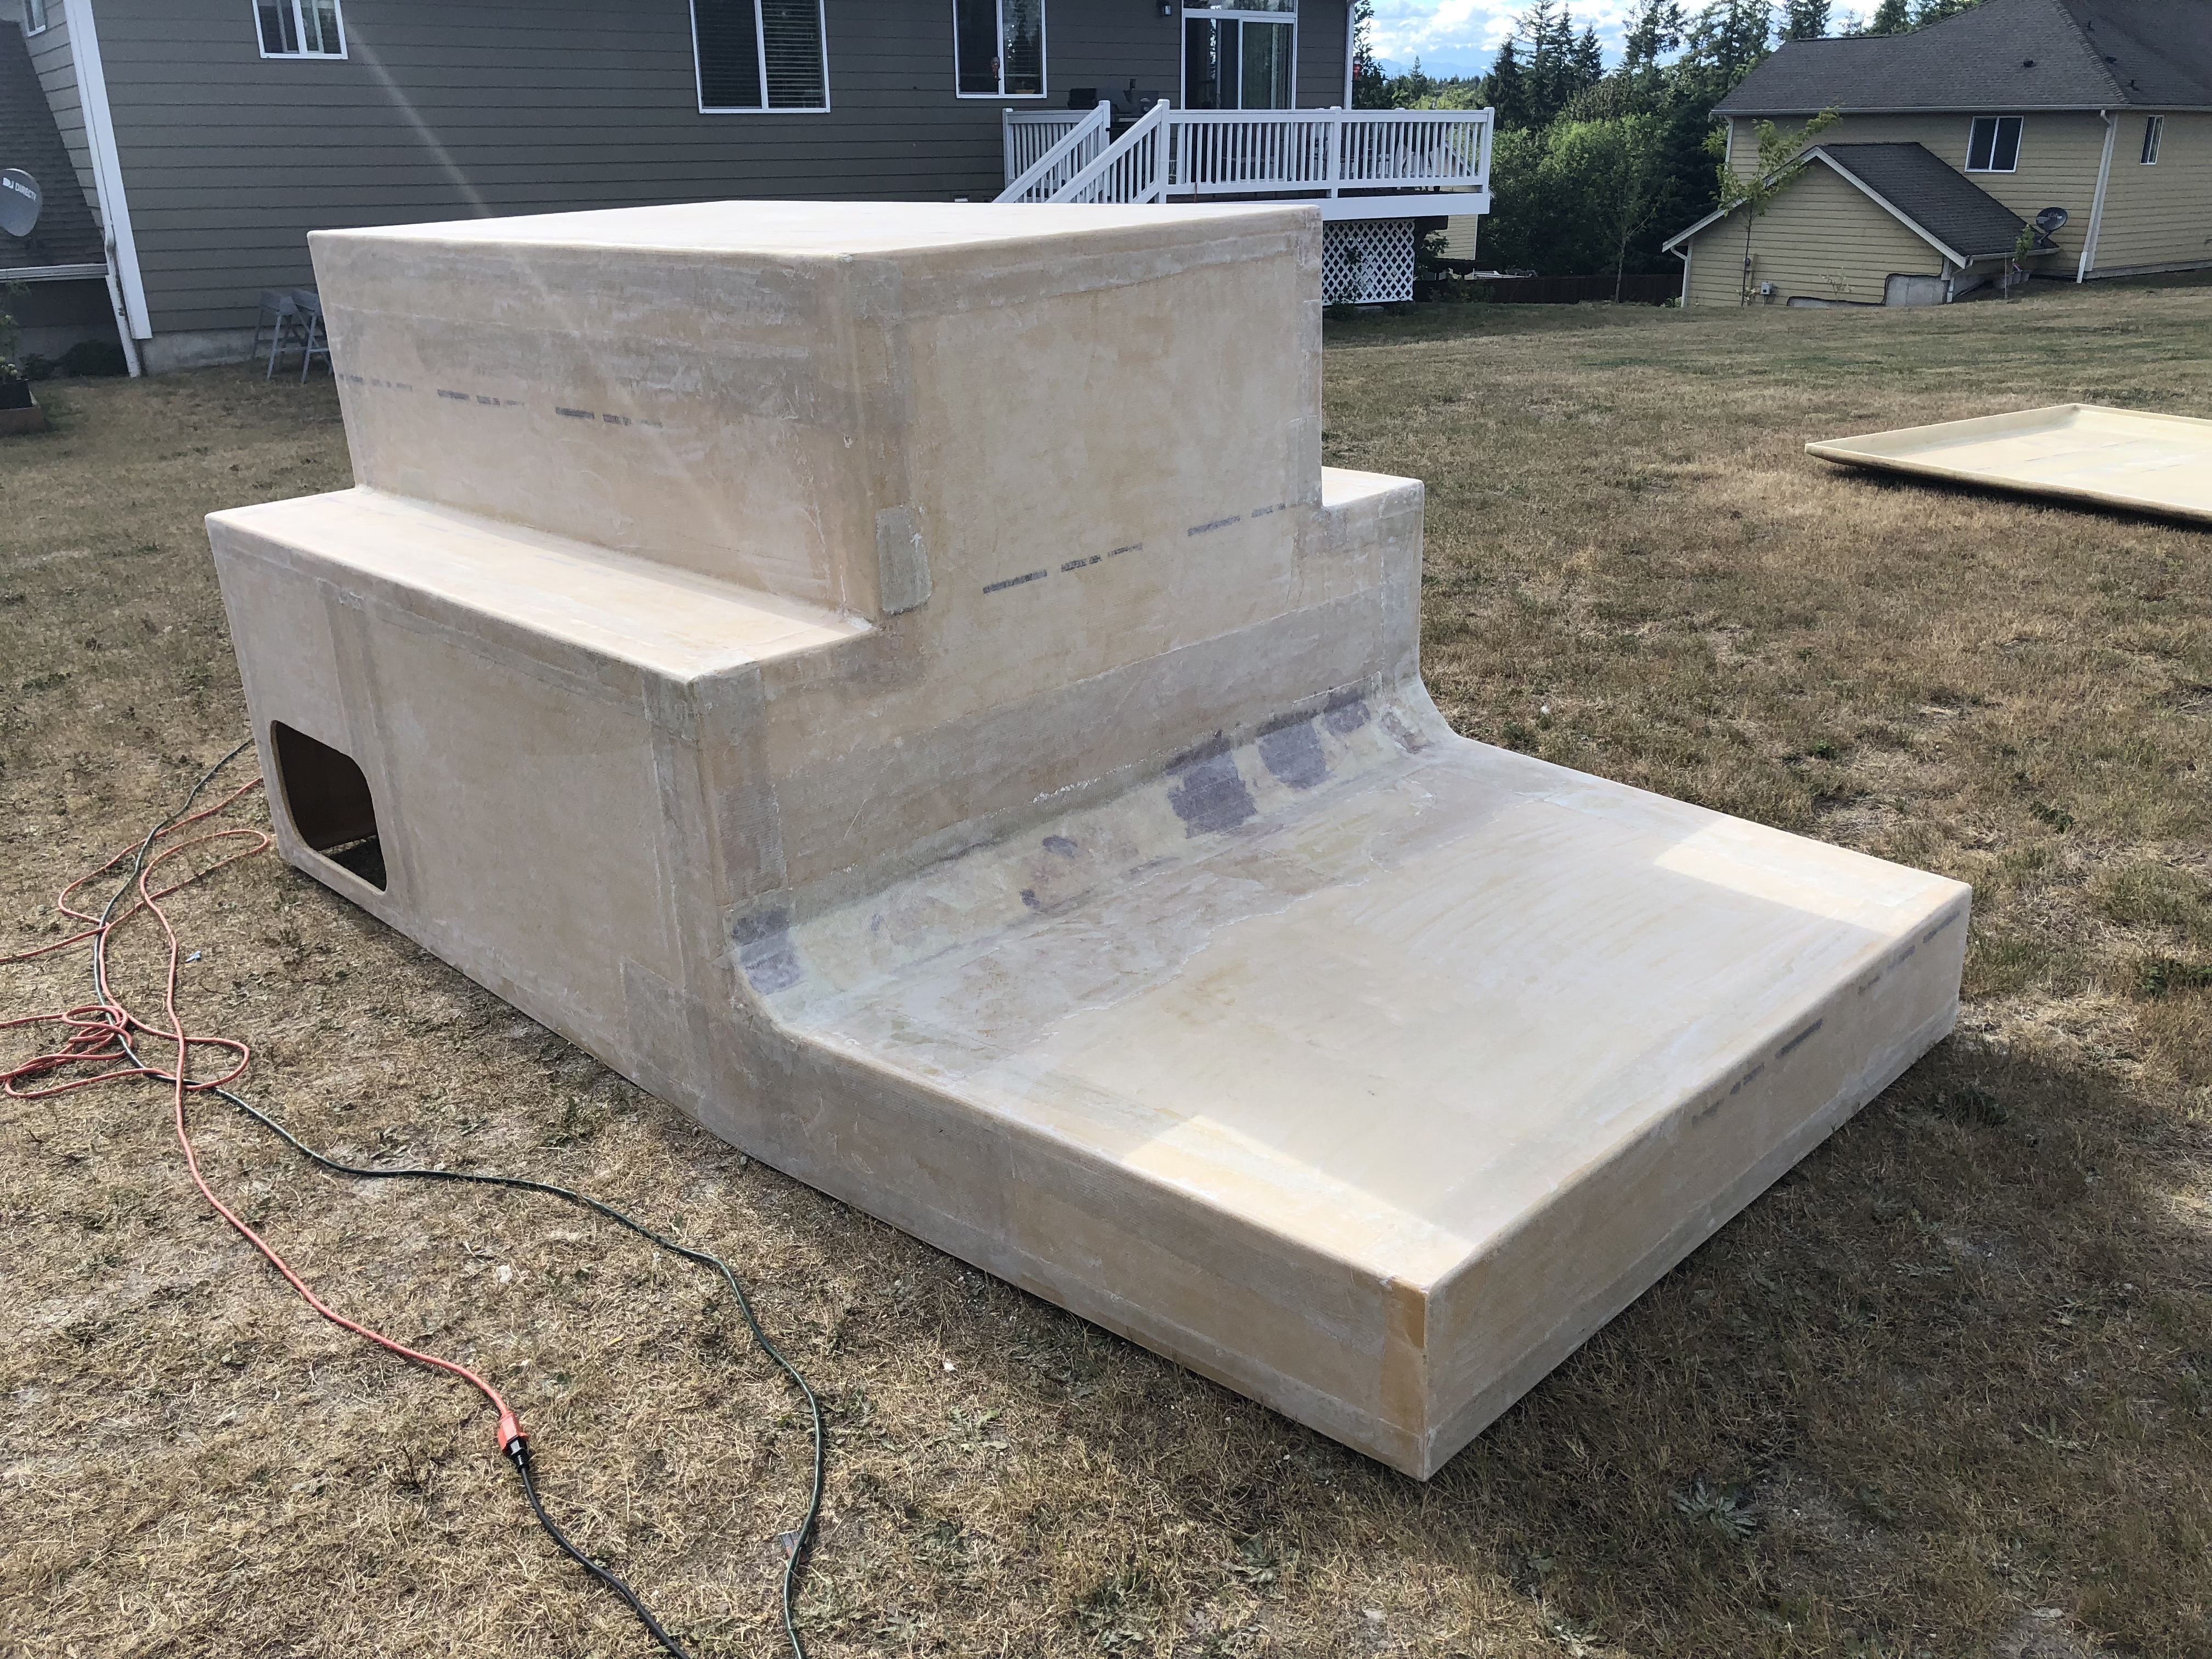
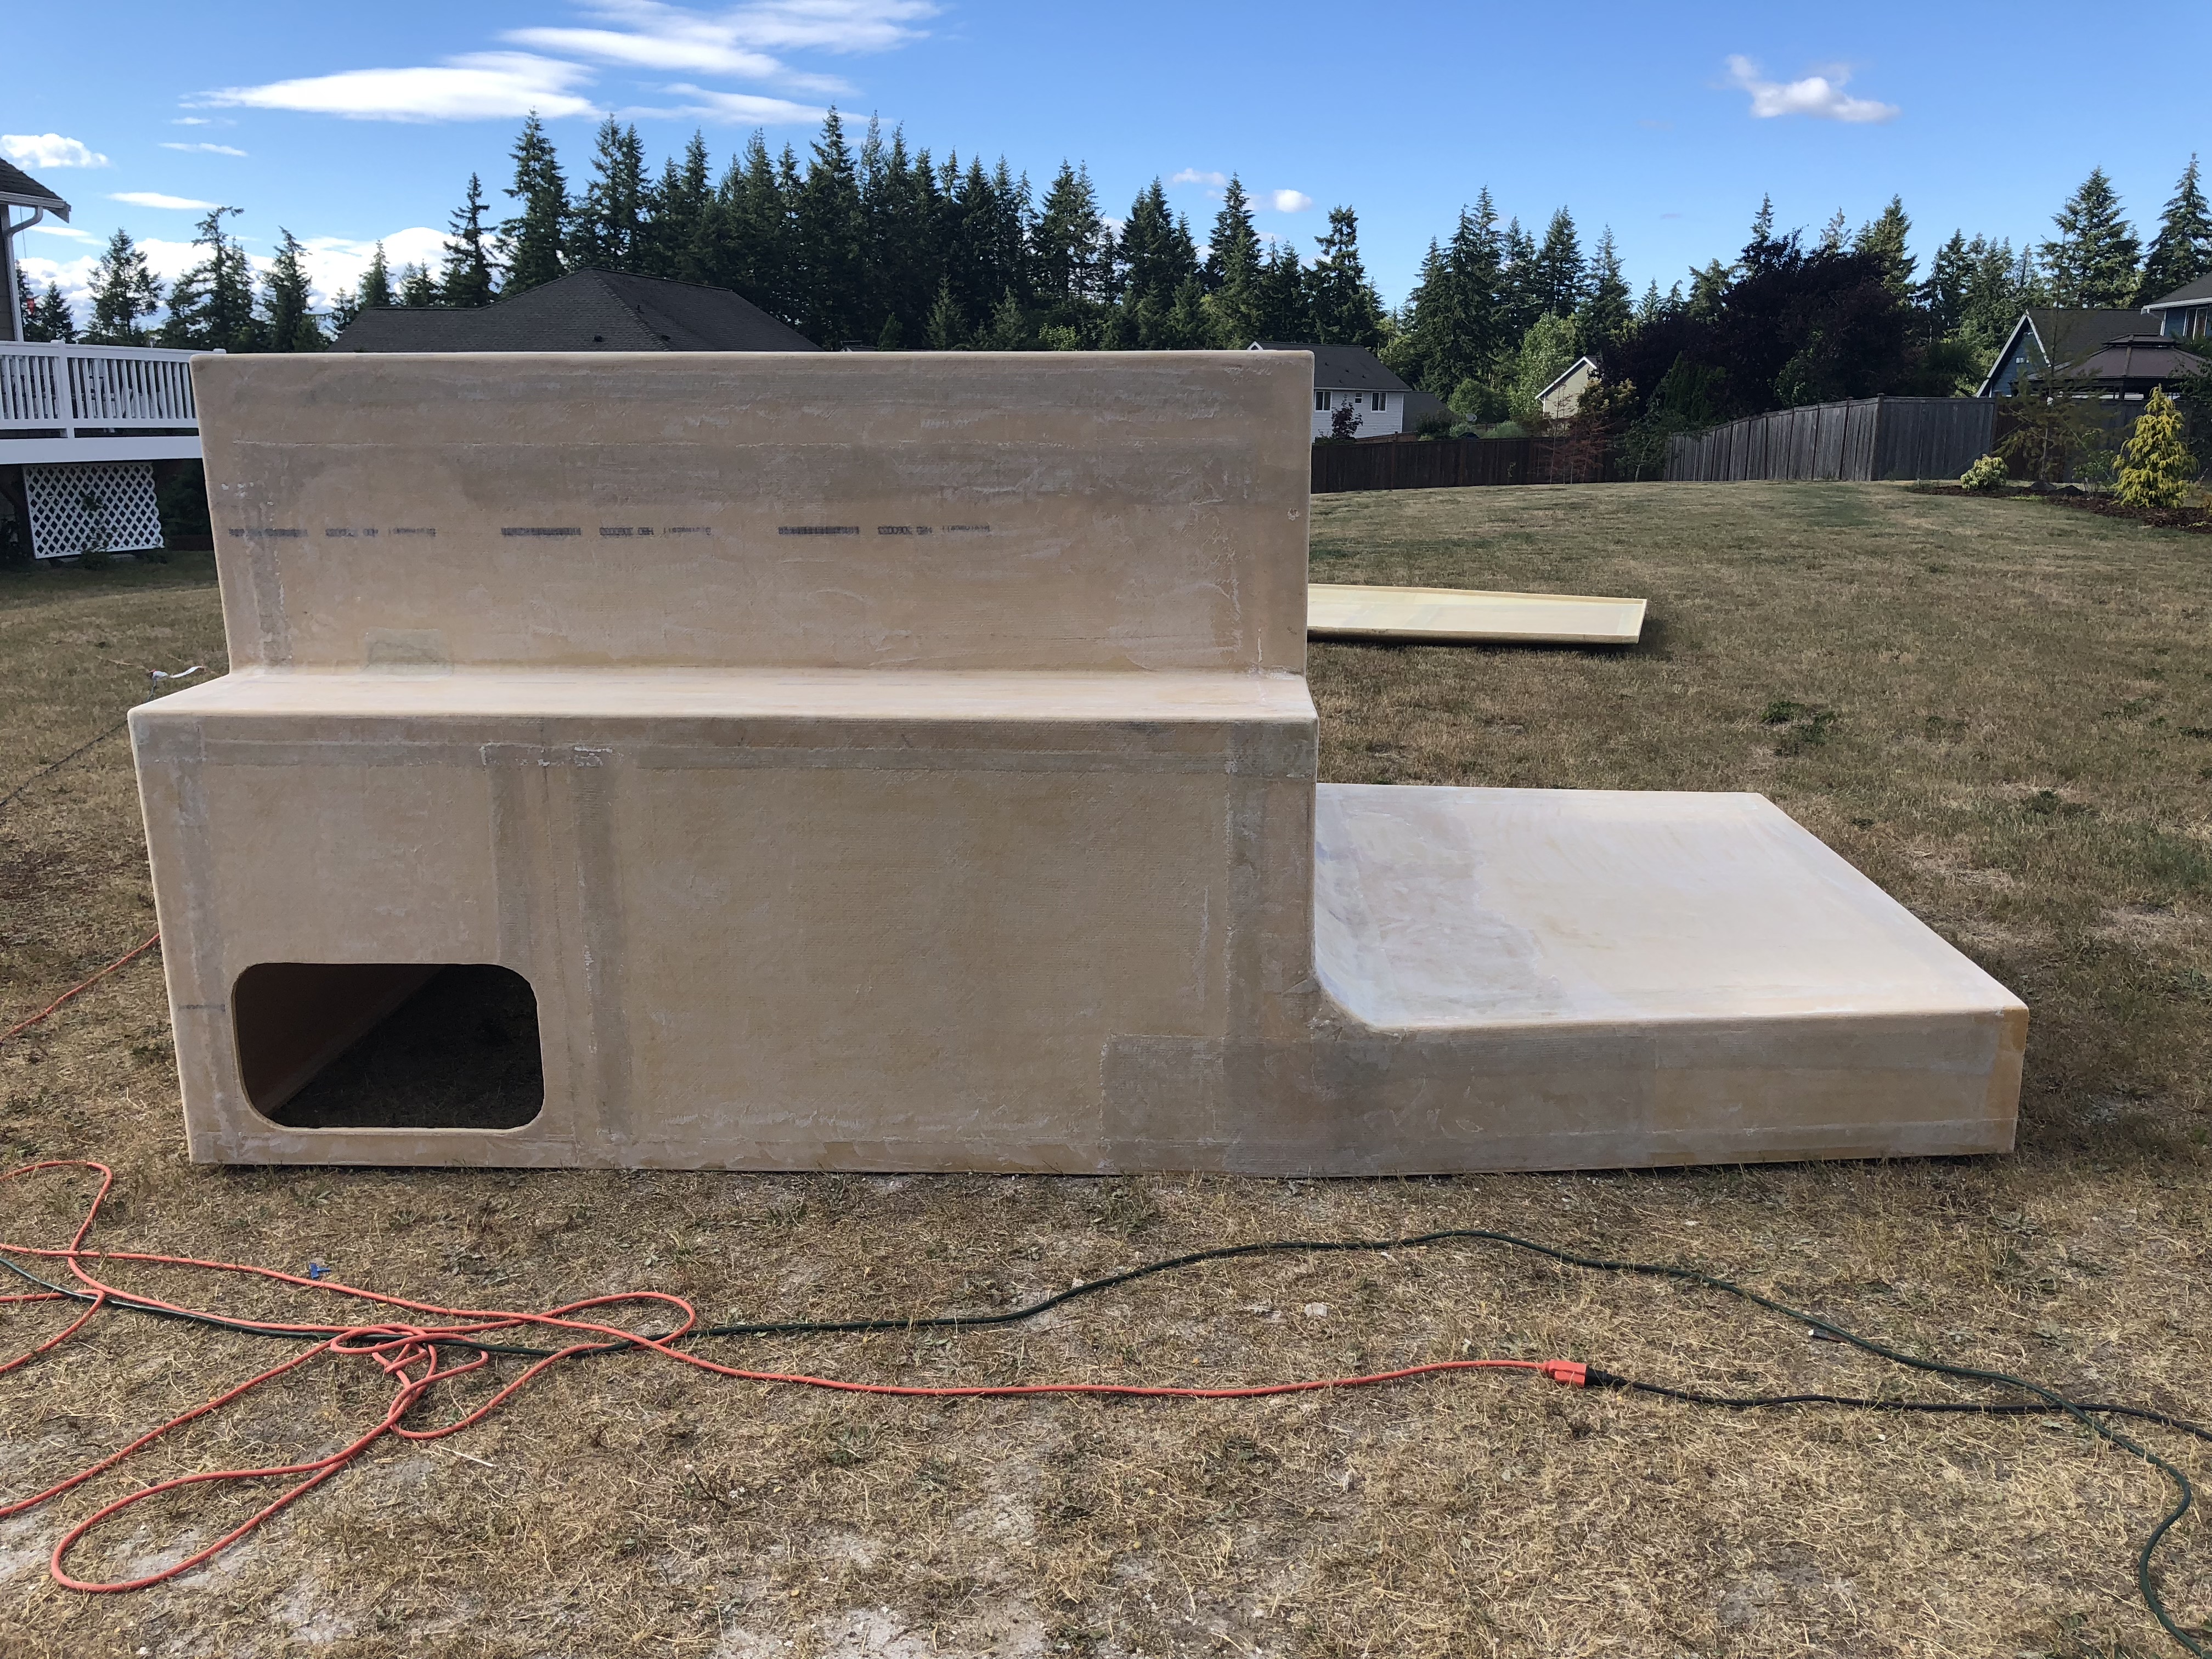
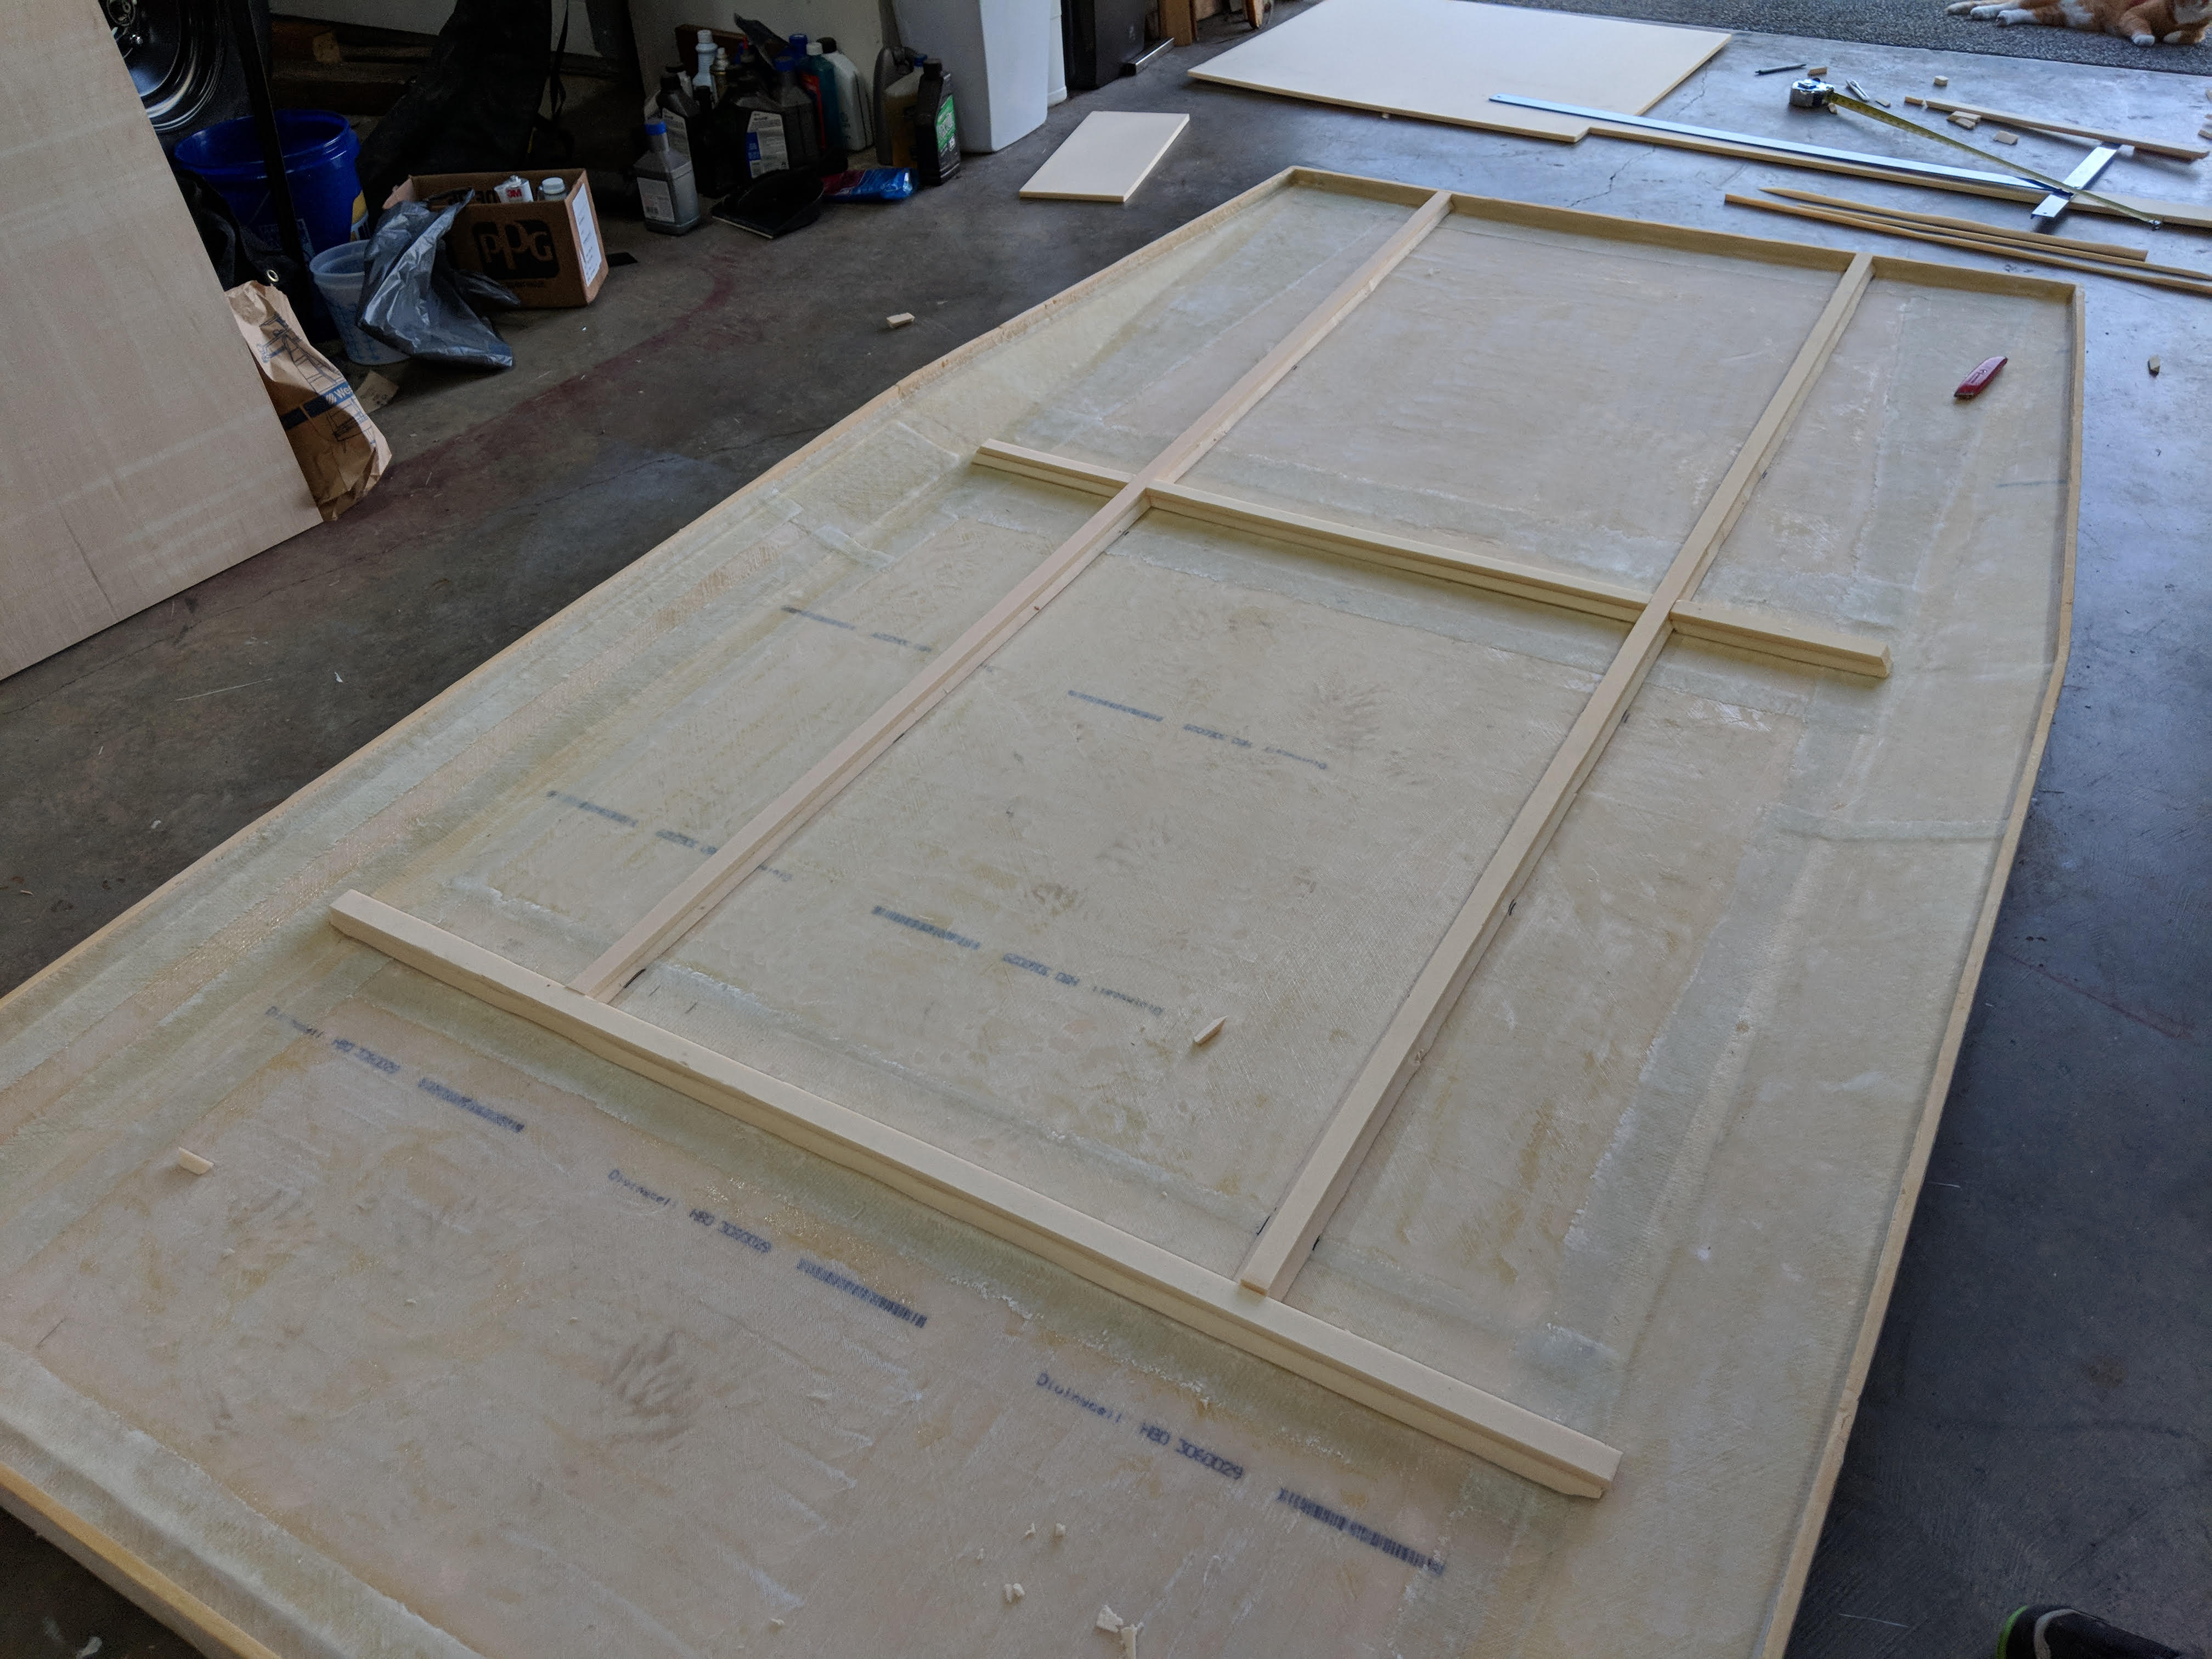
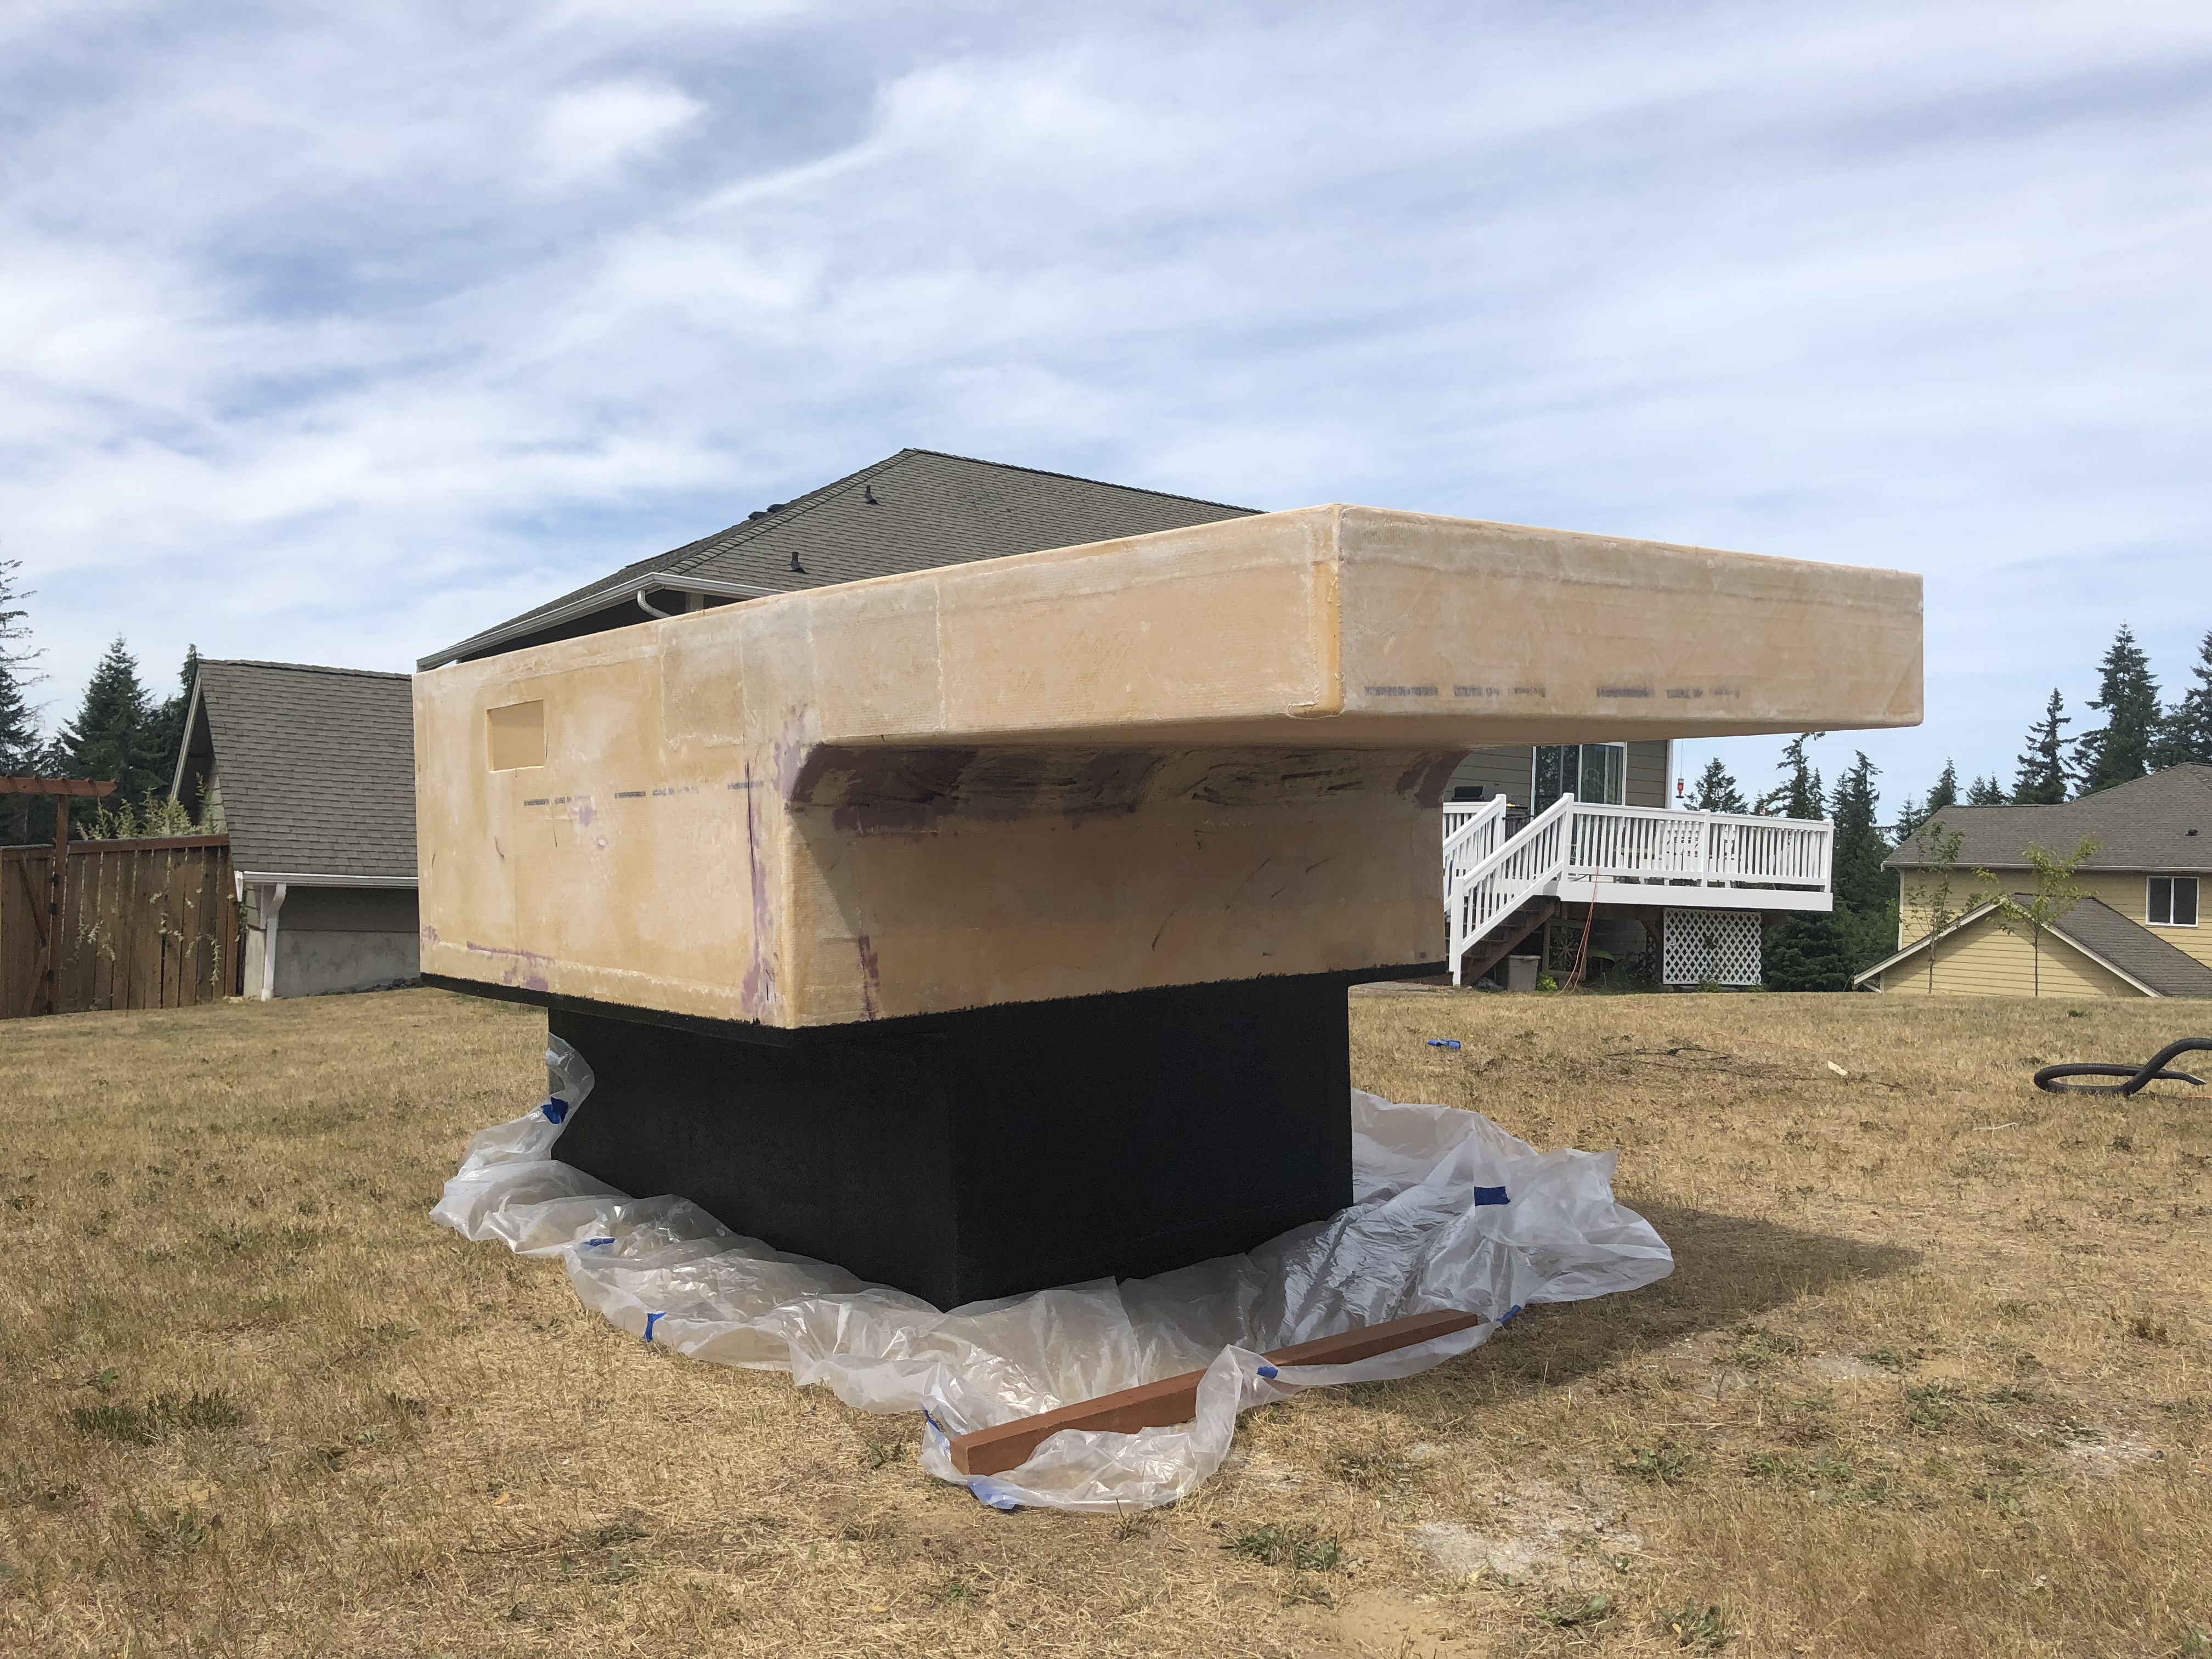
We spent the morning running around getting paint and supplies, which always feels like a giant waste of time when we could be doing actual work. Eventually we made it back home and I started sanding the camper shell so the filler would be smooth and all of the rough edges would stop tearing up my hands. The camper will be a lot less dangerous to handle now! Jason started sanding the underside of the roof so we could add some stiffening to it. I had hoped that maybe it would be stiff enough without it, but that wasn't the case. It's too large of an unsupported panel and still flexed.
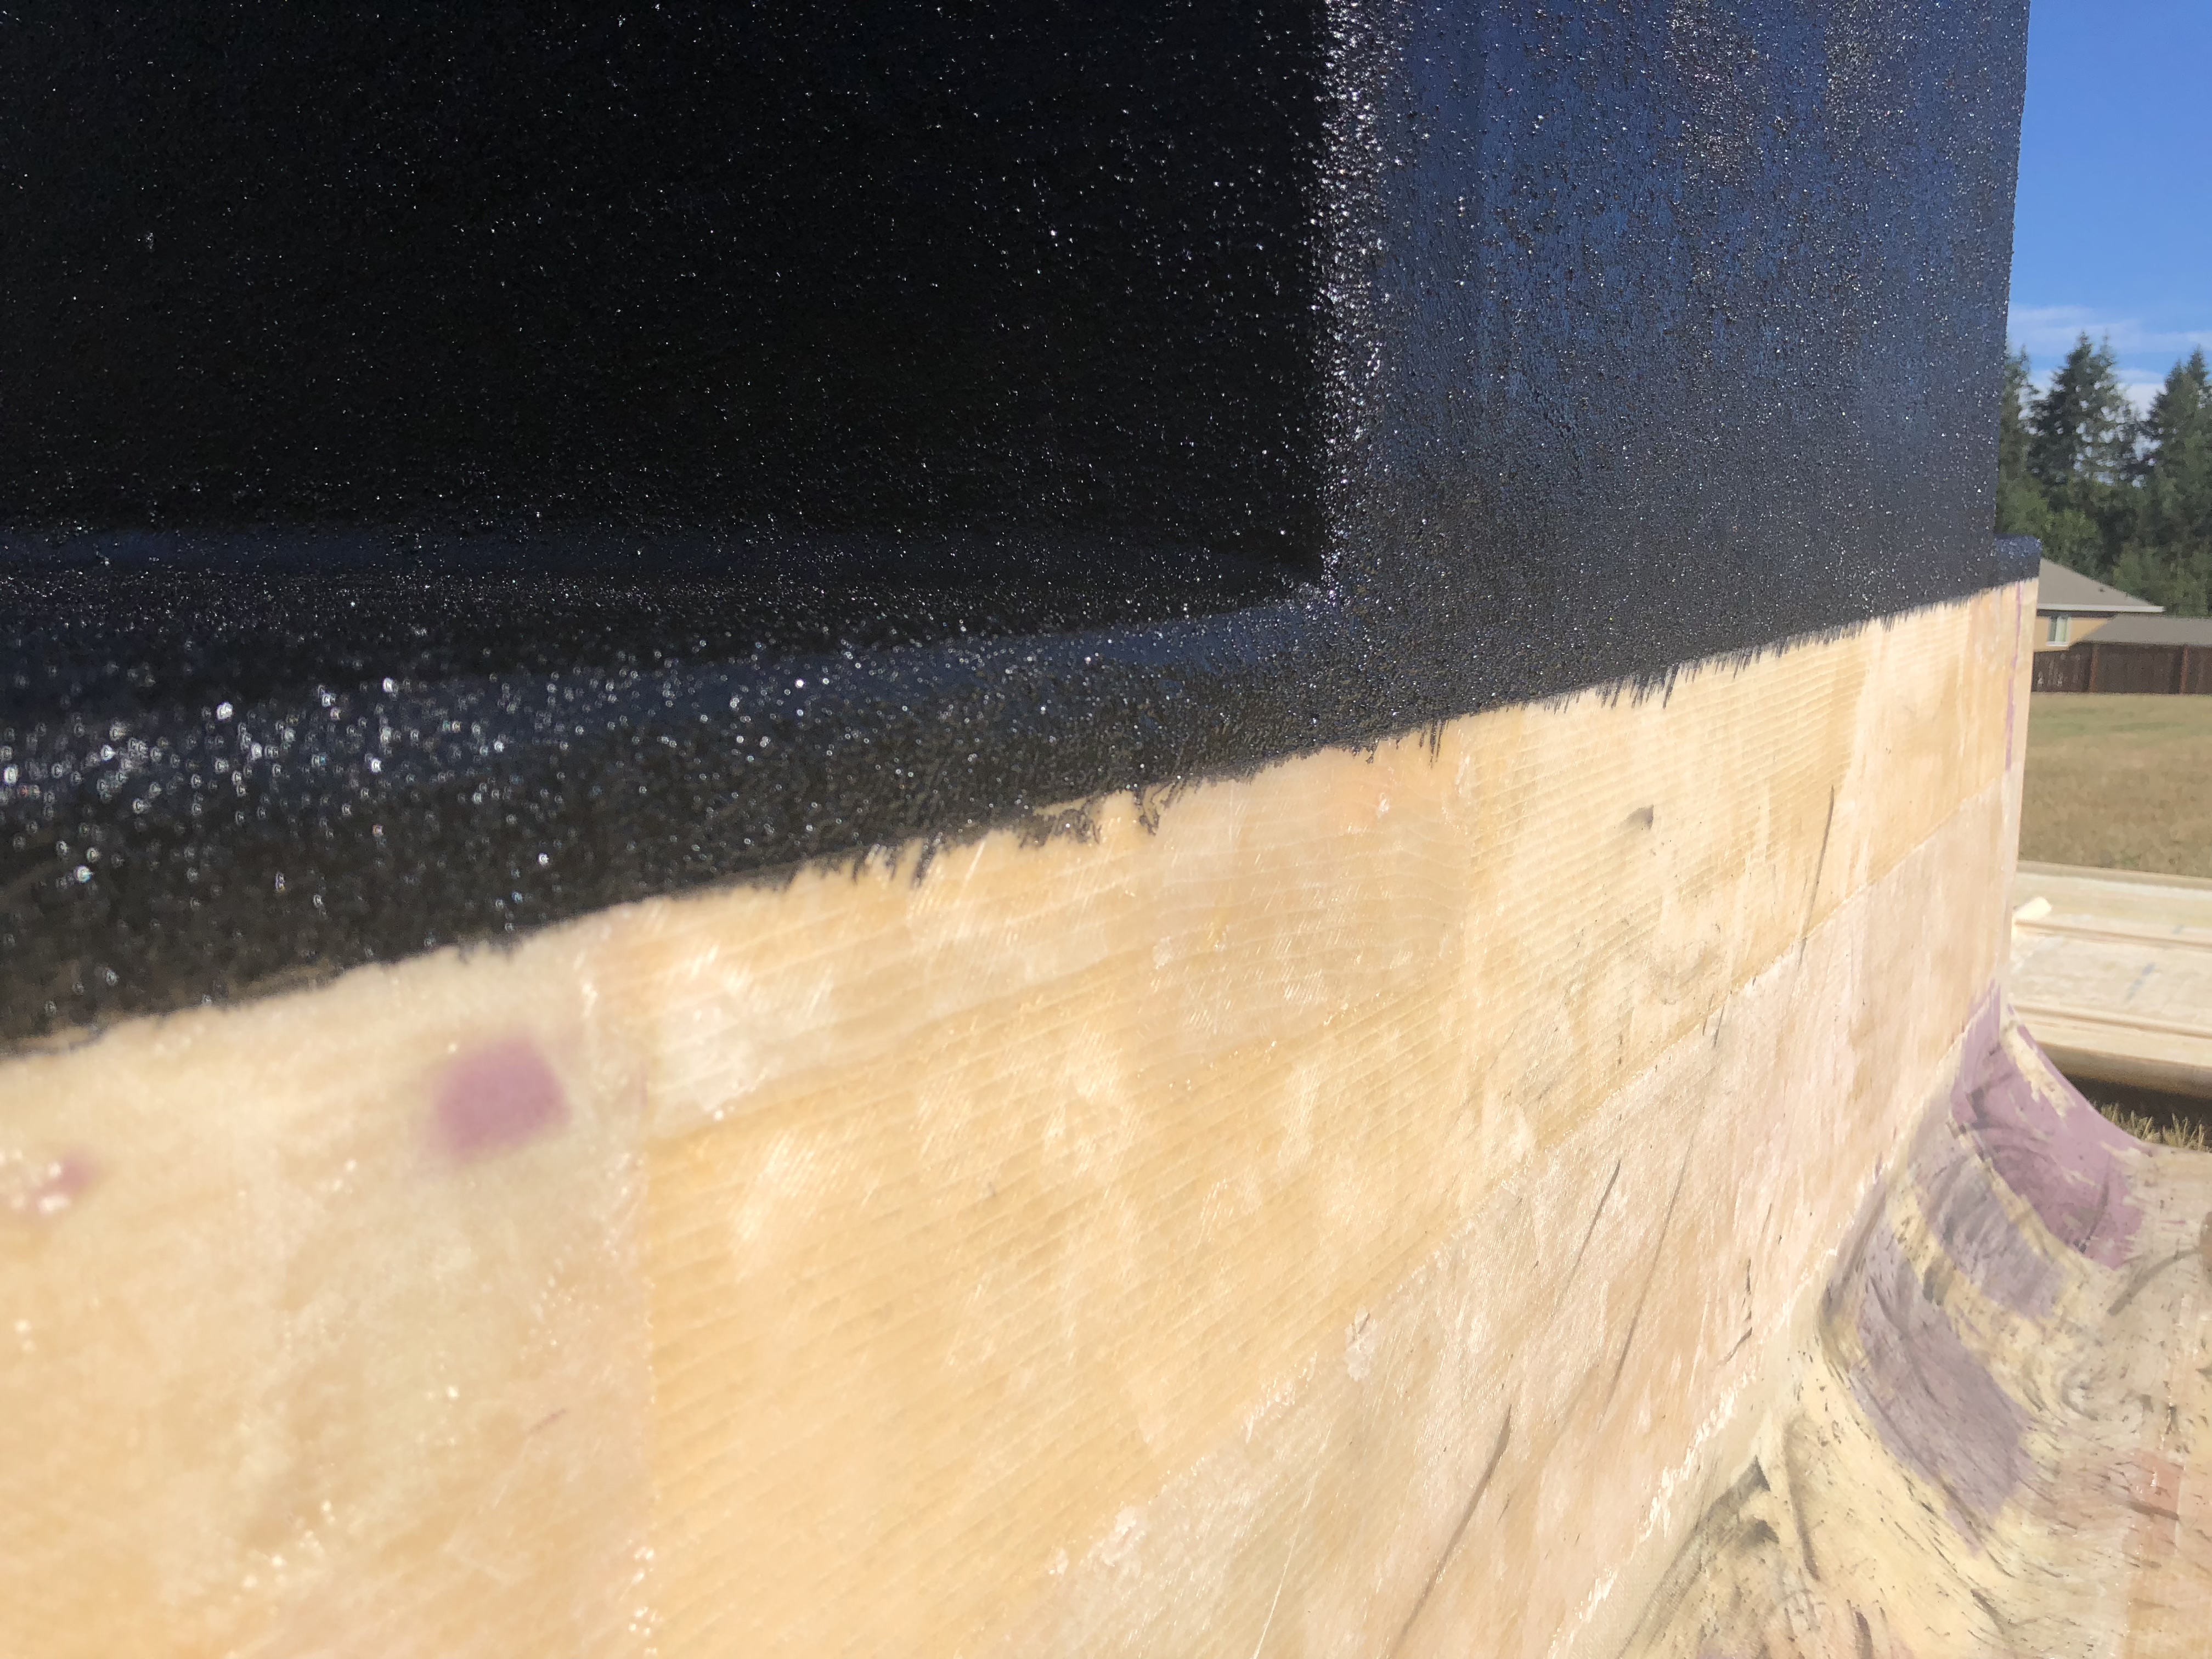
I was adamant that this be the last time we flip the camper shell upside down and got it into my head that we had to paint the lower half of it today. We bought some heavy duty roll on bedliner that looked like it would stand up to the camper and truck bed. In hindsight, I should have at least painted a strip of the main color paint first because masking over bedliner isn't possible and I feel like an idiot now... It worked out in the end but I had to freehand the entire border when we did final paint.
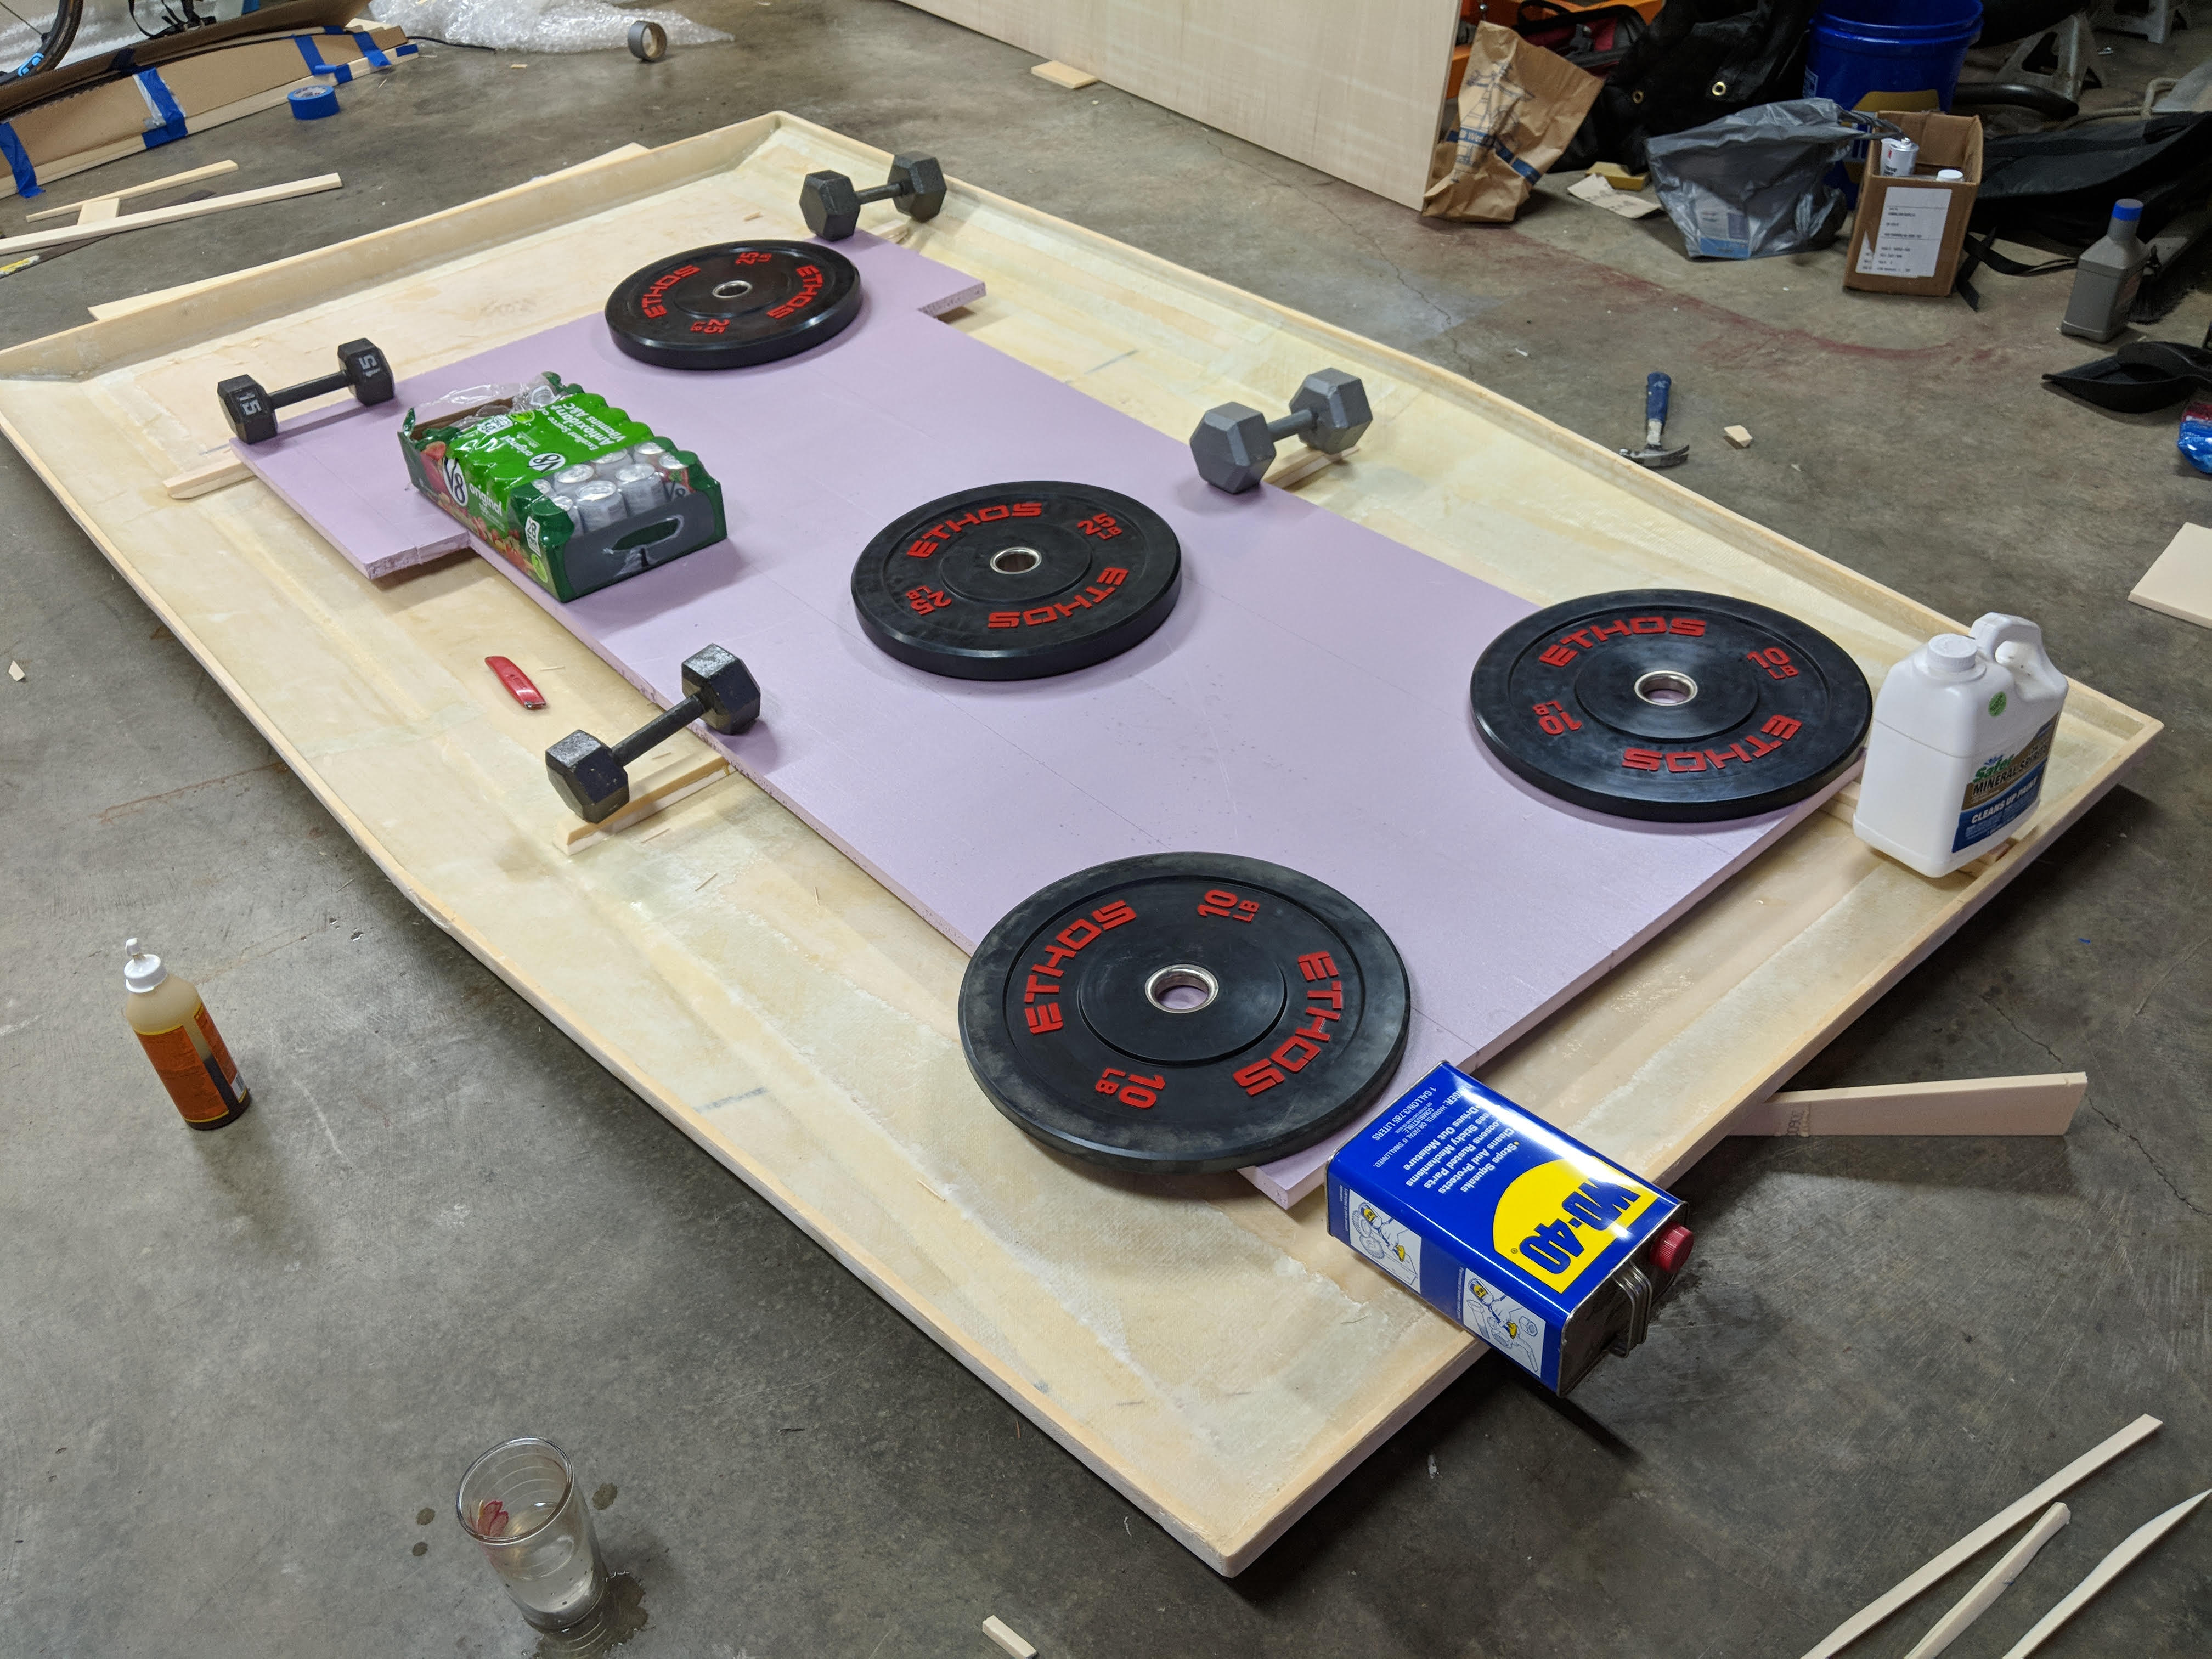
Back out in the garage, Jason had cut some of the foam with nice radius edges and had it laid out to stiffen the roof up. It looked exactly like I wanted. It doesn't show in the pictures really well, but there are 2 layers. The base is slightly wider than the top piece so it should look really slick when it's sanded out.
Time for some glue... Using everything heavy-ish in the garage that we could find. Also, that pink foam ended up being useful so it wasn't a total waste.
Also... we got a cat! This isn't our cat.. he just came to hang out with us for a while and then left. Pretty chill little dude.
I was adamant that this be the last time we flip the camper shell upside down and got it into my head that we had to paint the lower half of it today. We bought some heavy duty roll on bedliner that looked like it would stand up to the camper and truck bed. In hindsight, I should have at least painted a strip of the main color paint first because masking over bedliner isn't possible and I feel like an idiot now...
It worked out in the end but I had to freehand the entire border when we did final paint.
Back out in the garage, Jason had cut some of the foam with nice radius edges and had it laid out to stiffen the roof up. It looked exactly like I wanted. It doesn't show in the pictures really well, but there are 2 layers. The base is slightly wider than the top piece so it should look really slick when it's sanded out.
Time for some glue... Using everything heavy-ish in the garage that we could find. Also, that pink foam ended up being useful so it wasn't a total waste.
Also... we got a cat! This isn't our cat.. he just came to hang out with us for a while and then left. Pretty chill little dude.
underkill
Active member
I started working on the nose cone piece again today using cardboard templates, but it was just an epic failure. I was originally going to just sculpt something out of the pink foam and then remove it to have a solid glass shell, but Jason wanted to make it structural to hold the lights. It wasn't working, so I just gave up and went to something else. We don't technically need it to use the camper, so we can procrastinate on that a little longer.

We decided to dig the roof out from underneath all the weights that we stacked on it last night to hold it in place while the glue dried.
It didn't take long to round off all the corners of the foam strips!
We decided to use the 3" wide 6oz cloth strips because it would flex around the stiffeners a lot more easily than the 1708. We ended up with 4 layers on each beam and overlap at each joint. It should be plenty strong!
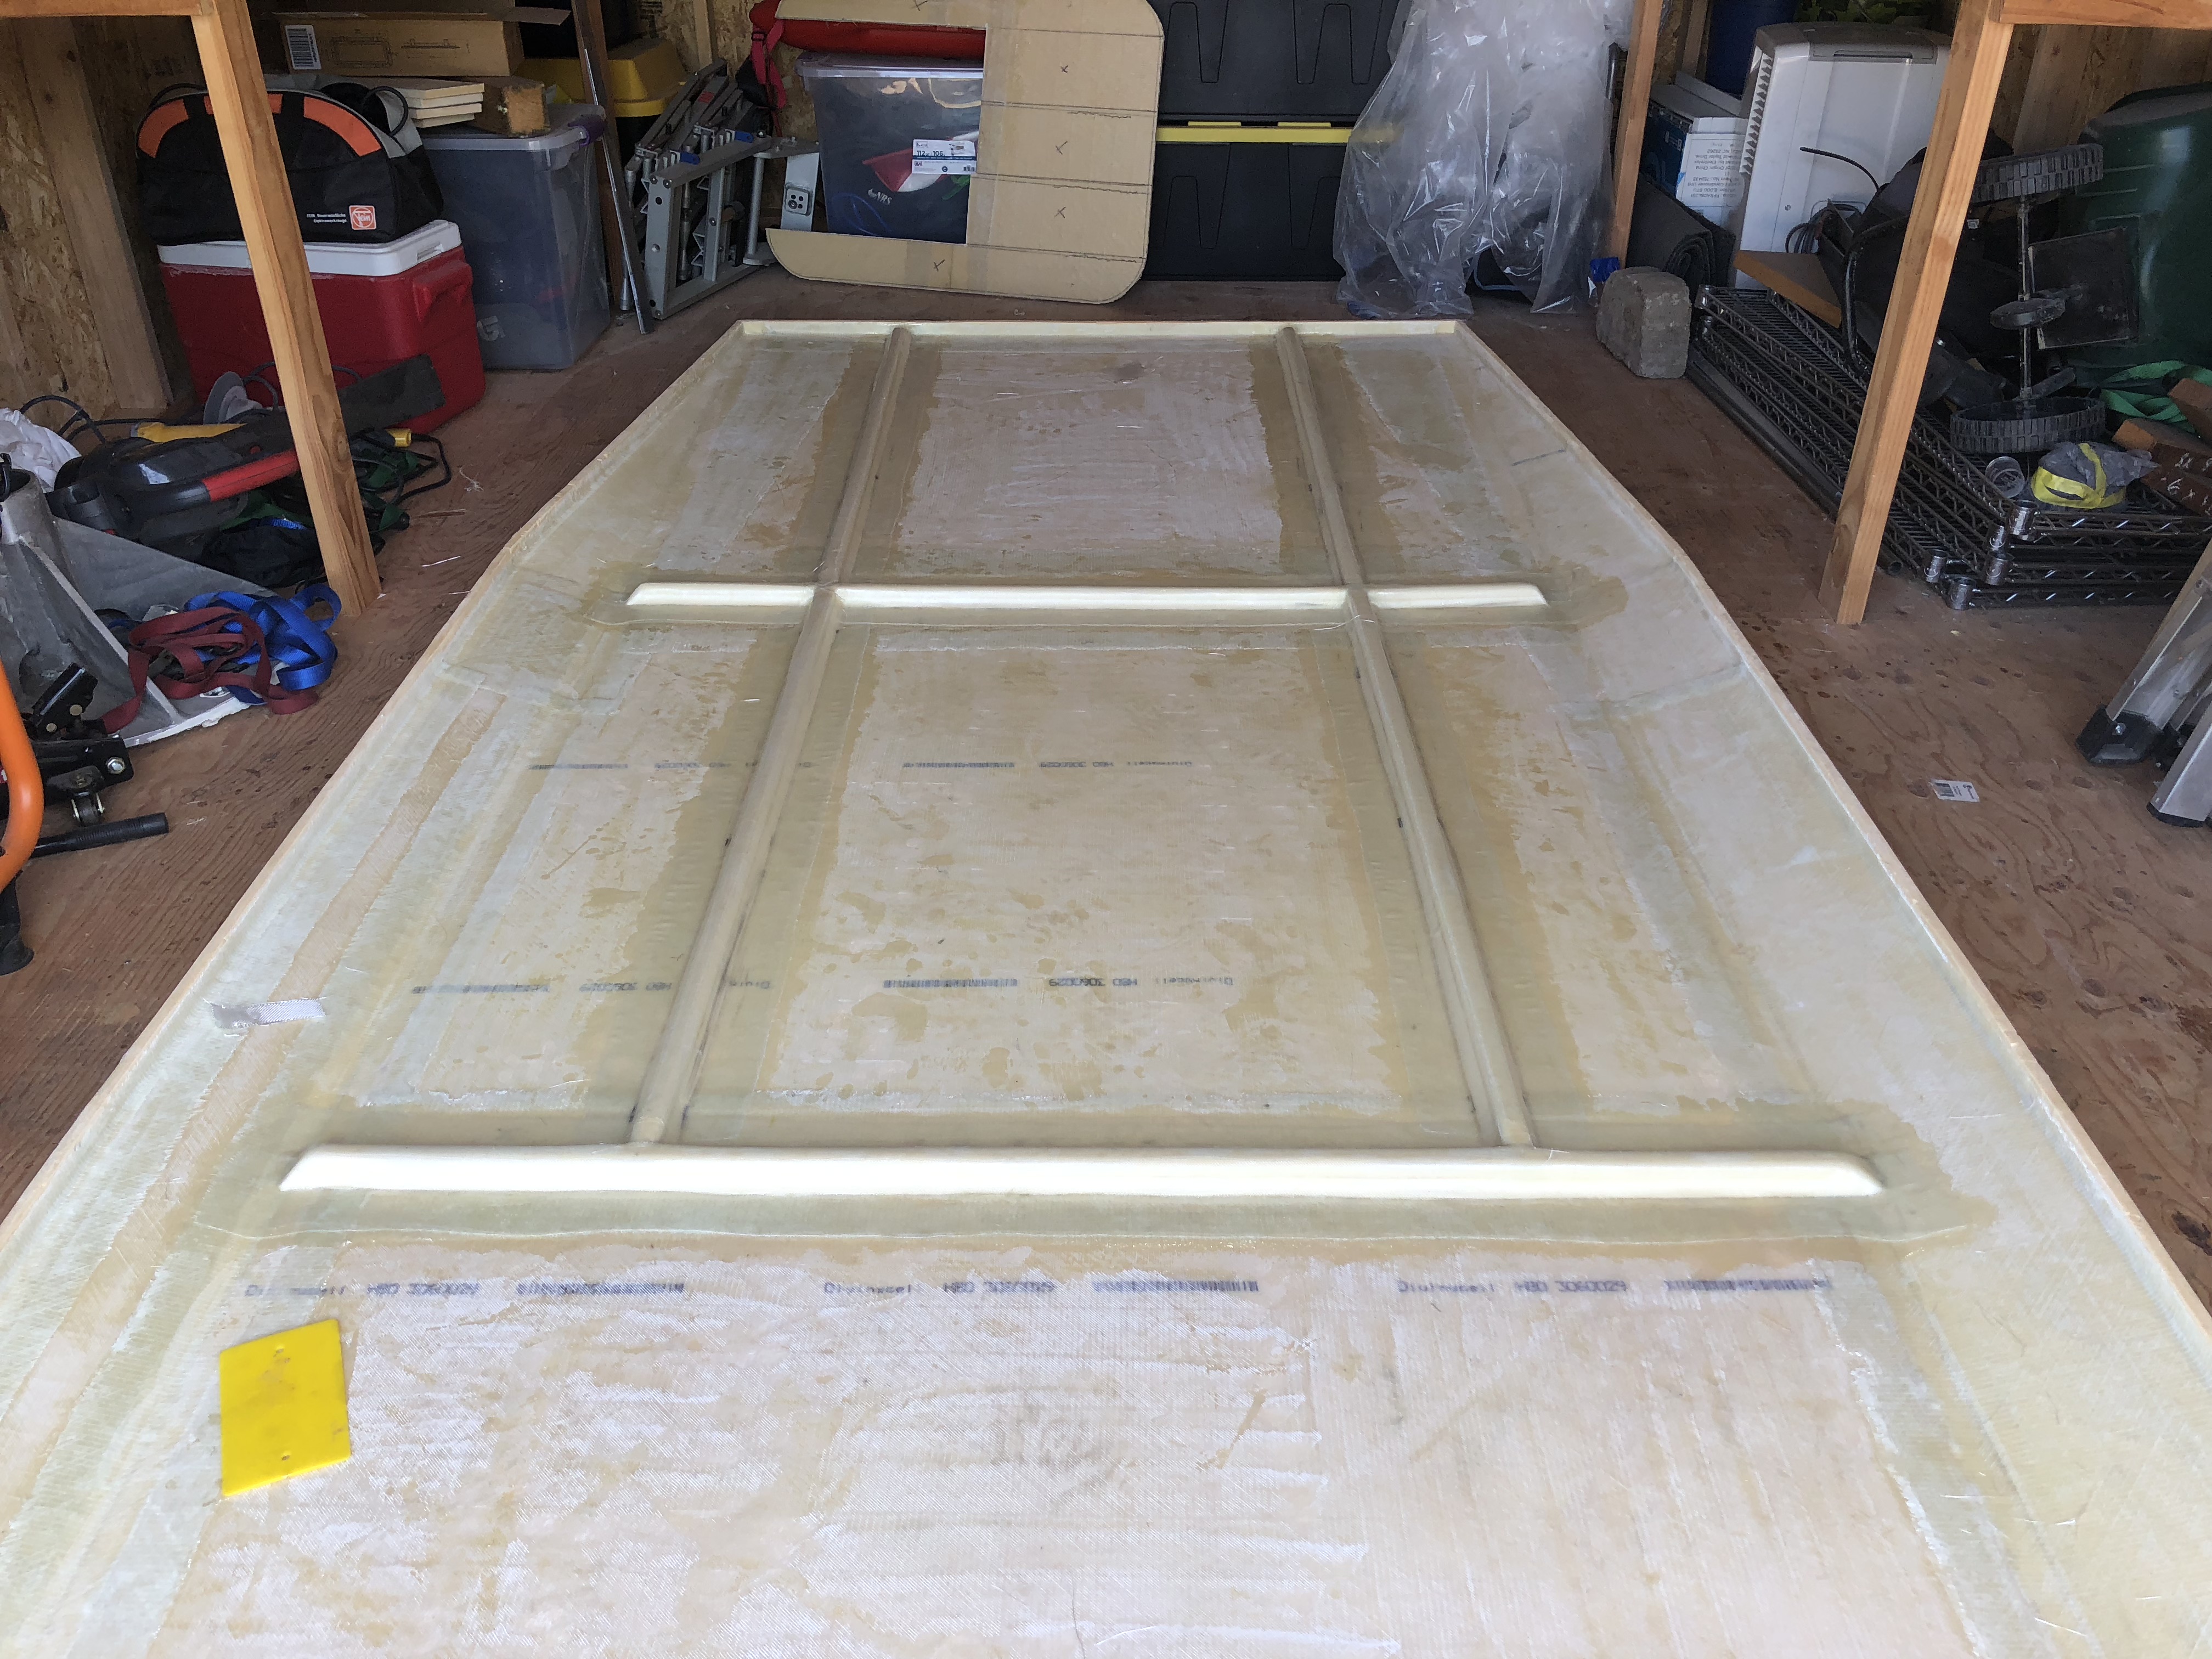
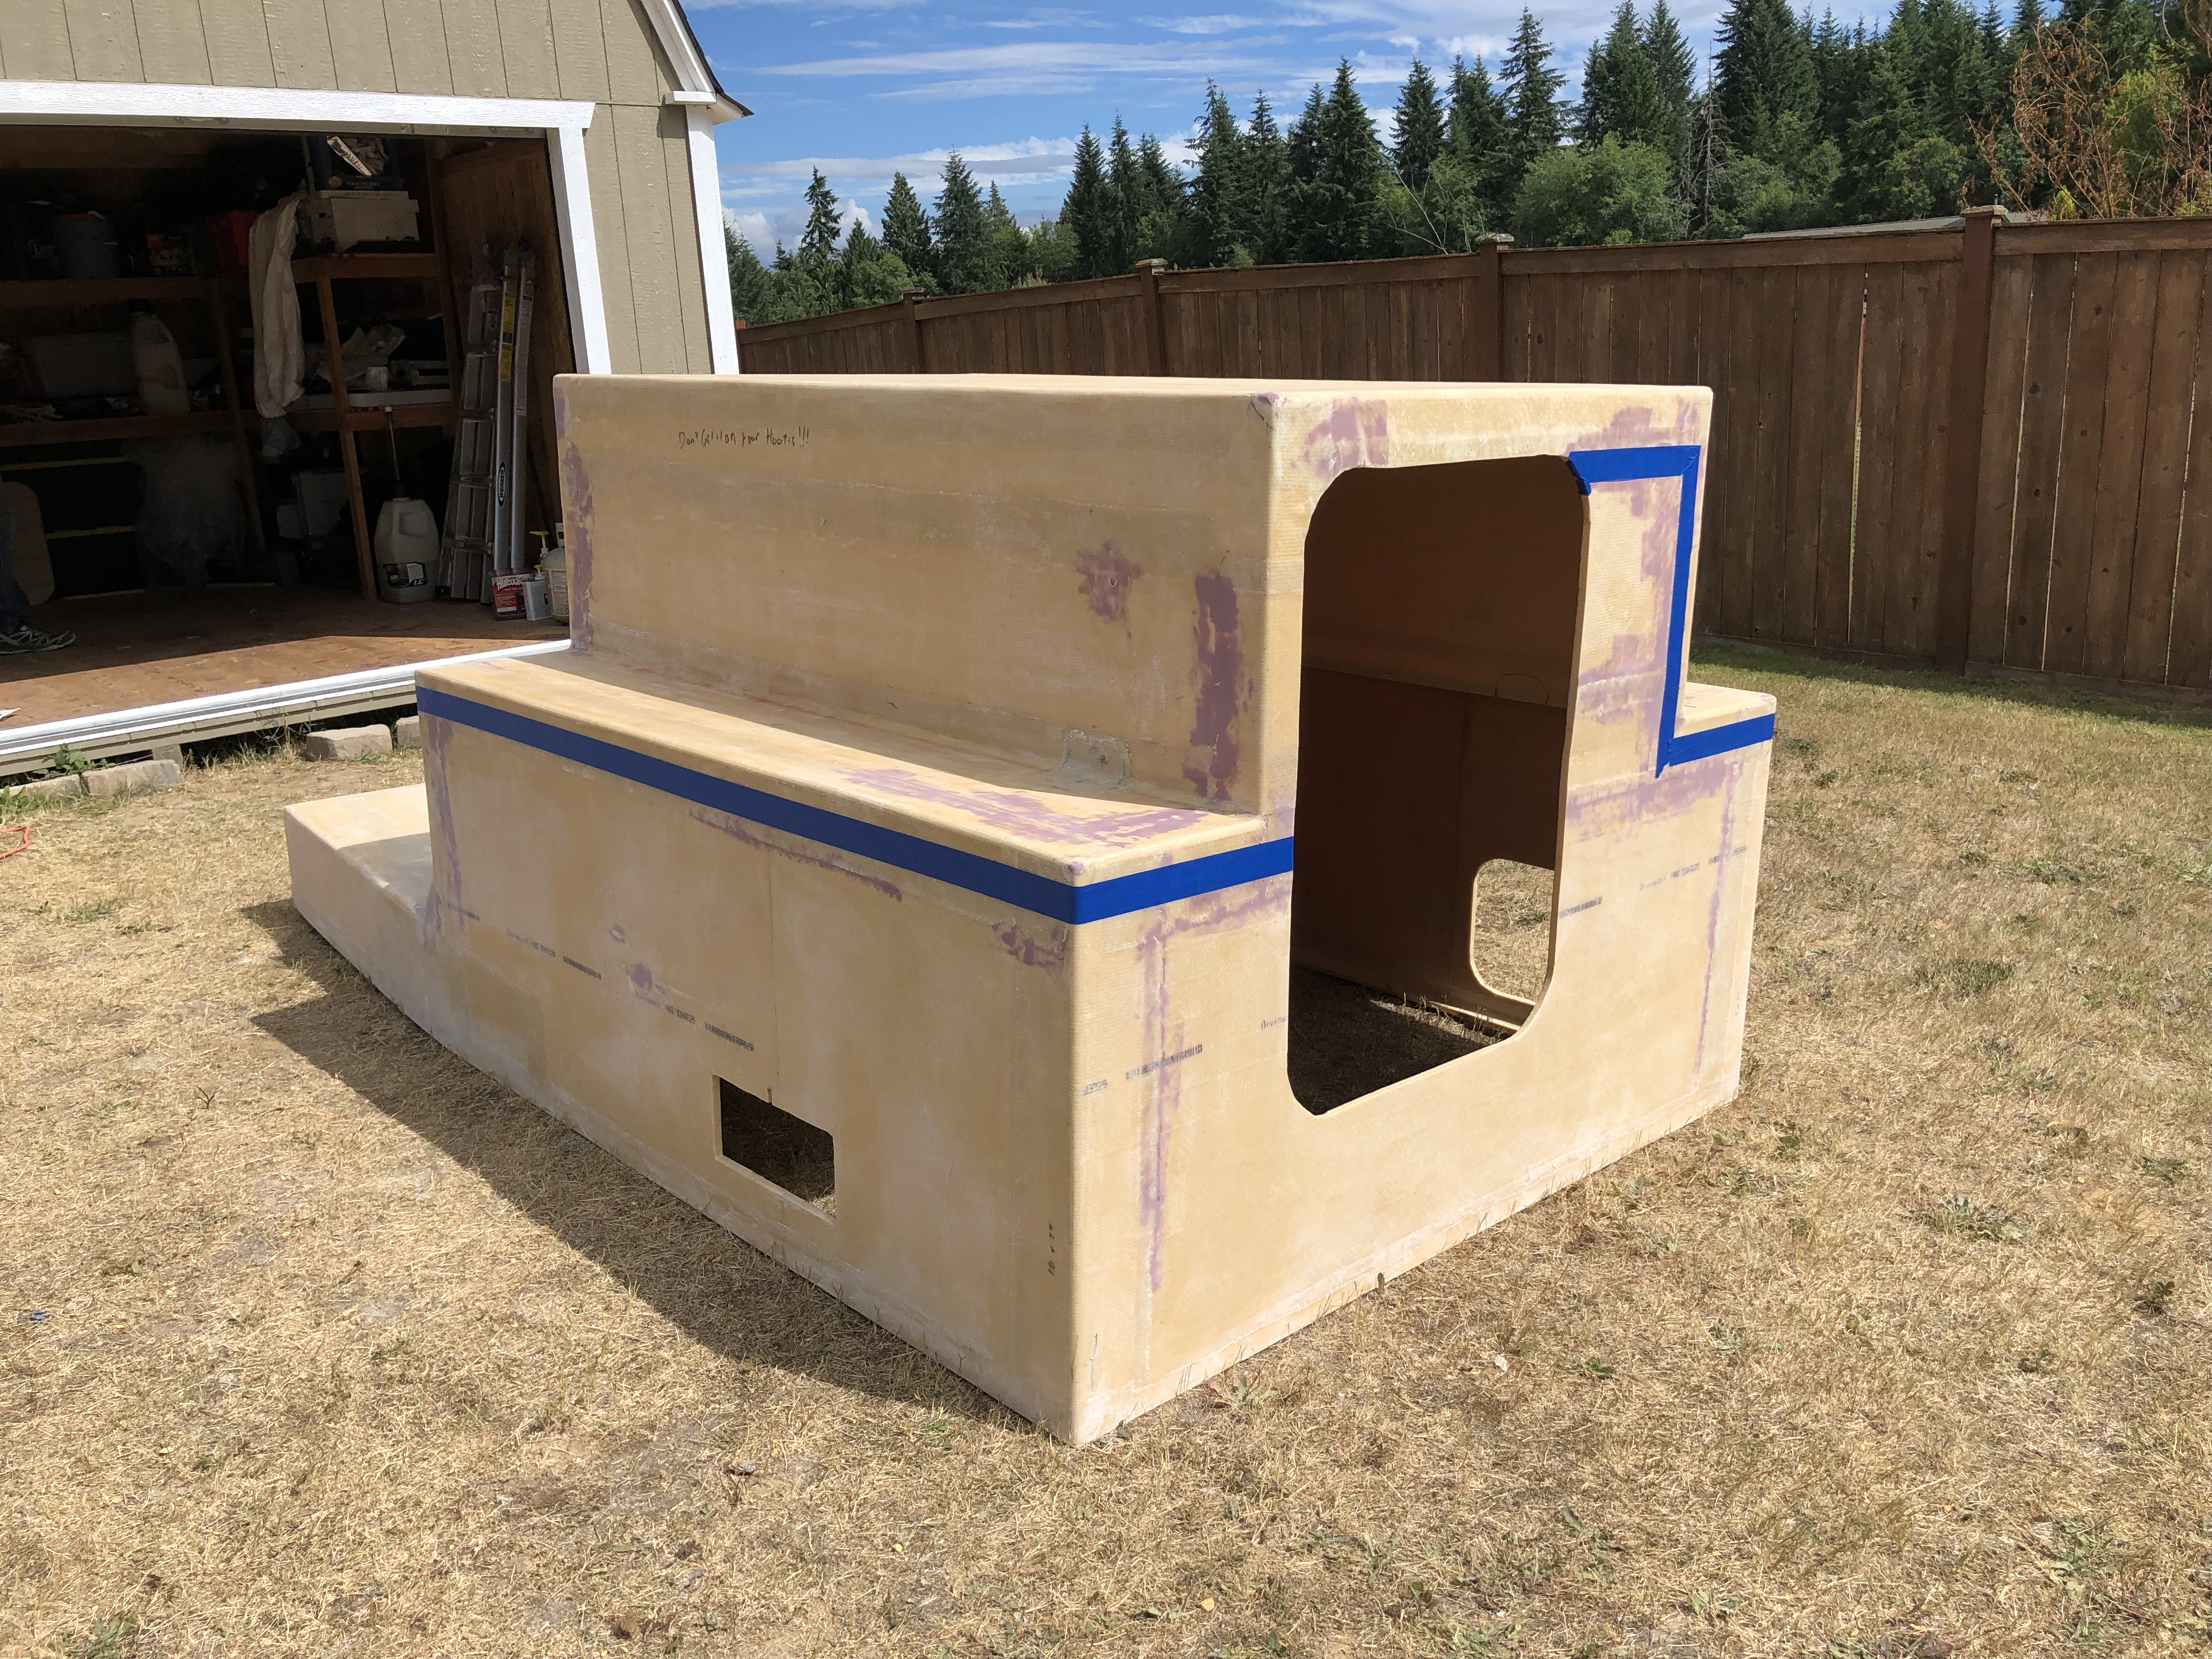
While that was drying we set the shell out in the sun to bake because the Herculiner bedliner was still slightly tacky.
The blue painters tape didn't work AT ALL on the fiberglass, which I should have expected... just one more reason to paint the final color first and then bedliner. or do the bedliner in stages.
We decided to dig the roof out from underneath all the weights that we stacked on it last night to hold it in place while the glue dried.
It didn't take long to round off all the corners of the foam strips!
We decided to use the 3" wide 6oz cloth strips because it would flex around the stiffeners a lot more easily than the 1708. We ended up with 4 layers on each beam and overlap at each joint. It should be plenty strong!
While that was drying we set the shell out in the sun to bake because the Herculiner bedliner was still slightly tacky.
The blue painters tape didn't work AT ALL on the fiberglass, which I should have expected... just one more reason to paint the final color first and then bedliner. or do the bedliner in stages.
underkill
Active member
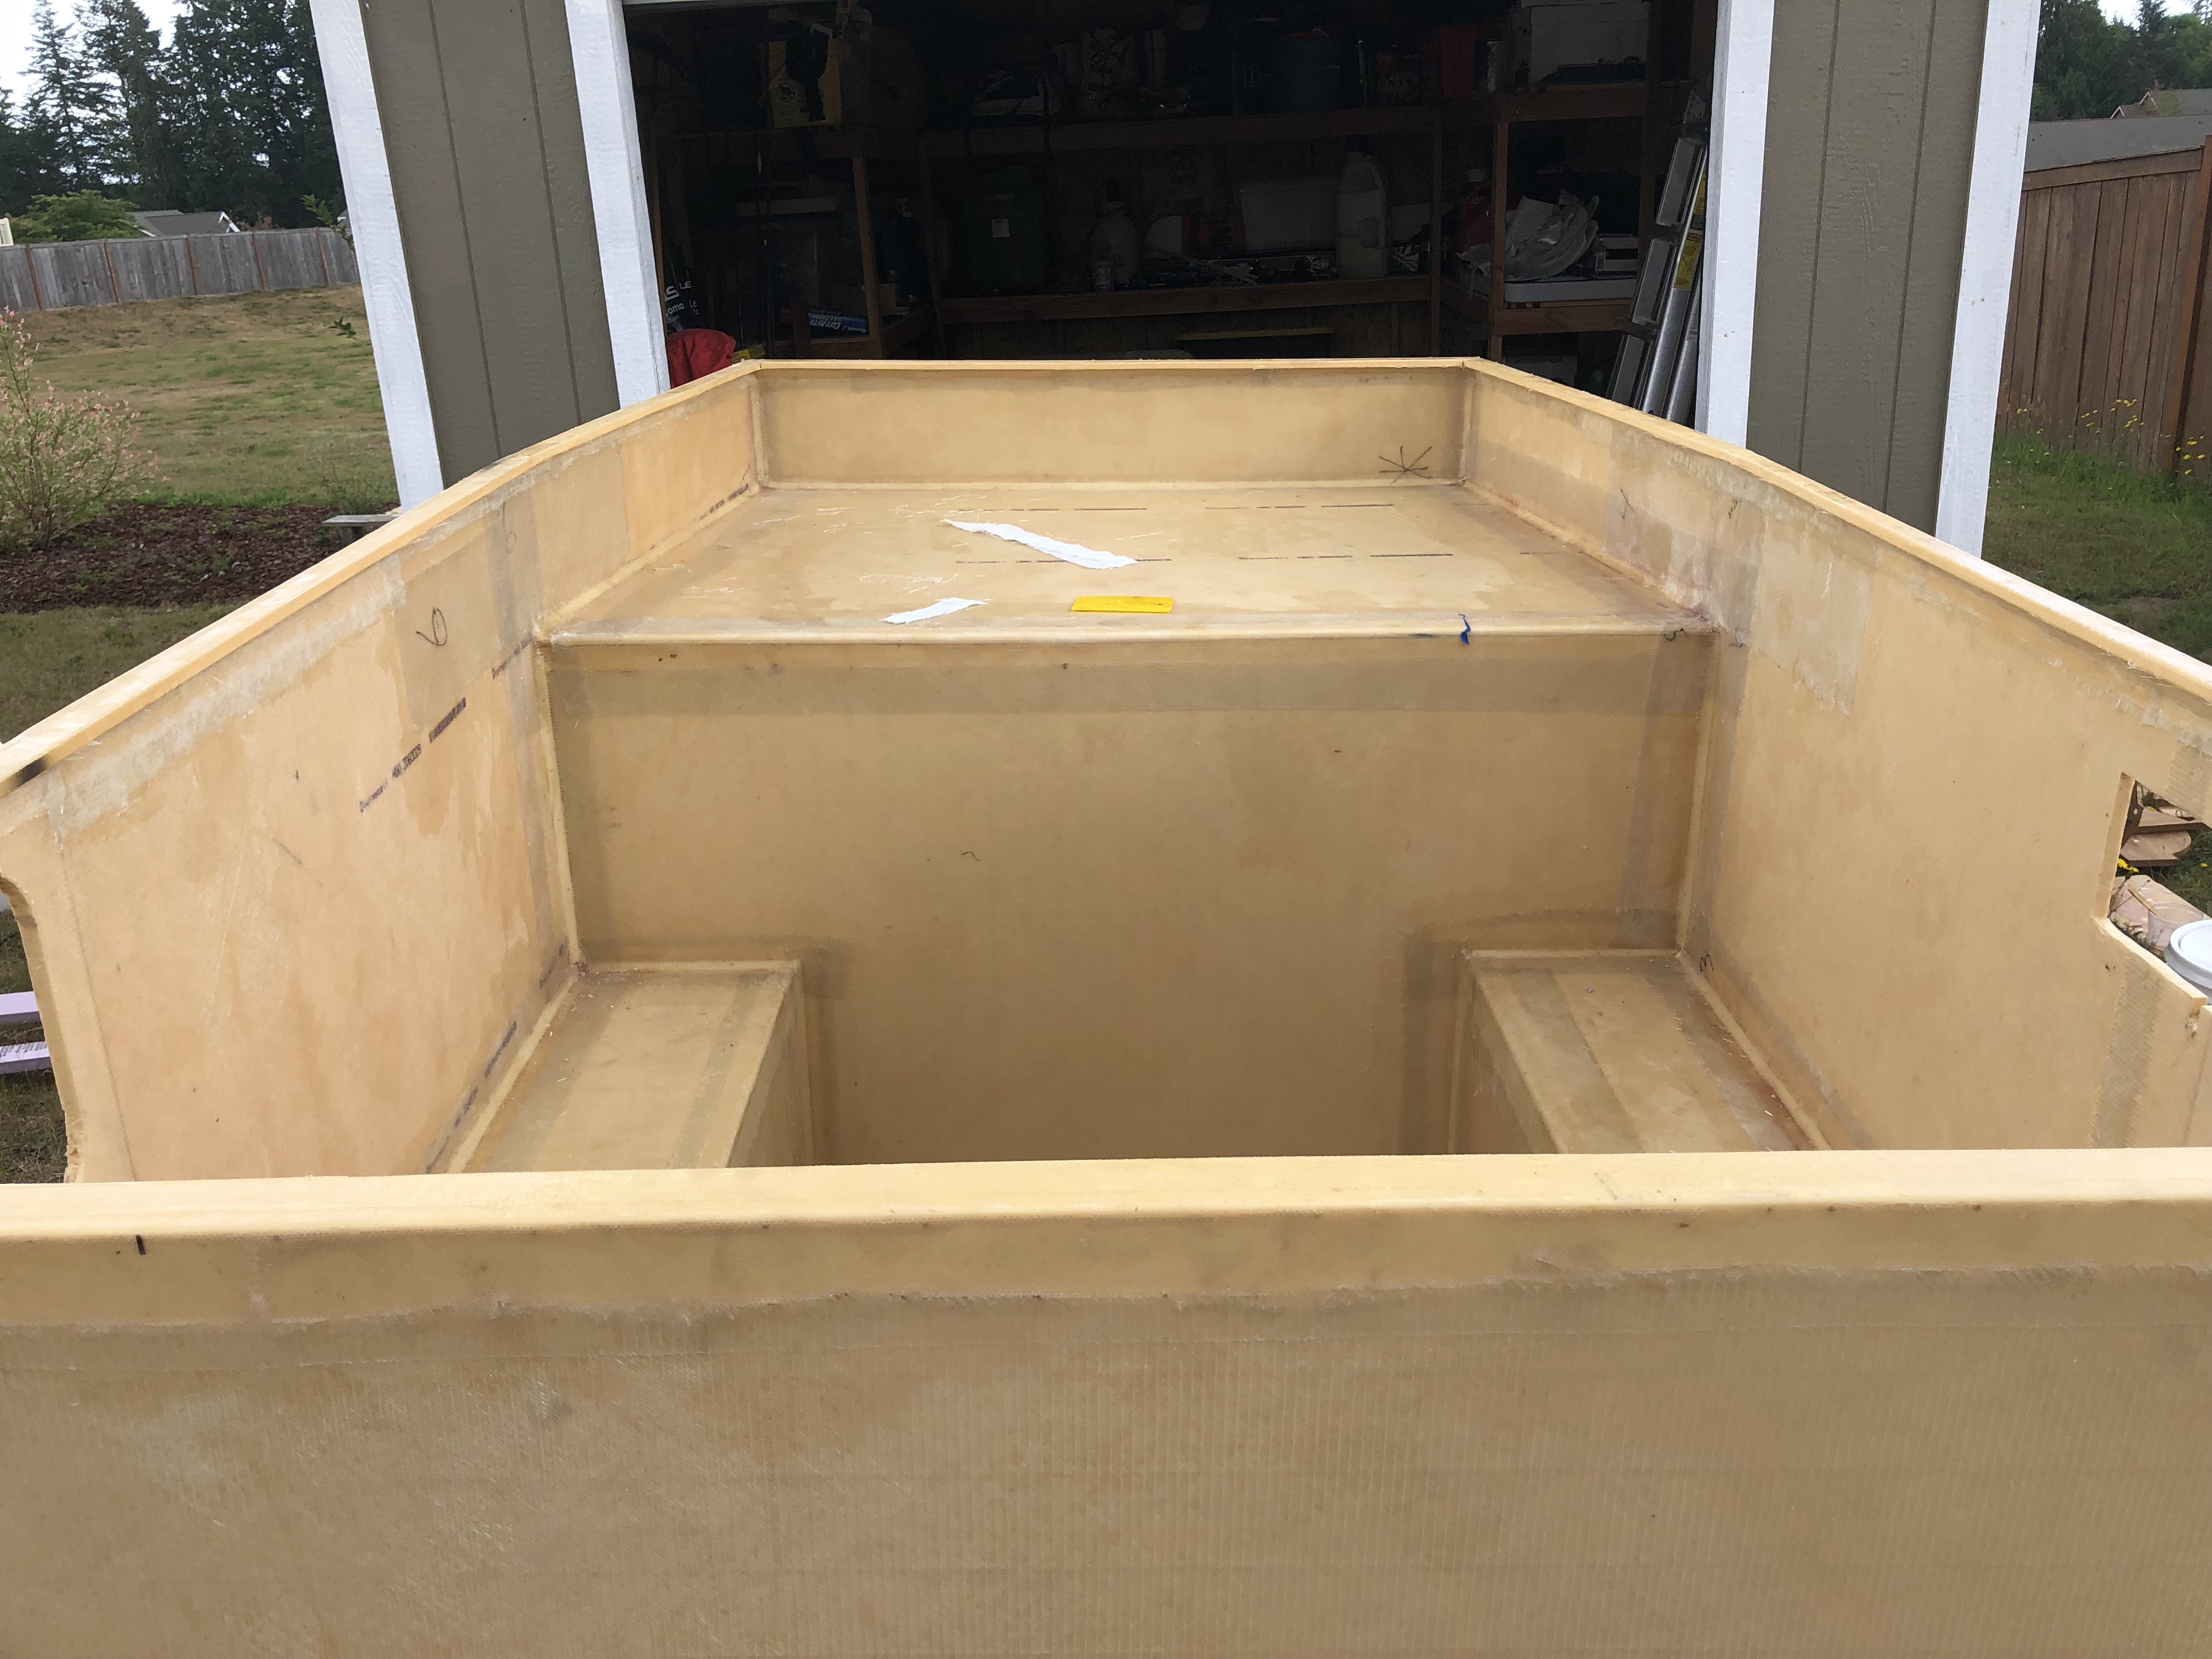
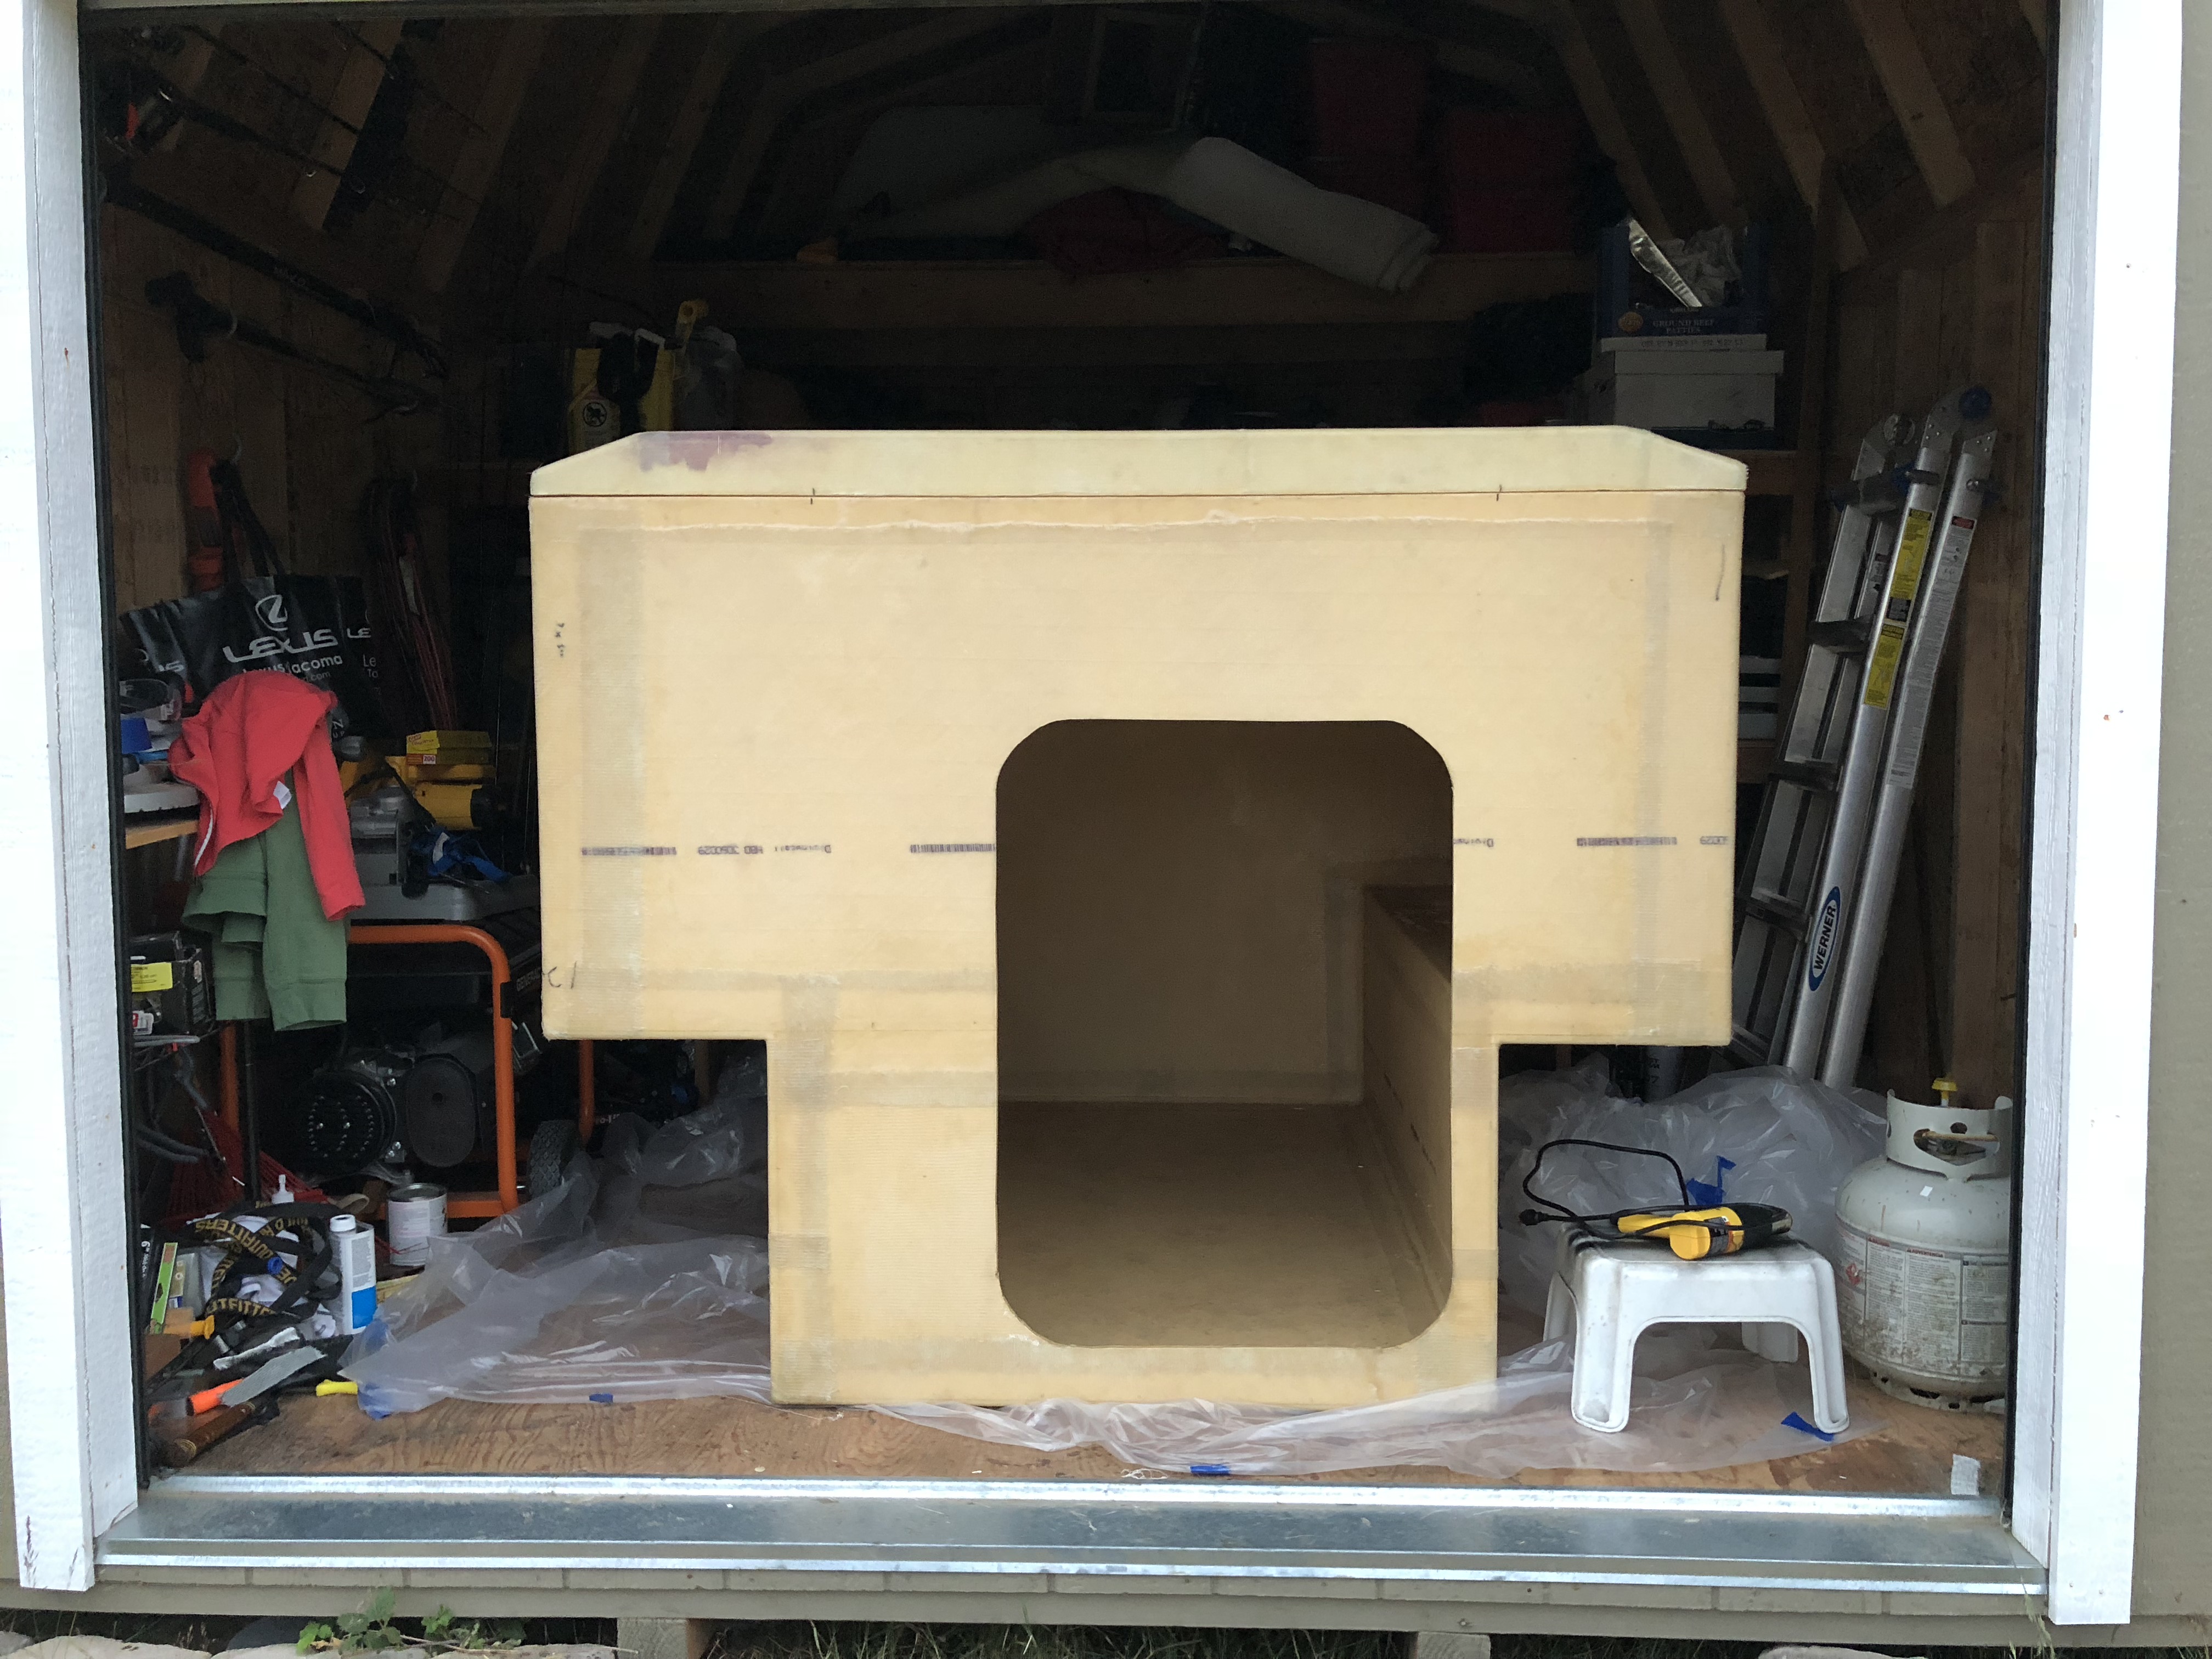
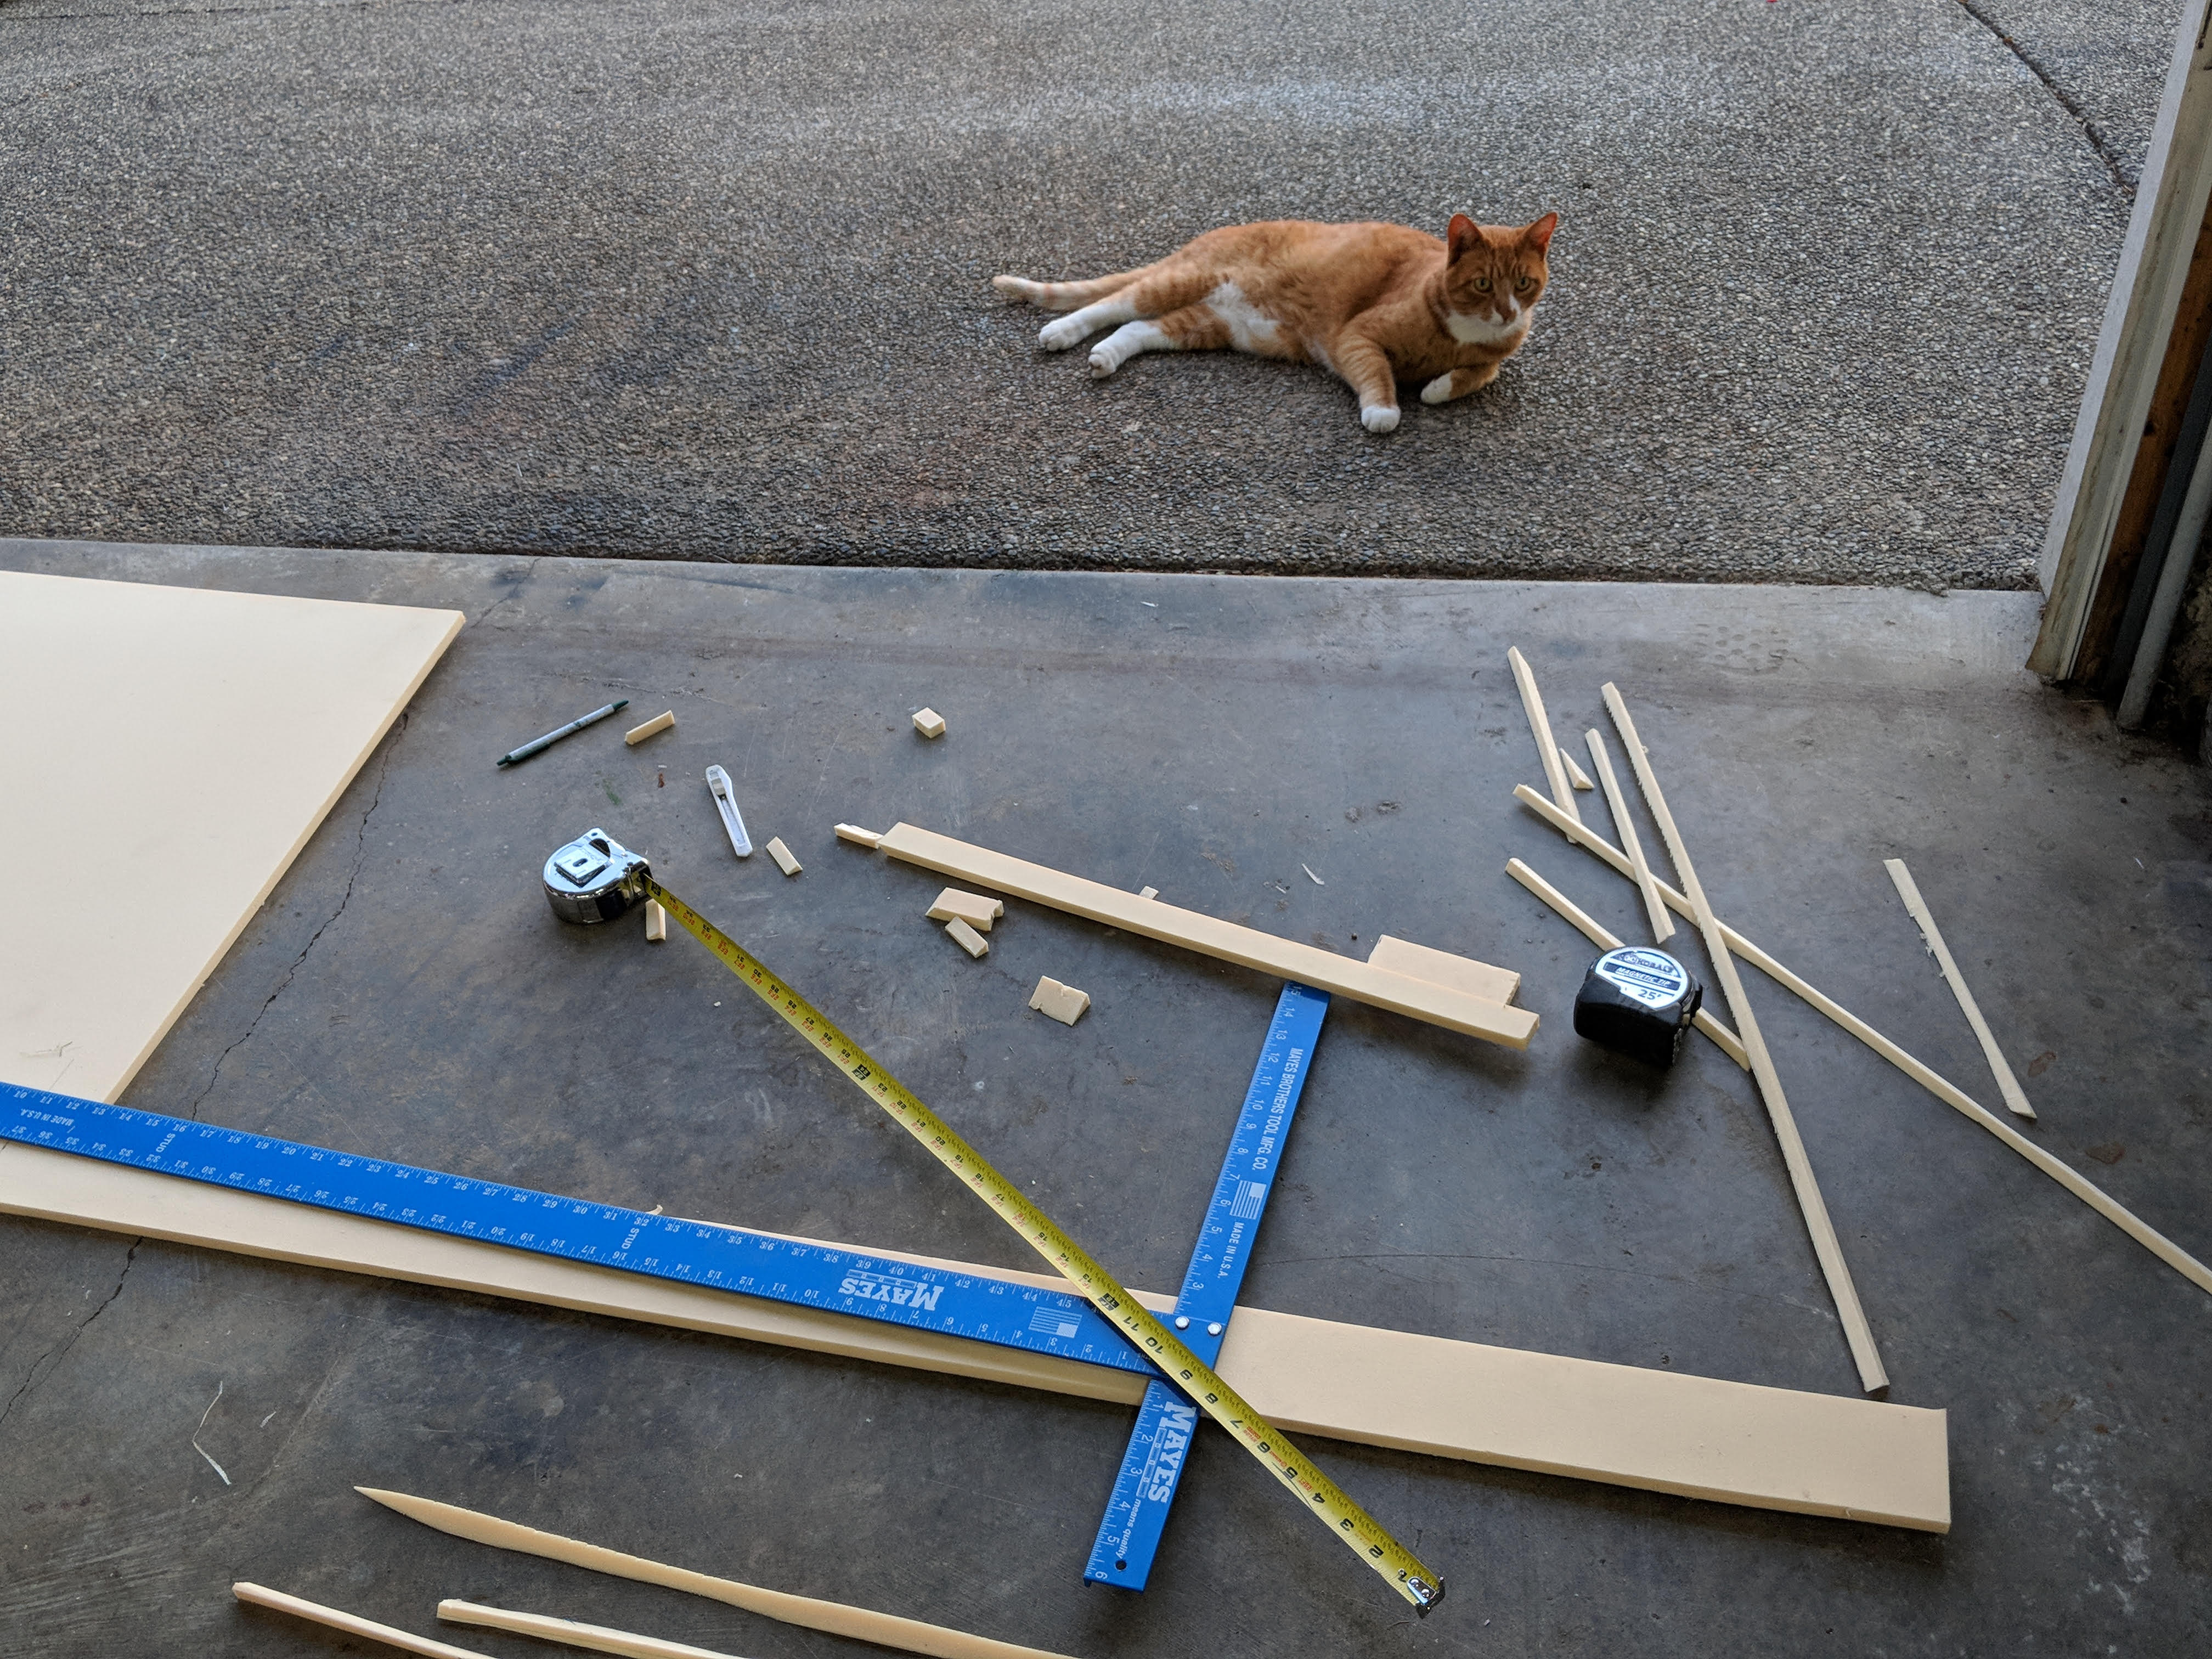
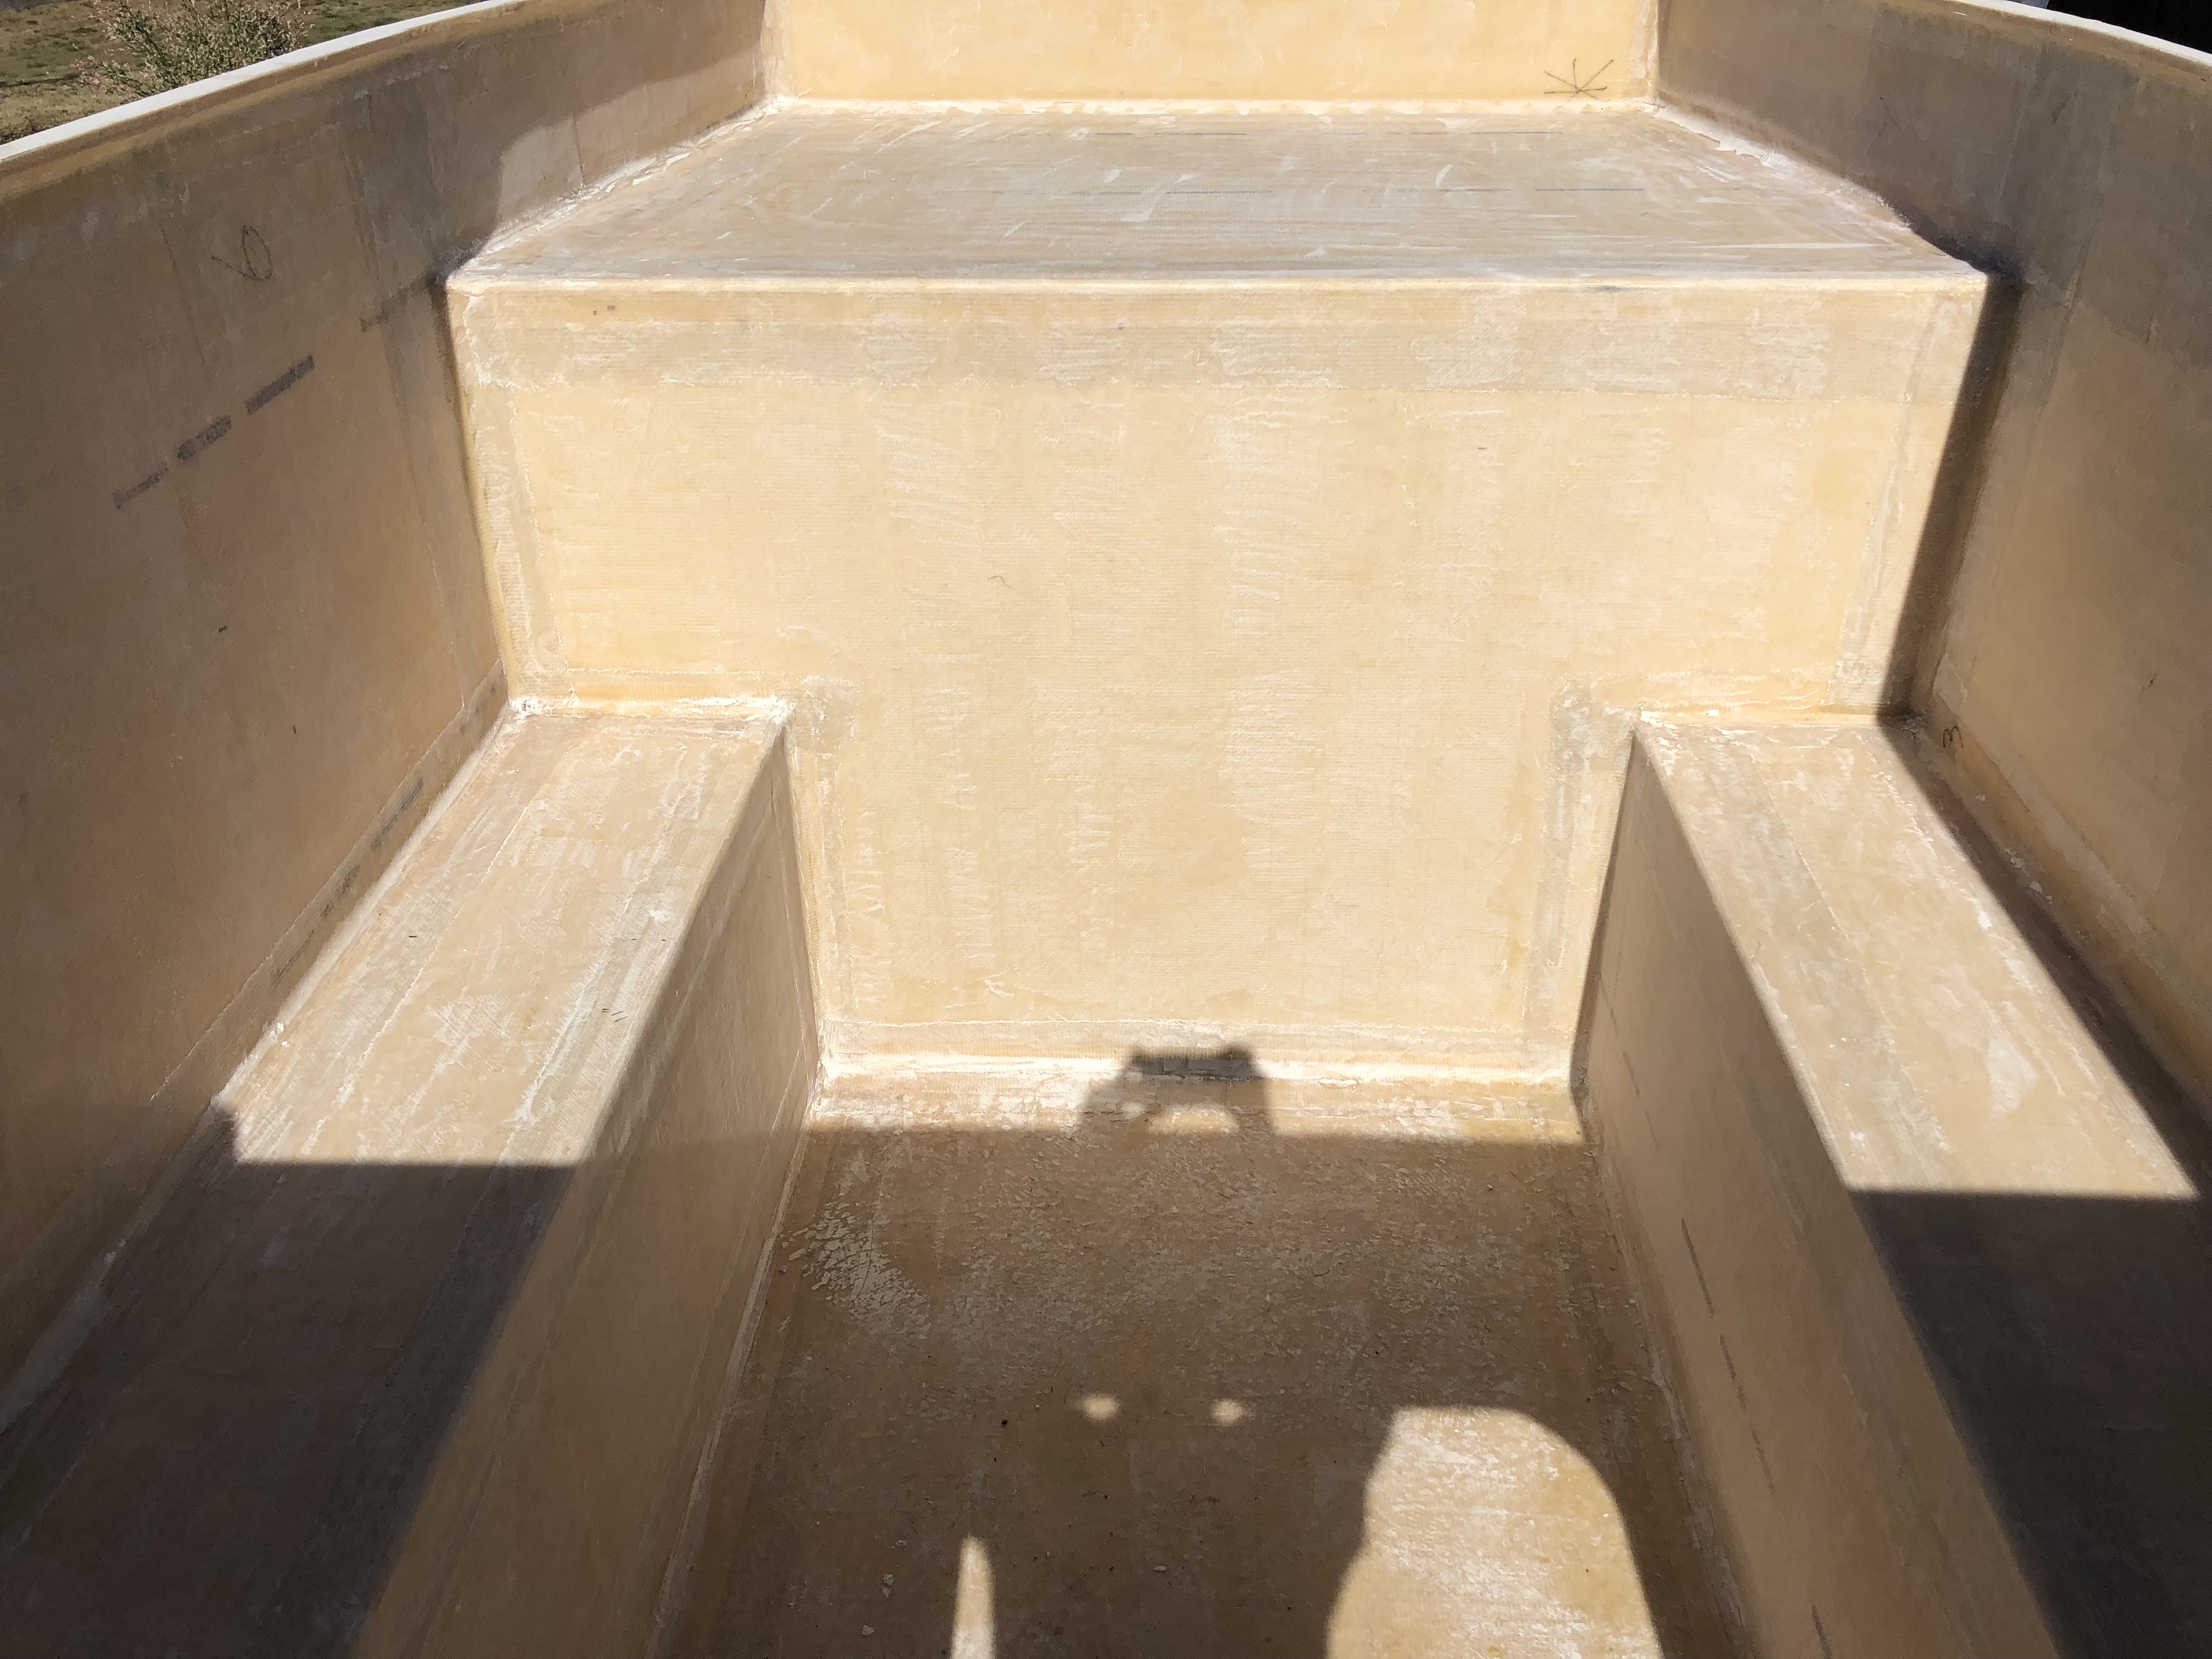
At this point we're practically "done" with the shell. Not finished of course, but it's structurally done enough that we're pretty confident that we're going to at least end up with a usable thing instead of an abandoned disappointment! That means that I needed to really start thinking about the interior layout a bit more. I had a plan and a 3d model and everything, but that only goes so far when things are custom built. Now that the camper is flipped back over I can start getting the actual measurements I need to move forward! It's also hard to get a feel for how much space you really need inside until you're sitting in there thinking about it. So I found some cardboard in the garage and started to lay out the galley and forward sitting area.
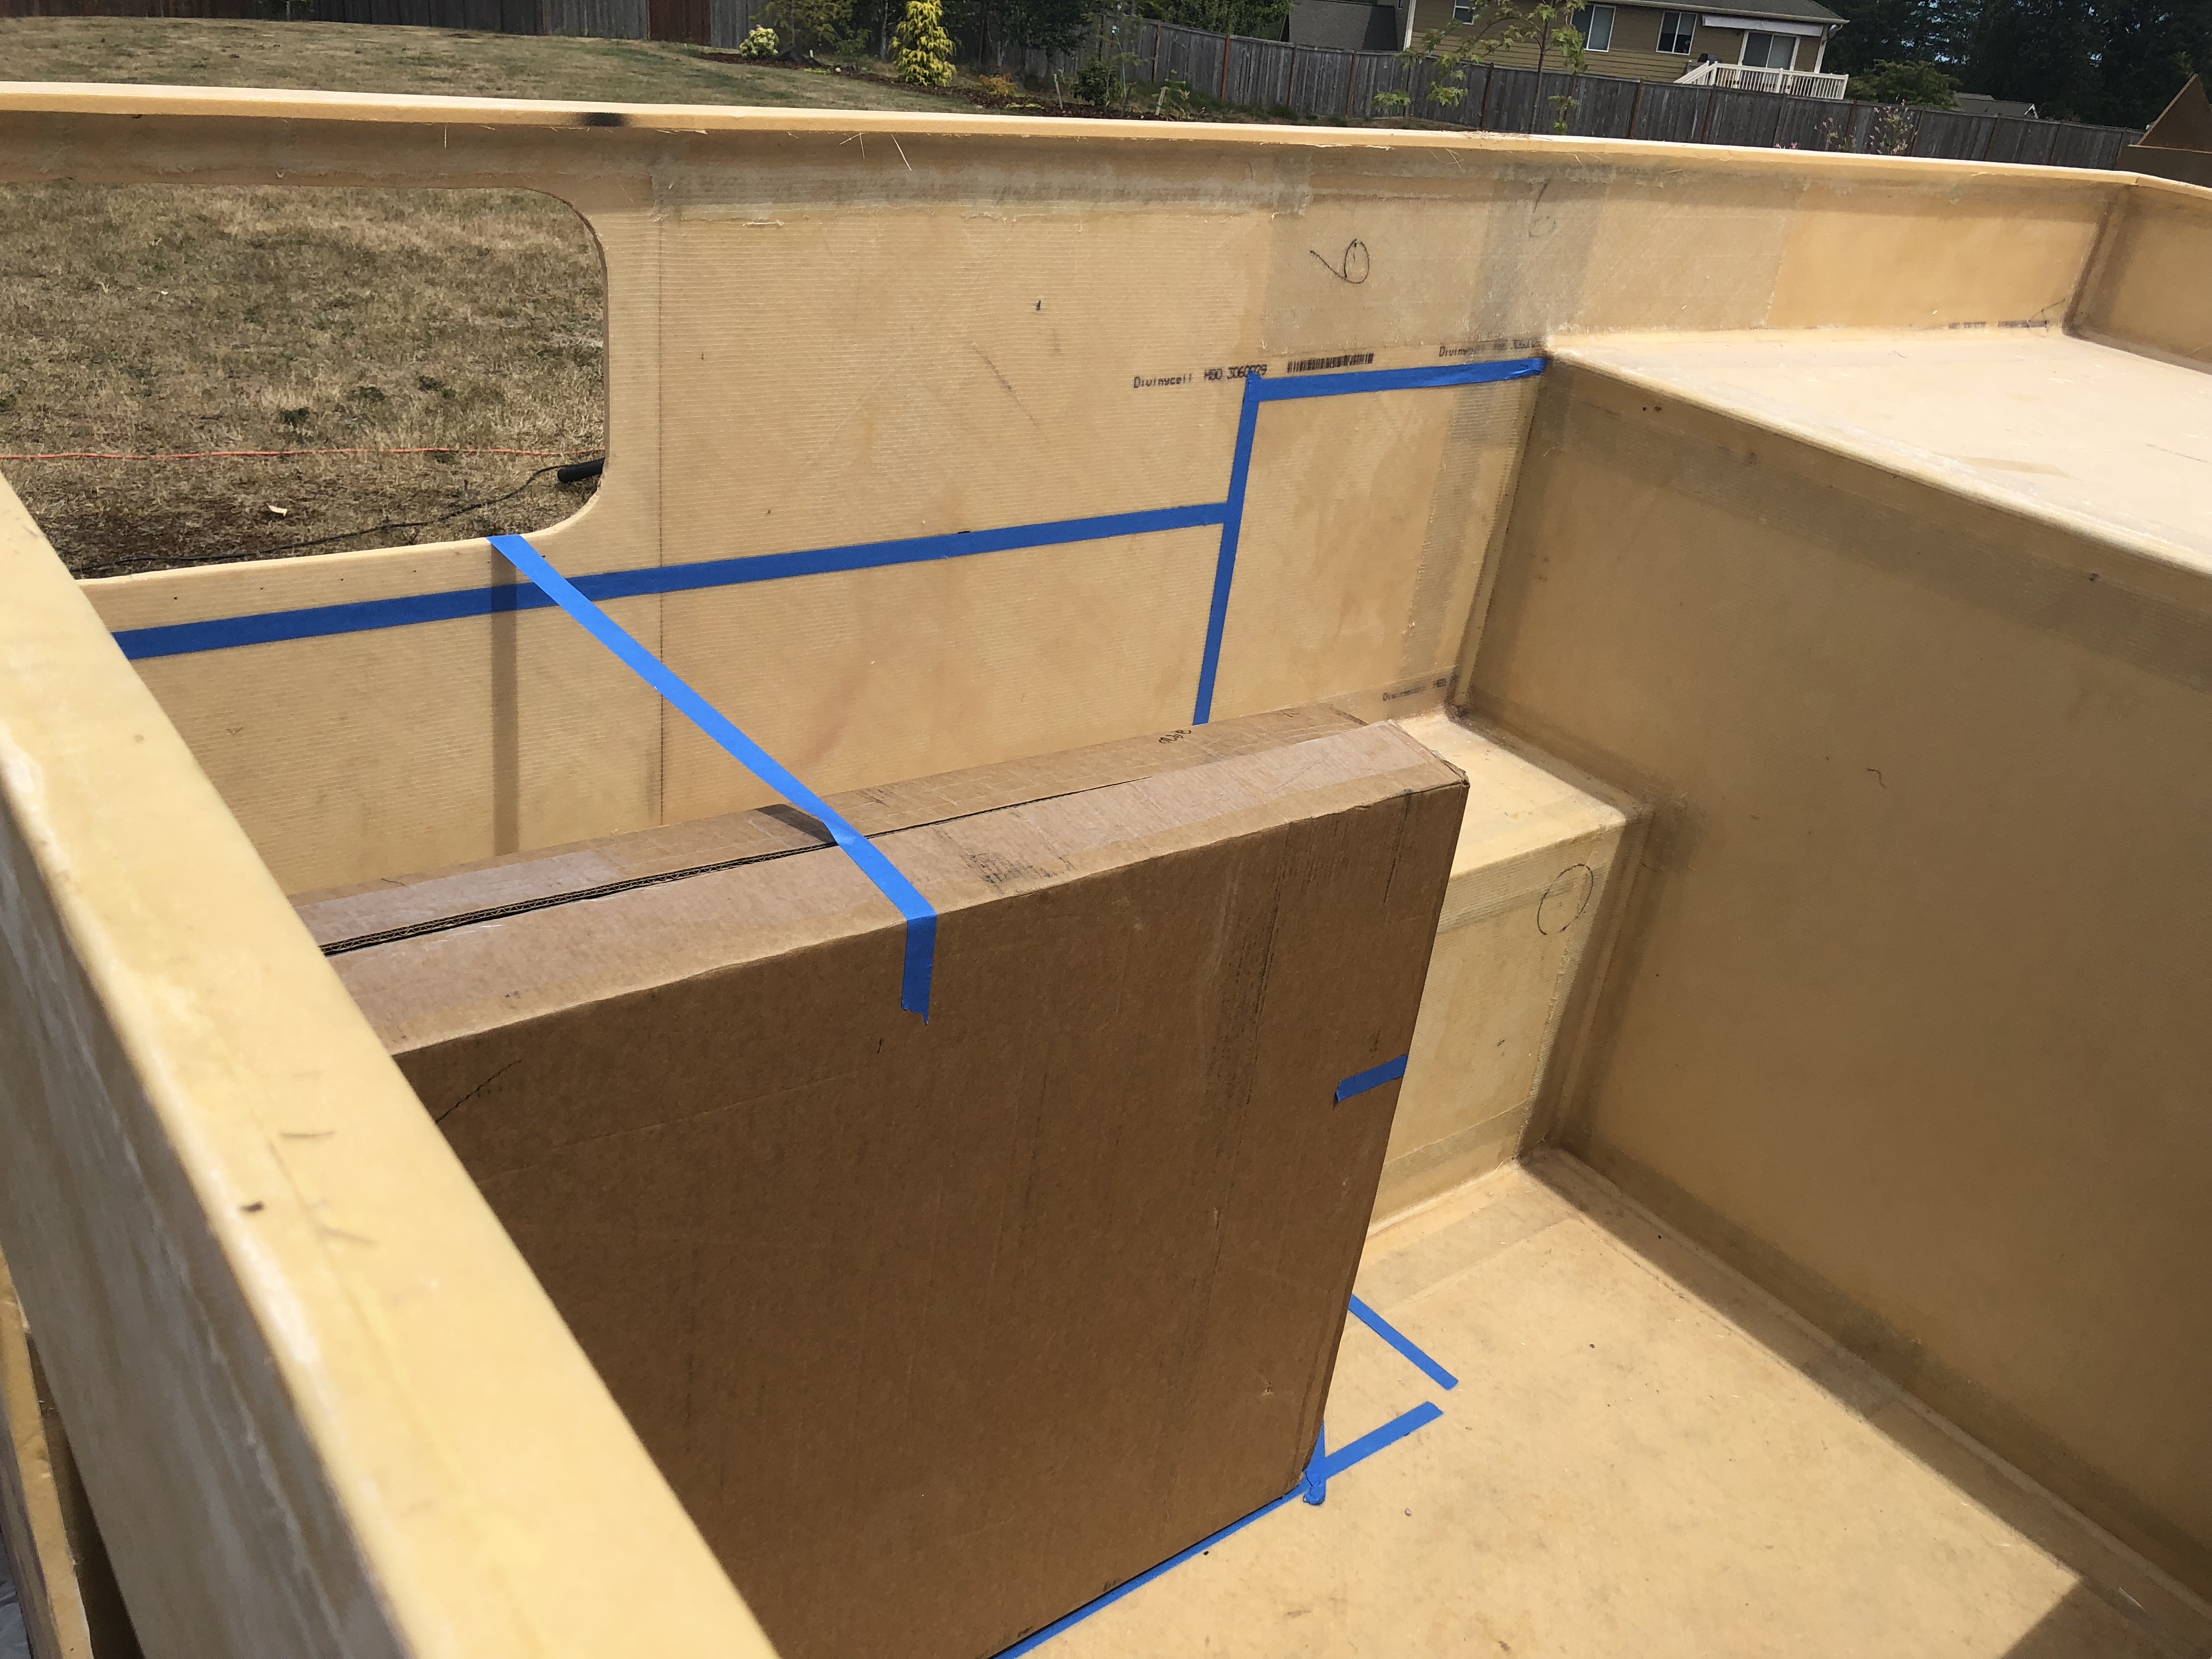
I wanted to have actual counter space to cook in the galley and enough room to sit that it didn't feel cramped. On the other side is the other seat, the cooler goes in the middle, and a storage cabinet will go on the right side.
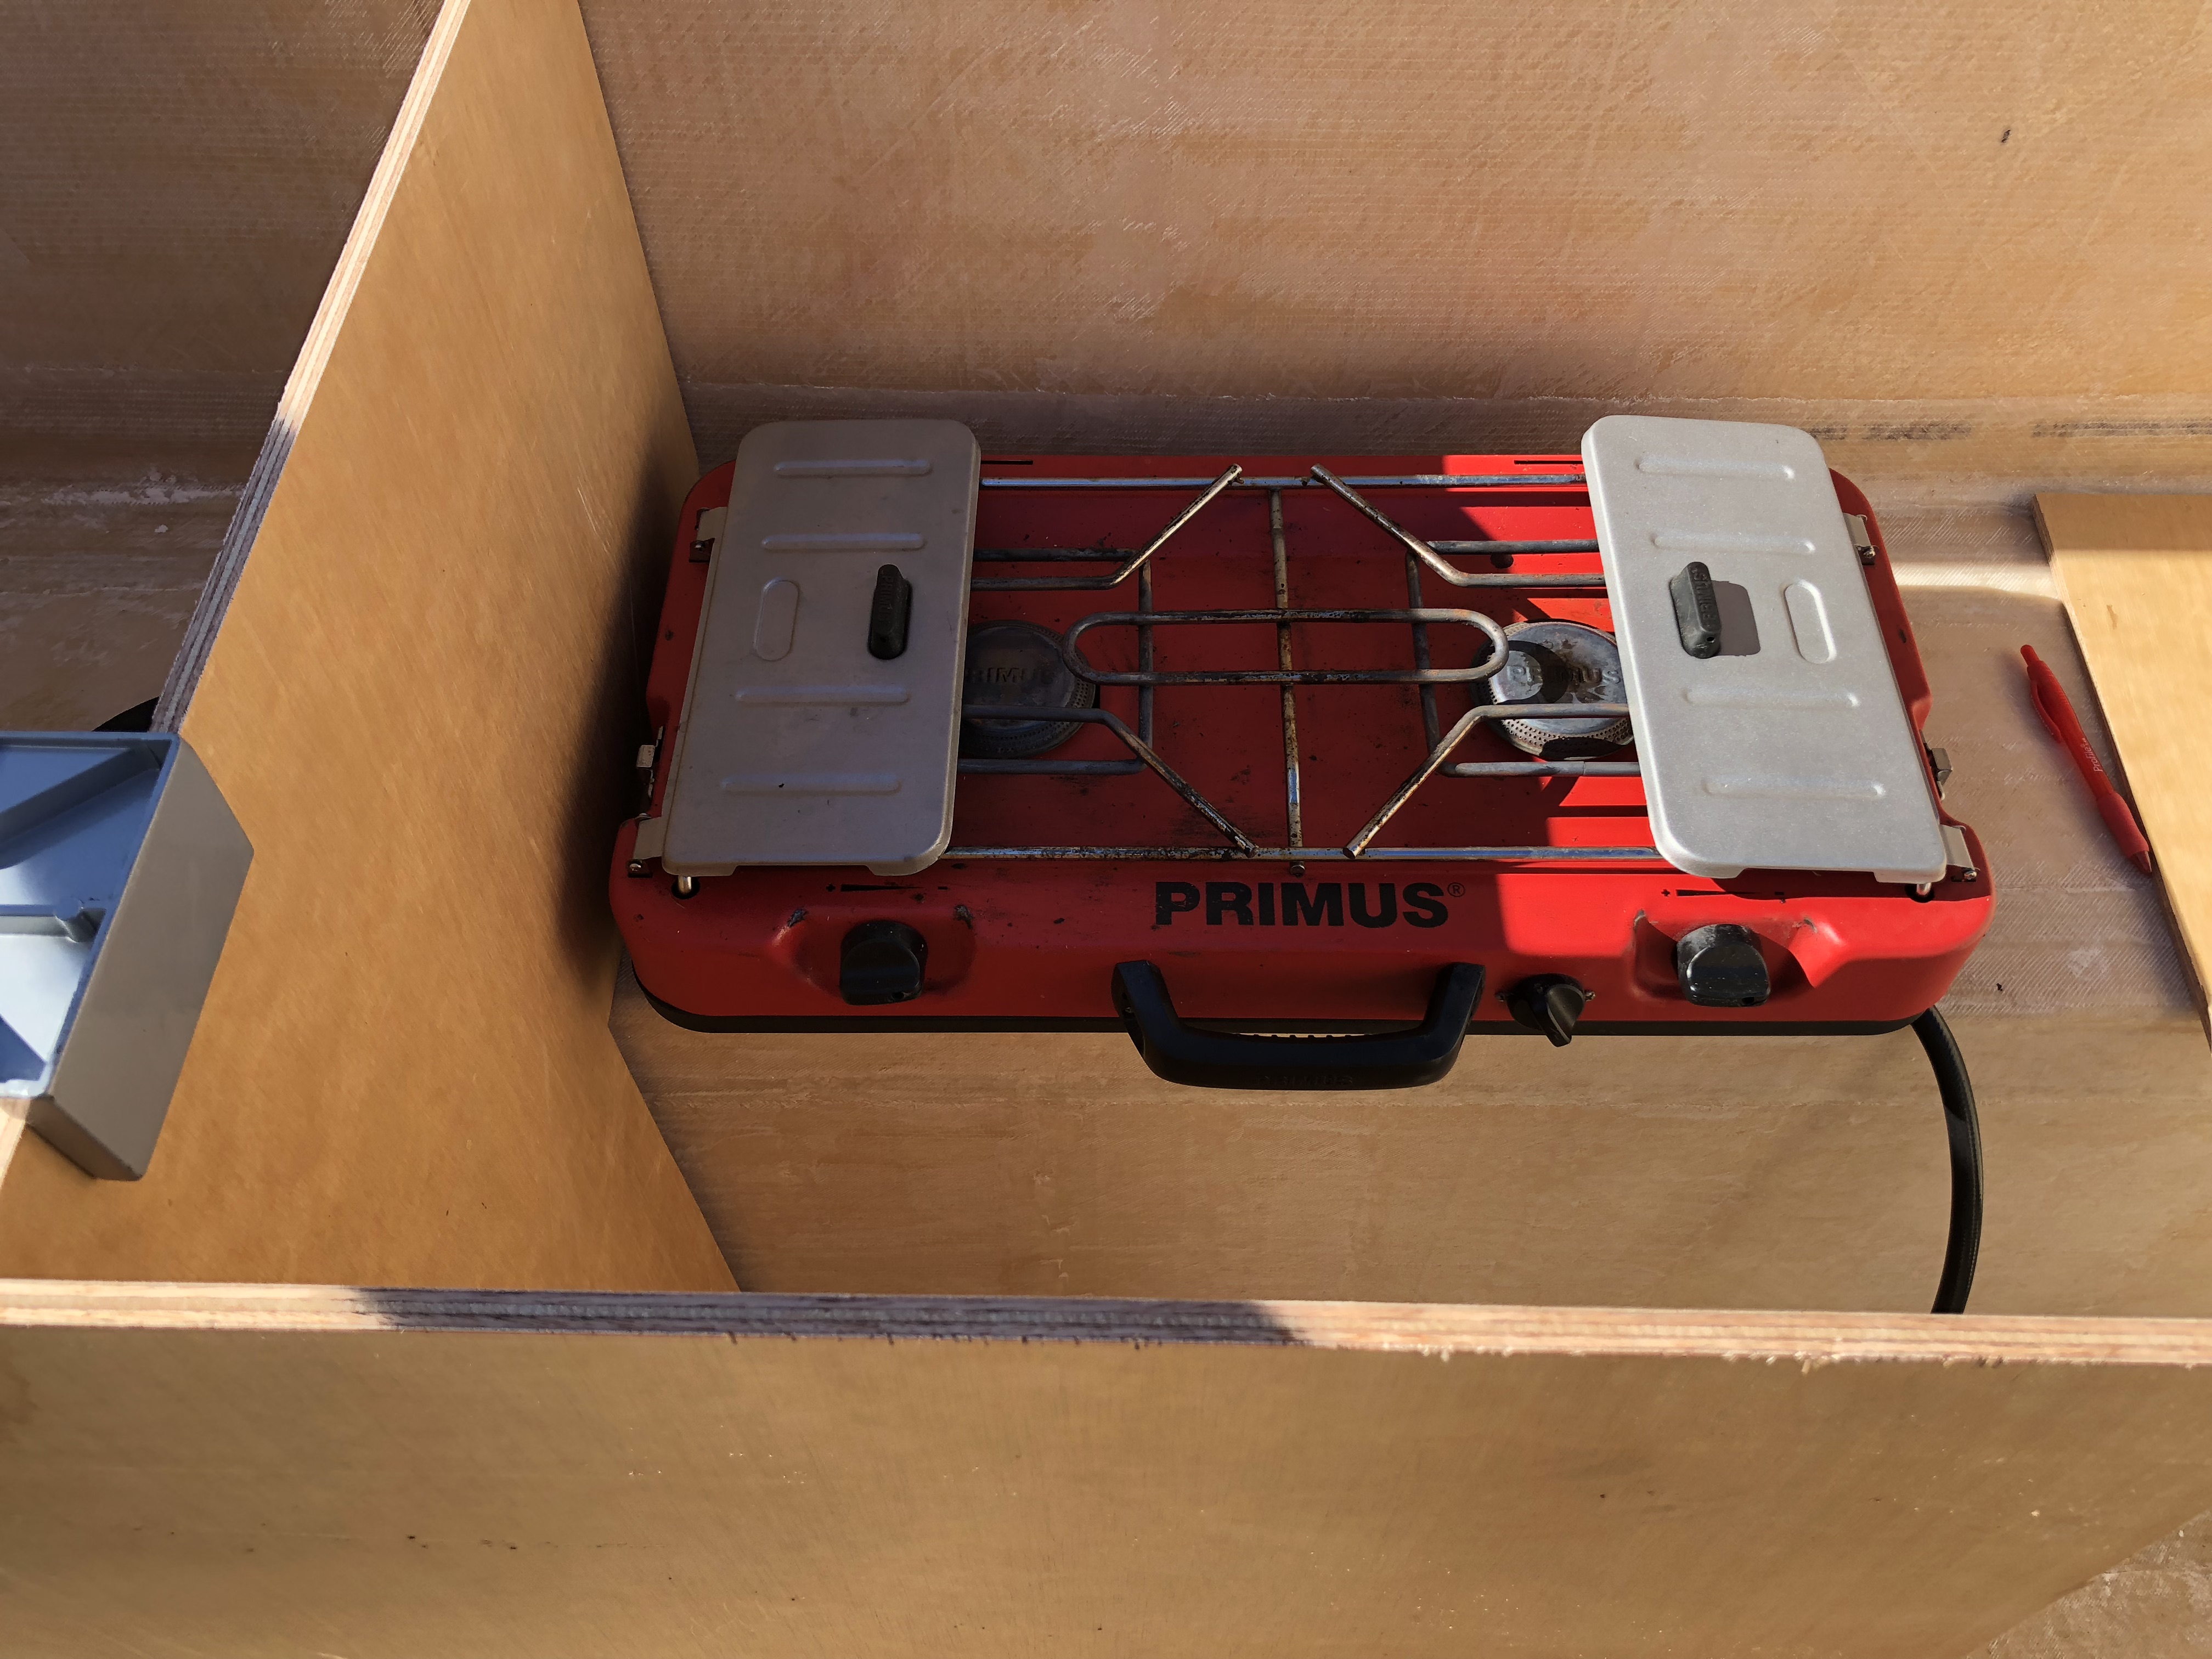
I was thinking in the beginning of having a propane locker and a large propane tank, but the only thing that will be running propane is our small camp stove. We currently own a 2-burner Primus that I'm planning on removing the lid from and just installing it in the galley. Why buy another thing if you don't have to? That left enough room for a cabinet in the corner and I guess you can never have enough storage...
We went to Lowe's to see if they had any cheap cabinets that we could just cannibalize for the camper. The counter is a comfortable 36" tall and 24 deep. Unfortunately due to all of the internal structure (the wheel well area...) we couldn't find anything that would make our lives easier, so we're going to have to just build something. Which is what we expected, but it never hurts to look! Anyway, we procrastinated enough at the hardware store and had to come back and start sanding the inside of the camper. That required a lot of crouching down to get into all the corners, which meant that I had to do it. It was a long couple hours of sweating from literally everywhere and now I need some Tylenol and a nap.
The inside just needs a few spots cleaned up and it's DONE! While I was suffering in the sun and Tyvek, Jason was digging out some of the leftover marine plywood that we had laying around so we could repurpose it into the camper!
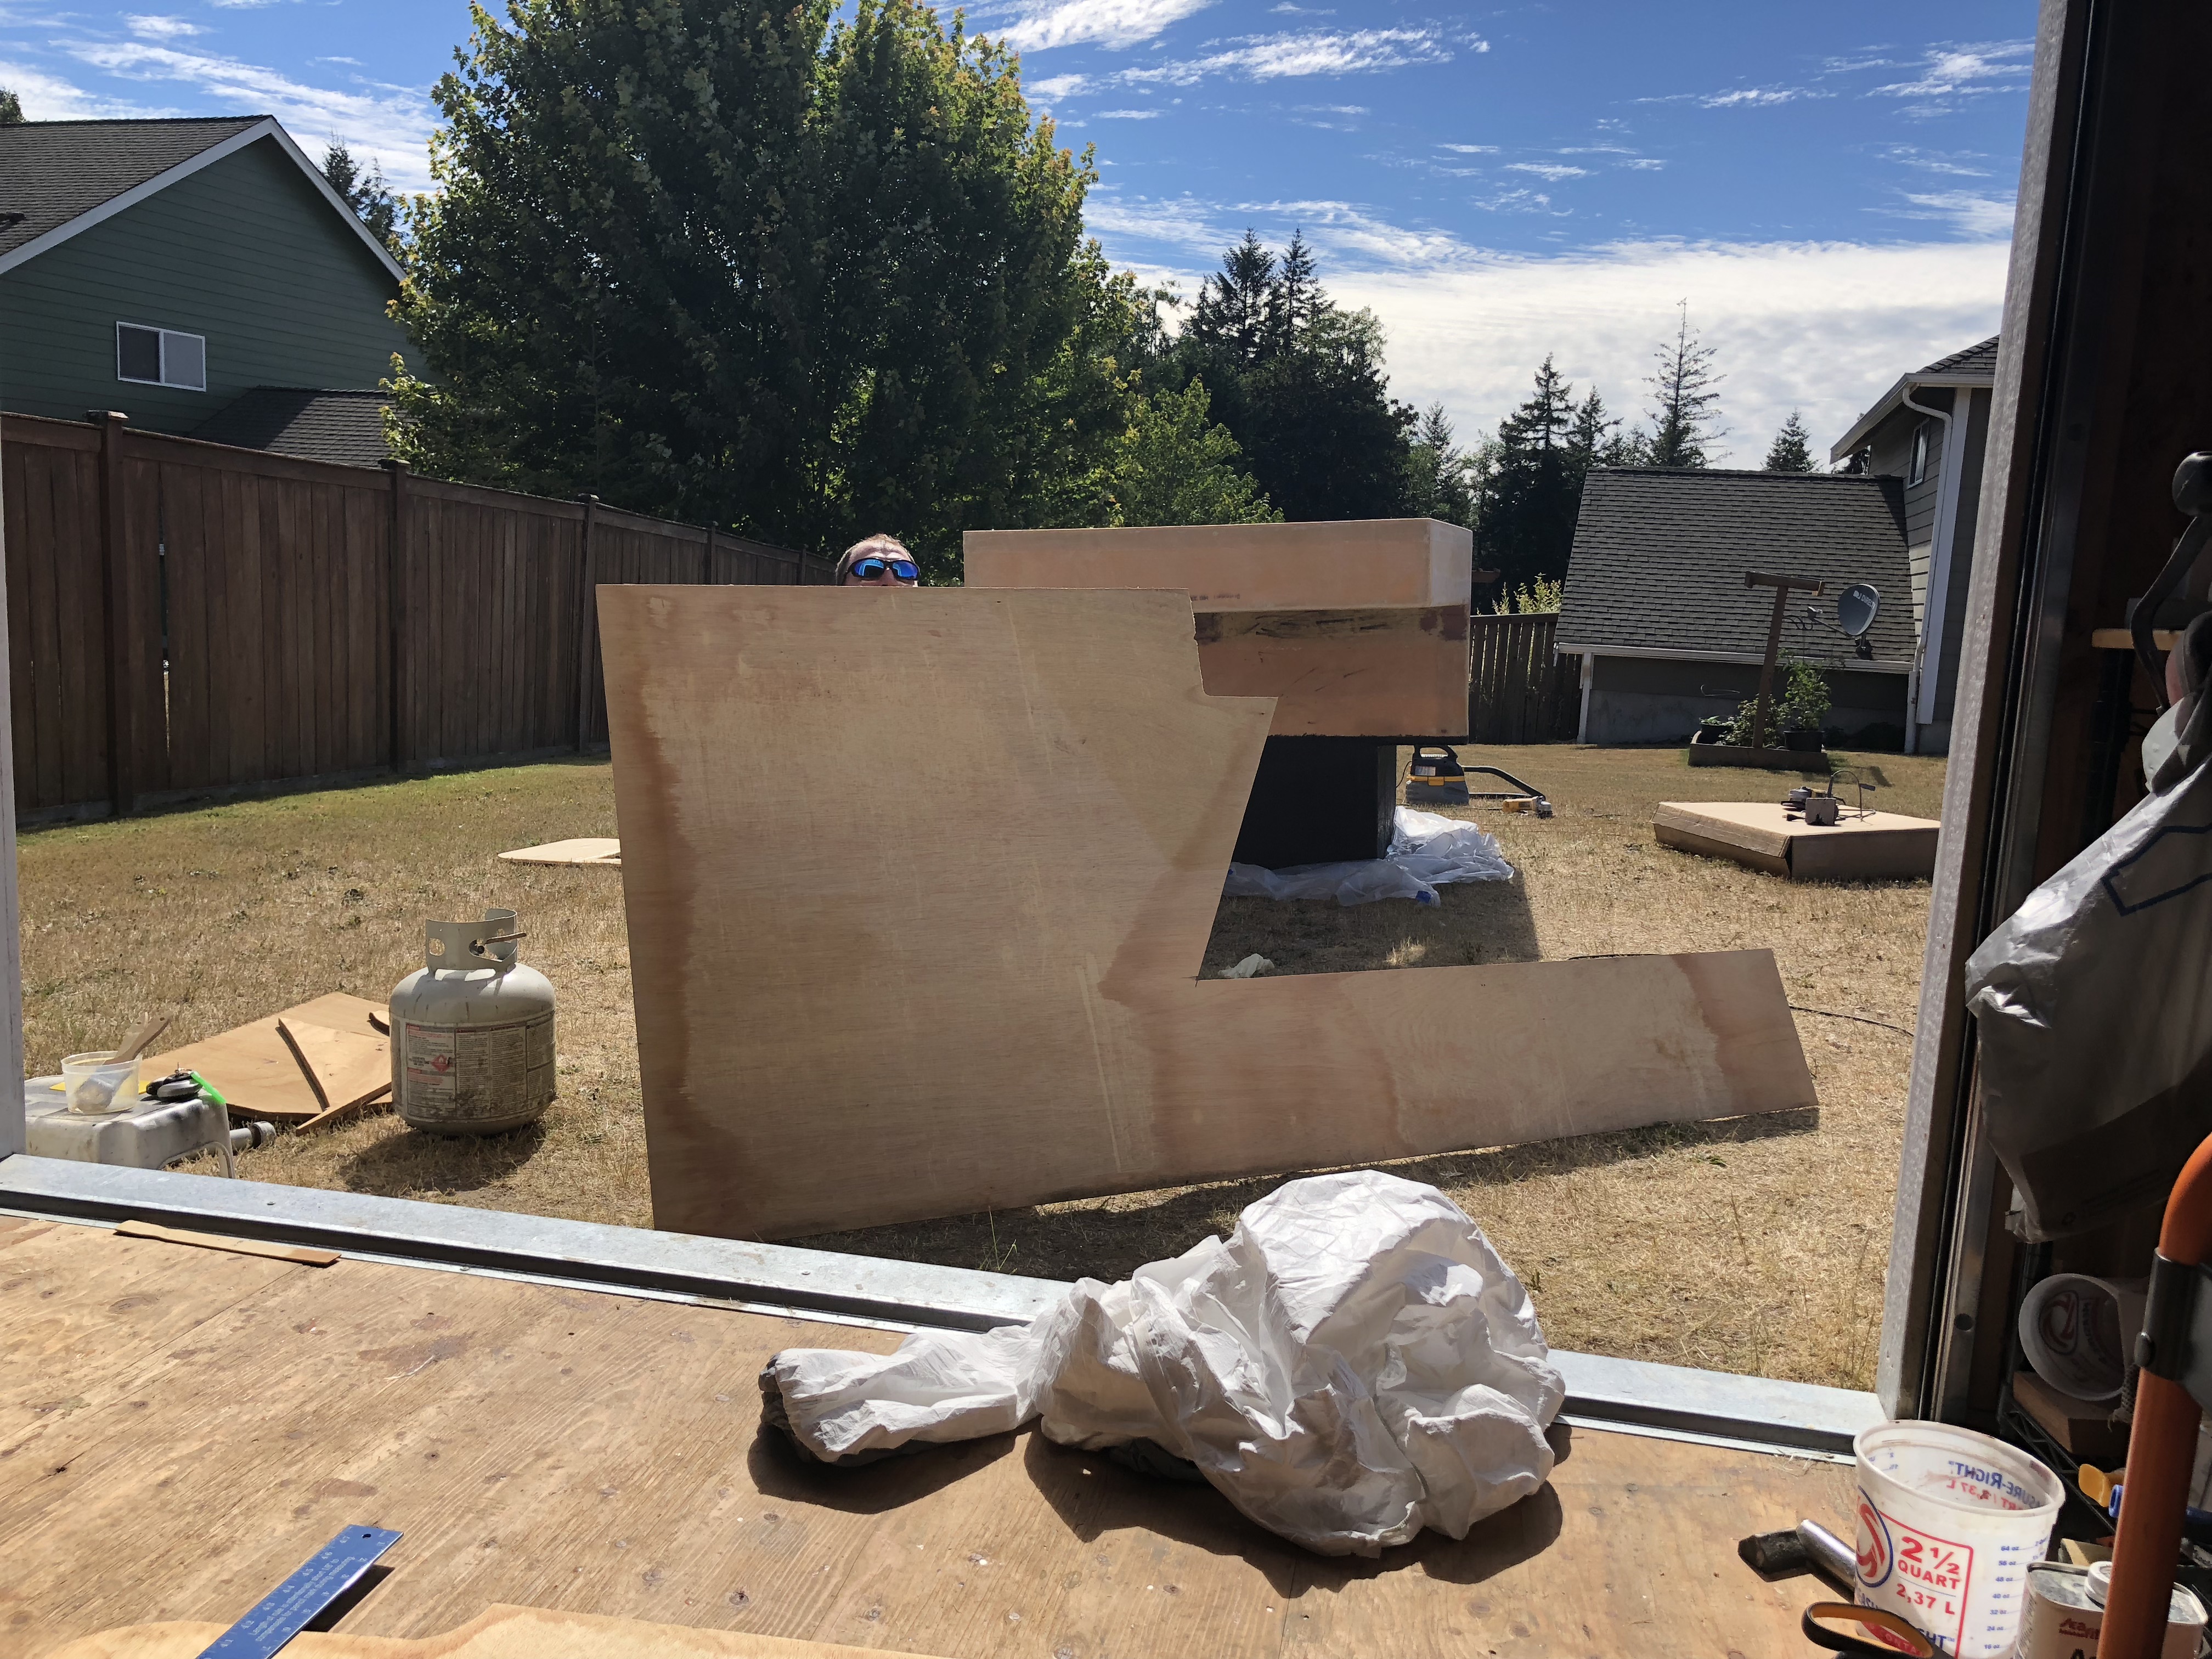
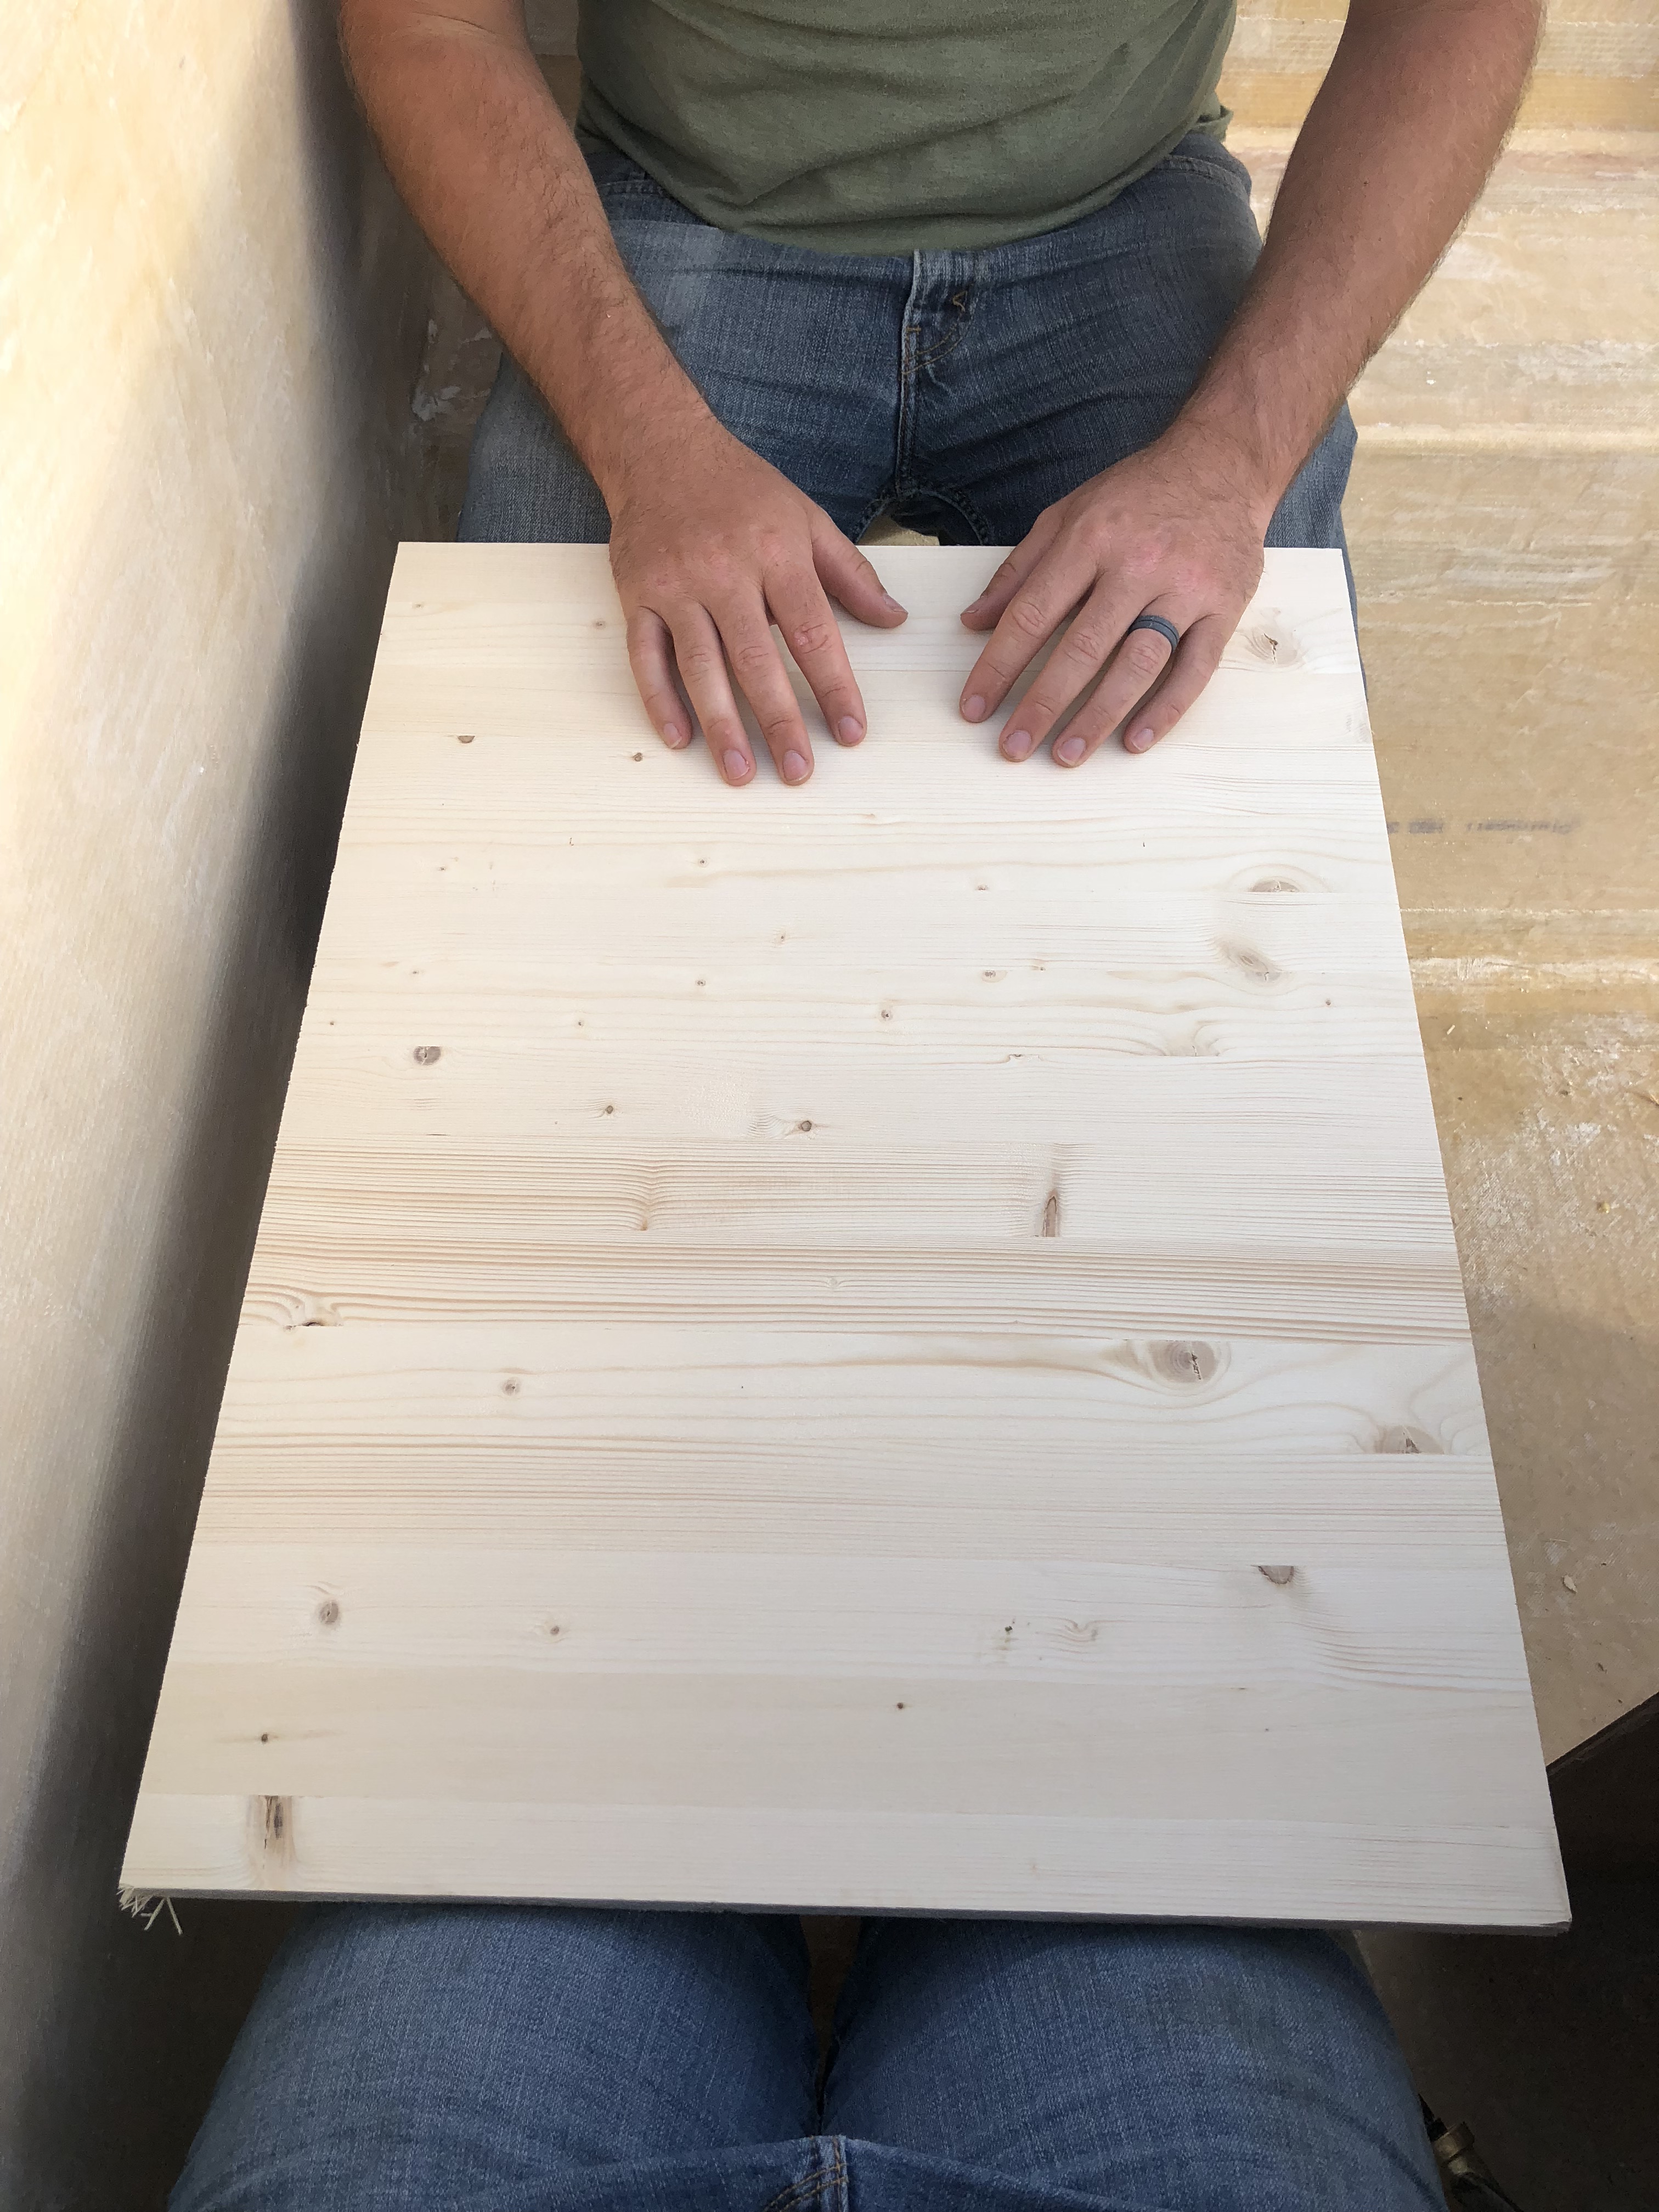
Jason got to measure everything because, honestly, my attention to detail is utter crap.
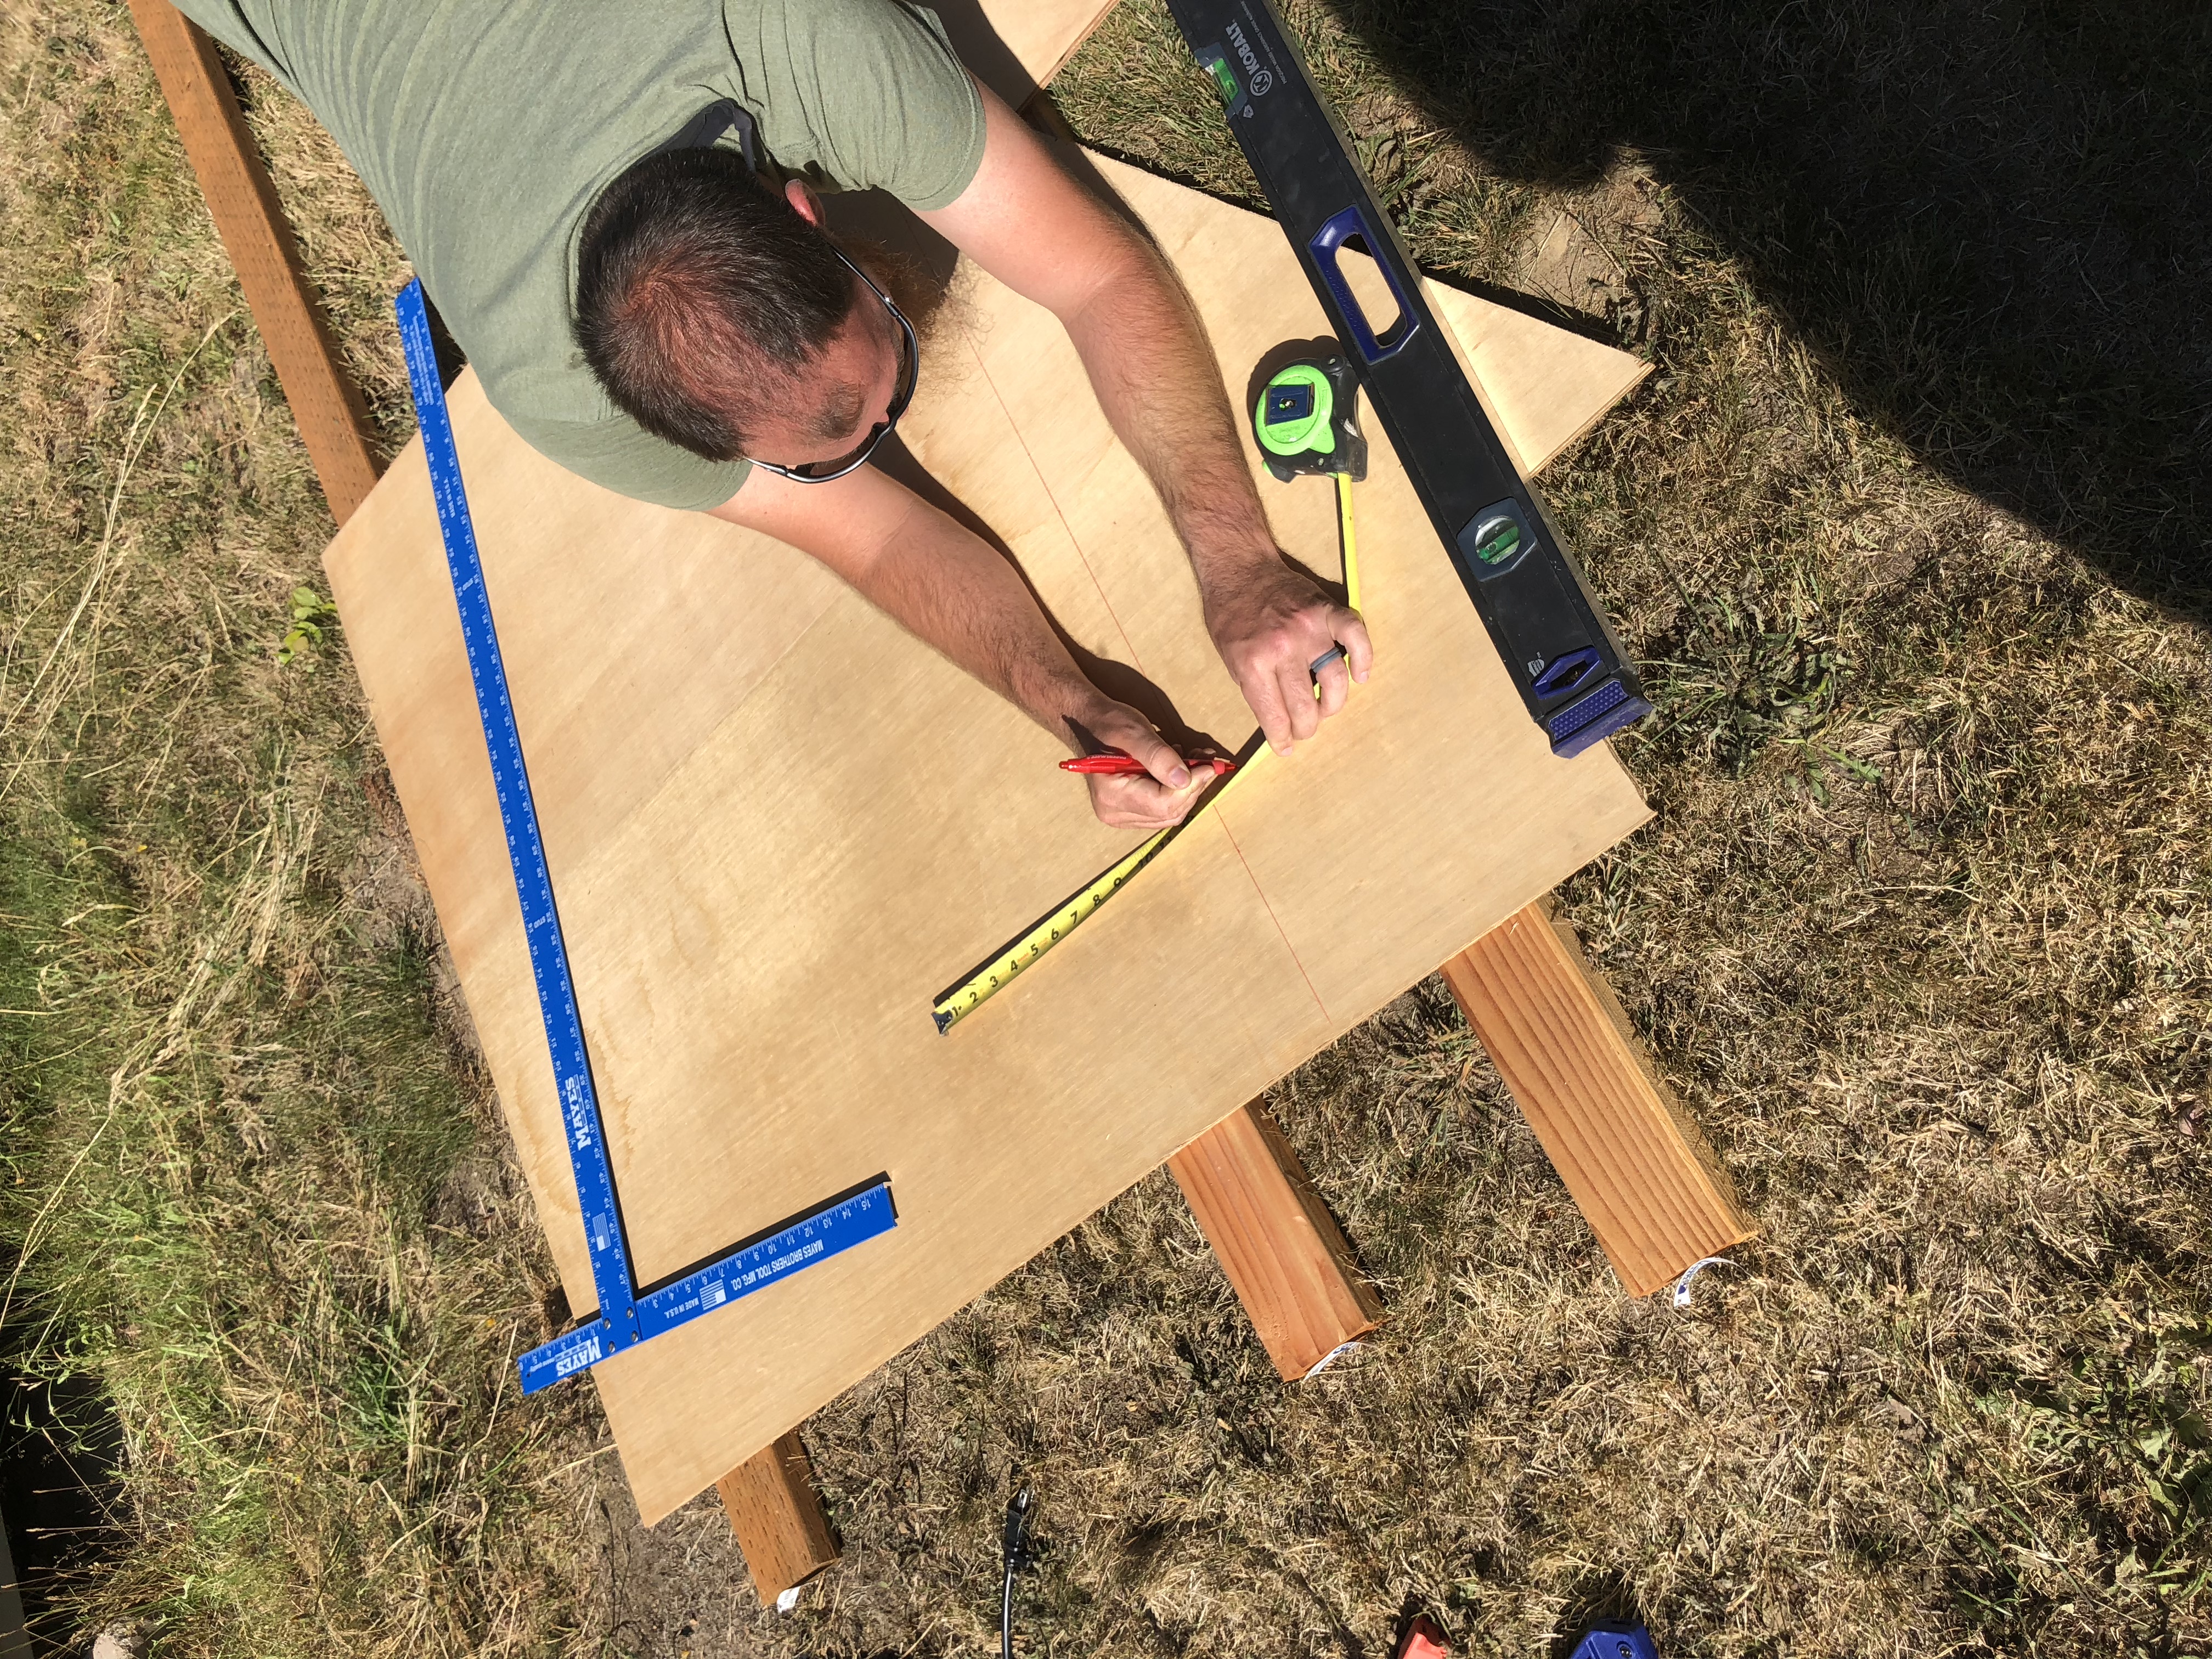
Here's the main galley cabinet face mocked up!
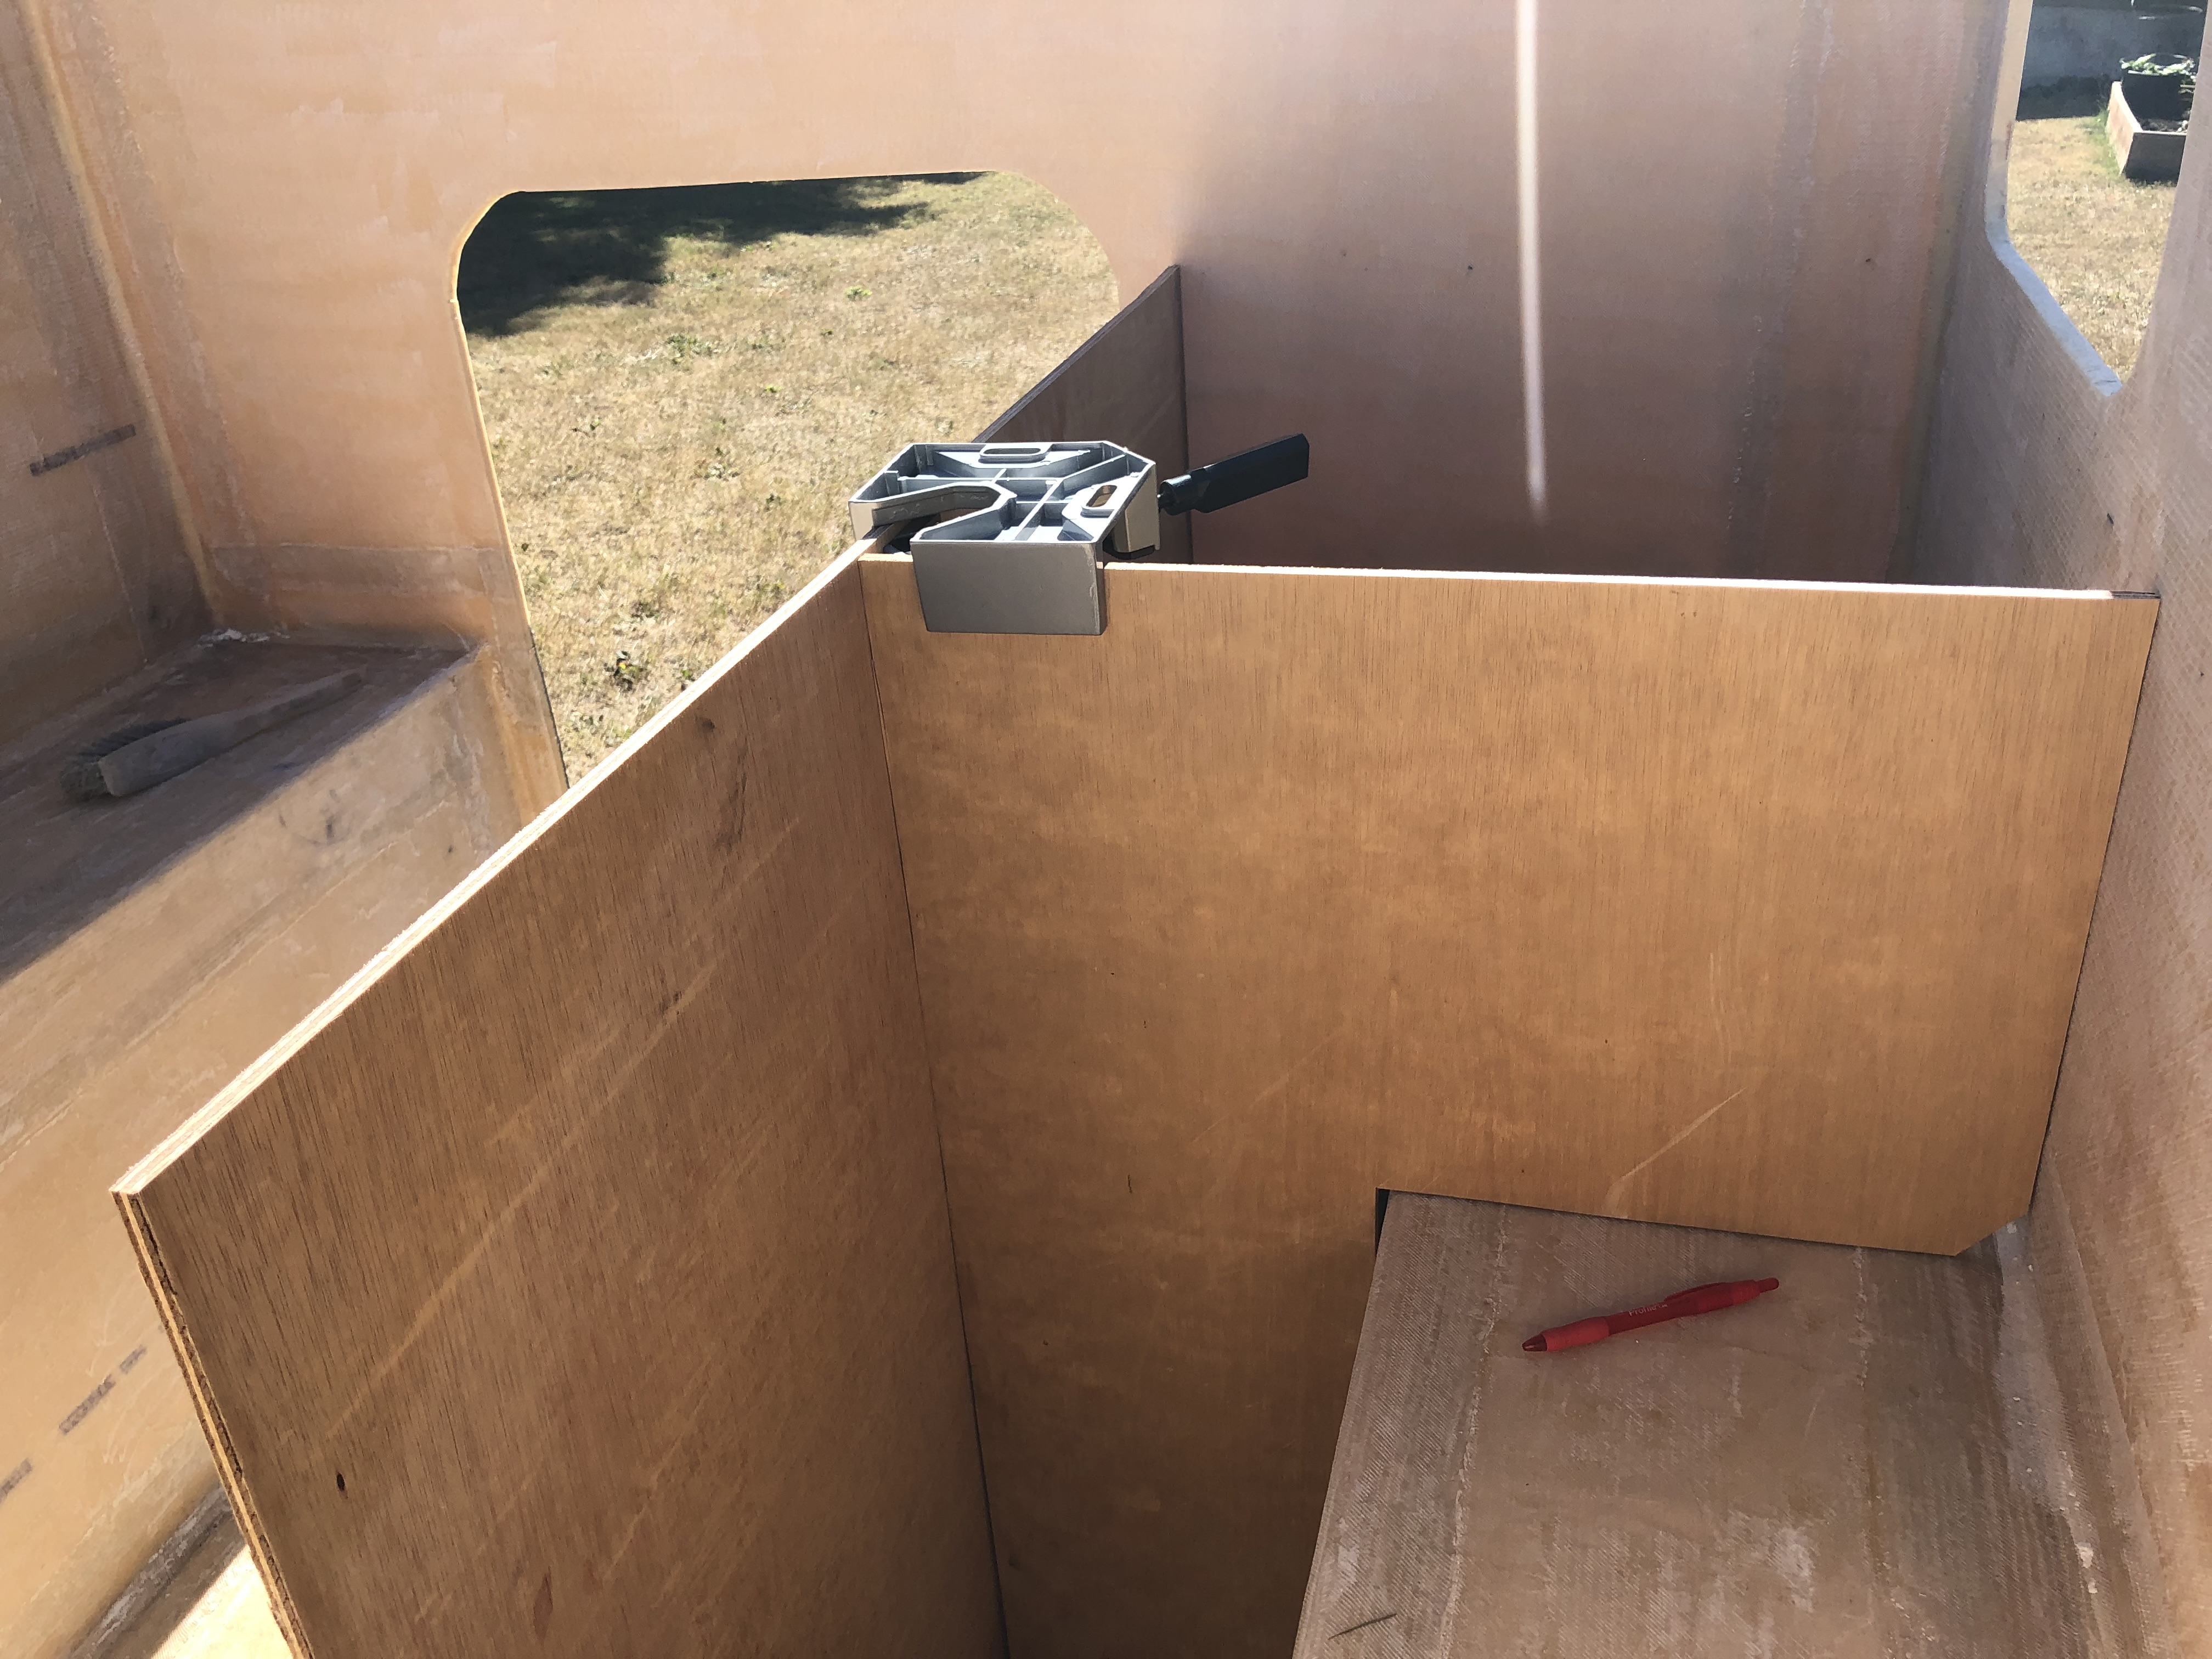
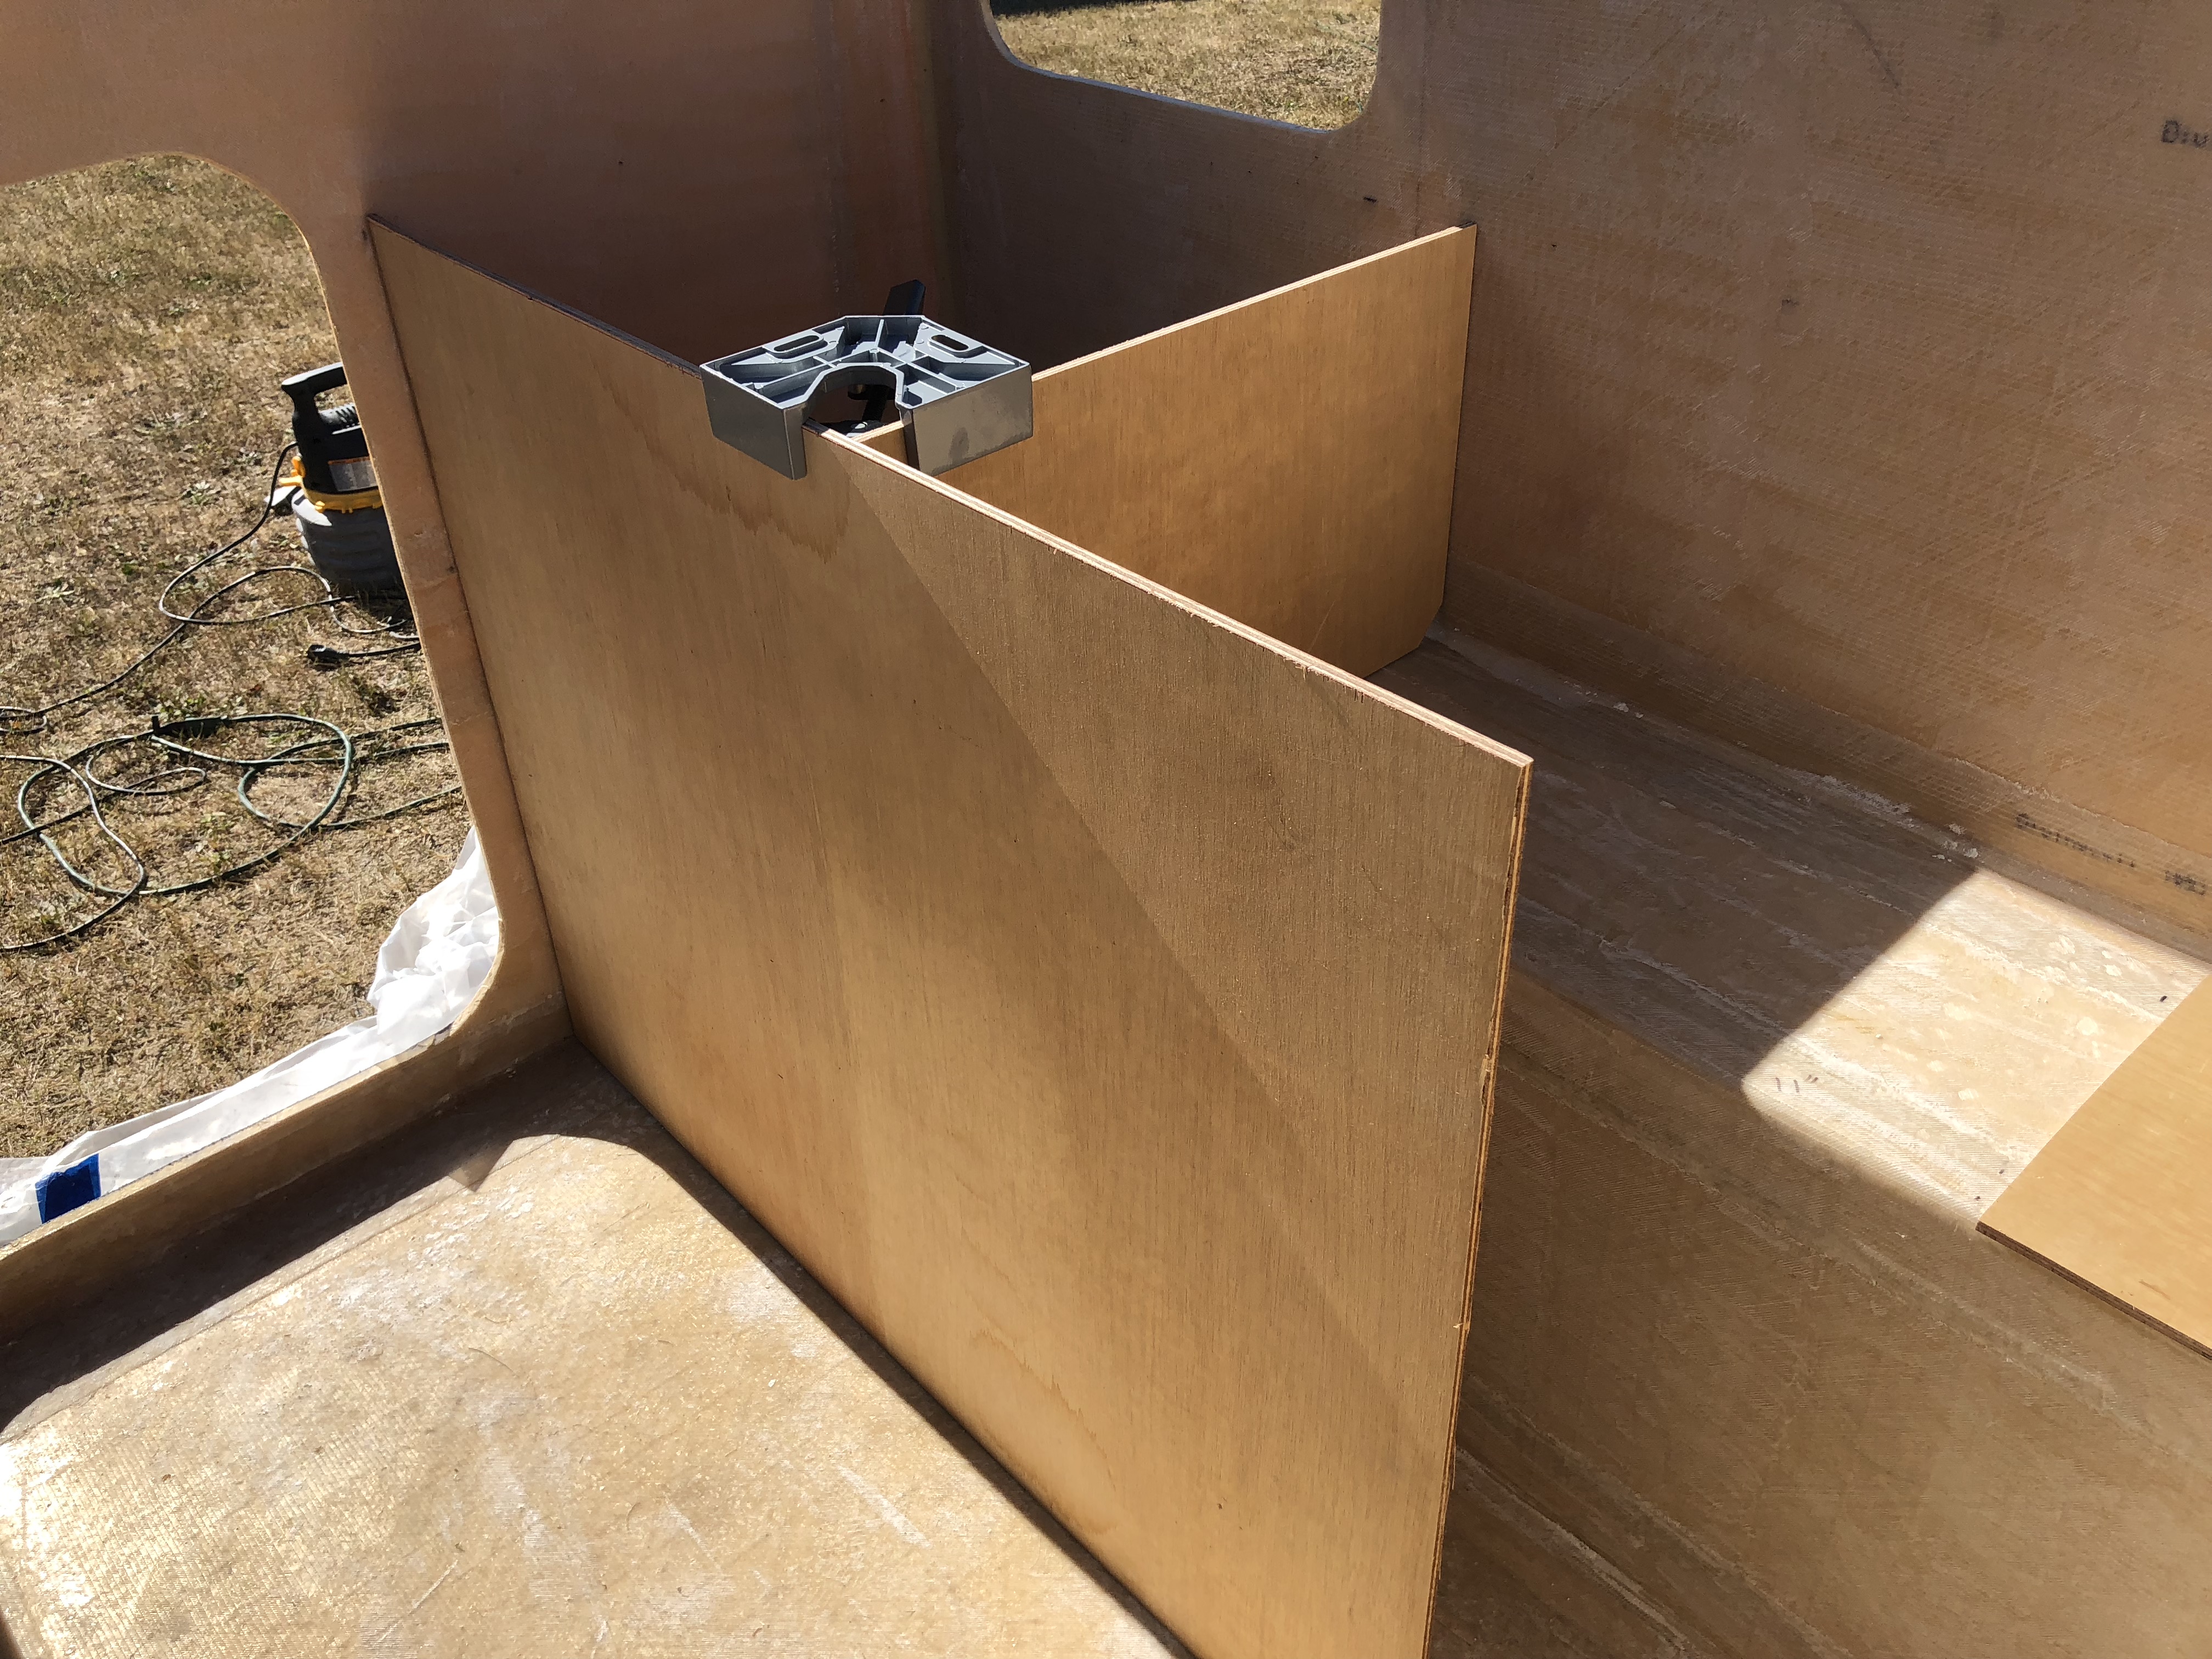
The stove is going to go a little further forward away from the door so if someone is cooking, the other can get in and out of the camper safely. (that's the idea anyway)
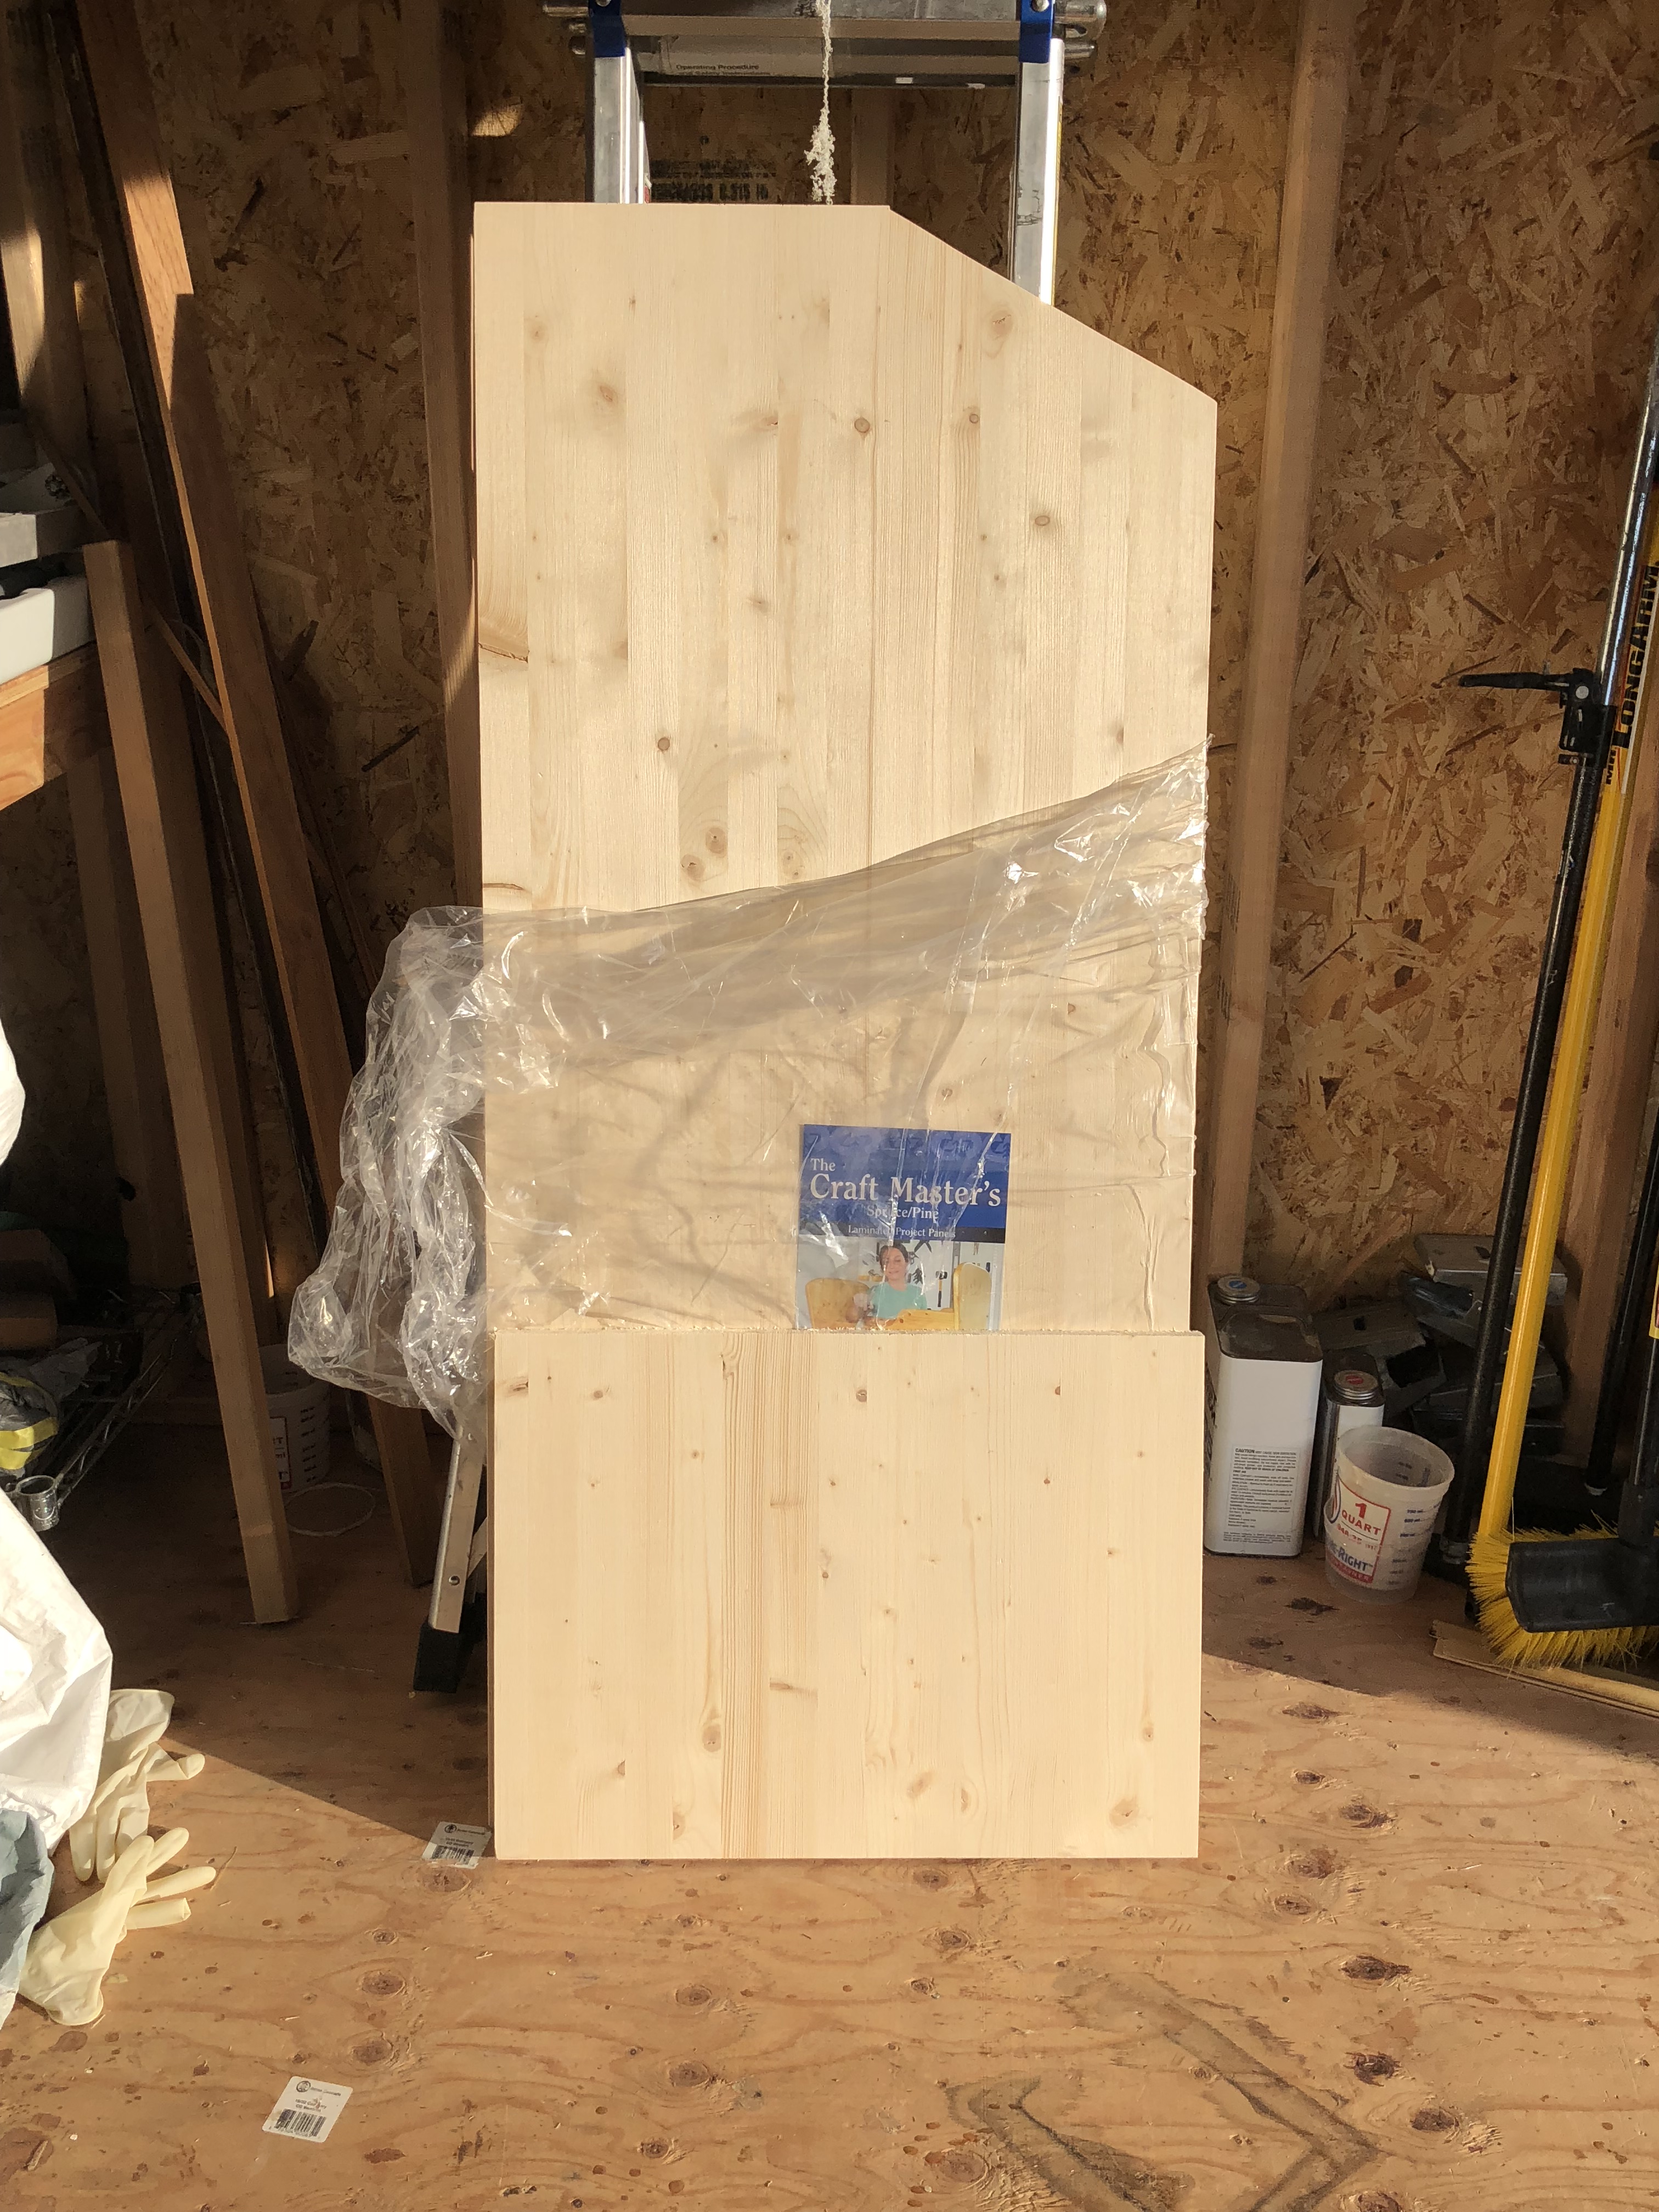
This is going to be a table someday.
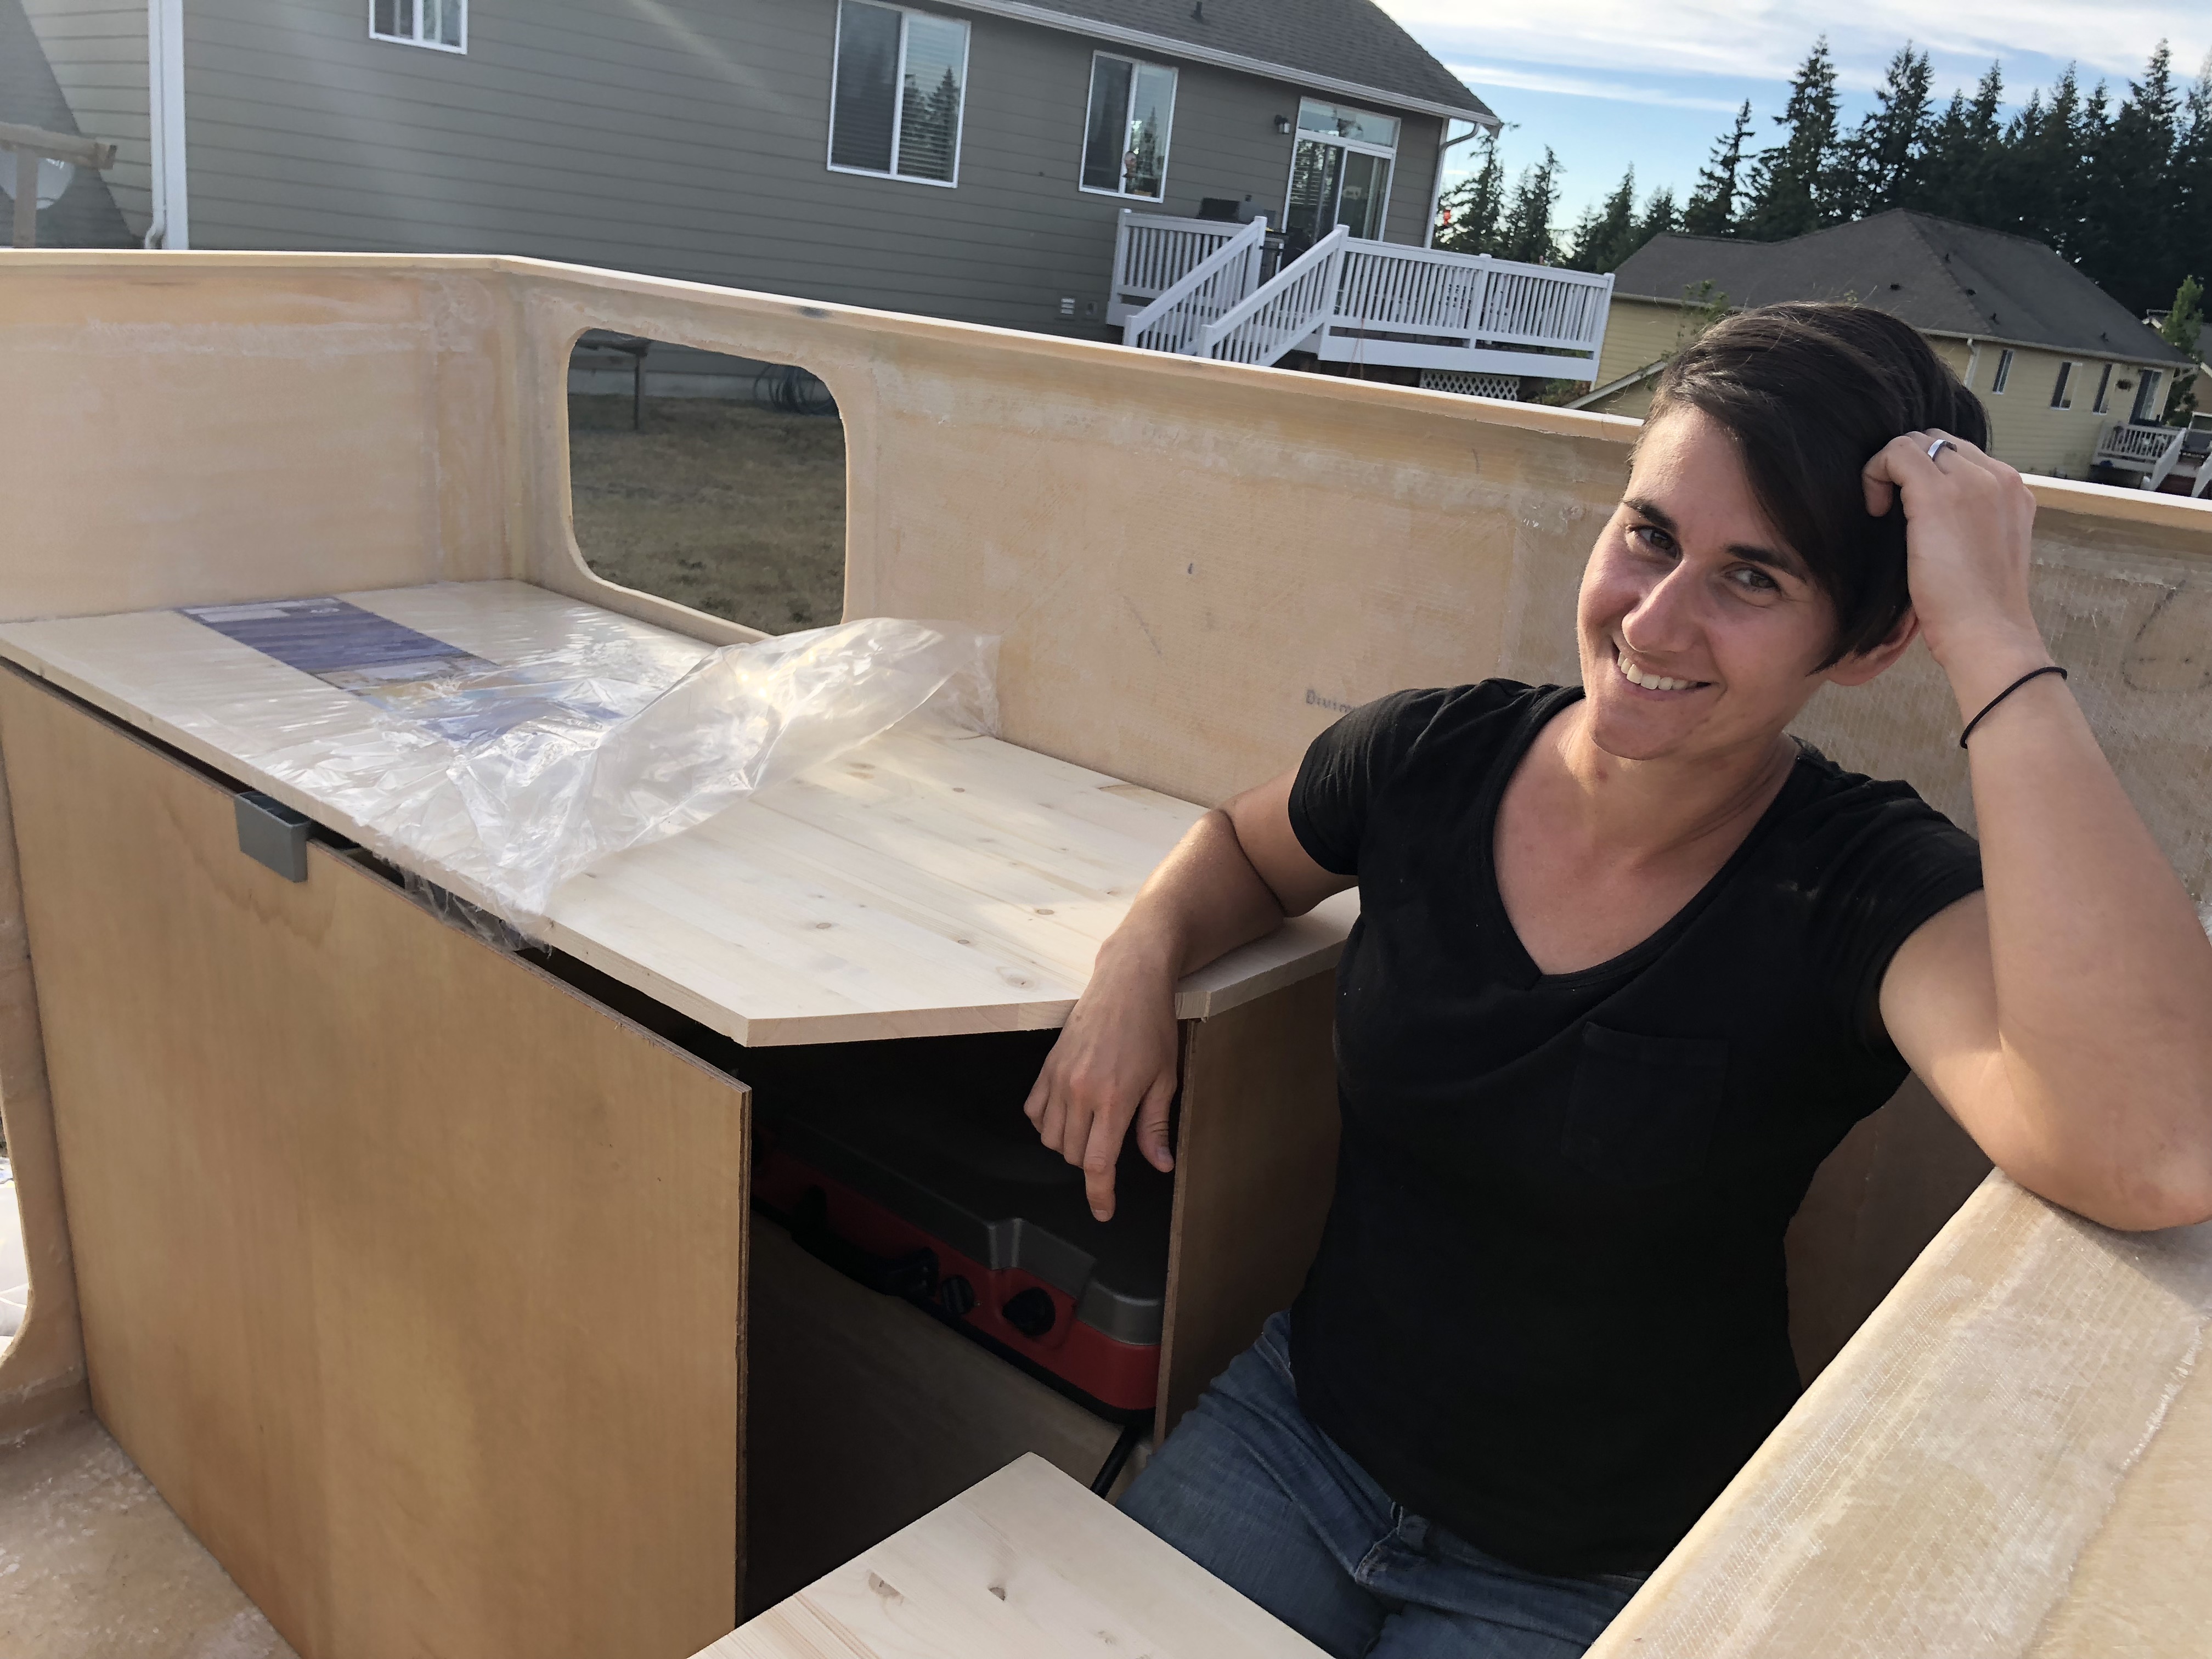
Here's an update on the countertop situation. In order for the person on the driver's side to get out of the sitting area, we had to put an angle on the corner of the galley cabinetry. It's a little tight in there, but not too bad given how small the entire camper is. The table will have angled corners to match and should be big enough for 2 people to eat dinner on. I had all kinds of super awesome ideas for the countertops, but we ended up with some butcher block looking wood from Lowe's.
It's starting to feel like a real camper!
I wanted to have actual counter space to cook in the galley and enough room to sit that it didn't feel cramped. On the other side is the other seat, the cooler goes in the middle, and a storage cabinet will go on the right side.
I was thinking in the beginning of having a propane locker and a large propane tank, but the only thing that will be running propane is our small camp stove. We currently own a 2-burner Primus that I'm planning on removing the lid from and just installing it in the galley. Why buy another thing if you don't have to? That left enough room for a cabinet in the corner and I guess you can never have enough storage...
We went to Lowe's to see if they had any cheap cabinets that we could just cannibalize for the camper. The counter is a comfortable 36" tall and 24 deep. Unfortunately due to all of the internal structure (the wheel well area...) we couldn't find anything that would make our lives easier, so we're going to have to just build something. Which is what we expected, but it never hurts to look! Anyway, we procrastinated enough at the hardware store and had to come back and start sanding the inside of the camper. That required a lot of crouching down to get into all the corners, which meant that I had to do it. It was a long couple hours of sweating from literally everywhere and now I need some Tylenol and a nap.
The inside just needs a few spots cleaned up and it's DONE! While I was suffering in the sun and Tyvek, Jason was digging out some of the leftover marine plywood that we had laying around so we could repurpose it into the camper!
Jason got to measure everything because, honestly, my attention to detail is utter crap.
Here's the main galley cabinet face mocked up!
The stove is going to go a little further forward away from the door so if someone is cooking, the other can get in and out of the camper safely. (that's the idea anyway)
This is going to be a table someday.
Here's an update on the countertop situation. In order for the person on the driver's side to get out of the sitting area, we had to put an angle on the corner of the galley cabinetry. It's a little tight in there, but not too bad given how small the entire camper is. The table will have angled corners to match and should be big enough for 2 people to eat dinner on. I had all kinds of super awesome ideas for the countertops, but we ended up with some butcher block looking wood from Lowe's.
It's starting to feel like a real camper!
Forum statistics
Members online
- Rockymountainhunter
- ITTOG
- whododat
- WyoJeep
- mark5280
- kmacafee
- PPiazza
- swinnie
- Mkstauffer
- misfit31
- SiberianSoon
- DakarDarrell
- BrookTrout304
- Pierre D
- GHI
- Anarchy Joe
- MR. ED
- ebrabaek
- bradleg
- TommyG
- McTJ
- phuta
- LaBlaze
- Jseda3g
- Skinhyfish
- watjoe
- nukeandjuke
- Avihay
- Gravity
- dogbite
- lactic
- jim65wagon
- Bmcdoug1
- pmkcolorado
- Rancid
- schuy2147
- Dunzee
- DSisOK
- roverbuild
- Hyperdrive
Total: 721 (members: 44, guests: 677)