AT IT AGAIN: Paul and Mike Convert a Mid/Tall T1N Sprinter Cargo

mhiscox

Expedition Leader
There are a few guys running "flip up" screens on the Sprinter forum without issue.
I've seen lots of writeups on the Sprinter-Source, but my personal experience wasn't too brilliant.

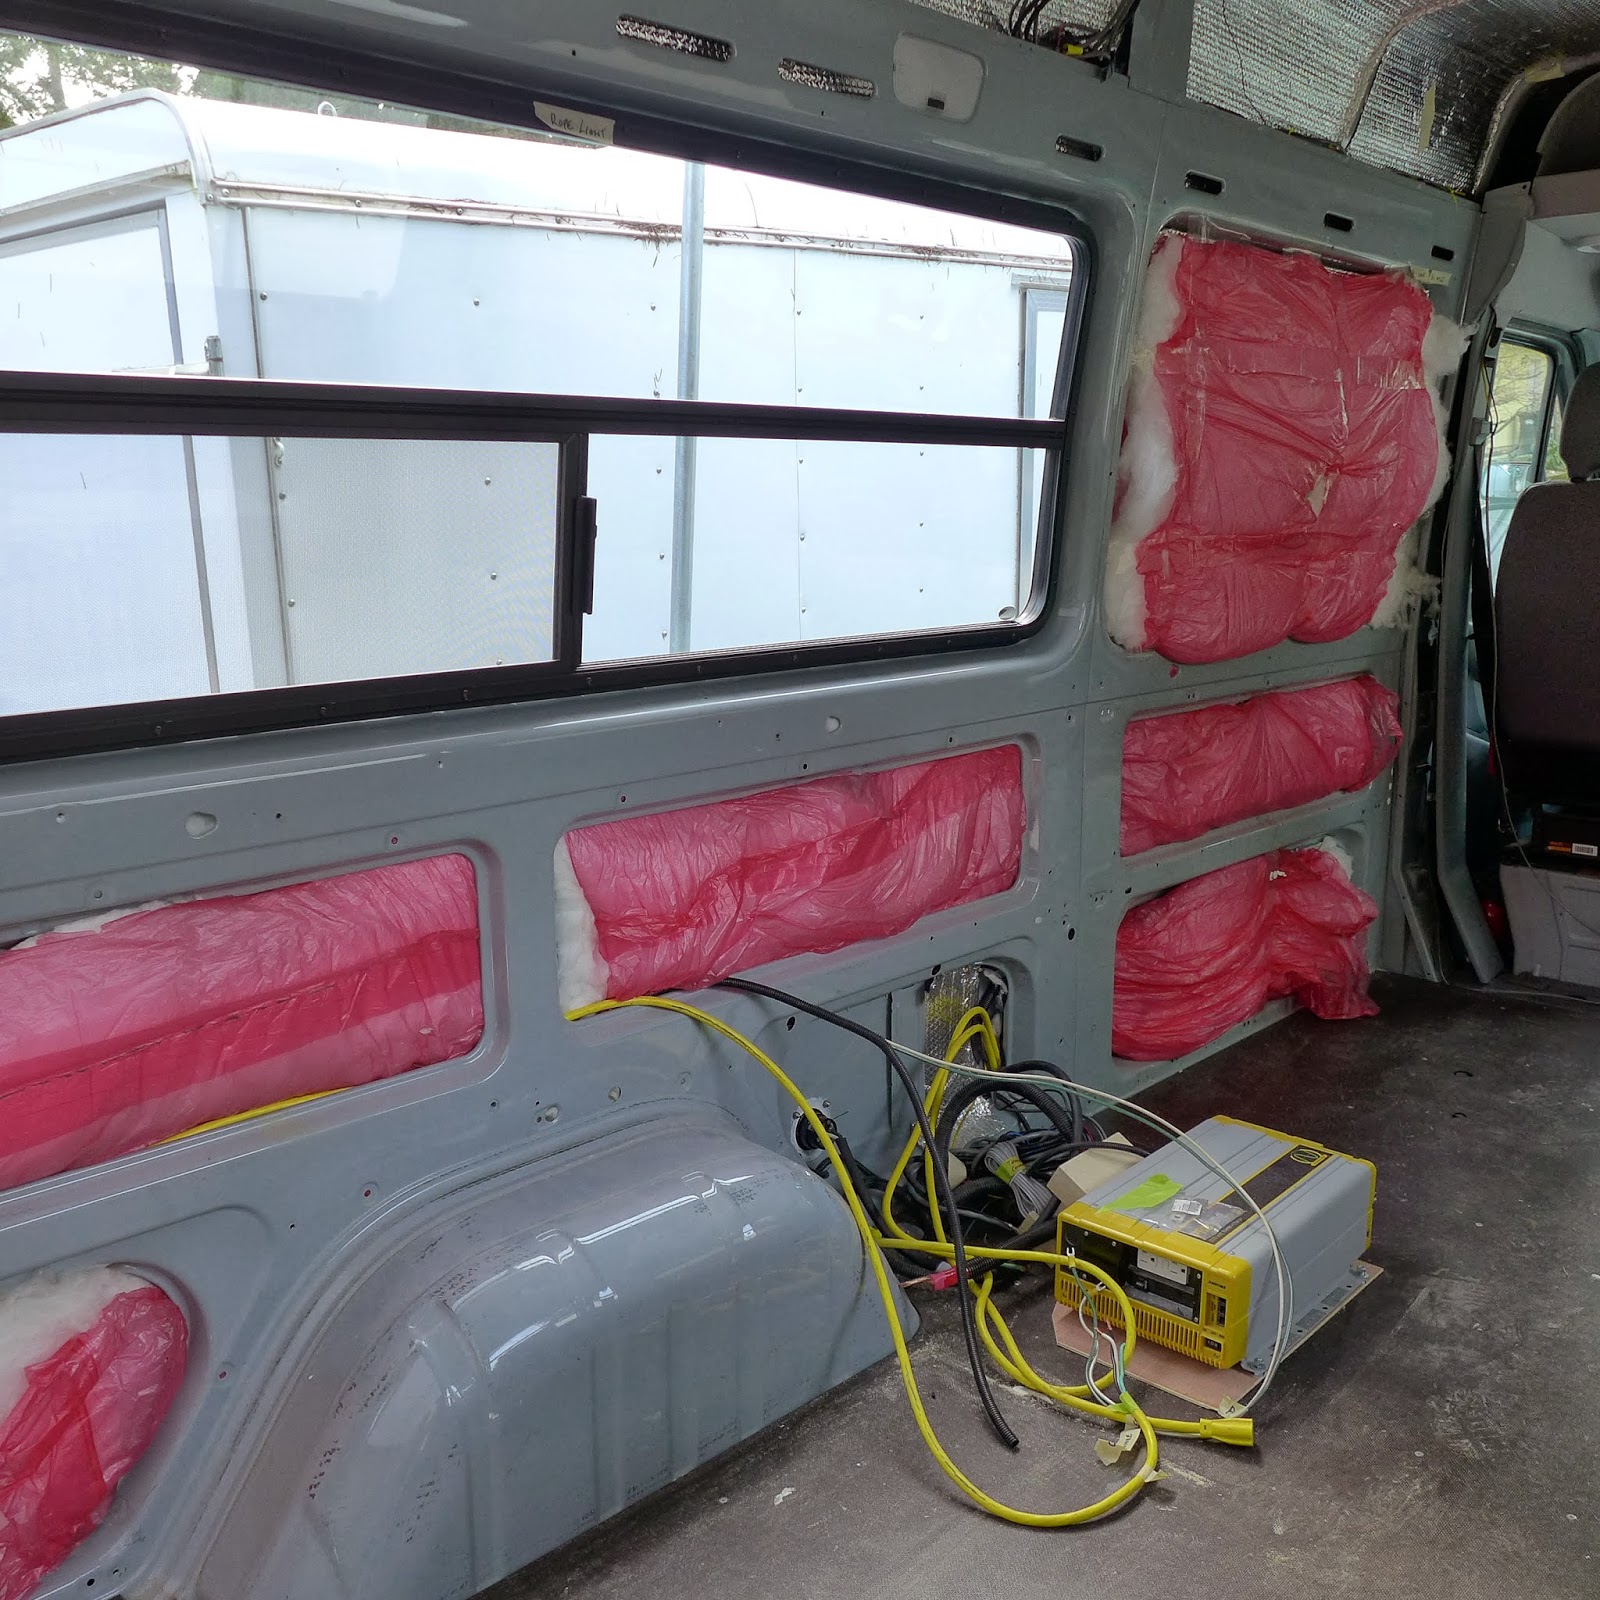
The biggest problem I had was that you often couldn't see the screen details. Sprinters have big windshields and side windows, and my previous Sprinter also had windows everywhere:

Mog Junior NV boondock.jpg

and the T1N Sprinter radio sits at the top of the dash . . . all of which teneded to put a lot of light onto the screen, even in cloudy Oregon. Also, the angle between the driver's eyes and the head end screen is really oblique, not far short of 180 degrees, and that created a huge viewing angle. All this meant that I routinely had to move my head around to try and see anything.

A close second, problem-wise, is that the screen placement is waaay out of the driver's line of sight and I really had to take my eyes off the road to do any operation on the touchscreen.

I'm not saying that someone of a different height, or with longer arms, or a different driving position, or a darker van, or better eyes couldn't make good use of one of the touchscreen units, but I didn't have a positive experience.
 

mhiscox

Expedition Leader
I understand. My primary use for a screen would be a backup camera.
Ironically, instead of relying on the screen of the AV head end, I'd installed a special rear view mirror that had the backup monitor built in.

That turned out to a world-class dumb idea; the backup image in the mirror was totally washed out. :sombrero:

This was 2005, though, and I'm guessing that screens hold up better to stray light than they used to. Good luck with your install.
 

CLynn85

Explorer
Great work as always! Just curious, I may have missed it but I haven't seen a gray water tank on the sink drain for most of Paul's builds. Where do they empty out at?
 

spressomon

Expedition Leader
The tambour style doors are slick! Question: I would assume the gap clearance, between the tambour doors and the track, is critical otherwise if too tight the doors are sticky to operate...and if too loose they rattle in transit? How do you insure they are rattle/noise free?
 

86scotty

Cynic
Wow, just read this thread in the last two nights at work. I'm an old Airstream guy and your 'modern' (read painted) tambour is beautiful! Really nice work, thanks for documenting and sharing it with us.
 

PaulJensen

Custom Builder
G...I may have missed it but I haven't seen a gray water tank ...

The grey water tank is being fabricated by a polyethylene tank company...It will fit under the sink and when appropriate, drain through the floor at a legal disposal location...That's the plan anyway...
 

PaulJensen

Custom Builder
T... the gap clearance, between the tambour doors and the track, is critical, otherwise if too tight the doors are sticky to operate...and if too loose they rattle in transit? How do you insure they are rattle/noise free?

Test fit and adjust...

With wood it should all be pretty quiet...
 

PaulJensen

Custom Builder
Took the van for a drive to the counter-top guy...The Gallo speakers with the $20 amp sound AMAZING...Like having $400 headphones on...Stereo with distinct right and left...I had the I-pod with Clapton live from the '70's on and had it as loud as it would go...Loud...Could hear no road noise...The music is stuff I've listen to consistently since the '70's and I head things I never heard before...The sound is so clear and rich...The placement is PERFECT...The music goes straight into your ears...No deflection or refraction...I could drive for days just to listen to this thing...I'm really blown away how it turned out...!!!...
 

mhiscox

Expedition Leader
Just curious, I may have missed it but I haven't seen a gray water tank on the sink drain for most of Paul's builds. Where do they empty out at?
As to my two other Jensenmobiles . . .

On the Jeep the grey water (sink and shower drains) goes into the original Earthroamer plumbing, which leads to a fiberglass grey water tank that's at the forward end of the curbside bench, right behind the hot water heater Original shown; replacement in same spot).

P1010236.jpg

FWIW, I did replace a kinda-hard-to-use plastic ball valve that was outboard of the passenger seat with a metal valve that's under the floor.

In the LX470 rear conversion, the sink drains onto the streetside-most of the the two 4-gallon Reliable jugs.

P1130044 (1).JPG


Thanks for the compliment.
 

PaulJensen

Custom Builder
#19

P1040751.JPG

(above) The 10'5" driver-side cabinet that I hand-hold out with an extended arm...Getting ready to be wired...

P1040756.JPG

(above) The roll-up doors on the curb-side were one slat short of moving smoothly, so the driver-side tambour doors get one more added...

P1040757.JPG

(above) Easy enough with fabric and glue...

P1040759.JPG

(above) With word of the countertops being ready for fitting, the focus shifted to the lower cabinets...

The fridge was placed, the granite surface height was adjusted, feet for the fridge got sockets, minor trimming and fridge electrical, happened...

P1040760.JPG

(above) Close to how I found it...

P1040761.JPG

(above) Now fully aware of the potential evil of friable spun FiberGlass insulation, it got sealed far, far away...

The wires are for the fridge...AC / DC...

P1040762.JPG

(above) Curb-side countertop...3/4" thick stone...

Below, hardware for the table...

P1040764.JPG

(above) Black with copper flecks...Looks like it's under 1/4" of water...

P1040765.JPG

(above) Hard to photograph...It goes off in the sunshine...

P1040766.JPG

(above) Tyler the stone guy, fitted the kitchen counter to the wall curves and I gave him templates for the holes...Sometime next week the final fitting happens...But before I can do anything permanent with the top, the water and storage tank need to get here and get fitted...Drawers have to wait as does sink and supply and drain piping...Need the tanks...

More happened, I was too busy doing to stop and record it...

More tomorrow...
 

mhiscox

Expedition Leader
Nice, I'm a huge fan of the KISS solutions. Do you use the 3/4" garden hose connections to allow you to un-thread and disconnect for emptying? Pretty ingenious, I might definitely be stealing that one!
Actually, the garden hose was chosen mostly for being rigid enough not to kink (sometimes a problem with the equivalent plastic tubing), opaque (so you can't see the grunge) and, above all, not otherwise being used. I actually filled fresh water and emptied waste water by unscrewing the white plastic caps on the jugs.

It was, as you detected, nice for being stone simple, and the 4 gallon capacities were perfect, big enough to be worthwhile, but small enough that handling full jugs was not a problem. (For anyone who cares more, the build thread is here: http://www.expeditionportal.com/forum/threads/77938.)
 

McZippie

Walmart Adventure Camper
Like!... Been off the forum for a month and come back to see an amazing in progress build, that's nearing completion.
Wow, Paul you work fast!

Mike, any plans to flat tow your Jeep rig with the Sprinnter?
 

PaulJensen

Custom Builder
#20

P1040767.JPG

(above) The bed / sofa cabinet is next...

P1040768.JPG

(above) The big drawer gets two sets of self-closing drawer slides...They are not designed for lateral drawers but work fine when paired...

P1040769.JPG

(above) Box jointed 1/2" plywood drawer boxes, with 1/4" plywood stapled and glued to the bottom...Routered, sanded, putty'd, sanded, primed, painted...Double guide rails...

P1040770.JPG

(above) The plan is to not take this out...

P1040771.JPG

(above) Snack drawer pulled out...

P1040772.JPG

(able) Fully functional...The faces are push-rod-tube polyurethaned to the boxes and screwed for the mechanical bond...
P1040773.JPG

(above) There is access from the top as well...

P1040774.JPG

(above) Drop-down hatch plywood is attached with a piano hinge...Simple hole for the pull...

P1040775.JPG

(above) Opened up, it spreads wide...

P1040776.JPG

(above) Waiting for "other stuff" is the kitchen cabinet...

P1040777.JPG

(above) The electrical panels are placed, ready to wire...

P1040778.JPG

(above) Dark transparent plastic will conceal the panels from this side...

P1040779.JPG

(above) Ready to cover...

P1040780.JPG

(above) 6 mil. poly-sheeting, packing-taped to the walls...The electrical is, ready to wire...

P1040781.JPG

(above) Bed / sofa cabinet in to stay...However, all the cabinetry is built to be undone and placed in a similar vehicle...

P1040782.JPG

(above) The flooring will get glued in place...

P1040783.JPG

(above) I really wish the water tanks were here...

P1040784.JPG

(above) Without tanks everything is 'on hold' in this space...
 
Last edited:

Forum statistics

Threads
185,897
Messages
2,879,321
Members
225,497
Latest member
WonaWarrior
Top