All-Purpose Scout 80 build

amgvr4

Adventurer
Good work man. Having just "finished" my suspension I know how big of a relief is is to finally have it all the way you want it and be ready to start moving on to other items. Have you ever though about flipping the u-bolts on top of the axle? My guess is you have based on the amount of attention to detail in your build. I only bring it up because I hated having the bolts hang down on my FJ60 and catch on everything. I damaged some of the threads bad enough I probably would not have been able to get them off without cutting the bolt and getting new ones. Thanks for sharing your work, I have learned a lot from it. Keep it up!
 

MotoDave

Explorer
Good work man. Having just "finished" my suspension I know how big of a relief is is to finally have it all the way you want it and be ready to start moving on to other items. Have you ever though about flipping the u-bolts on top of the axle? My guess is you have based on the amount of attention to detail in your build. I only bring it up because I hated having the bolts hang down on my FJ60 and catch on everything. I damaged some of the threads bad enough I probably would not have been able to get them off without cutting the bolt and getting new ones. Thanks for sharing your work, I have learned a lot from it. Keep it up!

Thanks for the feedback, it keeps me motivated to keep posting updates.

I'll look into the u-bolt flip, but its probably on the 'projects to tackle some weekend after the truck is running' list. Which is growing already:)
 

shortbus4x4

Expedition Leader
Your fuel filler still makes me a little weak in the knees. Nice attention to detail. I had a '66 when I was 17 that I wheeled all over northern California, 152 4 cylinder and 3 speed. Wasn't fast but sure was fun.
 

bftank

Explorer
shock placement is something ive been trying to figure out in my explorer build as well. some of the things ive been considering to fit longer shocks with out protruding into the body.

-mounting the shock in front of the rear axle so that as the suspension cycles the tire moves away from the shock instead of towards it.
-using the wheel well to mount the top of the shock to instead of the frame. and then supporting the mount with the rollcage on the other side of the wheel well. this way i can keep it as close as possible to the sheetmetal
-ive been checking out lots of cherokee shock mounting in every man challenge king of the hammers rigs, some good ideas in there.
-for right now im using super duty lower mounts with a ubolt so that i can play around with the placement some once its under the rig.


just some thoughts. i thought id share. i love the builds where the builder thinks about how everything is going to effect each other vs. slapping it together out of a catalogue.


oh and for the ubolt flip. the explorer is also staying spring under. im using 1988+ chevy ubolts, to do the flip. for the top plate i used a piece of 6" channel should work pretty slick. if need be i can post pics of it for later use.
 
Last edited:

MotoDave

Explorer
Got any pics of your setup? I'm not familiar with Explorers ...

I don't think the axle moves significantly enough to make min front/behind much of an issue, at least not compared to running them next to the axle instead of on top. I put mine behind the axle in the theory that as the suspension compresses the shocks will go slightly more towards vertical, to try to offset the angle they're mounted at. I've had suggestions to have one in front and one behind the axle to try to prevent wheel hop, but that means one shock is gaining angle while one loses it, so I want to try to keep stuff consistent.

Using the top of the wheel well, braced by the roll cage is a good idea, if you have room between the inner fender and tire for the shock. I don't.
 

bftank

Explorer
ill get some pics up for you later today. it currently has a 14 bolt in the rear, soon to be replaced by a sterling. so there is a little more room in there axle wise.

it has 63" 3/4ton chevy springs in there now with the overload and the first couple of leafs removed. the spring under takes away any axlewrap. so far. sooper camper has a good idea about setting up springs for anti wrap that i want to try. once i get the 37s on, if there is any wrap i will put in a top link to the frame on each side with rod ends to control it. hopefully that wont be necessary.

sooper campers springs. http://www.expeditionportal.com/forum/threads/135144-The-Sooper-Camper-F350?p=1715512#post1715512
 

rayra

Expedition Leader
MotoDave, in post 98 you're talking about cantilever suspension designs, is that the same sort of thing as Christie tank suspension geometry? The conversion of vertical motion into horizontal dampening seems very similar to me.
 

MotoDave

Explorer
MotoDave, in post 98 you're talking about cantilever suspension designs, is that the same sort of thing as Christie tank suspension geometry? The conversion of vertical motion into horizontal dampening seems very similar to me.

Similar idea, except there would be a link between the axle and the bellcrank, and some other mechanism for locating the axle. The Christie suspension uses the bellcrank as a suspension arm as well, which would only really work on an independent suspension setup. It will also have the same challenges with nonlinearity between travel and spring/damping forces.

thank you for saving this old girl ...i have a love for scouts ,,,had 73 scout was one of my favorites....j

Haha I read that as 'I've had 73 Scouts' ...but thanks anyways.
 

MotoDave

Explorer
73 Scouts would be a good start ;)

Yeah you might get 1 rust free one out of the bunch :)

I'm calling the rear shock mounts done for now. Everything clears when I cycle it as much as I can with a floor jack in the garage, we'll just have to see how they do in the real world.

The pictures don't look much different, but I remade the upper mounts using 3/16" plate, and configured them so I have more room for a washer and lock nut on the backside of the bung.

2015-01-25%252016.42.49.jpg


2015-01-25%252016.43.52.jpg


2015-01-25%252016.43.15.jpg


Yes there's rust :(
2015-01-25%252016.44.41.jpg


The mounts ended up ~1.5" inside of the body, I'll make some cover plates that can be removed for access to the nut. Hex head bolt will be replaced with a flange bolt, and the length will be such that no thread is inside the bung, i.e. proper grip length to avoid a shear load on a threaded section of bolt. It as good as I can make a single shear mount in this case.

The tire cycles about 6" of bump for 5" of shaft travel due to the angle of the shock, which I'm happy with. Droop doesn't seem great with these springs (56" Chevy) but we'll see how it does in the rear world. A custom spring pack is likely once I figure out what exactly I need.

I think I'm close to pulling the body off the frame, or at least lifting it up enough to get to all the welds that need finishing on the top side. I'm going to deal with the surface rust on the tub, as well as the frame at the same time. Not really looking forward to grinding/sanding/painting, but at least it'll be a change of pace.
 

MotoDave

Explorer
Shifting gears from all that suspension work, I've been working on cleaning up the frame and underside of the body to paint. Goal is to get that done, drop the body back on the frame for good, and then start final mechanical assembly. I will paint the outside sometime later.

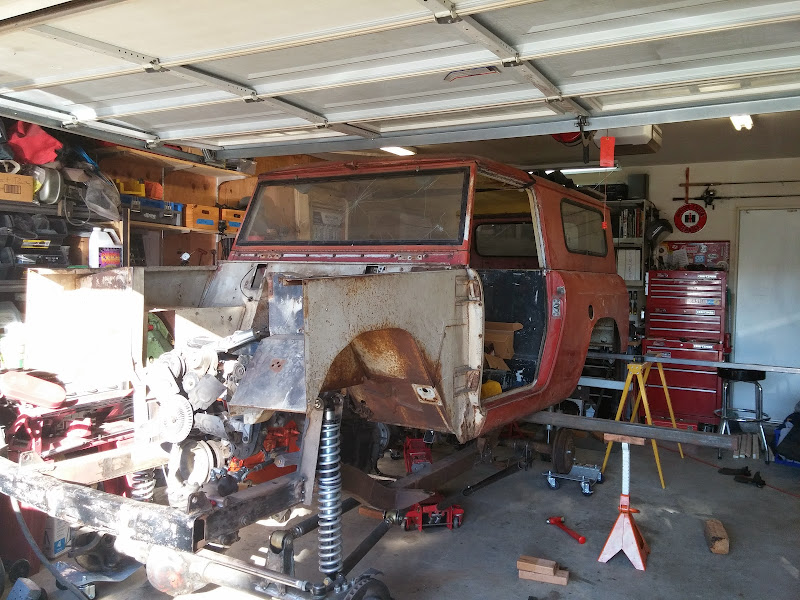
In process of lifting the body
2015-02-15%252015.35.31.jpg


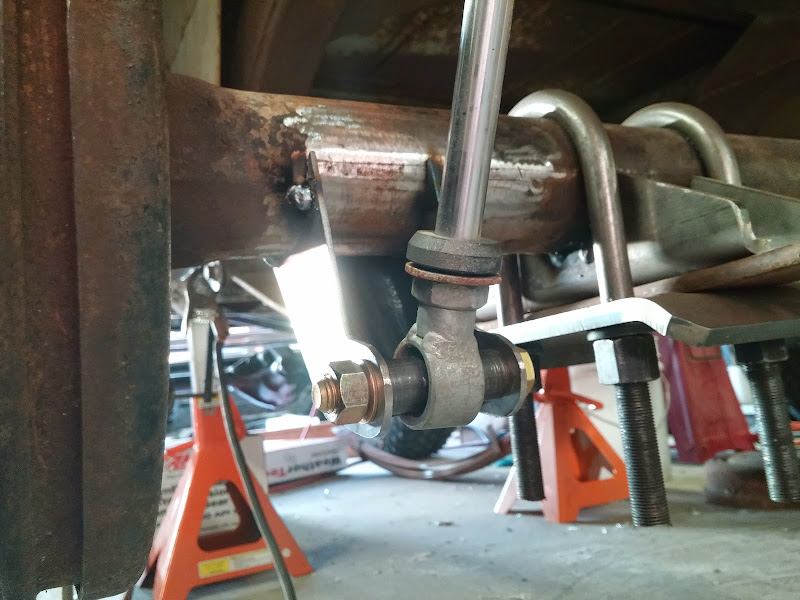
I was planning to lift it high enough to roll the frame out from under it, but once I got it up about 12" I realized I've got enough room to do what I need to, so I'm just running with it as-is. Before anyone yells at me, this was just during the lift, there are now additional supports between the body and frame to keep it from falling on my head.

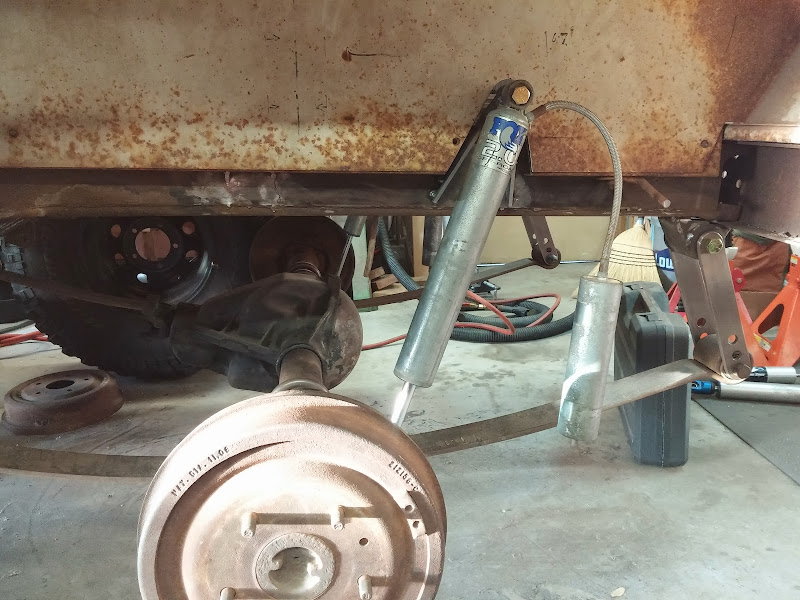
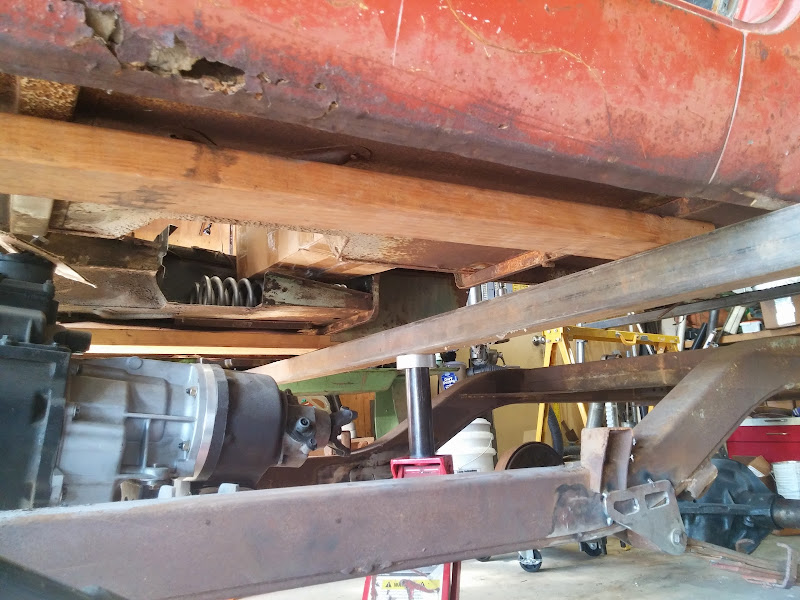
Jack riser I built, its bolted solid to my floor jack. this also gives an idea of what the frame is like now, lots of surface rust but nothing serious. the body rot you see in the rocker is the worst spot on the body, and I have plans for a solid rock slider piece that will replace this whole area.
2015-02-15%252015.35.49.jpg


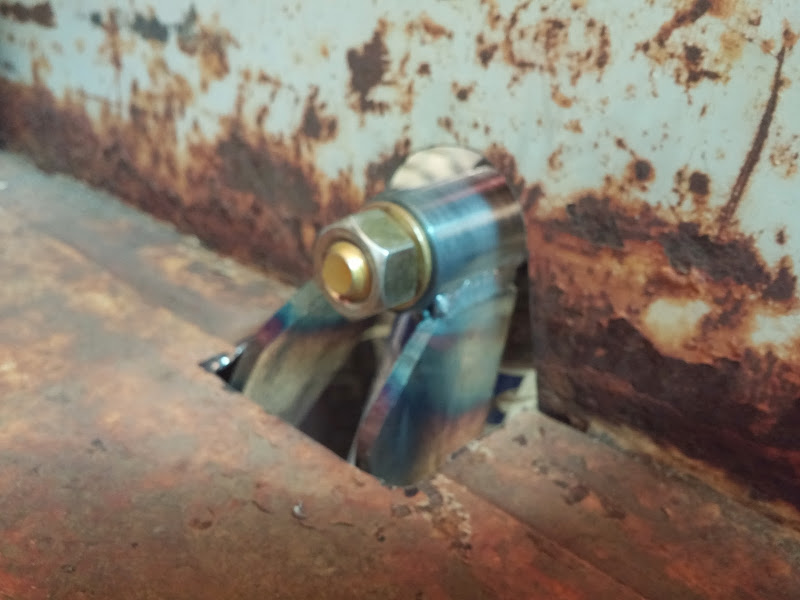
I'm lifting on a piece of heavy wall tube, with 2x10 wood blocks distributing the load between 2 braces that are under the cab. The back of the body is supported by a tube bolted to the body mounts, across some sawhorses.

I'm starting with a twisted wire cup on a grinder to knock the loose stuff off, followed by another grinder with a paint stripper disc on it (LINK). These things work awesome but I learned quickly to stay away from edges, or you get to watch a $5 disc disappear in about 0.1 seconds.

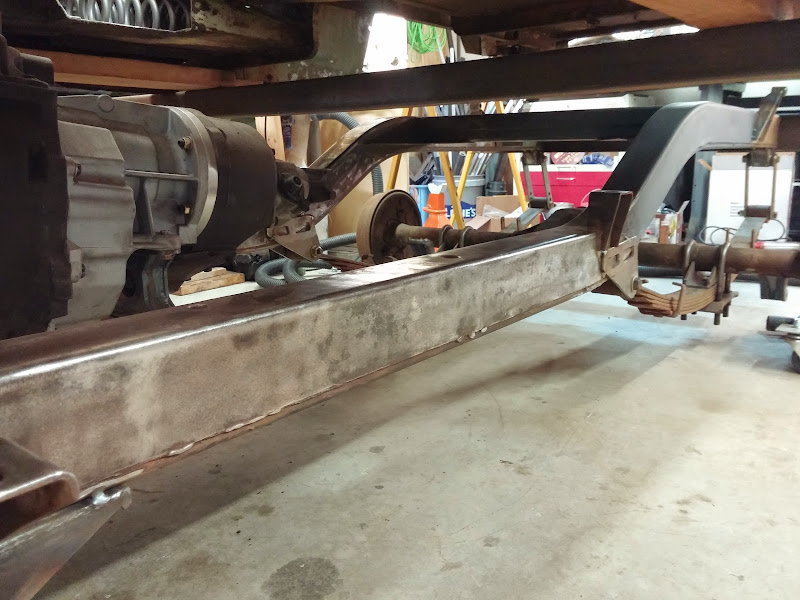
Anyways a couple of afternoons of work has the frame from what you see above to this:
2015-02-28%252017.15.03.jpg


The plan is to shoot the frame with good old rustoleum primer and top coat, this will make changes later easier than if I used something like POR-15. The underside of the body will get a coat of this stuff (LINK) since I don't see any way I will get 100% of the rust off the body. Primer will be followed by LizardSkin sound insulation, and finally a top coat of rustoleum with ceramic beads mixed in to (hopefully) help with heat insulation. Yes I know its a lot of work to throw at a crappy old truck with a not great body, but I am hoping the sound/heat insulation helps make it a halfway reasonable truck to put some miles down.

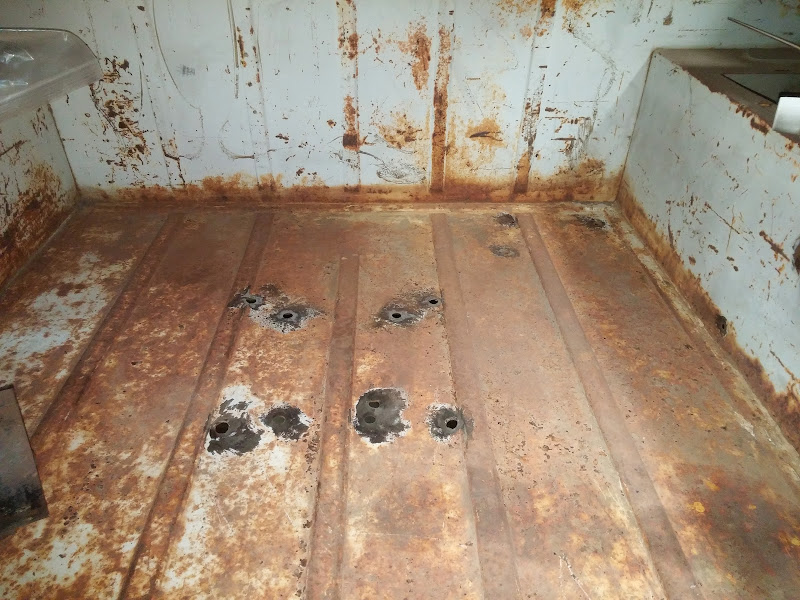
Before I spray the coating on the body I need to make sure all the holes in the body are welded up, so I've been making plugs to weld in using my new favorite toy - Blair Rotabroach kit
0301151743.jpg


Some of these holes look like they were drilled with a dull masonry bit, or maybe a .45 ACP. You can see that the metal under all that surface rust really isn't that bad. Its not a show truck, so it'll work out fine. I'm more interested in keeping water out than how it looks, plus eventually the inside of the tub will get a coat of bedliner to hide all my crappy body work..
0301151757a.jpg


Random holes in the fenders, I'm just going to try to take these closed using a copper backer.
0301151757c.jpg


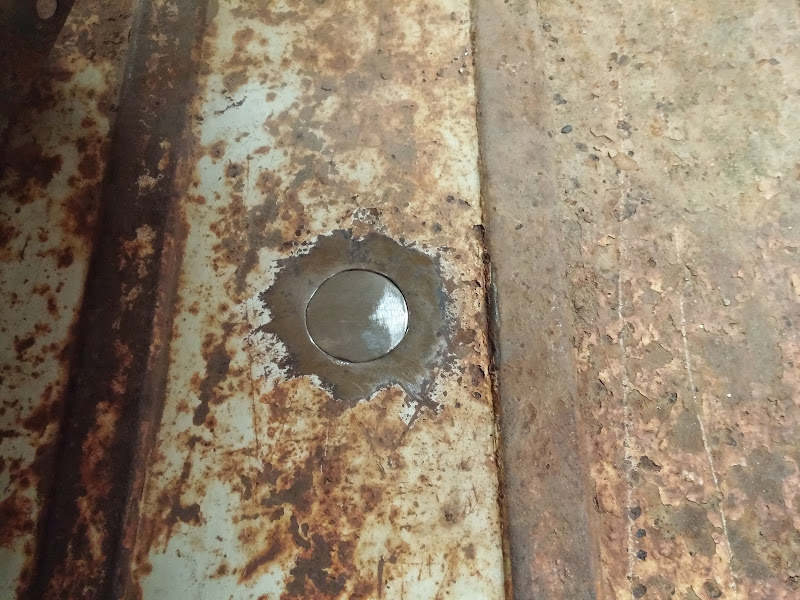
The worst hole at the back of the floor was bad enough I just cut out out with a 1.5" hole saw and made a larger patch.
0301151745.jpg


I've also been collecting parts for the steering/hydroboost system as well as the rest of the plumbing, so once I get though this body work phase I'm hoping to be making some more interesting progress.
 

Forum statistics

Threads
185,826
Messages
2,878,609
Members
225,393
Latest member
jgrillz94
Top