You are using an out of date browser. It may not display this or other websites correctly.
You should upgrade or use an alternative browser.
You should upgrade or use an alternative browser.
A trailer for the short bus
- Thread starter jays0n
- Start date
jays0n
Adventurer
Finally received the correct brake drums but they didn't send me new grease seals as requested (the ones that came with the incorrect drums were installed in those drums). I've gone to 4 autoparts stores and none have had grease seals for a trailer, in fact, only 1 of them even knew what I was asking for  So I ordered a pair from Amazon on Friday to be delivered Saturday so I could install them today as my wife is working this weekend. Well Amazon lost them and now they said I will receive them sometime in the next week. Jack stands for another week it is....
So I ordered a pair from Amazon on Friday to be delivered Saturday so I could install them today as my wife is working this weekend. Well Amazon lost them and now they said I will receive them sometime in the next week. Jack stands for another week it is....jays0n
Adventurer
Surprisingly I got home from running a couple errands yesterday evening and they were sitting on my front steps! I was able to get them installed and adjust the brakes to a good starting point. Now that the brake install on the trailer side is complete I still need to order and install the controller in the FJC, hoping that will get ordered later this week and the install wrapped up next week. I'll take it out for a good ride then come back and re-check all the fasteners, re-adjust the brakes if needed and toss a few pumps of grease into the zerks on the spindles. We have a trip planned to Eastern OR in the middle of June so I have a few weeks to get this wrapped up.
jays0n
Adventurer
Was able to get a few more bits done this weekend and I even grabbed some photos. Prepared for the arrival of the brake controller hopefully this week and fixed a couple small issues I found. I pulled apart the center console and part of the dash and pre-ran the brake and power wiring in the FJC to be ready to install the REDARC controller when it arrives, should take no more than an hour to install. I finally wrapped up the 7-pin connector install on the FJC as well. I also built a better way to carry the water heater and hope to have resolved the issue with the stoves bouncing around in the chuck box. We are departing for the Oregon BDR on the 13th of June, time is ticking...
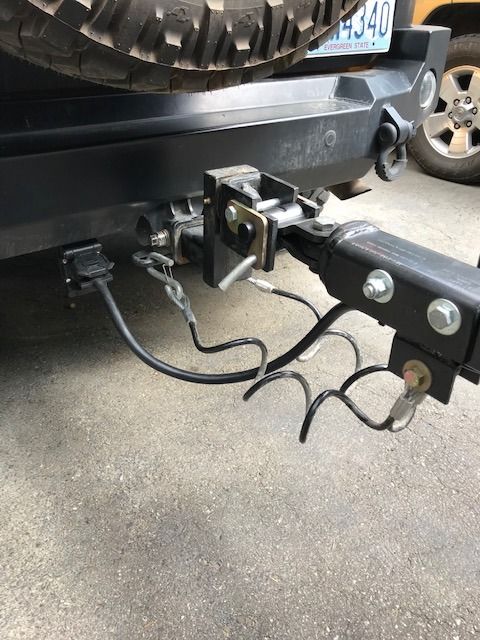
All hooked up and ready for a test drive, length of the new cable seems to be just right, I was a little worried that i shortened it too much. I drove 10 miles or so and the hub temp only rose about from about 64 degrees to 73 degrees so it feels like the bearings are well packed and the brakes aren't dragging (only roughly adjusted them).
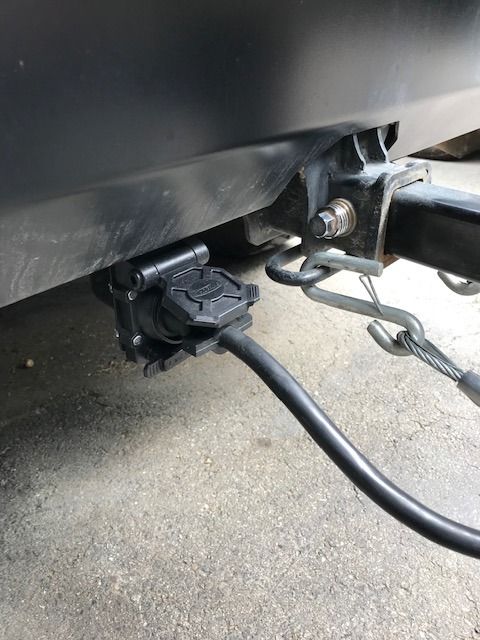
The 7-pin mount I used has a built in 4/5-pin connector so I don't need to use an adapter for my other trailers, which is why I chose it however the mounting bracket is pretty thin so it may get replaced with something custom at some point down the road, likely after I bend it beyond repair
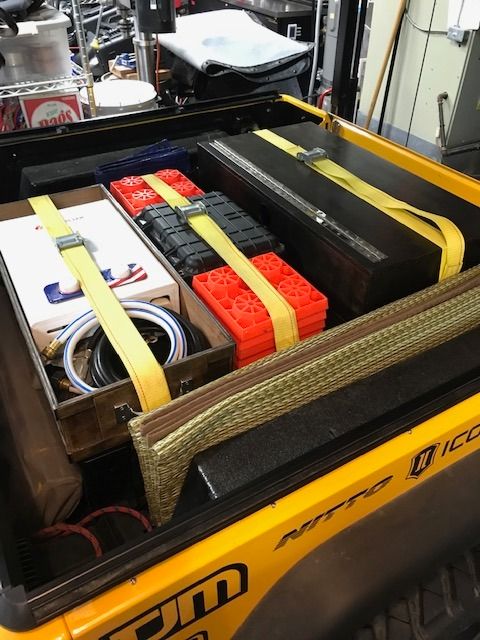
I've always used the Rubbermaid Action Packer storage bins and kinda hated them (slippery bottoms, slanted sides, wasted space in the lid, etc). I also carried a lot more stuff than I've ever really used so I made some hard decisions, ditched some things, and ended up replacing 4 of them with 2 of the FrontRunner WolfPack storage containers that are a bit larger. I also distributed things to very specific parts of the trailer for ease of getting to them during setup and where to pack them during teardown.
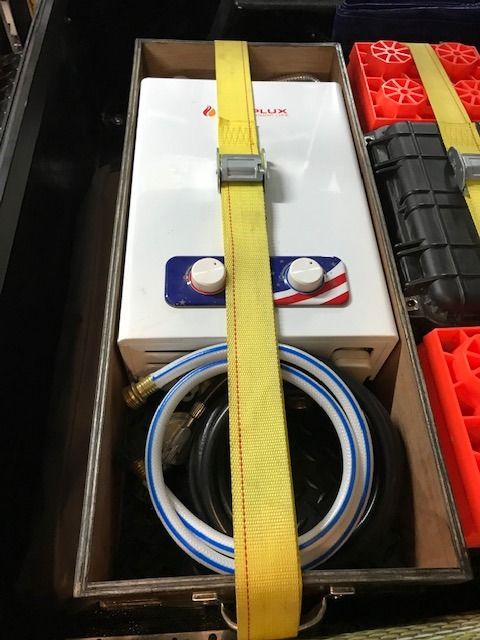
Using some plywood scraps I built a tray to hold the water heater and hoses to make it easier to get in and out, before it was just sliding around under a strap and a pain to get out to set up.
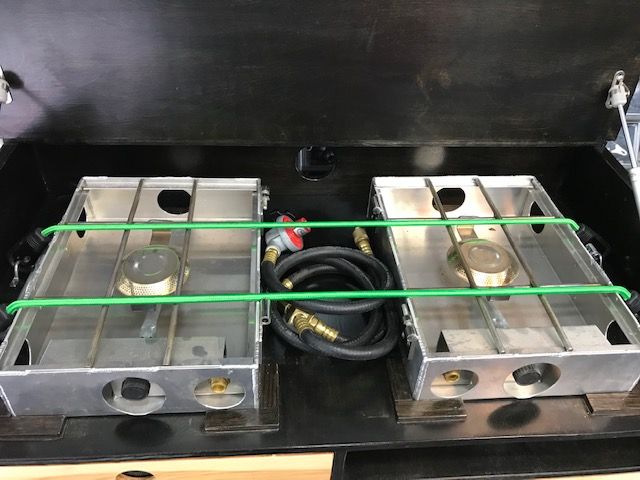
I originally attached small wood strips around the base of the stoves in the chuckbox to hold keep them in place but they still bounced around a lot. The attempted solution was to mount stainless loops on the outsides of each to hook a bungee cord on, seems to keep them in place so far.
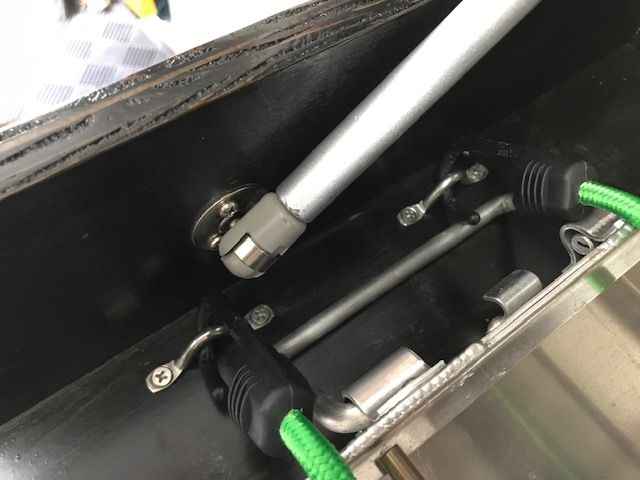
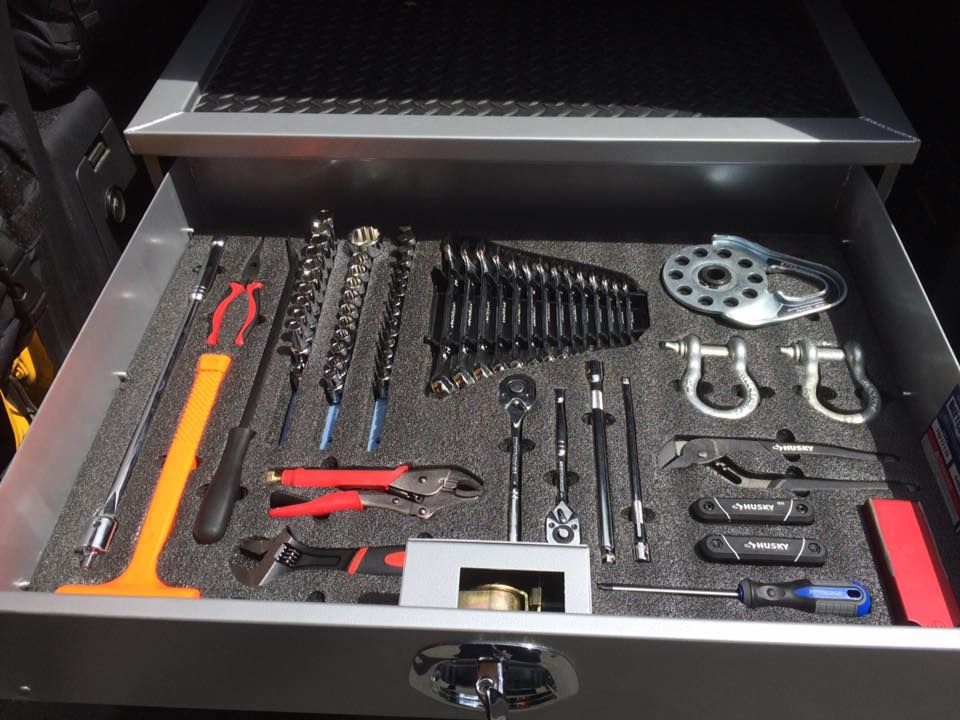
I got these cast stainless loops on Amazon and had the perfect length bungees so we'll see how it goes. Just need to take it for a good ride to see if it stays put now. I also organized one of the drawers with foam that I left loose when I built it last summer.
All hooked up and ready for a test drive, length of the new cable seems to be just right, I was a little worried that i shortened it too much. I drove 10 miles or so and the hub temp only rose about from about 64 degrees to 73 degrees so it feels like the bearings are well packed and the brakes aren't dragging (only roughly adjusted them).
The 7-pin mount I used has a built in 4/5-pin connector so I don't need to use an adapter for my other trailers, which is why I chose it however the mounting bracket is pretty thin so it may get replaced with something custom at some point down the road, likely after I bend it beyond repair
I've always used the Rubbermaid Action Packer storage bins and kinda hated them (slippery bottoms, slanted sides, wasted space in the lid, etc). I also carried a lot more stuff than I've ever really used so I made some hard decisions, ditched some things, and ended up replacing 4 of them with 2 of the FrontRunner WolfPack storage containers that are a bit larger. I also distributed things to very specific parts of the trailer for ease of getting to them during setup and where to pack them during teardown.
Using some plywood scraps I built a tray to hold the water heater and hoses to make it easier to get in and out, before it was just sliding around under a strap and a pain to get out to set up.
I originally attached small wood strips around the base of the stoves in the chuckbox to hold keep them in place but they still bounced around a lot. The attempted solution was to mount stainless loops on the outsides of each to hook a bungee cord on, seems to keep them in place so far.
I got these cast stainless loops on Amazon and had the perfect length bungees so we'll see how it goes. Just need to take it for a good ride to see if it stays put now. I also organized one of the drawers with foam that I left loose when I built it last summer.
Last edited:
Hillbilly Heaven
Explorer
Footman loops
jays0n
Adventurer
Exactly! Totally spaced on the name, thanks!Footman loops
jays0n
Adventurer
The addition of electric brakes is done and done! The wiring is finished and it's up and running. Finding a spot that the cigarette pack sized box could be mounted solidly was a lot more difficult than anything else was.
I've done a little testing and am happy with it so far. I know it will need a little tweaking to get the settings perfect and I may need to physically adjust the brakes a bit but I'll be putting 500+ miles on it in the next few weeks so I'll have plenty of time to mess with it. This is my first trailer with electric brakes so I'll do some reading before i just "wing it" and see if there is an established method for adjusting brakes that I can follow. Here are a couple photos.
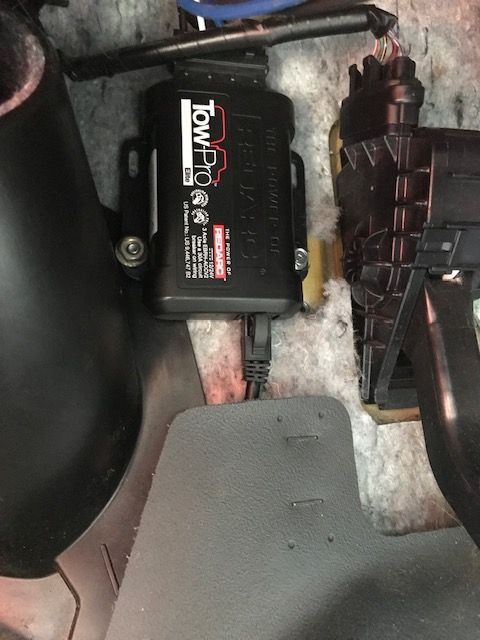
The hidden part of the controller is mounted to the firewall between the brake and accelerator pedals. It has a 3 axis accelerometer inside and it "learns" which direction is forward and back during calibration so it has to be mounted to a solid surface. The CAT5 network cable on the bottom connects to the control knob mounted in the dash.
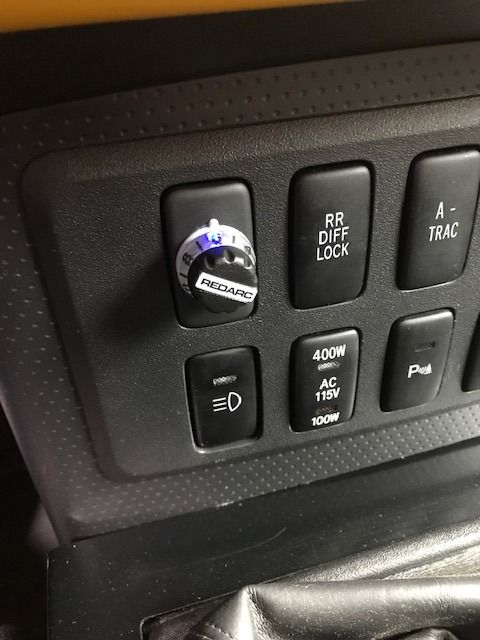
This is all you really see, the control knob. It has a multi color LED that tells you all you need to know about what it's doing. Blue means the trailer is connected and it's in proportional mode, it turns red when the brakes are being applied to the trailer proportionately to how they are applied on the tow vehicle, this is mostly for on road use. Green means user controlled mode where the brakes are applied to the trailer based on the number on the dial when the tow vehicle brakes are applied, mostly for off road use. To apply the brakes on demand you just push the button. So far it works great and I'm really happy I don't have to worry about smashing my knee on a brake controller every time I get into the FJ!
I've done a little testing and am happy with it so far. I know it will need a little tweaking to get the settings perfect and I may need to physically adjust the brakes a bit but I'll be putting 500+ miles on it in the next few weeks so I'll have plenty of time to mess with it. This is my first trailer with electric brakes so I'll do some reading before i just "wing it" and see if there is an established method for adjusting brakes that I can follow. Here are a couple photos.
The hidden part of the controller is mounted to the firewall between the brake and accelerator pedals. It has a 3 axis accelerometer inside and it "learns" which direction is forward and back during calibration so it has to be mounted to a solid surface. The CAT5 network cable on the bottom connects to the control knob mounted in the dash.
This is all you really see, the control knob. It has a multi color LED that tells you all you need to know about what it's doing. Blue means the trailer is connected and it's in proportional mode, it turns red when the brakes are being applied to the trailer proportionately to how they are applied on the tow vehicle, this is mostly for on road use. Green means user controlled mode where the brakes are applied to the trailer based on the number on the dial when the tow vehicle brakes are applied, mostly for off road use. To apply the brakes on demand you just push the button. So far it works great and I'm really happy I don't have to worry about smashing my knee on a brake controller every time I get into the FJ!
DannyLLama
Observer
Wow, looks like it's been years since I've been here, it's time to get back into it. Just a quick catchup on the trailer, never made the trip to Mexico, my employer wouldn't let me take enough time off even though I had it saved up, so I left and started a new job (it was time anyway). We ended up doing a giant renovation of our house not long after so the trailer has been in storage for the last year and a half or so. Just got back into the house and are planning to do the northern section of the WABDR next week, leaving this Sunday. Of course these trailers are never really complete so I'm just finishing up a few additions and tweaks. Here are some pics of the recent changes.
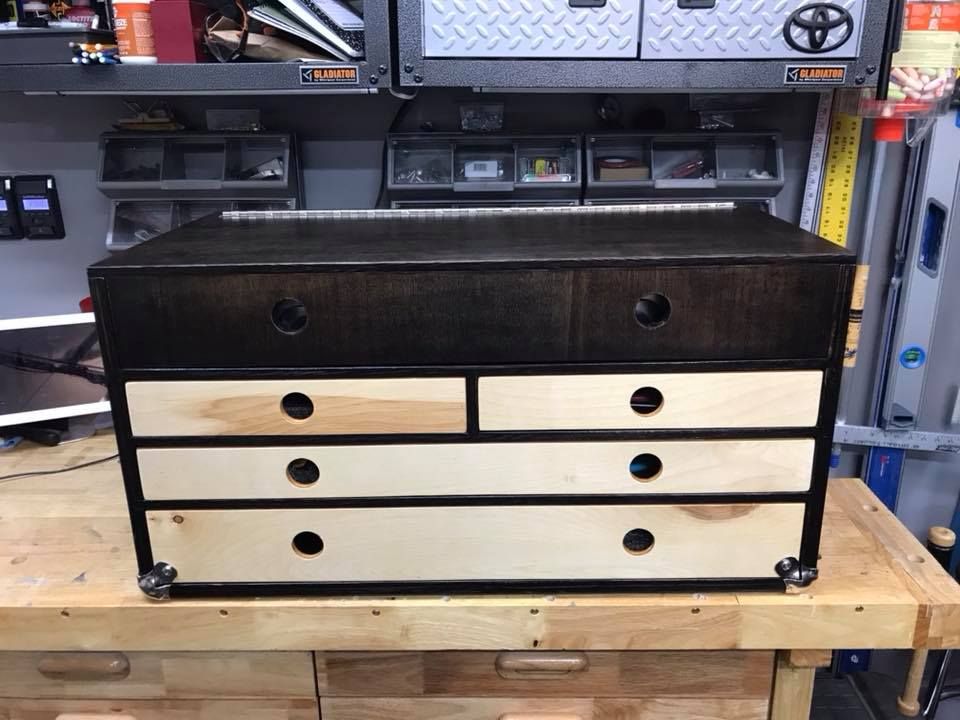
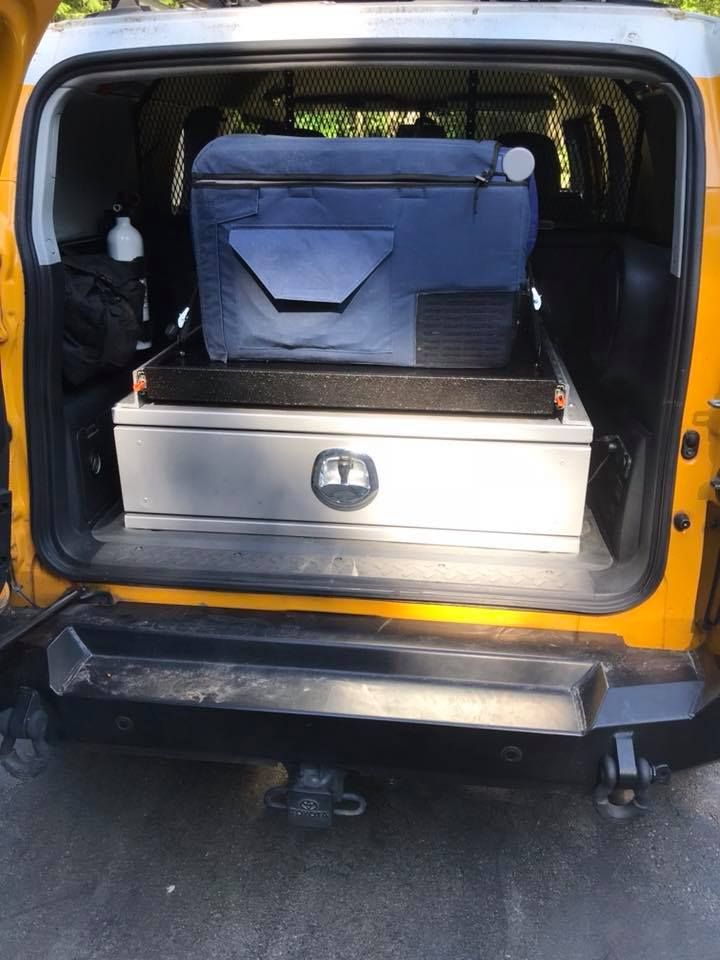
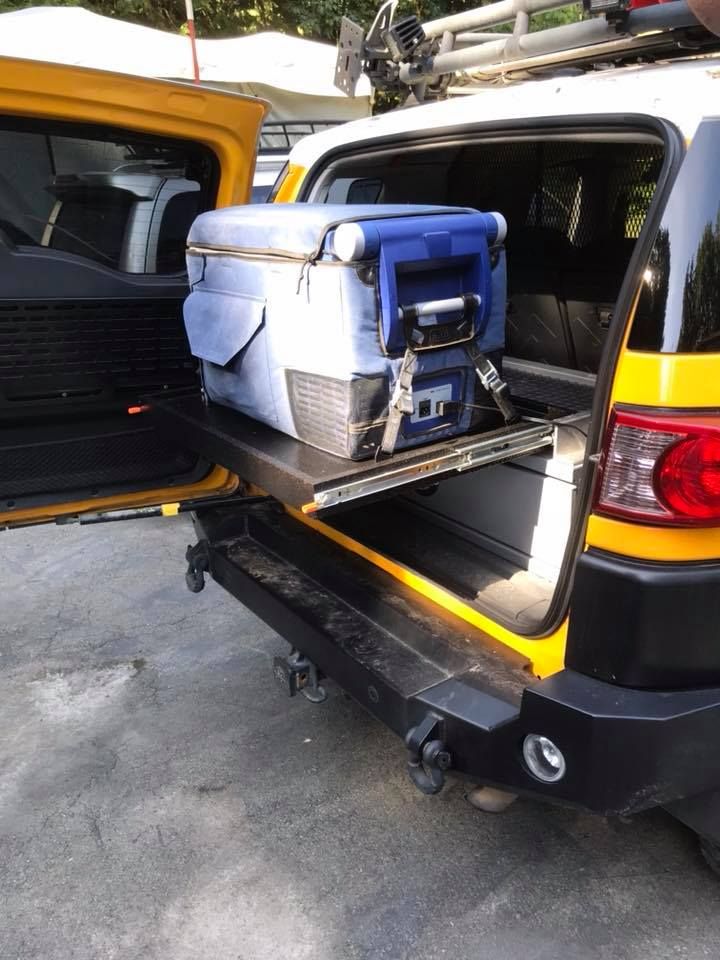
I built a slide out for my fridge to mount in the FJ so I had space in the trailer. I built a chuckbox to fit in the space the fridge used to take in the trailer. It isn't anything fancy, mostly made with stuff I had laying around the shop. Drawers are held closed by magnets and the lid held up with hydraulic pistons.
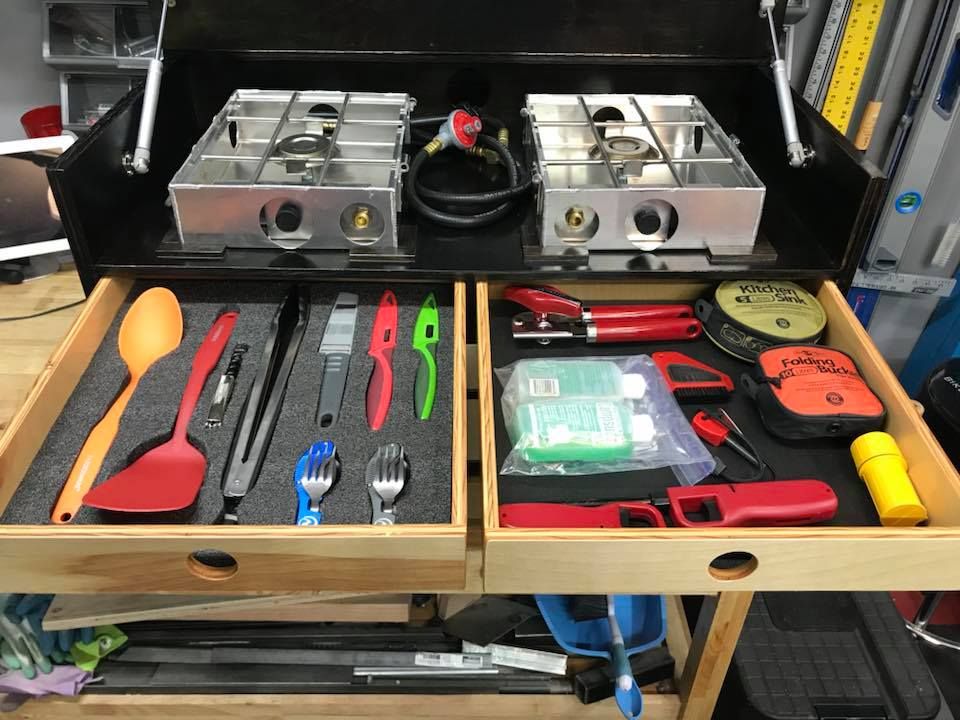
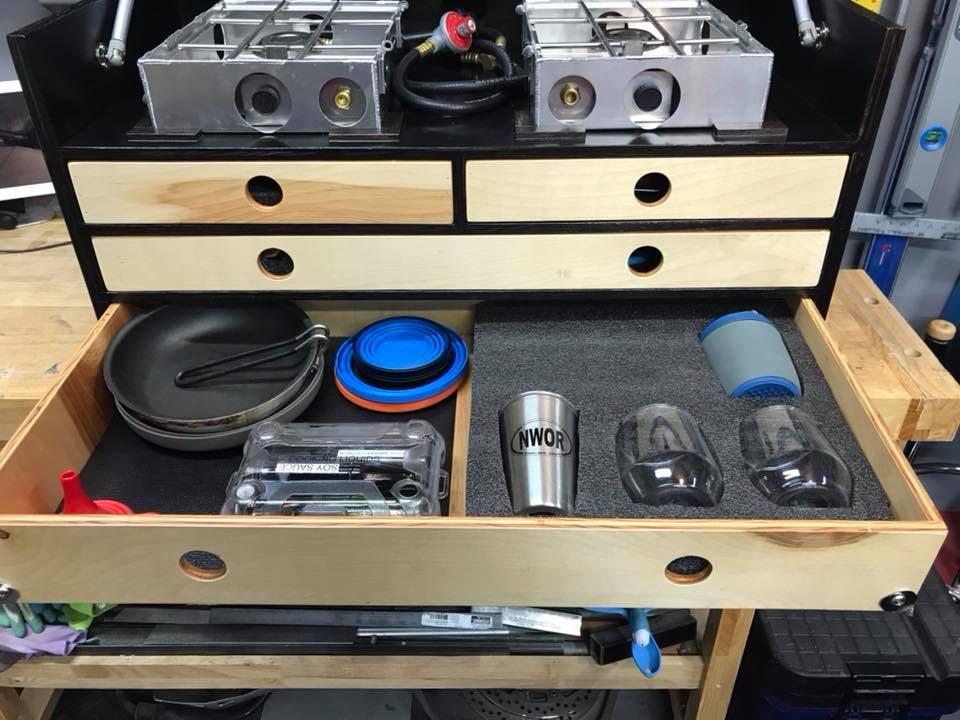
I finally got a Cook Partner stove and clearly love me some organization, friends call it OCD but I disagree, I think it makes it simple to know when something didn't get re-packed

More OCD-ness, we actually cook when we travel and that new stove really helps make that more enjoyable.


This is cool! where did you end up mounting the drawer system?
jays0n
Adventurer
Thanks!!! I have a drawer system that is mounted in the back of the FJ Cruiser with tools and recovery gear and it has a slide out for the ARB fridge mounted on top. This "chuck box" (maybe what you were referring to) is portable and sits in the trailer for transport and is pulled out when we set up camp. It's worked out very well so far.
Last edited:
DannyLLama
Observer
Thanks!!! I have a drawer system that is mounted in the back of the FJ Cruiser with tools and recovery gear and it has a slide out for the ARB fridge mounted on top. This "chuck box" is portable and sits in the trailer for transport and is pulled out when we set up camp. It's worked out very well so far.
Did you build it yourself or buy it somewhere? Can you share link or build : )
gabrielef
Well-known member
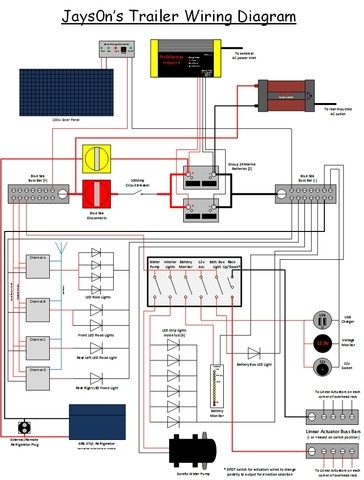
Any chance to get a PDF or bigger image of this? Trying to read everything but even glasses I am on the struggle bus hahaAn updated wiring diagram, added the rock lights and shuffled around how the lighting is distributed across the 4 channels of the wireless key fobs.
ottsville
Observer
right click, save as" ", open that file and zoom inAny chance to get a PDF or bigger image of this? Trying to read everything but even glasses I am on the struggle bus haha
gabrielef
Well-known member
Haha, did that before I commented but everything is fuzzy when you zoom in, or I am doing something wrong.right click, save as" ", open that file and zoom in
Forum statistics
Members online
- WagonsFTW
- matttahoe53
- John82601
- S_Whit
- Pelicano
- redforman
- Castsnoshadow
- Winterfell_JK
- tsd4ct
- xleratin
- gojoe
- TundraBro
- Mohica
- dizzydom
- Sm0kyXPLR
- vintage914racer
- aknightinak
- MrGrodskyi
- AZvanman
- driveby
- LivinAnAdvntr
- colorover
- snowkistdynasty
- Skippy T
- hdas
- OVRLNDFX4
- ChrisCosta416
- Jeff_DML
- DrivnNCryin
- Dans12
- jk6661
- JCDriller
- Rudy13
- TG2
- jeep-N-montero
- Westy
- zpharr
- TexasSixSeven
- Alwaysstranded
- paperracquet
- Dougnuts
- jtjk
- AZJim
- blkprl2004
- rehammer81
- Semiquixotic
Total: 694 (members: 48, guests: 646)