A trailer for the short bus

jaxonm

Observer
Great work! The trailer looks amazing. I would love to see some details on your electrical system. Details on your charge controller, charger, etc, and those remote units! How the wiring is all done (a diagram would be awesome) and if you have shore power planned and how that is integrated in.

Clearly I am in the process of planning my own trailer, and details on these things are pretty sketchy.

Thanks!
 

jays0n

Adventurer
I never really made a wiring diagram to build it but figured it wouldn't hurt to have one so I put this together today. The wiring is one part of the trailer that I'm most comfortable with so I just did it as I went. I'm currently not set up for shore power and not sure that I'll change that unless the need arises. The system is actually quite simple and I can answer any specific questions you might have as well as summarize the system as follows:

  • Quantity 2 deep cycle group 24 batteries in parallel
  • 100 amp circuit breaker immediately inline after battery bank
  • Quantity 2 marine grade battery shut offs, one for all electronics, one for ARB refrigerator
  • Quantity 2 marine grade bus bars, one for ground, one for positive
  • Marine grade switch panel with fuses, tied to accessories and both bus bars
  • ARB refrigerator shut off tied to external plug for "remote" fridge operation and cable in bed of trailer
  • LEDs inside trailer tied to switch on panel
  • National Luna battery monitor tied to switch on panel
  • USB charge plug, volt meter, 12v outlet in parallel tied to switch on panel
  • 750w inverter wired to 110v outlet mounted in rear of trailer
  • water pump tied to switch on panel
  • Wireless remote relays tied to each LED floodlight and to bus bars (system has 2 fobs, 4 channels handling up to 10amps each, from eBay for about $40 total)
  • LED strip light mounted to cover of battery box and wired to switch on panel
  • ProMariner waterproof 8amp, 2 bank charger connected to external inlet and each battery directly
  • Solar charge controller connected to both bus bars
  • Individual grounds ran to all devices, no chassis ground utilized

 
Last edited:

elmo_4_vt

Explorer
Nice use of the Panduit to clean things up... I'm impressed with the electrical system and the build in general. It looks right at home behind the Cruiser.

Don

-
 

jah310

Adventurer
I'm not planning to keep both this thread and the one at Tventuring.com completely in sync but my solar panel installation seems unique from my searching so I thought people here might appreciate it or even better improve on it :)

Hopefully these are pretty straightforward, it slides in/out very easily and the brakes work great to keep it in. There are stops on each end to keep it from sliding in or out too far but I'll probably put a leash on it just in case. Enjoy.

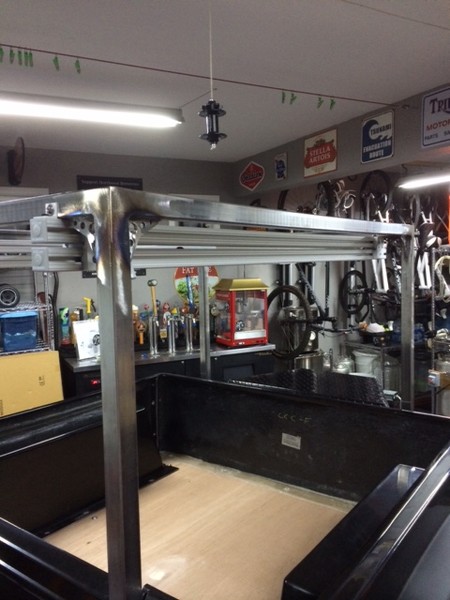
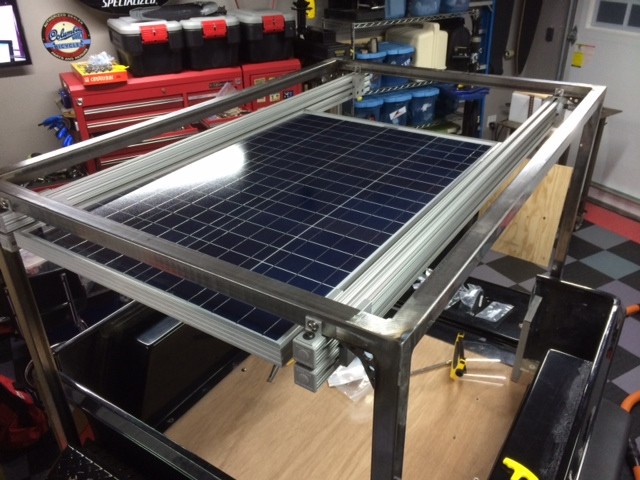
First I put up the top stationary rails then mounted the lower sliding rail using the 4 linear bearings.


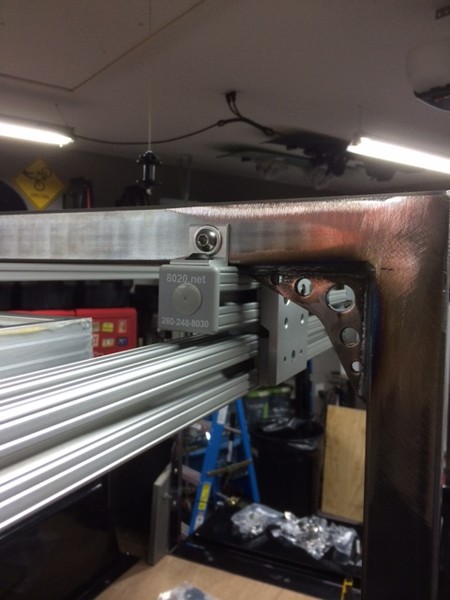
The rear bearing is fixed to the lower rails, moves with the panel, and has a brake to lock it down.


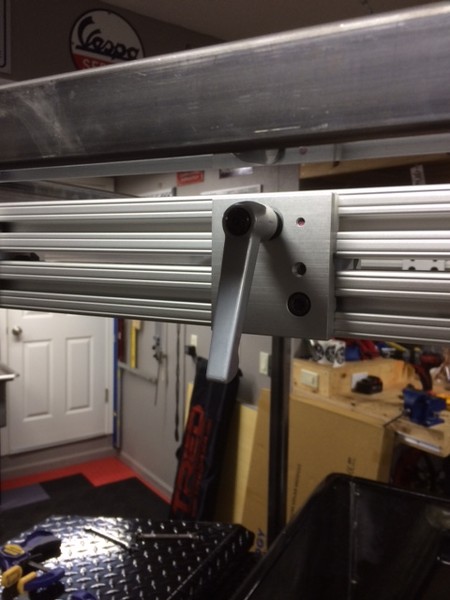
The front bearing is fixed to the upper rails and is stationary.


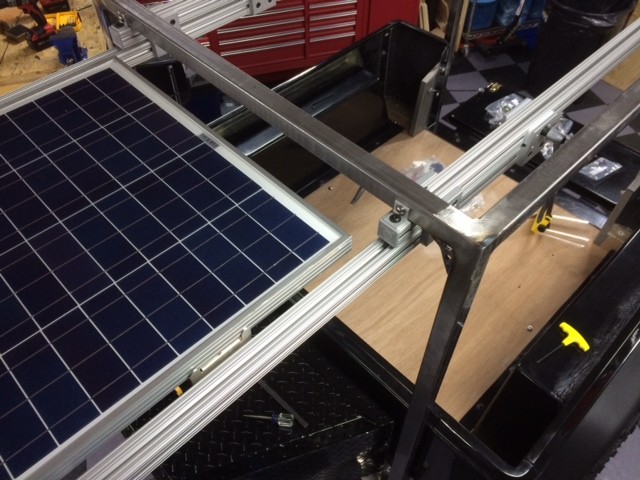
The wider panel brackets allow the holes to reach the channel in the bottom of the rail.


I had to slide it in and out a few times with everything loose to get the alignment right.


The whole system fit between the rack gussets with no extra space, like it was made for it!


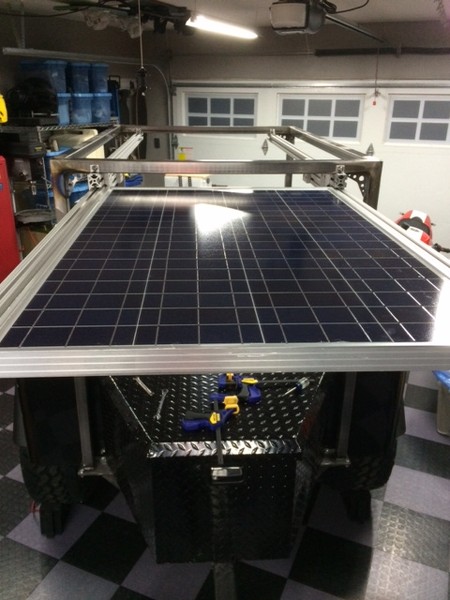
Extended it doesn't sag at all, it would be nice to be able to tilt it but perhaps that can be a future mod.


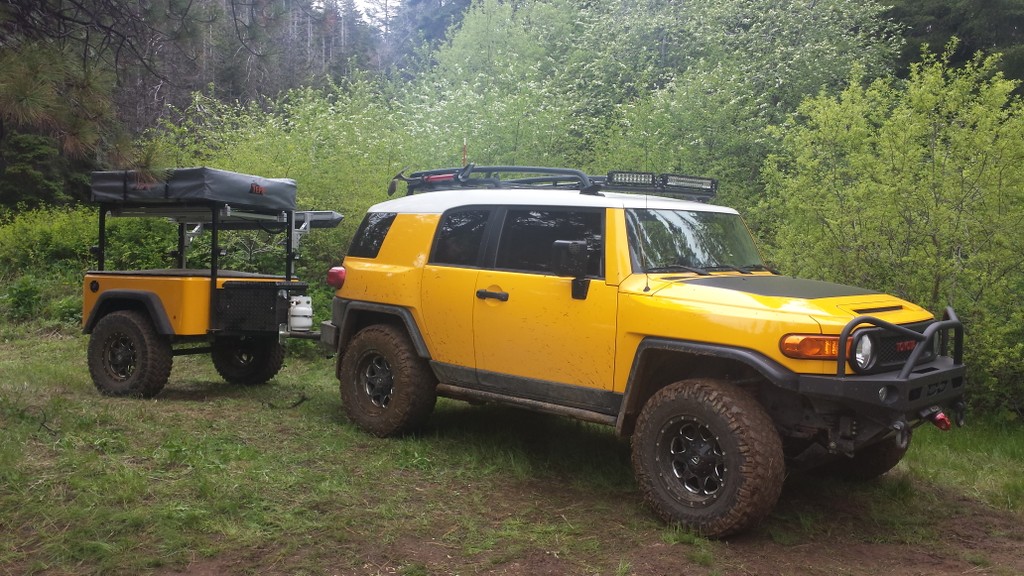
Stowed it will be under the RTT and mostly out of sight.

Wow - this is exactly what I want to do for my trailer solar set up. I've been trying to figure out a good way to mount a slide onto the bottom of my Thule load bars that extends far enough out from underneath the RTT. I'm also looking to use a larger 100watt panel, but haven't really found slides that i think would work well. This looks way way better than all the other options I've been able to find.

Could you possibly elaborate on the parts you used. I went to the 80/20 website and I think I found the rails, but where did you get the bearings, mounting brackets, and brake. Any help would be greatly greatly appreciated.

Awesome build BTW. Many thanks.
 

jah310

Adventurer
jays0n - I got in the phone with the folks at 80/20 and figured out the parts that I'd need. So don't worry about getting me more details... Don't want you to go though the extra work. Thanks for sharing the idea!!
 

jays0n

Adventurer
All the 80/20 parts came from 80/20's eBay store (which I believe is really them and not a reseller) and the design is pretty straightforward, tried to keep it simple. Sounds like they were able to help you with everything you need, good deal. The stuff is fun to work with, cuts nice and clean with a carbide chop saw and is super strong. Good luck with your build!

The tank mount is from Adventure Trailers, they are quite proud of it (as they should be, it's awesome) so I think they get $69 for one.
 

jays0n

Adventurer
Got the tent and awning set up but ran into a few issues, I had to lower the end of the awning a lot more than I wanted to in order to get the tent's rain fly supports installed, 80/20 parts are already on the way to modify the mounting so this isn't an issue.

Other than that it went well, running the ARB fridge (startup from ambient temp) with moderate overcast skies, the National Luna battery monitor told me I was holding at 100% charge. With clear skies it said I was actually still charging the batteries and not draining them! Couldn't ask for better than that.


jays0n

Adventurer
First trip out, trailer did great!

jja19.jpg


q1mq.jpg
 

Forum statistics

Threads
185,829
Messages
2,878,649
Members
225,393
Latest member
jgrillz94
Top